
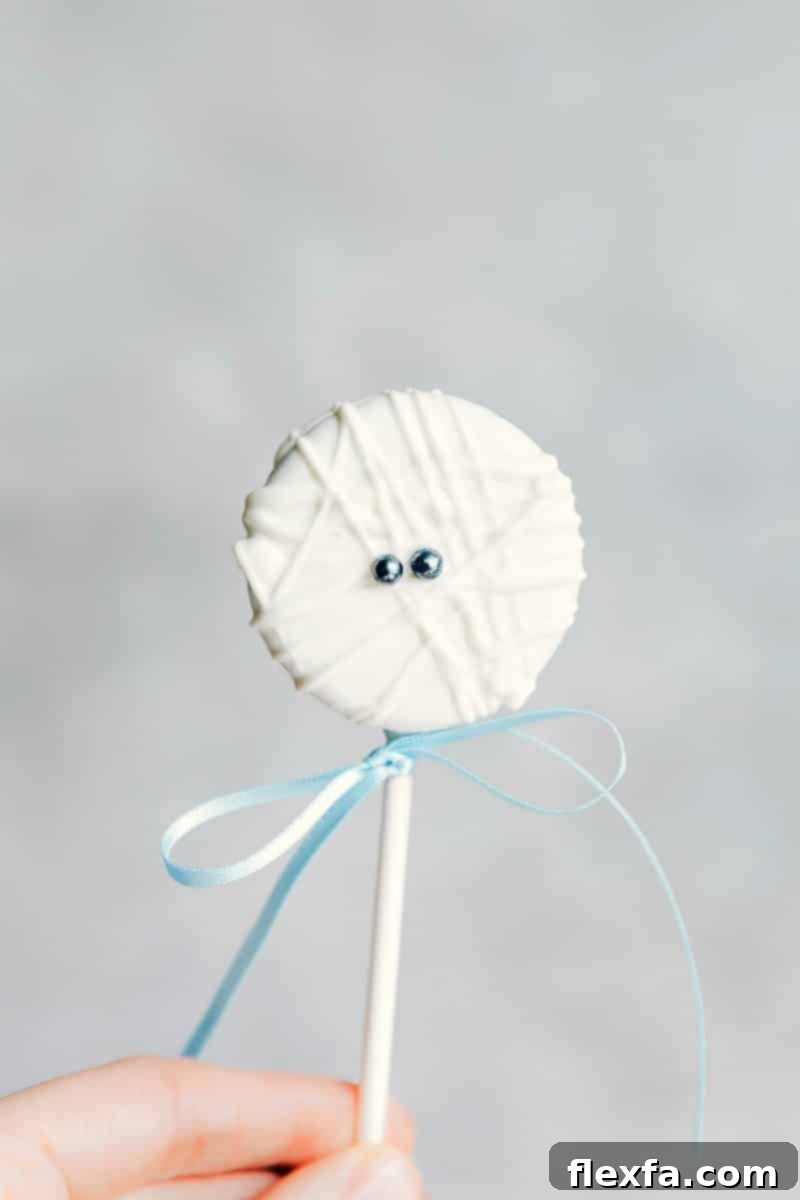
Unleash your inner ghoul and get ready for some frightfully delicious fun this Halloween! Our collection of simple Oreo Pops is designed to transform classic cookies into enchanting and spooky characters, perfect for any festive celebration. Whether you’re hosting a grand Halloween party, seeking creative snacks for trick-or-treaters, or simply wish to enjoy some themed baking, our Bat Oreo Pops, Pumpkin Oreo Pops, Mummy Oreo Pops, and Creepy Eyeball Oreo Pops are guaranteed to be a hit. Each design is not only easy to create but also promises a delightful crunch encased in smooth chocolate or candy coating with every bite.
To make your Halloween treat-making experience as smooth as possible, we highly recommend having a few essential tools on hand. A sturdy cake pop holder, like this fantastic Nordic Ware one, is invaluable for securely holding your pops upright as they set, and also makes for an impressive presentation. Additionally, ensure your kitchen is stocked with plenty of Parchment Paper. This non-stick surface is crucial for laying out your freshly decorated Halloween Oreo pops, allowing their chocolate or candy coatings to harden perfectly without sticking, which ensures easy removal and pristine, picture-perfect treats every time.
BAT OREO POPS: SPREAD YOUR SWEET WINGS THIS HALLOWEEN!
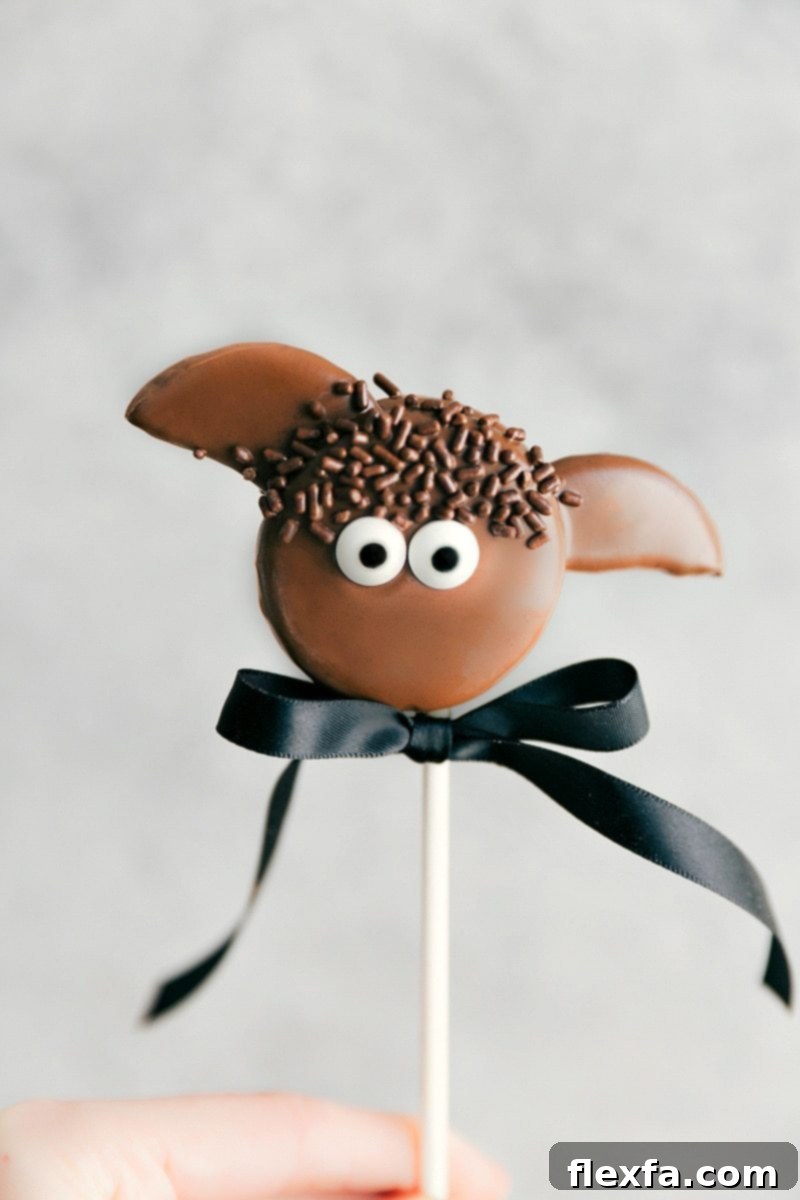
Transform ordinary Oreos into adorable creatures of the night with these incredibly fun Bat Oreo Pops! Perfect for Halloween parties or a spooky movie night, these pops are dipped in rich milk chocolate, adorned with crunchy Oreo Thin “wings,” and finished with whimsical candy eyes. The combination of classic cookie, smooth chocolate, and playful design makes them an irresistible treat for all ages. They’re surprisingly simple to assemble, making them a fantastic project for a family activity or a quick, impressive dessert.
For your convenience, all the necessary ingredients and specialized tools to craft these charming Bat Oreo Pops can be easily purchased online. Click on the direct links below to gather everything you need without leaving the comfort of your home:
- Parchment Paper: Essential for a non-stick surface.
- Lollipop Sticks: For easy handling and a classic pop presentation.
- Candy Eyeballs: Choose from large, small, or a convenient bundle to fit your bat’s personality.
- Chocolate Jimmies Sprinkles: An optional but delightful touch for added texture.
- Black Ribbon: Perfect for tying around the stick for a polished, festive look.

Print Recipe
Rated 5 out of 5 stars by 2 users.
Bat Oreo Pops
Chelsea Lords
20 minutes
20 minutes
24 pops (depending on Oreo package size)
Equipment
-
Large sheet pan (15″ x 21″)
-
Parchment paper
Ingredients
- 1 package Oreos (approximately 36 cookies; use your favorite flavor!)
- 1 (12-ounce) bag milk chocolate chips
- 48 candy eyeballs
- 1 package Oreo THINS (for the wings)
- Chocolate sprinkles (optional, for added detail)
- 1-1/2 teaspoon vegetable oil or shortening (optional, to achieve a smoother chocolate consistency)
- Lollipop sticks (approximately 6-inch length recommended)
Instructions
-
Begin by lining a large sheet pan with parchment paper. This will provide a non-stick surface for your finished Oreo pops to cool and set. Set it aside.
-
Carefully separate the regular Oreos by gently twisting the two halves apart. Take your time to minimize breakage, though a few broken cookies are inevitable and perfectly fine for snacking.
-
Divide the milk chocolate chips into three separate microwave-safe bowls. Working in batches prevents the chocolate from hardening too quickly as you decorate.
-
To each bowl of chocolate chips, add approximately 1/2 teaspoon of vegetable oil or shortening. This optional step helps to thin the chocolate, making it easier to work with and ensuring a smoother dip. Add a little more if a thinner consistency is desired.
-
Melt the chocolate in the microwave using short 20-second bursts. Stir thoroughly after each burst to ensure even melting and prevent burning. Continue until the chocolate is completely smooth and melted.
-
Dip one end of a lollipop stick into the melted chocolate. Immediately press the chocolate-dipped end into the cream filling of one Oreo half. This anchors the stick firmly.
-
To create the bat wings, separate the Oreo THINS and carefully remove their cream filling. Break each Oreo Thin in half. Dip one straight edge of each half into the melted chocolate, then press them firmly into the cream filling on either side of the lollipop stick, creating a pair of wings.
-
Spoon a small amount of melted chocolate onto the underside of the other plain Oreo half. Carefully place this half on top of the “bat wings” and the cream filling, gently pressing down to secure the entire pop. Allow these assembled pops to harden completely on the parchment paper for about 10-15 minutes before proceeding.
-
Once the bat structure is firm, gently spoon the melted chocolate over the entire Oreo pop, ensuring both the cookie and the “wings” are fully coated. Lightly tap the Oreo pop against the edge of the chocolate bowl to smooth out any excess chocolate. Scrape the bottom of the pop against the bowl rim to remove drips, then carefully place it back onto your prepared parchment-lined sheet pan.
-
While the chocolate coating is still wet, carefully place two candy eyeballs onto the front of the bat. If desired, sprinkle a few chocolate jimmies above the eyes for extra texture, resembling fuzzy bat fur. Allow the finished Bat Oreo Pops to harden completely at room temperature or in the refrigerator before handling or serving.
MUMMY OREO POPS: WRAPPED IN SWEETNESS FOR A GHOULISHLY GOOD TREAT
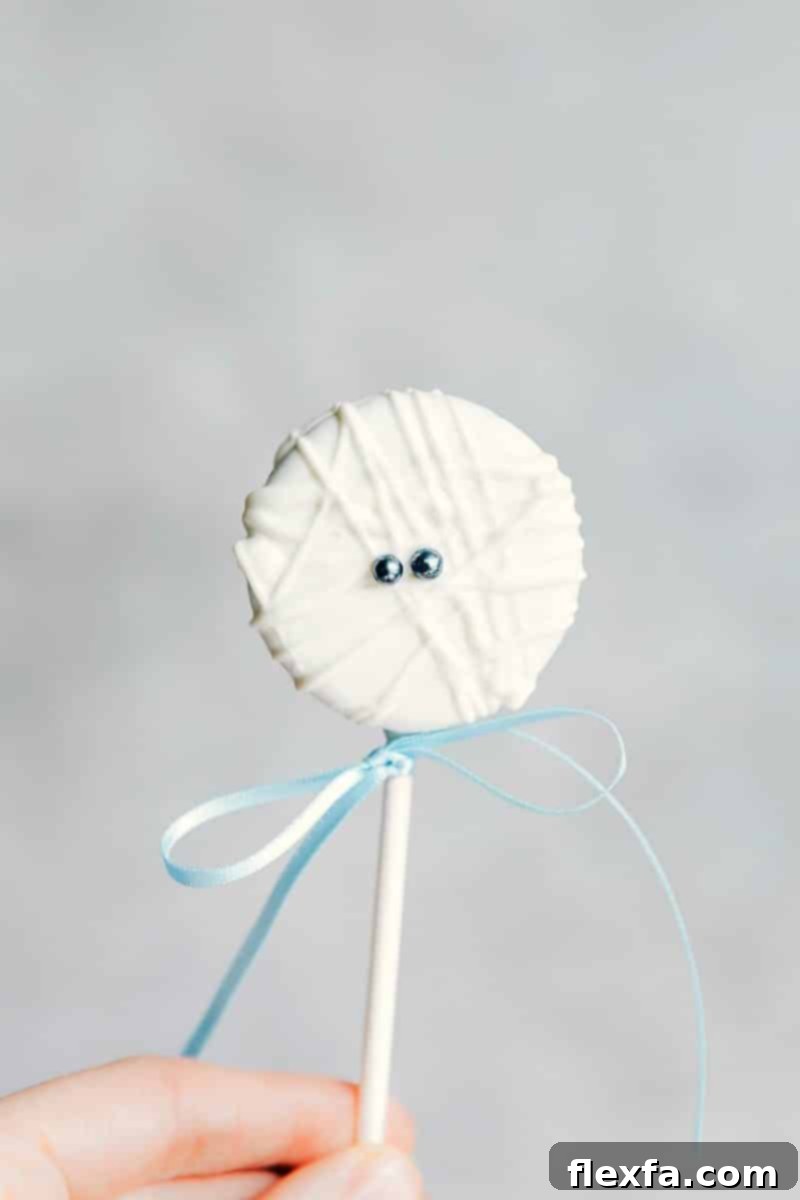
Unwrap the fun this Halloween with these delightful Mummy Oreo Pops! Each classic Oreo is first enveloped in a luscious, smooth white chocolate coating, then artfully piped with intricate “bandages.” Two charming black pearl sprinkles serve as the mummy’s iconic, slightly eerie eyes, bringing these ancient wonders to life in a sweet and edible form. These treats are not only incredibly simple to assemble, making them a fantastic activity for bakers of all ages, but they also promise delicious results that will undoubtedly be the highlight of your spooky dessert table or party favor bags.
To easily gather all the necessary ingredients and tools for your Mummy Oreo Pops, simply browse and purchase everything you need online through the conveniently provided links below:
- Parchment Paper: For a non-stick surface during cooling.
- Lollipop Sticks: For easy dipping and serving.
- Black Pearl Sprinkles: These make perfect, striking mummy eyes.
- Blue Ribbon: An optional decorative touch for presentation.
Print Recipe
Rated 5 out of 5 stars by 2 users.
Mummy Oreo Pops
Chelsea Lords
20 minutes
20 minutes
25 Oreo Pops
Equipment
-
Sheet pan (15″ x 10″)
-
Parchment paper
-
Resealable plastic bag or piping bag fitted with a #2 tip (for bandages)
Ingredients
- 1 package Oreos (approximately 36 cookies; use your favorite flavor!)
- 1 (12-ounce) bag white chocolate chips
- 40 to 50 black pearl sprinkles (for mummy eyes)
- Vegetable oil or shortening (optional, to thin the white chocolate)
- Lollipop sticks (approximately 6-inch length recommended)
Instructions
-
Prepare your workspace by lining a sheet pan with parchment paper. This will be your non-stick surface for cooling the pops.
-
White chocolate hardens quickly, so it’s most efficient to work in small batches. In a microwave-safe bowl, combine 1/2 cup of white chocolate chips with about 1/4 tablespoon of vegetable oil or shortening.
-
Microwave the mixture for 30 seconds, then stir thoroughly. Continue microwaving for another 25 seconds, then stir until the chocolate is completely melted and smooth. If the consistency is too thick for dipping, add a tiny bit more vegetable oil. Patience and thorough stirring are essential to prevent burning the delicate white chocolate.
-
Dip one end of a lollipop stick into the melted white chocolate, then press that side firmly into the cream filling of one Oreo half. Place the other half of the Oreo on top, pressing gently but firmly to secure the cookie around the stick. Allow these assembled pops to harden completely before dipping.
-
Once the initial Oreo structure with the stick is stable, spoon the melted white chocolate evenly over the entire Oreo pop, ensuring full and smooth coverage. Gently tap the Oreo pop against the edge of the bowl to remove any excess chocolate and achieve a smooth finish. For a perfectly opaque white mummy, you might consider applying a second thin coat of chocolate after the first has slightly set.
-
Carefully place the fully dipped cookies onto your prepared parchment-lined sheet pan.
-
Gather all remaining melted white chocolate (if it has thickened, re-melt it in the microwave for another 15 seconds until smooth). Transfer this melted chocolate into a small resealable plastic bag or a piping bag fitted with a #2 tip.
-
Snip a very tiny corner off the plastic bag to create a fine opening. Drizzle or pipe the melted white chocolate over the coated Oreos in random, overlapping lines to form the “bandages” of your mummy.
-
Immediately, while the piped chocolate “bandages” are still wet, gently secure two black pearl sprinkles onto each mummy pop to serve as the eyes. Allow the finished Mummy Oreo Pops to harden completely at room temperature or in the refrigerator until firm.
Recipe Notes
Nutrition (Approximate per serving)
Nutrition information is automatically calculated and should be used as an approximation only. Actual values may vary.
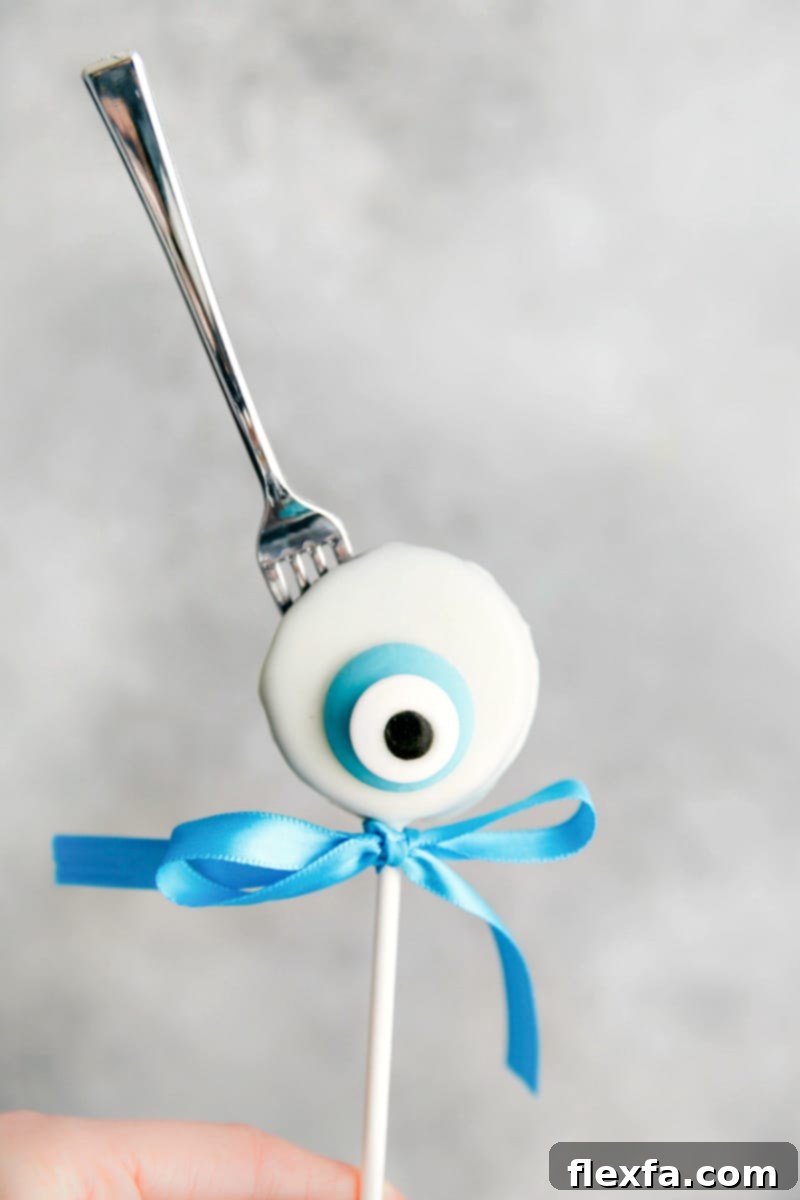
CREEPY EYEBALL OREO POPS: GAZE INTO THE SWEETNESS THIS HALLOWEEN
Add a wonderfully wicked and delightfully eerie touch to your Halloween dessert table with these Creepy Eyeball Oreo Pops! Each classic Oreo cookie is expertly dipped in smooth white chocolate, creating a pristine canvas. It’s then adorned with a vibrant colored candy melt to form a striking “iris” and finished with a perfectly placed candy eyeball, creating a treat that’s both spooky and utterly irresistible. These pops are incredibly fun and surprisingly easy to make, offering a satisfying crunch, followed by rich chocolatey goodness, making them a must-have for any monster bash, haunted house gathering, or even just a fun family activity.
Prepare for your spooky culinary creation by conveniently gathering all your ingredients online. Direct links are provided below for effortless shopping:
- Parchment Paper: Your best friend for non-stick cooling.
- Lollipop Sticks: The foundation for your creepy pops.
- Candy Eyeballs: Available in various sizes, choose large, small, or a bundle to achieve your desired level of creepiness.
- Blue Candy Melts: For a striking iris color.
- Green Candy Melts: Another excellent option for vibrant iris colors.
- Mini Forks: (Optional) The ones shown in the picture and video can often be found at dollar stores or party supply shops, adding an extra eerie detail to the “eye” socket.
Print Recipe
Rated 5 out of 5 stars by 2 users.
Creepy Eyeball Oreo Pops
Chelsea Lords
20 minutes
20 minutes
24 Oreo Pops
Ingredients
- 1 package Oreos (approximately 36 cookies; use your favorite flavor!)
- 1 (12-ounce) bag white chocolate chips
- 24 candy melts (choose blue or green for the iris)
- 24 large candy eyeballs (or small ones for a different effect)
- Vegetable oil or shortening (optional, for thinning chocolate)
- Lollipop sticks (approximately 6-inch length recommended)
Instructions
-
Prepare your workstation by lining a large sheet pan with parchment paper. This will provide a non-stick surface for your finished eyeball pops to cool and set. Set it aside.
-
Carefully separate the Oreos by slowly twisting the two halves apart. Aim for as many clean halves as possible, but don’t fret over a few broken ones.
-
Divide the white chocolate chips into three separate microwave-safe bowls. This method is crucial to prevent the chocolate from hardening prematurely while you work.
-
Add approximately 1/2 teaspoon of vegetable oil or shortening to each bowl of white chocolate chips. This optional addition helps thin the chocolate for a smoother, more even dipping consistency. You can add a little more if a thinner consistency is preferred.
-
Melt the chocolate in the microwave using short 20-second bursts. Stir thoroughly after each burst to ensure even melting and prevent burning. Continue until the chocolate is completely smooth and melted.
-
Dip one end of a lollipop stick into the melted white chocolate, then immediately press that dipped end into the cream filling of an Oreo half. This step secures the stick. For an extra creepy effect, you can gently press the tines of a mini plastic fork into the Oreo cream at this point, giving a “veined” appearance.
-
Place the other plain Oreo half on top of the cream-filled half with the stick, gently pressing down to secure the entire pop. Allow this initial assembly to harden completely before proceeding to the full dipping stage.
-
Spoon the melted white chocolate over the entire Oreo pop, ensuring it is fully coated. Gently tap the pop against the edge of the bowl to remove any excess chocolate and create a smooth finish. For a truly opaque white base, you might opt for a second thin coat after the first has slightly set.
-
Immediately transfer the white-chocolate-coated Oreo pops to the prepared parchment-lined tray. Before the chocolate hardens, press a colored candy melt (blue or green work well for an iris) into the center of the Oreo pop. If necessary, use a sharp serrated knife to carefully trim or flatten the back surface of the candy melt slightly so it sits flush. Then, dab a small amount of melted chocolate onto the back of an edible candy eyeball and carefully adhere it to the center of the candy melt.
-
Allow the finished Creepy Eyeball Oreo Pops to harden completely at room temperature or in the refrigerator before handling or serving to ensure all components are fully set.
Recipe Notes
Nutrition (Approximate per serving)
Nutrition information is automatically calculated and should be used as an approximation only. Actual values may vary.
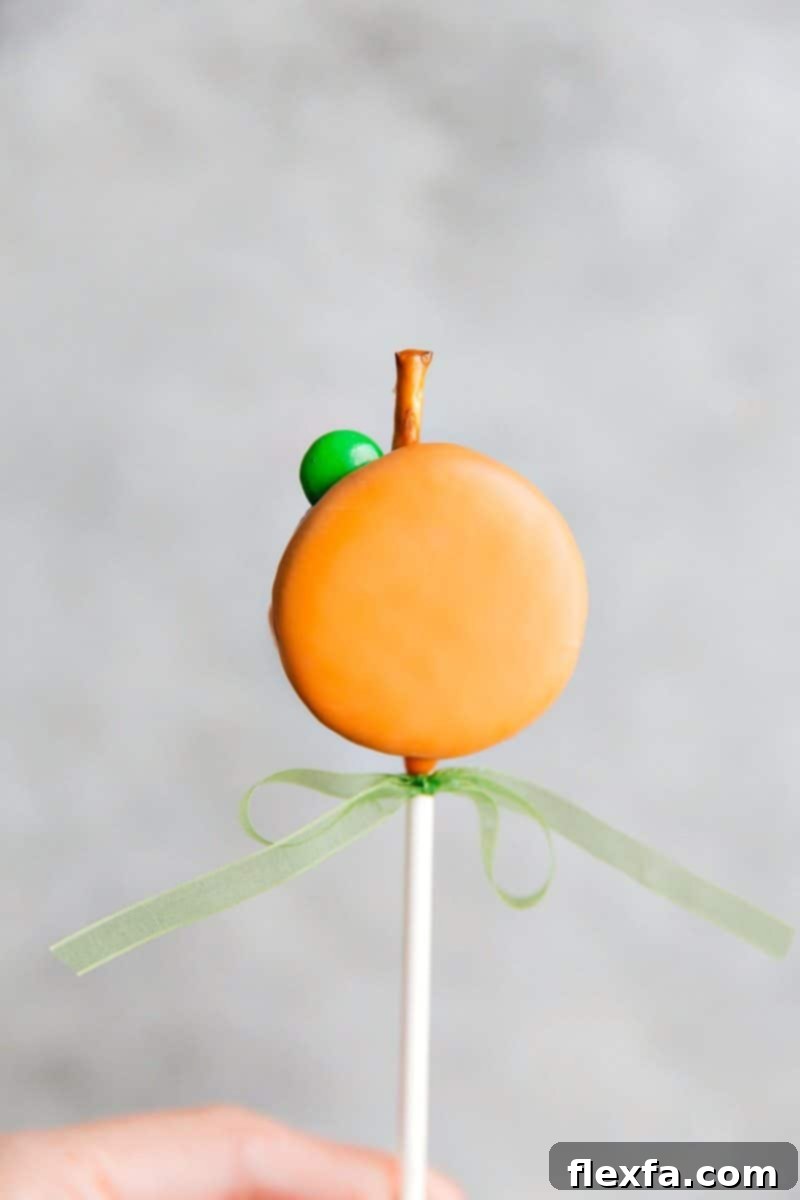
PUMPKIN OREO POPS: AUTUMN’S SWEETEST BITE FOR HALLOWEEN
Embrace the vibrant spirit of autumn and Halloween with these absolutely charming Pumpkin Oreo Pops! Each classic Oreo cookie is lovingly dipped in bright orange candy melts, magically transforming it into an adorable mini pumpkin. Topped with a crunchy pretzel stick “stem” and a cute green M&M “leaf,” these pops are as delightful to look at as they are to eat. They’re incredibly simple and quick to assemble, making them a perfect and engaging project for a cozy fall afternoon, a festive Halloween gathering, or even as edible gifts. Their festive appearance and delicious taste are sure to bring smiles to everyone.
For effortless preparation, conveniently shop for all your Pumpkin Oreo Pop ingredients online using the direct links provided below:
- Parchment Paper: Essential for a smooth, non-stick finish.
- Lollipop Sticks: For easy dipping and serving.
- Orange Candy Melts: The key to that vibrant pumpkin hue.
- Green Ribbon: (Optional) Adds a lovely decorative touch around the stick.
Explore More Halloween Fun from Our Kitchen:
- Halloween Oreos: Version #1: Discover more creative Oreo transformations!
- Halloween Oreo Balls (5 ingredients): Quick and delightful no-bake treats.
- 3-Ingredient Halloween Treats: Simplicity meets spookiness.
- Mummy Milanos: Elegant and easy mummy-themed cookies.
- Brownie Batter Mummy Bark: A rich and spooky bark recipe.
Print Recipe
Rated 5 out of 5 stars by 2 users.
Pumpkin Oreo Pops
Chelsea Lords
20 minutes
20 minutes
24 Oreo Pops
Video Tutorial (Specific to Pumpkins)
For a visual guide on general dipping techniques applicable to all Oreo pops, including these charming Pumpkin-themed ones, please refer to the main video tutorial at the top of this page.
Equipment
-
Large sheet pan (15″ x 21″)
-
Parchment paper
Ingredients
- 1 package Oreos (approximately 36 cookies; use your favorite flavor!)
- 1 (12-ounce) bag Orange candy melts
- 24 green M&M’s (for the leaves)
- 24 pretzel sticks (for the stems)
- 1-1/2 to 3 teaspoons vegetable oil or shortening (optional, to thin candy melts for easier dipping)
- Lollipop sticks (approximately 6-inch length recommended)
Instructions
-
Line a large sheet pan with parchment paper. This creates a non-stick surface crucial for cooling your finished pumpkin pops. Set it aside for later use.
-
Gently separate the Oreos by slowly twisting the two halves apart. Work carefully to prevent excessive breakage.
-
Divide the orange candy melts into three separate microwave-safe bowls. This method helps keep the candy melts at a workable consistency throughout the decorating process.
-
Add approximately 1/2 to 1 full teaspoon of vegetable oil or shortening to each bowl of candy melts. This is an optional step that helps to thin the melts, making them smoother and easier for dipping. Adjust as needed to achieve your desired consistency.
-
Melt the candy melts in the microwave using 20-second bursts. Stir thoroughly after each interval to ensure even melting and prevent scorching. Continue until the melts are completely smooth.
-
To assemble the base of your pumpkin pop, dip one end of a lollipop stick into the melted orange candy melts and press it firmly into the cream side of an Oreo half. Next, break pretzel sticks into thirds to create small “stems.” Dip one end of a pretzel piece into the melted candy and press it into the cream side of the Oreo, positioning it near the top. Lastly, dip the corner of a green M&M into the melted candy and press it next to the pretzel stem at the top of the Oreo, forming a little leaf.
-
Spoon a small amount of the melted candy onto the underside of the other plain Oreo half. Carefully place this half on top of the assembled Oreo with the stem and leaf, pressing down gently but firmly to secure all components. Allow this initial assembly to harden completely before proceeding with the full dip.
-
Once the pop is stable, spoon the melted orange candy evenly over the entire Oreo pop, being careful to avoid coating the pretzel stem and M&M leaf. Gently tap the pop against the edge of the bowl to smooth the candy coating and remove any excess.
-
Transfer the finished pumpkin Oreo pops to your prepared parchment-lined sheet pan. Allow them to harden completely at room temperature before handling, packaging, or serving.
Recipe Notes
Nutrition (Approximate per serving)
Nutrition information is automatically calculated and should be used as an approximation only. Actual values may vary.
Loved making these Halloween Oreo Pops? We’d be thrilled to hear about your creations! Leave a comment below and share your spooky sweet success!