
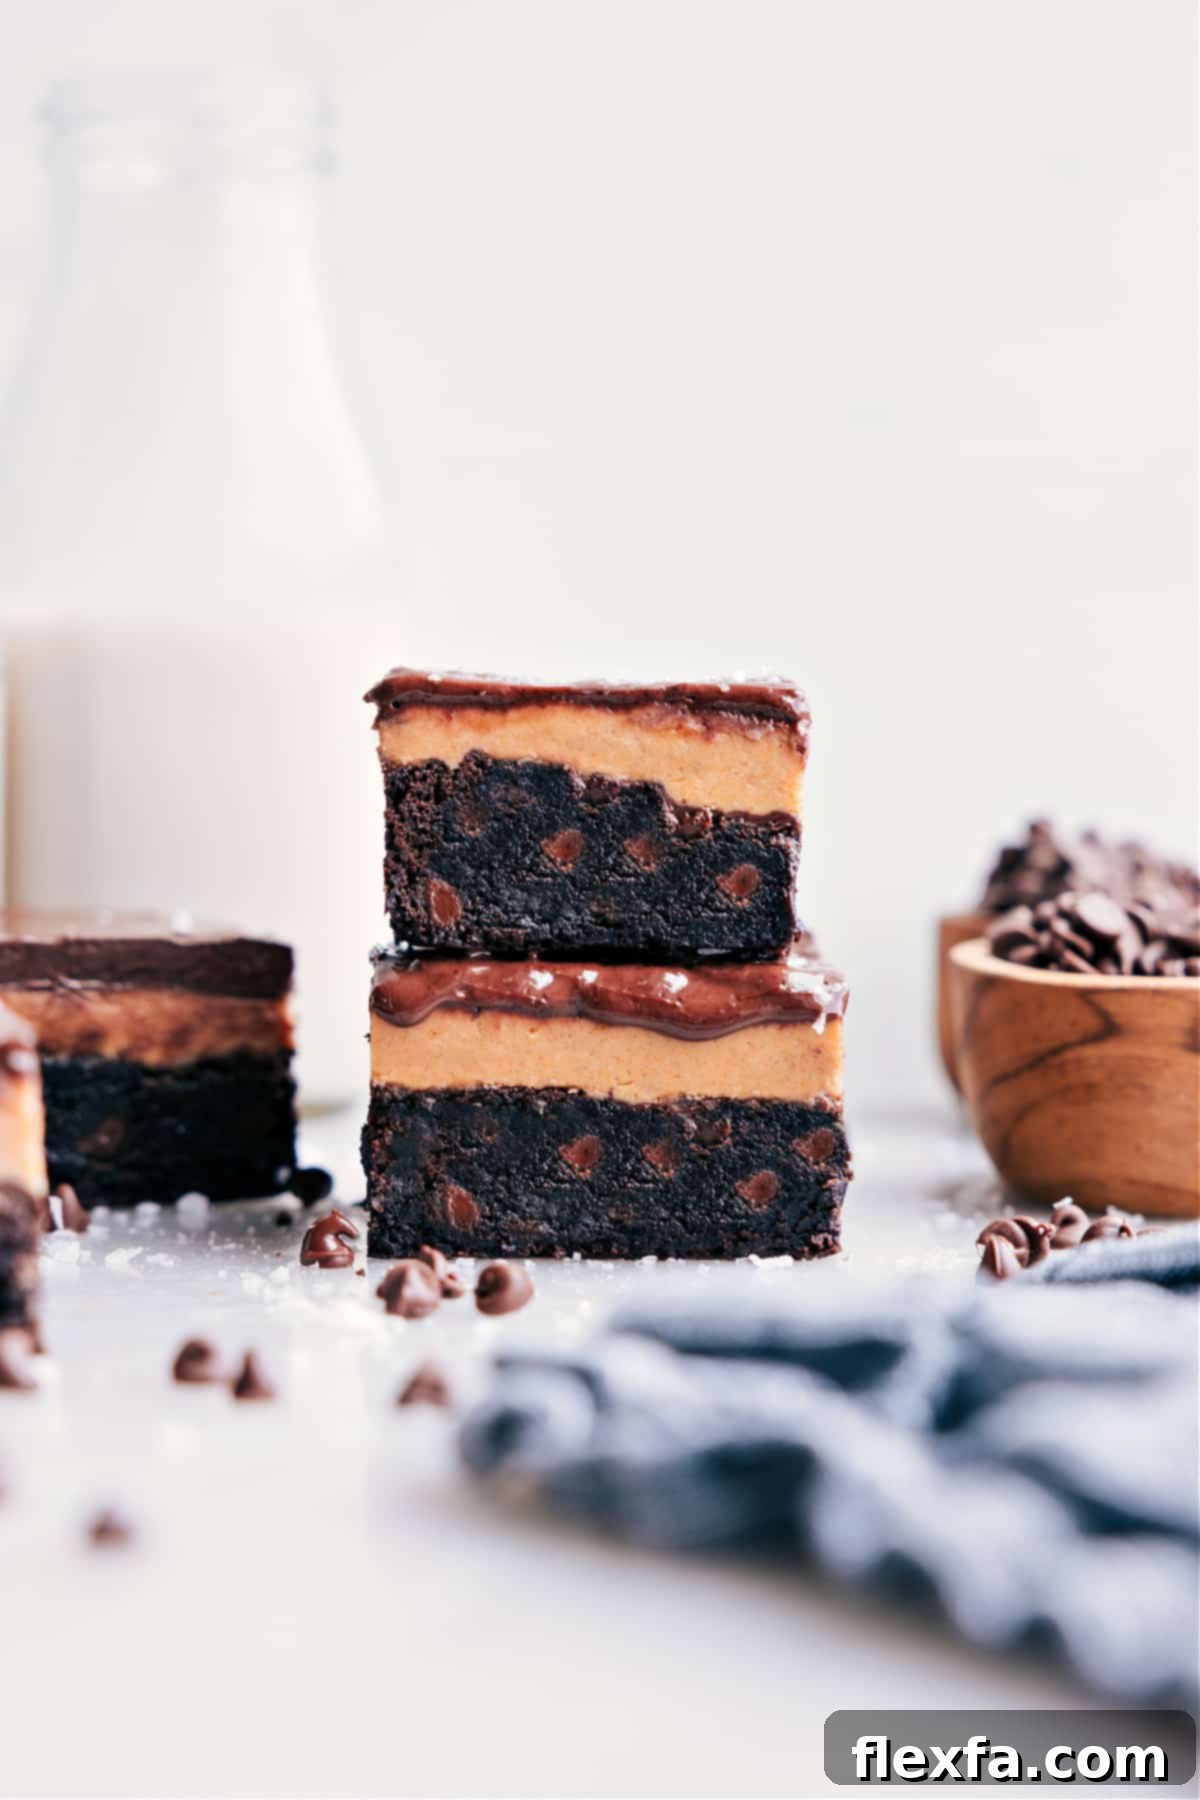
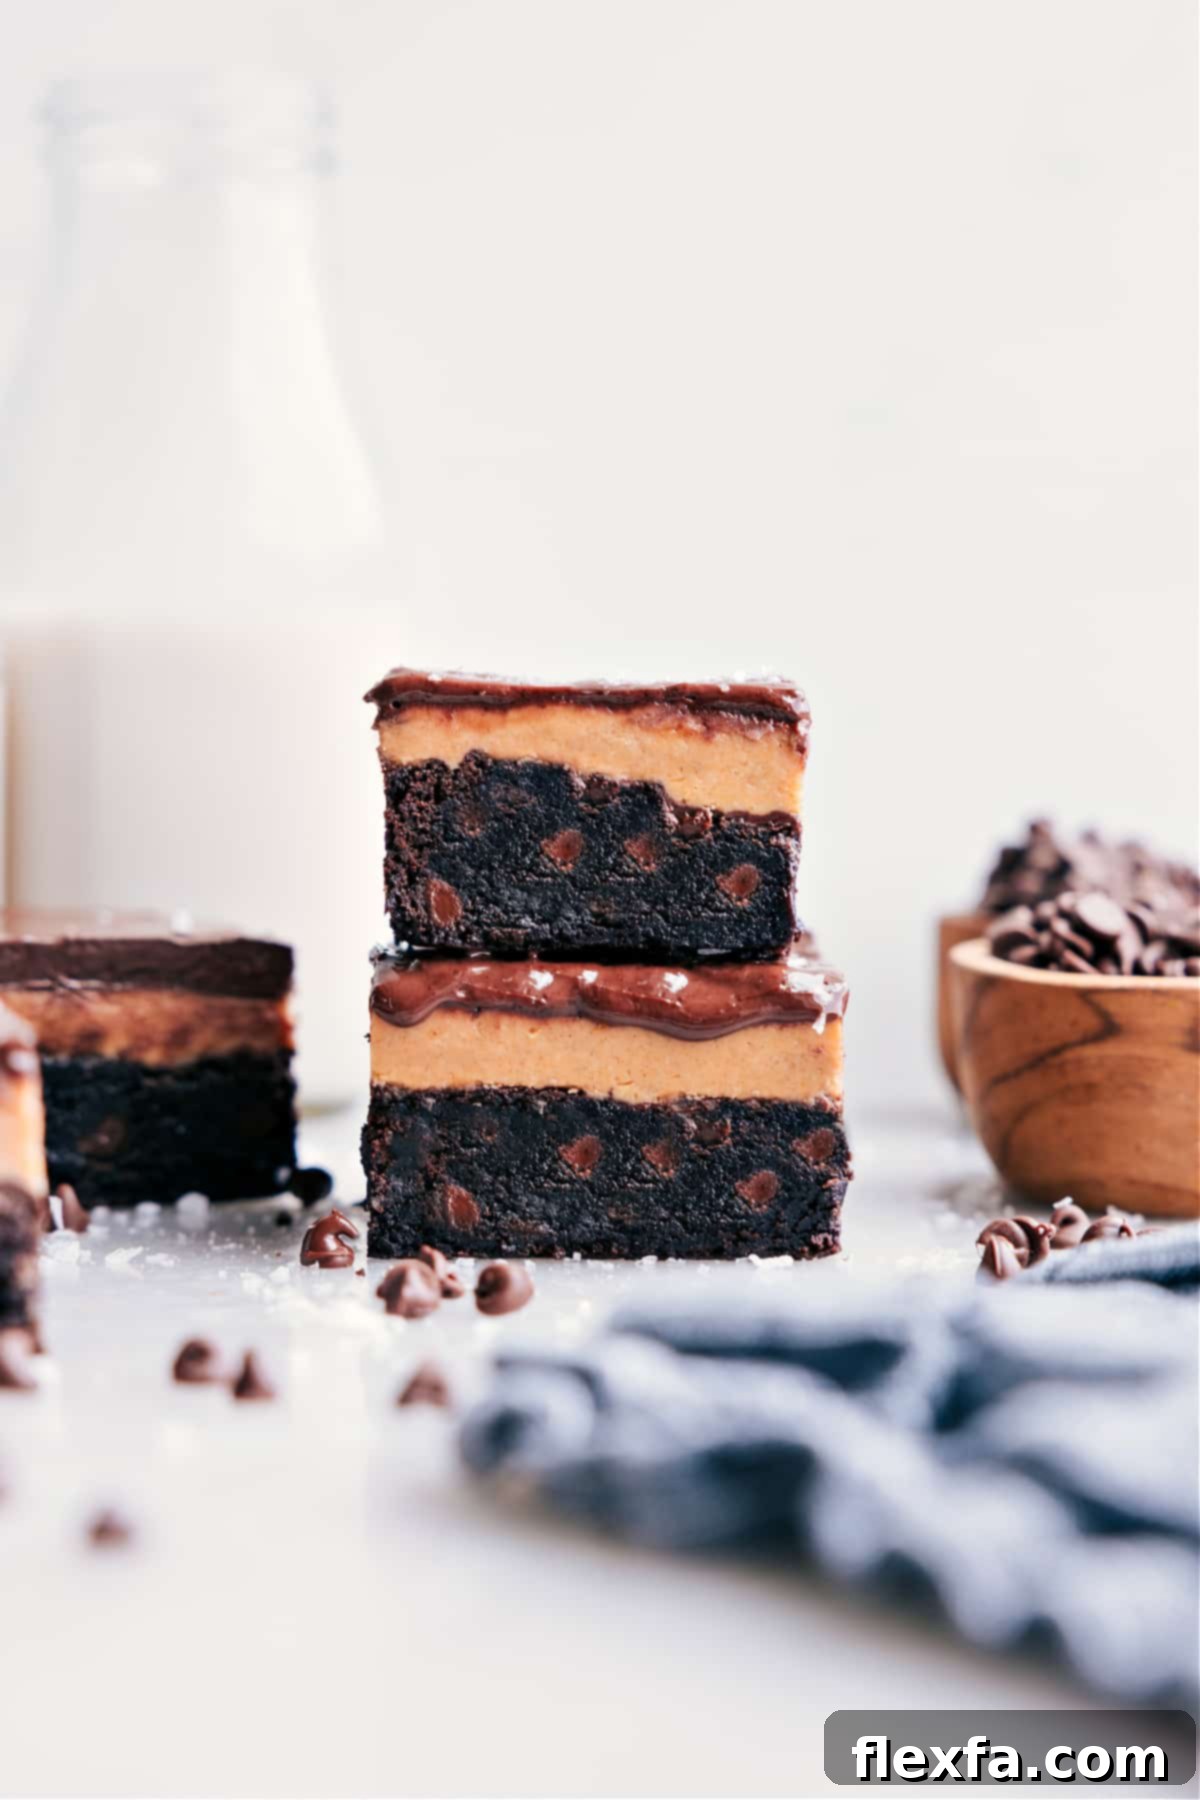
Buckeye Brownies: A show-stopping dessert featuring a decadent, thick, and chewy brownie base, generously topped with a velvety smooth peanut butter layer, and finished with a rich, glossy chocolate topping that shatters perfectly with every bite. This recipe brings together the classic flavor combination of chocolate and peanut butter in an utterly irresistible bar form, perfect for sharing, gifting, or simply indulging!

From the Author
Why These Buckeye Brownies Are Always a Crowd-Pleaser!
Growing up, especially during the festive holiday season in Cleveland, Ohio, Buckeyes were more than just a treat; they were a tradition. These delightful candies, a simple yet perfect combination of chocolate and peanut butter, were ubiquitous and cherished by everyone. After moving away, I found myself constantly missing that unique taste of home and the comforting nostalgia they evoked.
That longing sparked an idea: why not transform the beloved Buckeye candy into a more substantial, shareable dessert? And thus, the Buckeye Brownies were born! This recipe takes everything wonderful about the classic Ohio Buckeye and elevates it to new heights, creating a dessert that’s even more satisfying. Imagine a rich, fudgy brownie serving as the foundation, topped with a generous, thick layer of creamy, dreamy peanut butter, and finally, enrobed in a smooth, irresistible chocolate ganache-like topping.
Honestly? I think I like these Buckeye Brownies even more than the original candies! They offer a delightful interplay of textures and flavors – the chewiness of the brownie, the smoothness of the peanut butter, and the snap of the chocolate. They quickly became a staple in my own kitchen and a guaranteed hit at any gathering. You’re about to discover your new favorite chocolate peanut butter indulgence!
Essential Ingredients for Perfect Buckeye Brownies
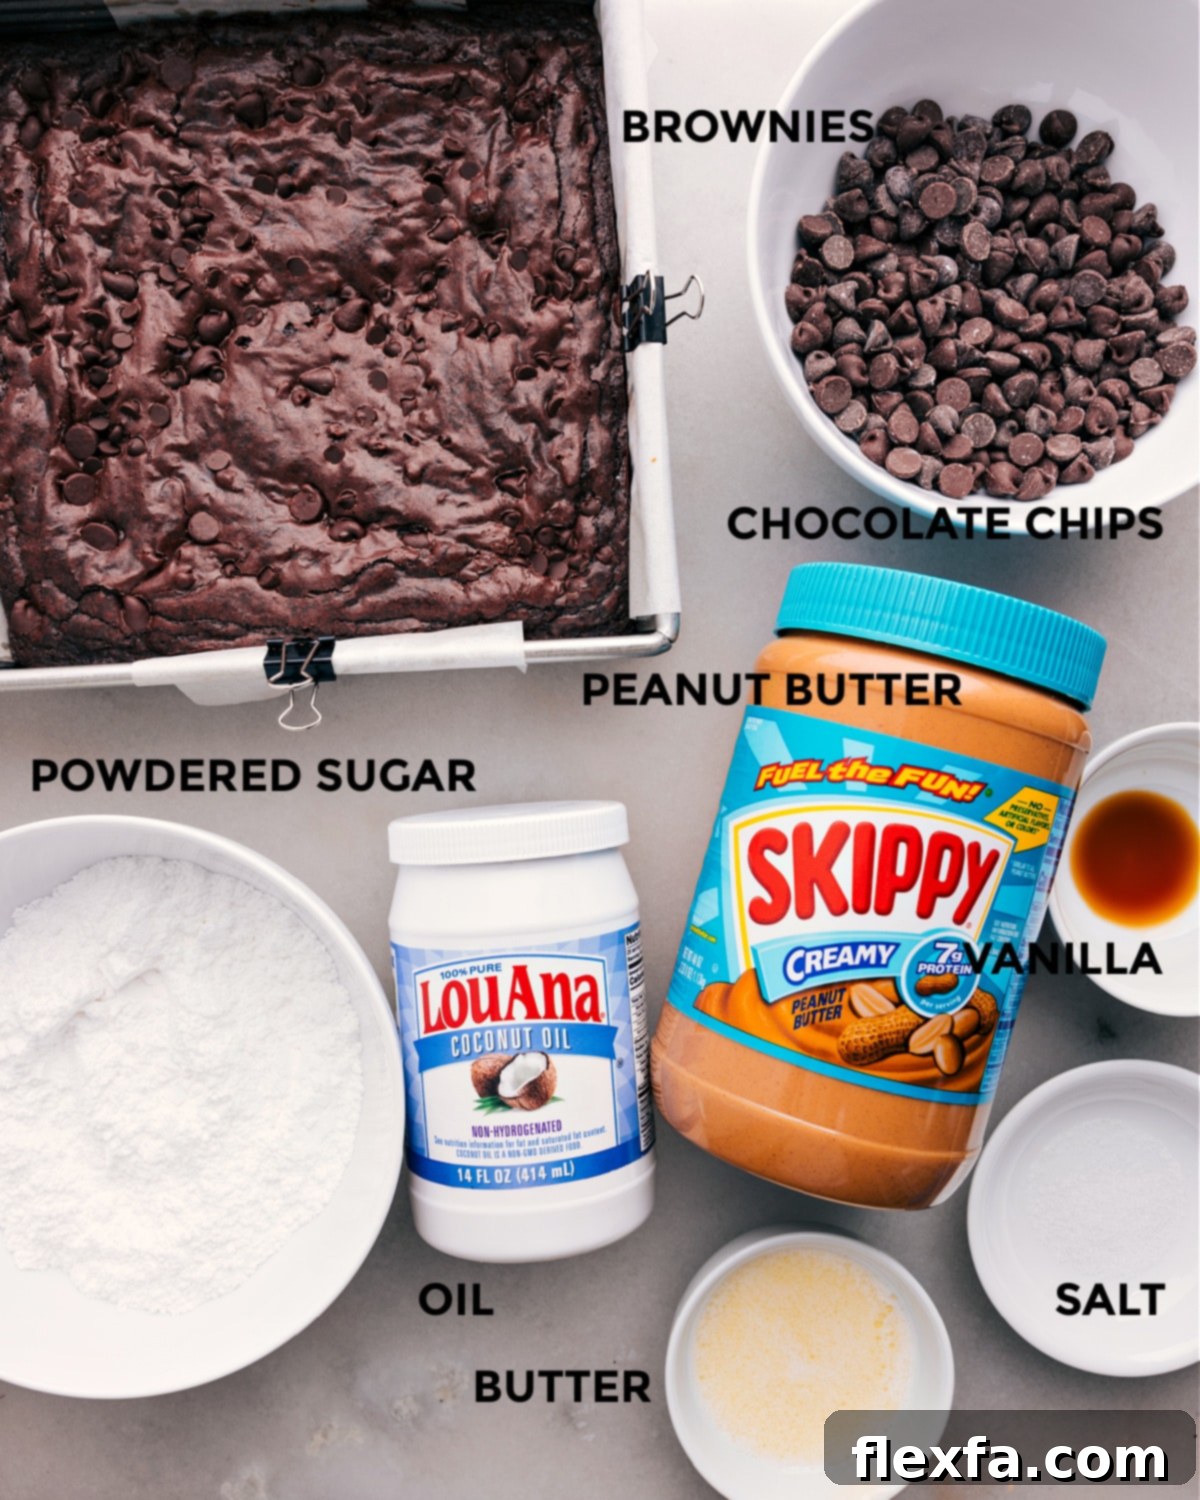
Crafting these delectable Buckeye Brownies is surprisingly simple, especially with a few key ingredients. Here’s a breakdown of what you’ll need and why each component plays a crucial role in achieving that perfect balance of fudgy, creamy, and chocolaty goodness:
- Brownie Mix (or Homemade Base): For ultimate convenience and consistent results, a boxed brownie mix is a fantastic starting point. It simplifies the process without compromising on flavor. I highly recommend using a high-quality mix like Betty Crocker Delights Supreme Triple Chunk or Ghirardelli Ultimate Chocolate Premium Brownie Mix for their rich flavor and fudgy texture. If you prefer a homemade brownie recipe, ensure it yields enough batter to fill an 8×8 or 9×9-inch baking pan to achieve the ideal brownie thickness for layering. Whichever you choose, follow the package or recipe directions carefully, paying close attention to baking times.
- Unsalted Butter: This is a foundational ingredient for the luxurious peanut butter layer. Melted butter contributes to the layer’s smooth, rich texture and helps it set beautifully once chilled. Using unsalted butter allows you to control the overall saltiness of the dessert, ensuring a perfect sweet and salty balance.
- Creamy Peanut Butter: The star of the middle layer! For that signature smooth, melt-in-your-mouth texture that defines a classic Buckeye, creamy peanut butter is essential. Avoid natural peanut butter that separates easily, as its oil content can affect the consistency of the filling. Standard creamy peanut butter works best here.
- Vanilla Extract: A touch of pure vanilla extract enhances all the sweet flavors in both the peanut butter filling and subtly complements the chocolate. It adds a warm, aromatic depth that elevates the overall taste profile. Don’t skip this!
- Powdered Sugar (Confectioners’ Sugar): This finely milled sugar is key to achieving the smooth, firm-yet-creamy consistency of the peanut butter layer. It dissolves effortlessly, preventing any gritty texture, and provides the perfect level of sweetness without making the layer overly dense.
- Salt: A small pinch of salt in the peanut butter layer is critical. It acts as a flavor enhancer, balancing the sweetness of the sugar and intensifying the rich taste of the peanut butter and chocolate. This touch of salt is what truly makes the sweet and salty combination shine.
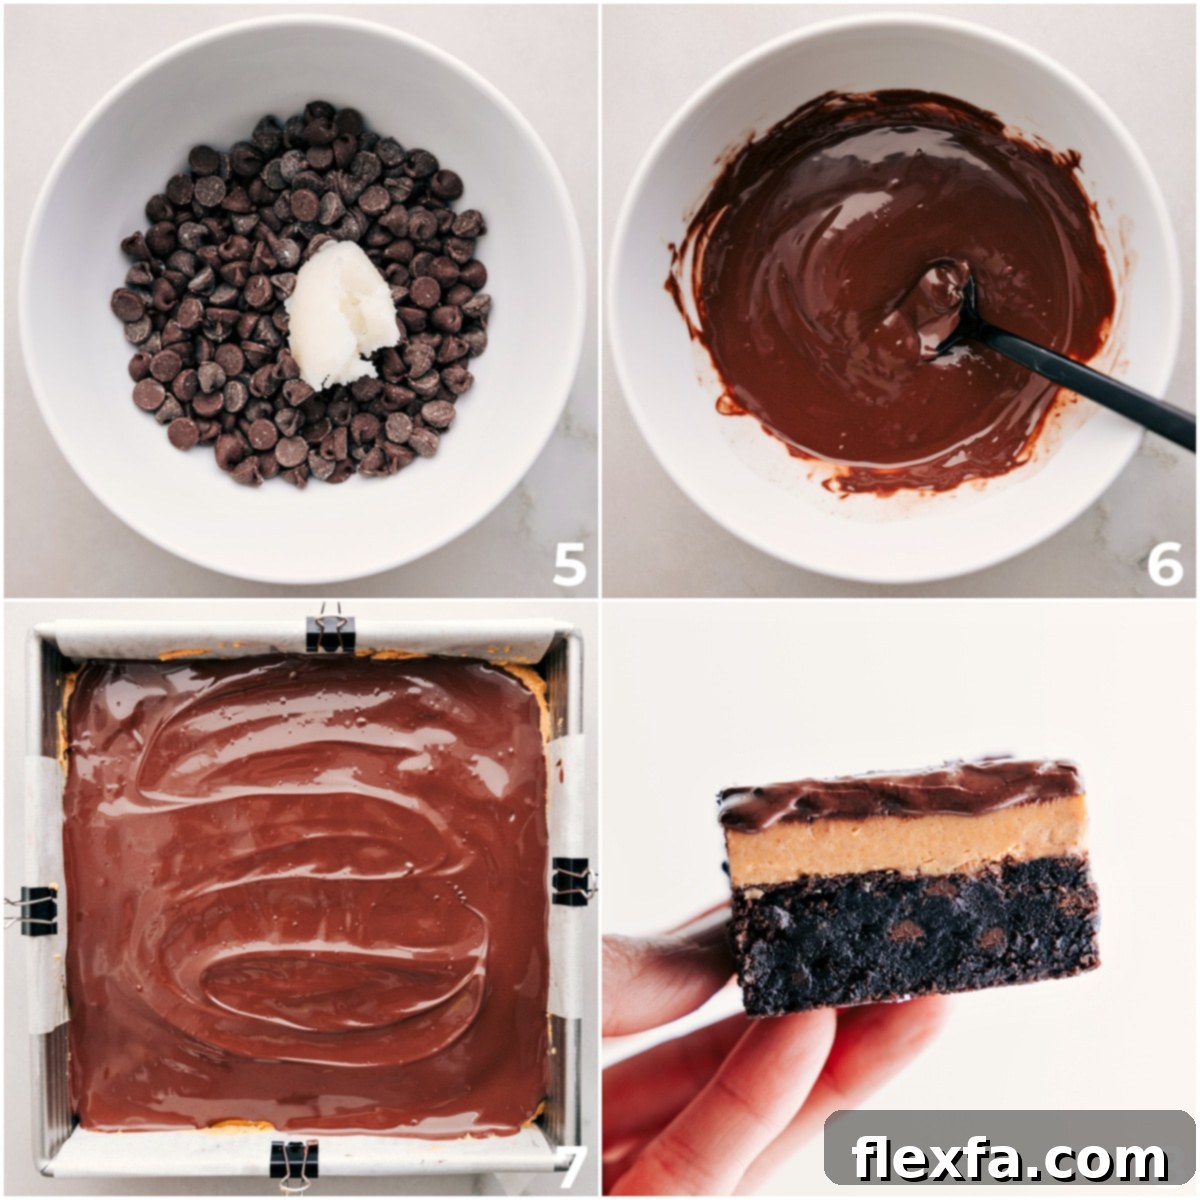
- Semi-Sweet or Dark Chocolate Chips: For the top layer, high-quality chocolate chips are a must. Semi-sweet chocolate offers a classic balance, while dark chocolate chips will provide a more intense, less sweet contrast to the rich peanut butter layer. Choose your favorite, as both melt beautifully to create a glossy, delicious topping.
- Coconut Oil: This secret ingredient is what makes the chocolate topping so smooth, glossy, and easy to slice without cracking. Just a small amount helps the chocolate achieve the perfect consistency, ensuring a clean cut through all three layers for a stunning presentation. Refined coconut oil is typically preferred as it has a neutral flavor, but unrefined can also be used if you enjoy a subtle coconut hint.
Expert Tips for Crafting the Best Buckeye Brownies
Achieving bakery-quality Buckeye Brownies is simple with these insider tips. Follow these guidelines to ensure your brownies are nothing short of spectacular, perfectly fudgy, creamy, and easy to handle:
- Prepare Your Pan with Parchment Paper: This is perhaps the most crucial tip for easy removal and clean slicing. Always line your baking pan with parchment paper, leaving a generous overhang on two sides. Once the brownies are fully chilled, you can simply use these overhangs to lift the entire slab out of the pan, making cutting a breeze. Without parchment, you risk damaging the layers when trying to remove them.
- Avoid Overbaking the Brownies: The secret to fudgy brownies lies in not overbaking them. Brownies should still look slightly underdone and perhaps a bit moist in the center when you pull them from the oven. They will continue to set as they cool. Overbaked brownies will be dry and crumbly, which detracts from the overall texture of these layered bars. A toothpick inserted should come out with moist crumbs, not completely clean.
- Chill Time is Your Best Friend: Patience is key with layered desserts, and Buckeye Brownies are no exception. Each layer benefits significantly from proper cooling and chilling.
- Brownie Base: Allow the baked brownie base to cool completely at room temperature before adding the peanut butter layer. Even better, chill it in the fridge or freezer for 30-60 minutes to ensure it’s firm.
- Peanut Butter Layer: Once the peanut butter layer is spread, return the brownies to the fridge for at least 1-2 hours (or even overnight) to let it firm up properly. This prevents the warm chocolate topping from melting into the peanut butter, keeping your layers distinct and neat. I often bake my brownies the night before I plan to assemble them, giving them ample time to cool.
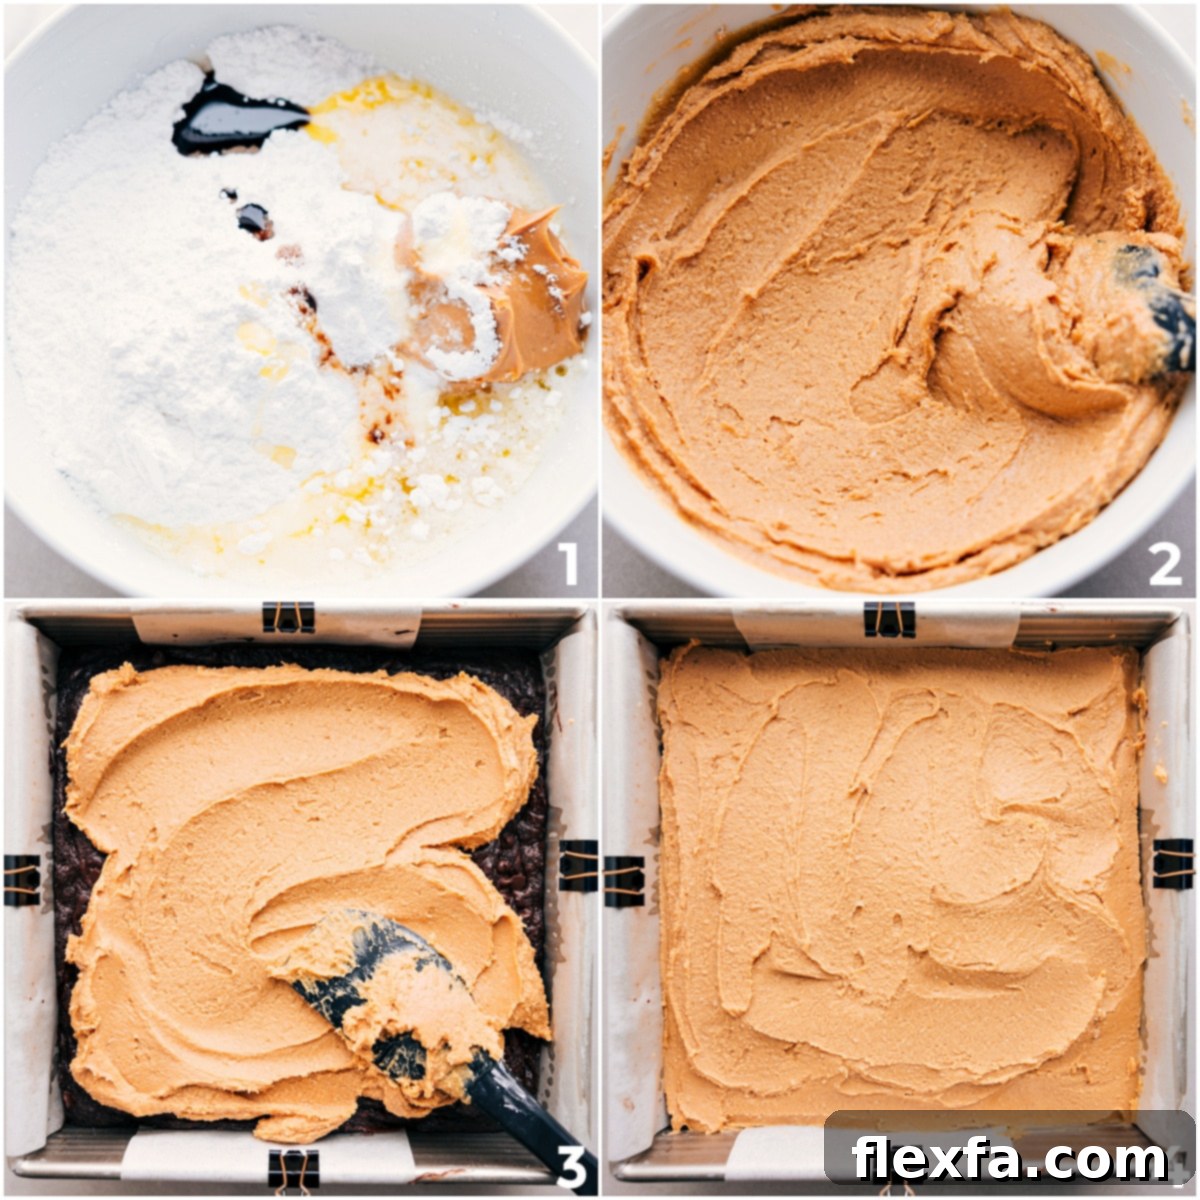
- Spread the Peanut Butter Layer Evenly: When spreading the peanut butter mixture, take your time to ensure it’s perfectly even and goes all the way to the edges of the brownie. Any gaps or thin spots could allow the melted chocolate topping to seep through to the brownie layer, making for a messier appearance and less defined layers. A lightly oiled spatula or the back of a spoon can help achieve a smooth, consistent layer.
- Achieve Clean Slices with a Warm Knife: For beautifully neat, professional-looking slices, this trick works wonders. Before each cut, run a sharp, thin-bladed knife under hot water, then wipe it completely dry. The warmth helps the chocolate topping and peanut butter layer slice cleanly without dragging or cracking. Repeat this process for every cut to ensure every piece is perfect. Cut them into small bars, as they are incredibly rich and satisfying!
- Ingredient Temperature Matters: Ensure your melted butter for the peanut butter filling isn’t too hot, or it could make the peanut butter mixture too runny. Allow it to cool slightly before mixing.
Exciting Buckeye Brownies Recipe Variations to Try
While the classic Buckeye Brownie recipe is perfect as is, it’s also incredibly versatile! Don’t hesitate to get creative and customize these bars to suit your taste or the occasion. Here are some delightful variations to experiment with:
- Elevate with a Sprinkle of Sea Salt: For those who adore the sweet and salty combination, a generous sprinkle of flaky sea salt (like Maldon) over the wet chocolate topping before it sets is a game-changer. The coarse salt crystals provide a delightful textural contrast and perfectly highlight the sweetness of the chocolate and peanut butter.
- Experiment with Different Nut Butters: While peanut butter is traditional, other creamy nut butters can create exciting new flavor profiles.
- Almond Butter: Offers a slightly milder, nuttier flavor that pairs wonderfully with chocolate.
- Cashew Butter: Provides a rich, buttery, and even sweeter note.
- Sunflower Seed Butter (SunButter): A great option for those with peanut allergies, offering a distinct, delicious flavor.
Ensure any alternative nut butter is smooth and creamy for the best consistency.
- Go for a Darker, Richer Chocolate Experience: If you prefer a less sweet and more intense chocolate flavor, swap out semi-sweet chocolate chips for dark chocolate chips (60-70% cacao). This will create a sophisticated contrast with the sweet peanut butter layer, appealing to true chocolate connoisseurs.
- Boost the Peanut Butter Punch: For the ultimate peanut butter lover, there are several ways to amplify the flavor and texture:
- Peanut Butter Cups: Chop up your favorite mini or regular peanut butter cups and either mix them into the brownie batter before baking (for an extra fudgy surprise) or sprinkle them over the peanut butter layer before adding the chocolate topping.
- Reese’s Pieces: Sprinkle these colorful and crunchy candies over the chocolate topping while it’s still wet for an added burst of peanut butter flavor and a fun pop of color and texture.
- White Chocolate Drizzle: After the dark chocolate topping has set, melt some white chocolate chips with a tiny bit of coconut oil and drizzle it decoratively over the top for an elegant finish and an extra layer of sweetness.
- Add a Crunch: Mix in finely crushed graham cracker crumbs or pretzels into the peanut butter layer for an unexpected textural delight. The saltiness of pretzels would be particularly delicious!
Storage and Shelf Life
To maintain their optimal flavor and texture, store your Buckeye Brownies in an airtight container. The refrigerator is the best place for them, where they will stay fresh and delicious for 3–4 days. Because of the dairy content in both the creamy peanut butter filling and the chocolate topping, freezing is generally not recommended. The texture of these layers can become grainy or separate upon thawing, diminishing the overall quality of this delightful dessert. For the best experience, enjoy them chilled directly from the fridge!
More Irresistible Brownie & Bar Desserts You’ll Love:
Desserts
Mint Brownie Cookies
Desserts
Brownie Oreo Ice Cream Bars
Desserts
Caramel Brownie Cookie Bars
Desserts
Dessert Cheese Ball (Brownie Batter)
Pin Recipe
Print Recipe
The Ultimate Buckeye Brownies Recipe
Chelsea Lords
20 minutes
45 minutes
4 hours
5 hours 5 minutes
20 bars (cut ’em small; they’re RICH!)
Recipe Video Tutorial
Watch this quick video to see how easily these incredible Buckeye Brownies come together! For the best viewing experience, click the link to open in a new tab.
Click to watch the Buckeye Brownies video!
Equipment Needed
-
9 x 9-inch baking pan or 8 x 8-inch for a thicker brownie base
-
Parchment paper (with an overhang for easy lifting)
-
Large mixing bowls
-
Rubber spatula or spoon
-
Microwave-safe bowl for melting chocolate
-
Sharp knife for clean slices
Ingredients List
For the Brownie Base:
- 1 (17.8-ounce) package brownie mix and additional ingredients as listed on the package (e.g., eggs, oil, water), see Note 1 below
For the Creamy Peanut Butter Filling:
- 4 tablespoons unsalted butter melted and slightly cooled
- 3/4 cup creamy peanut butter (not natural style)
- 1/2 teaspoon vanilla extract
- 1 cup powdered sugar sifted, if clumpy
- 1/8 teaspoon fine sea salt
For the Rich Chocolate Topping:
- 1 cup semi-sweet chocolate chips or dark chocolate chips for a richer flavor
- 2 teaspoons coconut oil (refined for no coconut taste)
Step-by-Step Instructions
-
Preparation is Key: Allow yourself ample time to prepare these Buckeye Brownies, as chilling is essential for distinct, clean layers. I highly recommend baking the brownies a day ahead of assembling the entire dessert to ensure they are thoroughly cooled.
1. Bake the Brownie Base: Preheat your oven to 350°F (175°C). Line a 9×9-inch baking pan (or an 8×8-inch pan for slightly thicker brownies) with parchment paper, ensuring you leave a generous overhang on two opposite sides. This parchment paper sling will make lifting the finished brownies out of the pan incredibly easy. Prepare the brownie mix according to the package directions (adding eggs, oil, water, etc.), then pour the batter into your prepared pan. Bake for the recommended time, being very careful not to overbake. The brownies should appear slightly moist in the center when removed from the oven for that perfect fudgy texture. Let the brownies cool completely in the pan at room temperature for at least 20-30 minutes. Once cooled, cover the pan loosely and place it in the refrigerator (or even the freezer for a quicker chill) while you prepare the peanut butter layer. This firm base is crucial for the next step.
-
2. Prepare and Spread the Peanut Butter Layer: In a large mixing bowl, combine the slightly cooled melted butter, creamy peanut butter, vanilla extract, powdered sugar, and a pinch of salt. Mix thoroughly until all ingredients are well incorporated and a smooth, thick, and uniform dough-like mixture forms. The consistency should be firm enough to hold its shape but still spreadable. Retrieve your chilled brownie base from the fridge. Drop dollops of the peanut butter mixture evenly over the surface of the cooled brownies. Using the back of a spoon or an offset spatula, gently and carefully spread the peanut butter layer out into an even thickness, making sure to extend it all the way to the edges of the pan. Press it down lightly to ensure it adheres well to the brownie base and no gaps remain. Once smooth, cover the pan again and return it to the refrigerator for at least 1-2 hours (or ideally, overnight) to allow the peanut butter layer to firm up completely. This is critical for preventing the chocolate topping from blending into the peanut butter.
-
3. Create and Apply the Chocolate Topping: In a microwave-safe bowl, combine your chosen chocolate chips and coconut oil. Microwave in short bursts of 20 seconds, stirring well after each interval, until the chocolate is fully melted and completely smooth with a beautiful glossy finish. Be careful not to overheat the chocolate, as this can cause it to seize. Remove the chilled brownies with their firm peanut butter layer from the refrigerator. Pour the smooth melted chocolate mixture evenly over the peanut butter layer. Use an offset spatula or the back of a spoon to gently spread it from edge to edge, creating a uniform, glistening chocolate surface. Allow the brownies to sit at room temperature for about 30 minutes, then transfer them back to the refrigerator for at least another 1-2 hours, or until the chocolate topping is fully set and firm to the touch.
-
4. Slice and Serve Your Buckeye Brownies: Once the chocolate topping is completely firm, use the parchment paper overhangs to carefully lift the entire slab of Buckeye Brownies out of the baking pan and place it on a cutting board. For the cleanest, most attractive slices, employ the warm knife trick: run a sharp, thin-bladed knife under hot water, wipe it completely dry, and then make a quick, decisive cut. Re-warm and dry the knife between each slice. This prevents the chocolate from cracking and ensures a smooth cut through all layers. Cut the brownies into your desired size – typically small bars, as they are incredibly rich and decadent! Allow the cut brownies to sit at room temperature for about 30 minutes before serving. This allows the layers to soften slightly for the best eating experience. Enjoy your homemade Buckeye Brownies!
Important Recipe Notes
Storage Tips: For optimal freshness and to preserve the delightful layers of your Buckeye Brownies, store them in an airtight container in the refrigerator. They will maintain their best taste and texture for 3–4 days. While tempting for longer preservation, freezing is generally not recommended for this particular dessert. The dairy components in both the peanut butter filling and the chocolate topping can undergo textural changes when frozen and thawed, often resulting in a grainy or separated consistency that detracts from the overall enjoyment. It’s best to savor them within a few days of preparation.
Serving Suggestion: These brownies are quite rich, so cutting them into smaller, bite-sized squares or bars is often appreciated. For the best flavor and texture, allow them to come to room temperature for about 30 minutes before serving, which will soften the layers slightly.
Nutrition Information (Approximate)
Per Serving (1 bar):
- Calories: 299 kcal
- Carbohydrates: 35.4 g
- Protein: 4.4 g
- Fat: 16.7 g
- Cholesterol: 15.2 mg
- Sodium: 117.4 mg
- Fiber: 1.3 g
- Sugar: 26.1 g
Nutrition information provided is an estimation and can vary based on specific ingredients, brands, and serving sizes. It should be used as an approximation only.
Loved this recipe? Share your thoughts below!
Don’t forget to leave a comment and rating if you try these incredible Buckeye Brownies. Your feedback helps other bakers!