
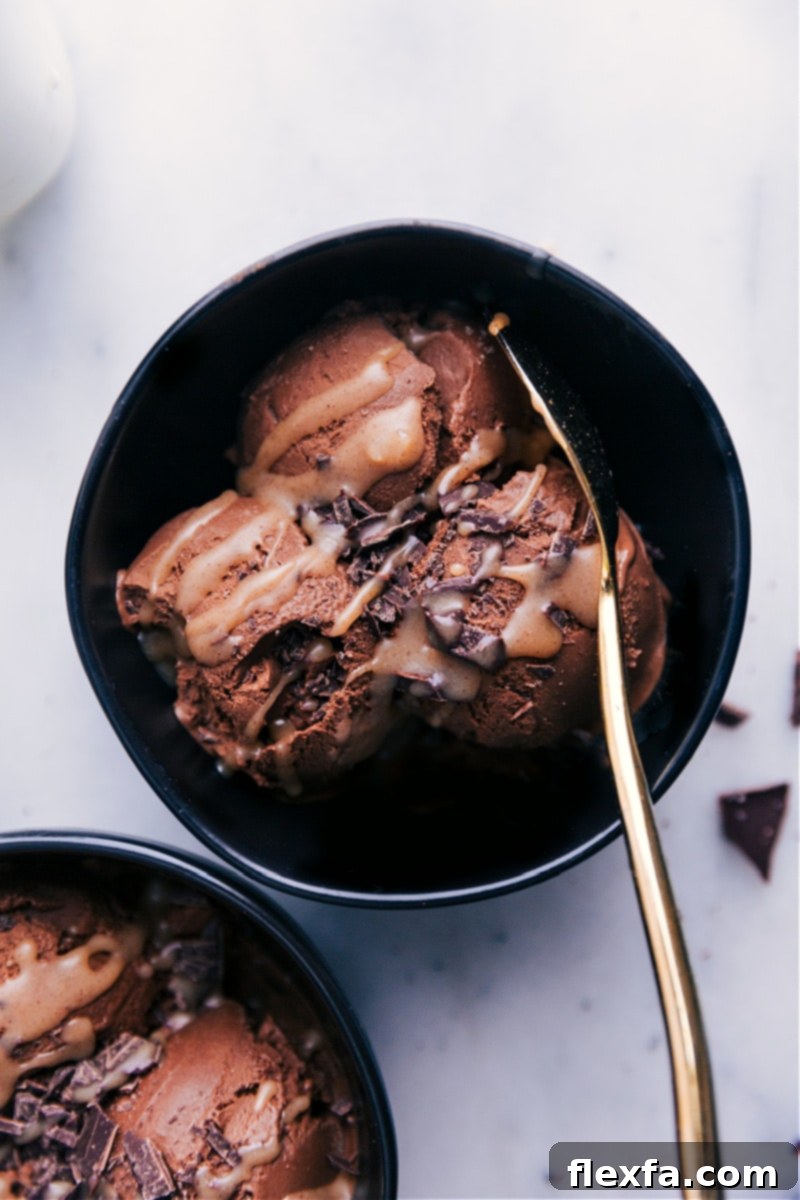
Forget everything you thought you knew about healthy ice cream! This revolutionary Healthy Chocolate Ice Cream Recipe uses the unexpected magic of sweet potatoes to create an unbelievably creamy, rich, and utterly delicious dessert. Unlike common “nice cream” recipes that often rely on bananas, this version delivers a true ice cream texture and flavor, all while being naturally dairy-free, vegan, vegetarian, and gluten-free. Prepare to be amazed – you won’t even taste the sweet potato!
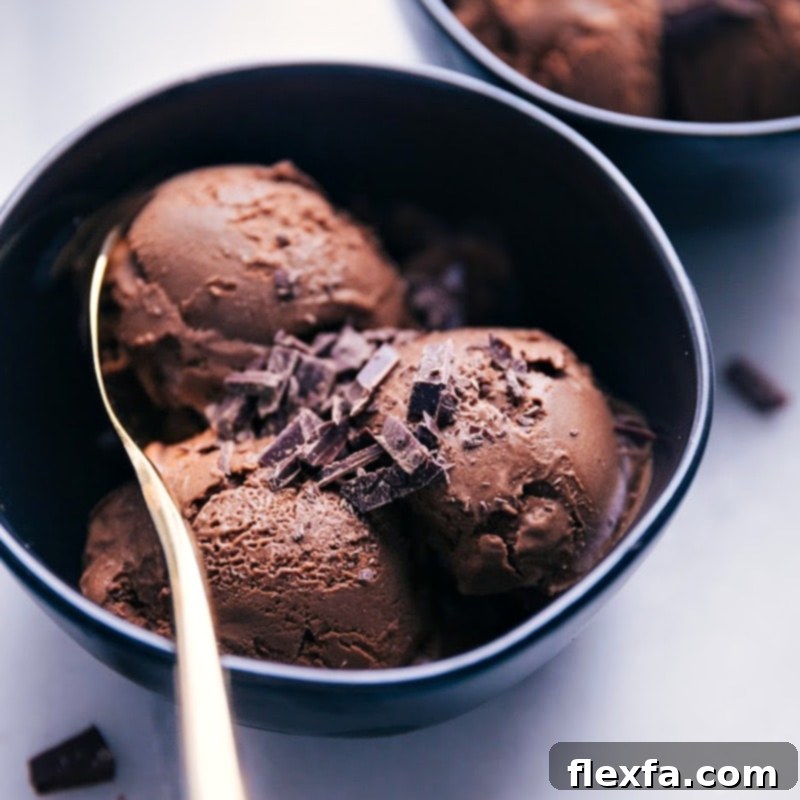
Elevate your dessert experience by topping this luscious chocolate creation with a drizzle of healthy caramel sauce and a sprinkle of chopped dark chocolate. Craving other wholesome frozen treats? Don’t miss out on exploring delightful flavors like blueberry ice cream or cashew ice cream next!
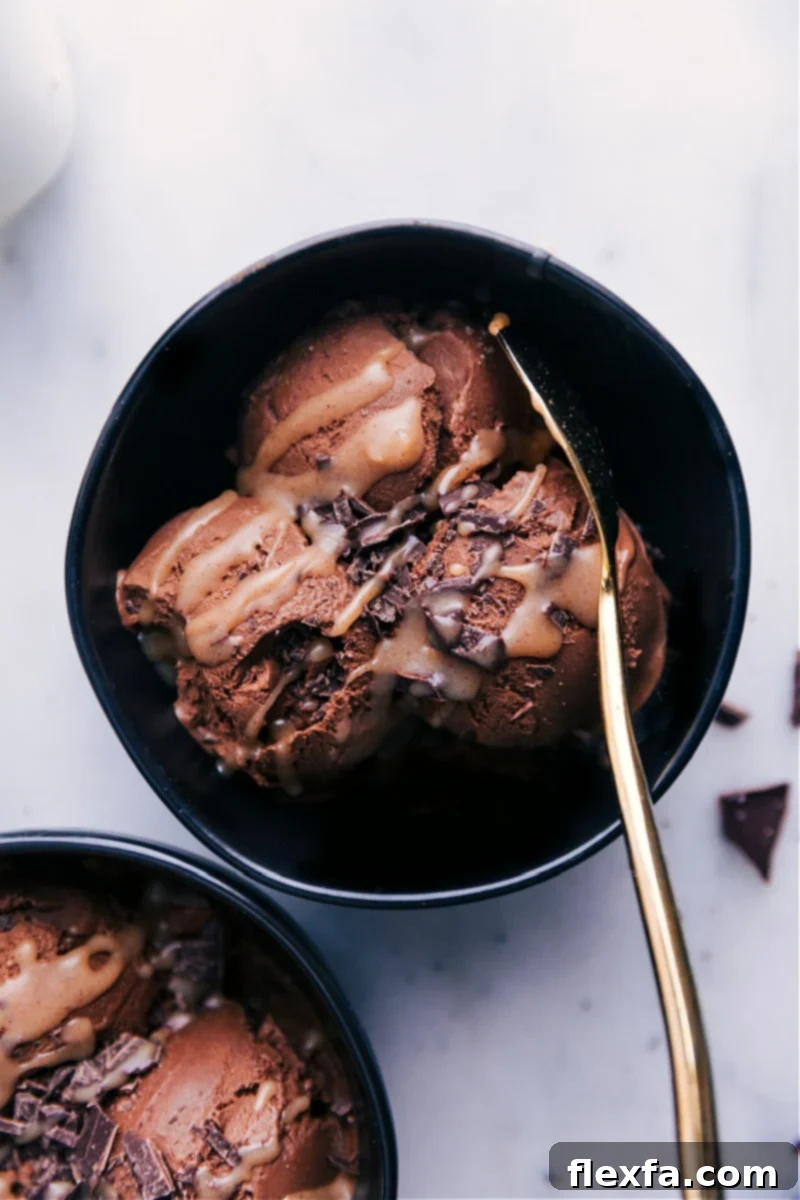
The Ultimate Healthy Chocolate Ice Cream Recipe: Sweet Potato Edition
Are you tired of “healthy” ice cream that tastes more like a frozen smoothie than a decadent dessert? Many recipes promise a guilt-free treat but often fall short, delivering icy textures or an overpowering banana flavor. Our unique healthy chocolate ice cream recipe breaks the mold. It’s thick, remarkably creamy, and boasts an authentic ice cream taste that will fool even the most discerning palate – all without a single banana in sight!
This isn’t just another sweet treat; it’s a culinary revelation. Crafted with just six simple, wholesome ingredients, it offers a deep, satisfying chocolate flavor without any artificial sweeteners or complicated processes. Everything you need can be easily found at your local grocery store, and the preparation is surprisingly quick. Just blend your ingredients to a silky-smooth consistency, pour into your ice cream maker, and let the magic happen!
So, what’s the surprising secret behind its incredible texture and richness, if not bananas? The answer lies in a humble, yet powerful vegetable: sweet potato. Read on to discover how this incredible ingredient transforms into the base of your new favorite healthy dessert!
Why Sweet Potatoes are the Game-Changer in Healthy Ice Cream
When you first hear “sweet potato ice cream,” you might raise an eyebrow, and rightly so! It’s an unconventional ingredient for a dessert, especially one designed to taste like classic chocolate ice cream. However, sweet potatoes are the unsung heroes of this recipe, providing an unparalleled creaminess and smooth texture that’s often lacking in other healthy ice cream alternatives. Their mild sweetness and dense, starchy flesh break down beautifully in the blender, creating a rich base that thickens as it churns, mimicking traditional dairy ice cream.
Beyond texture, sweet potatoes bring a powerhouse of nutrition. They are an excellent source of beta-carotene (which converts to Vitamin A), Vitamin C, manganese, and dietary fiber. This means you’re not just enjoying a delicious treat, but also nourishing your body with essential vitamins and minerals. The best part? The robust flavor of dark chocolate completely masks any hint of sweet potato, leaving you with pure, unadulterated chocolate bliss. It’s a truly ingenious way to incorporate more vegetables into your diet without even realizing it!
Nutritional Benefits of Our Wholesome Ingredients
This isn’t just a healthier ice cream; it’s a nutrient-rich indulgence. Each ingredient plays a vital role not only in flavor and texture but also in contributing to your well-being:
- Sweet Potatoes: As discussed, they are packed with vitamins A and C, antioxidants, and fiber. They promote good digestion, support immune function, and contribute to healthy skin and vision. Their natural sweetness also helps reduce the need for excessive added sugars.
- Dark Chocolate: A true superfood, dark chocolate (especially 70% cacao or higher) is loaded with antioxidants, flavanols, and essential minerals like iron, magnesium, and copper. It’s known to improve heart health, brain function, and even mood. Choosing a high-quality dark chocolate ensures you get the most benefits and the richest flavor.
- Coconut Milk: When opting for lite coconut milk, you get the creamy texture without an excessive amount of saturated fat found in full-fat versions. It’s naturally dairy-free and provides a subtle tropical hint that complements the chocolate beautifully. It’s also a source of healthy fats that can aid in nutrient absorption.
- Coconut Sugar: A natural sweetener derived from the sap of coconut palm, it offers a slightly lower glycemic index than refined white sugar, meaning it causes a slower rise in blood sugar. It also retains more nutrients compared to regular sugar, including iron, zinc, calcium, and potassium.
Enjoying this ice cream means treating yourself to something that tastes incredible and is genuinely good for you!
Simple Ingredients for an Extraordinary Healthy Ice Cream
Crafting this incredible sweet potato ice cream requires only a handful of easily accessible ingredients. Each one is carefully chosen to contribute to the final creamy texture and deep chocolate flavor profile:
- Sweet Potato: The star of the show! Don’t let its humble nature fool you. When cooked and blended, it transforms into a smooth, neutral base that absorbs the chocolate flavor perfectly, creating an incredibly thick and creamy consistency without being detectable. Aim for about 1 pound for this recipe.
- Dark Chocolate Chips: Essential for that rich, decadent chocolate taste. I personally prefer Nestle’s® 53% cacao dark chocolate chips for their balanced bitterness and sweetness, but any quality dark chocolate chips you enjoy will work beautifully. For a dairy-free or vegan option, ensure you select certified dairy-free chocolate chips.
- Lite Coconut Milk: This is key for achieving the right balance of creaminess without an overpowering coconut flavor or excessive richness. Lite coconut milk provides the necessary liquid and fat for a smooth texture, allowing the chocolate to truly shine. Look for it in unrefrigerated cans in the international foods aisle, often with Latin or Asian ingredients. My go-to is Lite Thai Kitchen® Coconut Milk.
- Coconut Sugar: Our preferred natural sweetener. It adds a lovely caramel-like depth that enhances the chocolate. If you don’t have coconut sugar, light brown sugar is a good substitute. For a sugar-free alternative, you can try liquid stevia, starting with just 1/4 teaspoon and adjusting to taste, as its sweetness is potent. Feel free to adjust the amount to your desired level of sweetness.
- Vanilla Extract: A touch of pure vanilla extract elevates the overall flavor, adding warmth and complexity that complements the chocolate. Don’t skip this!
- Sea Salt: Just a small pinch of fine sea salt is crucial. It acts as a flavor enhancer, balancing the sweetness and intensifying the chocolate notes, making the ice cream taste even more profound and satisfying.
Quick Tip: Selecting Your Coconut Milk
Choosing the right coconut milk makes a difference. Always look for unrefrigerated cans, typically found in the international aisle alongside Latin or Asian culinary products. Avoid refrigerated carton coconut milk beverages, as they are often thinner and not suitable for this recipe. For consistently excellent results, I recommend Lite Thai Kitchen® Coconut Milk.
Picking the Perfect Sweet Potato for Your Ice Cream
The type of sweet potato you choose can impact the final texture and sweetness of your ice cream. Here’s what to look for:
- Understanding “Yams”: In many U.S. grocery stores, orange or red-skinned sweet potatoes are sometimes incorrectly labeled as “yams.” True yams are a different vegetable entirely – starchier, drier, and rarely found in typical supermarkets. For this recipe, stick to what are commonly sold as “sweet potatoes.”
- Color Matters: Opt for orange or red-skinned varieties, such as Red Garnet or Jewel sweet potatoes. These types are naturally sweeter and have a creamier texture when cooked, making them ideal for desserts. Avoid tan or purple-skinned sweet potatoes, as they tend to be drier and less sweet, which could affect the final consistency and flavor.
- Firmness and Appearance: Select firm sweet potatoes that are free from soft spots, sprouts, or any unusual blemishes. A healthy, firm sweet potato will yield the best results.
- More Sweet Potato Inspiration: If you’re interested in exploring other delicious ways to prepare this versatile vegetable, be sure to check out recipes for perfectly roasted sweet potatoes or a simple method for fluffy baked sweet potatoes.
Essential Tips for a Flawless Healthy Ice Cream
Achieving that perfect, scoopable consistency for your homemade ice cream is all about preparation and patience. Follow these essential tips for the best results:
- Pre-Freeze Your Ice Cream Maker Insert: This step is non-negotiable! Your ice cream maker’s freezer bowl needs to be completely frozen solid for at least 12-24 hours, or according to your manufacturer’s instructions. If it’s not thoroughly frozen, your ice cream mixture won’t churn and set properly, resulting in a runny consistency. Plan ahead!
- Chill the Mixture Before Churning: After blending all your ingredients, the friction from the blender blades can sometimes warm the mixture. For optimal churning and a super creamy outcome, it’s crucial that your ice cream base is as cold as possible before it goes into the machine. If the mixture feels warm to the touch, transfer it to an airtight container and refrigerate it for 30-60 minutes, or until thoroughly chilled. This prevents the ice cream maker from having to work harder and ensures a smoother, faster set.
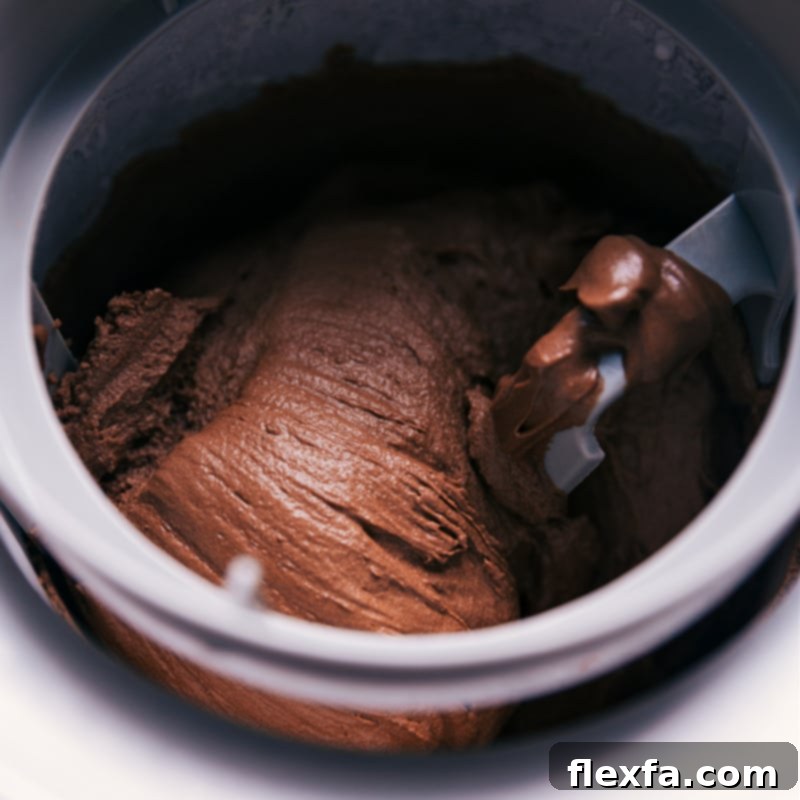
Choosing and Using Your Ice Cream Maker
While this recipe focuses on creating the ideal base, an ice cream maker is an invaluable tool for achieving that desired creamy texture. It continuously churns the mixture, preventing large ice crystals from forming and resulting in a smooth, soft-serve consistency that then hardens beautifully in the freezer.
- Recommended Ice Cream Maker: For consistently excellent results with this healthy ice cream recipe, you’ll benefit greatly from an electric ice cream maker. I personally use and highly recommend this Cuisinart model, which reliably produces perfectly churned ice cream every time.
- Churning Duration: In my Cuisinart machine, the churning process typically takes about 25–30 minutes to reach a luscious soft-serve consistency. Keep an eye on your machine and mixture, as times can vary slightly depending on the model and the initial temperature of your base.
- No Ice Cream Maker? No Problem (with effort!): If you don’t own an ice cream maker, don’t despair! You can still enjoy this delicious treat with a bit more manual effort. Transfer your chilled ice cream mixture into a shallow, freezer-safe airtight container. Place it in the freezer and stir the mixture thoroughly every 30 minutes for 3-4 hours, or until it reaches a firm, scoopable ice cream consistency. While the texture won’t be exactly the same as machine-churned ice cream (it might be slightly icier), you will still achieve a wonderfully rich and flavorful frozen dessert.
Quick Tip: Achieving Perfect Firmness
After churning to a soft-serve consistency in your machine, transfer the ice cream to an airtight freezer-safe container. Smooth the top and freeze for an additional 2–3 hours, or even overnight, for a firmer, more traditional scoopable texture. I find the flavor and texture are often best enjoyed the day after it’s fully frozen.
Customizing Your Healthy Chocolate Ice Cream
While this recipe is perfect as written, you might be tempted to experiment with different flavors and additions. Here’s a guide to smart customization:
Of course, you’re always welcome to experiment with substitutions, but please be aware that I’ve only thoroughly tested this recipe exactly as described. I cannot guarantee the outcome of specific alterations, especially for core ingredients.
The most frequent question about this recipe involves replacing chocolate chips. Unfortunately, there isn’t a direct substitute that will yield the same results. Cocoa powder, for example, will not provide the necessary richness, fat content, and melting consistency that chocolate chips offer to create the creamy base.
Delicious Topping and Flavor Variations:
- Classic Chocolate Indulgence: Swirl in extra mini chocolate chips after churning, or top with a sprinkle of cacao nibs for added crunch and intense chocolate flavor.
- Nutty Delight: Fold in chopped roasted almonds, walnuts, or pecans after churning. A drizzle of natural peanut or almond butter would also be divine!
- Berry Bliss: Gently fold in fresh raspberries or chopped strawberries for a fruity counterpoint to the rich chocolate.
- Mint Chocolate Chip: Add 1/2 to 1 teaspoon of pure peppermint extract to the blender mixture for a refreshing minty twist.
- Coffee Kick: Incorporate 1-2 teaspoons of instant espresso powder or strong cold-brew concentrate for a mocha-flavored ice cream.
- Coconut Lover’s Dream: Toast some shredded coconut flakes and sprinkle them on top for extra texture and tropical flavor.
Dietary Considerations for Your Healthy Ice Cream
One of the fantastic aspects of this sweet potato chocolate ice cream recipe is its versatility, catering to various dietary needs without compromising on taste or texture:
- Gluten-Free: This recipe is inherently gluten-free, relying on whole, naturally GF ingredients. However, it’s always good practice to double-check the labels of all your packaged ingredients (especially chocolate chips) to ensure they haven’t been processed in facilities that handle gluten, which could lead to cross-contamination.
- Dairy-Free: The use of coconut milk makes this recipe naturally dairy-free. Just be sure to select dark chocolate chips that are explicitly labeled as dairy-free to maintain this qualification. Many quality dark chocolate brands are dairy-free, but always verify.
- Vegan: To make this healthy chocolate ice cream completely vegan, simply ensure that your dark chocolate chips are dairy-free and that your chosen sweetener (coconut sugar or brown sugar) aligns with vegan principles (though most are).
- Vegetarian: As written and with standard ingredients, this healthy chocolate ice cream recipe is already suitable for a vegetarian diet. No modifications are needed.
This inclusive nature makes it a perfect dessert for gatherings or for families with diverse dietary preferences, ensuring everyone can enjoy a scoop of delicious, creamy chocolate goodness!
Storage and Serving Suggestions
Once your healthy chocolate ice cream is perfectly churned and hardened, proper storage ensures you can enjoy its delightful taste for weeks to come, and knowing how to serve it best will elevate the experience.
Storage:
- Airtight Container is Key: Always transfer your finished ice cream to a high-quality, freezer-safe airtight container. This prevents freezer burn and helps maintain the ice cream’s creamy texture, protecting it from absorbing odors from other foods in the freezer.
- Lifespan: Stored correctly, this sweet potato ice cream can be kept in the freezer for up to 1 month. Beyond this, while still safe to eat, its texture might start to degrade slightly.
Serving:
- Softening Before Scooping: Because homemade ice cream (especially dairy-free versions) tends to freeze harder than commercial varieties, it’s best to let it sit at room temperature for 5-15 minutes before scooping. This allows it to soften just enough to achieve that perfect, creamy consistency.
- Perfect Pairings: This chocolate ice cream is fantastic on its own, but it also makes a wonderful accompaniment to other healthy desserts. Try it alongside healthy brownies, or as a scoop next to a warm slice of healthy zucchini bread.
Frequently Asked Questions
- Can I use a different vegetable instead of sweet potato? While sweet potato is highly recommended for its unique texture contribution and mild flavor, some adventurous cooks have experimented with pumpkin puree or even cooked cauliflower. However, results may vary significantly in taste and texture. Sweet potato is ideal because it’s naturally sweet and provides a dense, smooth base.
- My ice cream turned out too icy. What went wrong? This usually happens if your ice cream maker insert wasn’t fully frozen, or if your ice cream base wasn’t cold enough before churning. Ensure your freezer bowl is solid and your mixture is well-chilled. Over-churning or under-churning can also affect the texture.
- Can I make this ice cream without an ice cream maker? Yes, you can! While an ice cream maker yields the creamiest results, you can freeze the mixture in a shallow pan and stir it every 30 minutes for 3-4 hours until firm. This method requires more effort and may result in a slightly icier texture, but it’s still delicious.
- What kind of dark chocolate should I use? For the best flavor and health benefits, opt for dark chocolate chips with at least 50% cacao. If you’re going for a vegan or dairy-free option, make sure the label explicitly states “dairy-free” or “vegan.”
- How long does it last in the freezer? When stored in an airtight container, your homemade sweet potato ice cream will keep fresh in the freezer for up to one month. For optimal texture, allow it to soften at room temperature for a few minutes before serving.
Conclusion: Indulge Without the Guilt
This healthy chocolate ice cream recipe isn’t just a dessert; it’s a testament to how creative cooking can transform simple, wholesome ingredients into something truly extraordinary. By harnessing the natural creaminess and subtle sweetness of sweet potatoes, we’ve created a dairy-free, vegan, and gluten-free treat that boasts the rich flavor and smooth texture of traditional ice cream, all without the need for bananas or artificial additives.
So go ahead, scoop generously, and enjoy every spoonful of this guilt-free indulgence. Whether you’re adhering to a specific diet or simply seeking a healthier alternative to your favorite frozen dessert, this sweet potato chocolate ice cream is sure to become a beloved staple in your kitchen. It’s time to redefine what healthy dessert truly means!
More Delicious Healthy Treats to Explore:
Desserts
Healthy Zucchini Bread
Desserts
Healthy Brownies
Desserts
Chocolate Chia Seed Pudding
Desserts
Healthy Cookie Dough Cups

Healthy Chocolate Ice Cream Recipe
By Chelsea Lords
A truly healthy chocolate ice cream recipe made with sweet potatoes instead of bananas. This creamy, rich, and delicious treat is easily made vegan, dairy-free, and gluten-free.
Prep Time: 25 minutes
Chilling Time: 2 hours 45 minutes
Total Time: 3 hours 10 minutes
Servings: 10 servings
Equipment
- Blender
- Ice cream maker
Ingredients
- 1 large sweet potato (about 1 pound)
- 1 (10-ounce) bag dark chocolate chips (Nestle’s 53% cacao dark chocolate morsels recommended, see Note 1 for dairy-free)
- 2 teaspoons vanilla extract
- 1/2 teaspoon fine sea salt (or 1/4 teaspoon table salt)
- 1/4 cup coconut sugar (or light brown sugar)
- 1 (13.66-ounce) can lite coconut milk (Thai Kitchen recommended)
Instructions
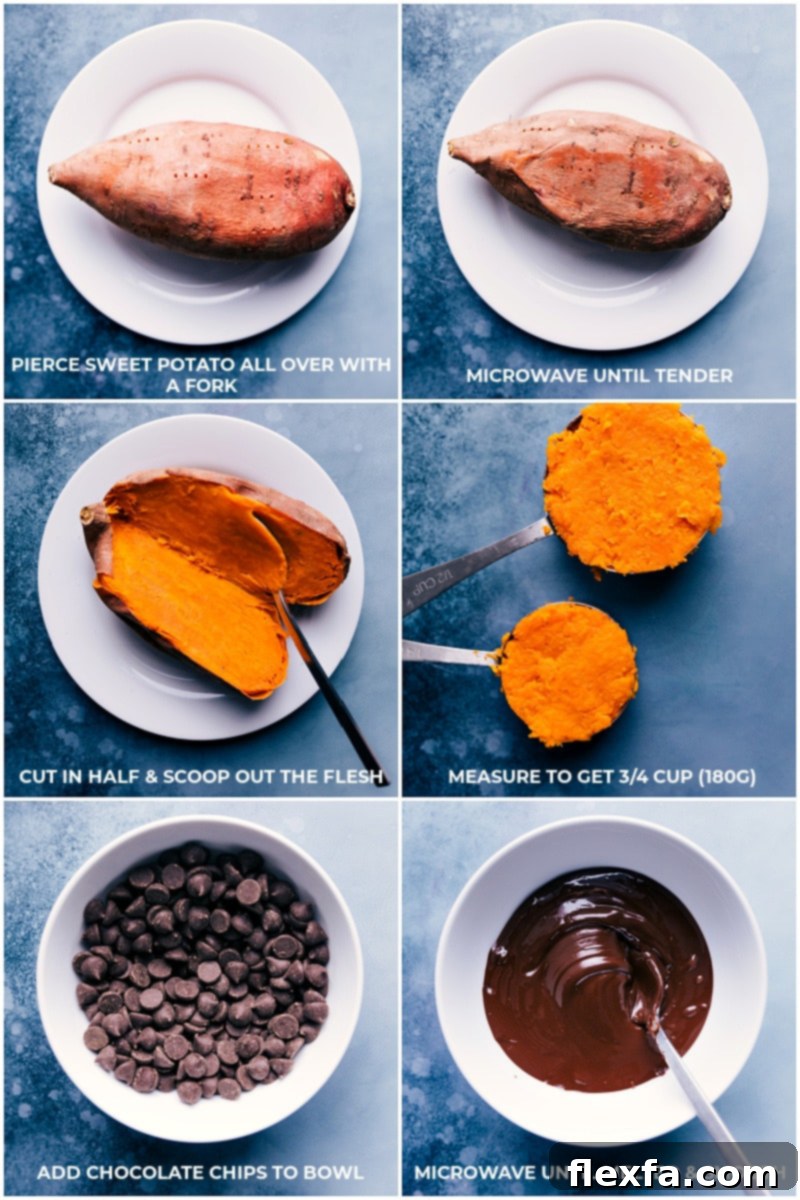
- Wash and scrub the sweet potato thoroughly. Pierce it several times with a fork. Place the sweet potato on a microwave-safe plate and cook for 5 minutes. Flip it over and microwave for another 5 minutes, or until it is very tender when pierced. Set the cooked sweet potato aside and allow it to cool completely.
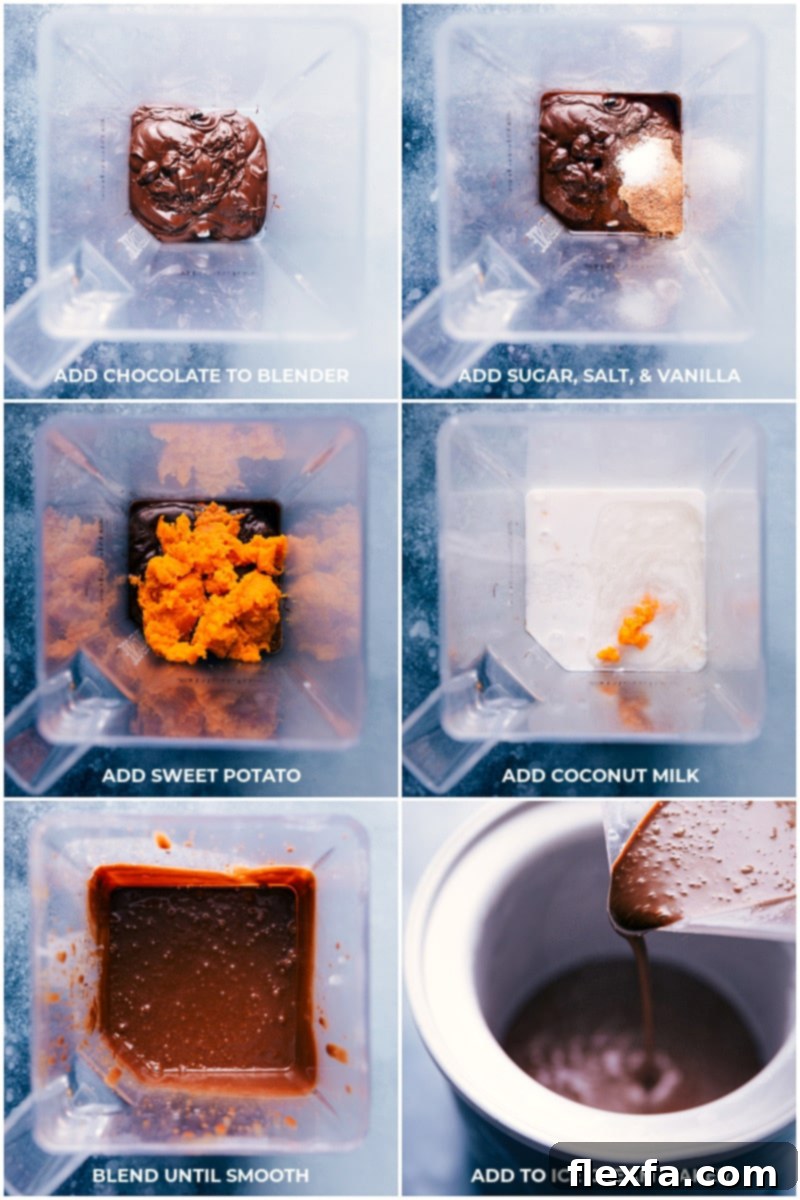
- While the sweet potato cools, place the dark chocolate chips in a microwave-safe bowl. Heat in 20-second increments, stirring well for 15 seconds after each increment, until the chocolate is completely smooth and melted. Transfer the melted chocolate to a large blender, ensuring you scrape every bit of chocolate from the bowl with a spatula. Add the coconut sugar, vanilla extract, and sea salt to the blender.
- Once the sweet potato is cool enough to handle, remove its skin. Thoroughly mash the potato with a fork until smooth. Measure exactly 3/4 cup (180g) of the mashed sweet potato and add it to the blender, along with the canned lite coconut milk.
- Secure the lid on the blender and blend on high speed for at least 1 minute, or until all ingredients are completely smooth and thoroughly incorporated. The mixture should have a silky, uniform consistency. If the mixture feels warm from blending, transfer it to an airtight container and refrigerate for 20-30 minutes to chill before proceeding.
- Pour the chilled mixture into your ice cream maker (using a spatula to get every last drop) and churn according to the manufacturer’s directions. (For a Cuisinart machine, it typically takes about 25-30 minutes to reach a soft-serve consistency.) Once churned, transfer and smooth the ice cream into an even layer in an airtight freezer-safe container. Place the container in the freezer to allow the ice cream to firm up further, which will take approximately 2–3 hours, or preferably overnight. The ice cream often tastes best the next day!
- No Ice Cream Maker Method: If you do not have an ice cream maker, you can still make this recipe with a little extra effort. Pour the blended mixture into a shallow, freezer-safe airtight container. Place it in the freezer and stir the mixture thoroughly every half hour for 3–4 hours, or until it achieves a firm, ice cream-like consistency.
Recipe Notes
- Note 1 (Dairy-Free/Vegan): To ensure this ice cream is fully vegan and/or dairy-free, use dark chocolate chips that are specifically labeled as dairy-free.
- Storage: Store any leftover sweet potato ice cream in an airtight container in the freezer for up to 1 month. For the best scooping experience, let it sit at room temperature for a few minutes to soften slightly before serving.
Nutrition Information (Approximate)
Serving: 1 serving | Calories: 214kcal | Carbohydrates: 30g | Protein: 3g | Fat: 9g | Saturated Fat: 8g | Cholesterol: 1mg | Sodium: 183mg | Potassium: 334mg | Fiber: 2g | Sugar: 16g | Vitamin A: 6438IU | Vitamin C: 1mg | Calcium: 100mg | Iron: 1mg
Nutrition information is automatically calculated, so should only be used as an approximation. Individual results may vary based on ingredients used and preparation.