
4 Delightful DIY Christmas Mason Jar Gifts: Easy & Creative Holiday Ideas
The holiday season is a magical time for giving, and what could be more heartfelt than a handmade gift? This year, ditch the generic presents and create something truly special with these four incredibly easy and creative Christmas mason jar gift ideas! Whether you’re looking for a charming Grinch jar, a festive Santa jar, an adorable reindeer jar, or a whimsical snowman jar, we’ve got you covered. These DIY projects are perfect for all skill levels, making them ideal for holiday crafting with family or as thoughtful, budget-friendly presents for friends, teachers, neighbors, and loved ones. Get ready to spread some festive cheer with personalized jars brimming with holiday joy!
The beauty of mason jar gifts lies in their versatility. Not only are they adorable and customizable, but they also offer a fantastic way to present small treats or craft supplies in a decorative and memorable fashion. These projects are simple enough to whip up in an afternoon, even if you’re short on time. For those eager to get a head start on Christmas preparations, these ideas will be a lifesaver. And if you prefer to wait until after Thanksgiving to dive into holiday crafting, be sure to save this guide for later – you won’t want to miss out on these charming creations!
1. Christmas Mason Jar: The Grinch Jar
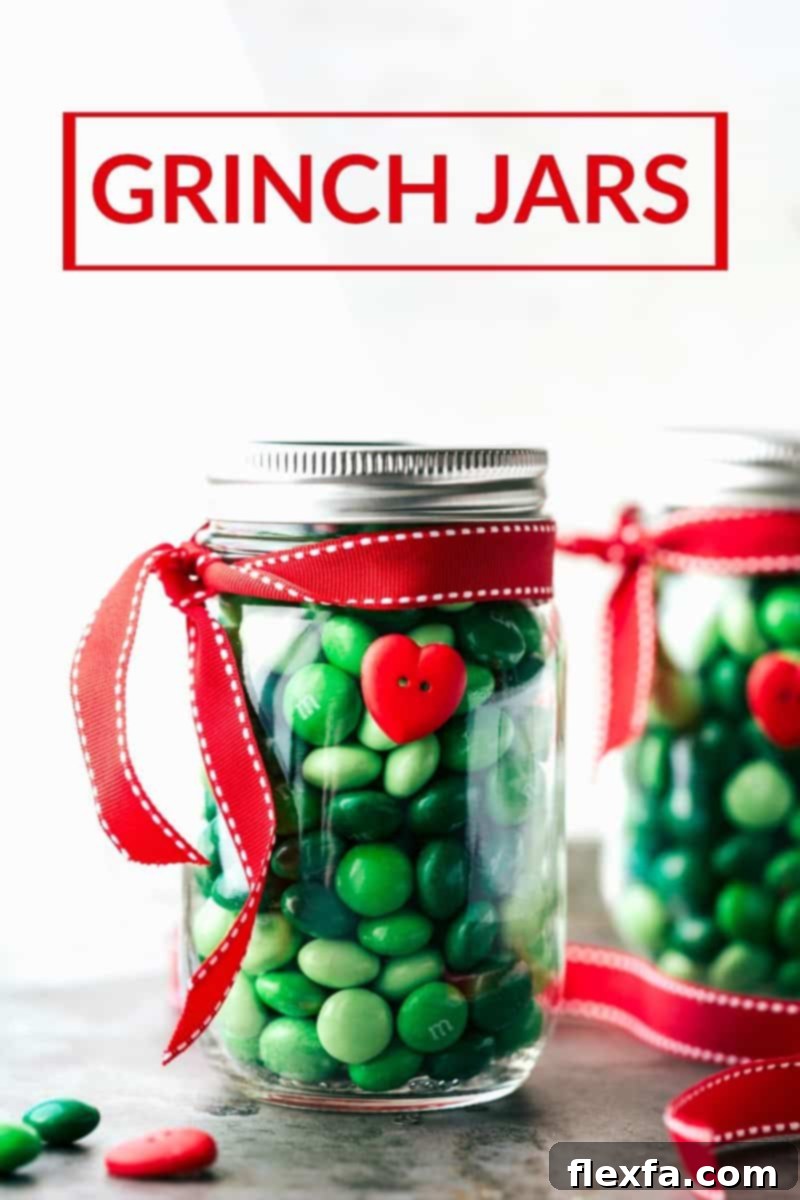
Bring a touch of mischievous charm to your holiday gifting with our delightful Grinch Jars! Inspired by Dr. Seuss’s iconic character, these jars are a playful nod to the Grinch’s transformation and growing heart. They make a fantastic gift for anyone who loves the classic Christmas story, filled with a vibrant green treat that perfectly captures his grumpy-turned-good nature.
To craft your very own Grinch Christmas mason jar, the process is wonderfully straightforward. Start by selecting your favorite green candy to fill the jar. Mint M&M’s are an excellent choice, providing both the ideal color and a refreshing holiday flavor. You could also consider green gummy bears, sour apple belts, or even green-wrapped chocolates. The goal is to create a visually appealing base that evokes the Grinch’s signature hue.
Once filled, the decoration begins. A striking red ribbon, preferably with white stitching for that classic Christmas feel, is tied securely around the top of the jar. This pop of red immediately draws the eye and contrasts beautifully with the green contents. The final, heartwarming touch is a small red heart-shaped button, which you’ll attach to the jar. This button serves as a symbolic representation of the Grinch’s heart, which famously grew “three sizes that day” thanks to the spirit of Christmas. It’s a subtle yet powerful detail that makes this gift truly special and tells a story.
These Grinch Jars aren’t just gifts; they’re conversation starters, perfect for teachers, colleagues, or anyone who appreciates a bit of holiday whimsy. They can also double as festive decorations on a mantelpiece or shelf, adding a playful element to your holiday decor long before they’re opened.
Grinch Jar Recipe & Instructions
Crafting these Grinch-themed mason jars is quick and easy, taking only about 5 minutes per jar. Adjust quantities as needed for more servings!
Prep Time: 5 minutes
Total Time: 5 minutes
Servings: 1 Jar
Equipment:
- Hot glue gun (plus glue sticks)
Ingredients:
- 16 oz Mason jars
- Red ribbon (with white stitching recommended)
- Mint M&M’s (or other green candy of choice)
- Red heart-shaped buttons
Instructions:
- Fill the Mason Jars: Carefully fill each 16 oz mason jar with mint-flavored M&M’s. One standard bag of Mint M&M’s will typically fill an 8-ounce jar approximately three-quarters full. For larger 16 oz jars, you might need about 1.5 to 2 bags per jar, depending on how full you want them.
Tip: To manage costs when making multiple jars, consider using smaller mason jars or a more budget-friendly green-colored candy to achieve the same effect. - Add the Ribbon: Tie a festive red ribbon securely around the neck or top of each mason jar. Ensure the knot is neat and positioned where you’d like the heart button to be.
- Attach the Heart Button: Using a hot glue gun, carefully glue a red heart-shaped button to the right side of the jar, near where the ribbon’s tie ends. This placement makes the heart appear as if it’s “growing” on the Grinch-themed jar.
Nutrition information is automatically calculated, so should only be used as an approximation.
Like this idea? We’d love to hear from you! Leave a comment below!
2. Christmas Mason Jar: The Santa Jar
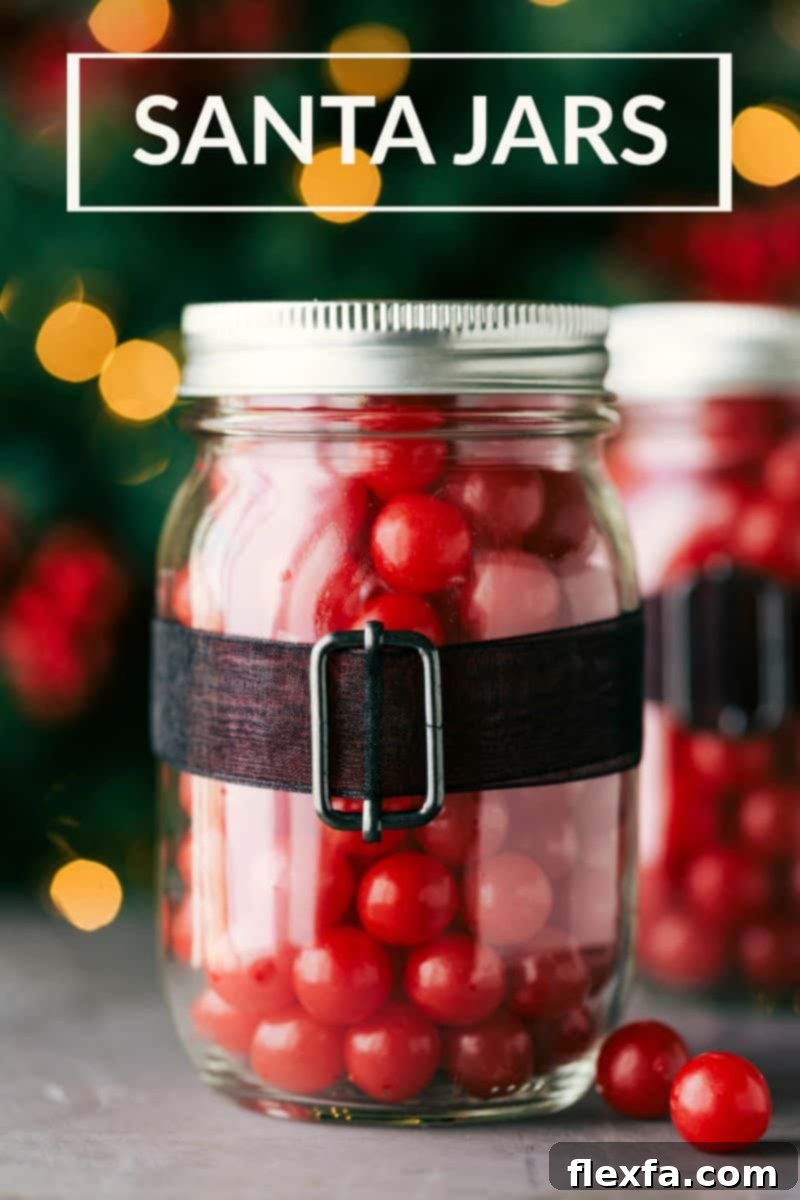
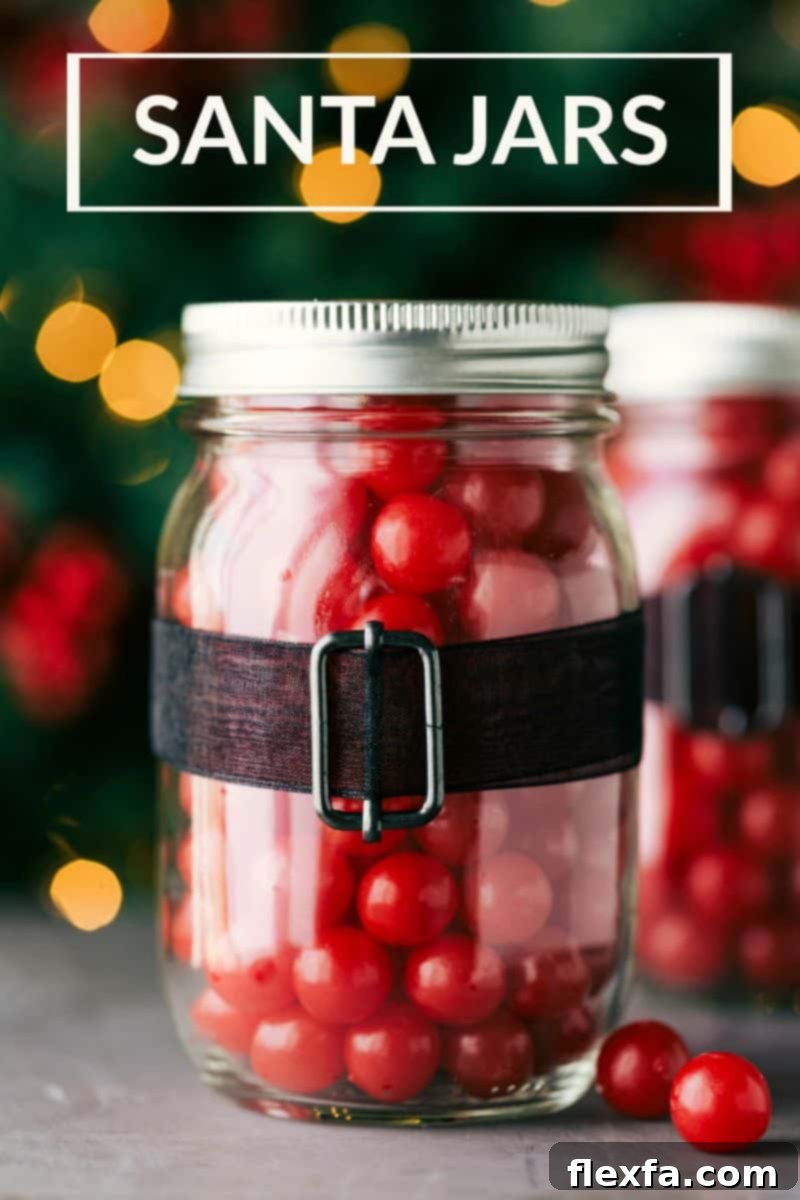
Ho ho ho! Get ready to spread some serious Christmas cheer with these charming Santa Jars. This Christmas mason jar idea transforms an ordinary jar into a mini Santa Claus, complete with his iconic belt. It’s a fantastic and festive gift that’s sure to be a hit with kids and adults alike, whether filled with delicious treats or small trinkets.
The creation process for these Santa-themed jars is both fun and simple. Begin by filling your mason jar with a selection of vibrant red candy. Cherry Chew Sour Balls are an excellent choice, offering a bright red hue and a tasty treat. Other fantastic options include red gumballs, strawberry hard candies, red licorice, or even individually wrapped chocolates in festive red foil. The goal is to create a solid red base that embodies Santa’s jolly suit.
Once the jar is filled, it’s time to add Santa’s signature accessory: his belt! Take a black ribbon, ideally one that is wide enough to make a noticeable “belt” around the jar’s circumference. Thread a shiny metal belt buckle onto the ribbon. These buckles can often be found at craft stores during the holiday season, or you can get creative by making your own with gold cardstock. Carefully wrap this “belt” around the center of the jar, positioning the buckle front and center. Use a hot glue gun to secure the ends of the ribbon at the back of the jar, ensuring a snug fit. You only need a small dab of glue on each end, pulled taut, to keep it perfectly in place.
These Santa Jars are not just gifts; they’re little works of art that capture the spirit of Christmas. They make wonderful stocking stuffers, party favors, or gifts for teachers and colleagues. Imagine a row of these adorable Santas lined up on a shelf, adding a touch of festive magic to any room. Each jar is a sweet reminder of the season’s joy and generosity.
Santa Jar Recipe & Instructions
Crafting these Santa-themed mason jars is quick and easy, taking only about 5 minutes per jar. Adjust quantities as needed for more servings!
Prep Time: 5 minutes
Total Time: 5 minutes
Servings: 1 Jar
Equipment:
- Hot glue gun (plus glue sticks)
Ingredients:
- 16 oz Mason jars
- Black ribbon
- Metal belt-buckles (or craft your own from gold cardstock)
- Red candies (e.g., Cherry Chew Sour Balls, red gumballs, strawberry hard candies)
Instructions:
- Fill the Mason Jars: Fill each mason jar with your chosen red candy. Ensure the candy fills the jar sufficiently to create a vibrant red “suit” for Santa.
- Prepare the Belt: Cut a length of black ribbon that is long enough to wrap around the width of your jar, with a little overlap for gluing. Thread a belt buckle onto the ribbon, centering it. (Metal buckles can be found at craft stores, or you can fashion one from sturdy cardstock or foil.)
- Attach the Belt: Position the ribbon with the buckle around the center of the mason jar, making sure the buckle is facing forward. Use a hot glue gun to secure the ends of the ribbon at the back of the jar. Apply glue only to the very ends of the ribbon and pull it tight as you attach it, creating a neat and secure “belt” around the jar.
Like this idea? We’d love to hear from you! Leave a comment below!
3. Christmas Mason Jar: The Reindeer Jar
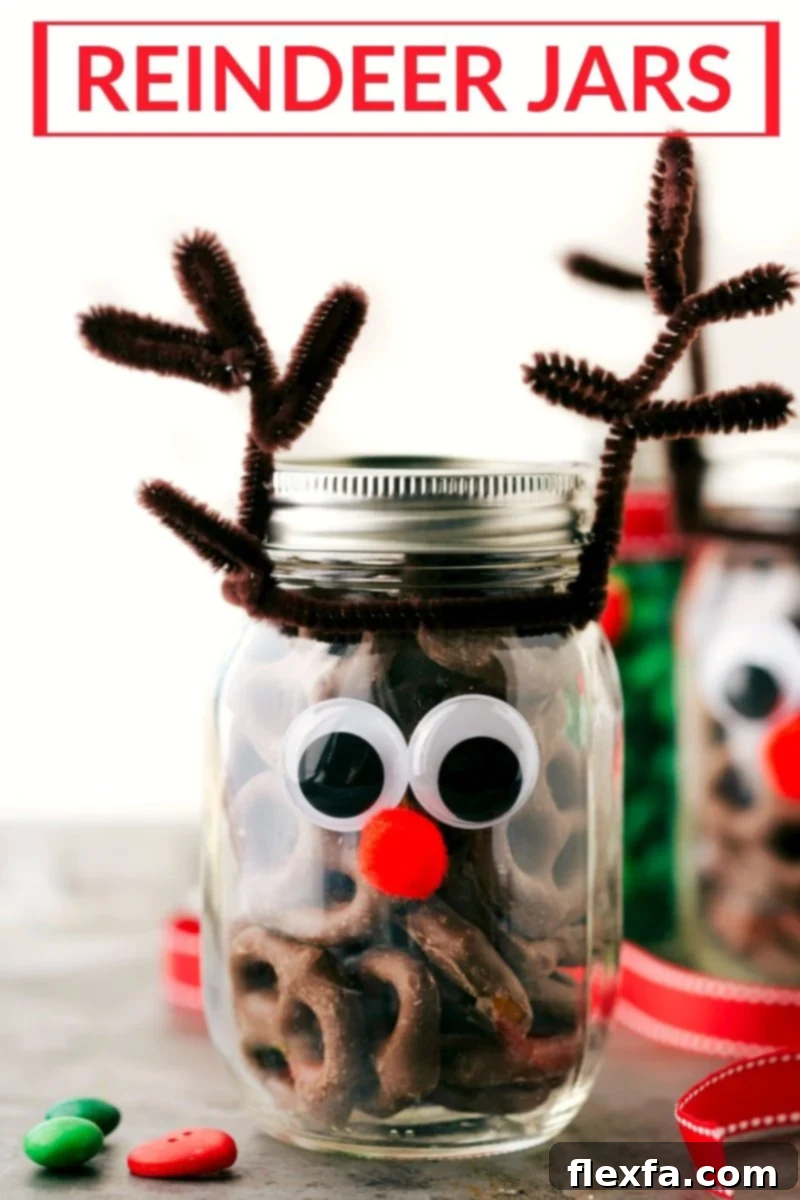
Dasher, Dancer, Prancer, and Vixen… and now, your very own Reindeer Jar! This Christmas mason jar idea is incredibly cute and versatile, serving as both a heartwarming gift and a festive decoration. Transform a simple mason jar into an adorable reindeer, ready to delight anyone who receives it.
To begin, fill your mason jar with a delicious brown candy. Chocolate-covered pretzels are an ideal choice, offering a crunchy, sweet, and salty treat that perfectly matches the reindeer’s brown color. Other fantastic brown candy options include Whoppers, Raisinets, Mini Reese’s Peanut Butter Cups, Mini Butterfingers, or even classic Milk Duds. If you’re feeling ambitious and want to add an extra personal touch, you can even make your own chocolate treats! Consider homemade microwave fudge, chocolate cashew toffee clusters, thin mint cups, or cookie butter crunch cups for an extra special surprise.
Once your jar is filled, it’s time for the creative part: assembling the reindeer’s face. You’ll need brown pipe cleaners to fashion the antlers. Take one pipe cleaner and circle it around the very top of the mason jar, just under the lid, twisting the ends together to secure it. This forms the base for the antlers. Next, take two additional brown pipe cleaners and bend and shape them to resemble reindeer antlers. The classic antler shape involves a few gentle curves and branches. Once you’re happy with the shape, attach each antler to the sides of the jar by wrapping and bending its base around the circled pipe cleaner you just installed. For extra stability and to ensure the antlers stay put, apply a small amount of hot glue at the points where they connect.
No reindeer is complete without a face! Using hot glue, attach two googly eyes to the front of the jar, slightly below the antlers. For the nose, a vibrant red pom-pom is the perfect choice, evoking the famous Rudolph. Place it directly below the eyes. The combination of the brown treats, googly eyes, pipe cleaner antlers, and red pom-pom nose creates an undeniably charming reindeer. These Reindeer Jars are perfect for kids’ parties, classroom gifts, or as a delightful addition to your holiday dessert table. They’re a fantastic way to show you care with a handmade touch.
Reindeer Jar Recipe & Instructions
Crafting these adorable Reindeer-themed mason jars is quick and easy, taking only about 5 minutes per jar. Adjust quantities as needed for more servings!
Prep Time: 5 minutes
Total Time: 5 minutes
Servings: 1 Jar
Equipment:
- Hot glue gun (plus glue sticks)
Ingredients:
- 16 oz Mason jars
- Brown pipe cleaners
- Red pom-poms
- Googly eyes
- Chocolate-covered pretzels (or other brown candy like Whoppers, Raisinets, Mini Reese’s, Mini Butterfingers, Milk Duds)
Instructions:
- Fill the Mason Jar: Fill the mason jar with chocolate-covered pretzels or your chosen brown candy. Make sure it’s packed nicely to form the reindeer’s body.
- Create the Antler Base: Take one brown pipe cleaner and gently circle it around the very top edge of the mason jar, just below the threads for the lid. Twist the ends together to secure it in place, forming a stable base for the antlers.
- Form and Attach Antlers: Use two other brown pipe cleaners to shape into reindeer antlers. Bend and twist them to create the desired antler appearance. Once shaped, attach each antler to the side of the jar by bending its base around the circled pipe cleaner. Secure these attachments with a small dab of hot glue to ensure they remain upright and stable.
- Add Face Details: Using hot glue, attach two googly eyes to the front of the jar, positioned as the reindeer’s eyes. Then, glue a red pom-pom directly below the eyes to serve as the iconic red nose.
Like this idea? We’d love to hear from you! Leave a comment below!
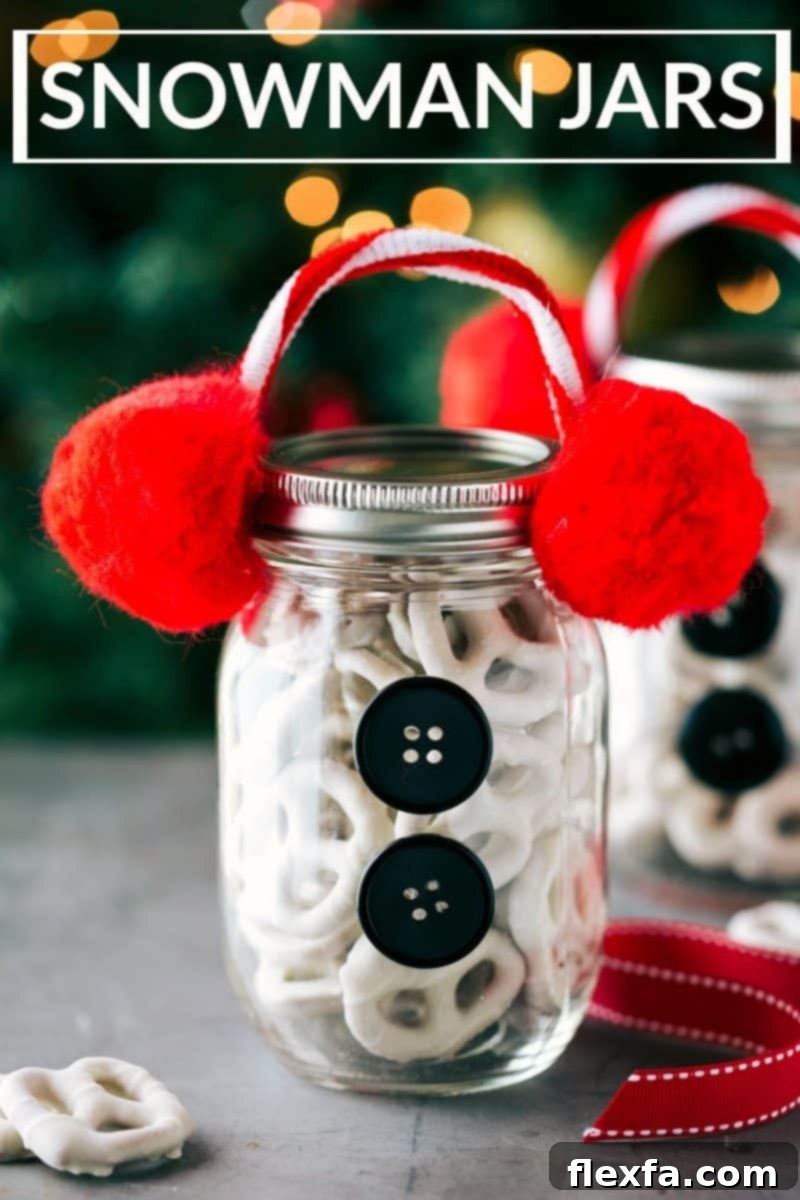
4. Christmas Mason Jar: The Snowman Jar
Build a snowman that won’t melt with this adorable and easy Christmas mason jar gift idea! Our Snowman Jars are a charming way to present holiday treats, doubling as a festive decoration that brings the magic of a winter wonderland indoors. This project is incredibly fun to assemble and results in a gift that’s both sweet and visually delightful.
To begin your snowman transformation, fill your mason jar with a white-colored treat. White chocolate-covered pretzels are an excellent choice, offering a delightful crunch and a perfect “snowy” appearance. Other great options include mini marshmallows, white chocolate chips, peppermint bark pieces, or even white gumballs. The white filling creates the body of your snowman, setting the stage for the charming details.
Once filled, it’s time to add the snowman’s iconic accessories. First, let’s create his cozy earmuffs. Take a pipe cleaner (red or a festive red and white striped one works wonderfully) and fold it in half to form a gentle arch. This arch will sit over the top of the jar, mimicking the band of earmuffs. Use a hot glue gun to attach each end of the folded pipe cleaner to the sides of the jar, just below the lid. Ensure it’s centered and secure. Next, hot glue two small red pom-poms to each end of the pipe cleaner, creating the fluffy ear coverings of the earmuffs. These red accents truly make the snowman pop!
Finally, complete your snowman’s look with his buttons. Select two large black buttons and, using hot glue, attach them to the front and center of the jar. These buttons serve as the snowman’s coal buttons, adding a classic touch. You can even consider adding a small orange construction paper triangle for a carrot nose, or draw a simple face with a permanent marker if the contents allow for it. These Snowman Jars are not only perfect for gifting to children, teachers, or friends but also make enchanting centerpieces or accents on your holiday buffet. They capture the innocent joy of winter and the festive spirit of Christmas in a single, sweet package.
Snowman Jar Recipe & Instructions
Crafting these adorable Snowman-themed mason jars is quick and easy, taking only about 5 minutes per jar. Adjust quantities as needed for more servings!
Prep Time: 5 minutes
Total Time: 5 minutes
Servings: 1 Jar
Equipment:
- Hot glue gun (plus glue sticks)
Ingredients:
- 16 oz Mason jars
- White chocolate covered pretzels (or other white candy like marshmallows, white M&Ms, peppermint bark)
- Pipe cleaners (red and white, or just red)
- Red pom-poms (1 inch recommended)
- Large black buttons
Instructions:
- Fill the Mason Jar: Fill the mason jar with white chocolate-covered pretzels or your chosen white candy, creating the snowman’s body.
- Create the Earmuff Band: Take a pipe cleaner (red or red and white) and fold it neatly in half. Apply a small amount of hot glue to each end of the folded pipe cleaner and attach them to opposite sides of the jar, just under the lid, forming an arch over the top – this is your earmuff band.
- Add Earmuff Fluff: Hot glue a red pom-pom to each end of the pipe cleaner that you just attached to the jar. These form the cozy “ear” parts of the earmuffs.
- Attach Buttons: Glue two large black buttons to the front and center of the jar, one below the other, to create the snowman’s body buttons.
Like this idea? We’d love to hear from you! Leave a comment below!
General Tips for Crafting & Gifting Mason Jars This Christmas
These four festive mason jar ideas are just the beginning of your holiday crafting adventure! To ensure your DIY Christmas gifts are a resounding success, here are some general tips to keep in mind:
- Quality Over Quantity: While these projects are easy, taking a little extra time to ensure neatness in your ribbon ties, glue application, and candy arrangement will make a big difference in the final presentation.
- Personalize It: Consider adding a small handwritten tag with a festive message or the recipient’s name. A personalized touch makes any gift more special.
- Source Materials Early: Popular craft items like specific colored ribbons, pom-poms, and candies can sell out quickly during the holiday rush. Shop early to avoid disappointment.
- Experiment with Fillings: Don’t feel limited to candy! For non-food gifts, you could fill jars with homemade hot cocoa mix, cookie mix ingredients, small craft supplies, scented potpourri, or even mini beauty products (e.g., bath salts, small lotions).
- Layering is Key: If you’re using multiple types of candy or ingredients, consider layering them artistically for a more appealing look. This works especially well with contrasting colors or textures.
- Secure the Lid: Ensure the mason jar lid is tightly sealed, especially if gifting food items, to maintain freshness. You can even tie a fabric scrap over the lid for an extra decorative touch.
- Batch Production: If you’re making multiple jars, set up an assembly line. This makes the process much more efficient and enjoyable.
Creating handmade gifts is a wonderful way to express your affection and share the joy of the season. These Christmas mason jar ideas are not only fun to make but also budget-friendly and deeply personal. They show that you’ve put thought and effort into celebrating those you care about. So, gather your materials, put on some festive music, and start crafting these delightful jars that are sure to spread smiles and holiday cheer!