
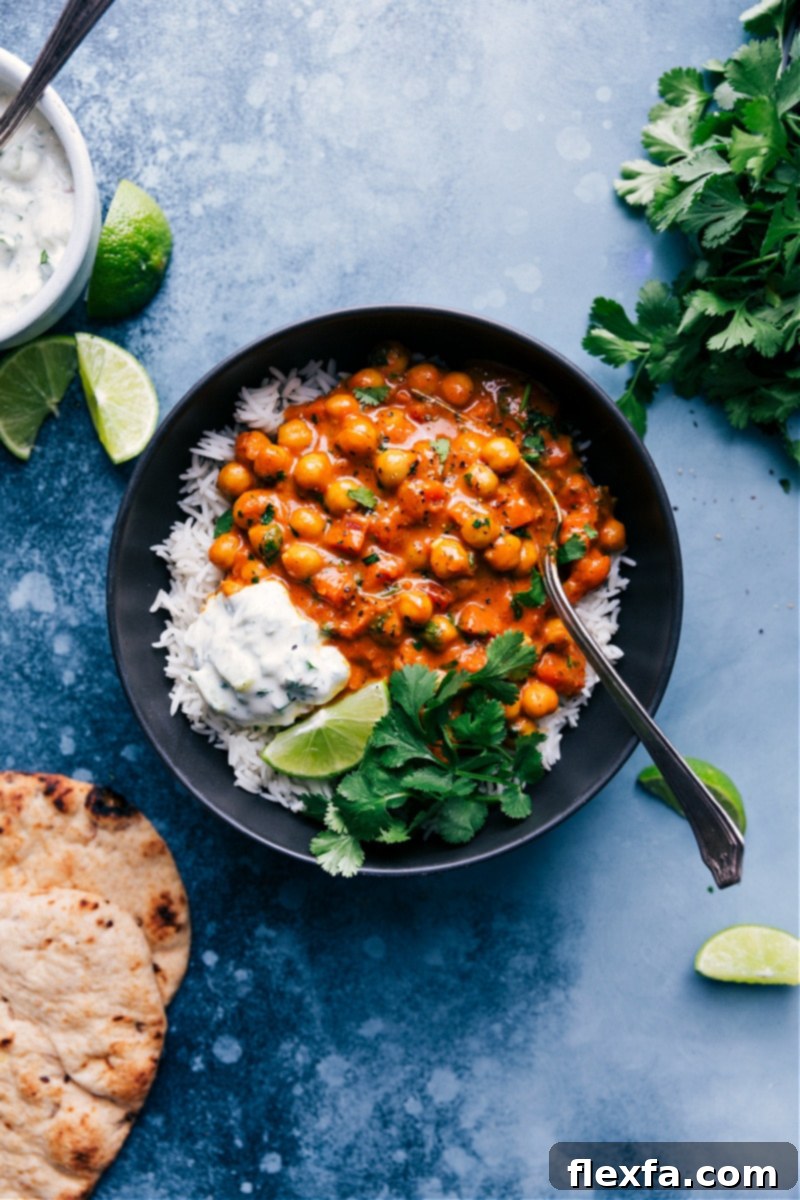
Flavor-Packed Vegan Chickpea Curry: An Easy Weeknight Meal
Discover the magic of this incredibly delicious and easy-to-make Chickpea Curry, brimming with vibrant vegetables, hearty chickpeas, and a lusciously creamy coconut sauce. This plant-based recipe is a perfect solution for busy weeknights, offering a naturally gluten-free and vegan meal that doesn’t compromise on flavor. Whether you’re a seasoned chef or a beginner in the kitchen, this aromatic curry promises to be a satisfying and healthy addition to your culinary repertoire.

author’s note
A Family Favorite You’ll Crave!
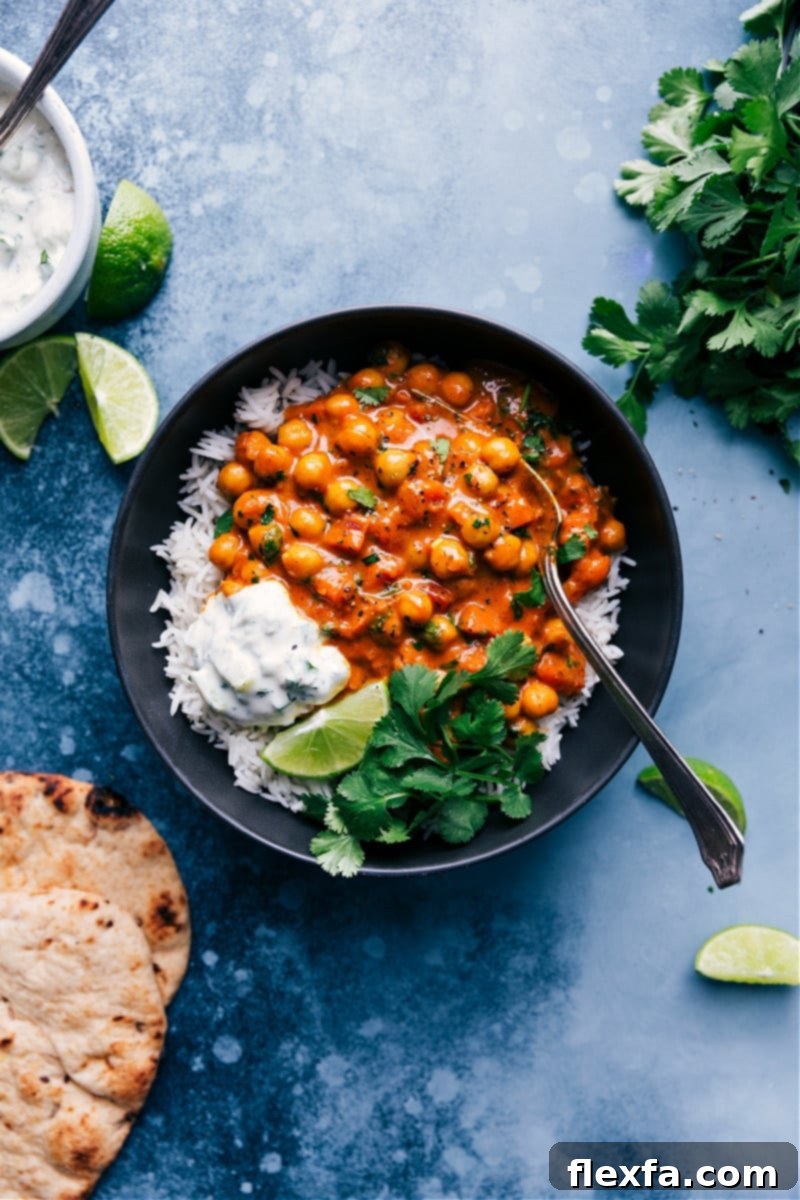
This delightful Chickpea Curry recipe draws its inspiration from one of my blog’s most beloved dishes, my Coconut Chicken Curry. After countless requests for a vegetarian or vegan alternative, I embarked on a journey of testing and experimenting. The goal was to find an ingredient that could stand up to the rich sauce and truly absorb the incredible blend of spices. Chickpeas emerged as the undisputed champion! Their firm texture and remarkable ability to soak up every nuance of flavor made them the perfect plant-based substitute.
Truthfully, I didn’t anticipate this version becoming such a massive hit in my own household, but it quickly transformed into a cherished family favorite. Even my two-year-old, usually a picky eater, enthusiastically devoured what I’d consider a full adult portion and clamored for more. She wasn’t even interested in the fluffy rice or soft naan bread; her focus was solely on those tender, flavorful chickpeas.
For the little ones, I typically keep the spice level mild, ensuring it’s palatable for sensitive taste buds. However, if you’re like me and enjoy a kick of heat, rest assured that I’ve included several easy ways to dial up the spiciness, ensuring this curry caters to every preference. Get ready to add this versatile, wholesome, and utterly delicious chickpea curry to your regular meal rotation – it’s guaranteed to impress!
Essential Ingredients for Your Chickpea Curry
Crafting the perfect chickpea curry begins with selecting quality ingredients. Each component plays a vital role in achieving that rich, creamy, and deeply flavorful profile. Here’s a closer look at the key players and how to make the most of them:
| Ingredient | Expert Tip or Smart Swap |
|---|---|
| Full-Fat Coconut Milk | Always opt for regular, full-fat coconut milk over light versions. It’s crucial for achieving the desired richness, creamy texture, and depth of flavor in your curry. |
| Red Curry Paste | The paste you choose significantly impacts the flavor and heat. Thai Kitchen® offers a mild, kid-friendly option. For a bolder, spicier kick (my personal preference!), try Maesri® Red Curry Paste. |
| Fresh Vegetables | Finely dicing your vegetables (onion, carrot, garlic, ginger) ensures even cooking and better flavor integration. A food processor can speed up chopping time. For ultimate convenience, consider using quality frozen chopped vegetables to save precious minutes. |
| Ground Spices | To unlock their full aromatic potential, lightly toast the dry spices with the sautéed veggies. This crucial step deepens their flavor profile. Feel free to adjust the quantities based on your personal taste preferences. |
| Fire-Roasted Tomatoes | These add a wonderful smoky depth. If unavailable, regular crushed tomatoes make a suitable substitute, though you might miss a hint of that roasted flavor. |
| Canned Chickpeas | After rinsing and draining, it’s essential to dry the chickpeas well. This small step allows them to better absorb the rich curry sauce, becoming incredibly flavorful. |
| Fresh Lime Juice & Cilantro | These are added at the very end to provide a bright, zesty “pop” of freshness that elevates the entire dish. If cilantro isn’t your favorite, fresh parsley makes a good alternative. |
Quick Tip: Selecting Your Coconut Milk
When shopping, look for shelf-stable canned coconut milk typically found in the international aisle alongside Latin or Asian products. The quality of coconut milk can vary significantly between brands, impacting the final consistency and flavor of your curry. For guidance on top-rated brands, this article offers excellent recommendations. Personally, I find Imperial Kitchen® to be a reliable and widely available choice.
Mastering Your Chickpea Curry: Expert Tips for Success
Achieving a truly outstanding chickpea curry is easier than you think with these straightforward tips. Pay attention to these details, and you’ll be rewarded with a deeply flavorful and perfectly textured dish every time:
- Chop Small and Evenly: Consistency is key! Aim for evenly diced vegetables to ensure they cook at the same rate and melt seamlessly into the sauce. This prevents large, unpleasantly raw bites. Don’t hesitate to use a food processor for a quick and uniform chop.
- Amplify the Heat: If you love a spicy kick, don’t hold back! You can increase the red curry paste to up to 3 tablespoons. For an extra fiery boost, add a pinch or two of cayenne pepper. Remember to adjust gradually and taste as you go.
- Season to Perfection: Always start with the recommended amount of salt and pepper, but consider it a guideline. The true art of cooking lies in seasoning to taste. After the curry has simmered, take a small bite and adjust with more salt, pepper, or even a touch more spice if desired.
- Layer and Build Flavor: Don’t rush the initial stages. Adding ingredients in a thoughtful sequence allows flavors to develop and deepen. Sautéing the spices with the aromatics helps to bloom their essential oils. Cooking down the tomatoes concentrates their sweetness, and simmering the chickpeas allows them to fully absorb the rich sauce. Each step contributes to the complexity of the final dish.
Perfect Pairings: What to Serve with Chickpea Curry
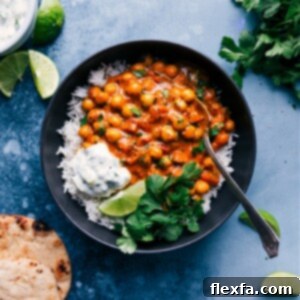
While this Chickpea Curry is a star on its own, pairing it with the right accompaniments truly elevates the dining experience. My go-to sides for this rich and aromatic curry are warm, pillowy naan bread, a refreshing cucumber raita, and perfectly cooked basmati rice.
- Refreshing Raita: This quick and cooling yogurt sauce, akin to a tzatziki, provides a delightful contrast to the warmth of the curry. Its blend of yogurt, finely chopped vegetables, and fresh herbs is a must-try.
- Fluffy Basmati Rice: The elongated grains of basmati rice are the ideal canvas for soaking up every drop of this delicious curry sauce. If you’ve ever struggled with clumpy or mushy rice, my tried-and-true method below guarantees perfect, separate grains every single time.
- Warm Naan Bread: Soft, chewy, and slightly charred naan is perfect for scooping up the curry. You can easily warm it on the stovetop over an open flame for a smoky char, toast it in a toaster oven, or even briefly microwave it with a damp paper towel for softness.
- Steamed Greens: For an extra boost of nutrition, a side of lightly steamed spinach, kale, or green beans would complement the curry beautifully.
- Mango Chutney: A spoonful of sweet and tangy mango chutney can add another layer of complexity and flavor to your meal.
How to Cook Perfect Basmati Rice
Achieving light, fluffy, and separate basmati rice is simpler than you might think. This method is my absolute favorite, providing the ideal base for a saucy curry like our chickpea delight:
- Rinse Thoroughly: Place your desired amount of basmati rice in a fine-mesh sieve. Rinse it under cold running water, gently swirling with your hand, until the water runs completely clear. This removes excess starch, preventing sticky rice.
- Soak for Optimal Texture: Transfer the rinsed rice to a bowl and cover it with fresh water. Allow it to soak for 5–10 minutes. Soaking helps the grains absorb water evenly, leading to a more tender texture and preventing breakage during cooking.
- Boil Water: While the rice soaks, bring a large pot of water to a rolling boil. Ensure you use plenty of water, similar to cooking pasta.
- Cook the Rice: Drain the soaked rice well from its soaking water and add it to the vigorously boiling water. Stir gently once to prevent sticking. Cook for exactly 5 minutes (do not reduce heat). The grains should be tender but still have a slight bite.
- Drain and Fluff: Immediately drain the cooked rice through the fine-mesh sieve. Return the rice to the empty hot pot, cover it tightly with a lid, and let it steam off-heat for another 5-10 minutes. This allows the residual steam to finish cooking the rice perfectly, making it incredibly fluffy. Fluff with a fork before serving.
Explore More Delicious Plant-Based Recipes:
Dinner
Hearty Black Bean Bowls
Dinner
Delectable Vegetarian Sushi Bowls
Soups And Stews
Flavorful Vegetarian Chili Recipe
Dinner
Simple One-Pot Moroccan Stew
Print Recipe
Creamy Vegan Chickpea Curry
Chelsea Lords
25
minutes
30
minutes
55
minutes
4
servings
Equipment
-
Large cast-iron pot or Dutch oven
Ingredients
- 3 tablespoons coconut oil
- 1-1/2 cups finely diced red onion
- 1 cup finely diced carrot
- 2 tablespoons minced garlic
- 2 tablespoons minced fresh ginger
- 2 tablespoons red curry paste (see note 1)
- 1 tablespoon yellow curry powder (see note 2)
- 1-1/2 teaspoons garam masala
- 1-1/2 teaspoons paprika
- 1-1/2 teaspoons ground coriander
- 1-1/2 teaspoons sugar
- 1 teaspoon ground cumin
- 3/4 teaspoon ground turmeric
- 3/4 teaspoon salt
- 1/4 teaspoon pepper
- 1 (14.5-ounce) can fire-roasted crushed tomatoes
- 2 (15.5-ounce) cans chickpeas (rinsed and drained)
- 1 (13.5-ounce) can full-fat coconut milk
- 1 lime
- 1/3 cup finely chopped cilantro
Instructions
-
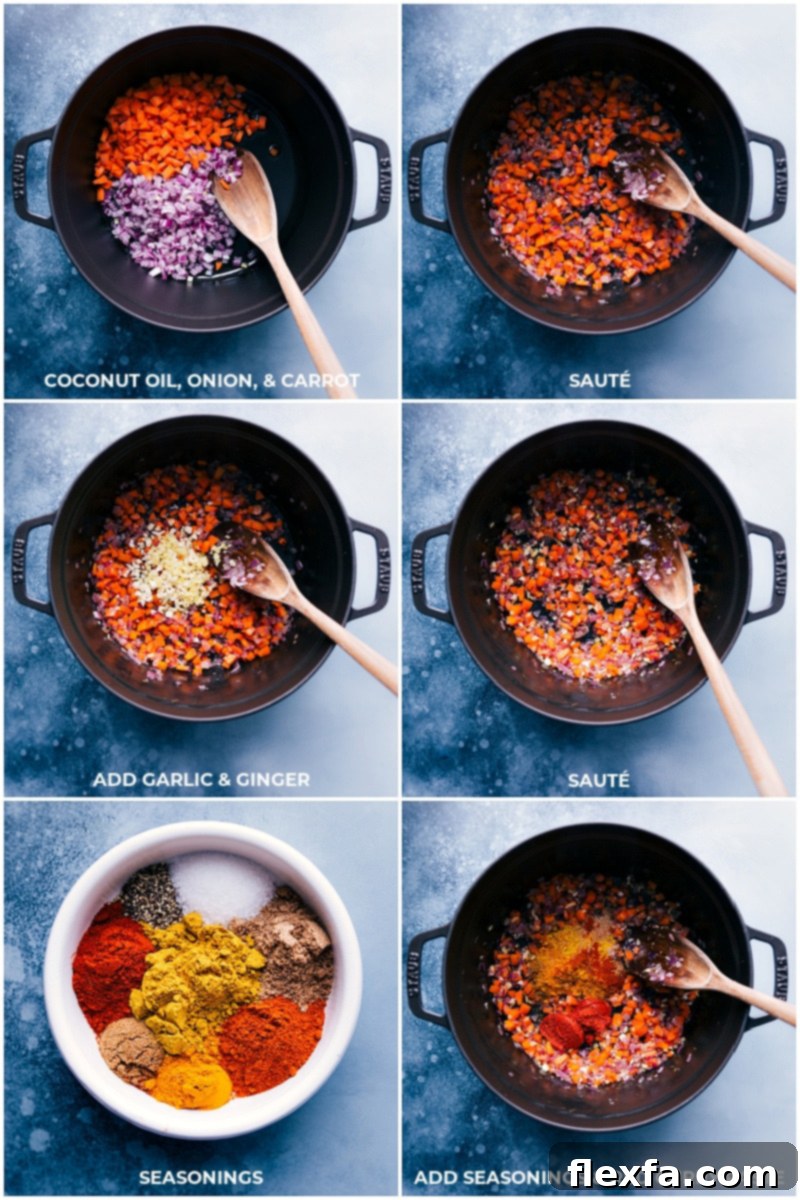
Heat the coconut oil in a large cast-iron pot or Dutch oven over medium-high heat until melted and shimmering. Add the finely diced onions and carrots to the pot. Sauté, stirring frequently, for approximately 8–11 minutes, or until the vegetables have become translucent and tender. It’s important not to rush this step, as these ingredients won’t soften significantly more later in the cooking process. Be aware that cooking times might be slightly longer if you are using a nonstick pot due to its lower heat retention.
-
Stir in the minced garlic and fresh ginger, cooking for just 1 minute until fragrant. Immediately add the yellow curry powder, garam masala, paprika, ground coriander, sugar, ground cumin, ground turmeric, salt, pepper, and red curry paste (refer to notes 1 and 2 for curry paste variations). Continue to cook, stirring constantly, for an additional 1–2 minutes, or until the spices become incredibly aromatic. Ensure that nothing burns or browns by lowering the heat if necessary to prevent scorching.
-
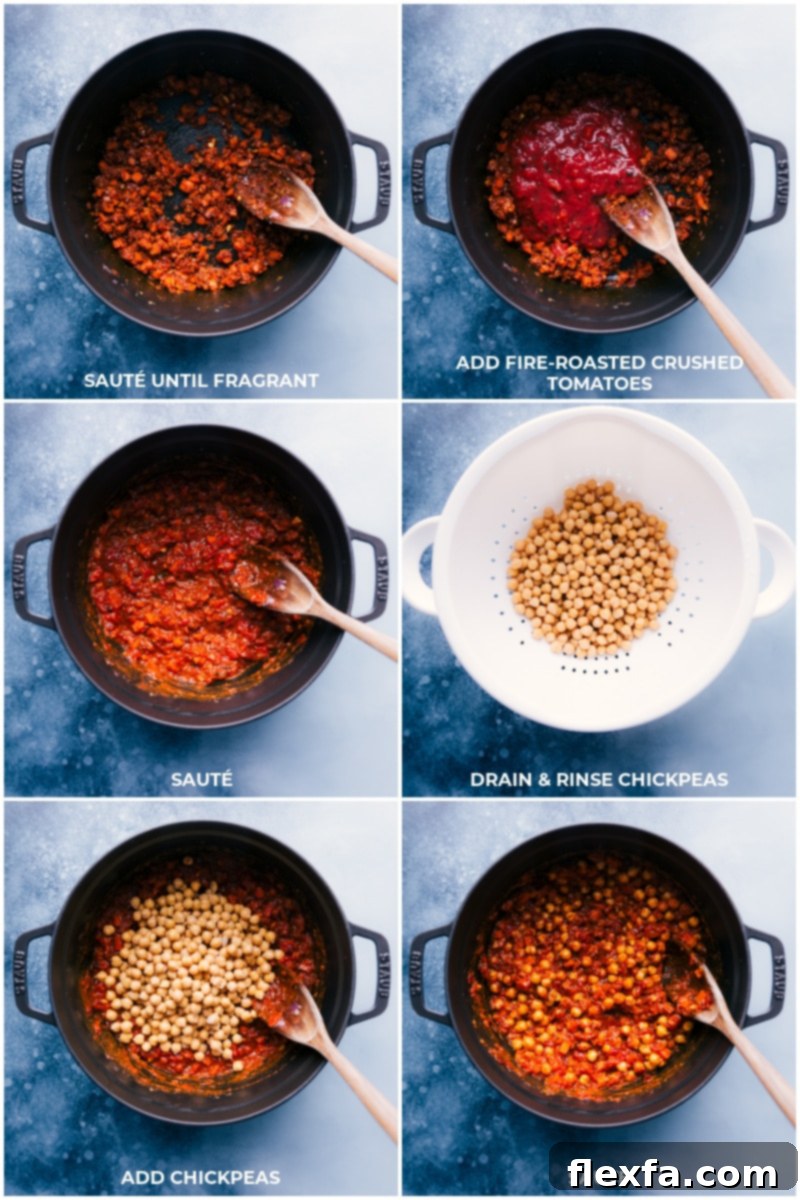
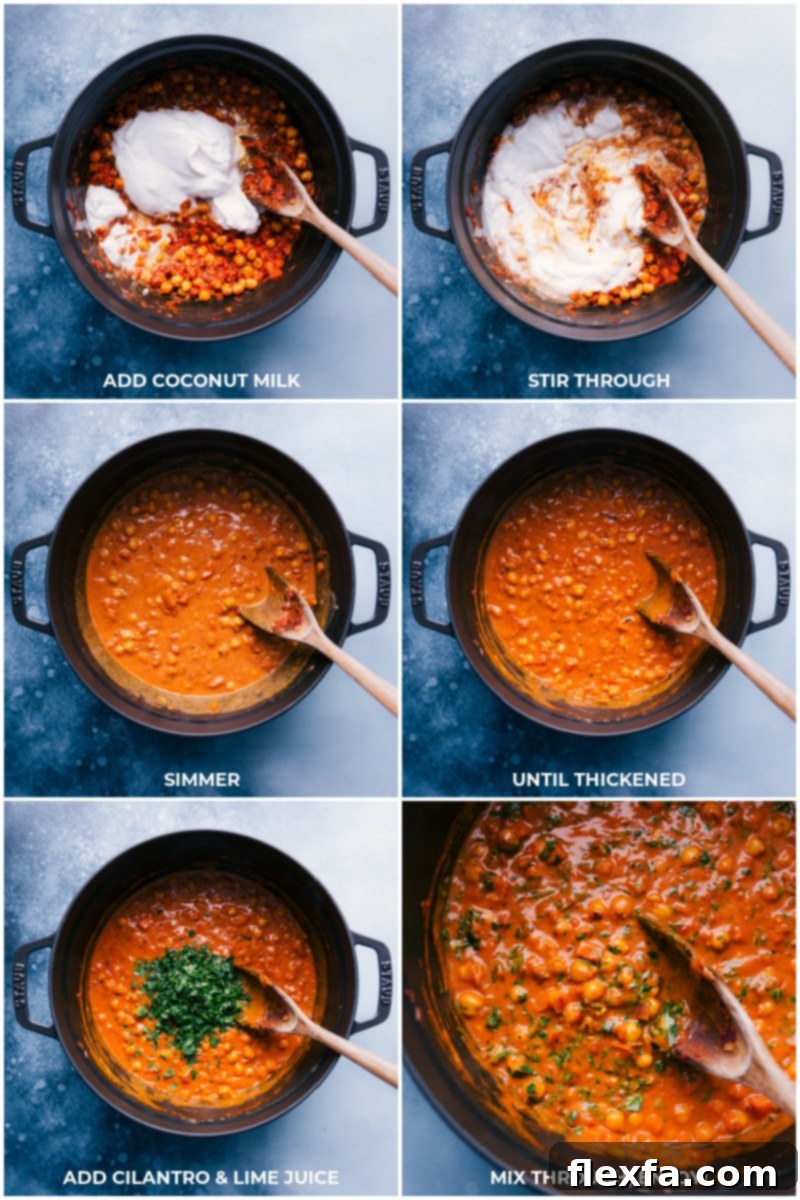
Pour in the fire-roasted crushed tomatoes. Cook, stirring constantly and scraping the bottom of the pot to release any flavorful browned bits, for about 1 minute. Add the thoroughly rinsed and drained chickpeas to the pan, cooking and stirring for another minute to coat them in the rich spice mixture. Finally, add the full-fat coconut milk, stirring gently until all ingredients are well combined and the sauce looks smooth. Bring the curry to a gentle simmer, then reduce the heat to low, cover, and let it simmer for 15–20 minutes, stirring occasionally. The curry should thicken and become intensely fragrant.
-
Using a citrus juicer, extract approximately 2 tablespoons of fresh juice from the lime. Stir the fresh lime juice and finely chopped cilantro into the curry. Taste the curry and adjust the seasonings as needed, adding a little more salt, pepper, or a pinch of cayenne if you desire more heat. Serve this delicious Chickpea Curry immediately over fluffy basmati rice, accompanied by warm naan bread and a scoop of cooling raita if desired (see note 3 for raita recipe). Enjoy your flavorful, homemade meal!
Recipe Notes
Note 2 – Yellow Curry Powder: Similar to curry pastes, yellow curry powders also vary between brands. I’ve successfully tested this recipe with Great Value®, Simple Truth Organic®, and McCormick® brands, all of which provided excellent and mild results. Feel free to use your preferred mild yellow curry powder.
Note 3 – Cooling Raita Yogurt Sauce: The creamy, cooling effect of raita perfectly complements the rich curry. To prepare it, simply stir the following ingredients together in a small bowl until well combined:
- 1/2 cup plain full-fat Greek yogurt
- 1/2 cup finely chopped English (or Persian/salad) cucumbers
- 2 tablespoons each: chopped fresh cilantro, chopped green onions
- 1/4 teaspoon each: ground cumin, ground coriander, fine sea salt
Nutrition Note: The provided nutritional information is calculated solely for the chickpea curry itself and does not include any accompanying sides such as rice, bread, or raita.
Storage & Meal Prep: Allow the chickpea curry to cool completely before transferring it to an airtight container. It can be stored safely in the refrigerator for 4–5 days. For longer-term storage, freeze individual portions for up to 3 months. Thaw in the refrigerator overnight and reheat gently on the stovetop or in the microwave.
Nutrition Facts
Serving:
1
serving
|
Calories:
163
kcal
|
Carbohydrates:
15
g
|
Protein:
2
g
|
Fat:
12
g
|
Saturated Fat:
9
g
|
Sodium:
47
mg
|
Potassium:
346
mg
|
Fiber:
3
g
|
Sugar:
5
g
|
Vitamin A:
11089
IU
|
Vitamin C:
12
mg
|
Calcium:
65
mg
|
Iron:
2
mg
Nutrition information is automatically calculated and should only be used as an approximation.
Love this recipe? Leave a comment below!
Your feedback helps us improve and inspires other home cooks.