
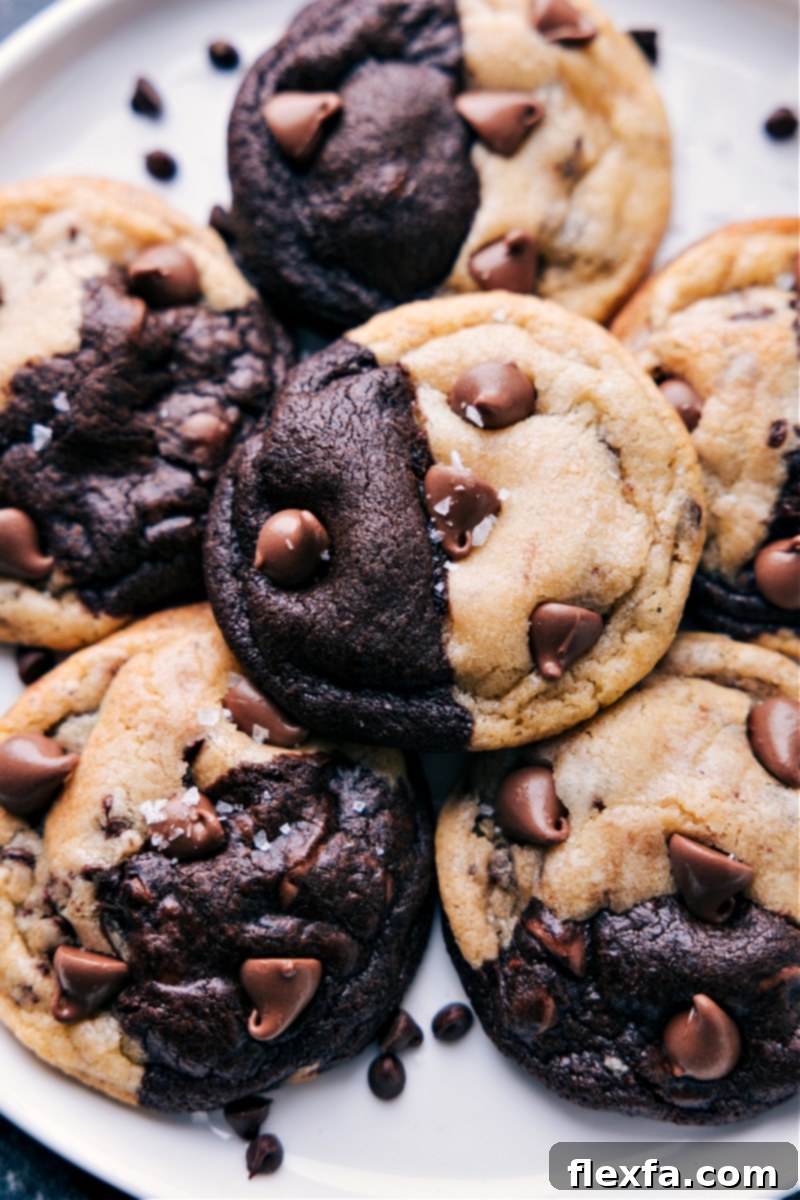
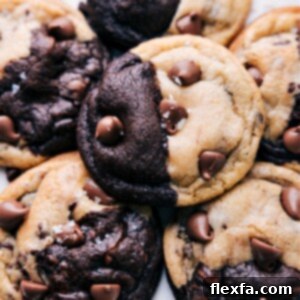
Brookies are the ultimate dessert hybrid, masterfully combining the rich, fudgy decadence of a brownie with the chewy, classic comfort of a chocolate chip cookie. This sensational mashup delivers an irresistible symphony of chocolatey, sweet, and buttery flavors in every single bite. If you’ve ever found yourself torn between a brownie and a cookie, then Brookies are your dream come true – a match made in dessert heaven that satisfies both cravings simultaneously.
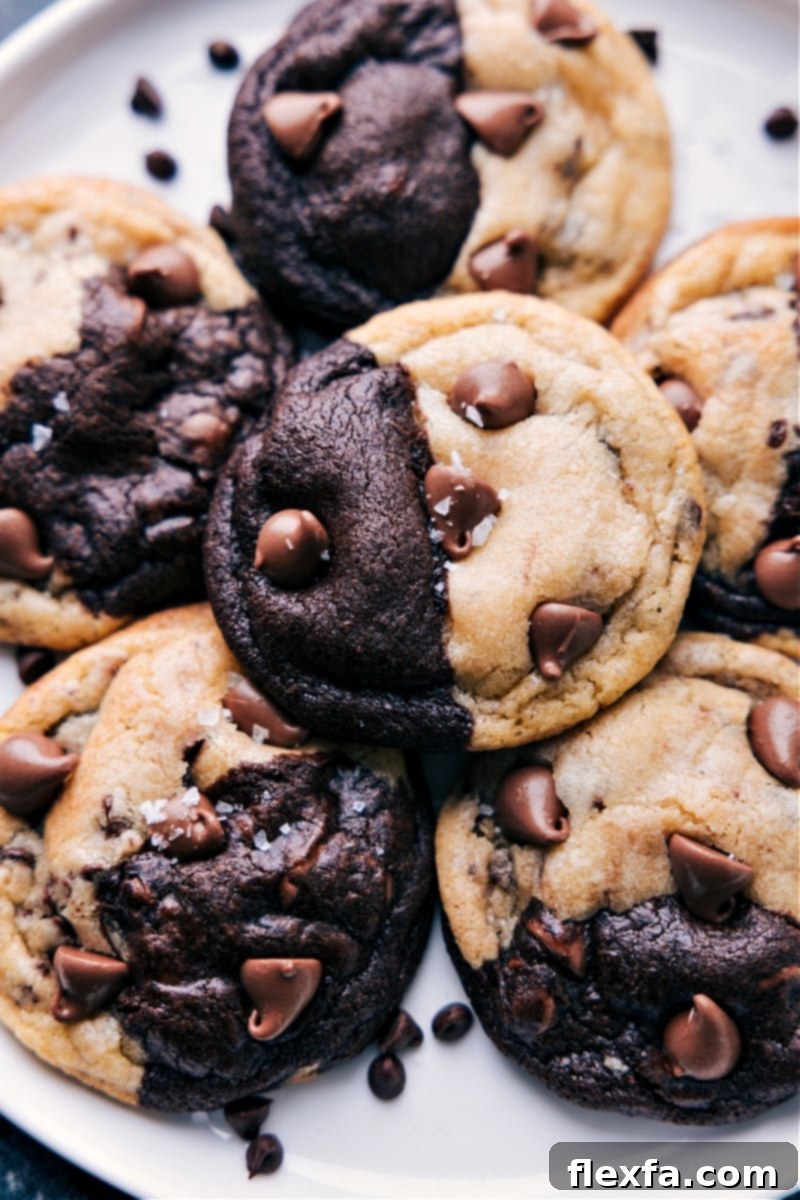
Why You Need to Make This Brookies Recipe!
While making Brookies might require a touch more effort than a standard single-batch cookie, the reward is absolutely phenomenal and undeniably worth every minute. This recipe is more than just a sweet treat; it’s an experience that stands out from the crowd. Here’s a deeper dive into why this particular Brookie recipe is an absolute must-try for any baking enthusiast:
- They offer an unparalleled flavor combination, expertly blending the deep, decadent chocolate notes of a fudgy brownie with the beloved buttery, sweet profile of a classic chocolate chip cookie. This dual-texture and flavor explosion makes them incredibly delicious and uniquely satisfying.
- This recipe yields a generous batch of cookies, providing plenty for immediate enjoyment and thoughtful future planning. You can bake some now to share (or devour!) and easily freeze the remaining dough for impromptu cookie cravings or quick last-minute desserts. It’s perfect for meal prepping your sweet tooth!
- Brookies are far from your everyday dessert. They are a fun, unique, and conversation-starting treat, making them ideal for parties, potlucks, or as a delightful homemade gift that truly impresses. Their distinct appearance and sensational taste make them memorable.
- For those who love to experiment, this recipe is incredibly versatile. You can elevate your Brookies by adding various fillings like creamy Nutella, delightful Hershey Kisses, or gooey Rolos. These additions introduce an extra layer of flavor and texture, turning a great cookie into an extraordinary one.
Essential Baking Tip for Perfect Brookies
Achieving the perfect Brookie texture is crucial, and it largely hinges on careful baking. Overbaking is the arch-nemesis of a soft, chewy cookie, transforming it into a dry, crumbly disappointment. To ensure your Brookies remain wonderfully moist and fudgy in the center with slightly crisp edges, it’s best to slightly underbake them. When you remove them from the oven, they might still appear a little soft in the middle—this is exactly what you want! The residual heat from the baking sheet will continue to cook the cookies gently as they cool, allowing them to set to perfection without drying out. Look for edges that are just firm and a center that is set but still looks moist and not overly gooey. This technique guarantees that delightful chewiness that makes Brookies so irresistible.
Mastering Brookies: Expert Baking Tips for Success
Creating beautiful and delicious Brookies is a rewarding process, and these expert tips will help ensure your success. Pay close attention to these details, and you’ll be baking perfect Brookies every time:
- Accurate Ingredient Measurement is Key: Baking is a science, and precision is paramount. This is especially true for flour. Using too much flour can result in dry, dense, and crumbly cookies, while too little can lead to overly flat and spread-out cookies. Always use a kitchen scale for the most accurate measurements, or if using cups, spoon the flour into the measuring cup and level it off with a straight edge rather than scooping directly from the bag.
- Avoid Overmixing the Dough: Once you add the dry ingredients to the wet ingredients, mix only until they are just combined. Overmixing develops the gluten in the flour, which can lead to tough, dense, and less tender cookies. A gentle hand is best here; stop mixing as soon as no streaks of dry flour remain.
- Utilize a Silicone Baking Mat or Parchment Paper: To prevent your delicious Brookies from sticking to the baking sheet and to make cleanup a breeze, always line your pans with a silicone baking mat or parchment paper. This also promotes even baking and helps the cookies maintain their shape.
- Chill the Dough as Directed: Don’t skip the chilling step! Chilling the dough is critical for several reasons. It allows the flavors to meld and deepen, resulting in a richer taste. More importantly, it solidifies the butter in the dough, which prevents the cookies from spreading too much during baking, ensuring a thicker, chewier texture. For best results, adhere to the specified chilling times.
- Allow Cookies to Cool on the Baking Sheet: Freshly baked cookies are delicate. After removing them from the oven, let them cool on the hot baking sheet for 5-10 minutes. This allows the cookies to firm up and set properly before you attempt to transfer them to a wire rack. Moving them too soon can cause them to break or fall apart.
- Gently Shape for Perfect Roundness: For that aesthetically pleasing, perfectly round cookie shape, take a spoon or a thin turner and gently push the edges of your Brookies inward immediately after they come out of the oven. This quick trick helps to create crisp, even edges and a uniform appearance, making your homemade treats look professionally baked.
Exciting Brookies Variations: Get Creative!
These Brookies are truly incredible in their classic form, but if you’re feeling adventurous and want to explore new flavor dimensions, consider these delightful variations:
Stuff the Centers for a Surprise!
One of the most exciting ways to customize your Brookies is by stuffing the centers with a small, melt-in-your-mouth chocolate candy. Imagine a burst of caramel or creamy chocolate hidden within each cookie! Great options include a chocolate Kiss, a gooey Rolo, or even a mini peanut butter cup. The key is to fully conceal the candy by sandwiching it securely between two small cookie dough balls (one brownie, one chocolate chip). This ensures the filling stays put and melts beautifully inside. Another fantastic center addition is a dollop of rich, hazelnut Nutella. Here’s how to perfectly add Nutella to your Brookies:
- Prepare Nutella Discs: Scoop out small portions of Nutella, approximately 1 teaspoon each, onto a parchment-lined baking sheet. Ensure they are spaced out.
- Freeze Until Solid: Place the baking sheet with Nutella dollops into the freezer. Freeze them until they are completely solid, which typically takes about 20 minutes. This firmness is essential for easy handling.
- Enclose the Nutella: Once the Nutella is frozen solid, take one small brownie dough ball and one small chocolate chip cookie dough ball. Flatten each slightly, place a frozen Nutella disc in the center of one, then top with the other cookie dough ball. Gently seal the edges, rolling it into a neat ball, making absolutely sure the Nutella is completely enclosed within the cookie dough.
- Keep Remaining Nutella Frozen: To prevent the Nutella from thawing too quickly at room temperature while you work, keep the tray of remaining Nutella dollops in the freezer. Take out only the quantity you need for each cookie as you assemble them. This method keeps the Nutella firm and easy to work with, guaranteeing a perfectly stuffed Brookie.
Optimal Brookies Storage Solutions
How to Store Baked Brookies
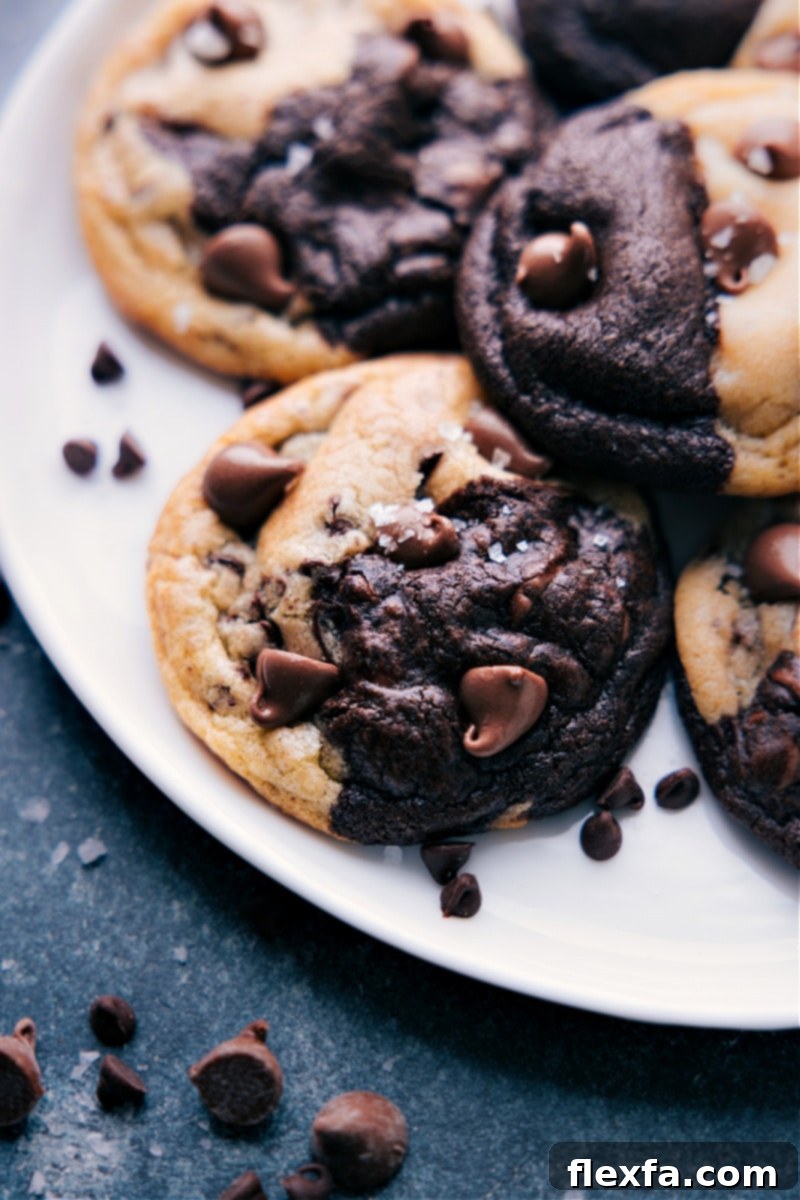
To maintain their exquisite taste and texture, freshly baked Brookies should be stored in an airtight container at room temperature. They will remain wonderfully soft and chewy for about 2-3 days. Beyond this period, their texture begins to diminish, becoming drier and less enjoyable. For best enjoyment, consume them within this timeframe.
Freezing Brookies Dough for Later
For long-term storage and to always have fresh Brookies on hand, freezing the unbaked dough is highly recommended over freezing baked cookies. Freezing baked cookies can sometimes affect their texture and moisture levels upon thawing. To freeze the dough effectively, follow these steps:
- Portion and Freeze Solid: Prepare the Brookie dough as instructed, forming individual cookie dough balls (sandwiching the brownie and chocolate chip portions together). Drop these dough balls onto a baking sheet lined with parchment paper, ensuring they don’t touch each other. Freeze them until they are completely solid, usually about 1-2 hours.
- Transfer to Airtight Container: Once the dough balls are frozen solid, transfer them to a freezer-safe airtight container or a heavy-duty freezer bag. This prevents freezer burn and helps maintain their quality.
- Storage Duration: Stored properly, frozen Brookie dough balls can last for up to 3 months.
- Baking from Frozen: When you’re ready to bake, there’s no need to thaw the dough! Simply place the frozen cookie dough balls directly onto a lined baking sheet and bake as usual. You may need to add a few extra minutes (typically 2-4 minutes) to the specified baking time, as they are starting from a frozen state. This method allows you to enjoy warm, fresh-baked Brookies whenever the craving strikes, with minimal fuss.
Explore More Delightful Dessert Mash-Up Recipes:
If you loved the innovative combination of Brookies, you’re in for a treat! Discover other creative dessert mash-ups and unique recipes from our collection that promise to delight your taste buds and impress your guests.
Desserts
Coffee Cake Cookies
Desserts
Pumpkin Carrot Cake
Desserts
Brownie Cookie Bars
Desserts
Chocolate Chip Cupcake Recipe
Pin
Brookies Recipe
Video Tutorial
Equipment Needed
- Stand mixer
- Large sheet pan (15″ x 21″) (lined with parchment paper or silicone mat)
Ingredients
For the Brownie Cookies:
- 16 tablespoons (2 sticks) unsalted butter, cold and cubed
- 1-1/2 cups light brown sugar, firmly packed
- 2 large eggs
- 2 teaspoons vanilla extract
- 1 teaspoon cornstarch
- 1 teaspoon baking soda
- 1 teaspoon salt
- 1/2 cup Dutch process cocoa powder (see Note 1 below for important details)
- 1 cup cake flour (see Note 2 below for texture secrets)
- 1-1/2 cups all-purpose flour
- 1 cup mini chocolate chips
- 2 cups regular chocolate chips
For the Chocolate-Chip Cookies:
- 16 tablespoons (2 sticks) unsalted butter, cold and cubed
- 1 cup light brown sugar, lightly packed
- 2/3 cup granulated sugar
- 2 large eggs
- 2 teaspoons vanilla extract
- 3 cups all-purpose flour
- 1 tablespoon cornstarch
- 1 teaspoon baking powder
- 1 teaspoon baking soda
- 1 teaspoon salt
- 1 cup mini chocolate chips
- 1 cup regular chocolate chips
Instructions
Making the Brownie Cookie Dough:
-
Cut the cold unsalted butter into small cubes immediately after taking it from the fridge. In a large mixing bowl or the bowl of a stand mixer fitted with a whisk attachment, combine these cold cubed butter pieces with the light brown sugar. Beat on medium speed for about 3–4 minutes until the mixture transforms into an ultra-creamy, light, and fluffy consistency, resembling the smooth texture of peanut butter. This creaming process is crucial for air incorporation.
-
Add the large eggs one at a time, beating well after each addition until fully incorporated. Stir in the vanilla extract. Next, add the cornstarch, baking soda, salt, and Dutch process cocoa powder. Beat until these ingredients are just combined, being careful not to overmix. Use a rubber spatula to scrape down the sides of the bowl to ensure everything is evenly incorporated. Finally, add the cake flour and all-purpose flour, mixing on low speed until the flour streaks have just disappeared. Overmixing at this stage will result in tough cookies. Gently fold in both the mini and regular-sized chocolate chips using your spatula. Cover the bowl tightly with plastic wrap and refrigerate the brownie cookie dough for at least 45 minutes to allow the flavors to develop and the dough to firm up.
Preparing the Chocolate Chip Cookie Dough:
-
Similar to the brownie dough, cut the cold unsalted butter into small cubes. In a separate large bowl or stand mixer with a whisk attachment, combine the cubed butter with both the light brown sugar and granulated sugar. Beat until the mixture is light, creamy, and smooth, exhibiting a consistency akin to peanut butter. Add the eggs and vanilla extract, mixing thoroughly until they are fully incorporated and the mixture is cohesive.
-
Incorporate the cornstarch, baking powder, baking soda, and salt, mixing until they are well combined throughout the wet ingredients. Gradually add the all-purpose flour, mixing just until it is incorporated and no dry flour remains visible. Again, avoid overmixing. Finally, gently fold in both the mini and regular chocolate chips with a spatula. Cover this bowl tightly with plastic wrap and refrigerate the chocolate chip cookie dough for 25 minutes.
Baking the Brookies:
-
Preheat your oven to 375°F (190°C). Prepare a large baking sheet by lining it with either a silicone baking mat or parchment paper. This prevents sticking and promotes even baking.
-
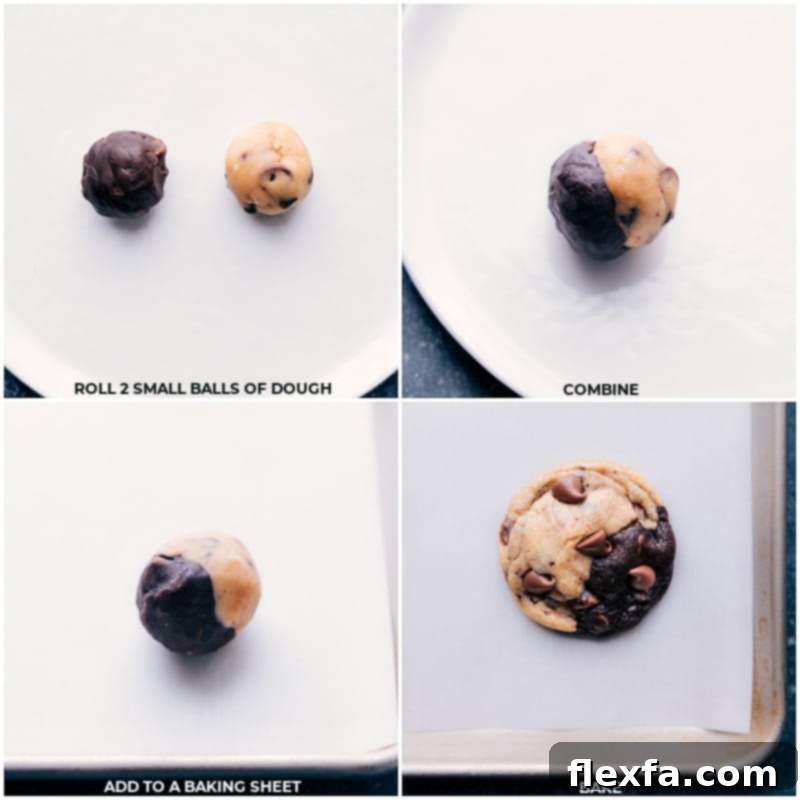
Using a food scale for precision, measure out 20-gram dough balls (this is roughly equivalent to 1 tablespoon) for both the brownie and chocolate chip doughs. Take one portion of the chilled chocolate brownie dough and one portion of the chilled chocolate chip cookie dough. Gently press them together to form a single, unified dough ball. The goal is for them to hold together without fully blending into one color; you want to see the distinct swirls. Place these formed cookie dough balls onto the prepared baking sheet. Repeat this process until all the dough is used up. Once assembled, place the baking sheet with the cookie dough balls into the freezer for an additional 15–20 minutes. This quick chill further prevents excessive spreading during baking, contributing to that perfect thick Brookie.
-
Arrange the chilled cookie dough balls on the lined baking sheet, ensuring they are spaced at least 2 inches apart to allow for proper spreading. Bake for 12–13 minutes, or until the edges are just beginning to turn a light golden brown and the centers are set but still look soft. Remember our earlier tip: slightly underbake for maximum chewiness! Remove the baking sheet from the oven and, if desired, immediately sprinkle a touch of sea salt over the warm cookies for an enhanced flavor contrast. For an extra aesthetic and chocolatey boost, gently press a few more chocolate chips into the tops of the hot cookies. Let the cookies cool on the baking sheet for 5 minutes before carefully transferring them to a wire cooling rack using a spatula to cool completely. Enjoy your homemade, perfectly blended Brookies!
Recipe Notes
Note 1: For these Brookies, we highly recommend using Dutch-process cocoa powder. This type of cocoa powder has been treated with an alkalizing agent, which neutralizes its acidity. The result is a darker, mellower, and profoundly deep chocolate flavor that is less bitter than natural cocoa powder. This contributes significantly to the rich, dark color and intense chocolate taste of the brownie portion. We do not recommend substituting with plain (natural) cocoa powder, as it will alter the flavor profile and color.
Note 2: The secret to the irresistibly soft and chewy texture of these Brookies lies in the combination of flours. We use a blend of cake flour and all-purpose flour to achieve that perfect balance. Cake flour has a lower protein content and finer texture, which creates a more tender crumb. You can typically find cake flour in the baking aisle of most grocery stores, usually near other types of flour. For this specific recipe, we strongly advise against substituting with a different flour or attempting to make “homemade” cake flour (e.g., all-purpose flour with cornstarch), as these alternatives will not yield the same desired texture and can significantly impact the outcome of your Brookies.
Storage: As detailed above, baked Brookies are best stored in an airtight container at room temperature for 2–3 days. For longer-term storage and ultimate freshness, prepare and freeze the unbaked cookie dough balls. Place them on a sheet pan until solid, then transfer to an airtight container or bag for up to 3 months. You can bake them directly from frozen; simply add a few extra minutes to the baking time as needed for perfect results.
Nutrition Information
|
Calories: 300 kcal
|
Carbohydrates: 41 g
|
Protein: 3 g
|
Fat: 15 g
|
Saturated Fat: 9 g
|
Polyunsaturated Fat: 0.5 g
|
Monounsaturated Fat: 2 g
|
Trans Fat: 0.4 g
|
Cholesterol: 40 mg
|
Sodium: 29 mg
|
Potassium: 90 mg
|
Fiber: 1 g
|
Sugar: 27 g
|
Vitamin A: 305 IU
|
Vitamin C: 0.05 mg
|
Calcium: 43 mg
|
Iron: 1 mg
Nutrition information is automatically calculated and should be used as an approximation only.
Loved this recipe? Share your thoughts below!