
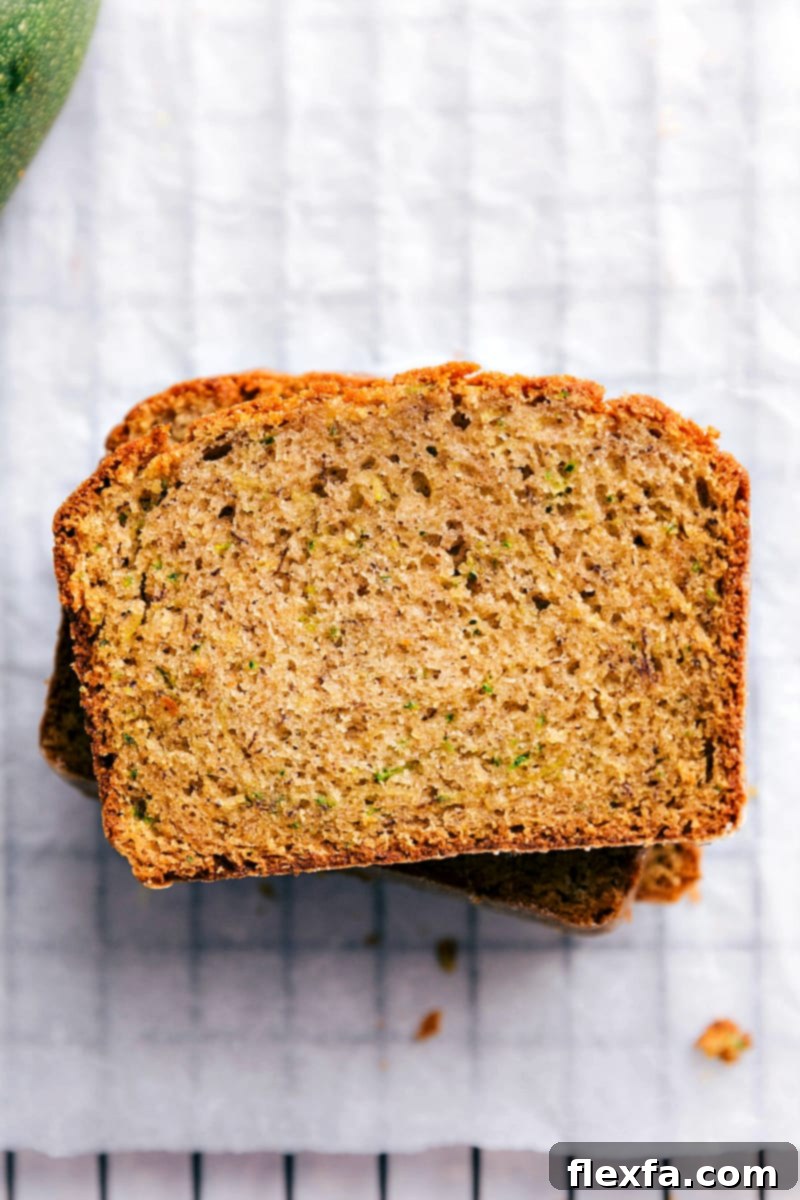
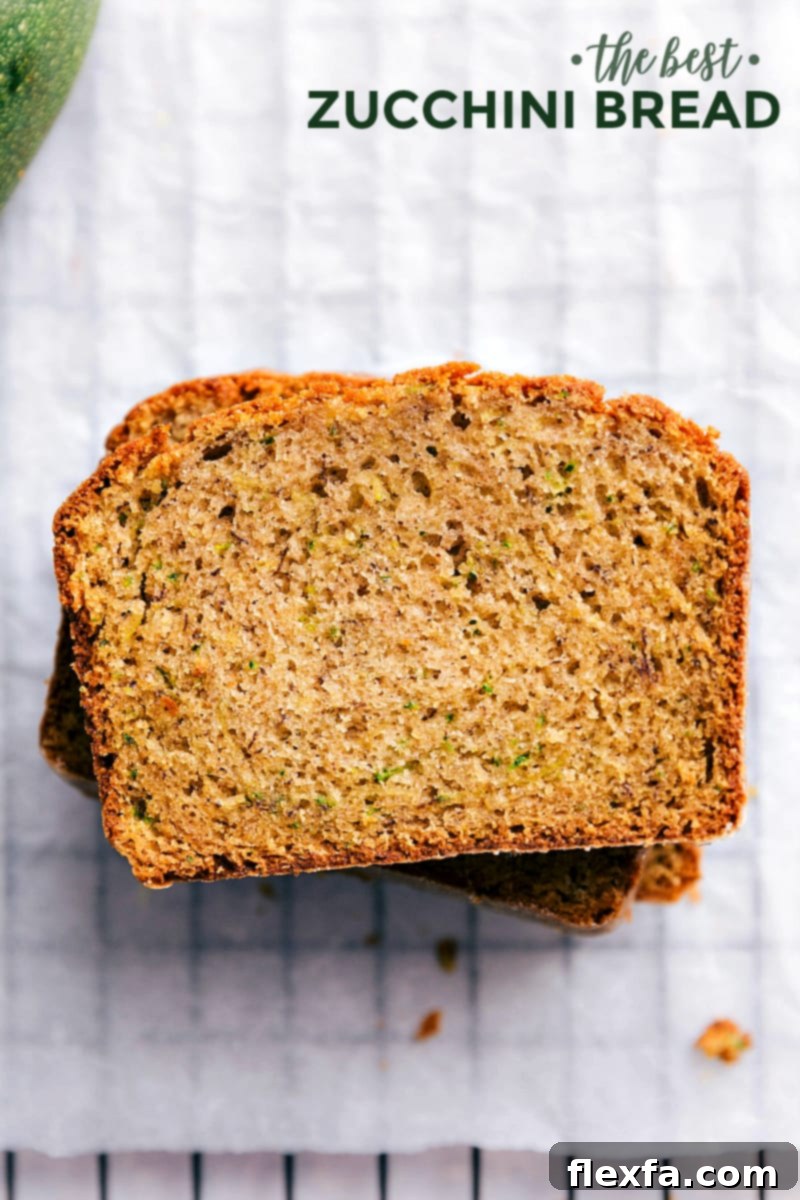
Welcome to the only Zucchini Bread Recipe you’ll ever need! This recipe is incredibly quick, surprisingly easy, and best of all, made in a single bowl with just a wooden spoon. The zucchini isn’t just hidden; it’s the secret ingredient that guarantees an unbelievably moist, tender, and flavorful bread every single time.
If you adore the comforting taste of homemade zucchini bread, you’re in for a treat. After mastering this classic, be sure to explore more delightful variations like our Lemon Zucchini Bread for a citrusy twist or the indulgent Chocolate Zucchini Bread for a richer experience.

Author’s Note
Zucchini Bread That’s Truly Worth the Hype!
Zucchini bread holds a special place in my heart – it’s truly one of my all-time favorite baked treats. In fact, I loved it so much that I even served mini loaves at my wedding reception alongside these incredible coconut macaroons!
For years, I hesitated to share a zucchini bread recipe on my blog because I wanted to ensure it was nothing short of perfection. After countless rounds of testing, tweaking, and tasting, I can confidently say I’ve perfected this recipe. It consistently delivers an exceptional loaf every single time.
This bread isn’t just moist; it’s bursting with flavor and boasts a beautiful, perfectly risen dome. Quick breads can sometimes be a bit finicky, but by following these straightforward steps, you’ll achieve a loaf that is thoroughly cooked through, delightfully tender, and simply irresistible. Get ready for a baking win!
The Magic of Zucchini: Your Secret Ingredient for Moisture
Zucchini is often an underestimated ingredient in baking, but it’s the star that makes this bread truly spectacular. Its high water content naturally keeps the bread incredibly moist, eliminating the need for excessive oil or butter. Beyond moisture, zucchini adds a subtle earthiness and a delightful texture, all without overpowering the classic sweet spice flavors we all love in zucchini bread. Plus, it’s a fantastic way to sneak in some extra vegetables!
Mastering Zucchini Preparation for Baking
To Peel or Not to Peel Zucchini for Bread?
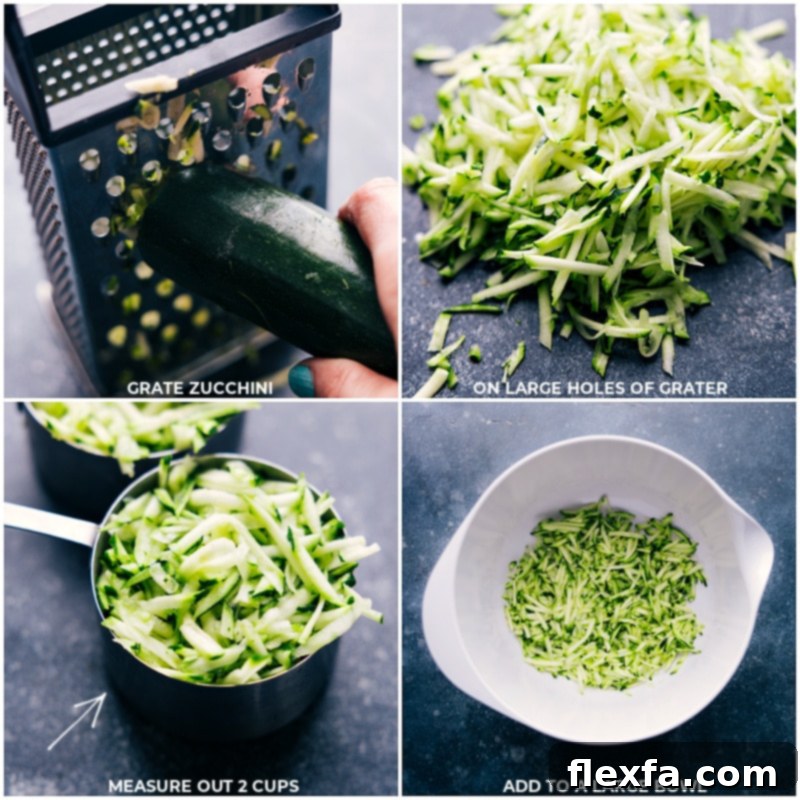
One of the best things about making zucchini bread is how fuss-free the preparation can be. There’s absolutely no need to peel the zucchini before grating it for this recipe! The peel is thin and tender enough to completely disappear into the batter during baking, offering no detectable texture. In fact, leaving the peel on adds lovely, delicate flecks of green throughout your bread, giving it a rustic, homemade charm. Plus, skipping the peeling step keeps this quick bread truly quick!
Grating Zucchini to the Right Consistency
After washing and thoroughly drying your zucchini(s) – a crucial step for optimal texture – simply trim off both ends. Then, using a standard box grater, grate the zucchini on the large holes. This size creates perfect strands that integrate beautifully into the batter, ensuring even moisture distribution and an undetectable presence once baked.
Should You Squeeze Liquid from Zucchini for Bread?
For many baked goods, removing excess moisture from zucchini is essential, but not for this recipe! We are purposefully relying on every single ounce of the natural moisture the zucchini provides. This moisture is the “secret weapon” that delivers an incredibly ultra-moist and tender loaf of bread. So, resist the urge to squeeze – simply grate and add!
Quick Tip: The “Quick” in Quick Bread
Ever wondered why it’s called “quick bread”? It’s all about the leavening! Unlike yeast breads that require hours of rising time, quick breads use chemical leavening agents like baking powder and baking soda to make the batter rise almost instantly. This means no waiting around for dough to proof, making quick breads, including this zucchini delight, incredibly fast and convenient to prepare!
Creating this zucchini bread is surprisingly straightforward, and the delicious results truly speak for themselves. Below is a detailed overview of the process, with specific measurements and instructions provided in the full recipe section.
How To Bake the Perfect Zucchini Bread: A Simple Guide
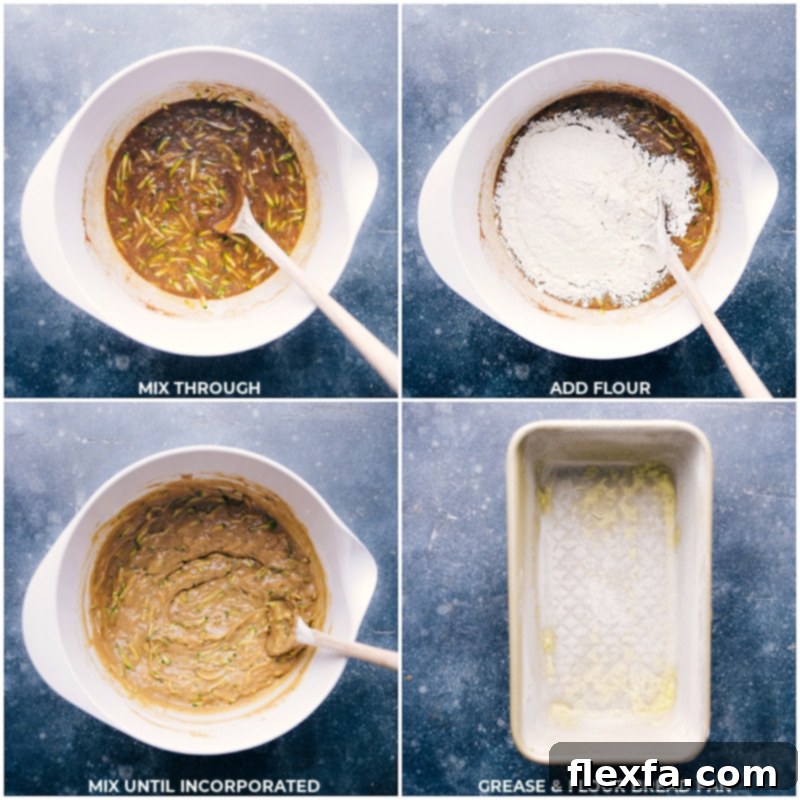
- Prepare Your Loaf Pan with Care: There’s nothing more disappointing than a perfectly baked loaf that sticks to the pan. To prevent this, generously grease your 9×5-inch loaf pan with nonstick cooking spray or rub a thin layer of shortening across the interior. Then, lightly dust it with flour, tapping out any excess. For an even easier removal, you can line the pan with parchment paper, leaving an overhang on the longer sides. This creates “handles” for effortless lifting once baked.
- Master the One-Bowl Batter: Our recipe embraces simplicity by combining all ingredients in a single large bowl. Using a sturdy wooden spoon, mix everything until just combined. It’s crucial to avoid electric hand or stand mixers. These machines can introduce too much air into the batter, which can cause your bread to rise dramatically during baking, only to collapse or sink in the middle as it cools, leading to a dense texture. Gentle mixing with a spoon ensures a tender, perfect crumb.
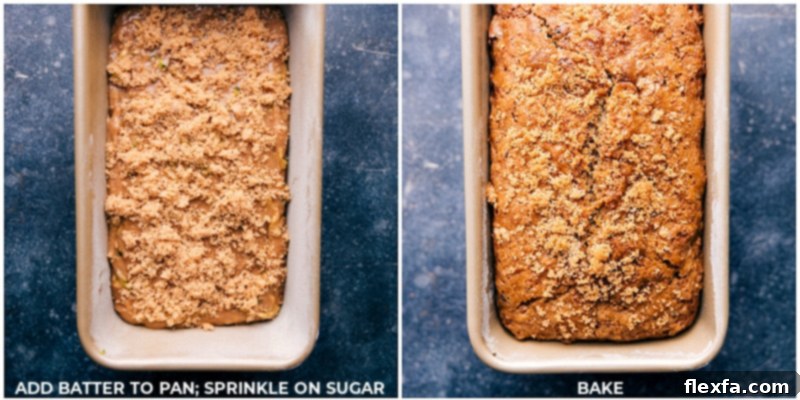
- Bake to Golden Perfection: Transfer the batter to your prepared pan and bake for approximately 55-60 minutes. The bread is done when a toothpick inserted into the very center comes out clean or with only moist crumbs attached. If it comes out wet, continue baking in 5-minute increments until it passes the test. The top should be golden brown and the edges should start to pull away from the pan.
Creative Variations to Make This Recipe Your Own!
Customize Your Zucchini Bread Experience
How To Make A Delightful Chocolate Chip Zucchini Bread
- Elevate your bread with chocolate chips! Simply add 1 cup of semisweet or milk chocolate chips to the batter. For best results (and to prevent them from sinking to the bottom), toss the chocolate chips with 1 tablespoon of the measured flour before incorporating them into the wet ingredients. This flour coating helps ensure an even dispersion throughout your delicious loaf.
- For a richer, more decadent treat, consider using a mix of dark and milk chocolate chips. You can also add a sprinkle of extra chocolate chips on top of the batter before baking for a beautiful finish.
Adding Nuts or Dried Fruits for Extra Texture and Flavor
- If you prefer a nutty crunch or a chewy burst of fruit, substitute the chocolate chips with 1 cup of your favorite add-ins. Walnuts and pecans are classic choices, but toasted almonds or even chopped dried cranberries or raisins work wonderfully. Just like with chocolate chips, toss them in 1 tablespoon of flour first to ensure they are evenly distributed and don’t clump at the bottom of the pan.
- For an extra layer of flavor, lightly toast nuts before adding them to enhance their aroma and crunch.
Transforming Your Zucchini Bread into Delicious Muffins
This versatile recipe can easily be adapted into delectable zucchini muffins:
- Start by preparing a standard muffin tin: spray each cavity with nonstick spray and lightly dust with flour, or use paper liners.
- Fill each muffin cavity slightly higher than halfway with the batter. This ensures a nice, domed top.
- Bake at 350°F (175°C) on the middle rack of your oven until the muffins are lightly golden brown and spring back when gently pressed on top – typically about 18-24 minutes.
- To confirm doneness, insert a toothpick into the center of a muffin. If it comes out clean or with moist crumbs, they’re ready. If wet batter adheres, bake for a few more minutes.
For more muffin inspiration, don’t miss our Healthy Zucchini Muffins or our Gluten-Free Zucchini Muffins.
Optimal Storage for Fresh Zucchini Bread
Can You Freeze Zucchini Bread? Absolutely!
Zucchini bread freezes beautifully, making it perfect for meal prep or enjoying a fresh-tasting treat whenever a craving strikes. Once your bread has cooled completely, wrap the entire loaf tightly in plastic wrap, then encase it in aluminum foil or place it in a freezer-safe bag, ensuring as much air as possible is removed. It will stay fresh in the freezer for up to 3 months. To enjoy, simply thaw at room temperature. You can also freeze shredded zucchini for future baking endeavors – just portion it out and freeze in airtight bags.
How Long Does Zucchini Bread Last?
At room temperature, this zucchini bread remains wonderfully fresh for 1-2 days. Many people, myself included, find it tastes even better on the second day as the flavors meld and the moisture settles. After 2-3 days, however, it may start to become too moist or slightly dense, which indicates it’s past its prime for optimal texture.
Should You Refrigerate Zucchini Bread?
Yes, if you wish to extend its freshness! To make your zucchini bread last up to a week, it’s best to refrigerate it after the first 2 days. For optimal storage in the fridge, wrap individual slices tightly in plastic wrap to prevent them from drying out or absorbing refrigerator odors, then place them in an airtight container. This method ensures each slice retains its delicious moistness.
Creative Ways to Use Up Your Abundant Zucchini Harvest
If you find yourself with extra zucchini after baking this delightful bread, don’t let it go to waste! Zucchini is an incredibly versatile vegetable that shines in both sweet and savory dishes. Here are some fantastic ideas to incorporate more of this nutritious green squash into your meals:
- Sheet Pan Chicken and Zucchini: A vibrant and easy weeknight meal, this one-pan garlic parmesan chicken and zucchini recipe is seasoned to perfection and served with a simple, refreshing dipping sauce.
- Savory Zucchini Boats: Impress your family with hearty zucchini boats, generously stuffed with flavorful Italian sausage, herbs, and cheese, then baked until tender and bubbly.
- Refreshing Pasta Salad: Brighten up your lunch or dinner with a light pasta salad featuring sweet roasted corn, tender zucchini, creamy avocado, and a zesty dressing.
- Quick Zucchini Pasta Sauce: For a fresh and speedy meal, create a vibrant zucchini pasta sauce infused with aromatic pesto, perfect for tossing with your favorite spaghetti or linguine.
- Grilled Zucchini Spears: Simple yet delicious, toss zucchini spears with olive oil, salt, pepper, and garlic powder, then grill until tender-crisp for a healthy side dish.
- Zucchini Fritters: Grate zucchini, mix with a little flour, egg, and seasoning, then pan-fry until golden brown for savory, crispy fritters.
Crucial Quick Tip: The Right Bread Pan Matters!
Achieving a perfectly baked zucchini bread isn’t just about the ingredients; it’s also about the equipment. It’s vital to use the correct size bread pan for this recipe. A 9×5-inch (1-pound) pan is specifically designed for the volume of this batter, ensuring it bakes evenly and rises beautifully. Using a pan that’s too small can lead to overflow or a dense, undercooked center, while a pan that’s too large can result in a thin, dry loaf. By the way, this is our absolute favorite loaf pan!
Note on Pan Sizes: A slightly narrower 9×5-inch pan might require an extra 10-15 minutes of baking time. An 8×4-inch pan is generally too small for the full batter; if you must use one, only fill it about 75% full and be prepared for a shorter baking time (use any leftover batter for a few muffins!). Always remember to generously grease and flour your pan.
Homemade Zucchini Bread Recipe
Video
Equipment
-
9 x 5-inch bread pan see note 1
-
Cooling rack
Ingredients
- Cooking spray
- 2 cups zucchini (unpeeled, about 1 medium zucchini)
- 2 large eggs
- 1/3 cup canola oil (or vegetable oil)
- 1/3 cup unsalted butter (melted and cooled)
- 1 cup light brown sugar (lightly packed)
- 2 teaspoons vanilla extract
- 1 teaspoon salt
- 2 teaspoons ground cinnamon
- 3/4 teaspoon baking soda
- 1/2 teaspoon baking powder
- 2 cups all-purpose flour (plus some for dusting the pan)
- 2 tablespoons light brown sugar (firmly packed, for topping)
Instructions
-
Preheat your oven to 350°F (175°C). Prepare a 9×5-inch bread pan by lightly greasing it with cooking spray or shortening, then dusting it with flour, tapping out any excess. Set aside. Melt the unsalted butter in the microwave and allow it to cool slightly so it’s not hot when added to the other ingredients. Wash and thoroughly dry the zucchini; then, using the large holes of a box grater, grate the zucchini (no need to peel!). Gently place the shredded zucchini into measuring cups without packing it tightly.
-
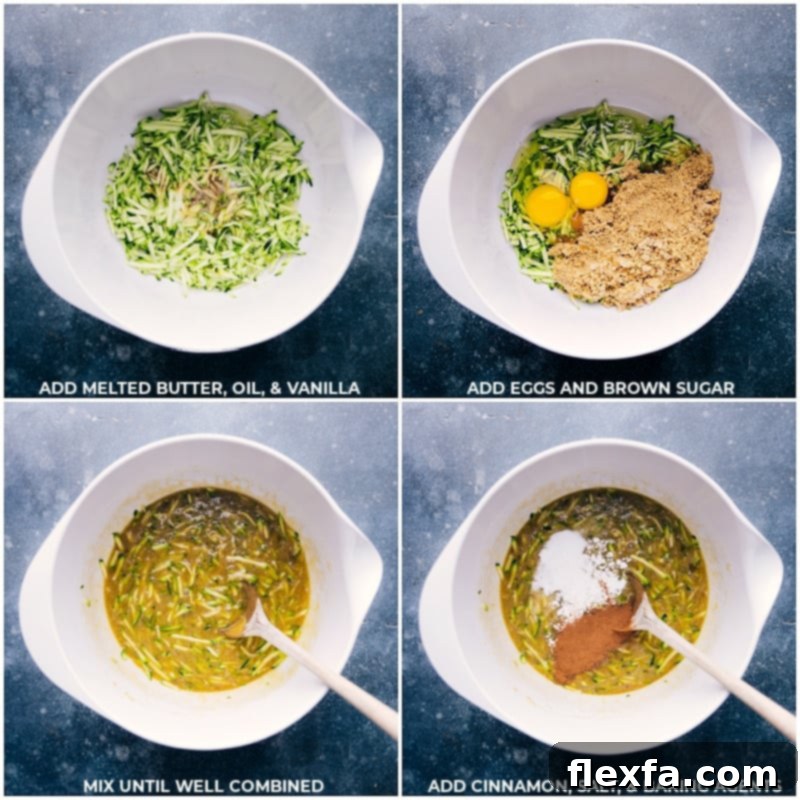
In a large bowl, combine the grated zucchini, eggs, canola oil, cooled melted butter, light brown sugar, and vanilla extract. Using a wooden spoon, mix these wet ingredients until they are completely combined and smooth. Remember, avoid using hand or stand mixers, as overmixing can incorporate too much air, leading to a dense loaf.
-
Add the salt, ground cinnamon, baking soda, and baking powder directly onto the wet ingredients. Mix briefly to incorporate, then add the flour. Continue to mix with your wooden spoon until the flour is just combined and the batter is smooth. Stop mixing as soon as no dry streaks of flour remain, as overmixing will develop the gluten too much, resulting in a tough bread.
-
Carefully scrape the batter into your prepared loaf pan using a spatula. Smooth the top evenly, then sprinkle with the remaining 2 tablespoons of light brown sugar for a delicious crunchy crust. Bake for 55–60 minutes, or until a wooden toothpick inserted into the center of the loaf comes out clean or with only moist crumbs attached.
-
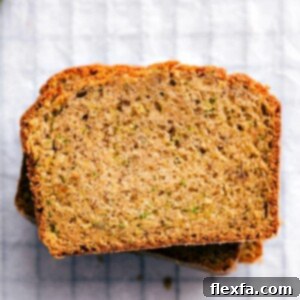
Once baked, remove the bread from the oven and allow it to cool in the pan for 15 minutes. This crucial resting period allows the bread to set and prevents it from crumbling. After 15 minutes, carefully invert the loaf onto a wire cooling rack to finish cooling completely before slicing with a sharp serrated knife. Slicing warm quick bread can cause it to crumble.
Recipe Notes
Note 2: The Importance of Cooling: After baking, it’s essential to let the bread cool in the pan for 15 minutes. This isn’t just for handling ease; baking is still occurring through residual heat even after it leaves the oven, allowing the loaf to set properly. Once transferred to a wire cooling rack, ensure the bread is fully elevated so air can circulate around all sides. If the bottom of the bread remains on a solid surface, moisture from the internal heat will condense, making the bottom damp and potentially sticky, compromising the texture.
Storage Tips: For the best flavor and texture, I recommend finishing this Zucchini Bread within 1–2 days of baking. It’s often even more moist, spiced, and flavorful on the second day as the ingredients have more time to meld. After the second day, the texture can begin to change, becoming overly moist. However, it can still last up to a week if stored correctly. For longer storage after the second day, I recommend refrigerating it. Wrap each slice tightly in plastic wrap and place them in an airtight container to maintain freshness and prevent drying out. For freezing instructions, please refer to the “Optimal Storage” section above.
Nutrition
Calories: 317kcal |
Carbohydrates: 42g |
Protein: 4g |
Fat: 15g |
Saturated Fat: 5g |
Polyunsaturated Fat: 3g |
Monounsaturated Fat: 7g |
Trans Fat: 0.3g |
Cholesterol: 53mg |
Sodium: 407mg |
Potassium: 139mg |
Fiber: 1g |
Sugar: 22g |
Vitamin A: 294IU |
Vitamin C: 4mg |
Calcium: 49mg |
Iron: 2mg
Nutrition information is automatically calculated and should be used as an approximation.
Zucchini Bread Recipe FAQs
Determining doneness for quick breads can be influenced by various factors, including altitude, humidity, your specific oven’s temperature accuracy, and even the type of pan you use. To ensure a perfectly baked loaf, first make sure your oven is properly calibrated and fully preheated. The loaf should be centered in the oven. Key indicators of readiness include the bread pulling away from the edges of the pan and a wooden toothpick or thin skewer inserted into the very center coming out clean, or with only a few moist crumbs attached. If it comes out with wet batter, it needs more time.
For smaller, younger zucchinis, there’s no need to remove the seeds, as they are typically tender and virtually undetectable in the baked bread. However, if you are using large, mature zucchinis, their seeds can be quite prominent and tough. In such cases, it’s best practice to cut the zucchini in half lengthwise and use a spoon to scrape out and discard the seeds and any watery pulp surrounding them before grating.
Several factors can contribute to a zucchini bread sinking in the middle, often indicating an issue with structure or leavening:
- Overmixing the Batter: This is a common culprit. Mixing the batter too vigorously, whether by hand or with an electric mixer, develops the gluten in the flour excessively and incorporates too much air. While the air initially helps it rise, the delicate structure can’t support itself, causing it to collapse in the middle during or after baking, leading to a dense, sunken loaf. Always mix until just combined.
- Too Much Liquid: If the batter contains an imbalance of wet ingredients or the zucchini wasn’t properly dried (though we don’t wring it out for this specific recipe, ensure it’s not dripping wet), it can be too heavy for the leavening agents to lift adequately. This results in a weak structure that sags in the center.
- Expired Leavening Agents: Baking soda and baking powder lose their potency over time. If your leavening agents are old, they won’t produce enough gas to make the bread rise properly, leading to a flat or sunken middle.
- Oven Temperature Issues: An oven that’s too cool can cause the bread to rise slowly and then fall. Conversely, an oven that’s too hot can set the outside crust too quickly before the inside has a chance to fully bake and set, leading to a collapse. Ensure your oven temperature is accurate (an oven thermometer can help!).
- Opening the Oven Door Too Early: Resist the urge to open the oven door during the first two-thirds of the baking time. The sudden change in temperature can cause the rising structure to deflate and sink.