
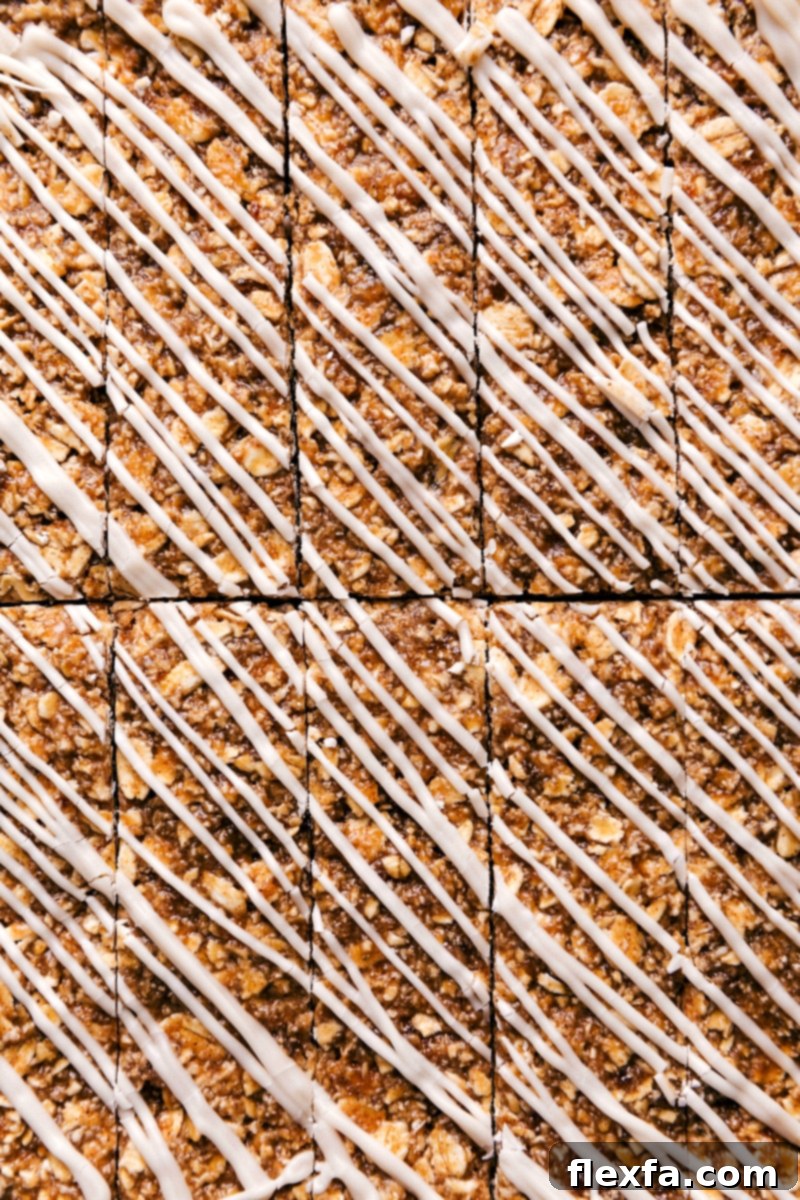
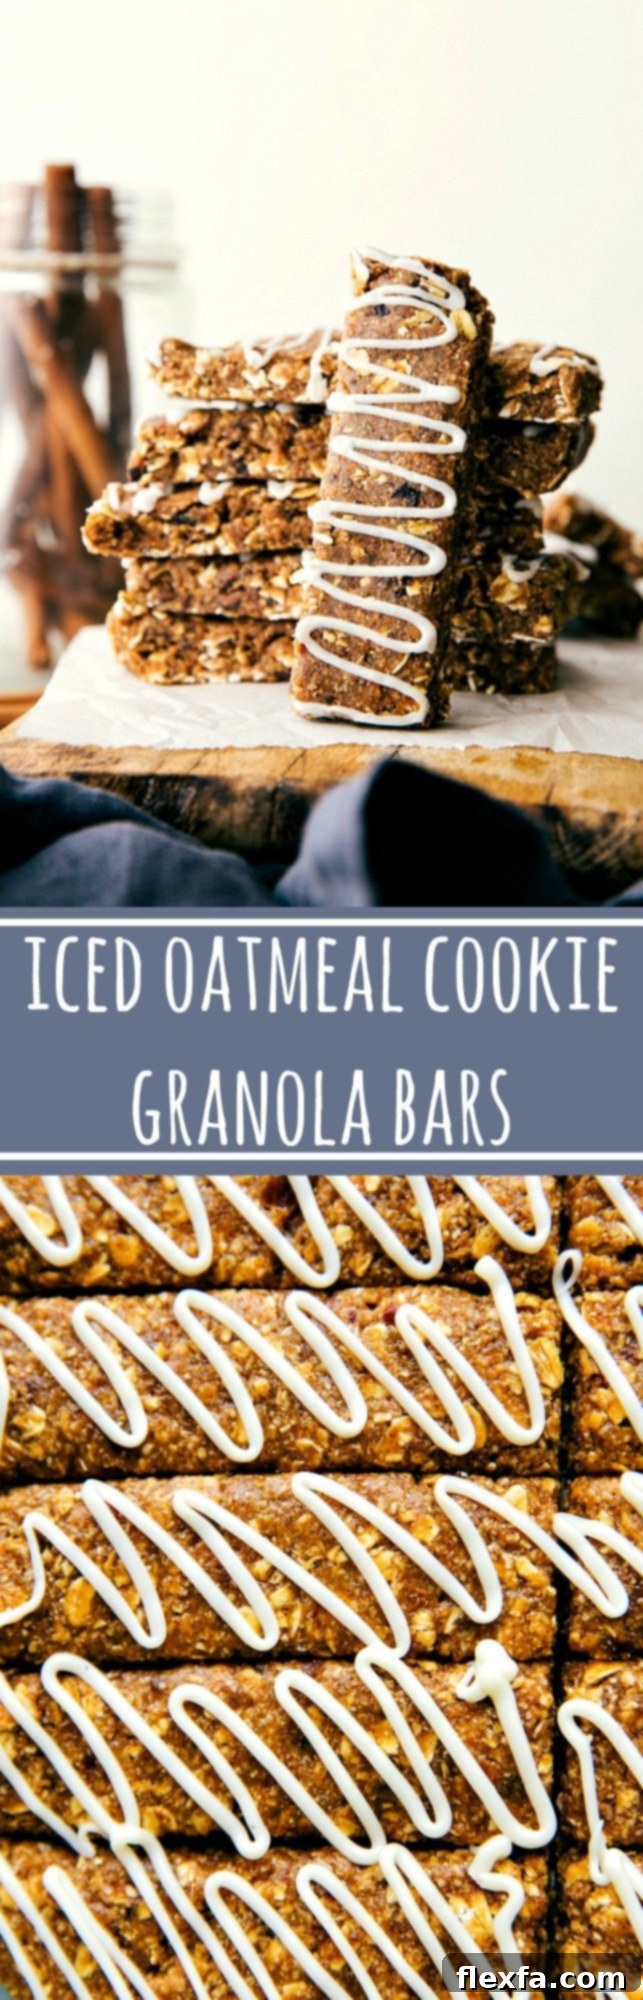
Craving the comforting taste of an iced oatmeal cookie but looking for a more nutritious and convenient option? Look no further! These No-Bake Oatmeal Granola Bars are meticulously crafted to capture that classic, sweet, and spiced flavor in a wholesome, easy-to-make bar. Forget the oven – these soft, chewy, and perfectly glazed granola bars require absolutely no baking, making them an ideal choice for quick snacks, healthy desserts, or a delightful breakfast on the go.
If you love creating your own delicious and wholesome treats, be sure to explore some of our other popular granola bar recipes: whip up a batch of Chewy Granola Bars loaded with miniature M&M’s, indulge in the rich decadence of Fudgy Chocolate Granola Bars featuring three types of chocolate, or try our classic Homemade Granola Bars packed with almonds and chocolate chips for a timeless favorite.
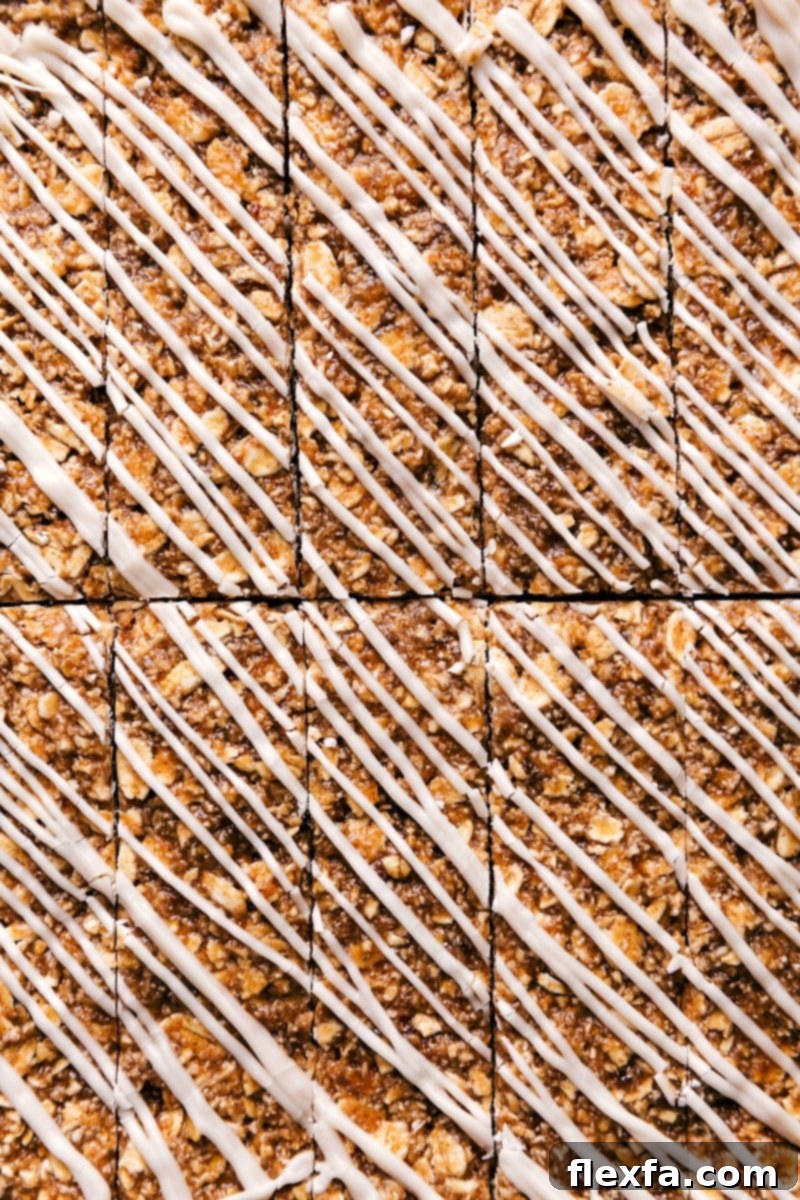
No-Bake Iced Oatmeal Cookie Granola Bars: A Wholesome Treat
The inspiration for these extraordinary no-bake oatmeal granola bars stems from a longtime family favorite: store-bought Clif® Kid Z bars. Their soft, chewy texture and subtle oatmeal cookie flavor always made them a hit, disappearing from Costco-sized boxes almost as quickly as they were bought. However, the continuous expense and a desire for more control over ingredients led to a quest for a homemade alternative.
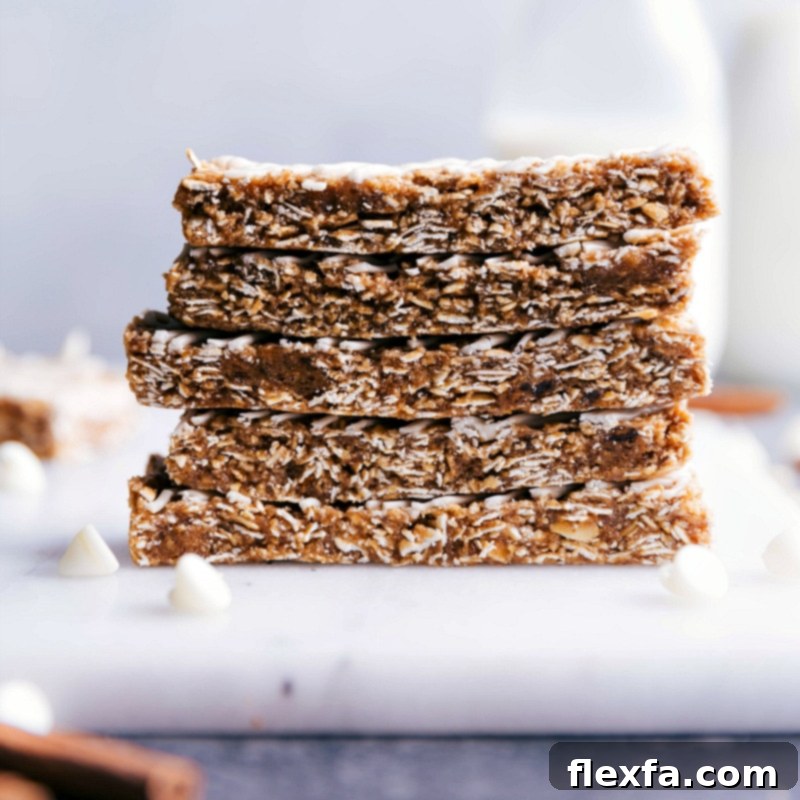
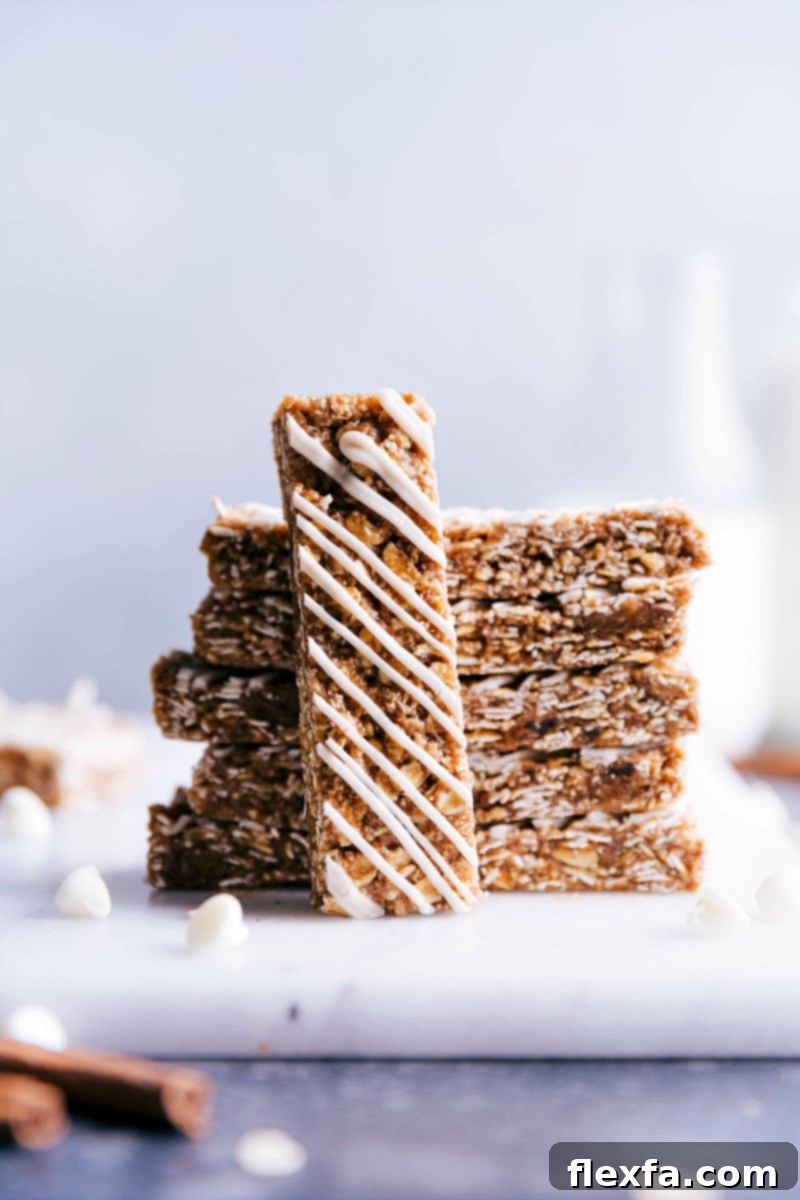
While these homemade delights didn’t replicate the Clif bars exactly, they blossomed into something even more remarkable: a soft, chewy, and utterly delicious granola bar that perfectly captures the essence of an iced oatmeal cookie. Each bar is generously sweet and finished with a dreamy white chocolate icing that melts in your mouth. Many who have tried them agree – these homemade Iced Oatmeal Granola Bars surpass even the popular store-bought varieties in both taste and texture, offering a more wholesome and satisfying experience.
Crafting Your No-Bake Oatmeal Granola Bars: An Easy Step-by-Step Guide
Creating these delightful no-bake granola bars is surprisingly simple, making them a perfect project for any home cook. Follow these clear steps to achieve perfect, chewy bars every time:
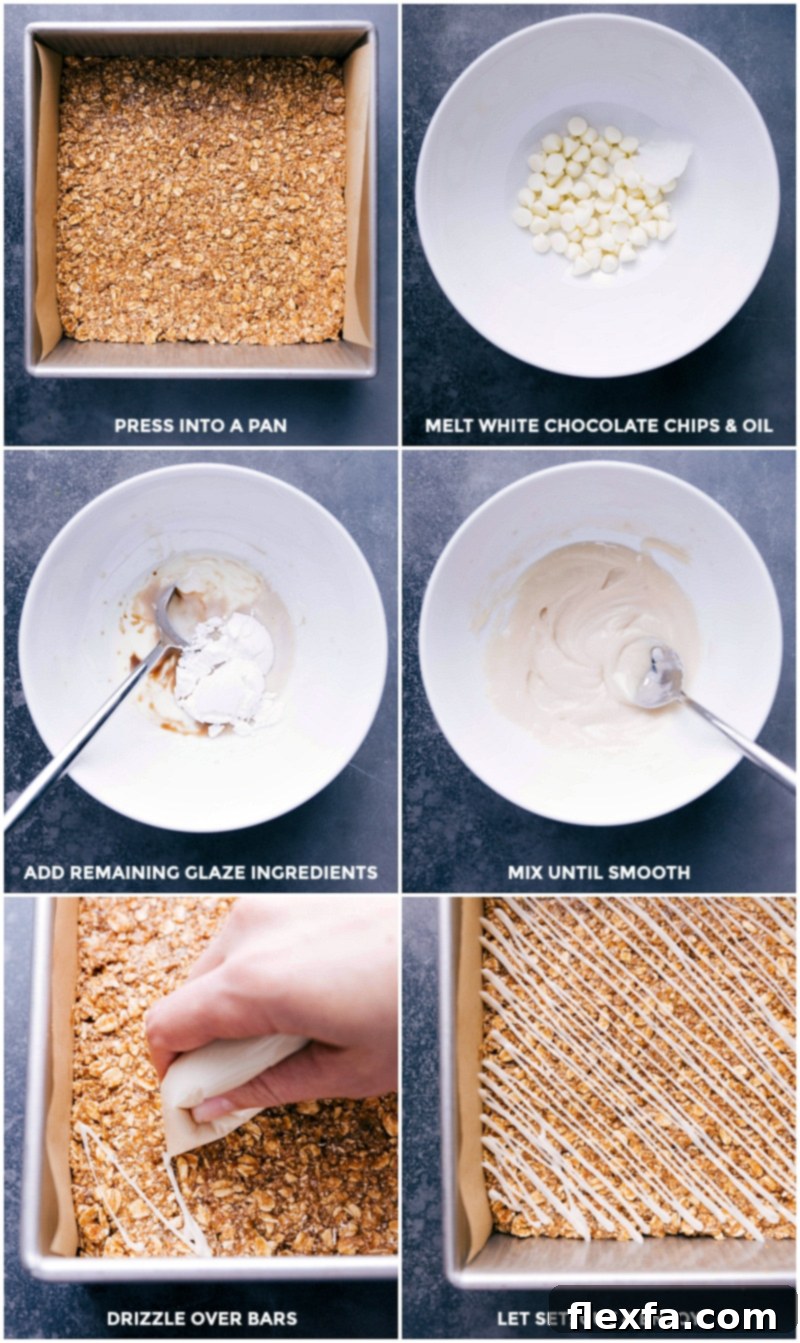
- Prepare Your Pan: Begin by lining an 8×8-inch baking pan with parchment paper. Ensure you leave a generous overhang on the sides – this will act as convenient “handles” to easily lift the entire slab of granola bars out of the pan once they’ve set. This simple step makes removal and cutting a breeze.
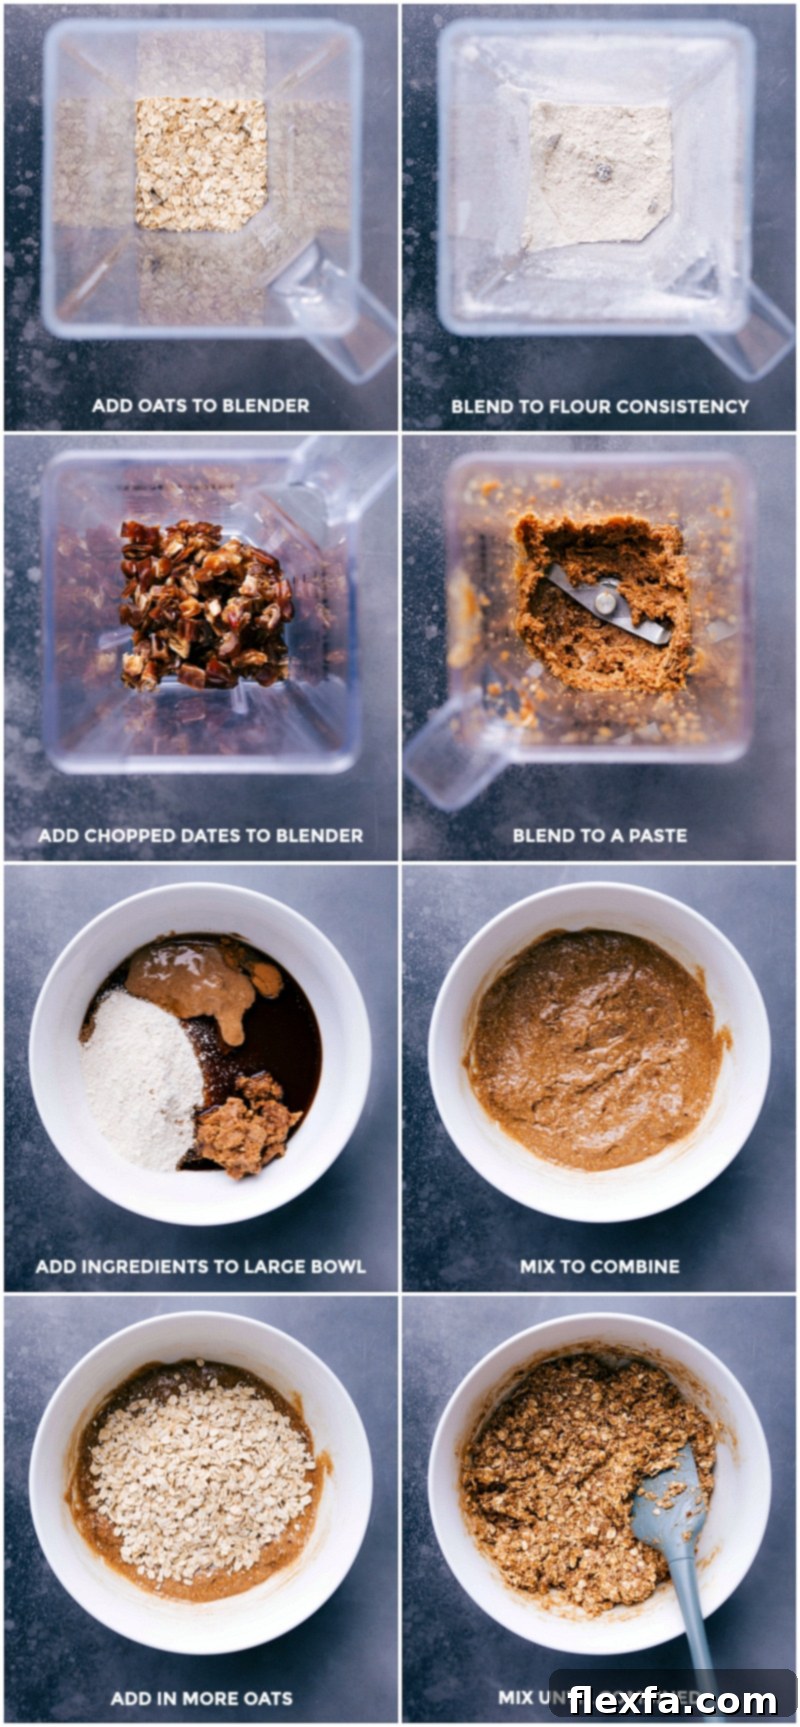
- Transform Oats into Flour: Measure out 1 cup of old-fashioned oats and transfer them to a high-powered blender or food processor. Pulse and blend until the oats reach a fine, flour-like consistency. It’s crucial to avoid any large, unprocessed chunks, as a smoother oat flour contributes significantly to the final bar texture. Scrape down the sides of the blender as needed to ensure even processing.
- Create a Date Paste: Pit your Deglet Noor dates (double-check for hidden pits!). If your dates are firm, soak them in hot water for about 5-10 minutes to soften, then drain and pat dry thoroughly. Add the softened, pitted dates to your blender and process them into a thick, uniform paste. This step requires patience; you’ll likely need to stop, scrape down the sides, and stir a few times until a smooth, sticky paste forms. This date paste is essential for binding and natural sweetness.
- Combine All Ingredients: In a large, sturdy mixing bowl, combine the freshly ground oat flour and the sticky date paste. Add the remaining 1 3/4 cups of whole old-fashioned oats, almond butter, pure maple syrup, vanilla extract, salt, and ground cinnamon.
- Mix Thoroughly: Using a hand mixer or the paddle attachment of a stand mixer, beat the mixture until all ingredients are thoroughly combined. The mixture will be quite thick and somewhat wet, but don’t worry – it will firm up beautifully in the refrigerator. Ensure no dry spots remain and everything is evenly distributed.
- Press and Chill: Scrape the entire granola bar mixture into your prepared 8×8-inch pan. Using a firm spatula or the back of a spoon, press the mixture down very firmly and evenly into the pan. This is a critical step for ensuring your bars hold together well. Cover the pan with plastic wrap and refrigerate for at least 1 hour, or until completely firm.
- Prepare the Glaze: While the bars are chilling, prepare the optional white chocolate glaze. In a microwave-safe bowl, combine white chocolate chips and coconut oil (ensure the coconut oil is measured after melting if solid). Microwave in 15-second intervals, stirring well after each burst, until the mixture is completely smooth and melted. Stir in the vanilla extract, powdered sugar, and milk (plant-based milk works perfectly here), adding milk gradually until a thick, pourable frosting consistency is achieved.
- Glaze and Final Chill: Transfer the prepared glaze to a small plastic bag and snip off a tiny corner. Drizzle the glaze generously over the chilled granola bars in your pan. Return the glazed bars to the refrigerator, covered, for an additional 20 minutes to allow the glaze to harden and set.
- Cut and Serve: Once the bars and glaze are fully set, use the parchment paper overhang to lift the entire slab onto a cutting board. With a large, sharp knife, cut the slab into individual bars of your desired size. For best results, clean your knife periodically to ensure clean, crisp cuts.
Essential Tools for Crafting Perfect Oatmeal Granola Bars
Having the right tools can make all the difference in achieving perfectly consistent and delicious no-bake oatmeal granola bars. Here’s what we recommend:
- High-Powered Blender: This is a non-negotiable item for this recipe. Dates, even fresh ones, can be incredibly tough and sticky. A powerful blender (like a Vita-Mix or Blend-Tec) is essential to break them down into a smooth, thick paste without overworking your motor. Be prepared to scrape down the sides frequently to ensure all dates are processed.
- Hand Mixer or Stand Mixer: The granola bar mixture becomes very dense and sticky once all ingredients are added. Attempting to mix it thoroughly with just a wooden spoon can be a strenuous task. An electric hand mixer or a stand mixer with a paddle attachment will ensure all components are evenly combined, leading to a consistent flavor and texture in every bite.
- 8×8-inch Baking Pan: This specific size is perfect for the quantity of ingredients in this recipe, yielding bars of an ideal thickness. A smaller pan might result in overly thick bars, while a larger one could make them too thin and prone to crumbling. An 8×8-inch pan ensures uniform bars.
- Parchment Paper: While optional, lining your pan with parchment paper is highly recommended. It prevents sticking, makes lifting the entire slab of bars out incredibly easy, and minimizes cleanup. Look for options like parchment paper for baking.
- Sturdy Spatula: A firm, flexible spatula is invaluable for scraping down your blender and mixing bowl, ensuring no precious ingredients are left behind. It’s also incredibly useful for firmly pressing the granola bar mixture into the pan, a key step for creating cohesive bars.
Key Ingredients for Irresistible Oatmeal Granola Bars
The success of these no-bake oatmeal granola bars hinges on the quality and specific type of each ingredient. Each component plays a crucial role in achieving the desired flavor and soft, chewy texture:
- Old-Fashioned Oats: These are the star of the show. We use them in two forms: one portion is blended into a fine oat flour, which acts as a binder and creates a smoother texture. The other portion remains whole, adding that characteristic hearty chewiness and fiber that makes granola bars so satisfying. It’s important to use old-fashioned oats, as quick oats or steel-cut oats will not yield the same results. You can find quality old-fashioned oats at most grocery stores.
- Deglet Noor Dates: More than just a sweetener, dates are the natural binding agent and provide a wonderful caramel-like flavor and chewy texture. Fun fact: dates are fresh fruit, not dried! For the best results, use fresh, soft dates. If yours are firm, a quick soak in hot water will soften them perfectly (see recipe notes for details). Leftover dates are versatile and can be used in other healthy recipes, such as a refreshing Cauliflower Smoothie or wholesome Gluten-Free Zucchini Muffins.
- Almond Butter: This ingredient adds rich flavor, healthy fats, and contributes to the bars’ filling nature. Its sticky consistency also acts as another critical binder, ensuring the bars hold together. We highly recommend choosing a slow-roasted, lightly salted almond butter that you genuinely enjoy the taste of on its own, as its flavor will shine through.
- Pure Maple Syrup: This natural sweetener, derived from boiled-down maple sap, provides both sweetness and essential stickiness. Crucially, it should not be confused with pancake syrup, which is often made from corn syrup and artificial maple extract. The unique flavor profile of pure maple syrup is vital for achieving that classic oatmeal cookie taste and the perfect chewy texture.
- Vanilla Extract: A touch of vanilla extract is paramount for enhancing the overall flavor profile, rounding out the sweetness, and contributing to that comforting, cookie-like aroma and taste.
- Salt: Just a small amount of salt is added to balance the sweetness of the dates and maple syrup, elevating all the other flavors in the bar.
- Cinnamon: Absolutely essential for that warm, inviting, and unmistakable spiced flavor profile of an authentic oatmeal cookie. Don’t skip the ground cinnamon!
Quick Tip: What Makes Granola Bars Stick?
The secret to perfectly cohesive no-bake granola bars lies in the harmonious blend of sticky binders. Ingredients like creamy almond butter, natural pure maple syrup, and the thick paste created from blended dates work together as powerful natural adhesives, ensuring your bars hold their shape beautifully without any baking.
Pro Tips for Oatmeal Granola Bar Perfection
To ensure your homemade no-bake oatmeal granola bars turn out perfectly every time, keep these expert tips in mind:
- Choose the Right Oats: Always use old-fashioned oats. Quick oats are too finely processed and will result in a mushy texture that won’t bind correctly. Steel-cut oats are too coarse and won’t soften enough without baking. Old-fashioned oats provide the ideal balance for both the oat flour and the whole oats in the mixture.
- Stick to the Recipe’s Core Ingredients: This particular recipe is quite specific about its ingredients because of their binding properties and flavor contributions. Even common “tried and true” substitutions like using honey instead of maple syrup, or peanut butter instead of almond butter, can significantly alter the texture and consistency, often leading to crumbly or overly sticky bars. For the best results, stick to the ingredients as listed.
- Master the Pressing Technique: When pressing the mixture into the pan, don’t be shy! The harder and more uniformly you press down, the better your bars will hold together. Use a sturdy spatula or the bottom of a glass to really compact the mixture, especially around the edges.
- Achieve Clean Cuts: Once your bars are thoroughly chilled and firm, use the parchment paper overhang to carefully lift the entire slab onto a cutting board. For neat and crisp bars, employ a large, sharp knife. Wiping the knife clean between cuts can also prevent sticking and ensure each bar looks as good as it tastes.
- Make Them Gluten-Free: While the core ingredients in this recipe (oats, dates, almond butter, maple syrup) are naturally gluten-free, cross-contamination can occur during processing. If you require truly gluten-free granola bars, always double-check the labels of all your ingredients to verify they are certified gluten-free and weren’t processed in facilities that handle gluten-containing grains.
- Soften Your Dates: If your Deglet Noor dates feel firm, take the extra step of soaking them in boiling water for 5-10 minutes. This makes them much easier to blend into a smooth paste, preventing lumps and ensuring better binding. Just remember to drain and pat them completely dry before blending.
Storage Solutions for Your No-Bake Oatmeal Granola Bars
Proper storage is key to maintaining the freshness and deliciousness of your homemade granola bars. Here’s how to store them effectively:
Granola Bars With Oatmeal Storage
After your no-bake oatmeal granola bars have fully set and been cut, individual wrapping is highly recommended. Wrap each bar tightly in plastic wrap or parchment paper. Store these individually wrapped bars in an airtight container or a resealable bag in the refrigerator for up to one week. This method keeps them fresh, prevents them from sticking together, and makes them incredibly convenient for grabbing a quick, on-the-go snack.
To Freeze for Long-Term Storage: For extended freshness, these granola bars freeze exceptionally well. Arrange the cut bars on a baking tray lined with parchment paper, ensuring they don’t touch. Place the tray in the freezer for 1-2 hours, or until the bars are firm. Once frozen solid, wrap each bar individually in plastic wrap or foil, then transfer them to a freezer-safe airtight bag or container. They can be stored in the freezer for up to 6 months, making them perfect for meal prepping healthy snacks in advance.
To Thaw Frozen Bars: When you’re ready to enjoy a frozen bar, simply let it sit at room temperature for about 30 minutes to thaw naturally. Alternatively, for a quicker thaw, you can microwave an individually wrapped bar for 10-15 seconds until it softens to your desired texture.
Explore More Wholesome and Nutritious Snack Ideas
If you’re looking to expand your repertoire of healthy and delicious homemade snacks, we have plenty of other fantastic recipes to try:
- Homemade Trail Mix: Customize your perfect snack with five different variations to suit every taste and craving.
- Oatmeal Energy Balls: These delightful bites are packed with wholesome oats, sweet coconut, and decadent chocolate – perfect for a quick energy boost.
- Chocolate Chia Seed Pudding: A naturally sweetened and thickened pudding that’s rich, creamy, and packed with nutrients.
- Roasted Coconut and Honey Almond Granola: Enjoy a crunchy, flavorful granola featuring toasted coconut flakes and sweet almonds.
- Overnight Oats: Discover four versatile and easy recipes for this convenient, make-ahead breakfast or snack.
Frequently Asked Questions (FAQ)
Can I substitute other nut butters for almond butter?
While almond butter is recommended for its specific flavor and binding properties, you can try other creamy nut butters like cashew butter. However, be aware that peanut butter has a very strong flavor that might overpower the subtle oatmeal cookie taste we’re aiming for, and it may also affect the texture due to differing oil content and consistency.
Can I use honey instead of maple syrup?
It’s generally not recommended to substitute honey for pure maple syrup in this recipe. While both are natural sweeteners, maple syrup has a thinner consistency and a different chemical makeup that contributes uniquely to the binding and texture of these bars. Honey can sometimes make the bars too sticky or overly dense, and its flavor profile is also distinct.
Can I add extra mix-ins to the granola bars?
Absolutely! Once you’ve mastered the basic recipe, feel free to get creative with mix-ins. Small additions like mini chocolate chips, chopped nuts (walnuts or pecans), shredded coconut, or dried cranberries can add extra flavor and texture. Just be mindful not to add too much, as it could affect the bars’ ability to hold together. Add them in step 4 with the other dry ingredients.
Are these oatmeal granola bars suitable for kids?
Yes, these no-bake oatmeal granola bars are incredibly kid-friendly! They’re soft, chewy, sweet, and offer a more wholesome alternative to many processed snacks. The familiar taste of an iced oatmeal cookie makes them appealing to children, and you can feel good about the nutritious ingredients.
How can I ensure my dates blend into a smooth paste?
The key to a smooth date paste is using fresh, soft Deglet Noor dates. If your dates are on the firmer side, soak them in hot (but not boiling) water for about 5-10 minutes. Then, drain them thoroughly and pat them dry before adding them to your high-powered blender. This pre-softening makes blending much easier and ensures a lump-free paste.
Quick Tip: The Power of Pressure
A crucial step for ensuring your no-bake granola bars hold their shape and don’t crumble is to press the mixture firmly and evenly into the pan. Take your time with this, applying good pressure across the entire surface. This compaction helps the natural binders create a dense, cohesive bar structure.
Print Recipe
Oatmeal Cookie Granola Bars
Chelsea Lords
30 minutes
1 hour 20 minutes
1 hour 50 minutes
12 bars
Video Tutorial
Equipment
-
8 x 8-inch baking pan
-
Parchment paper or aluminum foil
-
High-powered blender
-
Hand mixer or stand mixer
Ingredients
- 2-3/4 cups old fashioned oats divided
- 1 cup Deglet Noor dates pitted, see note 1
- 1/3 cup roasted and salted almond butter see note 2
- 1/2 cup pure maple syrup see note 3
- 2 teaspoons vanilla extract
- 1/4 teaspoon salt
- 1 teaspoon ground cinnamon
- 2 tablespoons white chocolate chips
- 1 teaspoon coconut oil
- 1/4 teaspoon vanilla extract
- 2 tablespoons powdered sugar
- 1 to 2 teaspoons milk plant-based milk works great here
Instructions
-
Line an 8×8 baking pan with parchment paper or foil, leaving an overhang for easy removal.
-
In a high-powered blender, blend 1 cup (105g) of the old-fashioned oats until they resemble flour—a fine powder. If needed, stir and reblend to break up larger chunks of oats—it should look like flour. Now pour all the blended oats into a large sturdy bowl or a bowl attached to a stand mixer.
-
See note 1 for prepping dates if needed. Ensure dates are pitted. (Sometimes dates labeled pitted still have a pit that sneaks in!) Using a sharp serrated knife, coarsely chop the dates. Add chopped dates to a blender and blend until a thick paste forms. This takes some patience; you will likely need to scrape down edges and stir a few times between blending. Once fully blended to a paste, use a spatula to scrape all of this mixture into the bowl with the oats. It’s thick and sticky!
-
To the bowl with the blended oats and dates, add almond butter, maple syrup, vanilla extract, salt, cinnamon and the remaining 1-3/4 cups (178g) old-fashioned oats.
-
Using a hand mixer (or paddle attachment on a stand mixer), beat until well combined and ingredients are incorporated. The mixture is a bit wet, but it sets up a bit in the fridge.
-
Use a spatula to scrape out all the mixture from the bowl into the prepared 8×8 pan. Firmly press the granola bar mixture evenly into the pan. Cover and place in the fridge to chill and set up for at least 1 hour.
-
Combine the white chocolate chips and coconut oil (measure oil when it is melted). Microwave the mixture in 15-second bursts, stirring between each burst for 10–15 seconds until completely smooth. Stir in the vanilla extract, powdered sugar, and milk. Stir until a thick frosting has formed and transfer to a small plastic bag. Cut off the tip and drizzle all over the bars. Return to the fridge (covered) until the glaze hardens, about 20 minutes.
-
Using the parchment or foil overhang, remove bars to a cutting board. Use a sharp knife to cut into bars. Wrap each bar individually and store in an airtight container in the fridge.
Recipe Notes
Note 2: I recommend a slow-roasted and lightly salted almond butter you enjoy eating straight from the jar to ensure the best granola bar flavor.
Note 3: Maple syrup is not to be confused with corn syrup or pancake syrup; pure maple syrup is the sap from a maple tree that has been boiled down to a thicker consistency. The flavor and stickiness of pure maple syrup improves both taste and consistency of these oatmeal granola bars.
Storage: After the bars have set, wrap each bar in plastic wrap and keep in a container or resealable bag in the fridge for up to a week.
Nutrition Information
Calories: 217kcal |
Carbohydrates: 38g |
Protein: 4g |
Fat: 6g |
Saturated Fat: 1g |
Polyunsaturated Fat: 1g |
Monounsaturated Fat: 3g |
Cholesterol: 1mg |
Sodium: 54mg |
Potassium: 277mg |
Fiber: 4g |
Sugar: 22g |
Vitamin A: 4IU |
Vitamin C: 1mg |
Calcium: 58mg |
Iron: 1mg
Nutrition information is automatically calculated, so should only be used as an approximation.
Love this recipe? Leave a comment below!