
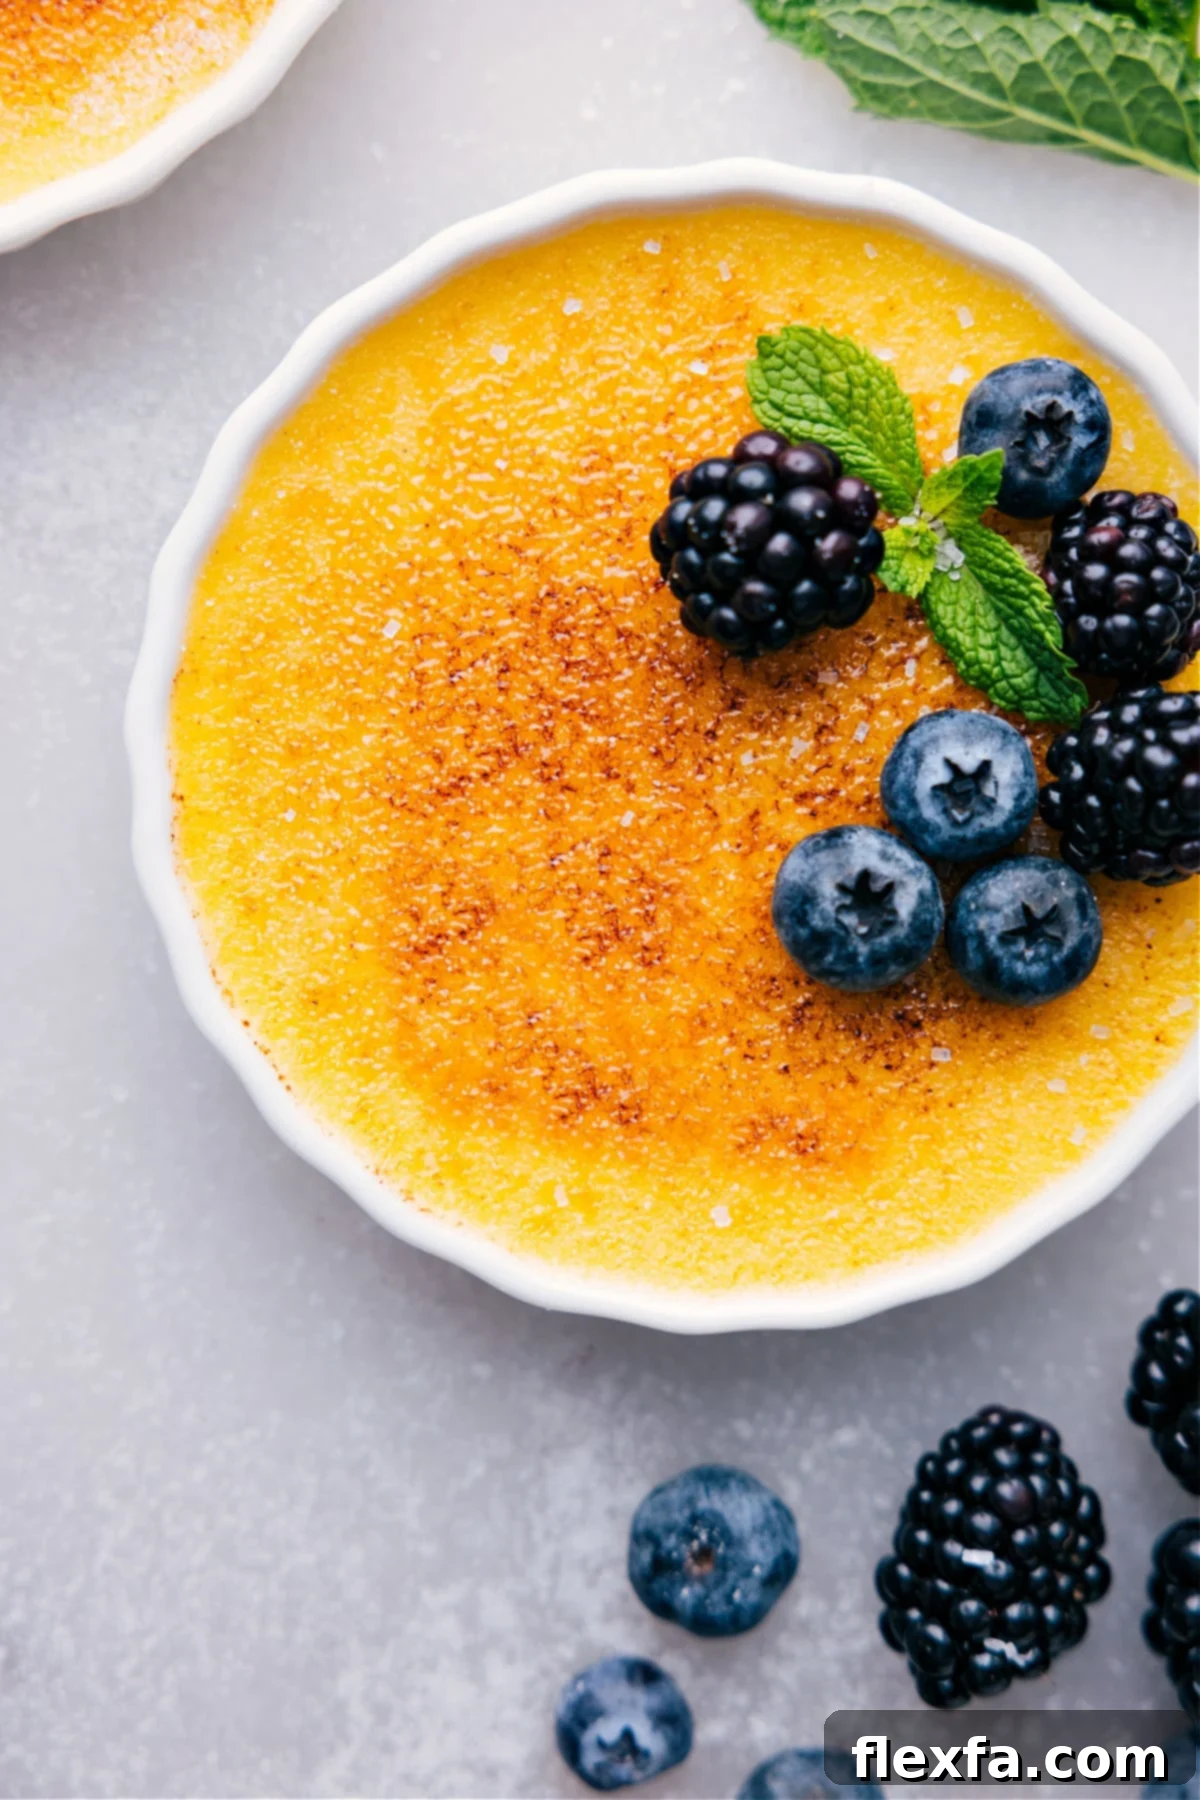
Discover the secrets to crafting the Ultimate Crème Brûlée Recipe, a luxurious dessert that is remarkably easier to master than its elegant appearance suggests. With a perfectly creamy custard, a delightful caramelized sugar crust, and expert guidance directly from a seasoned pastry chef, you’ll create a show-stopping treat that will impress everyone at your table.
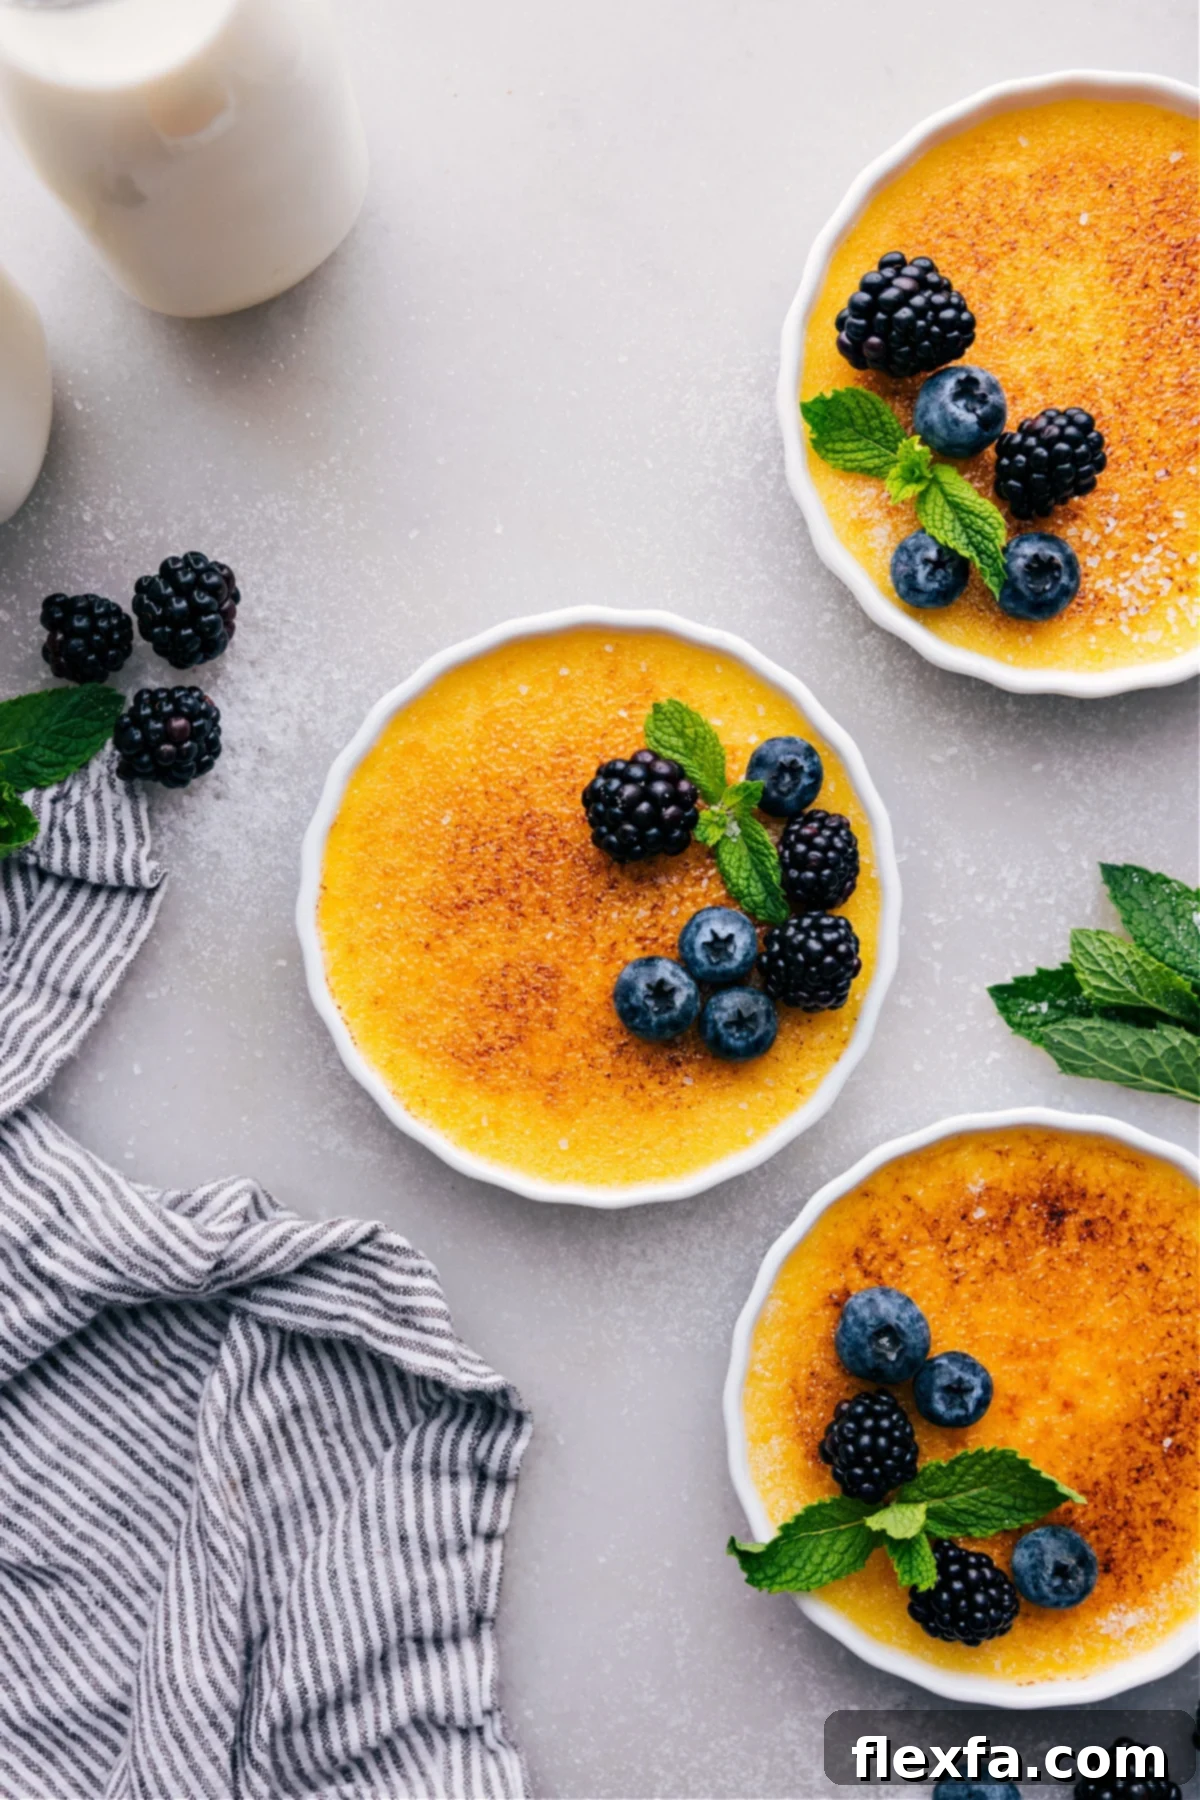

Author’s Insight
A Pastry Chef’s Foolproof Crème Brûlée Recipe!
During my formative years working in a bustling fine dining restaurant kitchen, I had the incredible fortune of learning directly from a highly acclaimed pastry chef, whose Crème Brûlée was nothing short of legendary. I vividly recall the first evening he entrusted me with the kitchen torch to caramelize the sugar topping. Initially, the task felt quite daunting, with visions of burnt sugar and uneven crusts, but with his patient guidance and a few key pointers, I quickly realized just how straightforward and incredibly satisfying the process could be.
That very chef generously shared the intricate yet uncomplicated secrets to his “foolproof” Crème Brûlée recipe, and these precious techniques have remained a cornerstone of my dessert repertoire ever since. What truly surprised me then, and continues to amaze me now, is the sheer simplicity of the process: it requires just five fundamental ingredients, a gentle baking method in a water bath to achieve that perfect creamy texture, and that satisfyingly quick torching flourish at the very end. Today, this recipe stands as my ultimate go-to whenever I aim to create a truly impressive dessert without dedicating endless hours to kitchen prep.
Furthermore, this Crème Brûlée is the quintessential make-ahead dessert. You can effortlessly prepare the rich, velvety custard well in advance, allowing it to chill and set perfectly in the refrigerator. Then, just moments before you’re ready to serve, you add that iconic, shatteringly crisp sugar topping. This flexibility makes it ideal for entertaining, allowing you to focus on your guests rather than last-minute preparations. The result? An elegant, deceptively easy, and consistently crowd-pleasing dessert that never fails to delight!

Essential Ingredients for the Best Crème Brûlée
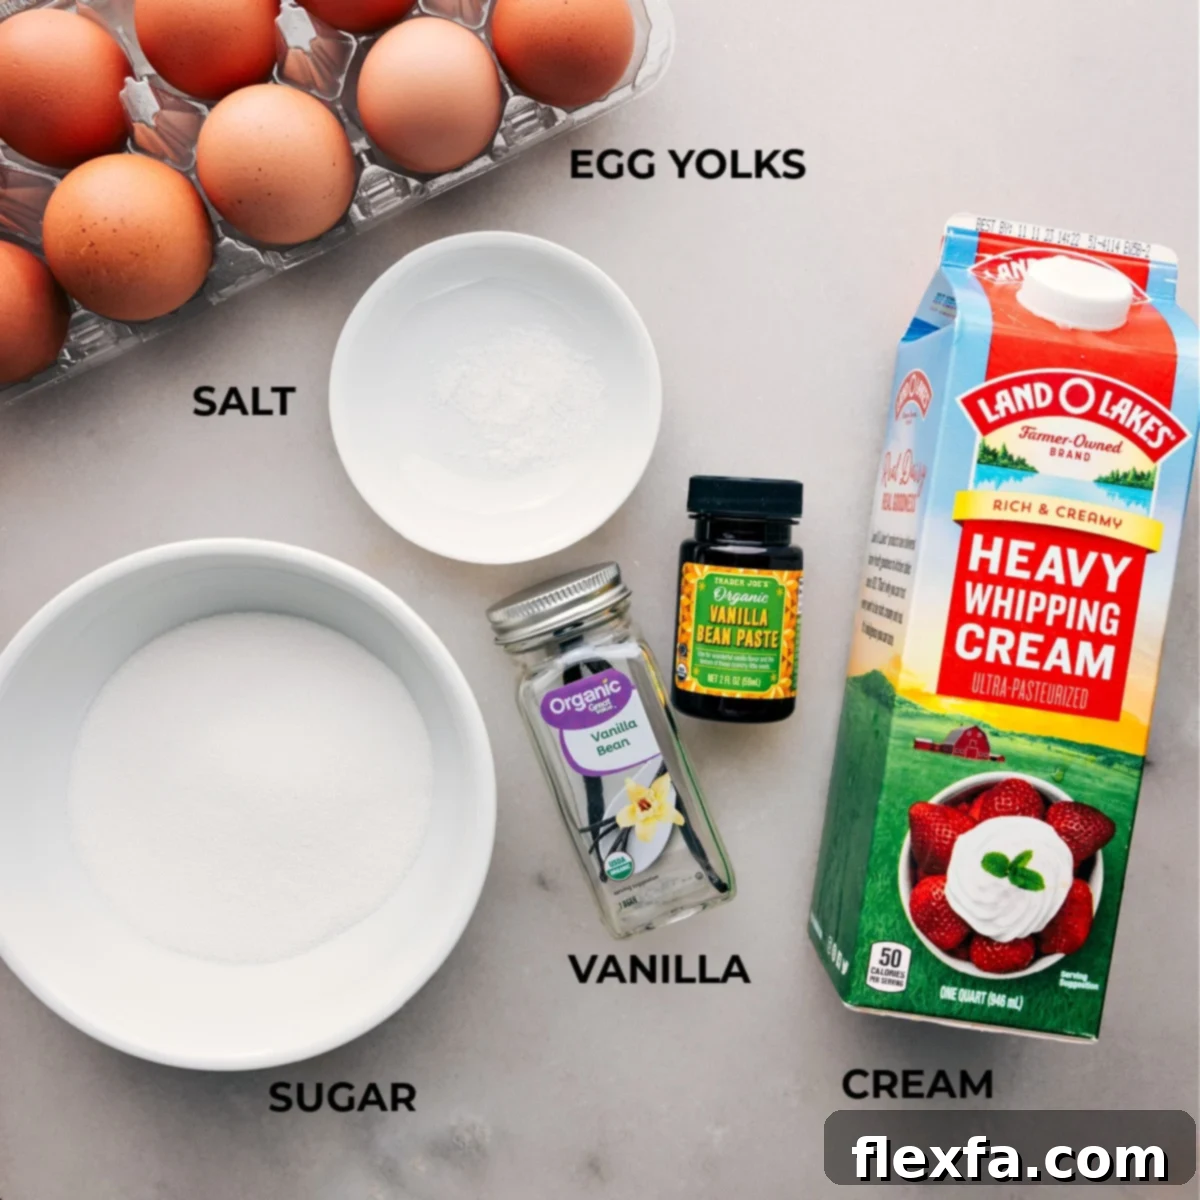
Crafting the perfect Crème Brûlée begins with a select few, high-quality ingredients. Each component plays a vital role in achieving that signature smooth custard and irresistible caramelized crust. You’ll be surprised at how such simple elements can combine to create a dessert of such sophisticated flavor and texture, proving that sometimes, less is indeed more when it comes to gourmet baking.
| Ingredient | Notes & Expert Swaps |
|---|---|
| Heavy Cream | This is the undisputed heart of your custard, providing unparalleled richness and a luxuriously silky texture. For the absolute best results, always opt for full-fat heavy cream or whipping cream. It’s crucial to avoid lighter alternatives like half-and-half or milk, as they contain significantly less fat and won’t allow your custard to set properly, leading to a disappointing runny consistency. The higher fat content is not just for flavor; it’s fundamental to the smooth, luxurious mouthfeel of authentic Crème Brûlée. |
| Egg Yolks | Egg yolks are indispensable for both the structural integrity and the opulent richness of the custard. They act as the primary emulsifier and thickener, giving the Crème Brûlée its characteristic body and delicate, quivering texture. For a vibrant, golden custard that truly shines, consider using organic or free-range egg yolks, which often boast a deeper, more appealing color. Don’t let the leftover egg whites go to waste! They can be frozen and reserved for other delicious recipes like meringues, angel food cake, or my delightful Meringue Cookies. |
| Granulated Sugar | Sugar serves a crucial dual purpose in this recipe: it provides the essential sweetness for the creamy custard and, most importantly, forms that iconic crisp, glass-like caramelized topping. While regular granulated sugar certainly works, for the absolute best, most uniform, and quickest caramelization, I highly recommend using superfine sugar (also known as caster sugar). Its finer crystals melt and caramelize more evenly and rapidly, resulting in a perfectly crackable crust with less risk of burning. |
| Vanilla | Vanilla is the quintessential and defining flavor for Crème Brûlée. For an intensely aromatic and visually stunning custard with tiny, beautiful flecks of vanilla bean throughout, a fresh vanilla bean is highly recommended. To use, simply split it lengthwise and scrape out the aromatic seeds to infuse the cream. If a vanilla bean isn’t readily available, a high-quality vanilla bean paste offers a similar depth of flavor and appealing flecked appearance. Pure vanilla extract is also a good and convenient alternative, though you might miss the visual flecks and some of the nuanced complexity. |
| Salt | Just a tiny pinch of fine sea salt makes a remarkably significant difference in the overall flavor profile. It acts as a masterful flavor enhancer, subtly balancing the sweetness of the sugar and cream, and bringing out the complex, delicate notes of the vanilla. Without this small addition, the dessert can sometimes taste a bit flat; with it, every spoonful is perfectly harmonious and wonderfully well-rounded. |
How to Make the Perfect Crème Brûlée: A Step-by-Step Guide
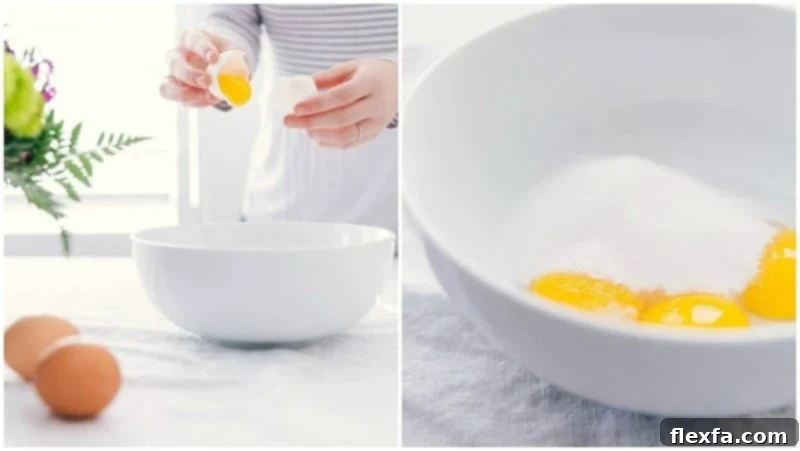
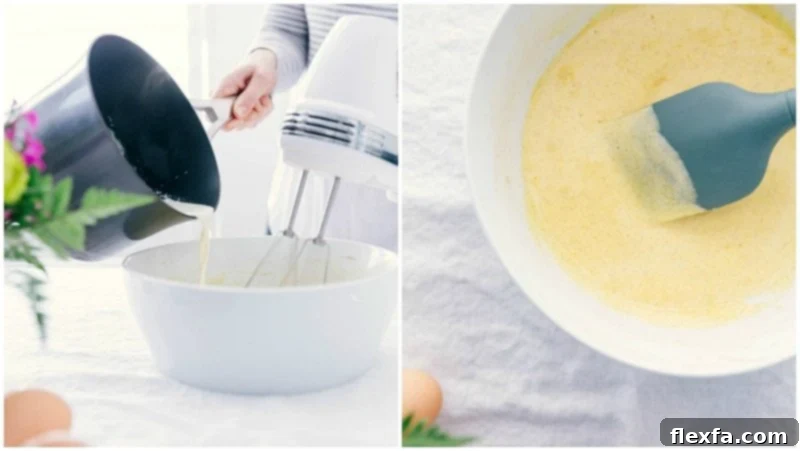
Creating this elegant French dessert is an enjoyable and gratifying process, especially when you understand the nuances of each step. Follow these detailed instructions to achieve a flawless Crème Brûlée with a creamy, melt-in-your-mouth interior and that signature, perfectly crisp sugar crust that everyone adores.
- Prepare Your Vanilla: If using a real vanilla bean, carefully slice it open lengthwise with a sharp paring knife. Use the back of the knife to gently scrape out the tiny, fragrant black seeds. Place these precious seeds into a large, heatproof mixing bowl. The empty vanilla pod will be added to your pot with the cream for optimal infusion. If you’re opting for vanilla paste or extract, simply measure it out and set aside; it will be stirred into the cream later.
- Infuse the Cream: In a medium saucepan, combine the heavy cream, the scraped vanilla pod (if using), and a pinch of salt. Heat this mixture over low to medium-low heat, stirring gently and occasionally, until it just barely simmers. You’ll notice small, wispy bubbles forming around the edges of the pan, and the cream will become wonderfully fragrant with vanilla. It’s crucial not to let it come to a rolling boil, as this can scorch the cream. Once warmed and infused, remove the saucepan from the heat and carefully discard the vanilla pod. If using vanilla extract or paste, stir it into the warmed cream now to incorporate its flavor.
- Create the Egg Base: In the large bowl containing your vanilla seeds (or just an empty bowl if using extract/paste), add the egg yolks and 1/2 cup of granulated sugar. Whisk these ingredients together by hand until they are well combined, and the mixture appears pale yellow and slightly thickened. The goal is to emulsify them smoothly; avoid over-whisking vigorously, as incorporating too much air can lead to a foamy custard that might not set as smoothly. Simultaneously, if you haven’t already, begin bringing 6 cups of water to a boil in a separate kettle or pot for the water bath.
- Temper the Eggs: This is a critical step to prevent the egg yolks from scrambling when combined with the hot cream. While continuously whisking the egg yolk and sugar mixture at a slow, steady pace, gradually pour about a quarter of the warm vanilla cream into the egg mixture. Whisk thoroughly until fully combined. This step slowly and gently raises the temperature of the eggs without cooking them prematurely. Continue to gradually pour in the remaining warm cream mixture, whisking consistently until the entire custard base is smooth and homogeneous. For an ultra-silky, perfectly smooth custard, consider straining the mixture through a fine-mesh sieve into a clean bowl; this removes any tiny bits of cooked egg or vanilla pod.
- Prepare the Water Bath and Bake: Preheat your oven to 325°F (160°C). Arrange your chosen ramekins (4-, 5-, or 6-ounce sizes work best for individual servings) evenly in a larger 9×13-inch baking pan. Carefully pour the smooth custard mixture into each ramekin, filling them almost to the very top, leaving just a tiny bit of space. Now, gently and carefully pour the boiling water into the larger baking pan, surrounding the ramekins. The water should come about halfway up the sides of the ramekins. This essential water bath creates a moist, even cooking environment, which is paramount for preventing the custards from cracking and ensures they bake into a silky-smooth, creamy texture.
- Bake and Chill: Carefully transfer the baking pan with the water bath and ramekins to your preheated oven. Bake for 30–35 minutes. The custards are perfectly done when the edges appear set and firm, but the center still retains a slight, delicate jiggle when you gently shake the pan. Overbaking will result in a grainy or rubbery texture, so trust the jiggle! Once baked, carefully remove the ramekins from the hot water bath (use tongs or an oven mitt to lift them out) and let them cool completely at room temperature on a wire rack. After cooling, transfer them to the refrigerator and chill for a minimum of 6–8 hours, or ideally, overnight. This extended chilling period is absolutely essential for the custard to fully set, firm up, and achieve its perfect, rich consistency. The custards can be stored, covered tightly with plastic wrap, in the fridge for up to 4–5 days before the final torching step.
- Caramelize and Serve: When you are ready to serve this delightful dessert, sprinkle the remaining 1/4 cup of granulated sugar evenly over the top surface of each thoroughly chilled custard. Gently swirl each ramekin to ensure a uniform coating of sugar; you can even tip any excess sugar from one ramekin into the next to ensure even distribution. Using a kitchen torch, carefully caramelize the sugar. Move the flame slowly and steadily across the sugar surface until it melts, bubbles, and transforms into a beautiful golden-amber color, or even slightly charred in spots for a deeper, more complex flavor. The goal is a uniform, crisp, and glass-like layer that will shatter upon impact. Be extremely careful not to burn the sugar excessively, as it will taste bitter. Garnish immediately with fresh berries (such as raspberries, blueberries, or sliced strawberries) for a vibrant burst of color and refreshing counterpoint, then serve without delay to enjoy the exquisite contrast of the warm, crackling sugar and the cold, creamy custard beneath.
Quick Tip: Achieving the Perfect Crème Brûlée Texture
The ideal Crème Brûlée should possess a luxurious, thick, and velvety consistency, strikingly similar to that of a full-fat Greek yogurt or a perfectly set panna cotta. Its texture should be incredibly smooth and melt-in-your-mouth rich, entirely devoid of any graininess or rubberiness. The flavor profile is a harmonious and delicate blend of creamy sweetness infused with the deep, nuanced notes of vanilla, all complemented by the satisfying bittersweet crunch of the freshly caramelized sugar topping. This delicate balance of rich textures and complex flavors is precisely what makes Crème Brûlée an iconic and universally adored dessert.
Expert Tips for Crème Brûlée Success
Even though this recipe is designed to be foolproof, a few expert tips can truly elevate your Crème Brûlée from simply good to absolutely spectacular. Paying close attention to these small details will ensure consistently perfect, professional-quality results every single time you bake this classic French dessert.
- Ramekin Size Matters Significantly: For individual servings and optimal baking, using 4-, 5-, or 6-ounce ramekins is ideal. These sizes allow for a perfect custard-to-sugar crust ratio. Using larger ramekins will naturally result in thicker custards, which will, in turn, require a longer baking time. Always ensure that all your ramekins are roughly the same size to promote uniform baking and setting.
- High-Quality, Room Temperature Egg Yolks: The color and richness of your finished custard are greatly influenced by the quality of your egg yolks. Organic or free-range egg yolks, which often have a deeper, more vibrant orange hue, will yield a visually appealing, richer-looking custard. Critically, always ensure your egg yolks are at room temperature before mixing. This prevents curdling when combined with warm cream and ensures a smoother, more homogeneous custard base.
- The Best Vanilla for Flavor: While good quality vanilla extract or paste certainly works well, a real vanilla bean truly delivers the most exceptional flavor and adds those beautiful, tell-tale black specks that signify a gourmet dessert. If you’re using a bean, maximize flavor extraction by infusing the empty pod in the cream as well as adding the scraped seeds.
- Mastering Tempering Eggs: To prevent your delicate egg yolks from scrambling when combined with the hot cream, the tempering process is absolutely crucial. Slowly pour a small amount (about a quarter) of the hot cream into the whisked egg yolks first, while continuously whisking vigorously. This vital step gradually raises the temperature of the eggs, preventing a sudden temperature shock. Only after this initial tempering should you slowly incorporate the rest of the warm cream, whisking constantly until the mixture is smooth.
- Superfine Sugar for the Perfect Topping: For the most consistent, crispiest, and quickest caramelized layer, superfine sugar (also known as caster sugar) is highly recommended. Its smaller, more uniform crystals melt and caramelize far more evenly and rapidly than regular granulated sugar, significantly minimizing the risk of burning the sugar or inadvertently heating the cold custard too much beneath the torch.
- The Unwavering Importance of a Water Bath: Baking Crème Brûlée in a water bath (known as a bain-marie) is non-negotiable for achieving a silky-smooth custard that is entirely free of cracks on its surface. The water bath ensures an incredibly even, gentle cooking process, preventing the edges of the custard from over-baking and becoming rubbery before the center is perfectly set. Be extremely careful not to get any water into the custards themselves during placement. For more detailed insights on the technique of a water bath, you can consult trusted culinary resources like America’s Test Kitchen.
- Patient Chilling is Essential: Do not, under any circumstances, rush the chilling process! Your Crème Brûlée requires a minimum of 6–8 hours in the refrigerator to fully set and develop its perfect, firm-yet-creamy texture. Overnight chilling is often even better, allowing the flavors to meld beautifully. Attempting to caramelize the sugar on custards that are warm or insufficiently chilled will invariably result in a soupy, disappointing mess as the heat from the torch melts the custard instead of just caramelizing the sugar.
Essential Crème Brûlée Tools
While Crème Brûlée might seem like a complex, professional-level dessert, the specialty tools required are quite minimal and often reusable for a variety of other culinary adventures. Having the right equipment on hand ensures a smoother, more efficient preparation process and helps you achieve those coveted, professional-looking results every time.
- Ramekins: These individual ceramic dishes are absolutely perfect for single servings of custard and are essential for achieving that ideal, uniform caramelized crust. I personally use and highly recommend durable 4- to 6-ounce ceramic ramekins, which are versatile for many other baked and chilled desserts.
- Kitchen Torch: An absolute essential for creating the signature crackly sugar top that defines Crème Brûlée. While an oven broiler can be an alternative in a pinch (see notes below), a kitchen torch offers precise, direct control, allowing you to caramelize the sugar quickly and effectively without unduly heating the cold custard beneath. This is my favorite kitchen torch for consistent, professional-grade results.
- 9×13-inch Baking Pan: This standard-size baking pan is crucial for holding your ramekins and creating the vital water bath (bain-marie) that ensures your custards bake evenly and achieve their silky texture without any unsightly cracks or overcooked edges.
- Whisk: A good quality wire whisk is fundamental for smoothly combining the egg yolks and sugar, and for the delicate, continuous action required to temper the cream into the egg mixture. A balloon whisk works best for incorporating air gently.
- Fine-Mesh Sieve: (Optional but highly recommended for perfectionists) Straining your custard mixture through a fine-mesh sieve before pouring it into the ramekins helps to remove any tiny bits of cooked egg, vanilla pod remnants, or other impurities, ensuring an incredibly smooth, lump-free, and impeccably uniform texture in your finished Crème Brûlée.
What to Serve with Crème Brûlée: Complementary Pairings
While Crème Brûlée is an utterly complete and decadent dessert on its own, certain thoughtful accompaniments can further elevate the experience and provide a delightful contrast in flavor or texture. Here are a few perfect pairings to consider for your next gourmet serving:
Desserts
How to Make Perfect Whipped Cream
Desserts
Classic Soft Shortbread Cookies
Desserts
Simple Homemade Vanilla Frozen Yogurt
Garnishes
Fresh Berries & Mint Garnish
Overall Rating: 4.9/5 stars based on 56 reviews
The Ultimate Crème Brûlée Recipe
Chelsea Lords
Unlock the secrets to a truly exceptional Crème Brûlée with this easy-to-follow recipe, straight from a seasoned pastry chef. Featuring a lusciously creamy vanilla custard and a show-stopping caramelized sugar crust, this classic French dessert is guaranteed to impress. It’s elegant, deceptively simple to prepare, and perfect for any special occasion or a luxurious weeknight treat.
20 minutes
30 minutes
8 hours
8 hours 50 minutes
5 (5-ounce) ramekins, 6 (4-ounce) ramekins, or 4 (6-ounce) ramekins

Equipment
- Ramekins (4-, 5-, or 6-ounce)
- Kitchen torch (or oven broiler for alternative method)
- Medium saucepan
- 9 x 13-inch baking pan
- Large mixing bowls
- Whisk
- Fine-mesh sieve (optional, for ultra-smooth custard)
Ingredients
(Yields approximately 5-6 servings)
- 1 full vanilla bean (alternatively, 1/2 tablespoon pure vanilla extract or 1 teaspoon vanilla bean paste)
- 1/4 teaspoon fine sea salt
- 2 cups heavy cream (ensure it’s full fat for best results, no half-and-half)
- 5 large egg yolks (must be at room temperature)
- 3/4 cup granulated sugar (divided: 1/2 cup for the custard, 1/4 cup for the topping; superfine sugar preferred for topping)
- 6 cups hot water (for the water bath)
- Fresh berries (optional, for serving and garnish)
Instructions
- Preheat Oven: Preheat your oven to 325°F (160°C).
- Infuse Cream with Vanilla: If using a vanilla bean, slice it open and scrape the seeds into a large heatproof bowl. Place the empty pod in a medium saucepan with the heavy cream and salt. Heat the cream mixture over low heat until it just barely simmers (small bubbles around the edge) for about 10 minutes, without boiling. Remove from heat and discard the vanilla pod. If using vanilla extract or paste, stir it into the warm cream now.
- Prepare Egg Base: In the bowl with vanilla seeds (or an empty bowl), add the egg yolks and 1/2 cup of granulated sugar. Whisk by hand until combined and slightly pale; avoid over-whisking.
- Temper the Custard: While continuously whisking the egg mixture slowly, gradually pour about 1/4 of the warm cream mixture into the egg and sugar blend. Whisk until fully combined. Then, slowly pour in the remaining cream mixture, whisking consistently until the custard base is smooth. For a silky custard, strain through a fine-mesh sieve.
- Set Up Water Bath & Fill Ramekins: Arrange 5-6 ramekins in a 9×13-inch baking pan. Carefully pour the custard mixture into the ramekins, filling almost to the top. Bring 6 cups of water to a boil. Gently pour the boiling water into the larger baking pan, surrounding the ramekins, until the water comes halfway up their sides.
- Bake & Chill: Carefully transfer the pan to the preheated oven. Bake for 30–35 minutes, or until the edges are set and the center has a slight jiggle. Remove ramekins from the water bath and cool completely at room temperature. Once cool, transfer to the refrigerator and chill for at least 6–8 hours, or overnight, for optimal texture.
- Caramelize & Serve: Just before serving, sprinkle the remaining 1/4 cup sugar evenly over each chilled custard. Swirl to coat. Using a kitchen torch, caramelize the sugar until it melts, bubbles, and turns golden-amber. Garnish with fresh berries and serve immediately.
- Alternative Caramelization (No Torch): If you don’t have a torch, ensure brûlées are chilled for at least 24 hours. Position an oven rack to the topmost setting and preheat your broiler to high. Place sugar-topped custards on a baking sheet on the top rack and broil for 1–3 minutes, watching *very closely* to prevent burning. Remove once golden, then refrigerate for 10–20 minutes to allow the custard to re-firm slightly before serving.
Recipe Notes
- Ramekins & Torch: The ramekins I use and love are essential for individual portions. My favorite kitchen torch ensures a perfect crust every time.
- Room Temperature Eggs: To quickly bring eggs to room temperature, immerse un-cracked eggs in warm (not hot) water for 3–5 minutes. Alternatively, separate cold eggs and allow the yolks to sit at room temperature in a bowl for about 15-20 minutes.
- Storage: Once cooled, cover each Crème Brûlée dish tightly with plastic wrap to prevent a skin from forming and store them in the refrigerator for up to 2-3 days before adding the sugar topping. Once topped with caramelized sugar, they are best served immediately for optimal crunch.
Nutrition Information
Serving: 1 serving | Calories: 500kcal | Carbohydrates: 33g | Protein: 5g | Fat: 40g | Saturated Fat: 24g | Cholesterol: 315mg | Sodium: 175mg | Potassium: 90mg | Sugar: 30g | Vitamin A: 1645IU | Vitamin C: 1mg | Calcium: 92mg | Iron: 1mg
Nutrition information is automatically calculated and should be considered an approximation. Individual results may vary based on exact ingredients and portion sizes used.
Love this recipe? Share your thoughts below!
Your feedback helps others discover and enjoy delicious desserts.
Crème Brûlée Recipe FAQs
Got burning questions about making Crème Brûlée? Here are some frequently asked questions and their comprehensive answers to help you master this classic French dessert with confidence and ease.
Crème Brûlée is traditionally served cool or at room temperature, making it a delightfully refreshing dessert. The custard base is always chilled thoroughly in the refrigerator for several hours (or ideally, overnight) to achieve its firm, creamy, and distinctively cold texture. The iconic sugar topping, however, is caramelized using a kitchen torch just moments before serving. This process creates a warm, crisp, and slightly melted layer that provides an exquisite textural and temperature contrast with the cold custard beneath. It is definitely not served hot throughout the entire dessert.
The key to a perfectly baked Crème Brûlée custard is removing it from the oven at precisely the right moment to avoid overcooking. The custard is done when the edges appear visibly set and firm, but the center still retains a slight, delicate jiggle. This gentle jiggle is exactly what you’re looking for! It signifies that the custard is cooked through but not overdone. The residual heat from the ramekins and the surrounding environment will continue to cook the custard slightly as it cools, and it will firm up completely during the essential chilling process in the refrigerator. Overbaking, on the other hand, can lead to a rubbery, grainy, or curdled texture, so always err on the side of a slight jiggle in the center.
Yes, absolutely! You can achieve a beautiful caramelized topping without a specialized kitchen torch by cleverly utilizing your oven’s broiler function. To do this effectively, ensure your Crème Brûlées are thoroughly chilled (preferably for at least 24 hours to ensure they are very cold, which helps prevent the custard from heating up too much). Position an oven rack on the topmost shelf, as close to the broiler element as possible, and preheat your broiler to high. Sprinkle a generous, even layer of superfine sugar over the top of each chilled custard. Place the sugar-topped custards on a sturdy baking sheet on the top rack and broil for a very short period, typically 1–3 minutes. It is crucial to watch them *continuously* during this time, as sugar can go from perfectly caramelized to completely burnt in a matter of mere seconds. Once the sugar has melted, bubbled, and transformed into a rich golden-brown, remove them immediately. After broiling, refrigerate the Crème Brûlées for another 10–20 minutes to allow the custard to re-firm slightly and the sugar crust to fully harden before serving.
Absolutely! Crème Brûlée is an ideal make-ahead dessert, which is one of its most charming and convenient qualities, especially when planning for entertaining or special events. You can easily prepare and bake the custard, then chill it in the ramekins (covered tightly with plastic wrap to prevent a skin from forming) in the refrigerator for up to 2-3 days in advance. The critical step is to add the sugar topping and caramelize it with the kitchen torch or broiler *just before* you are ready to serve. This ensures the sugar crust is perfectly crisp, warm, and crackly, providing that delightful contrast with the creamy, cold custard beneath. This flexibility allows you to focus on your guests and other meal preparations without any last-minute dessert stress.
Conclusion: Your Journey to Perfect Crème Brûlée
Mastering the art of Crème Brûlée might initially seem like a grand culinary achievement reserved for professional pastry chefs, but as you’ve discovered through this guide, it’s an accessible and incredibly rewarding process with the right guidance. From selecting the finest heavy cream and infusing it with fragrant vanilla to mastering the delicate technique of tempering eggs and achieving that signature, satisfyingly crackly sugar crust, every single step contributes to a dessert that is both elegantly sophisticated and deeply satisfying.
This comprehensive recipe, meticulously honed and shared by a seasoned pastry chef, strips away any intimidation, leaving you with a clear, straightforward path to creating a dessert that will earn you rave reviews and admiring glances. Whether you’re celebrating a special occasion, hosting a memorable dinner party, or simply indulging in a luxurious treat for yourself, this ultimate Crème Brûlée recipe promises a truly unforgettable experience. So, gather your ingredients, confidently fire up your torch, and prepare to delight your senses with this timeless French masterpiece. Bon appétit!