
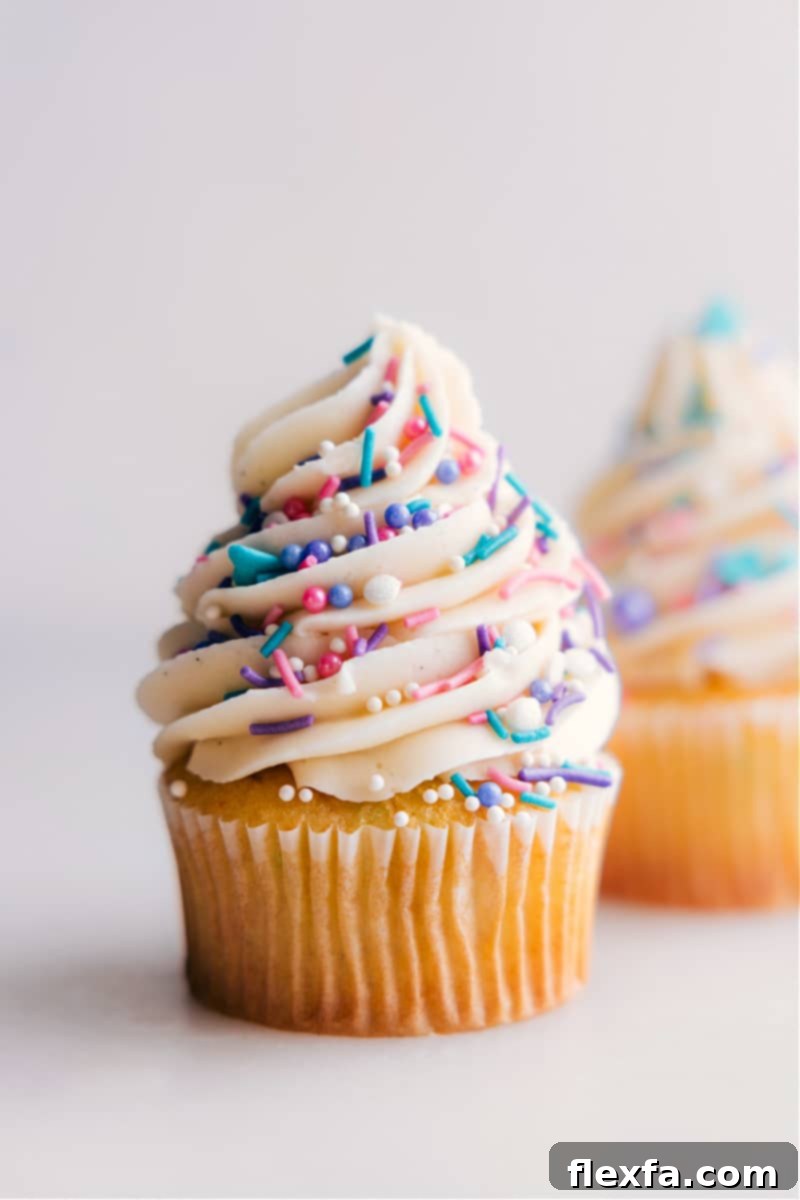
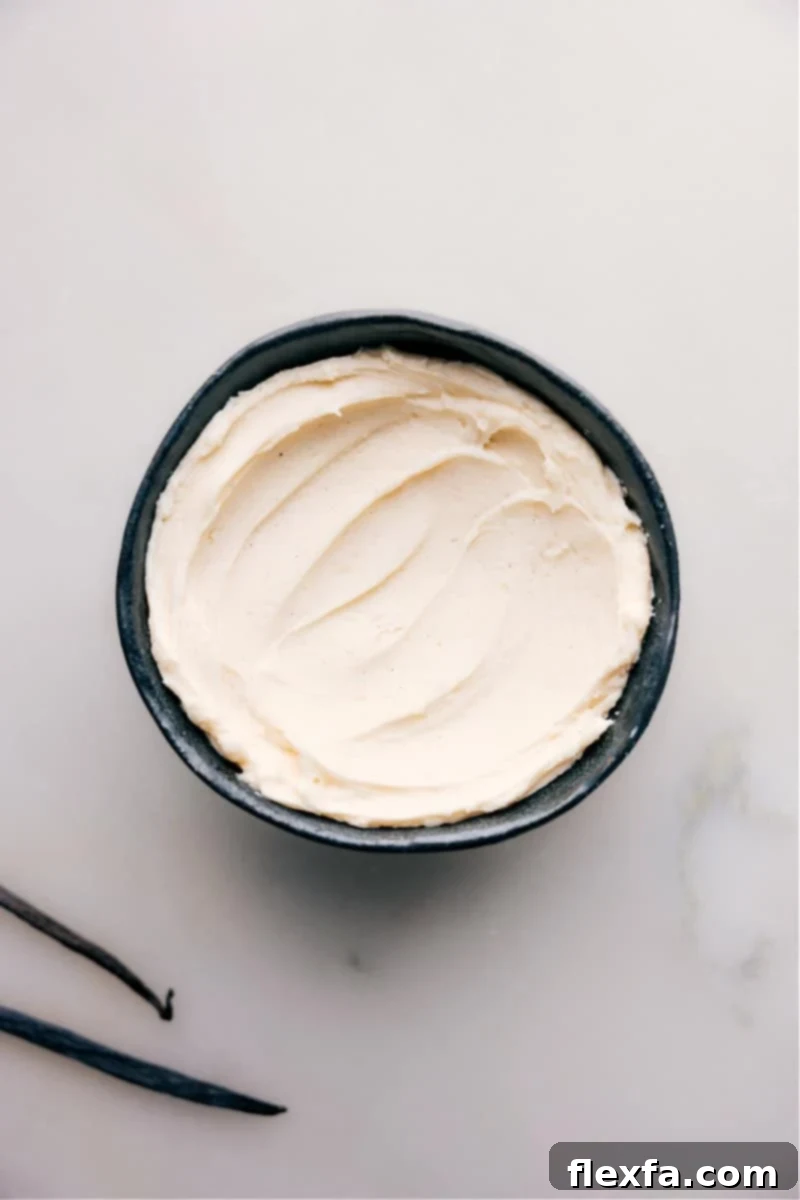
Welcome to the definitive guide for crafting the most delightful and **creamy Vanilla Frosting Recipe**! This essential topping, requiring just a handful of common ingredients, is incredibly smooth, delightfully simple to prepare, and exceptionally versatile for all your baking adventures. Whether you’re aiming for perfectly piped swirls on cupcakes or a silky-smooth layer on a classic cake, this recipe delivers consistent, beautiful results every time. It’s a foundational skill for any baker, promising to elevate your desserts with its rich flavor and impeccable texture.
For more delicious topping ideas, also explore these fantastic recipes: Cream Cheese Frosting, a tangy and sweet classic; Chocolate Buttercream Frosting, for the ultimate cocoa indulgence; or Peanut Butter Frosting, a rich and nutty delight.
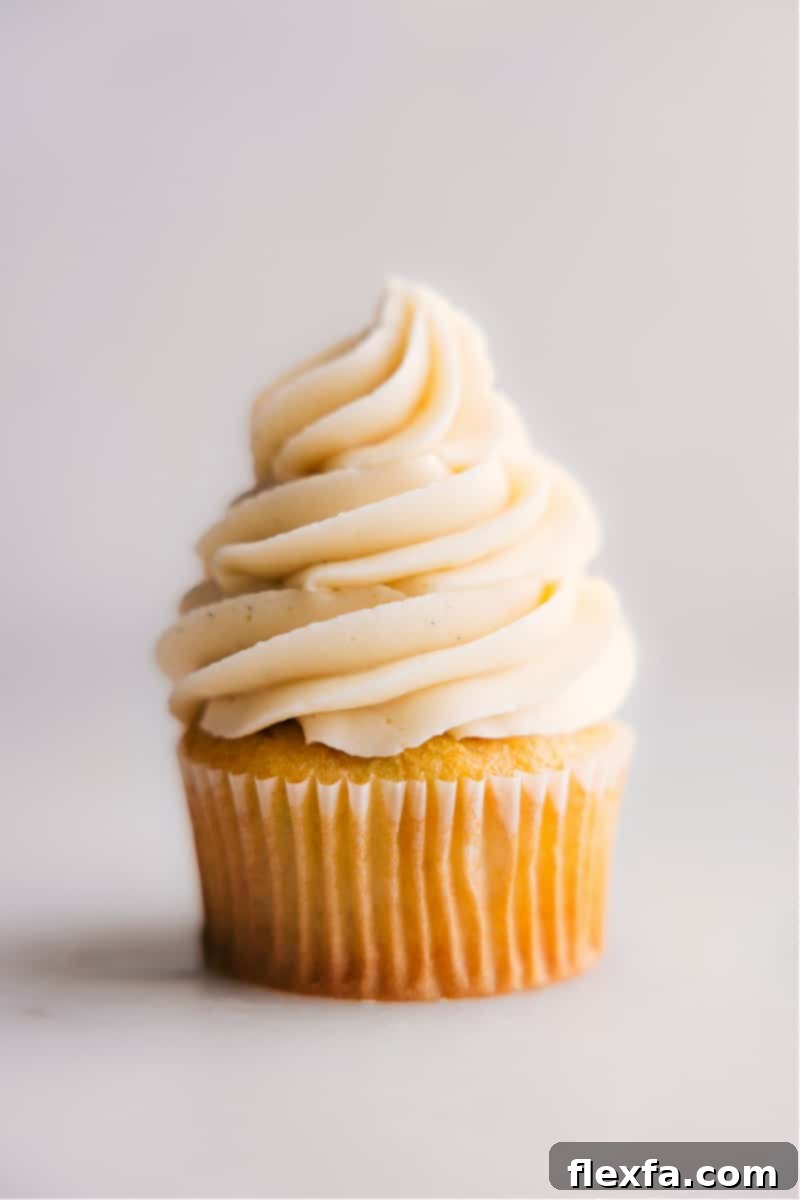
The Ultimate All-Purpose Vanilla Frosting Recipe
For years, this particular vanilla frosting has been my unwavering go-to. It’s one of those recipes that came so naturally, I never felt the need to formally write it down. Yet, time and again, after sharing cupcakes frosted with this very recipe at gatherings, I was met with countless requests: “Is this recipe on your blog?” “Can you share the exact details?” The overwhelming enthusiasm finally convinced me it was time to meticulously document the precise measurements that create such magic.
What makes this frosting truly special is its remarkable ease and adaptability. Crafted from simple pantry and refrigerator staples, it requires no fancy techniques or hard-to-find ingredients. You can effortlessly achieve a professional-quality frosting using either a trusty hand mixer or a robust stand mixer. This recipe isn’t just about taste; it’s about reliability. It offers a consistently smooth, pipeable texture that’s perfect for any decorating whim, from elegant swirls to intricate designs.
Beyond its simplicity, the true beauty of this vanilla frosting lies in its incredible versatility. It serves as a flawless canvas for customization, allowing you to easily incorporate food coloring for vibrant party themes or add festive sprinkles for holiday celebrations. It beautifully complements an array of dessert flavors—whether you’re topping a classic vanilla cake, a rich chocolate cupcake, a zesty lemon treat, or a vibrant strawberry dessert, this frosting enhances without overpowering. Consider this a core recipe, a true kitchen staple you’ll find yourself reaching for time and time again for every imaginable occasion.
Essential Ingredients for Perfect Vanilla Frosting
Creating a truly remarkable vanilla frosting starts with understanding the role each ingredient plays. Here’s a closer look at the simple components that come together to form this delightful topping:
- Unsalted Butter: The foundation of any great buttercream, unsalted butter provides the rich, creamy base. Using unsalted butter allows you to control the overall saltiness of your frosting. The most crucial tip here is to ensure your butter is at perfect room temperature. It should be soft enough to easily indent with your finger but still cool to the touch, not greasy or melted. Butter that is too cold will result in a lumpy, inconsistent frosting, while melted butter will make your frosting too thin and soupy.
- **Quick Butter Softening Tips:** If you’re short on time, you can cut butter into small pieces and let it sit for 15-20 minutes, or gently warm a glass with hot water, empty it, dry it, then place it over the butter for a few minutes. For a microwave, use 10% power for 8-second intervals, checking carefully each time to soften, not melt.
- Powdered Sugar (Confectioners’ Sugar): This fine sugar is what gives buttercream its signature smooth texture. Unlike granulated sugar, powdered sugar dissolves easily, preventing a gritty mouthfeel. To guarantee the silkiest frosting possible, I highly recommend sifting your powdered sugar. Even if it looks fine, it often contains small clumps that can lead to a less-than-perfect texture. Sifting ensures uniform distribution and a truly smooth finish.
- Heavy Cream: This is the secret to a rich, luscious, and incredibly creamy frosting. Heavy cream adds body and a velvety texture that plain milk simply can’t replicate. While you can substitute with milk or half-and-half in a pinch, be aware that these are thinner, so you’ll need to use less to achieve the desired consistency. Start with a smaller amount and add gradually until your frosting reaches perfection.
- Vanilla Extract or Vanilla Bean Paste: The star flavor of our frosting! High-quality vanilla is paramount here. Vanilla extract provides that classic, comforting aroma and taste. For an even more intense vanilla flavor and those beautiful tiny specks that signify true vanilla luxury, opt for vanilla bean paste. The choice can elevate your frosting from good to extraordinary.
- Salt: A small amount of fine salt is essential for balancing the sweetness of the sugar and enhancing all the other flavors. Think of it as a flavor enhancer; it prevents the frosting from being overly sugary and gives it a more complex, well-rounded taste. Use a fine-grained salt to ensure it dissolves smoothly into the mixture without leaving any discernible crystals. Adjust to your personal preference.
Mastering the Art of Vanilla Frosting: Step-by-Step Instructions & Pro Tips
Achieving the perfect creamy vanilla frosting is simpler than you might think. Follow these steps and tips for a consistently smooth and delicious result:
- Prepare Your Butter: Ensure your unsalted butter is perfectly at room temperature. It should be soft enough to mix easily without resistance, but crucially, it must not be melted or greasy. This balance is key to a stable and smooth frosting.
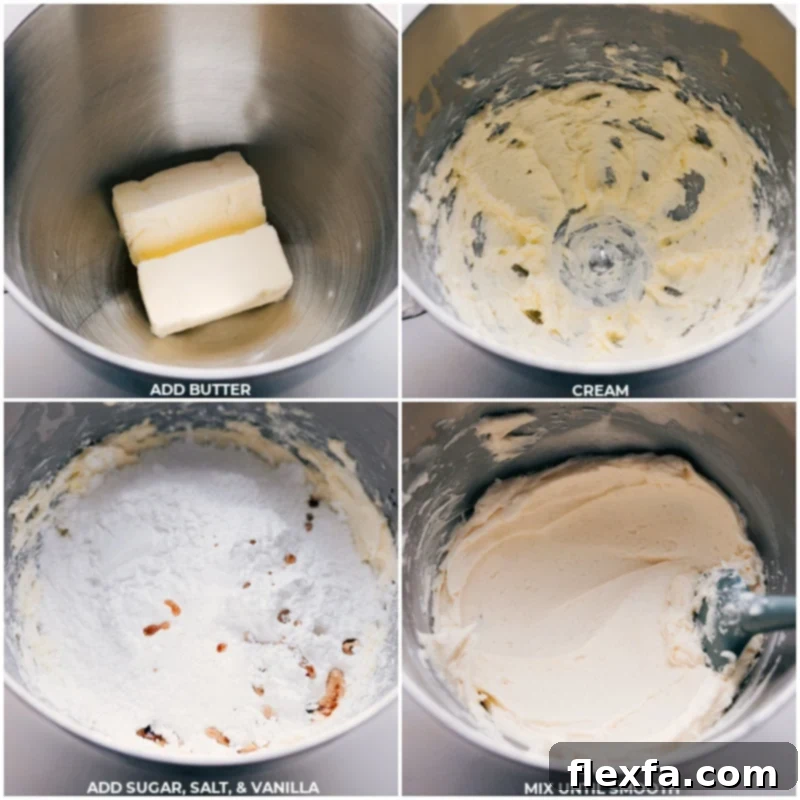
- Cream the Butter: In a stand mixer fitted with a paddle attachment, or using a large bowl and a hand mixer, beat the room temperature butter on medium speed. Continue mixing for 90 seconds to 2 minutes until it becomes light, fluffy, and visibly creamy. This step incorporates air, making the frosting light.
- Add Dry Ingredients: Reduce the mixer speed to low. Gradually add the sifted powdered sugar (to prevent lumps and cloud of sugar), vanilla extract (or paste), and salt to the creamed butter.
- Incorporate Cream Slowly: While the mixer is still on low speed, slowly begin adding the heavy cream, one tablespoon at a time. Start with the minimum recommended amount (4 tablespoons). Observe the consistency as you mix.
- Adjust Consistency: Once the initial liquid is incorporated, increase the mixer speed to medium-high and beat for several seconds. Stop the mixer, scrape down the sides and bottom of the bowl thoroughly with a spatula to ensure all ingredients are well combined. If the frosting appears too thick, add more cream (one tablespoon at a time) until it reaches your desired consistency. If it’s too thin or soft, gradually add more sifted powdered sugar (two tablespoons at a time) until it thickens properly.
- Achieve Ultimate Smoothness: Switch the mixer back to medium-high speed and beat for another 1-2 minutes. The goal is a truly smooth and creamy texture, but be careful not to over-whip it to the point where it becomes too airy, like whipped cream. A beautifully creamy frosting holds its shape well.
- Taste and Refine: Take a small taste of your frosting. This is your chance to make any final adjustments. If it’s too sweet, a tiny pinch more salt can balance it. If it needs more sweetness or flavor, add a touch more sugar or vanilla.
- Ready to Frost: Once your vanilla frosting is perfectly smooth, creamy, and balanced in flavor, it’s ready to use! This recipe generously yields enough frosting to cover a standard 9×13-inch sheet cake, perfectly frost a 2-layer 8 or 9-inch round cake, or beautifully ice 12 generously frosted cupcakes (or up to 24 more lightly frosted cupcakes).
Creative Ways to Enjoy Your Vanilla Frosting
This classic vanilla frosting is far more than just a cake topper. Its rich, creamy texture and delightful flavor make it incredibly versatile for a multitude of desserts. Here are some of our favorite creative ways to use it:
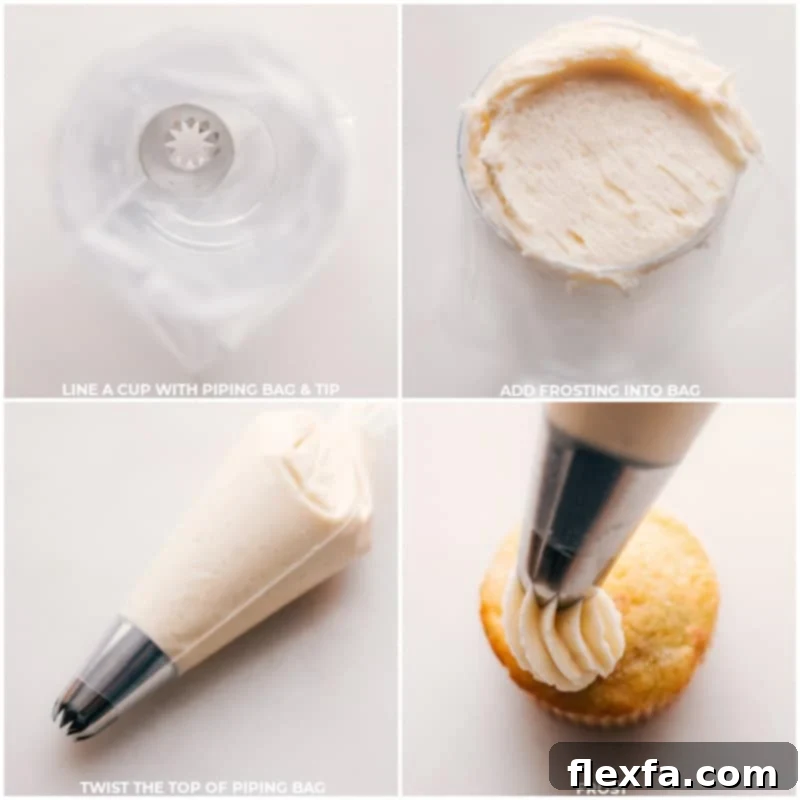
- Cakes and Cupcakes: The most obvious, yet always a winner! Spread it smoothly or pipe elaborate designs onto cooled cakes or cupcakes. It’s a dream companion for chocolate, vanilla, red velvet, Funfetti, lemon, or even carrot cake flavors. The smooth consistency makes piping a breeze.
- Cake Filling: Use this delicious frosting as a luscious filling between cake layers. It adds a wonderful burst of flavor and helps hold your cake tiers perfectly in place, creating a harmonious blend of cake and cream in every bite.
- Cookie Sandwiches: Transform ordinary cookies into extraordinary treats! Spread a generous layer of vanilla frosting between two of your favorite cookies—think chocolate chip, sugar cookies, or even Oreo Whoopie Pies. It’s a fun, interactive dessert that everyone loves.
- Brownies: Elevate a simple pan of brownies by frosting them once they’ve completely cooled. The combination of fudgy brownie and creamy vanilla frosting is simply irresistible and adds an extra layer of decadence.
- Doughnut Filling: Take your homemade or even store-bought doughnuts to the next level. Use a pastry bag with a long tip to inject this creamy vanilla frosting directly into the center of doughnuts for a delightful, unexpected burst of sweetness.
- Parfaits and Trifles: Layer this frosting with cubes of cake, crushed cookies, fresh berries, or chunks of brownies in clear glasses to create stunning and delicious parfaits or trifles. It adds a creamy, sweet element that ties all the layers together beautifully.
- Sweet Dip: Who says frosting is just for cakes? Serve it in a bowl as a decadent sweet dip for fresh fruits like strawberries and apple slices, pretzels for a sweet and salty crunch, graham crackers, or shortbread cookies. It’s a wonderfully indulgent treat for parties or a cozy night in.
Storing Your Homemade Vanilla Frosting
One of the best things about this vanilla frosting is that it can be made ahead of time, making your baking schedule much more flexible. Proper storage ensures your frosting remains fresh and delicious for future use:
Keep leftover Vanilla Frosting in a sealed, airtight container. It will stay fresh in the **fridge for up to a week**, or you can extend its life by freezing it for **up to three months**. If you choose to freeze it, ensure it’s in a freezer-safe container to prevent freezer burn.
When you’re ready to use refrigerated or frozen frosting, allow it to thaw completely in the refrigerator (if frozen) and then bring it to room temperature on your countertop for about an hour. Once it’s softened, give it a good stir or re-whip it with your mixer on medium speed for a minute or two until it returns to its smooth, creamy, and pipeable consistency. This step is crucial to revive its texture and ensure it’s as perfect as when it was freshly made.
If you’re making the frosting ahead of an event, storing it in the fridge is ideal. Just remember to pull it out about an hour before you plan to use it and give it a quick stir or re-wbeat to get that perfect consistency back.
More Dessert Recipes:
- Lemon Icebox Cake, a refreshing treat with only four ingredients!
- Dessert Cheese Ball in a delightful brownie-batter flavor.
- Swig Sugar Cookies, made even better with vanilla frosting!
- Cinnamon Roll Cake, a quick and easy recipe made in just 30 minutes, no dough rising required!
- Brookies, the ultimate mash-up of rich brownies and chewy cookies in one irresistible dessert.
Vanilla Frosting
Chelsea Lords
20 minutes
20 minutes
12
cupcakes (see note 1)
Equipment
-
Stand mixer or hand mixer
Ingredients
- 16 tablespoons unsalted butter softened to room temperature, see note 2
- 4-1/2 cups powdered sugar up to 5 cups, see note 3
- 4 to 6 tablespoons heavy cream or milk in a pinch, see note 4
-
1-1/2 teaspoons
vanilla bean paste
or 2 teaspoons vanilla extract -
1/8 teaspoon
salt
Instructions
-
In a stand mixer fitted with a paddle attachment, or in an extra-large bowl using hand mixers, beat the room temperature butter on medium speed until creamy, 90 seconds to 2 minutes.
-
Add powdered sugar, vanilla extract, and salt. Beat on low speed, gradually adding cream 1 tablespoon at a time (begin with 4 tablespoons).
-
Switch mixer to medium-high speed and beat for several seconds until the liquid is whipped into the frosting. Turn off mixer and scrape the sides and bottom. Adjust consistency by adding more cream (1 tablespoon at a time) if frosting is too thick or more powdered sugar (2 tablespoons at a time) if frosting is too soft.
-
Switch mixer to medium-high speed, beating for 1–2 minutes until frosting is smooth and creamy (but not whipped!). Taste and adjust for salt and sweetness.
Recipe Notes
Note 2: Butter should be at room temperature, but not at all melted. If it’s too soft or melted, the frosting could turn out too loose. If the butter is too cold or hard, it will be difficult to mix with the other ingredients and could create lumps. Room-temperature butter should still feel cool to the touch, hold its shape, but yield to slight pressure. (See post for how to soften butter quickly if needed.)
Note 3: Start with 4-1/2 cups of powdered sugar and add more as needed to achieve the desired sweetness and consistency. Ensure the measuring cups are fully filled with powdered sugar and use the back of a kitchen knife to level off the top when measuring for this recipe. For an ultra-smooth frosting, sift the powdered sugar. (Confession: I usually don’t bother!)
Note 4: Cream works best (superior flavor and texture), but milk can be used as a substitute if necessary. You’ll need less milk than cream (it’s not as thick), so add slowly until consistency is reached.
Nutrition Note: Nutrition information is calculated based on 12 servings—enough to frost one cupcake.
Storage: If not using immediately, store in an airtight container at room temperature for up to 2 days or refrigerate for 5–7 days. Before use, allow it to return to room temperature and re-mix to achieve the right consistency.
Nutrition
Serving:
1
serving
|
Calories:
364
kcal
|
Carbohydrates:
50
g
|
Protein:
0.4
g
|
Fat:
19
g
|
Saturated Fat:
12
g
|
Polyunsaturated Fat:
1
g
|
Monounsaturated Fat:
5
g
|
Trans Fat:
1
g
|
Cholesterol:
51
mg
|
Sodium:
29
mg
|
Potassium:
13
mg
|
Sugar:
50
g
|
Vitamin A:
603
IU
|
Vitamin C:
0.05
mg
|
Calcium:
10
mg
|
Iron:
0.04
mg
Nutrition information is automatically calculated, so should only be used as an approximation.
Like this? Leave a comment below!