
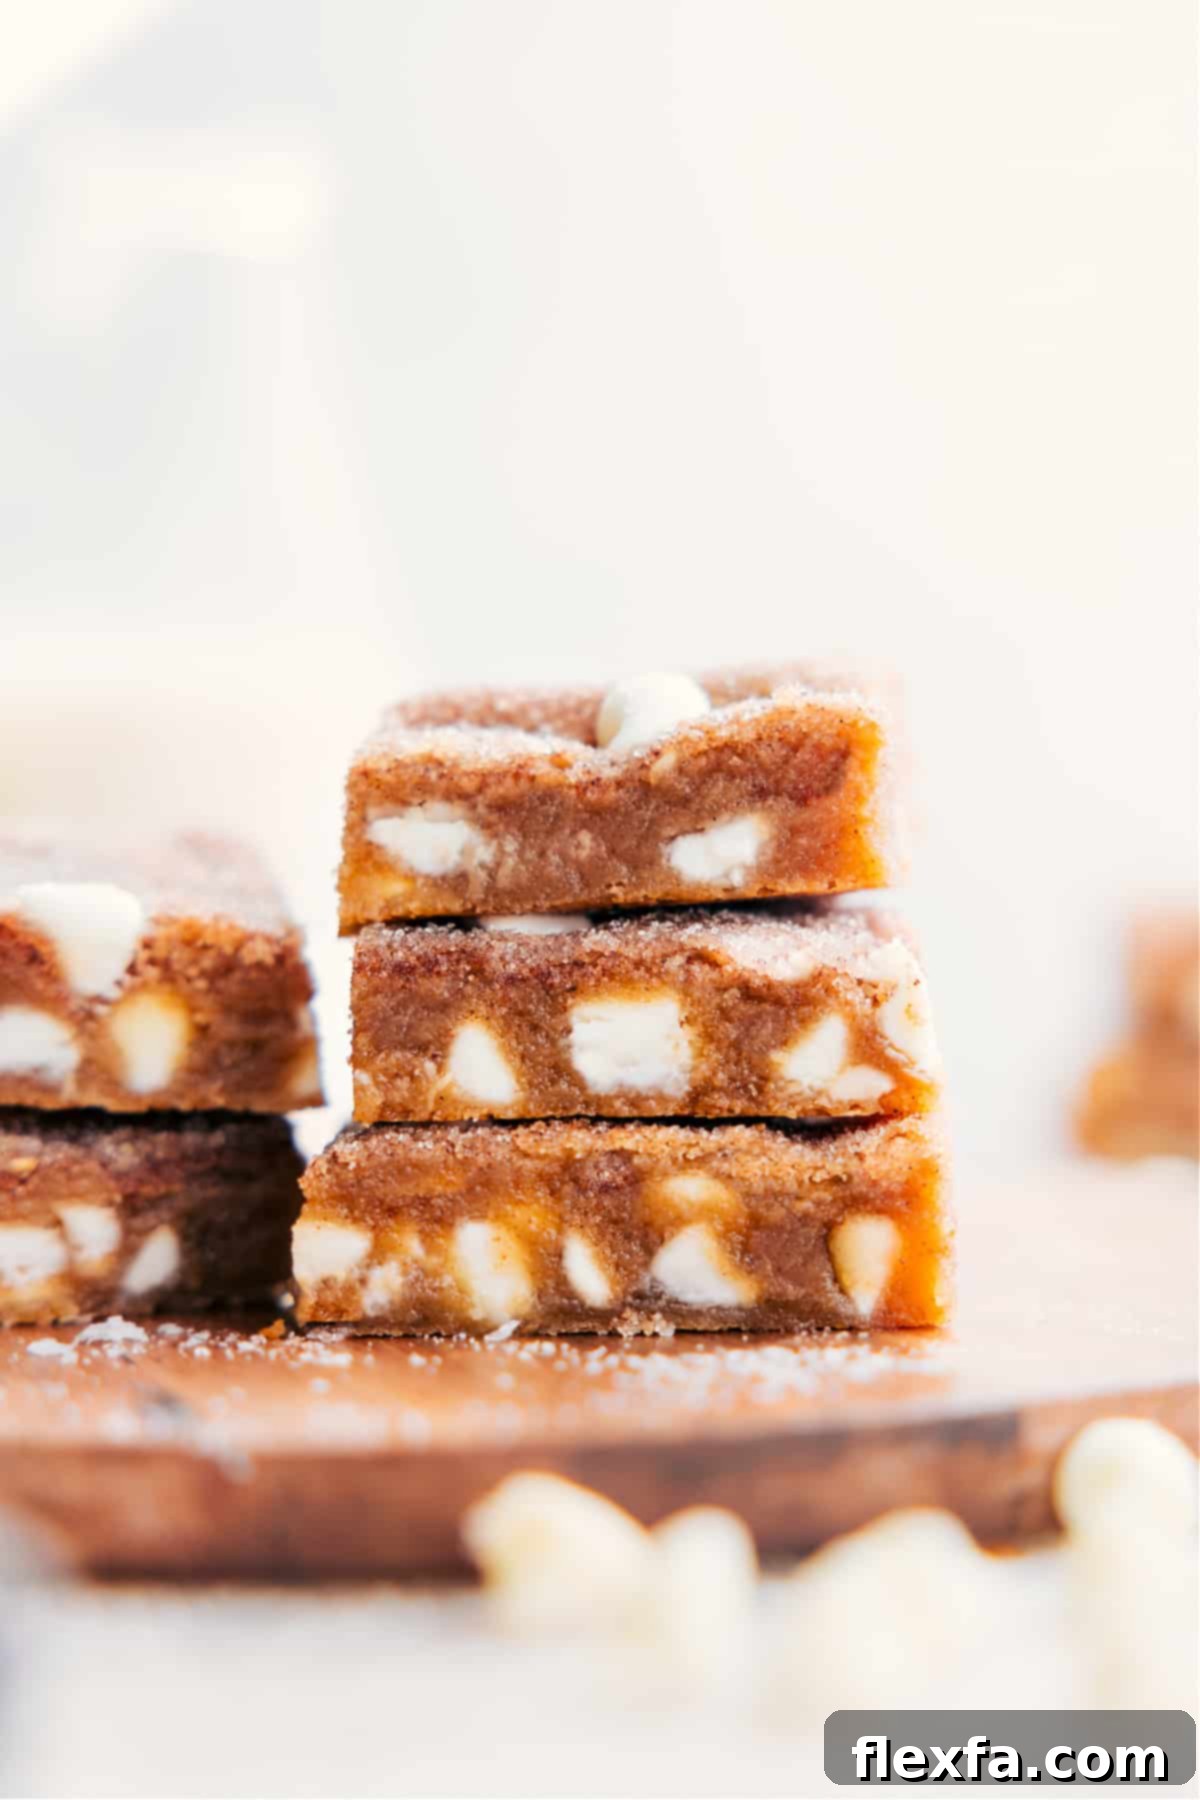
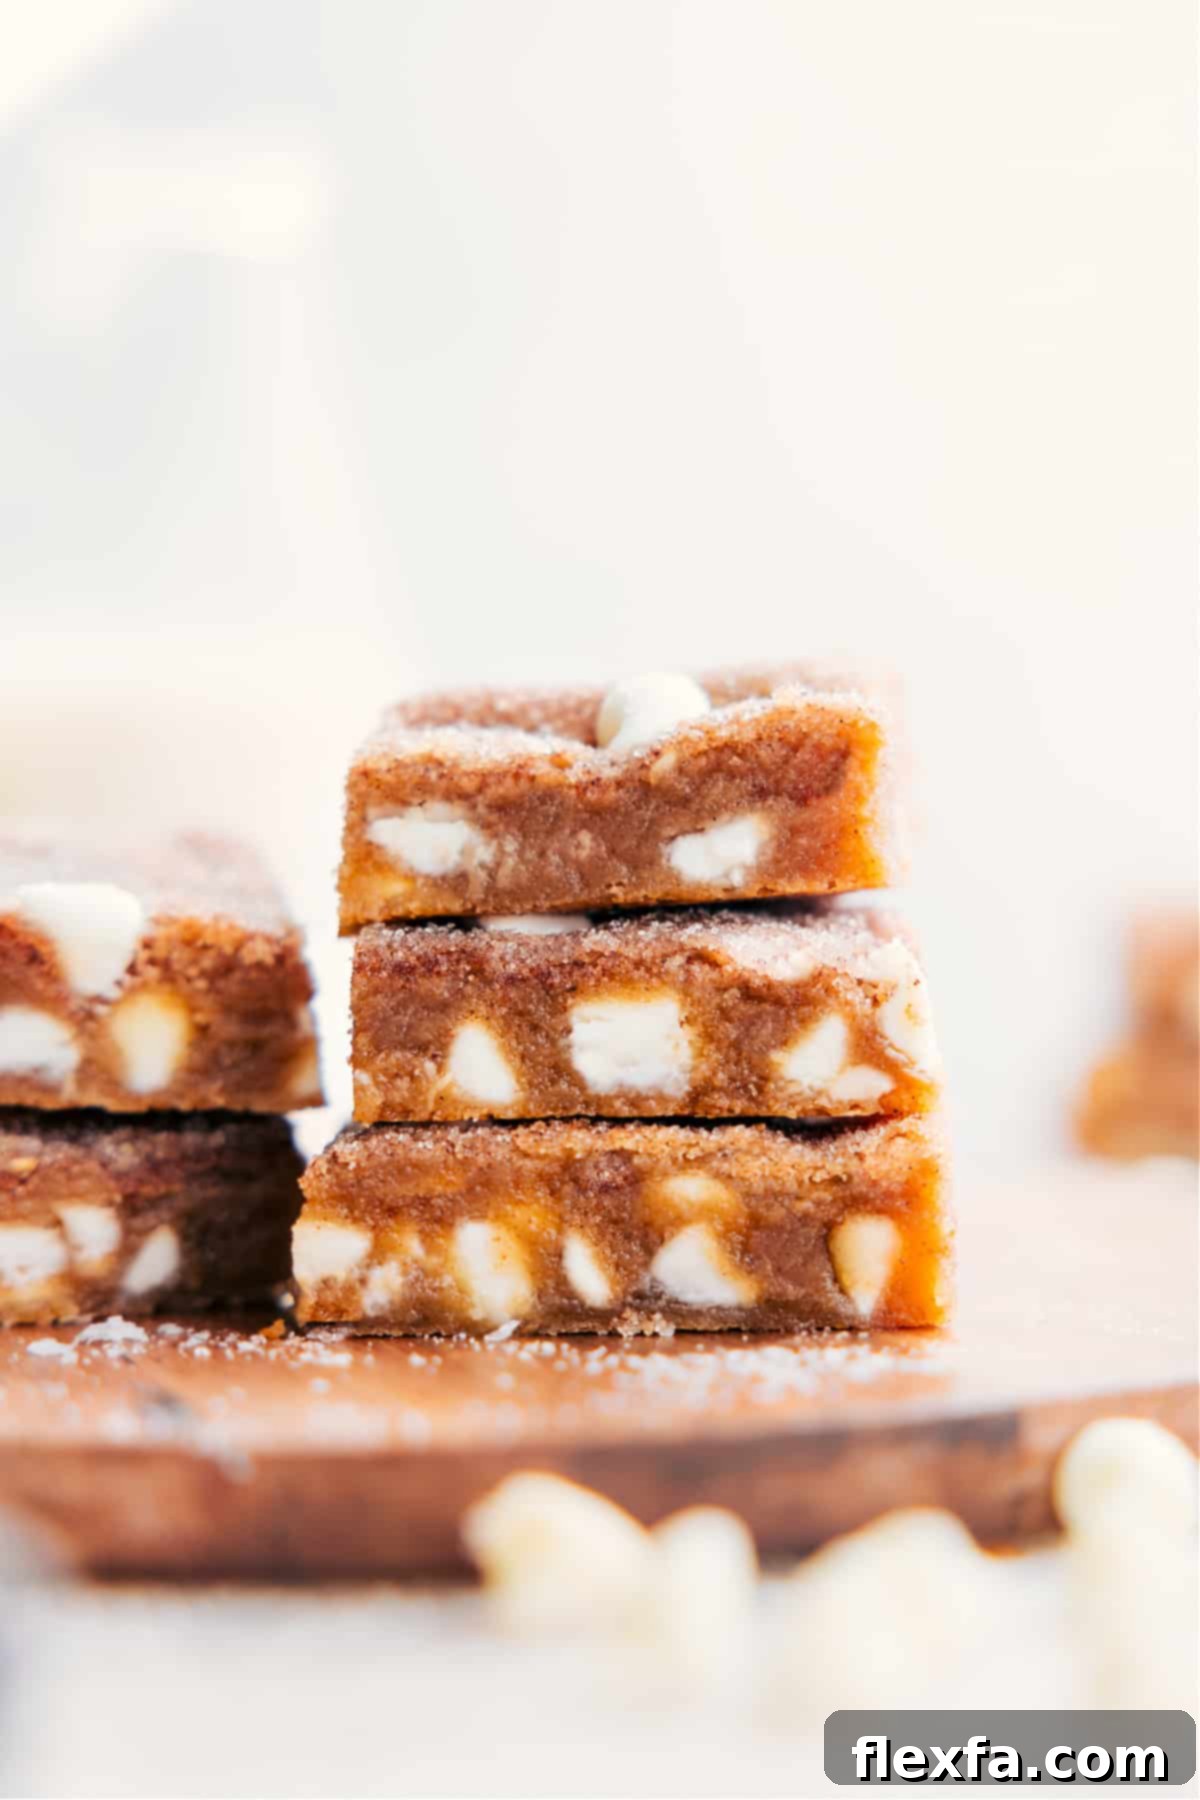
Snickerdoodle Blondies are the ultimate dessert, seamlessly blending the comforting warmth of a classic snickerdoodle cookie with the rich, chewy texture of a blondie bar. Each bite offers a delightful experience: incredibly soft and moist blondie base, generously studded with creamy white chocolate chips, all crowned with that signature sweet and spiced cinnamon-sugar topping. These bars are not just a treat; they’re a sensation that promises to be a new favorite for every occasion.

author’s note
Your New Go-To Dessert for Every Gathering!
These Snickerdoodle Blondies have quickly become one of my all-time favorite desserts, and if you’ve been following my culinary journey, that probably doesn’t come as a surprise! My obsession with Snickerdoodles runs deep and spans years, starting with the beloved classic Snickerdoodle Cookies. From there, I ventured into creative twists like decadent Caramel-Filled Snickerdoodles and even seasonal favorites such as Pumpkin Snickerdoodles.
So, it was truly inevitable that I would eventually transform these iconic flavors into a convenient and utterly irresistible bar format. But let me assure you, these are far from your typical dry or crumbly cookie bars. What you’re about to experience are the softest, chewiest, and most profoundly flavorful blondies you will ever sink your teeth into. Imagine the rich, satisfying density of a classic brownie, but without the chocolate, allowing the warm, buttery cinnamon notes to truly shine. These bars achieve their incredible denseness and melt-in-your-mouth texture because they cleverly omit baking soda and baking powder, simplifying the recipe while maximizing flavor.
To elevate these blondies to an even higher level of deliciousness, I incorporated one of my absolute favorite flavor-boosting techniques: browned butter. If you’ve tried my cherished Brown Butter Chocolate Chip Cookies, you already know the magic that browned butter brings to baked goods. It introduces a complex, nutty depth that transforms ordinary desserts into something truly extraordinary, and it works absolute wonders in these Snickerdoodle Blondies.
Why These Snickerdoodle Blondies Are a Must-Try
Beyond their delightful taste, these Snickerdoodle Blondies offer several compelling reasons to become your new favorite dessert:
- Unmatched Chewy Texture: Unlike some blondies that can be cakey or dry, this recipe guarantees a gloriously chewy, almost fudgy consistency that everyone adores.
- Irresistible Flavor Profile: The harmonious blend of browned butter, brown sugar, and a generous layer of cinnamon sugar creates a deeply comforting and spiced flavor that is simply addictive.
- Ease of Preparation: Despite their gourmet taste, these blondies are surprisingly simple to make, requiring minimal effort for maximum reward. They’re perfect for both seasoned bakers and beginners.
- Crowd-Pleasing Potential: Whether you’re bringing them to a potluck, serving them at a family gathering, or just enjoying a quiet evening at home, these blondies are guaranteed to disappear quickly.
- Versatile & Customizable: While perfect as is, they also provide a fantastic base for various additions and substitutions, allowing you to tailor them to your preference.
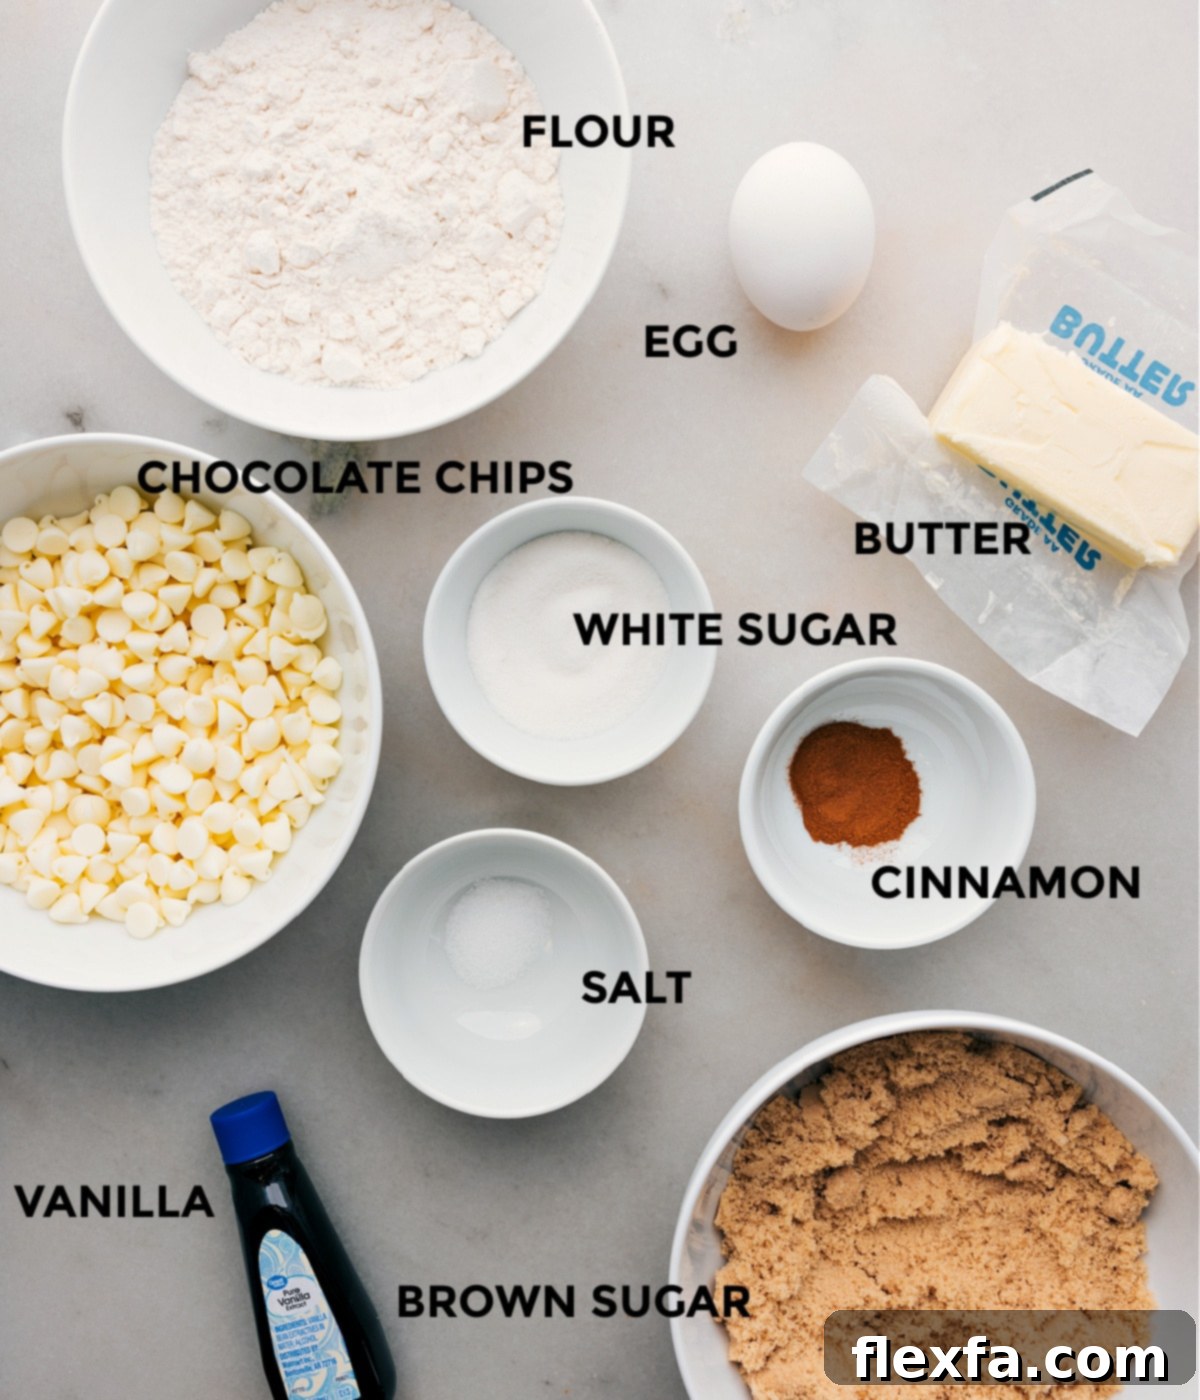
Essential Ingredients for Perfect Snickerdoodle Blondies
Crafting these delectable Snickerdoodle Blondies starts with selecting quality ingredients. Each component plays a vital role in achieving their signature flavor and texture:
| Ingredient | Swaps & Tips |
|---|---|
| Unsalted butter, browned | Browning the butter is non-negotiable for this recipe as it imparts a rich, nutty depth. If using salted butter, remember to reduce any other added salt in the recipe. Brown it until golden with fragrant brown specks, then cool for 5 minutes before using. Don’t forget to scrape all those flavorful browned bits into your bowl! |
| Brown sugar, light | Light brown sugar contributes to the blondies’ soft, chewy texture and deep caramel notes. Always pack it firmly into your measuring cup to ensure accurate measurement. |
| Egg | A single large egg binds the ingredients and adds moisture. Using it at room temperature ensures it incorporates smoothly into the batter. Whisking it well until glossy helps create that desirable chewy texture. |
| Cinnamon | Fresh, high-quality ground cinnamon is key for the classic snickerdoodle flavor. For an extra kick of spice, consider adding an additional 1/4 teaspoon to the blondie batter. |
| All-purpose flour | Flour provides the structure for the blondies. For the most accurate results, especially in baking, weighing your flour (120g per cup) is highly recommended. If using measuring cups, spoon the flour lightly into the cup and level it off without compacting. |
| White chocolate chips | These chips add a lovely creamy sweetness and another layer of texture. Feel free to swap them for cinnamon chips for an even more intense spice flavor, or omit them entirely for a more classic, purist blondie bar. |
| Cinnamon-sugar topping | This iconic topping is the hallmark of a snickerdoodle. Mix the granulated sugar and ground cinnamon just before sprinkling to prevent the sugar from dissolving, ensuring a beautifully sandy and even coating. For the best coverage, sprinkle from slightly higher up. |
Ingredient Deep Dive: Why Each Component Matters
- Unsalted Butter (Browned): This is the secret weapon! Browning the butter cooks out the water content and toasts the milk solids, resulting in a complex, nutty aroma and depth of flavor that cannot be achieved with regular melted butter. It’s truly a game-changer for these blondies.
- Light Brown Sugar: The molasses in brown sugar keeps the blondies incredibly moist and contributes to their signature chewiness and a hint of caramel flavor.
- Large Egg: The egg acts as an emulsifier, binding the fats and liquids together, and also provides structure and richness. A room temperature egg combines more easily, leading to a smoother batter.
- Vanilla Extract: A good quality vanilla extract enhances all the other flavors, adding a sweet, aromatic background note.
- Salt: Essential for balancing the sweetness and intensifying the overall flavor profile. Don’t skip it!
- Ground Cinnamon: The star spice! It provides the distinctive warm, sweet, and slightly peppery flavor that defines snickerdoodles.
- All-Purpose Flour: Provides the necessary structure without making the blondies tough. Proper measurement is crucial for the right texture.
- White Chocolate Chips: These add pockets of creamy sweetness that complement the cinnamon beautifully and enhance the blondies’ chewy consistency.
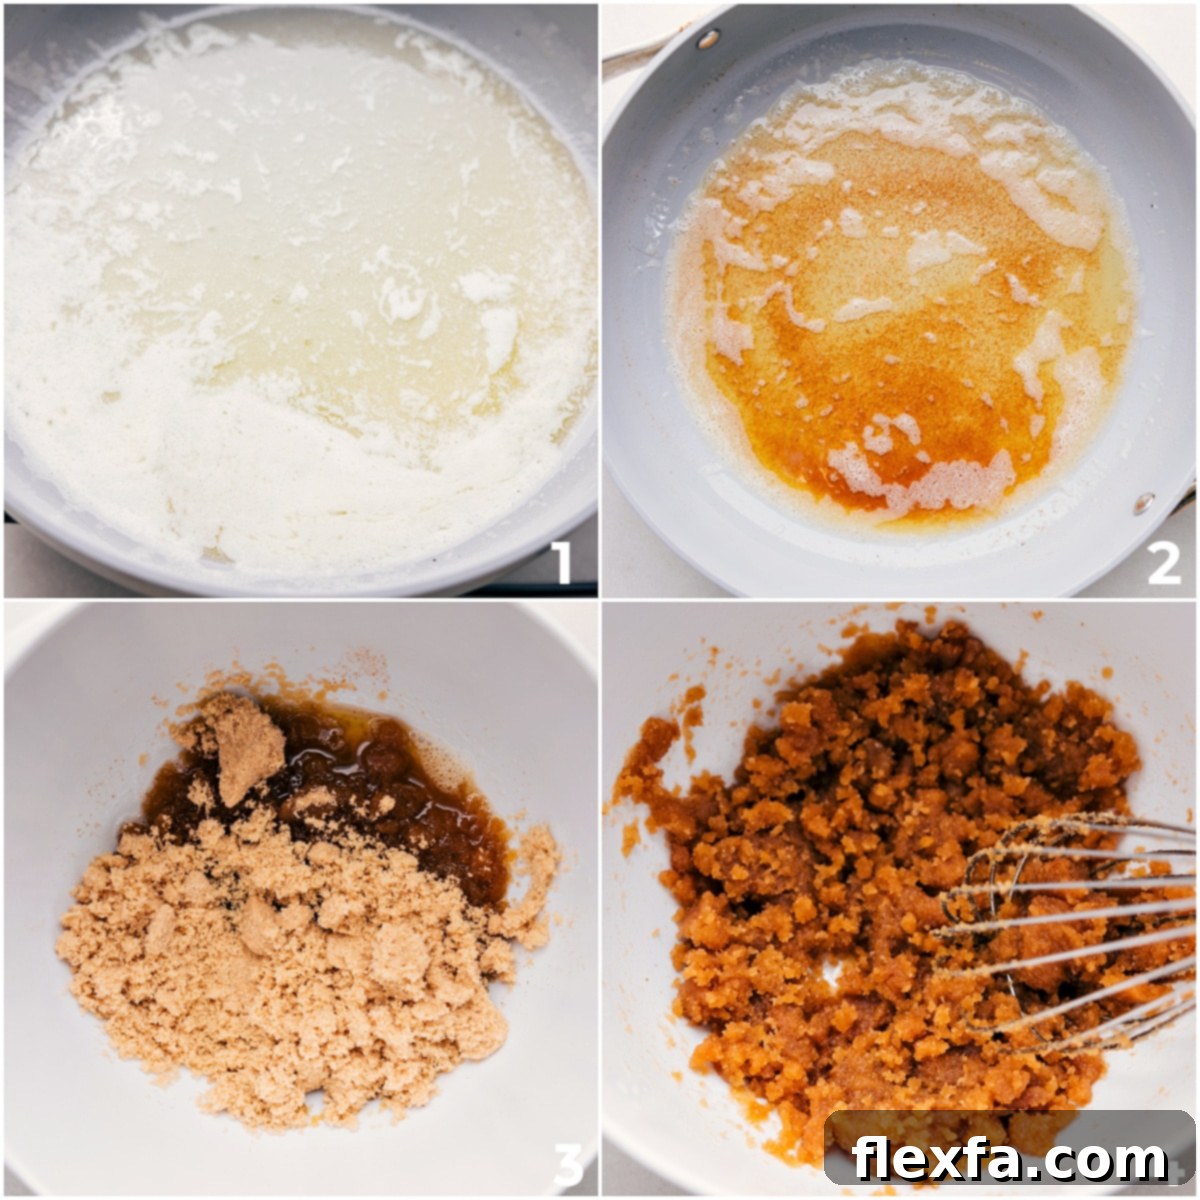
The Art of Browning Butter: A Step-by-Step Guide
Browning butter is a simple technique that yields incredible flavor, transforming a basic ingredient into a culinary powerhouse. Using a large, light-colored saucepan is key, as it allows you to clearly see the butter’s color change, preventing it from burning.
- Melt the Butter: Begin by adding your cut unsalted butter to the light-colored pan over medium heat. Stir occasionally to ensure even melting.
- Observe the Foam: As the butter melts and heats, it will start to foam and bubble. Continue to stir gently during this stage. The foam is the water evaporating.
- Spot Brown Specks: After a few minutes, the butter will turn a beautiful golden hue, and tiny brown bits will start to form at the bottom of the pan. At this point, you’ll also notice a distinct, enticing nutty aroma filling your kitchen. This is the Maillard reaction at work, developing those rich, complex flavors.
- Remove from Heat: As soon as you see these lovely brown specks and smell that nutty fragrance, immediately take the pan off the heat. It’s crucial to act quickly to prevent the butter from burning. Pour the browned butter into a separate heatproof bowl, making sure to scrape out all the precious browned bits from the bottom of the pan – these are packed with flavor!
- Cool and Use: Allow the browned butter to cool slightly for about 5 minutes before incorporating it into your Snickerdoodle Blondies recipe. This cooling step helps prevent it from cooking the other ingredients prematurely.
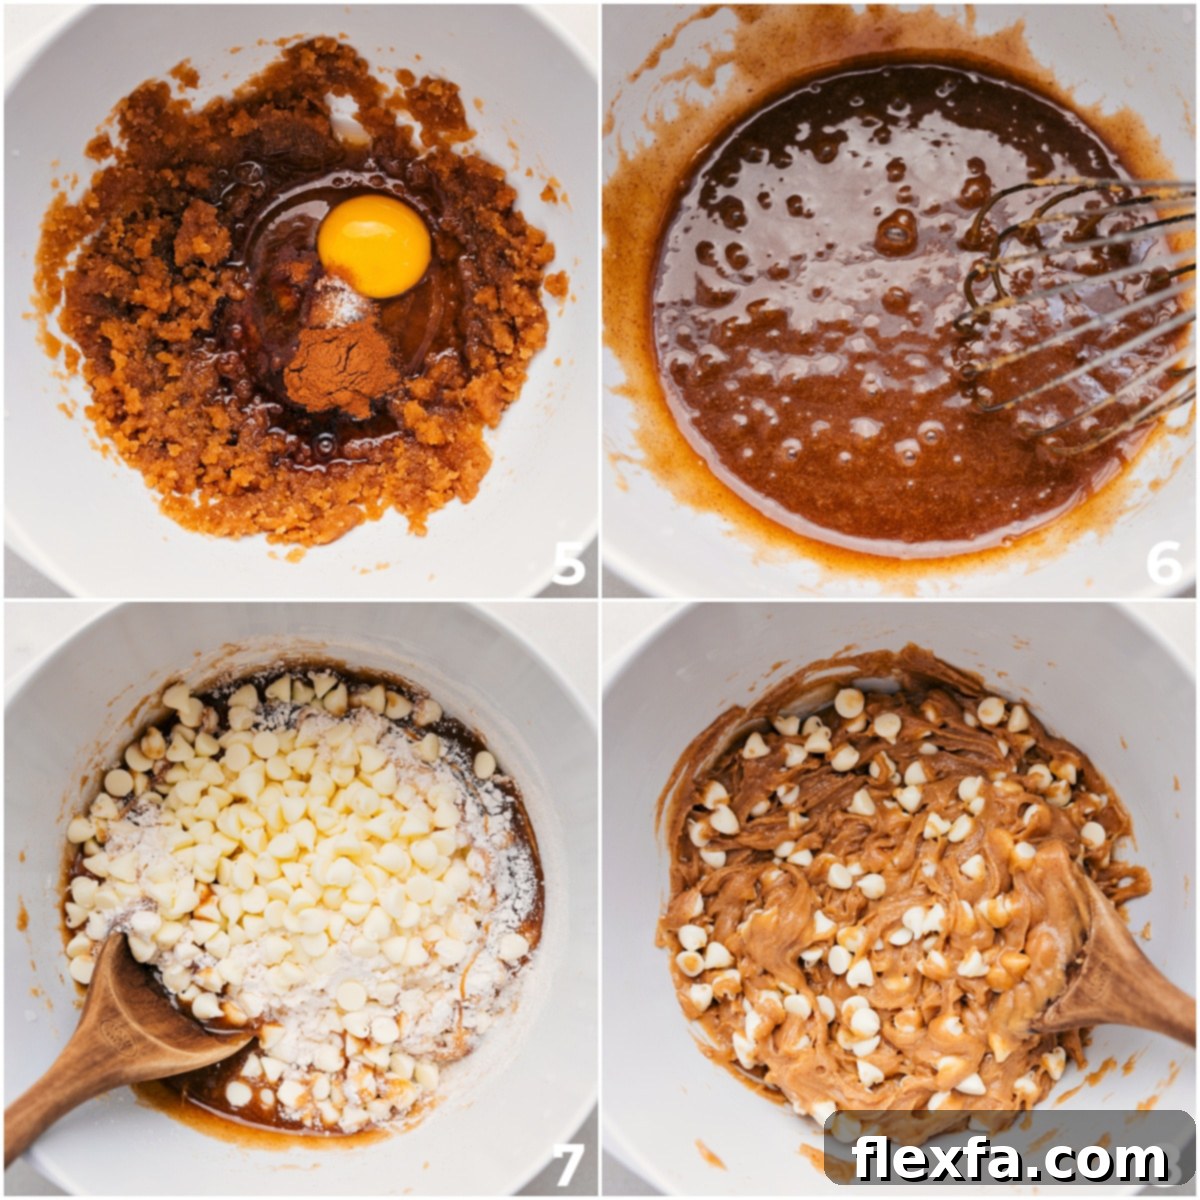
Crafting Your Snickerdoodle Blondies: A Simple Guide
Once your butter is perfectly browned and your ingredients are prepped, these blondies come together effortlessly. Follow these steps for an irresistible batch:
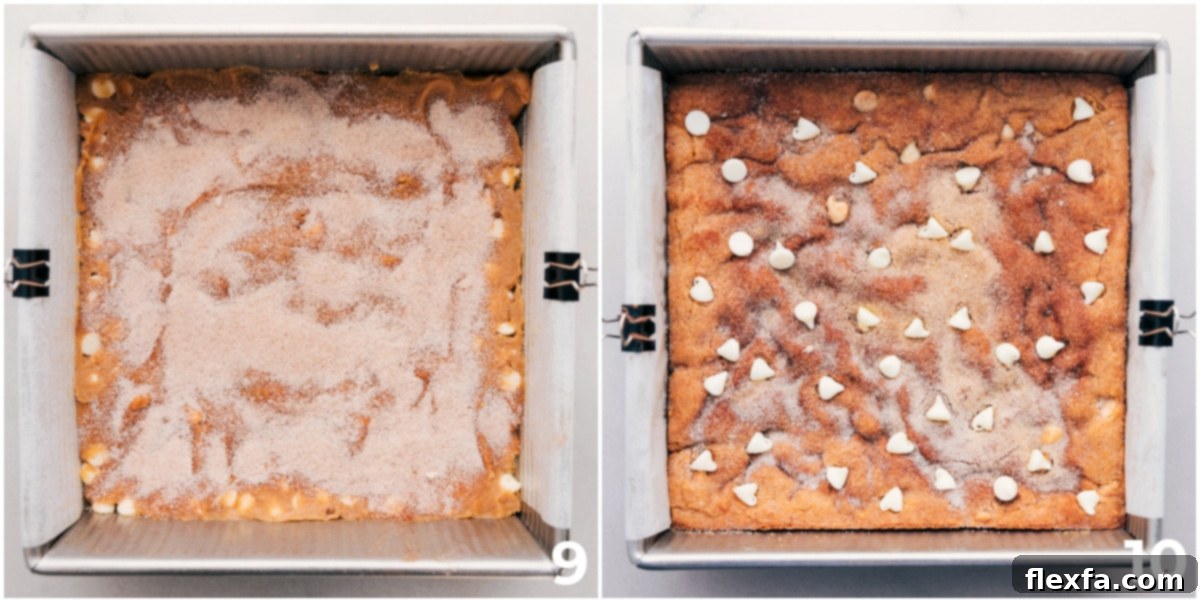
- Prepare Your Pan: First, preheat your oven to 350°F (175°C). Lightly spray an 8×8-inch baking pan with cooking spray. Then, line the pan with parchment paper, allowing some overhang on the sides. This “sling” will make it incredibly easy to lift the baked blondies out of the pan later.
- Brown the Butter: Following the detailed instructions above, brown your unsalted butter in a light-colored saucepan. Once browned, pour it into a mixing bowl, ensuring all the delicious brown bits are scraped in. Let it cool for about 5 minutes.
- Combine Wet Ingredients: Into the slightly cooled browned butter, whisk in the light brown sugar until thoroughly combined and it resembles wet sand. Next, add the room temperature egg, vanilla extract, salt, and half teaspoon of cinnamon. Whisk briskly for about 1-2 minutes until the mixture is beautifully creamy, smooth, and emulsified – this vigorous whisking contributes significantly to the blondies’ chewy texture.
- Fold in Dry & Add-ins: Gently fold in the all-purpose flour just until no dry streaks remain. Avoid overmixing, as this can lead to tough blondies. Finally, stir in the white chocolate chips until they are evenly distributed throughout the thick batter.
- Press and Top: Pour the thick blondie batter into your prepared 8×8-inch pan. Use a spatula to gently press the batter evenly into all corners of the pan and smooth the top. In a small separate bowl, combine the granulated sugar and the remaining half teaspoon of ground cinnamon for the topping. Sprinkle this aromatic cinnamon-sugar mixture evenly over the entire surface of the blondie batter.
- Bake to Perfection: Transfer the pan to your preheated oven and bake for 25-27 minutes. The blondies are ready when the edges appear lightly golden and set, and the center springs back slightly when gently touched. Avoid overbaking, as this will result in dry blondies.
- Cool and Enjoy: Once baked, remove the pan from the oven and let the blondies cool in the pan for 10-15 minutes. This resting period allows them to set properly. Then, use the parchment paper overhang to carefully lift the entire slab of blondies onto a cooling rack. Remove the parchment paper, slice into squares or bars, and serve while still slightly warm for the ultimate treat.
Pro Tips for Blondie Perfection
- Don’t Overmix: Once you add the flour, mix just until combined. Overmixing develops gluten, which can make your blondies tough instead of chewy.
- Room Temperature Egg: A room temperature egg emulsifies better with the butter and sugar, creating a smoother, more uniform batter and a better final texture.
- Calibrate Your Oven: Oven temperatures can vary. If your oven tends to run hot or cold, adjust baking time accordingly. An oven thermometer can be a great help.
- Underbake Slightly: For truly gooey, chewy blondies, it’s always better to slightly underbake than overbake. The residual heat in the pan will continue to cook them slightly as they cool.
- Patience with Cooling: Resist the urge to cut into the warm blondies immediately. Letting them cool in the pan for 10-15 minutes and then fully on a wire rack allows them to set properly, preventing them from falling apart.
Variations and Customizations
While perfect on their own, these Snickerdoodle Blondies are also wonderfully adaptable:
- Chocolate Chips: Experiment with different types of chocolate chips – milk, semi-sweet, dark, or even butterscotch chips could be delicious.
- Nuts: Fold in a half cup of chopped pecans or walnuts for an added crunch and nutty flavor.
- Spice It Up: Enhance the spice profile by adding a pinch of nutmeg or cardamom to the cinnamon sugar topping or the batter.
- Swirls: For an extra decadent touch, swirl a tablespoon of softened cream cheese or a dollop of caramel sauce through the batter before baking.
Serving Suggestions
These Snickerdoodle Blondies are divine warm, perhaps with a scoop of vanilla bean ice cream melting over the top, creating a comforting dessert experience. They are equally delightful at room temperature with a cup of coffee or tea, making them perfect for an afternoon treat or a grab-and-go snack.
Storage
Snickerdoodle Blondies Leftovers?
- Best on Day 1: For the ultimate soft and chewy texture, these bars are truly best enjoyed fresh on the day they are baked.
- Short-Term Storage: Store any leftover blondies in an airtight container at room temperature for up to 2-3 days. While they will still be delicious, their texture might become slightly firmer than on the first day.
- Freezing for Longer: For extended storage, individual blondie bars can be wrapped tightly in plastic wrap, then placed in a freezer-safe bag or container. They can be frozen for up to 3 months. Thaw at room temperature or warm gently in the microwave for a few seconds before serving.
While freezing works, remember that the peak enjoyment comes from freshly baked bars.
Frequently Asked Questions (FAQs)
What’s the difference between a blondie and a brownie?
The main difference lies in the chocolate content. Brownies are rich, fudgy chocolate desserts, while blondies are their vanilla counterpart. Blondies typically feature brown sugar, vanilla, and often white chocolate chips, butterscotch, or nuts, focusing on a buttery, caramel-like flavor profile rather than cocoa.
Can I make these Snickerdoodle Blondies ahead of time?
Absolutely! These blondies are a fantastic make-ahead dessert. You can bake them a day in advance and store them in an airtight container at room temperature. For optimum freshness, consider slightly warming them in the microwave for a few seconds before serving.
Why are my blondies dry or crumbly?
The most common culprits for dry or crumbly blondies are overmixing the flour or overbaking. Overmixing develops gluten, which toughens the batter, and overbaking removes too much moisture. Ensure you fold in the flour gently until just combined and watch the baking time carefully.
Can I use salted butter instead of unsalted?
Yes, you can. If you only have salted butter, you can use it, but remember to reduce or omit the 1/4 teaspoon of salt listed in the recipe. Always taste your batter if making such a substitution to ensure the balance of flavors.
Is browning the butter essential, or can I skip it?
While you *can* skip browning the butter and just use melted unsalted butter, it’s highly recommended not to. Browning the butter introduces a deep, nutty, and complex flavor that is truly transformative for these blondies, elevating them from good to absolutely extraordinary. It’s a simple step that makes a huge difference in the final taste.
The base recipe for these delightful blondies is adapted from the excellent Blondie recipe by InspiredTaste.
Explore More Decadent Desserts:
Desserts
Carmelitas (My Favorite Dessert!)
Desserts
Fruity Pebbles Rice Krispies Treats
Desserts
Twix Cheesecake Bars
Desserts
Raspberry Bread Pudding
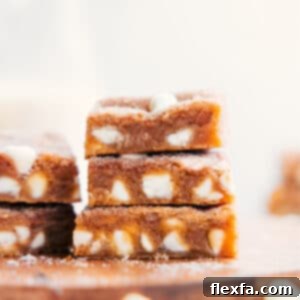
Snickerdoodle Blondies
Video
Equipment
-
8 x 8-inch baking pan with parchment paper
-
Large, light-colored pan for browning butter, see Note 1 below
Ingredients
- Cooking spray
- 8 tablespoons unsalted butter cut into small cubes
- 1 cup light brown sugar firmly packed
- 1 large egg
- 1 teaspoon vanilla extract
- 1/4 teaspoon salt
- 1/2 teaspoon ground cinnamon
- 1 cup all-purpose flour
- 1-1/3 cups white chocolate chips
- 2 tablespoons granulated sugar
- 1/2 teaspoon ground cinnamon
Instructions
- Preheat oven to 350°F (175°C). Spray an 8×8-inch pan with cooking spray and line it with parchment paper, leaving an overhang for easy removal.
- Melt the butter in a light-colored, large pan over medium-high heat. Once melted, reduce to medium heat and stir constantly with a silicone spatula. When the butter smells nutty and light-brown specks appear under the foam, remove it from the heat and pour it into a bowl, scraping out all the bits. Let it cool for 5 minutes.
- Whisk brown sugar into the cooled butter until it resembles wet sand. Add the egg, vanilla, salt, and cinnamon, and whisk briskly until the mixture is creamy and emulsified. Fold in flour and white chocolate chips with a spatula until no dry streaks remain. The batter will be thick.
- Pour the batter into the prepared pan and smooth the top with a spatula. In a small bowl, stir together the granulated sugar and ground cinnamon for the topping. Sprinkle this mixture evenly over the batter.
- Bake for 25–27 minutes, or until the edges are lightly golden and the top is set.
- Remove from the oven and let the bars cool in the pan for 10–15 minutes. Use the parchment-paper overhang to transfer the bars to a cooling rack, then remove the parchment paper. Cut into bars and serve.
Recipe Notes
Storage: These bars are best enjoyed on the first day when they’re fresh and wonderfully soft. Store any leftovers in an airtight container at room temperature for up to 2-3 days—they’ll still be good the next day, but might not be quite as soft. For longer storage, you can freeze them for up to 3 months, but they are truly at their best when eaten fresh.
Nutrition
Nutrition information is automatically calculated, so should only be used as an approximation.