
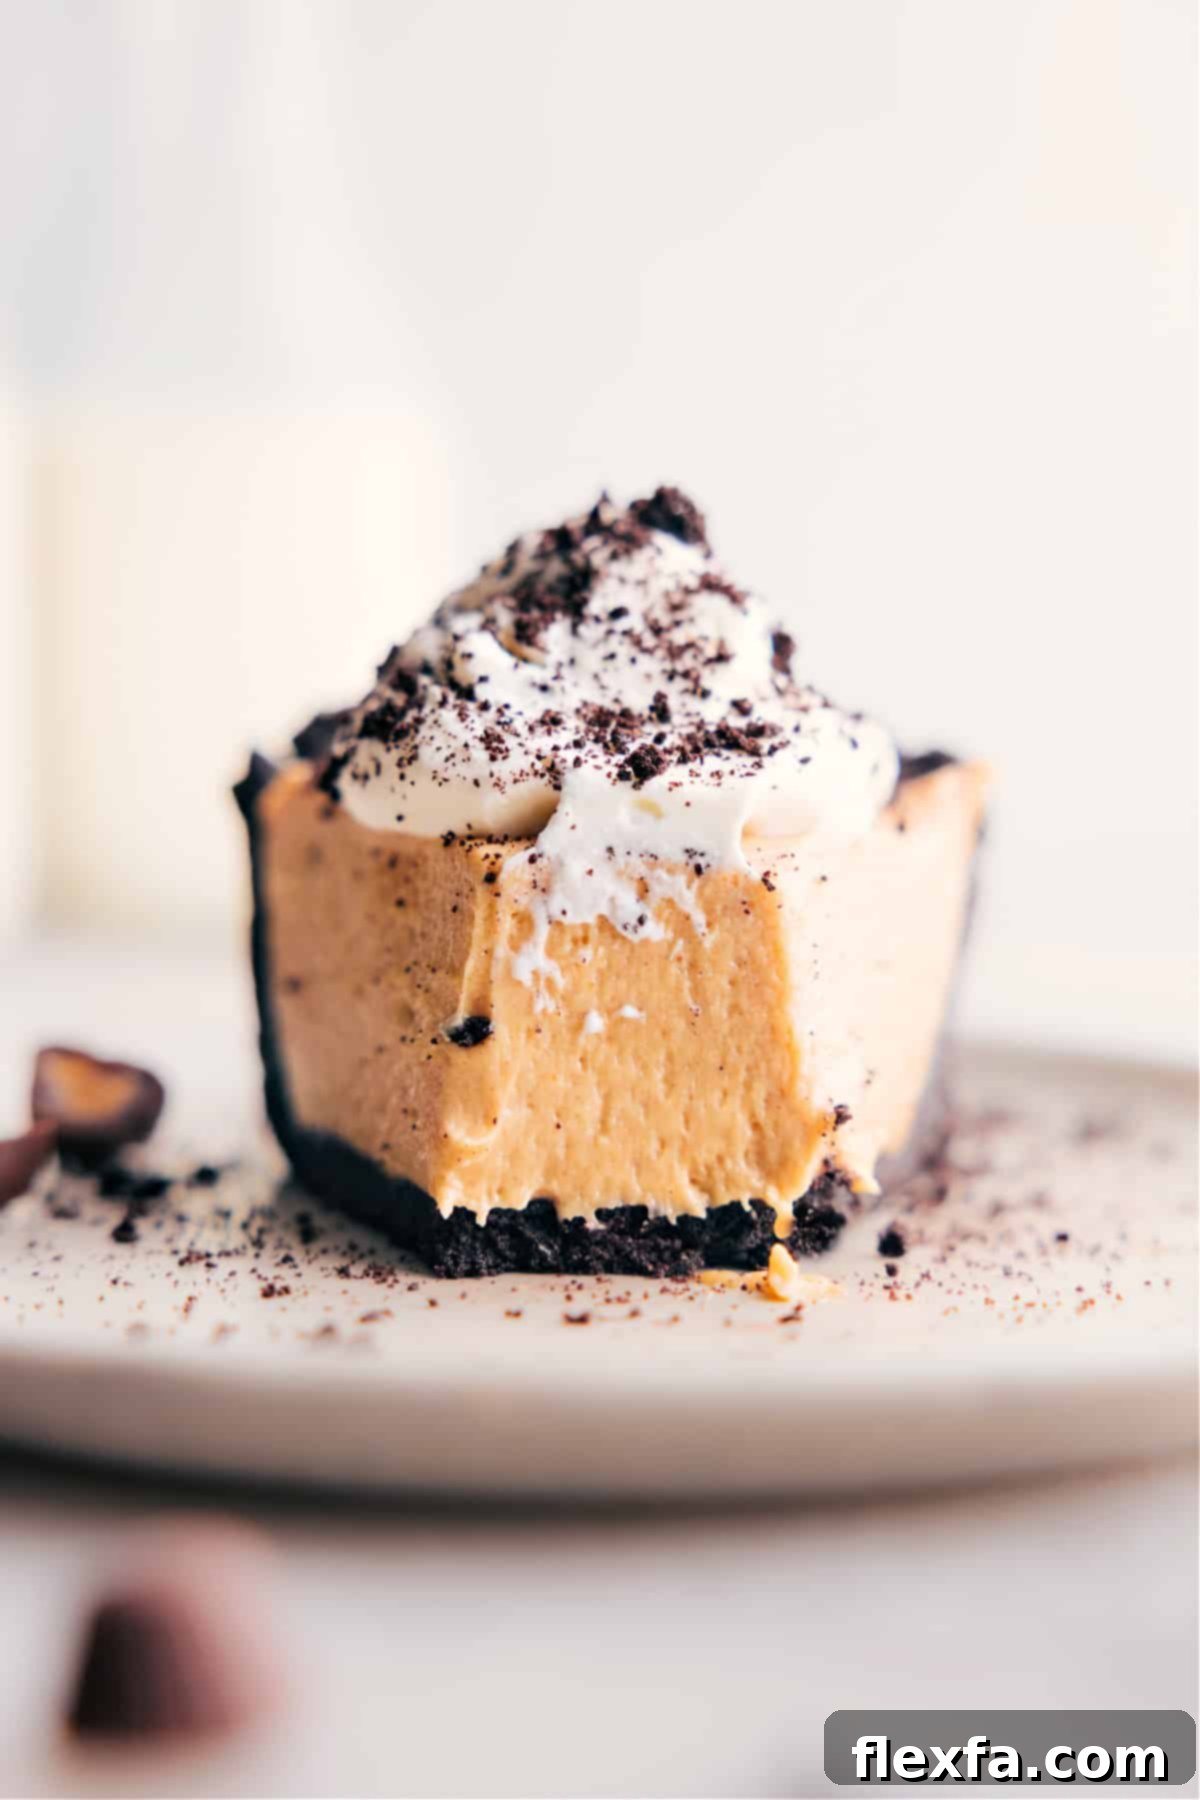
Welcome to the world of irresistible desserts, where two classic favorites — rich peanut butter and decadent chocolate — unite in a harmonious symphony of flavor. Our **Peanut Butter Pie** is not just any dessert; it’s a creamy, dreamy masterpiece designed to delight your taste buds and leave you craving more. This recipe combines a luscious, velvety peanut butter filling with a perfectly crumbly, chocolatey Oreo crust, creating an easy-to-make, no-bake treat that’s simply divine. Whether you’re a seasoned baker or just starting your culinary journey, this pie promises a hassle-free experience with maximum deliciousness.
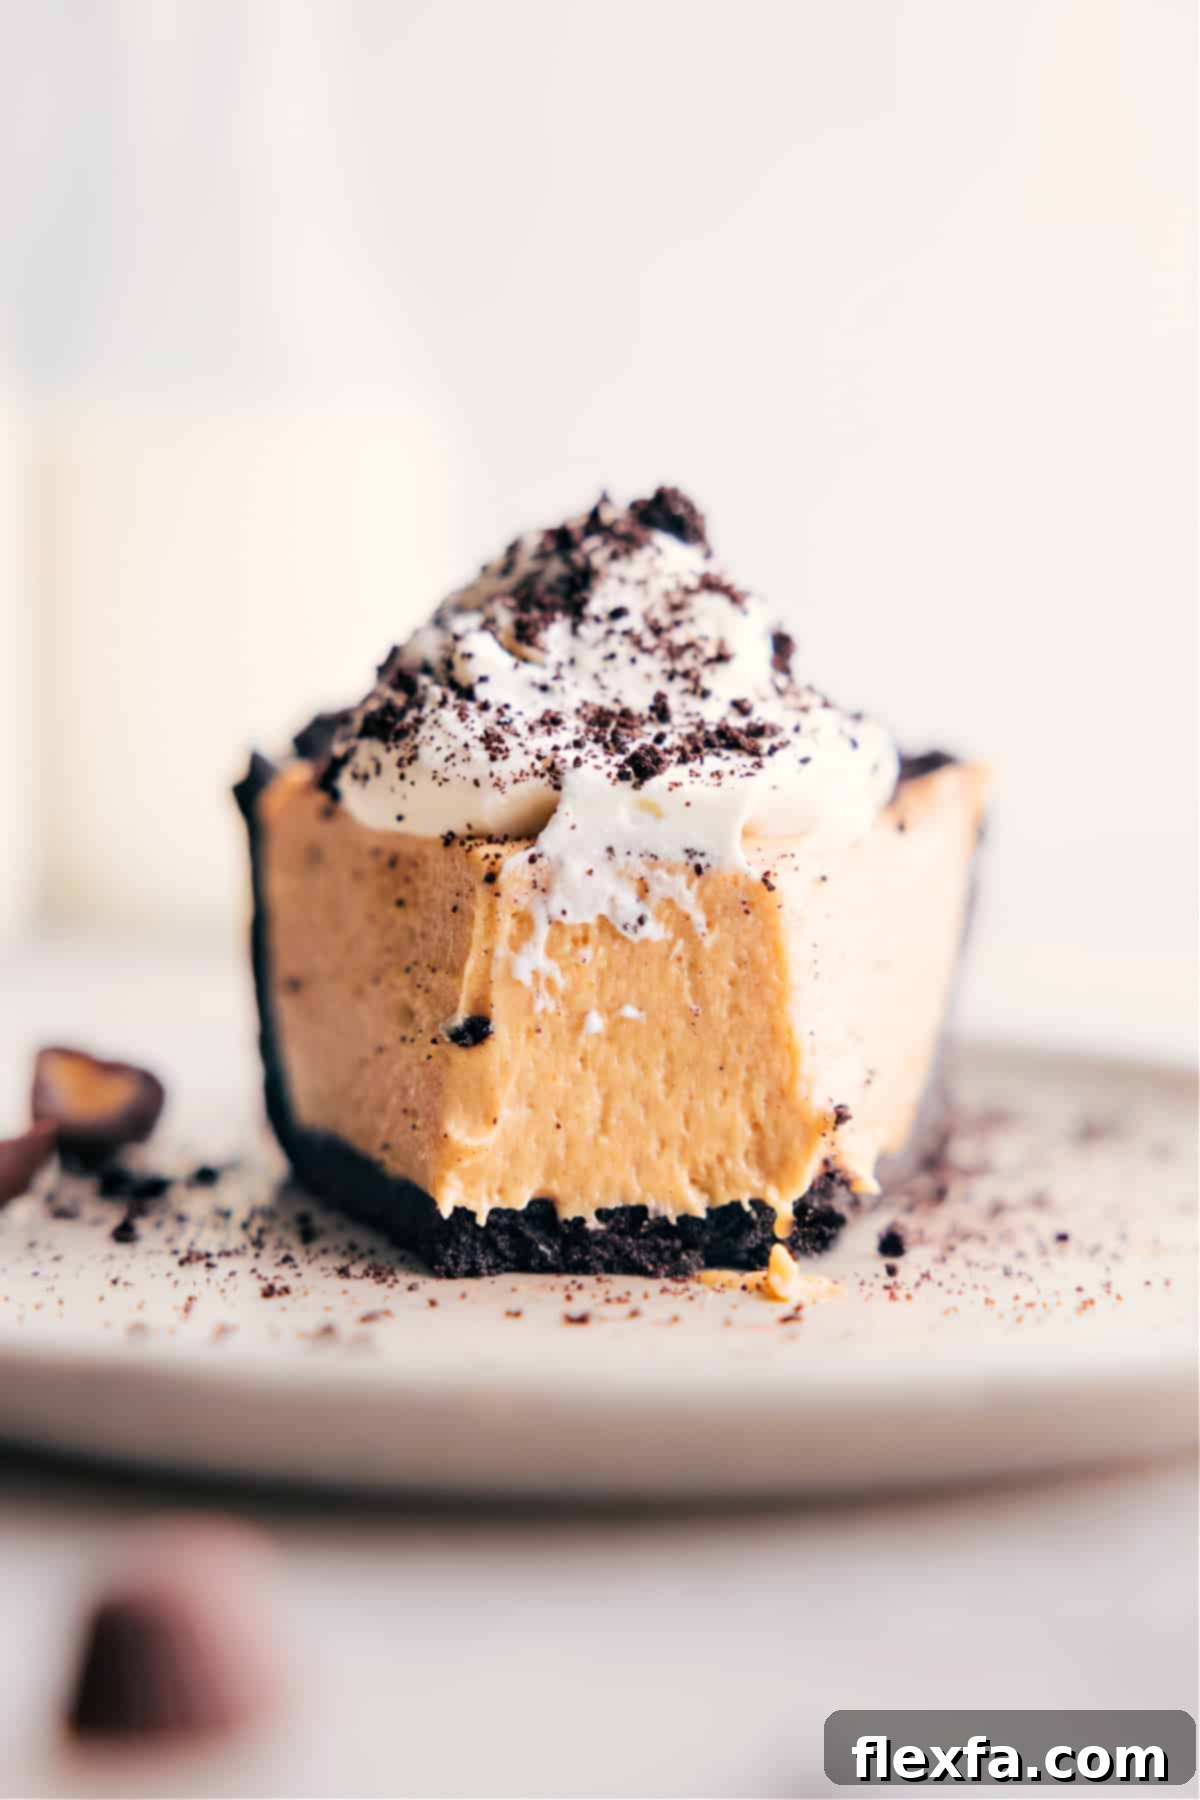
Why You’ll Absolutely Adore This Peanut Butter Pie
This isn’t just another dessert; it’s a culinary experience waiting to happen. Here’s why this Peanut Butter Pie will quickly become a cherished recipe in your collection:
-
Unbeatable Flavor Combination
The magic truly happens when the intense, nutty flavor of smooth peanut butter meets the deep, sweet crunch of a chocolate Oreo crust. Each bite offers a perfect balance of salty and sweet, creamy and crunchy, making it an absolute dream for anyone who loves the classic pairing of chocolate and peanut butter. It’s a flavor profile that evokes childhood nostalgia while satisfying sophisticated palates.
-
Effortless Preparation
Forget complicated baking techniques and lengthy kitchen sessions. This peanut butter pie is wonderfully simple to prepare, making it ideal for bakers of all skill levels. With minimal ingredients and straightforward steps, you can whip up this impressive dessert without breaking a sweat. It’s a no-bake wonder for the filling, and the crust requires only a quick bake, streamlining your dessert-making process.
-
A Crowd-Pleasing Favorite
Prepare for rave reviews! This pie is a guaranteed hit at any gathering, from casual family dinners to festive holiday celebrations. Kids and adults alike are captivated by its rich taste and delightful texture. It’s the kind of dessert that disappears quickly, prompting requests for the recipe and promises of future dessert duties.
-
Perfect for Make-Ahead Convenience
One of the greatest advantages of this peanut butter pie is its make-ahead potential. It requires several hours of chilling time, which means you can prepare it a day or even two in advance. This makes it an ideal choice for busy hosts or anyone looking to get a head start on event preparations, freeing up your time on the day of your gathering.
-
No Specialized Equipment Needed
You won’t need any fancy gadgets or expensive bakery tools to create this masterpiece. A standard pie pan, a blender or food processor for the crust, and a stand or hand mixer for the filling are all you need. Most of these items are readily available in any home kitchen, proving that extraordinary desserts don’t require extraordinary equipment.
Essential Ingredients for Your Peanut Butter Pie
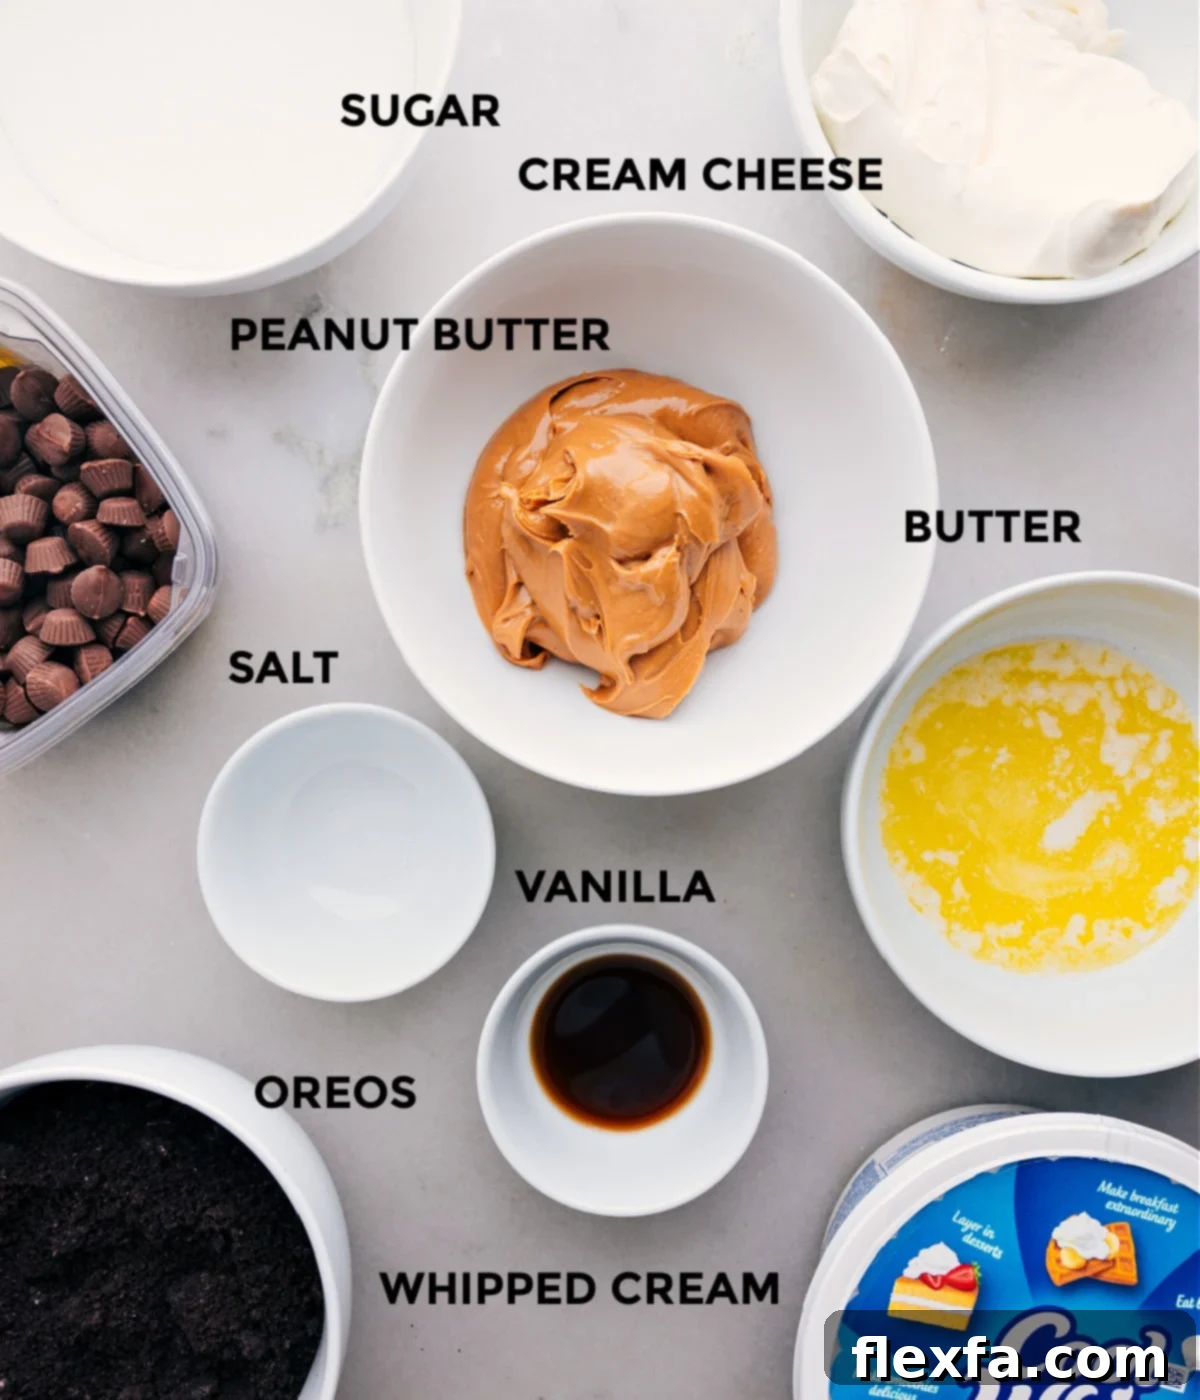
Crafting the perfect peanut butter pie begins with selecting the right ingredients. Each component plays a vital role in achieving that creamy, rich, and utterly delicious result. Here’s a detailed look at what you’ll need:
Crust Ingredients: The Chocolatey Foundation
- Unsalted Butter: Melted unsalted butter acts as the binding agent for our Oreo crust, providing richness and helping the crumbs hold their shape beautifully. Using unsalted butter allows you to control the overall saltiness of the pie.
- Oreo Crumbs: The star of our crust! We recommend using whole Oreo cookies—no need to meticulously scrape out the creme filling. The creme adds extra flavor and helps the crust become even more cohesive and flavorful. Simply crush them into fine crumbs using a blender or food processor. Approximately 24 standard Oreos will yield the required amount.
- Salt: Just a pinch of salt enhances the chocolate flavor of the Oreos and balances the sweetness, making the crust even more addictive.
Filling Ingredients: The Creamy Heart
- Cream Cheese: For the ultimate creamy and stable filling, always opt for full-fat, brick-style cream cheese. It provides the necessary structure and tangy counterpoint to the sweetness. Ensure it’s at room temperature before mixing to prevent lumps and achieve a silky-smooth consistency.
- Peanut Butter: This is where the magic truly shines! Stick to your favorite brand of conventional creamy peanut butter, such as Skippy or Jif. These types of peanut butter are stable and emulsified, ensuring a smooth, non-oily filling. Natural peanut butters, which often separate, can lead to an undesirable oily texture in the pie. If you must use natural, stir it exceptionally well before adding it to the mixture.
- Granulated Sugar: Provides the essential sweetness to balance the richness of the peanut butter and cream cheese. You can slightly adjust the amount to suit your personal preference for sweetness.
- Heavy Cream or Frozen Whipped Topping: For a truly decadent filling, whip cold heavy cream until stiff peaks form. This yields a light, airy, and rich texture. For convenience, an 8-ounce container of thawed frozen whipped topping (like Cool Whip) works beautifully, offering a quicker and equally delicious alternative.
- Vanilla Extract: Pure vanilla extract is crucial for adding depth and warmth to the overall flavor profile, complementing both the chocolate and peanut butter notes.
- Salt: A small amount of salt in the filling helps to bring out the flavors of the other ingredients and cuts through the sweetness, creating a more balanced and nuanced taste.
Optional Toppings: Elevate Your Pie
While delicious on its own, adding toppings can turn your peanut butter pie into an absolute showstopper!
- Homemade or Store-bought Whipped Cream: A generous dollop of fresh whipped cream adds an extra layer of lightness and creaminess.
- Crushed Oreos: For an extra textural contrast and a boost of chocolate flavor, sprinkle some crushed Oreo crumbs over the top.
- Mini Reese’s Cups: For the ultimate peanut butter and chocolate experience, adorn your pie with mini Reese’s Peanut Butter Cups. Their iconic flavor and cute size make for an irresistible decoration.
- Chocolate Drizzle: A simple drizzle of melted chocolate or chocolate syrup can add an elegant touch and another layer of chocolate goodness.
- Chopped Peanuts: For those who love extra crunch and nutty flavor, a sprinkle of chopped roasted peanuts can be a fantastic addition.
Crafting Your Dream Peanut Butter Pie: A Step-by-Step Guide
Making this peanut butter pie is a joyful journey that culminates in a dessert marvel. Follow these simple steps for a flawless result:
-
Prepare the Oreo Crust:
- Preheat your oven to 350°F (175°C). Lightly grease a 9-inch pie pan.
- Melt the unsalted butter and set it aside to cool slightly.
- In a food processor or blender, pulse the whole Oreo cookies until they form fine, uniform crumbs. Ensure there are no large chunks remaining.
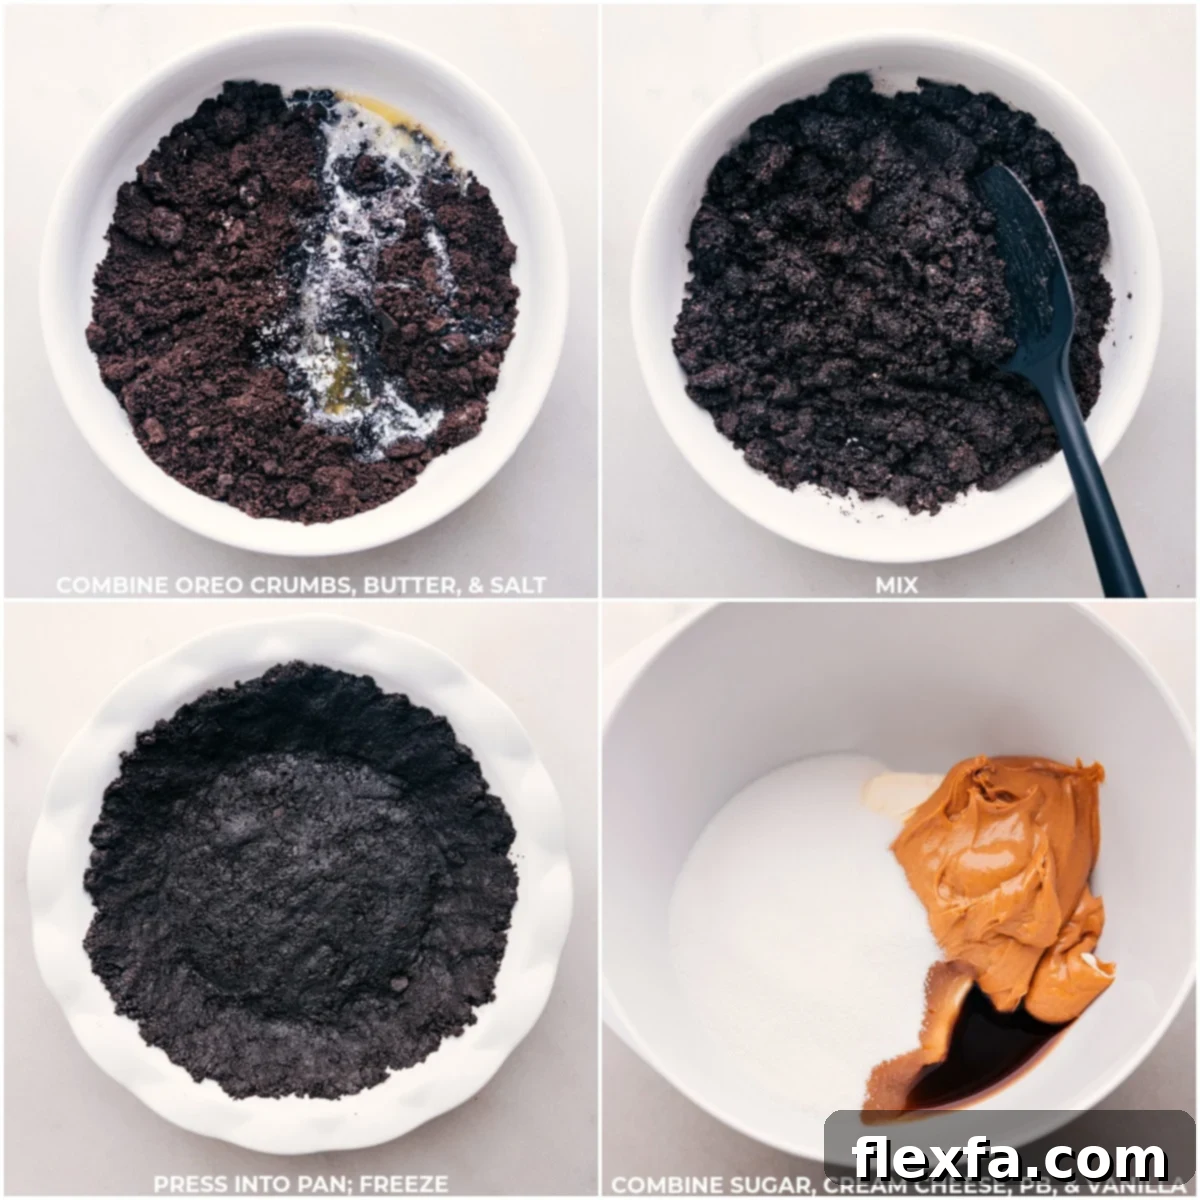
- In a medium bowl, combine the cooled melted butter, Oreo crumbs, and the pinch of salt. Mix thoroughly until the crumbs are evenly moistened and resemble wet sand.
- Transfer the crumb mixture to your prepared pie pan. Begin by pressing the crumbs firmly along the sides of the pan first, working your way up to create a sturdy edge. Then, press the remaining crumbs evenly into the bottom of the pan. Use the flat bottom of a 1-cup measuring cup or a glass to compress the crumbs very firmly. This step is crucial for a crust that holds together well.
- Bake the crust for 10 minutes. This quick bake helps to set the crust, making it less crumbly. Once baked, remove it from the oven and allow it to cool completely on a wire rack before proceeding. A fully cooled crust prevents the filling from melting or becoming oily.
-
Whip Up the Creamy Filling:
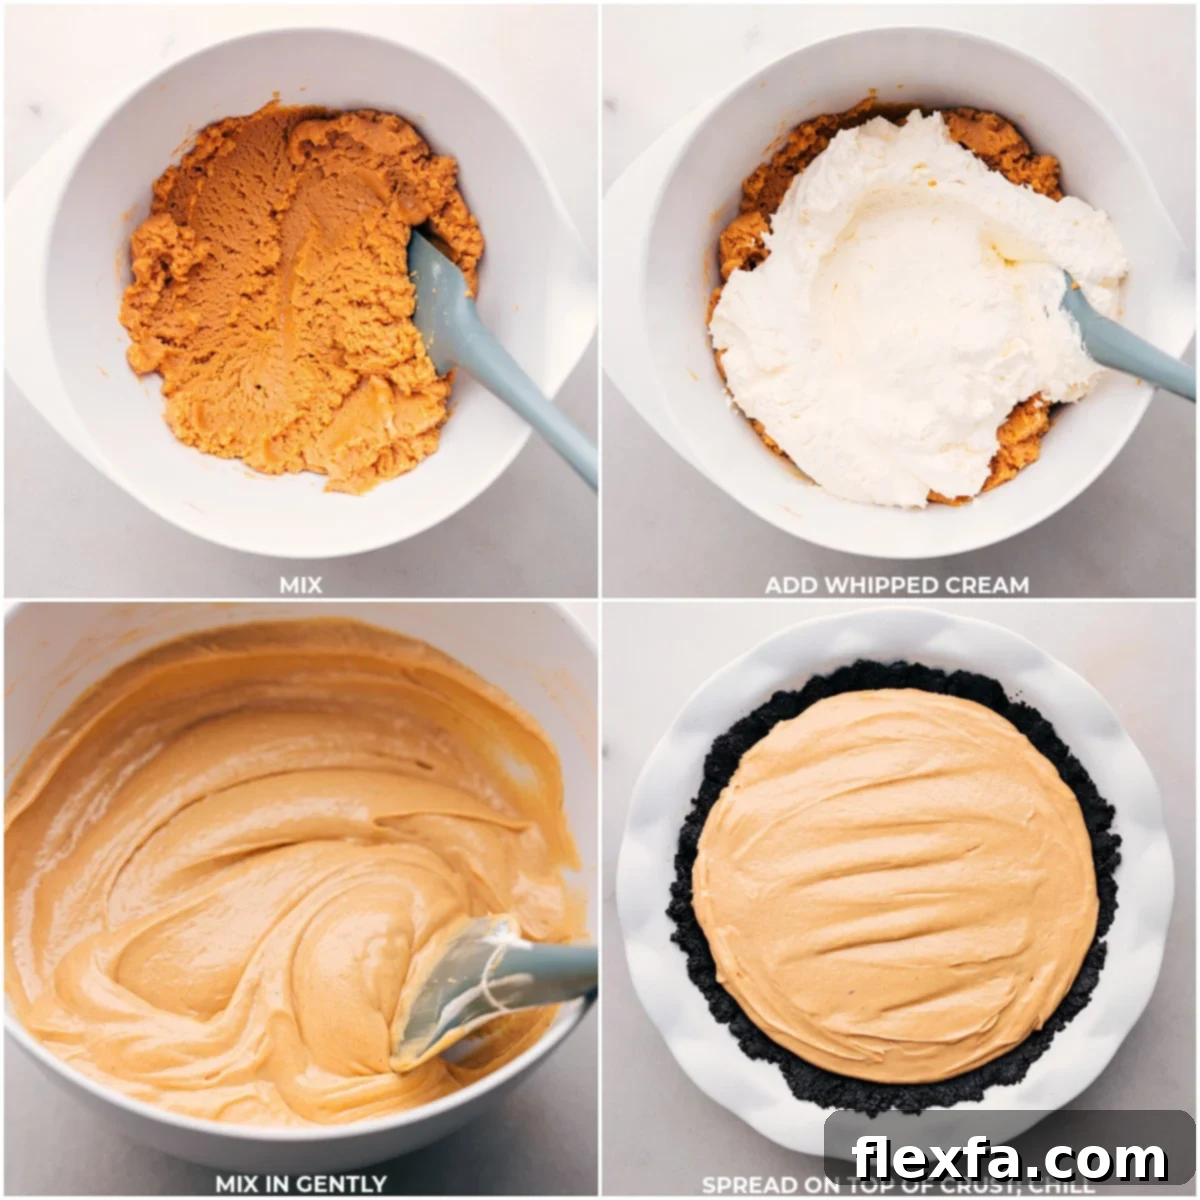
- In a large mixing bowl, using a stand mixer with a paddle attachment (or a hand mixer), beat the softened cream cheese, granulated sugar, creamy peanut butter, vanilla extract, and salt. Beat on medium speed for about 3 minutes, or until the mixture is light, fluffy, and completely smooth with no lumps. Scrape down the sides of the bowl as needed.
- If using heavy cream: In a separate, clean bowl, use the whisk attachment to whip the cold heavy cream on high speed until stiff peaks form. Be careful not to over-whip, or it will turn into butter.
- Gently fold the whipped cream (or thawed whipped topping) into the peanut butter mixture. Use a spatula and a gentle hand, folding until the two mixtures are just combined and no streaks of cream remain. Overmixing here can deflate the whipped cream, resulting in a less airy filling.
-
Assemble and Chill the Pie:
- Pour the prepared peanut butter filling into the completely cooled Oreo crust. Use an offset spatula or the back of a spoon to smooth the top evenly.
- Cover the pie tightly with plastic wrap to prevent a skin from forming and to keep it fresh.
- Refrigerate the pie for a minimum of 8 hours, or preferably overnight. This chilling time is essential for the pie to set properly, ensuring a firm, sliceable texture. Don’t rush this step!
-
Serve and Enjoy:
- Once thoroughly chilled, remove the pie from the refrigerator. For the cleanest cuts, run a sharp knife under hot water, wipe it dry, and then slice the pie. Repeat for each slice.
- Serve directly from the fridge. Optionally, top individual slices with a dollop of fresh whipped cream, a sprinkle of crushed Oreos, or a few mini Reese’s cups for an extra special touch.
Perfectly Serving Your Peanut Butter Pie
A beautifully made pie deserves an equally beautiful presentation. Here’s how to serve your peanut butter pie for maximum enjoyment:
- Chilled is Best: This pie is best enjoyed cold, straight from the refrigerator. The cold temperature ensures the filling is firm and refreshing. For a firmer, almost ice cream-like consistency, you can even enjoy it slightly frozen (see storage tips).
- Clean Slices: To achieve picture-perfect wedges, use a sharp, thin-bladed knife. For extra clean cuts, dip your knife in hot water and wipe it dry between each slice. This warms the blade slightly, allowing it to glide through the creamy filling and firm crust without dragging.
- Optional Toppings for Extra Flair: Elevate each serving with optional garnishes. A swirl of fresh whipped cream, a dusting of cocoa powder, a scattering of additional crushed Oreos, chocolate shavings, or mini peanut butter cups all make for an appealing presentation and an enhanced flavor experience.
- Serve Fresh: While the pie stores well, it’s at its peak freshness and texture when served immediately after being removed from the fridge and garnished.
- Pairing Suggestions: A slice of this rich pie pairs wonderfully with a glass of cold milk, a steaming cup of coffee, or a scoop of vanilla ice cream for an ultimate indulgence.
Choosing the Best Peanut Butter for Your Pie
The type of peanut butter you use is critical for the success and texture of your pie. Not all peanut butters are created equal, especially when it comes to no-bake desserts:
- Conventional Creamy Peanut Butter is Key: For this recipe, and most no-bake pies, your best bet is a conventional, creamy peanut butter. Brands like Skippy or Jif are excellent choices. These peanut butters contain stabilizers and are homogenized, meaning the oil doesn’t separate. This ensures your pie filling remains smooth, creamy, and consistent throughout. Skippy is a favorite for its classic flavor and reliable texture in this recipe!
- Avoid Natural Peanut Butters (Mostly): Natural peanut butters, which typically contain only peanuts and salt, tend to separate, with the oil rising to the top. If used in this recipe, this separation can cause the pie filling to become oily, lose its creamy texture, and even separate after chilling, making for a less appealing dessert.
- If You Must Use Natural Peanut Butter: Should you decide to use a natural peanut butter, it is absolutely crucial that you stir it exceptionally well before measuring and incorporating it into the filling. Stir until the oil is fully integrated and the peanut butter has a uniform, creamy consistency. Even then, be aware that the final texture of the pie may not be as firm or stable as with conventional peanut butter.
Storage Tips for Your Peanut Butter Pie
Proper storage is essential to maintain the freshness, texture, and safety of your delicious peanut butter pie.
How Long is Peanut Butter Pie Good For?
Once made, your peanut butter pie should be kept tightly covered in the refrigerator. Stored correctly, it will remain fresh and delicious for **3-5 days**. While it’s still safe to eat after this period, the crust may start to soften, losing some of its crispness, and the filling’s texture might subtly change.
How to Freeze Peanut Butter Pie:
This pie is also remarkably freezer-friendly, making it perfect for preparing far in advance or saving leftovers for a future craving.
- Freezing Method: To freeze, ensure the pie is completely chilled and set. Wrap the entire pie (or individual slices) tightly in several layers of plastic wrap, then an additional layer of aluminum foil. This double-layer protection helps prevent freezer burn. It can be frozen for up to 1 month.
- To Serve from Frozen: You have a couple of options! You can enjoy the pie directly from the freezer for a delightful, firm, ice cream-like dessert. Alternatively, thaw the pie overnight in the refrigerator before serving to return it to its original creamy consistency.
Does It Need Refrigeration?
Yes, absolutely! Due to the presence of dairy ingredients like cream cheese and whipped cream in the filling, this peanut butter pie requires constant refrigeration. It is not suitable for sitting out at room temperature for extended periods. The 8-hour chilling period is not just for setting; it’s also crucial for food safety. Plan to make this pie a day early and serve it directly from the refrigerator for the best experience.
Explore More Irresistible Peanut Butter Recipes:
If you’re a true peanut butter aficionado, you’ll love these other fantastic recipes that celebrate the nutty goodness:
- Salty-Sweet Pretzel Peanut Butter Bars
- Classic Chewy Peanut Butter Cookies
- Nostalgic Lunch Lady Peanut Butter Bars
- Energizing Peanut Butter Granola
- Addictive Peanut Butter Puppy Chow (Muddy Buddies)

Print Recipe
Peanut Butter Pie
Chelsea Lords
This Peanut Butter Pie is a delightful combination of velvety peanut butter filling and a crisp, chocolatey Oreo crust—an ultimate treat for all chocolate and peanut butter enthusiasts!
30 minutes
8 hours
8 hours 30 minutes
10 slices
Video Overview
Equipment
- Pie pan (9-inch, deep dish if possible)
- Blender or Food Processor
- Stand mixer or Hand mixer
Ingredients
- 4 tablespoons unsalted butter melted and cooled
- 1-3/4 cups Oreo crumbs (from approximately 24 whole cookies)
- 1/8 teaspoon salt
- 8 ounces cream cheese (brick-style, full-fat, at room temperature – see note 1)
- 1 cup creamy peanut butter (like Skippy, Jif – see note 2)
- 1 cup granulated sugar
- 1 teaspoon vanilla extract
- 1/8 teaspoon salt
- 1 cup heavy cream (or use 1 (8-ounce) container whipped topping, thawed – see note 3)
- Whipped cream
- Extra Oreo crumbs
- Reese’s minis
- Chocolate drizzle or shavings
- Chopped roasted peanuts
Instructions
-
Crust: Preheat oven to 350°F (175°C). Lightly grease a 9-inch pie pan. Melt butter and allow it to cool slightly. In a blender or food processor, blend cookies until fine crumbs, re-blending any larger chunks to ensure an even consistency. In a bowl, combine the cooled melted butter, Oreo crumbs, and salt. Mix until thoroughly combined.
-
Transfer the crumb mixture to the prepared pie pan. Press the crumbs firmly along the sides of the pan first, then evenly into the bottom. Use the flat bottom of a 1-cup measuring cup or a glass to compress the crumbs tightly. Bake for 10 minutes, then remove from the oven and let it cool completely on a wire rack.
-
Filling: In a large mixing bowl, beat the room-temperature cream cheese (see note 1), granulated sugar, creamy peanut butter, vanilla extract, and salt until the mixture is completely creamy, light, and smooth, approximately 3 minutes. Scrape down the sides of the bowl as needed to ensure everything is well incorporated.
-
If using heavy cream, in a separate, clean bowl, use a stand or hand mixer with the whisk attachment to whip the cold heavy cream until firm, stiff peaks form. Be careful not to over-whip.
-
Gently fold the whipped cream (or completely thawed whipped topping) into the peanut butter mixture using a spatula until the mixtures are well integrated and no streaks remain. Avoid overmixing.
-
Pour the creamy filling into the completely cooled Oreo crust and smooth the top evenly with an offset spatula.
-
Cover the pie tightly with plastic wrap and refrigerate for at least 8 hours, or preferably overnight, to allow it to set completely.
-
Serving: Slice with a sharp knife. For cleaner cuts, run the knife under hot water and dry it between each slice. Serve directly from the fridge. Optionally, top individual slices with extra whipped cream, crushed Oreos, mini Reese’s cups, chocolate drizzle, or chopped peanuts.
Recipe Notes & Expert Tips
Note 1: Cream Cheese Temperature is Key! Ensure your cream cheese is thoroughly softened to room temperature for a perfectly smooth pie filling. Cold cream cheese will result in a lumpy texture. If you’re short on time, microwave it outside of its packaging in 10-second bursts, for a total of 20–40 seconds, just until it reaches room temperature. Do not melt it completely.
Note 2: Choose the Right Peanut Butter. For the best results and a stable, non-oily pie, always use a smooth, commercial-style peanut butter (like Skippy or Jif). Natural peanut butters, which tend to separate oil, can cause the pie filling to become greasy and compromise its texture. If you must use natural, stir it vigorously until fully combined before adding.
Note 3: Whipped Cream Options. If using frozen whipped topping (like Cool Whip), make sure it is completely thawed before folding it into the peanut butter mixture. If using fresh heavy cream, ensure it is very cold before whipping it until stiff peaks form; this creates the best airy texture.
Preventing a Soggy Crust: The short bake time for the Oreo crust helps to crisp it up and prevent it from becoming soggy once the creamy filling is added. Ensure the crust is completely cooled before adding the filling.
Achieving a Smooth Filling: Beat the cream cheese and peanut butter mixture well until it’s light and airy before folding in the whipped cream. This aeration contributes to the pie’s delightful texture.
Storage: Return any leftover peanut butter pie, covered tightly with plastic wrap, to the refrigerator. It is good for up to 5 days. For longer storage, freeze as directed above.
Nutrition Information
Calories: 381kcal |
Carbohydrates: 30.5g |
Protein: 6.8g |
Fat: 27.4g |
Cholesterol: 40.6mg |
Sodium: 212.4mg |
Fiber: 1.4g |
Sugar: 23.9g
Nutrition information is automatically calculated and should only be used as an approximation.
Enjoyed this recipe? We’d love to hear from you!
Leave a comment below and share your experience!