
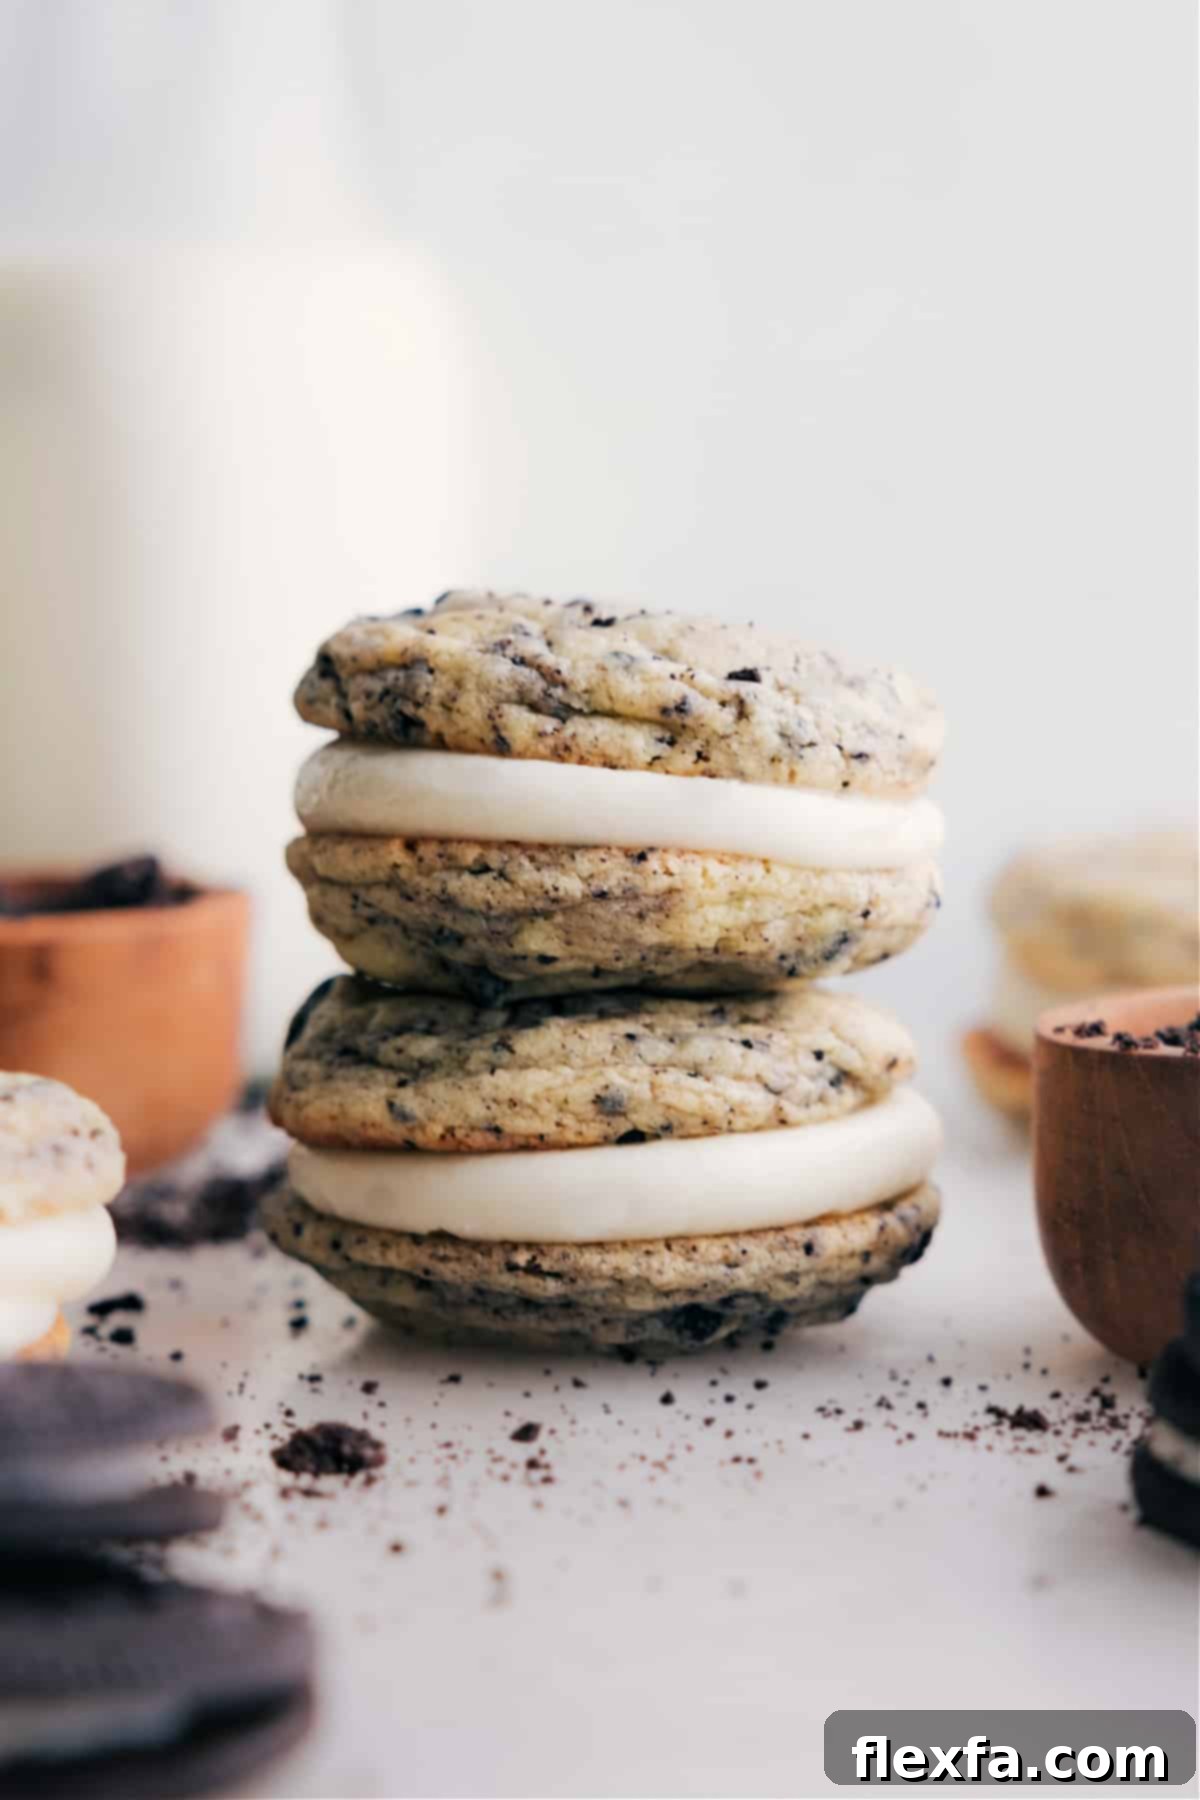
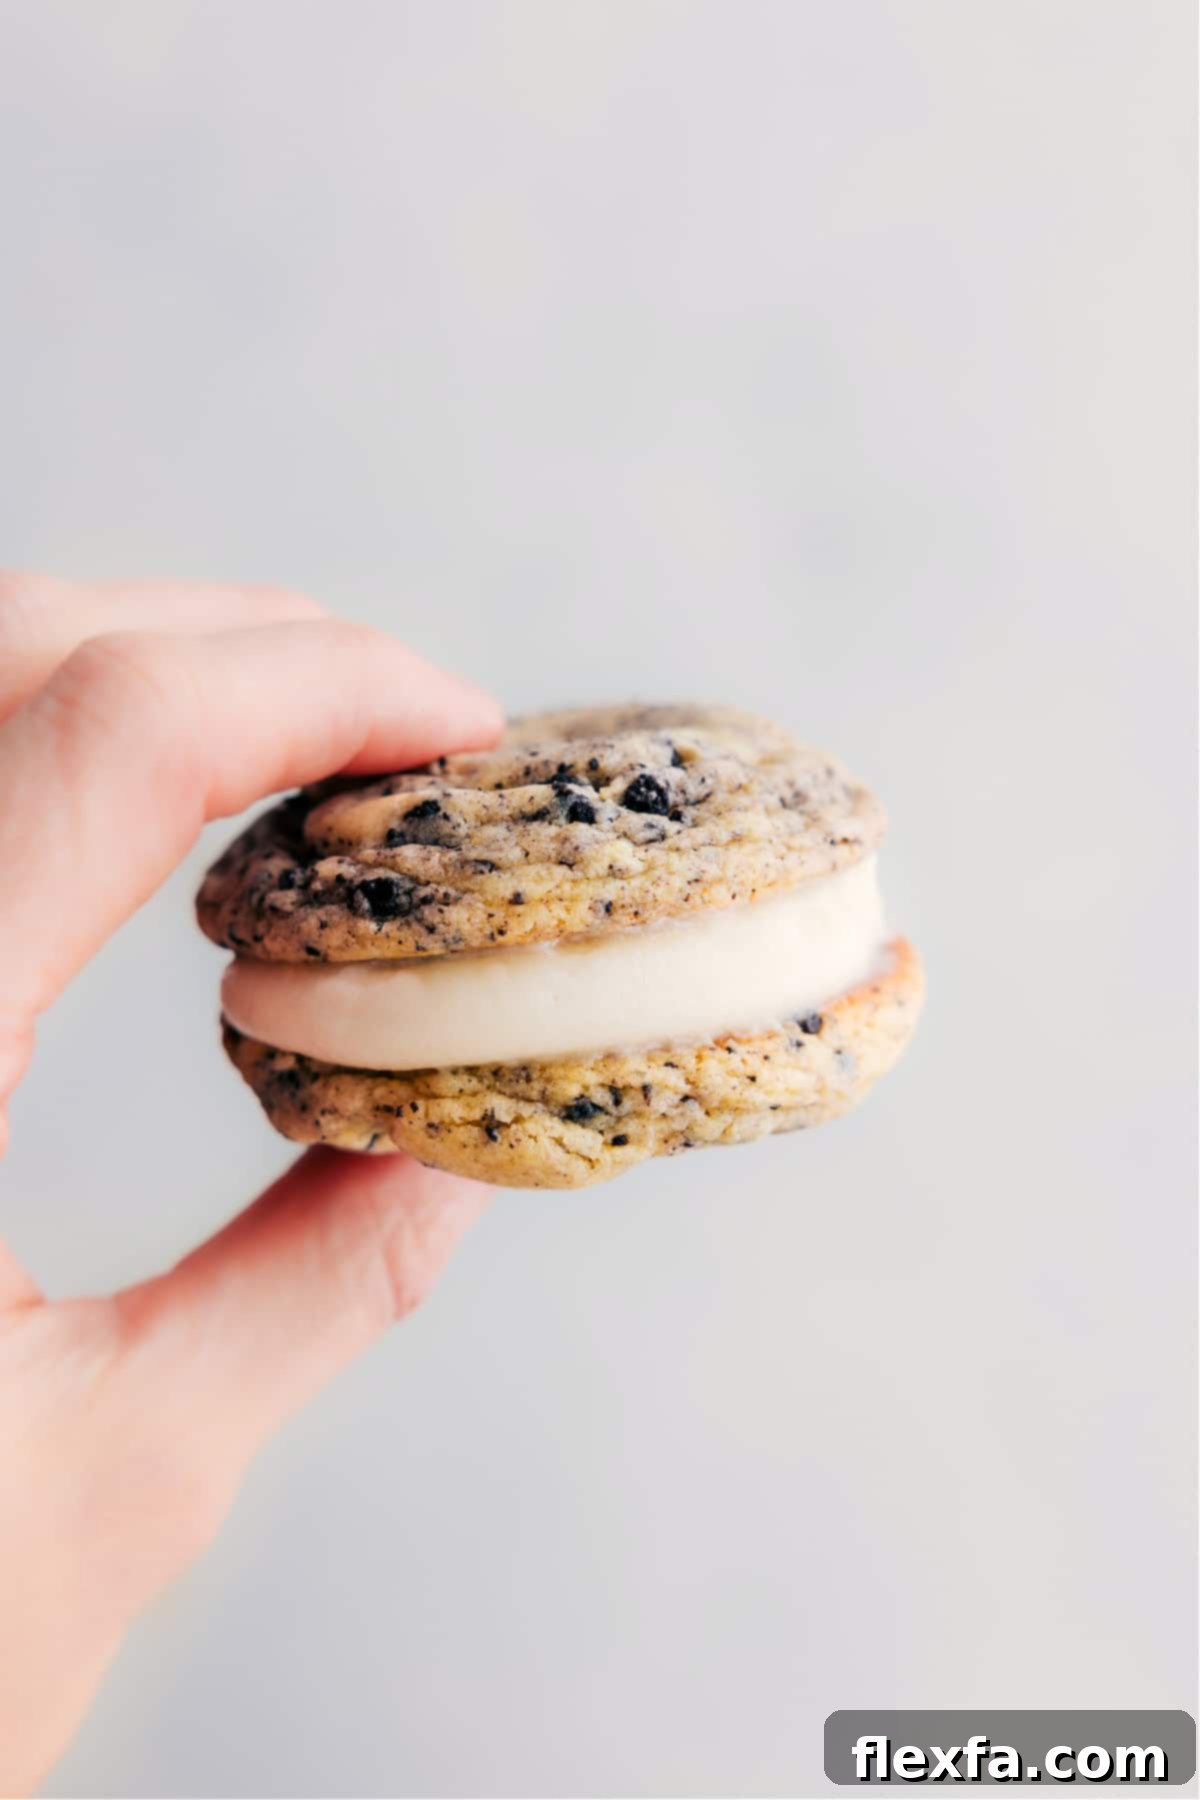
Oreo Whoopie Pies are a delightful dessert that brings smiles to every face! These classic treats feature soft, rich, cake-like cookies sandwiching a luscious, creamy frosting. Perfect for special occasions or just a sweet craving, this recipe delivers a homemade version that rivals any bakery, making it a true fan favorite. Forget the ordinary; these whoopie pies are an extraordinary way to enjoy the beloved Oreo flavor in a whole new dimension.
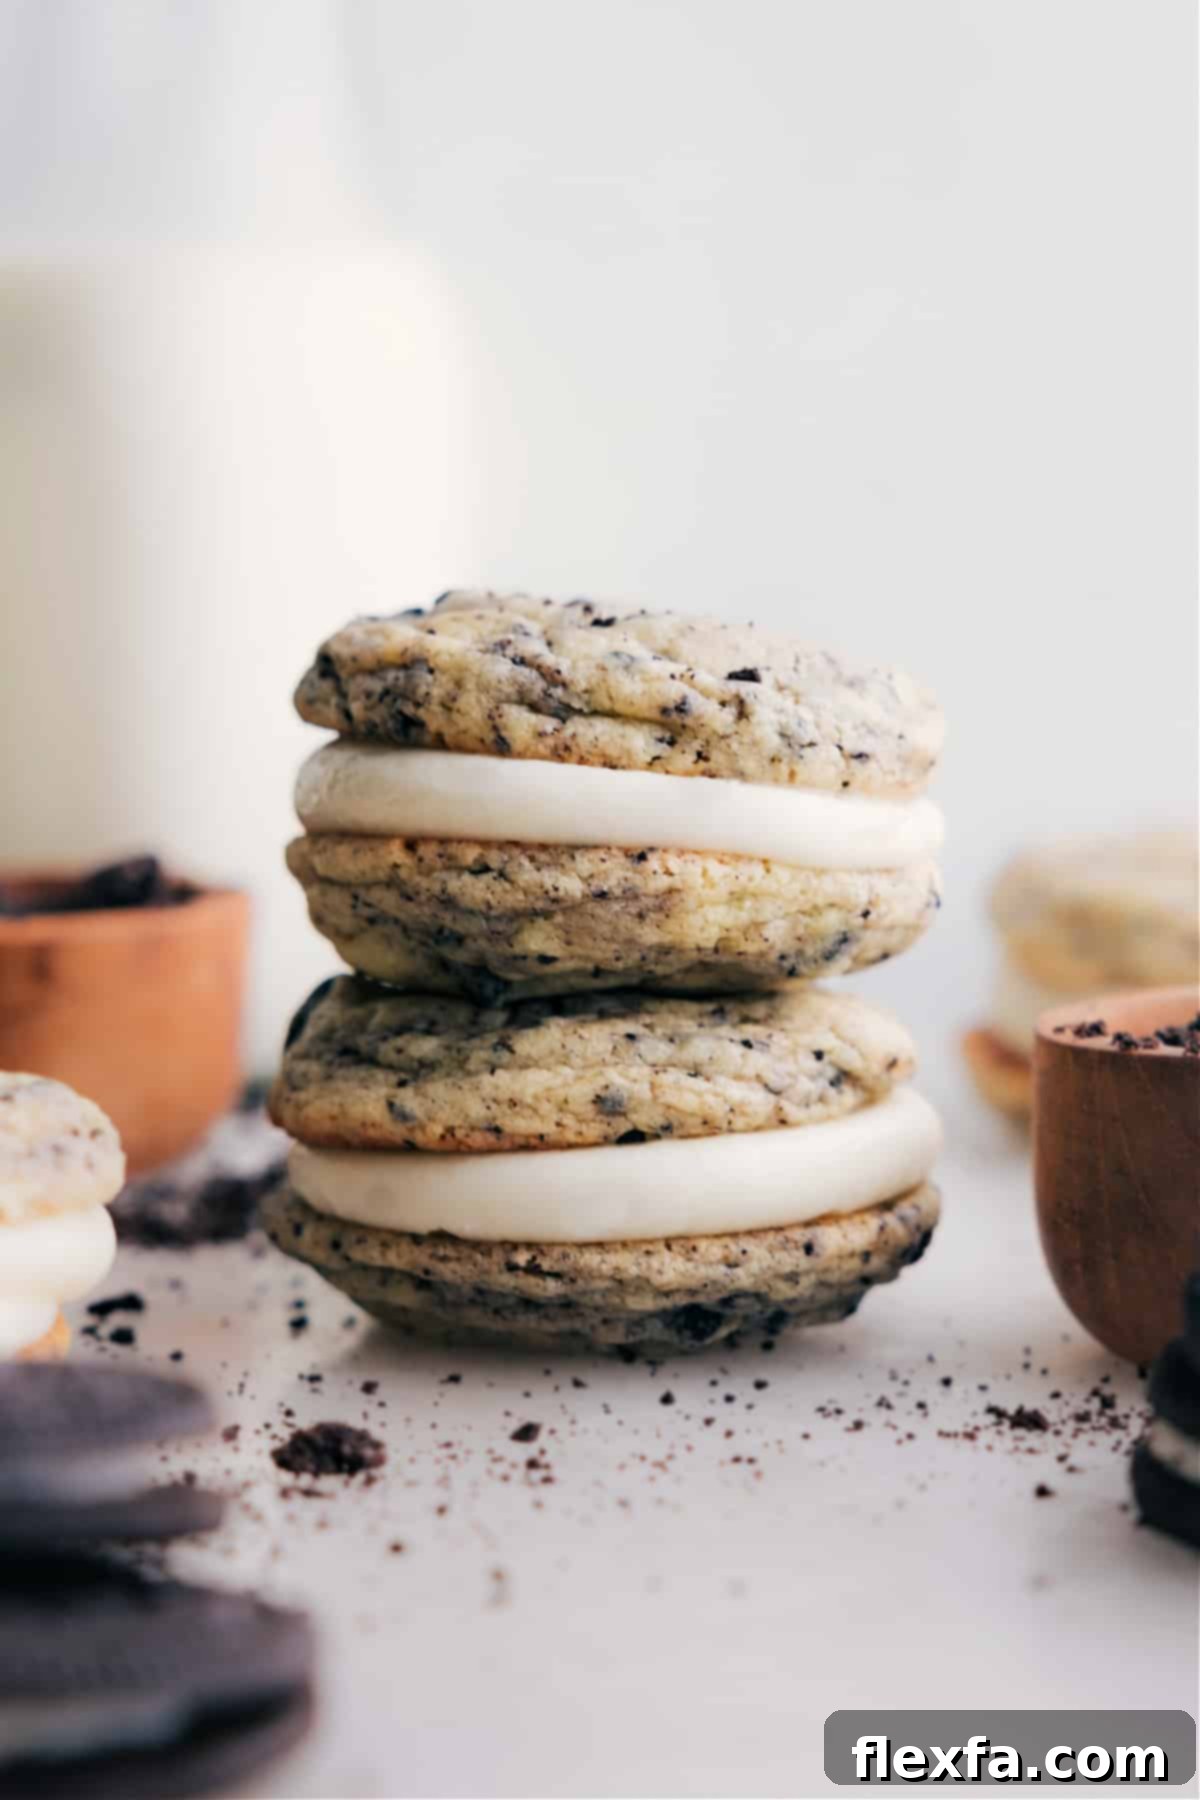
Irresistible Oreo Whoopie Pies: Your New Favorite Copycat Recipe!
There’s nothing quite like a beloved restaurant dessert, and for many in Utah, Cubby’s holds a special place, not just for their famous sandwiches and sweet potato fries, but for their incredible whoopie pies. My husband, a connoisseur of all things sweet, recently presented me with one of their legendary Oreo whoopie pies, declaring, “You absolutely *must* recreate these!” As a passionate baker, I thrive on such culinary challenges, and I enthusiastically accepted the mission to craft the perfect homemade version of these soft, cake-like delights.
My journey to perfecting these whoopie pies began with a reliable cake mix cookie base, similar to the method I used for my homemade Oreos. The key to their signature soft, tender texture lies in this foundation. For the creamy core, I turned to my tried-and-true cream cheese frosting recipe, a consistent winner for its balance of sweetness and tang. The combination of these elements creates a whoopie pie that is not only delicious but also remarkably easy to make.
One of the most crucial secrets to achieving the ideal whoopie pie experience—that wonderfully soft, melt-in-your-mouth texture—is allowing the assembled pies to rest overnight. This overnight softening period transforms the cookies, allowing them to absorb moisture from the creamy filling and develop an even richer flavor profile. This makes them an absolutely perfect make-ahead dessert, ideal for parties, gatherings, or simply enjoying throughout the week!
Crafting Perfection: Essential Ingredients for Your Whoopie Pies
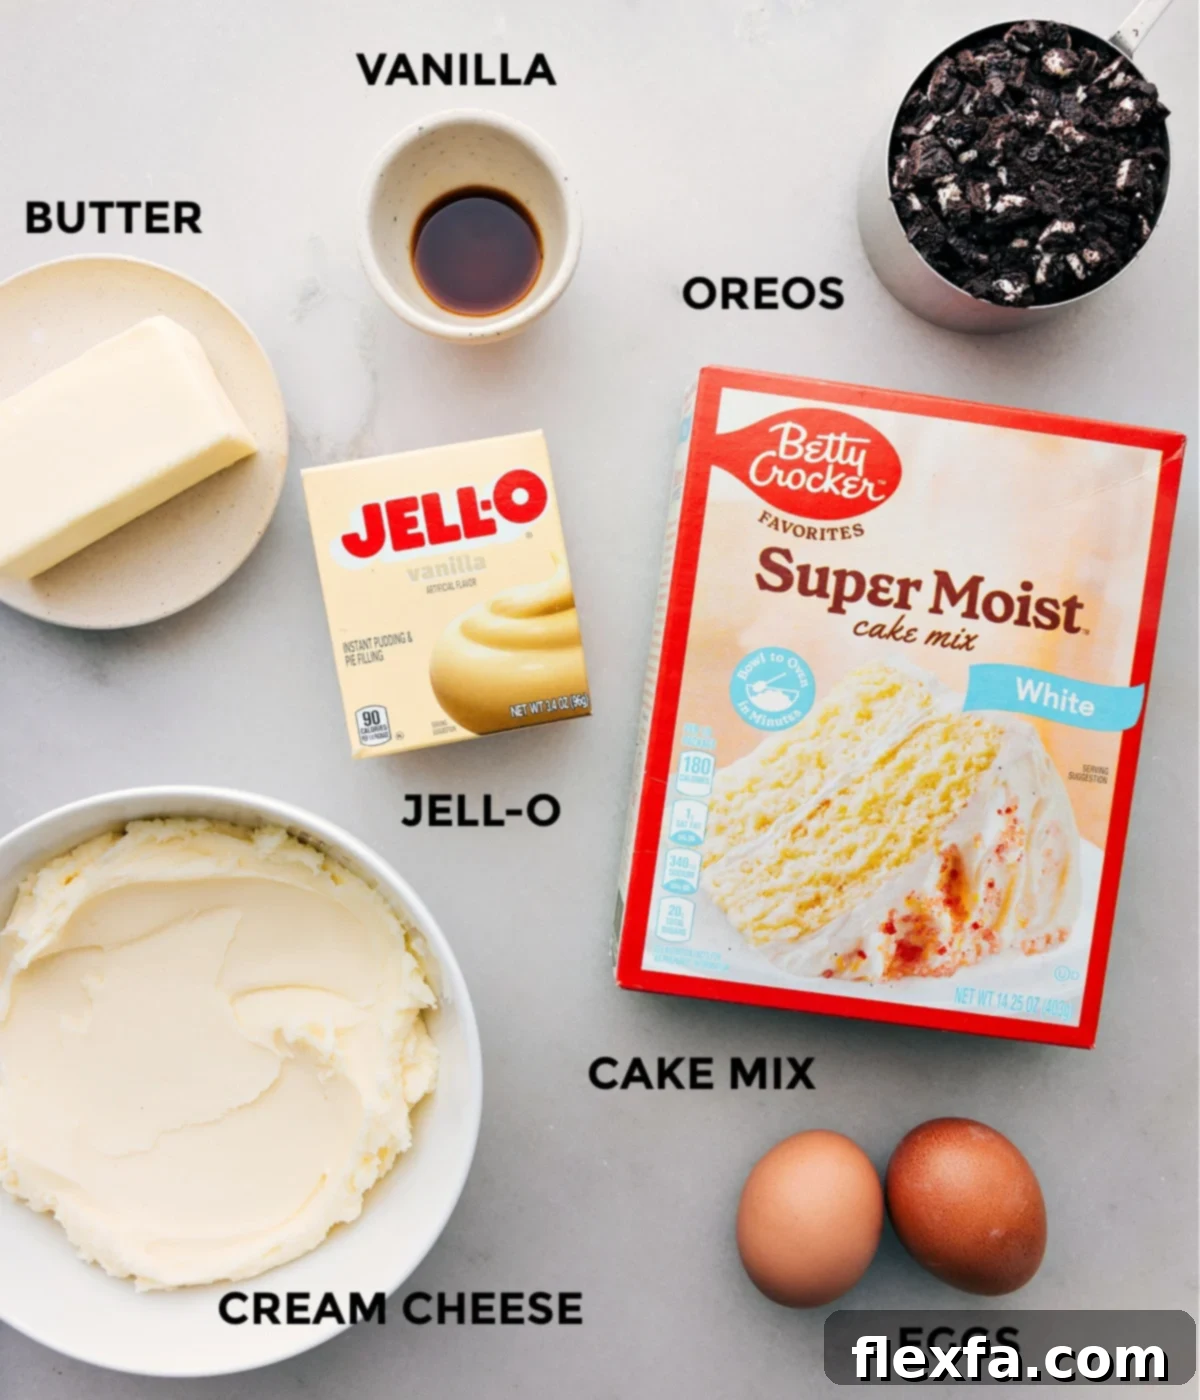
Creating these sensational Oreo Whoopie Pies starts with selecting the right ingredients. Each component plays a vital role in achieving the soft, cake-like texture and rich, creamy flavor that makes these treats so irresistible. Here’s a closer look at what you’ll need and why these choices matter:
For the Soft & Fluffy Oreo Cookies:
- Betty Crocker Super Moist Vanilla Cake Mix: This is my ultimate secret weapon for these whoopie pies! While other cake mixes might work, I’ve found that Betty Crocker’s Super Moist Vanilla (or even White Cake Mix) consistently delivers the best flavor, moisture, and tender texture, making it superior for cake-like cookies. Ensure you grab a 14.25-ounce box for optimal results, and remember, we’re only using the mix, not the box instructions!
- Instant Vanilla Pudding Mix: Don’t skip this ingredient! Using instant pudding mix (not the “cook and serve” variety) is key for enhancing the cookies’ moisture content and giving them an extra tender crumb. It also subtly boosts the vanilla flavor, complementing the chocolate Oreos beautifully.
- Large Eggs: Always use room temperature eggs when baking. Eggs at room temperature emulsify more easily with butter and other ingredients, leading to a smoother, more uniform dough and a better texture in your finished cookies.
- Unsalted Butter: Opt for unsalted butter to have full control over the salt content in your recipe. It should be softened to room temperature but not melted. Softened butter creams beautifully, creating air pockets that contribute to the cookies’ light and airy structure.
- Vanilla Extract: A good quality vanilla extract enhances all the other flavors, adding depth and warmth to the cookie base.
- Oreo Cookies: The star of the show! Use regular Oreos, as their classic chocolate cookie and cream filling contribute both flavor and textural contrast. Finely chop them (cream included!) to ensure an even distribution of Oreo goodness in every single bite. Crushing them in a sealed bag with a rolling pin or pulsing them briefly in a food processor works wonders.
For the Dreamy Cream Cheese Frosting:
The filling is just as important as the cookie in a whoopie pie, and this cream cheese frosting is the perfect complement. It’s rich, tangy, and incredibly smooth.
- Unsalted Butter: Like for the cookies, use unsalted butter at room temperature. This ensures it creams seamlessly with the cream cheese, yielding a smooth, lump-free frosting.
- Full-fat Cream Cheese: For the best texture and thickness, always choose brick-style, full-fat cream cheese. It should be softened but not melted. The higher fat content provides a richer, more stable frosting that holds its shape beautifully between the cookies.
- Vanilla Extract: Another dash of vanilla in the frosting amplifies its sweetness and creates a harmonious flavor profile with the chocolate cookies.
- Salt: A small pinch of salt is essential for balancing the sweetness of the powdered sugar and butter. It truly brings out the rich flavors and prevents the frosting from being overly sugary.
- Powdered Sugar: Also known as confectioners’ sugar, this provides the bulk and sweetness of the frosting. You can adjust the amount to achieve your desired level of sweetness and thickness. Sifting it beforehand can help prevent lumps, though thorough beating usually takes care of it.
Step-by-Step Guide: How To Make Homemade Oreo Whoopie Pies
Making these Oreo Whoopie Pies is a surprisingly straightforward process, especially with the clever use of a cake mix. Follow these steps for a guaranteed delicious outcome:
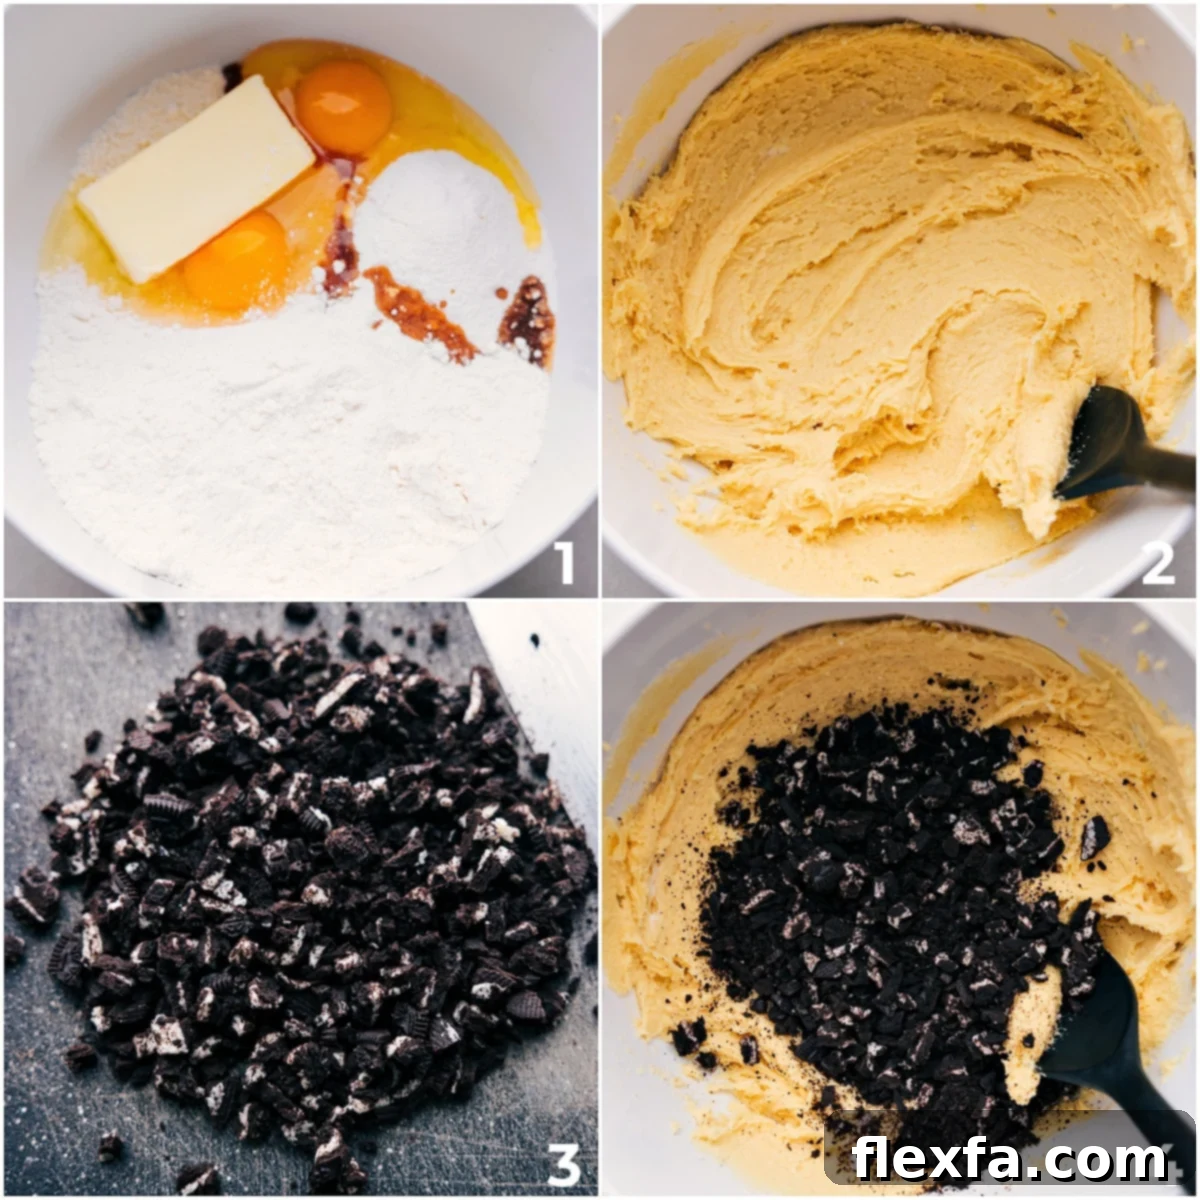
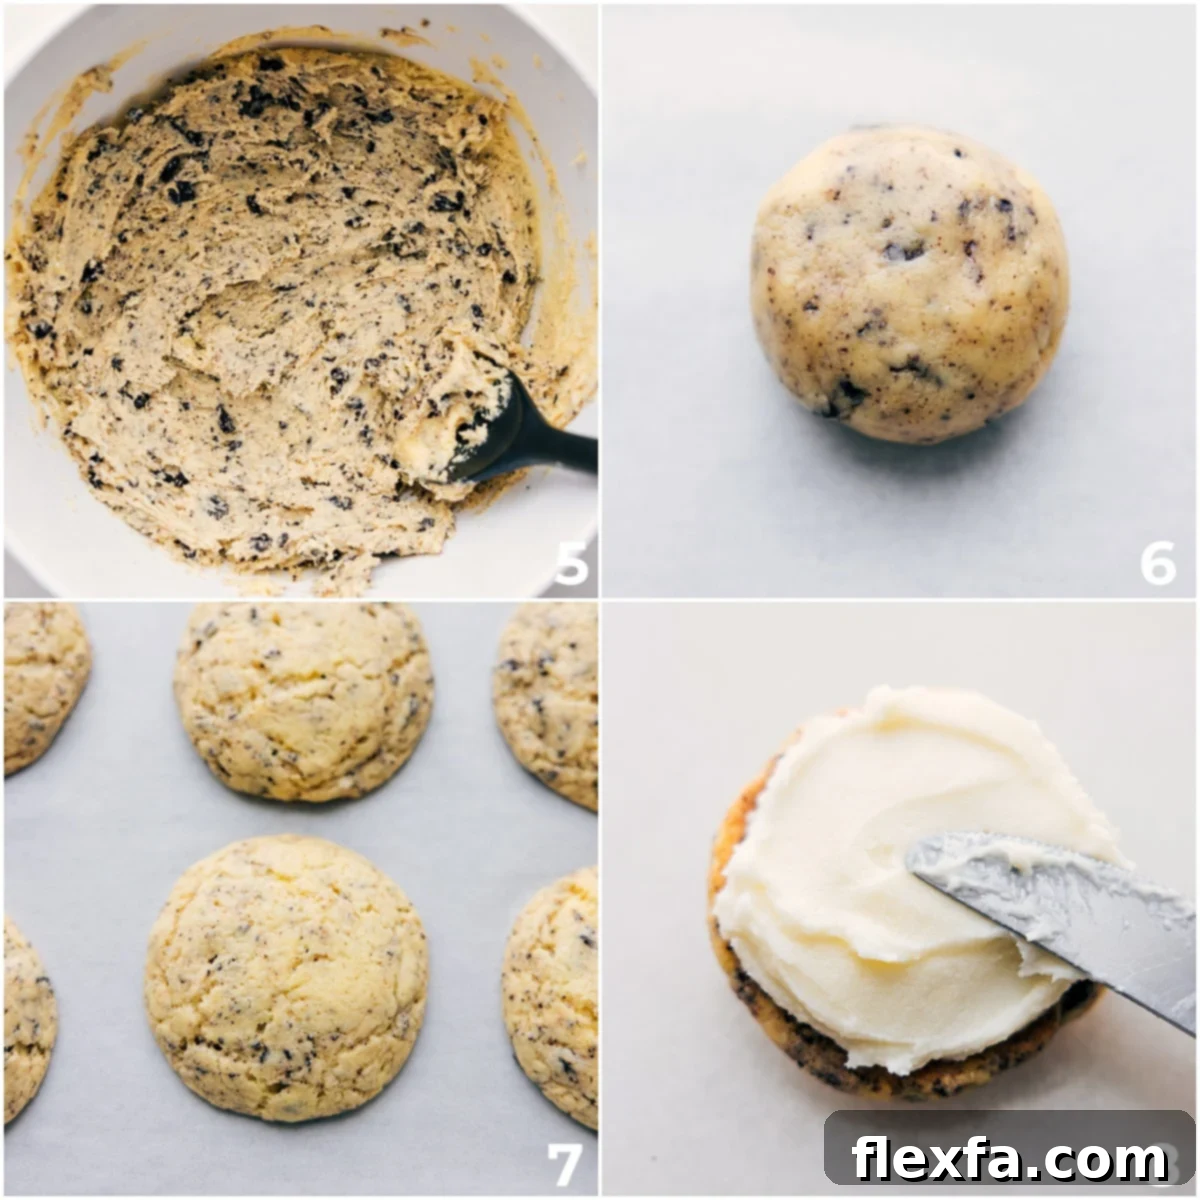
- Prepare the Cookie Dough: In the bowl of a stand mixer fitted with the paddle attachment (or using a large bowl and a hand mixer), combine the vanilla cake mix, instant vanilla pudding mix, softened unsalted butter, large eggs, and vanilla extract. Beat these ingredients on medium speed until a thick, uniform dough forms. Scrape down the sides of the bowl as needed to ensure everything is well incorporated. Once the dough is ready, gently fold in your finely chopped Oreo cookies. Be careful not to overmix at this stage to maintain cookie texture.
- Chill the Dough Balls: To ensure your whoopie pie cookies bake up perfectly puffy and don’t spread too thin, it’s crucial to chill the dough. Roll the dough into uniform balls, about 1 ½ tablespoons each (or roughly 30 grams if using a food scale for precision). Arrange them on a plate or small baking sheet and refrigerate for a minimum of 30 minutes, or up to an hour. This chilling time helps the butter solidify, preventing excessive spreading in the oven.
- Bake the Cookies: Preheat your oven to 350°F (175°C). Line a baking sheet with parchment paper or a silicone baking mat for easy release and consistent baking. Place the chilled dough balls about 2 inches apart on the prepared baking sheet. Bake for 9 to 10 minutes, or until the edges are lightly golden and the centers are set but still soft. Avoid overbaking, as this can lead to dry cookies. Let the cookies cool on the baking sheet for about 5 minutes before transferring them to a wire rack to cool completely. Repeat with any remaining dough.
- Whip Up the Creamy Frosting: While your cookies are cooling, prepare the luscious cream cheese frosting. Ensure both your unsalted butter and full-fat cream cheese are at room temperature. In your mixer, beat the butter and cream cheese together until the mixture is light, fluffy, and completely smooth, with no lumps remaining. Then, mix in the vanilla extract and a pinch of salt. Gradually add the powdered sugar, one cup at a time, beating on low speed until combined, then increasing to medium-high for 1-2 minutes until the frosting is smooth and creamy. If the frosting feels too soft, chill it for 20-30 minutes to firm up. If it’s too stiff, add a tiny splash of milk.
- Assemble Your Whoopie Pies: Once the cookies are entirely cool, it’s time for assembly! Transfer your chilled frosting to a piping bag fitted with a wide tip for easy and even distribution. Pipe a generous dollop of frosting onto the flat side of one cookie. Gently top with another cookie, pressing lightly to create a sandwich. Repeat this process with all remaining cookies.
- The Essential Overnight Rest: This step is non-negotiable for true whoopie pie perfection! Cover your assembled Oreo Whoopie Pies loosely with plastic wrap and refrigerate them overnight. This resting period allows the soft cookies to absorb moisture from the cream cheese frosting, transforming their texture into the quintessential soft, cake-like consistency that whoopie pies are famous for. It also melds the flavors beautifully, preventing the frosting from squeezing out when you take that first delightful bite.
Quick Tip: Achieve Perfectly Sized Whoopie Pies
For uniform whoopie pies that look professional and bake evenly, consistency is key. Using a food scale to weigh your dough balls (aim for about 30 grams per ball) ensures each cookie is the same size. This guarantees perfectly matched pairs and consistent baking results, eliminating the frustration of mismatched cookies.
Expert Tips & Troubleshooting for Your Best Oreo Whoopie Pies
Even though this recipe is relatively simple, a few expert tips can elevate your Oreo Whoopie Pies from great to absolutely phenomenal. Pay attention to these details for perfect results every time:
- Master the Oreo Chop: For a delightful burst of Oreo flavor in every bite, it’s essential to finely chop your regular Oreos (cream filling included!). You can achieve this with a sharp knife, or for quicker results, place them in a sealed Ziploc bag and crush them with a rolling pin. If you prefer a finer crumb, a few pulses in a food processor will do the trick. The goal is small pieces, not a fine powder, to retain some texture.
- Don’t Skip the Dough Chill: Chilling your cookie dough balls for at least 30 minutes in the refrigerator is a critical step. Cold dough prevents the cookies from spreading too much during baking, ensuring they maintain their thick, puffy, cake-like shape characteristic of whoopie pies. If your kitchen is warm, you might even consider chilling for up to an hour.
- Cool Completely Before Frosting: Patience is a virtue when it comes to whoopie pies! Ensure your cookies are entirely cooled to room temperature before you even think about adding the frosting. Applying frosting to warm cookies is a recipe for disaster; it will melt, slide, and turn your beautiful pies into a gooey mess.
- Fixing Frosting Consistency:
- If your frosting is too soft: This often happens if the butter or cream cheese was too warm, or if you added too much liquid. Simply pop the bowl of frosting into the refrigerator for 15-30 minutes. Give it a good whip after chilling, and it should firm up perfectly.
- If your frosting is too stiff: This can occur if your butter or cream cheese was too cold, or if you added too much powdered sugar. Let the frosting sit out at room temperature for a bit, then beat it again. If it’s still too stiff, add a tiny bit (half a teaspoon at a time) of milk or cream, beating until it reaches the desired smooth, pipeable consistency.
- The Overnight Rest is Magical: I cannot stress this enough – covering your assembled whoopie pies and letting them rest in the refrigerator overnight is the game-changer for this recipe. This allows the cookies to fully soften and become wonderfully cake-like, absorbing moisture from the frosting. It also gives the flavors time to meld beautifully. Without this step, the cookies might feel a bit firmer, and the frosting is more likely to squeeze out when you take a bite. Trust the process for that perfect, melt-in-your-mouth experience!
Essential Baking Tools for Whoopie Pie Success
Having the right tools can make all the difference in your baking experience, turning what could be a messy chore into an enjoyable process. For these Oreo Whoopie Pies, a few key pieces of equipment will streamline your preparation and help you achieve professional-looking results:
- Silicone Spatula: An indispensable kitchen tool! A good silicone spatula is perfect for scraping down the sides of your mixing bowls, ensuring all ingredients are thoroughly incorporated into the dough and frosting. Its flexibility and heat resistance make it incredibly versatile.
- Baking Tray & Silicone Liner or Parchment Paper: A sturdy baking tray provides an even heating surface for your cookies. Pairing it with a silicone baking mat (like a Silpat) or parchment paper is crucial. These liners prevent sticking, promote even baking, and make cleanup an absolute breeze. Plus, they contribute to the cookies’ perfectly browned bottoms without overbaking.
- Metal Spatula: A thin, offset metal spatula is incredibly handy for gently lifting your warm cookies from the baking sheet to the cooling rack. Its design minimizes the risk of breaking delicate cookies. You can also use it to gently smooth the edges of your cookies if you desire a perfectly rounded finish while they are still warm and pliable.
- Piping Bag with a Wide Tip: While you can certainly use a knife to spread the frosting, a piping bag fitted with a wide round or star tip makes the assembly process much cleaner, faster, and more professional-looking. It allows for an even distribution of frosting and creates a beautiful swirl that enhances the visual appeal of your whoopie pies. If you don’t have a piping bag, a large resealable plastic bag with a corner snipped off will work in a pinch.
Storage & Make-Ahead Tips for Oreo Whoopie Pies
To keep your Oreo Whoopie Pies fresh and delicious, store them in an airtight container in the refrigerator for up to 4 days. For the best flavor and texture, allow them to come to room temperature for about 30 minutes before serving. This brings the cookies back to their soft, cake-like consistency and ensures the frosting is perfectly creamy.
Planning ahead? You can freeze the unbaked cookie dough balls! Simply roll them as directed, then arrange them on a baking sheet and freeze until solid. Once frozen, transfer them to a freezer-safe bag or container for up to 2-3 months. When ready to bake, you can bake them directly from frozen, adding an extra 1-3 minutes to the usual baking time. Freezing the unbaked dough is preferable to freezing baked cookies, as it preserves the fresh-baked taste and ideal texture much better.
Don’t Let Those Leftover Oreos Go to Waste! Try These Delicious Desserts:
If you find yourself with extra Oreos after making these amazing whoopie pies, you’re in luck! Oreos are incredibly versatile and can be incorporated into a multitude of other delectable treats. Here are some fantastic ideas to put those leftover cookies to good use and satisfy any remaining sweet cravings:
- Oreo Frosting Recipe: This rich and creamy frosting, packed with crushed Oreos, is absolutely perfect for frosting cupcakes, adding a delightful topping to cakes, or even sandwiching between more cookies.
- Oreo Fluff Dessert Dip: A light, airy, and incredibly addictive dessert dip that combines creamy ingredients with crushed Oreos. It’s fantastic served with fruit, graham crackers, or vanilla wafers.
- Chocolate Covered Oreo Fudge: Indulge in this super easy-to-make fudge recipe, requiring minimal effort and just a microwave. It’s a rich, chocolatey, and delightfully textured treat that’s perfect for gifting or sharing.
- Crumbl Oreo Cookies Copycat Recipe: If you’re a fan of the popular cookie chain, this copycat recipe promises a cookie that’s even better than the original, capturing that iconic Crumbl taste and texture.
- Oreo Pie Crust: Elevate any pie or cheesecake with this simple yet decadent chocolate pie crust made from crushed Oreos. It’s my absolute favorite foundation for a variety of creamy desserts.

Oreo Whoopie Pies
Equipment
-
Sheet pan (15″ x 10″)
-
Parchment paper or liner
-
Stand mixer or hand mixer
-
Cooling rack
Ingredients
- 1 (14.25-ounce) package Betty Crocker Super Moist White Cake Mix or vanilla, see note 1
- 1 (3.4-ounce) package instant vanilla pudding mix
- 2 large eggs
- 8 tablespoons unsalted butter 1/2 cup, at room temp
- 1 teaspoon vanilla extract
- 1 cup finely chopped regular Oreos about 9 cookies
- 8 tablespoons unsalted butter 1/2 cup, at room temp
- 1 (8-ounce) package cream cheese full-fat, brick-style, softened
- 1 teaspoon vanilla extract
- 1/8 teaspoon salt
- 3 cups powdered sugar
Instructions
-
In a stand mixer (or using a large bowl and a hand mixer), combine cake mix, pudding mix, butter, eggs, and vanilla. Beat until you have a very thick dough. Scrape the bowl as needed. Finely chop whole Oreos (with the creme) and fold into the dough.
-
Roll 1-1/2 tablespoons of dough into balls (30 grams each on a food scale). Chill balls for 30 minutes to an hour to keep them puffy during baking.
-
Preheat oven to 350°F. Line a sheet pan with parchment paper or a liner. Place dough balls 2 inches apart on the sheet. Bake for 9–10 minutes until bottoms are slightly browned. Don’t overbake. Let cookies rest on the sheet for 5 minutes before moving to a cooling rack. Repeat with remaining dough.
-
Frosting: Soften the cream cheese in the microwave on a safe plate using 15–20 second bursts until room temperature. In a mixer, cream the butter and cream cheese until smooth. Mix in vanilla and salt. Gradually add powdered sugar, beating until smooth. Beat on low speed for 30 seconds, then increase to medium-high speed and beat for 1–2 minutes. For thicker frosting, add an extra 1/4 cup powdered sugar. Chill frosting for 20–30 minutes to firm up before frosting.
-
Once cookies are cool, transfer frosting to a piping bag with a wide tip. Pipe frosting on 1 cookie and gently sandwich with another. Repeat with all cookies.
-
Cover whoopie pies with plastic wrap and refrigerate overnight to soften (see note 2). The next day, let them come to room temperature before serving. They are best enjoyed on that same day.
Recipe Notes
Note 2: This is where they become soft and cake-like, plus more flavorful. If cookies haven’t had a chance to thoroughly soften, the frosting squeezes out when you bite into them!
Storage: Keep Oreo Whoopie Pies in an airtight container in the fridge for up to 4 days. Freeze the unbaked dough rather than the baked cookies. You can bake the dough straight from the freezer, just add 1–3 minutes to the baking time.
Nutrition
| Calories: 416 kcal
| Carbohydrates: 53.6g
| Protein: 3g
| Fat: 21.6g
| Cholesterol: 77.8mg
| Sodium: 352.7mg
| Sugar: 43.4g
Nutrition information is automatically calculated, so should only be used as an approximation.