
Easy No-Bake Halloween Treats: Spooky Fun with 4 Ingredients or Less!
Get ready for a hauntingly good time with these **easy Halloween treats**, each requiring just four ingredients or less! Forget complicated baking and lengthy prep times; these simple, delicious, and no-bake recipes are designed for maximum fun and minimal fuss. We’ll show you how to whip up delightfully creepy **Monster Eyeballs**, charming **Witch’s Hats**, whimsical **Witch’s Brooms**, and adorable **Bat Bites**. Whether you’re hosting a Halloween party, preparing for trick-or-treaters, or simply looking for a fun activity with the kids, these recipes promise spooky delight and unforgettable memories.

Author’s Note
Unleash Spooky Snacks with Minimal Effort!
Halloween holds a special place in my heart as the most enjoyable holiday for culinary creativity. It’s truly the only time of year you can serve up edible eyeballs, bats, and witches’ hats as delightful snacks without a second thought! This year, I focused on keeping things incredibly simple. After all, nobody wants to be bogged down with elaborate dessert preparations on a busy Halloween night. My goal was to create impressive yet effortless **no-bake Halloween treats** that everyone could enjoy making and eating.
I’ve crafted four unique and spooktacular treats, each boasting a concise ingredient list of **four items or less**: these include playful **Monster Eyeballs, charming Witch’s Hats, clever Witch’s Brooms, and adorable Bat Bites.**
These recipes are not only quick and require absolutely no baking, but they also provided endless giggles and smiles when my children and I made them together. Everyone pitched in, from unwrapping candies and sticking on the googly eyes to sneaking a few sprinkles here and there. The absolute best part? I never once had to turn on the oven, leaving more time for festive activities and less for cleanup!
Essential Ingredients for Your Easy Halloween Treats
Crafting these delightful Halloween snacks is incredibly straightforward, thanks to their minimal ingredient lists. Here’s a comprehensive rundown of all the components you’ll need, along with some helpful tips to ensure your treats turn out perfectly:
- Oreo Thins Cookies: These slender cookies are essential for two of our treats. The chocolate-crème variety works wonders for the base of our witch hats and forms the perfect bat wings. It’s crucial to stick with the “Thins” version for the bat bites; regular Oreos tend to be too heavy and might overpower the Reese’s cups or break easily when halved.
- Cream Cheese Frosting: While homemade cream cheese frosting undeniably offers the richest flavor and best texture, readily available bakery tubs or standard store-bought frosting brands will work just as well for convenience. Choose a vanilla or plain flavor that you can easily color.
- White Chocolate: For the smoothest melting and best flavor in your bat bites, always opt for a good quality brand of white chocolate chips or melting wafers. This ensures a clean look and a delightful taste.
- Chocolate Candy Kisses: These iconic candies are the perfect pointy tops for our witch hats. For a fun and slightly different twist, consider using Hershey’s “Hugs” to create striped witch hats – a creative variation that adds visual interest.
- Food Coloring: To achieve those vibrant, spooky Halloween hues, gel food colors are your best bet. They are more concentrated than liquid food coloring, meaning you’ll need less to get bright, bold results without altering the frosting’s consistency.
- Halloween Sprinkles: Sprinkles add a wonderful touch of festivity and color. You can find a fantastic array of seasonal mixes at local grocery stores, craft stores, or through online retailers. Look for orange, black, green, and purple mixes, or even specific Halloween shapes like ghosts or pumpkins.
- Reese’s Miniature Cups: These are a core component for our Witch’s Brooms and Bat Bites. To ensure they hold their shape and prevent any cracking or smudging during assembly, it’s best to use fresh, chilled miniature cups. Unwrap them ahead of time for easier assembly.
- Pretzels: We use two types of pretzels in these recipes. Pretzel twists (or snaps) are ideal for forming the eerie base of our monster eyeballs, offering a perfect nooky shape. Mini pretzel sticks, on the other hand, serve as the sturdy and edible handles for our charming witch’s brooms.
- Pull-Apart Twizzlers: For the broom bristles, fresh packs of pull-apart licorice are highly recommended. They are much softer and more pliable, making them significantly easier to shape and tie around the pretzel sticks without breaking.
- Rolos: These caramel-filled chocolates are key for the monster eyes. Make sure to use fresh Rolos that are soft enough to gently melt and hold their shape without crumbling when slightly warmed.
- M&M’s: You can use either seasonal Halloween-colored M&M’s or regular packs. If you use regular packs, you might want to sort them by color to achieve the desired spooky effect for your monster eyeballs.
- Edible Candy Eyeballs: These are the ultimate finishing touch for several of our spooky creations. Miniature candy eyeballs are perfect for the bats, while larger ones are essential for creating truly monstrous eyeballs. An assorted pack is always a convenient choice if you’re making a variety of these easy Halloween treats.
Quick Tip: Finding Edible Eyes
Having trouble locating those fun edible eyes for your Halloween treats? Don’t fret! You can typically find them in the baking aisle of most local grocery stores. Craft stores like Hobby Lobby and JoAnn’s are also excellent resources, often carrying a wider variety of sizes and styles, especially during the Halloween season. For the widest selection and convenience, online shopping is always a great option, ensuring you get exactly the eyes you need for your spooky creations.
Tips for Ensuring Spooktacular Success
Making these easy Halloween treats should be a fun and stress-free experience. Follow these simple tips to ensure your spooky snacks come out perfectly every time, making your Halloween prep a breeze:
- Preparation is Key: Before you even start assembling, lay out all your ingredients, unwrapped candies, and necessary tools. This “mise en place” approach ensures a smooth and quick assembly process, especially when working with melting chocolates or impatient little helpers. Having everything within reach eliminates last-minute scrambling.
- Strategic Chilling: If you find that your candies are becoming too soft or melting slightly during assembly, don’t hesitate to pop your treats into the fridge for a few minutes. A quick chill can firm them up, making them easier to handle and preventing your creations from losing their shape.
- Clever Piping: No fancy piping bag? No problem! A simple zip-top bag can be your best friend. Just fill it with frosting or melted chocolate, push the contents to one corner, twist the top to seal, and snip off a tiny bit of the corner with scissors. This creates an instant, disposable piping bag for precise application.
- Gentle Oreo Separation: When separating Oreo Thins for the bat wings, use a thin table knife or a small spatula. Gently twist and pry the cookies apart to minimize crumbling. Not every cookie will come apart perfectly, but with a careful hand, you’ll get plenty of usable halves.
- Mindful Rolo Melting: For the monster eyeballs, the key is to soften the Rolos, not completely melt them. Keep a close eye on them in the oven – a minute or two can make all the difference. You want them just pliable enough to press an M&M and an eyeball into, without becoming a liquid mess.
- Assembly Line Efficiency: If you’re making a large batch of treats, embrace the assembly line method. Line up all your Oreo bases, then go through and pipe frosting on all of them, then add all the chocolate kisses, and finally, all the sprinkles. This systematic approach is much faster and more efficient than making each treat individually.
- Involve the Kids: These treats are fantastic for little hands! Delegate age-appropriate tasks like unwrapping candies, sprinkling decorations, or placing the candy eyeballs. Not only does this lighten your workload, but it also turns snack-making into a memorable and engaging Halloween activity for the whole family.
How to Assemble These Easy Halloween Treats in Minutes
You’ll be truly amazed at how quickly and effortlessly these spooky delights come together. With just a few simple steps for each, you’ll have a platter full of Halloween fun in no time!
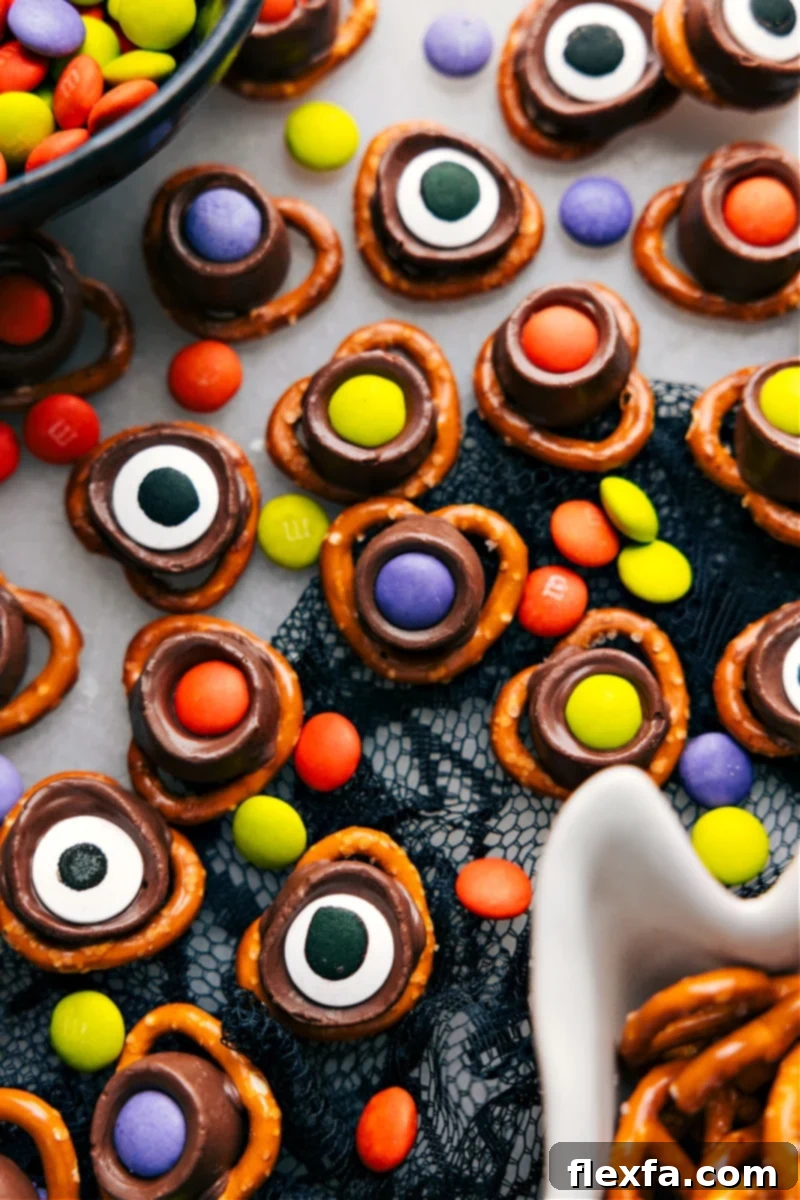
- Monster Eyeballs Assembly: Start by arranging pretzel twists on a parchment-lined baking sheet. Place an unwrapped Rolo onto the center of each pretzel. Briefly bake them to soften the Rolos (refer to the full recipe for precise timing). Immediately after removing them from the oven, gently press an M&M into the center of each Rolo, followed by a large candy eyeball. A tiny drizzle of melted chocolate can be added for creepy “veins” around the eyeball for an extra ghoulish effect.
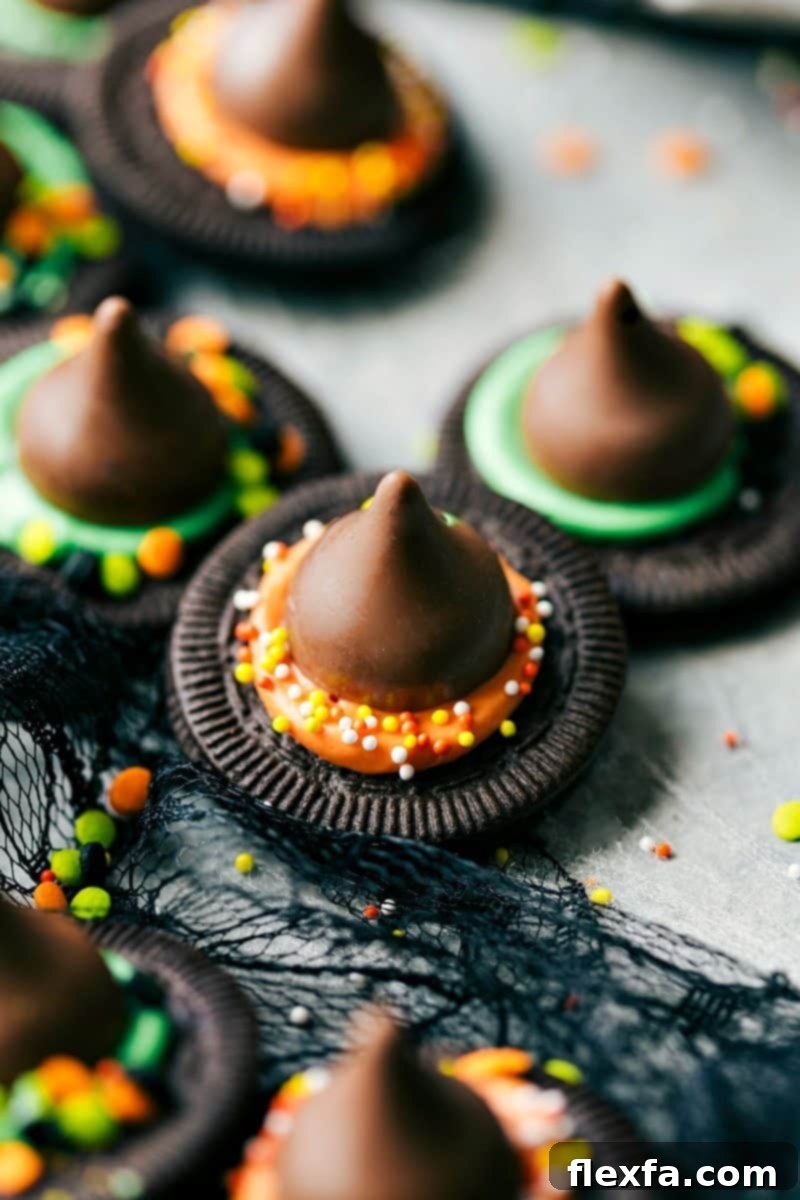
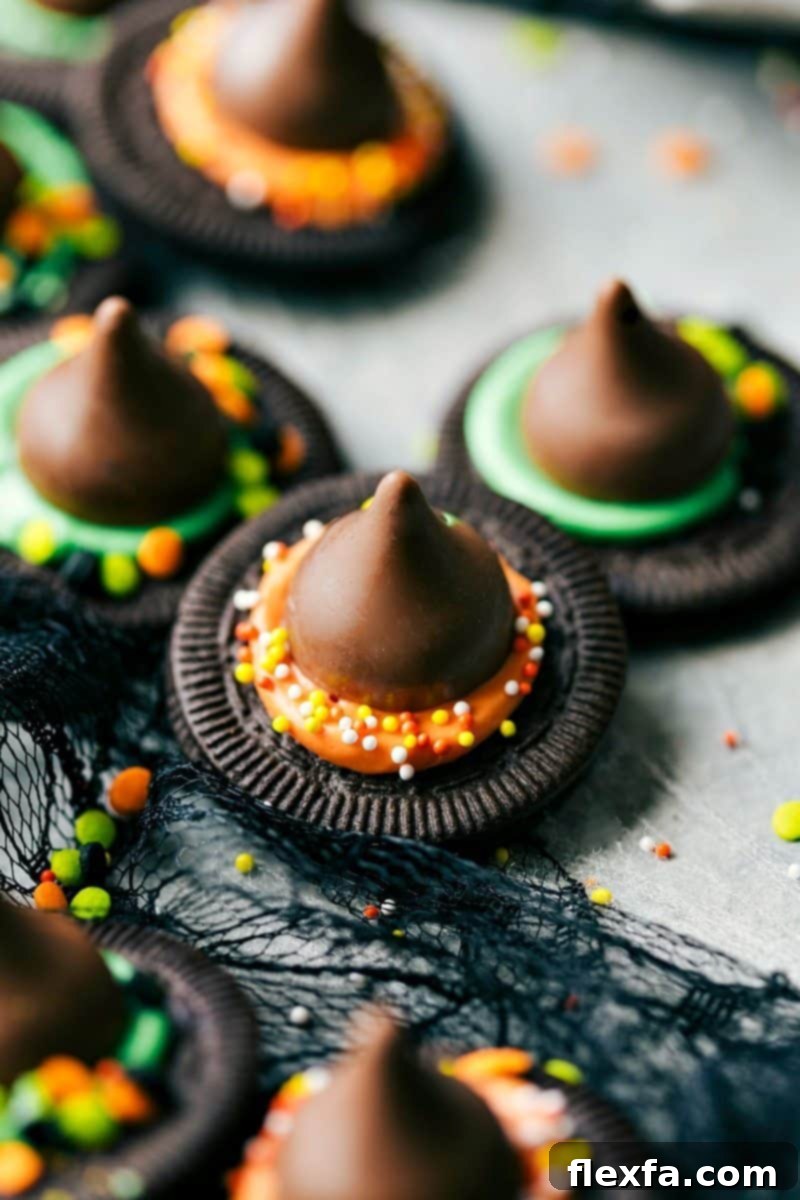
- Witch’s Hats Creation: Take an Oreo Thin and use it as your witch hat base. Using a piping bag (or a zip-top bag with a snipped corner), pipe a generous dollop of colored frosting (green and orange work wonderfully) in the very center of the Oreo. While the frosting is still soft, gently press an unwrapped chocolate kiss onto the frosting to form the pointed hat. For an extra touch of magic, scatter some Halloween sprinkles around the base of the frosting.
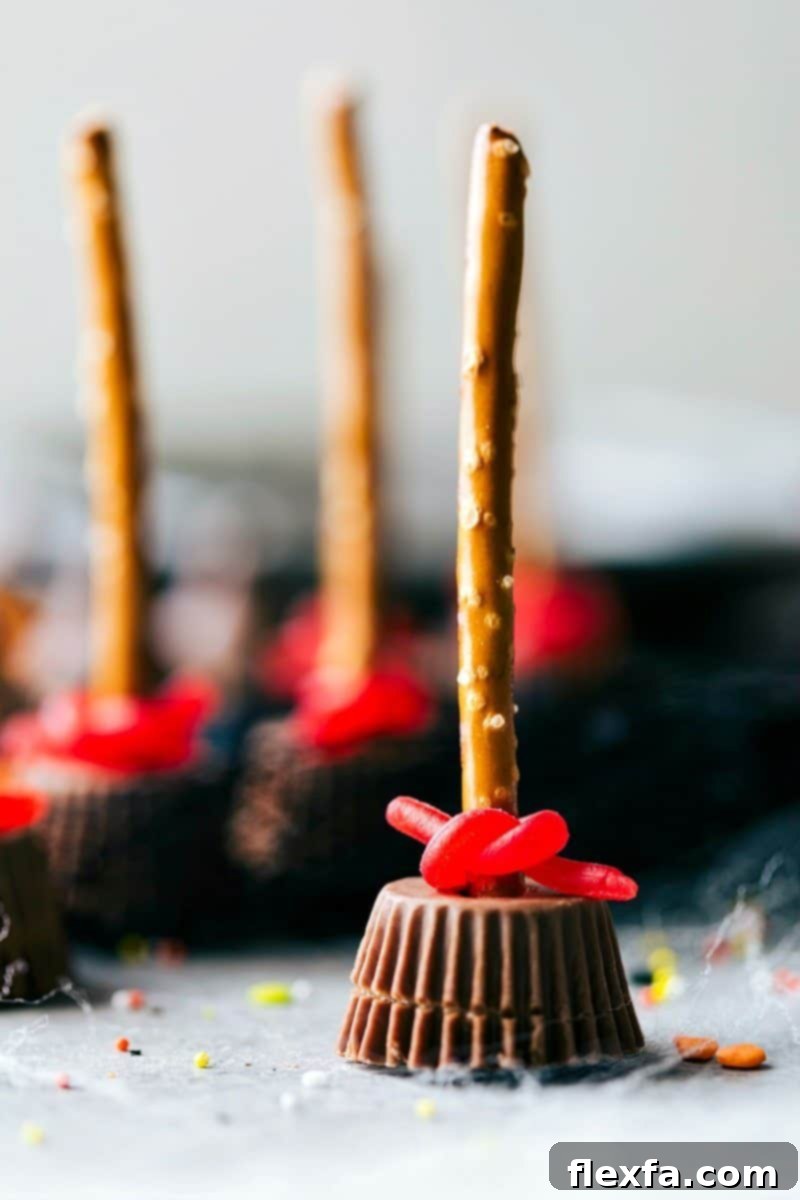
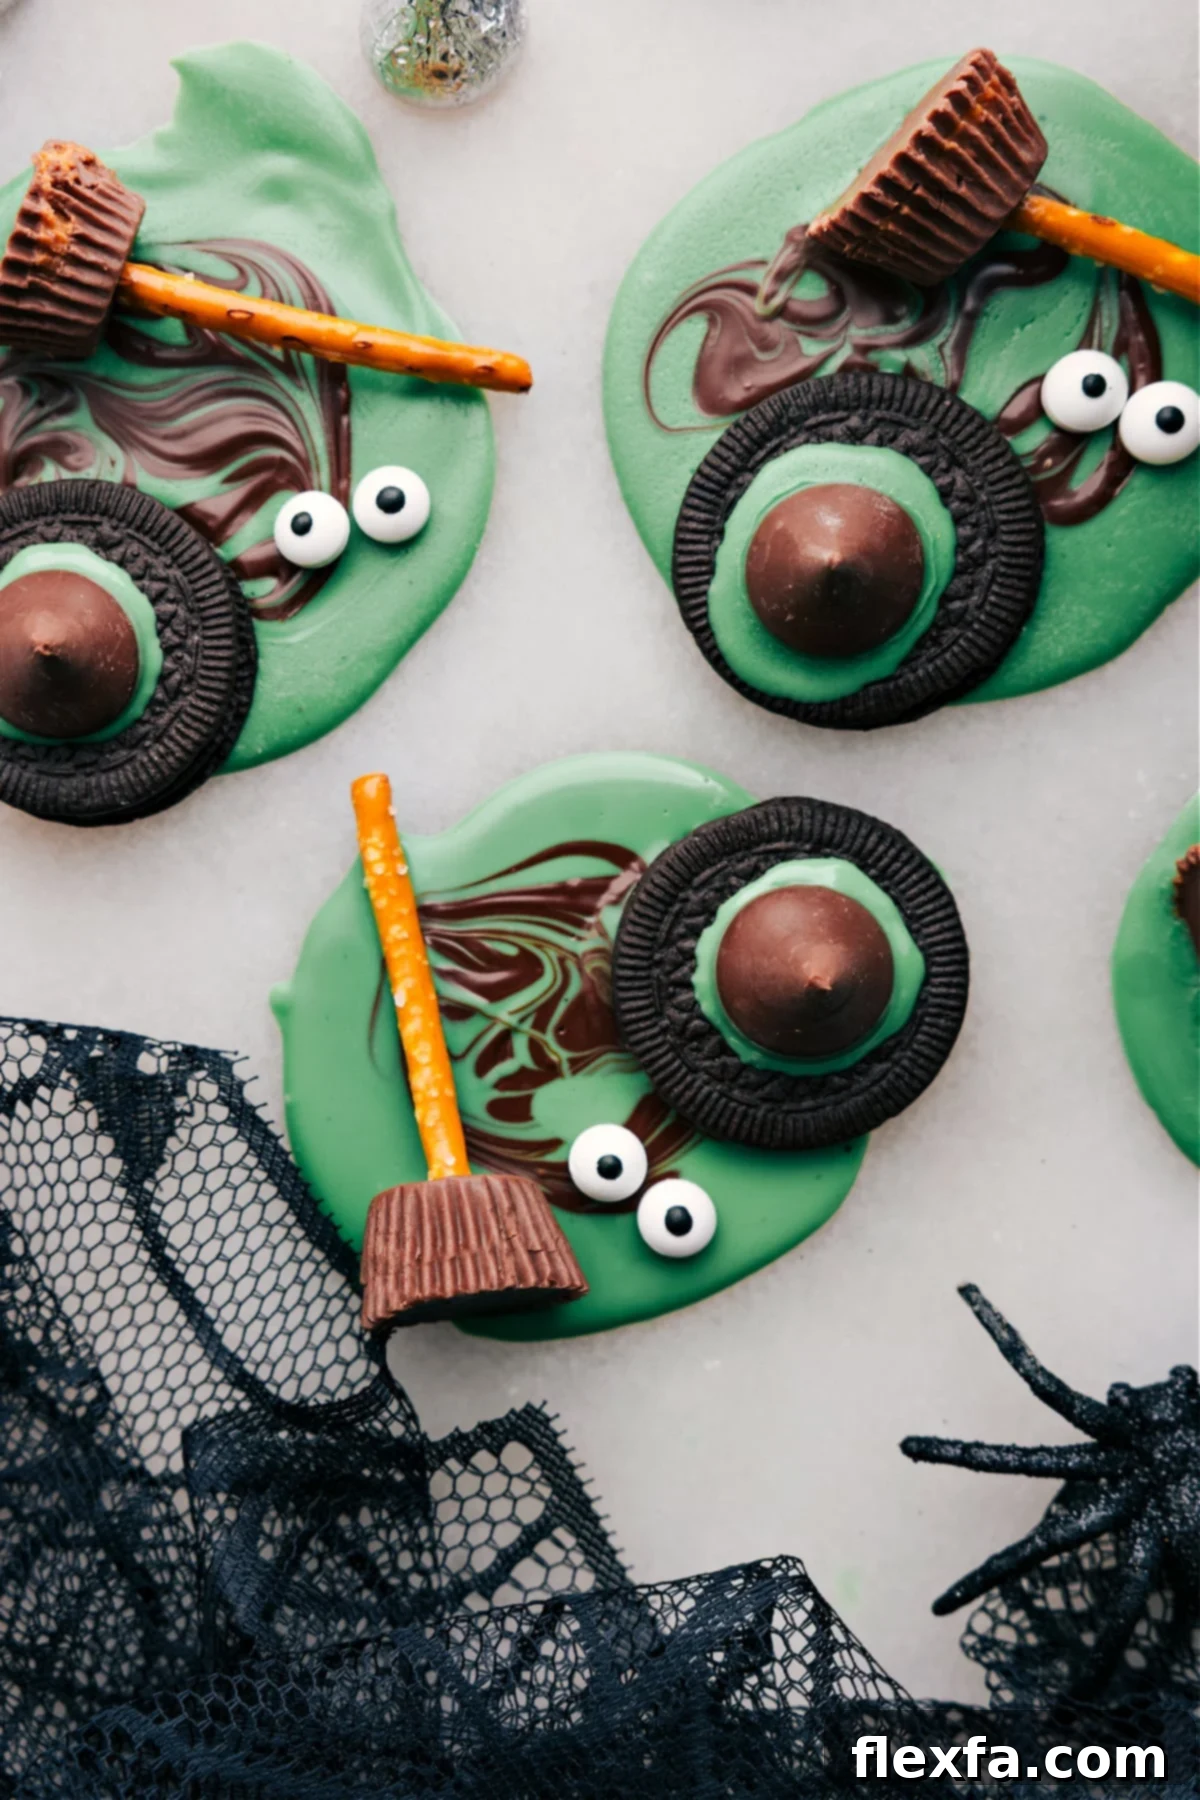
- Witch’s Brooms Construction: For these charming brooms, turn a Miniature Reese’s Cup upside down. Carefully insert a pretzel stick into the flat, wider end of the Reese’s cup, creating the broom handle. Next, take a small strip of pull-apart licorice (Twizzlers work great) and tie it securely around the pretzel stick where it meets the Reese’s cup, trimming any excess to create the broom’s bristled effect.
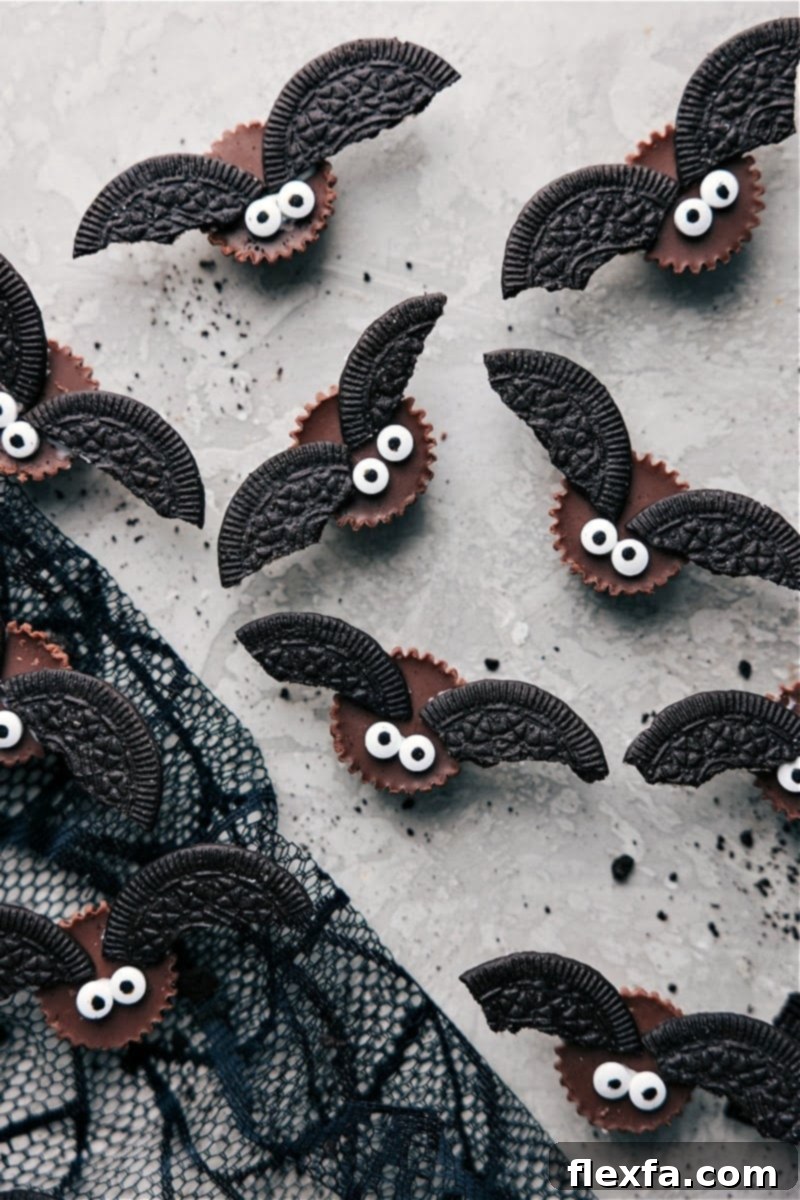
- Bat Bites Fabrication: Begin by unwrapping your Reese’s cups. For the bat wings, carefully separate Oreo Thins and gently scrape off the cream filling. Break each Oreo half in half again to form smaller, crescent-shaped wings. Melt a small amount of white chocolate chips and transfer to a piping bag. Pipe a tiny dot of melted chocolate onto the sides of the Reese’s cup. Press one Oreo wing onto each side. Pipe two more small dots on the front of the Reese’s and attach two mini candy eyes to bring your adorable bats to life.
Creative Variations to Explore
Don’t be afraid to get creative and personalize these easy Halloween treats! The possibilities are endless for adding your own unique touch. Try experimenting with different Oreo flavors, like peanut butter or mint, for distinct taste profiles. Vary the frosting colors to match your party theme or use different flavored frostings. Change up the sprinkles with glow-in-the-dark or metallic options. You can also swap out the chocolate kisses for other small, conical candies or add Halloween-themed decorations like gummy worms, candy corn, or tiny candy spiders for an extra spooky surprise.
More Spooktacular Halloween Treat Ideas:
Halloween
3-Ingredient Halloween Treat Ideas
Halloween
Ghost Cookies
Halloween
Halloween Cupcakes
Desserts
Halloween Rice Krispie Treats
Easy Halloween Treats
Video
A video showcasing the creation of Halloween Bat Treats is available. This video highlights how the creamy richness of Reese’s cups combines with the crunch of Oreos, brought to life with melted white chocolate and fun candy eyes. It demonstrates how to make these simple, tasty, and spooky treats using just 4 ingredients!
(Original Video: “Halloween Bat Treats” uploaded 2023-09-14T00:00:00.000Z, Thumbnail: https://content.jwplatform.com/thumbs/xs435Ouw-720.jpg)
Equipment
-
Resealable plastic bag
-
Large sheet pan (15″ x 21″)
-
Parchment paper
Ingredients
- Oreo THINS
- Cream cheese frosting homemade or store-bought
- Chocolate candy kisses
- Food coloring I use green and orange
- Halloween sprinkles optional
- Miniature Reese’s Cups unwrapped
- Pretzel sticks
- Pull-apart licorice
- Miniature Reese’s Cups unwrapped
- Oreo THINS make sure to get the THINS
- 3 tablespoons white chocolate chips
- Candy eyeballs
- Pretzel snaps or twists, not straight pretzels
- Rolos unwrapped
- M&M’s in Halloween colors
- Large candy eyeballs
Instructions
-
Witch’s Hats: Divide frosting into two bowls. Dye one bowl green and the other orange with gel food coloring for vibrant hues. Transfer each colored frosting to separate resealable plastic bags, ensuring to remove as much air as possible before sealing. Snip off a small corner from each bag. Pipe a generous dollop of frosting in the middle of each Oreo cookie. Gently press an unwrapped chocolate kiss into the center of the frosting. Optionally, add Halloween sprinkles around the frosting base for extra flair and a festive touch.
-
Witch’s Brooms: Turn Reese’s Cups upside down, so the wider base is facing up. Carefully push a pretzel stick into the center of each cup, ensuring it is secure enough to act as the broom handle. Pull apart Twizzlers into individual strands and cut each strand into thirds. Wrap one piece around the pretzel stick where it meets the Reese’s cup, tying it snugly to resemble broom bristles. Trim any excess licorice for a neat finish.
-
Bat Bites: Unwrap each Reese’s Cup. Separate Oreo cookies and carefully scrape off the cream filling. Break each Oreo half into two pieces to form bat wings (be patient here; a few might break, but you’ll get the hang of it!). Melt white chocolate chips in the microwave in short bursts of 25 seconds, stirring well between each burst until the chocolate is smooth and fully melted. Transfer the melted chocolate to a resealable plastic bag, snip off a small corner, and pipe small dots onto the sides of the Reese’s cup. Attach one Oreo half to each side of the Reese’s Cup to create the bat wings. Pipe a tiny amount of chocolate below the wings and secure candy eyeballs onto the Reese’s Cup to bring your bats to life.
-
Monster Eyes: Preheat your oven to 250°F (120°C). Line a large sheet pan with parchment paper. Arrange pretzel snaps or twists on the prepared sheet, leaving a bit of space between each. Place an unwrapped Rolo candy on top of each pretzel. Bake for 2–4 minutes, or until the chocolates are visibly soft and glossy, but not fully melted into a liquid. Immediately after removing from the oven, press an M&M into the center of each softened Rolo, followed by a large edible candy eyeball. Allow the candies to set completely at room temperature or speed up the process by chilling them in the fridge for about an hour, or until the chocolate is firm.
Recipe Notes
Reese’s Miniature Cups: For best results and easier handling, a quick tip is to chill these in the fridge prior to use. This keeps them firm and helps prevent melting or smudging during the assembly process, ensuring your treats look their best.
Edible candy eyeballs: When selecting your candy eyeballs, size matters for visual impact. Aim for miniature eyes for the Bat Bites to keep them proportional, and use the larger variety for the Monster Eyeballs to create a truly striking effect. This assorted size pack is perfect when you’re making multiple types of these easy Halloween Treats!
Nutrition Note: Please note that the nutrition information provided specifically pertains to the Oreo witch hats.
Storage: To keep your delicious creations fresh, store any leftover treats in an airtight container. They will maintain their quality and spooky charm at room temperature for up to 3 days.
Nutrition
Nutrition information is automatically calculated, so should only be used as an approximation.
Why Choose No-Bake for Halloween?
In the whirlwind of Halloween festivities, time is often a precious commodity. That’s precisely why no-bake treats are a game-changer! Not only do they save you valuable oven space and cooking time, but they also significantly reduce cleanup. This makes them ideal for busy parents, last-minute party planners, or anyone looking to enjoy the holiday without kitchen stress. Beyond the practicality, no-bake recipes are wonderfully inclusive, allowing even the youngest family members to safely participate in the fun of creating spooky snacks without the hazards of hot ovens or stovetops. It’s an opportunity to create cherished memories and delicious edibles simultaneously!
Fun Presentation Ideas for Your Spooky Spread
Once your easy Halloween treats are assembled, it’s time to elevate them into a truly show-stopping display for your party or family gathering. Presentation can transform simple snacks into an unforgettable part of your Halloween celebration. Here are some festive ideas to make your treats extra spooky and inviting:
- Spooky Platters: Line your serving trays with parchment paper, then drape them with fake spider webs, plastic spiders, or even scattered autumnal leaves. This instantly sets a creepy and thematic backdrop for your treats.
- Edible Graveyard: Create a miniature graveyard scene by crumbling chocolate cookies (like Oreos) over a large tray to serve as “dirt.” Arrange your Witch’s Hats among the cookie crumbs, adding gummy worms peeking out from the “earth” for a delightfully eerie effect.
- Cauldron Bowls: Source some small, clean plastic cauldrons. Fill them with wisps of cotton candy to simulate “smoke” or fog, then artfully arrange your treats (like Bat Bites or Monster Eyeballs) on top, making it look as though they’re emerging from a bubbling potion.
- Glowing Tray: For an ambient, eerie glow, place small, battery-operated LED tea lights underneath a layer of parchment paper on a serving tray. Then, carefully arrange your Halloween treats on top of the parchment. The soft, flickering light will create a captivating and mysterious atmosphere.
- Mummy Wrap: Give individual treats a mummy makeover! Wrap each one (Witch’s Brooms or even individual Monster Eyeballs work well) in thin strips of white crepe streamers or toilet paper. Secure the ends with a tiny dab of frosting or tape, and then affix a pair of small googly eyes to complete the mummified look.
Loved these Easy Halloween Treats? Leave a comment below!