
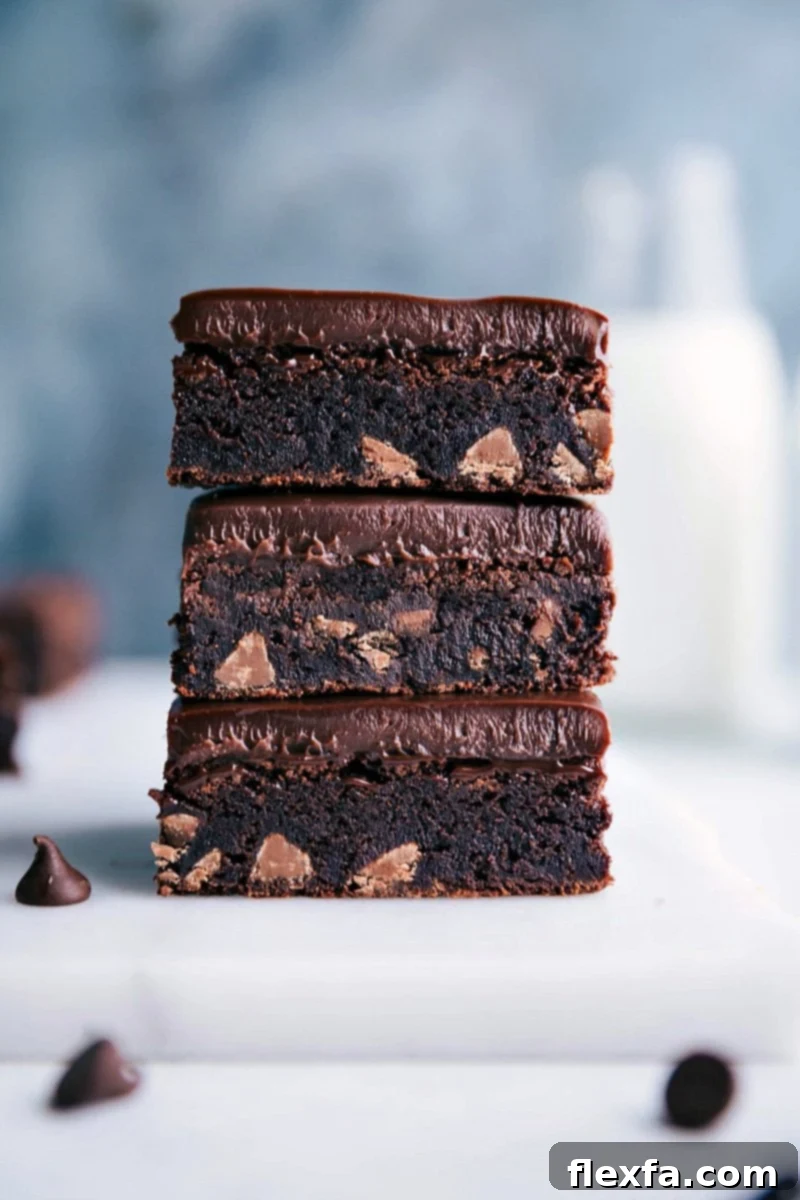
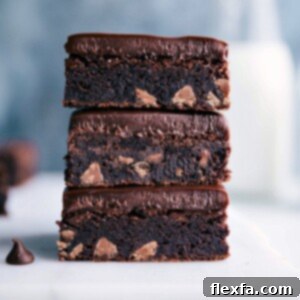
Prepare to indulge in the most decadent and fudgy Gluten-Free Brownies you’ve ever tasted! This meticulously crafted recipe delivers everything you crave in a classic brownie—intense chocolate flavor, a wonderfully dense and chewy texture, and an irresistible richness—all without a trace of gluten. Forget crumbly or dry gluten-free treats; these brownies are so good, no one will guess they’re gluten-free!
Once you master this foundational recipe, a world of delightful brownie creations opens up. Transform them into stunning Brownie Ice Cream Bars, refreshingly festive Mint Brownies, or nostalgic Cosmic Brownies. The possibilities are endless for customizing these perfect chocolatey squares.
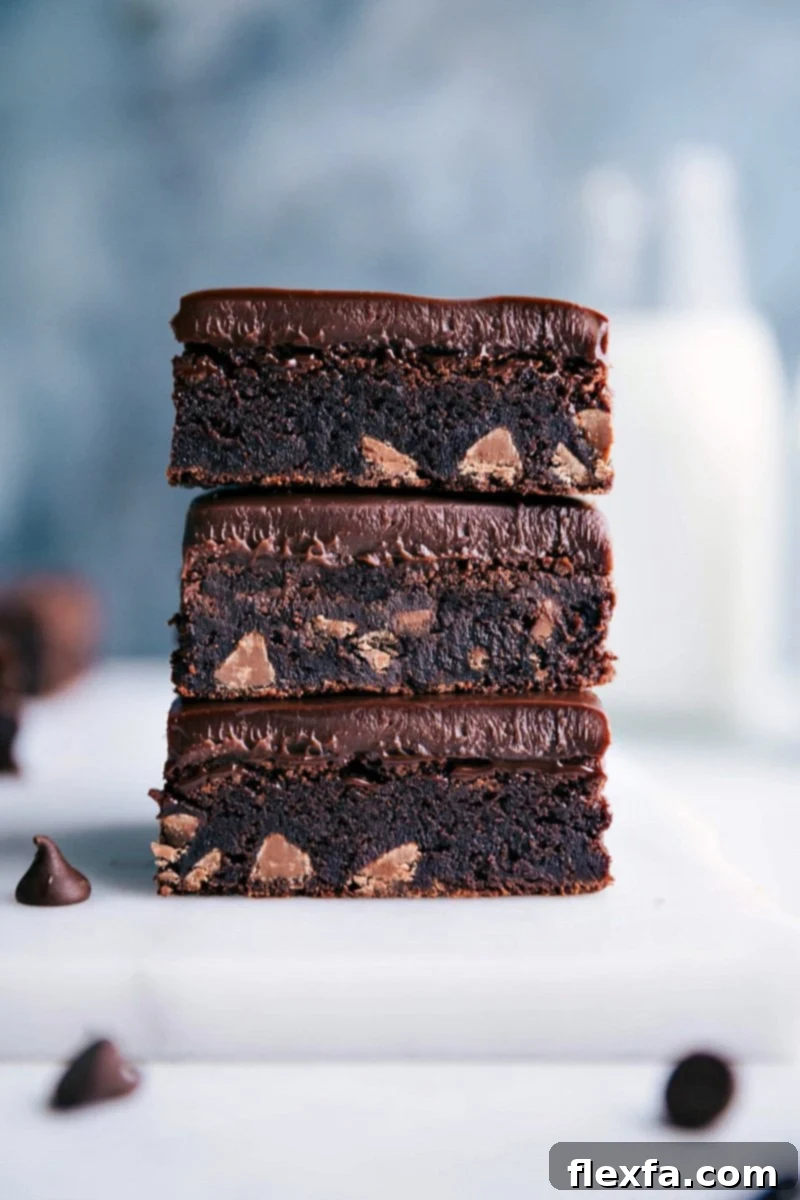
The Ultimate Fudgy Gluten-Free Brownies Recipe
My culinary journey into gluten-free baking was inspired by my sister’s gluten intolerance, driving me to create treats that are not just “good for gluten-free” but simply *good*. Over the years, I’ve perfected many gluten-free delights, from wholesome No-bake Energy Bites and delightful Peanut Butter Chocolate Muffins to a comforting Gluten Free Pumpkin Cake. Each recipe adheres to one strict principle: gluten-free treats must be every bit as delicious, if not more so, than their gluten-containing counterparts.
These brownies are a testament to that philosophy. They are incredibly rich, luxuriously dense, and bursting with chocolate flavor, all while being surprisingly simple to prepare—requiring just a bowl and a spoon. You won’t find any complicated gluten-free flour blends here; the magic lies in a clever combination of cocoa powder and cornstarch that yields an unparalleled texture. While undeniably delicious, it’s important to note these are a treat, not a health food. For a truly healthy brownie option, explore my healthy brownies recipe, which offers a guilt-free indulgence.
Essential Ingredients for Perfect Gluten-Free Brownies
Crafting the perfect fudgy brownie relies on a few key ingredients. Here’s a detailed look at what you’ll need and why each component is vital to achieving that coveted rich, dense, and chewy texture:
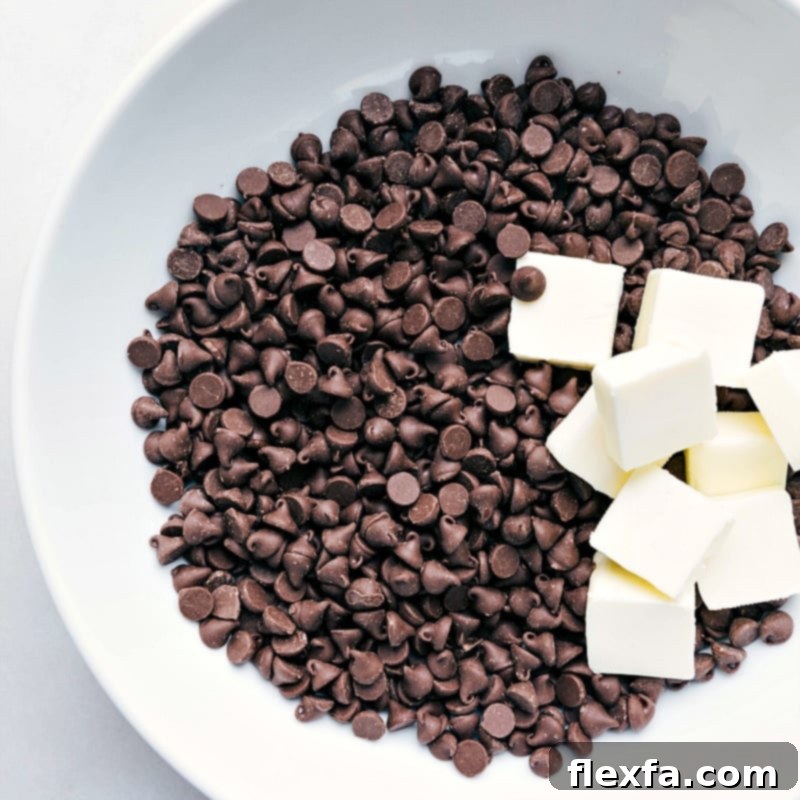
- Chocolate Chips + Butter: These form the backbone of our brownie’s flavor and texture. Using high-quality semi-sweet chocolate chips ensures a deep chocolate profile. The butter adds richness and contributes to the fudgy consistency. For a dairy-free version, simply swap with dairy-free chocolate and coconut oil.
- Granulated Sugar: Beyond sweetness, sugar plays a critical role in the brownie’s structure and moisture. It helps create that desirable crinkly top and keeps the brownies soft and moist. If you’re looking for a slightly different flavor depth, coconut sugar can be used, though it might result in a slightly denser texture.
- Eggs + Egg Yolk: Eggs are crucial for binding the ingredients and adding richness. The addition of an extra egg yolk is a secret weapon for achieving maximum fudginess and chewiness, making these brownies truly irresistible. For an egg-free alternative, flax eggs can be used, but anticipate a slightly softer, less dense brownie.
- Dutch-Process Cocoa Powder: This is where the intense, dark chocolate flavor comes from. Dutch-process cocoa has been treated to reduce its acidity, resulting in a smoother, less bitter taste and a darker color. While natural cocoa powder can be used in a pinch, the flavor will be a bit tangier, and the color won’t be as deep. Hershey’s Special Dark Cocoa is a readily available Dutch-process option.
- Cornstarch: This is our gluten-free secret for achieving a perfect texture without any flour. Cornstarch acts as a thickener and tenderizer, contributing to the brownie’s characteristic fudginess. Arrowroot starch or tapioca starch are excellent substitutes if cornstarch isn’t available.
- Vanilla Extract: A touch of vanilla enhances the chocolate flavor, adding depth and warmth to the brownies. Use pure vanilla extract for the best results.
- Fine Sea Salt: Never skip the salt! It’s a flavor enhancer that balances the sweetness and makes the chocolate flavors truly shine, preventing the brownies from tasting overly sweet or flat.
- Additional Chocolate Chips: Folding in extra chocolate chips ensures pockets of gooey, melted chocolate throughout every bite. Feel free to use milk, semi-sweet, or dark chocolate chips based on your preference; I personally love the creaminess of milk chocolate chips in this recipe.
Step-by-Step Guide to Baking Irresistible Gluten-Free Brownies
Making these gluten-free brownies is a straightforward process, designed for ease without compromising on taste or texture. Follow these simple steps for a batch of perfectly fudgy brownies every time:
- Prepare Your Pan: First, properly prepare your baking pan. Line a light-colored metal 9×13-inch pan with parchment paper, ensuring you leave an overhang on the sides. This overhang will act as handles, making it incredibly easy to lift the cooled brownies out of the pan for clean slicing. Lightly grease the parchment paper with cooking spray. This crucial step prevents sticking and guarantees easy removal. Preheat your oven to 350°F (175°C).
- Melt Chocolate and Butter: In a very large microwave-safe bowl, combine your 18 ounces of semi-sweet chocolate chips and the cubed unsalted butter. Microwave in short bursts, typically 15 seconds at a time, stirring thoroughly after each interval. Continue until the mixture is completely melted and smooth. Be cautious not to overheat or burn the chocolate; low and slow is key.
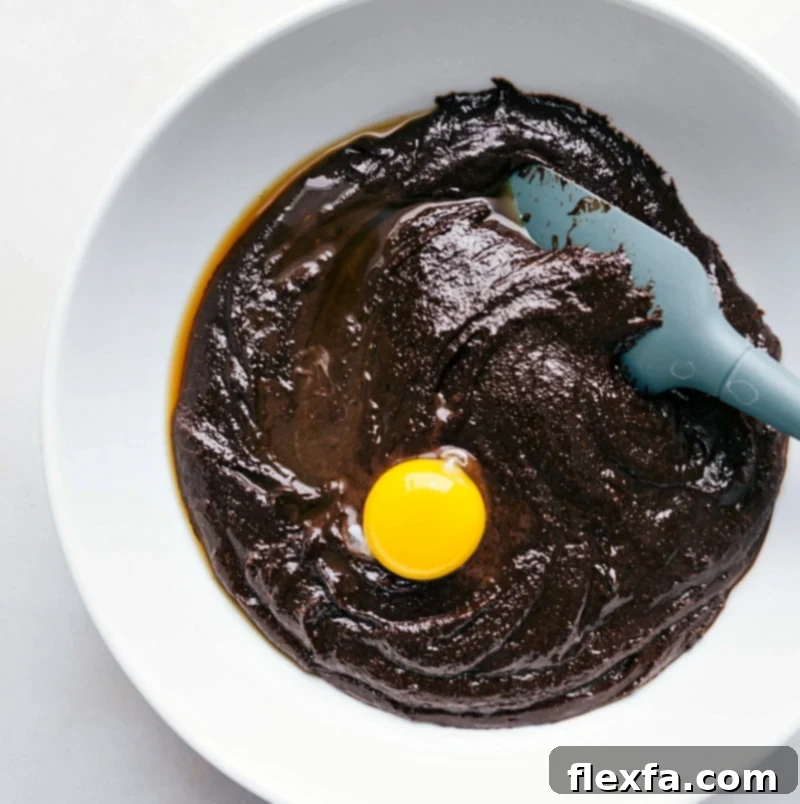
- Combine Wet Ingredients: Remove the melted chocolate mixture from the microwave and immediately stir in the granulated sugar until well combined. Next, add the vanilla extract, followed by the eggs one at a time. After each egg addition, use a wooden spoon to stir vigorously until it is completely incorporated into the thick batter. The batter will be quite thick, but resist the urge to use an electric mixer, as this can beat in too much air, leading to a cakier brownie texture rather than fudgy.
- Introduce Dry Ingredients: In a separate, small bowl, whisk together the Dutch-process cocoa powder, cornstarch, and fine sea salt until there are no lumps. Add this dry mixture to your wet brownie batter, along with the additional 1 1/2 cups of chocolate chips. Fold gently until everything is just combined and the batter is smooth. Avoid overmixing once the dry ingredients are added.
- Bake to Perfection: Pour the luscious brownie batter into your prepared baking pan and spread it evenly. Bake for 27-33 minutes. Crucially, watch carefully towards the end of the baking time. The brownies are done when a toothpick inserted into the center comes out with moist crumbs attached, but no wet batter (make sure you don’t hit a melted chocolate chip!). In most ovens, this sweet spot is around 29-30 minutes, but baking times can vary, so trust your toothpick test!
- Cool Completely: Remove the pan from the oven and allow the brownies to cool *completely* at room temperature before attempting to frost or cut them. This cooling period is essential for the brownies to set properly and achieve their ultimate fudgy texture. Patience is a virtue here!
- Optional Frosting (if desired): If you opt for a rich frosting, add 1 1/2 cups semi-sweet chocolate chips to a heat-safe bowl. In a small microwave-safe bowl, heat 1/2 cup heavy cream on high for 1 minute until simmering. Pour the hot cream over the chocolate chips. Cover the bowl with a lid or cookie sheet and let it stand for 4 minutes to allow the chocolate to melt. Stir until perfectly smooth. If any lumps remain, microwave for another 15 seconds and stir again. Spread this decadent frosting evenly over your completely cooled brownies. Chill the frosted brownies, covered, for 1-2 hours or until the frosting is firm.
- Slice and Serve: Once cooled (and frosted, if applicable), use the parchment paper overhang to lift the entire slab of brownies from the pan. For beautifully clean cuts, run a sharp knife under hot water, wipe it dry, and then make a slice. Repeat this process for each cut. Return any leftover brownies to an airtight container and store in the fridge. These fudgy brownies are often best served chilled, enhancing their dense texture.
Storage Tips for Optimal Freshness
- Countertop Storage: Unfrosted gluten-free brownies can be kept in an airtight container at room temperature for up to three days.
- Refrigerator Storage (Preferred): For optimal fudginess and to keep frosted brownies firm, store them tightly covered in an airtight container in the fridge for up to five days. The brownie base develops an even better flavor when chilled.
- Freezing for Later: To enjoy your brownies over an extended period, wrap each individual brownie tightly in plastic wrap. Then, place the wrapped brownies in a freezer-safe plastic bag or container and freeze for 2-3 months. Thaw at room temperature for a few hours before indulging.
Tips for the Fudgiest Gluten-Free Brownies
Achieving that coveted crackly top and intensely fudgy center is all about technique and a few key considerations. Here are some pro tips to ensure your gluten-free brownies are nothing short of perfection:
- Do Not Overbake: This is the golden rule for fudgy brownies! Brownies continue to cook slightly after being removed from the oven. Aim for a toothpick to come out with moist crumbs, not liquid batter. Overbaking will lead to dry, cake-like brownies.
- Quality Ingredients Matter: Since brownies have relatively few ingredients, the quality of each shines through. Use good quality chocolate chips and butter for the best flavor.
- Cool Completely: While tempting to cut into warm brownies, allowing them to cool fully (and chill, if frosted) helps them set and develop that dense, chewy texture. Warm brownies are more likely to crumble.
- Use Dutch-Process Cocoa: As mentioned, this type of cocoa creates a darker, richer chocolate flavor without the bitterness, contributing to a superior brownie.
- Don’t Overmix Dry Ingredients: Once the flour (or in this case, cornstarch) is added, mix only until just combined. Overmixing can develop toughness, even without gluten.
- A Pinch of Salt: Don’t underestimate the power of salt in sweet baking. It balances the sweetness and elevates the chocolate flavor, making the brownies taste even more decadent.
Flavorful Variations to Explore
While these fudgy gluten-free brownies are perfect on their own, they also serve as an incredible base for creative variations. Feel free to experiment and make them your own!
- Nutty Crunch: Fold in 1/2 to 1 cup of chopped walnuts, pecans, or almonds with the extra chocolate chips for added texture and flavor.
- Espresso Boost: Add 1-2 teaspoons of instant espresso powder to the melted chocolate mixture to deepen the chocolate flavor without adding a coffee taste.
- Caramel Swirl: After pouring the batter into the pan, dollop spoonfuls of dulce de leche or thick caramel sauce on top and swirl gently with a knife before baking.
- Mint Chocolate: Stir in 1/2 teaspoon of pure mint extract (or use peppermint extract) with the vanilla, and consider using mint chocolate chips for a refreshing twist.
- Cream Cheese Swirl: Prepare a simple cream cheese mixture (softened cream cheese, sugar, egg yolk) and swirl it into the brownie batter before baking for a tangy contrast.
- Different Chocolates: Instead of semi-sweet, try milk chocolate chips for a sweeter, creamier brownie, or dark chocolate for an intensely rich, less sweet version. You could even combine different types!
Frequently Asked Questions About Gluten-Free Brownies
- What makes these brownies fudgy versus cakey?
- The high fat-to-flour (or cornstarch) ratio, combined with a higher amount of sugar and the addition of an extra egg yolk, is key. Less leavening (baking powder/soda) also contributes to a dense, fudgy texture, while more liquid and leavening would result in a cakey brownie. The precise baking time, ensuring they are slightly underbaked, is also crucial.
- Do I need special gluten-free flour for this recipe?
- No! One of the beauties of this recipe is that it uses cornstarch, which is naturally gluten-free, instead of a complex gluten-free flour blend. This simplifies the ingredient list and ensures a consistent texture every time.
- Can I make these brownies dairy-free?
- Absolutely! To make them dairy-free, simply use high-quality dairy-free chocolate chips (check ingredients carefully) and substitute the unsalted butter with an equal amount of solid coconut oil. The taste and texture will still be fantastic.
- Why is Dutch-process cocoa powder recommended?
- Dutch-process cocoa powder has been treated to neutralize its acidity, resulting in a darker color and a smoother, richer, less bitter chocolate flavor compared to natural cocoa powder. This yields a more intense and luxurious brownie. While natural cocoa can work, the flavor profile will be slightly different.
- How do I know when the brownies are perfectly baked?
- The best way to test for doneness is the toothpick test. Insert a toothpick into the center of the brownies. If it comes out with moist crumbs attached (not wet batter), they are done. If it comes out completely clean, they might be slightly overbaked, leading to a cakier texture. Avoid hitting a melted chocolate chip with the toothpick, as this will give a false reading.
- Can I halve or double this recipe?
- Yes, you can halve this recipe and bake it in an 8×8-inch pan, adjusting the baking time downwards (start checking around 20-25 minutes). Doubling the recipe might require two 9×13-inch pans or baking in batches, as a single, very thick batch could bake unevenly.
- Is chilling necessary after baking?
- While not strictly necessary for unfrosted brownies, allowing them to cool completely helps them set and become truly fudgy. For frosted brownies, chilling is recommended to firm up the frosting and make them easier to slice cleanly. Chilled brownies often have an even denser, chewier texture that many prefer.
More Delicious Desserts You’ll Love:
Desserts
Peanut Butter Puppy Chow
Desserts
Strawberry Shortcake Recipe
Desserts
Chewy Chocolate Chip Cookie Recipe
Desserts
Best Crème Brûlée Recipe
Gluten Free Brownies Recipe
By Chelsea Lords
This rich, fudgy Gluten-Free Brownies Recipe is just as good as the classic—dense, chocolatey, and totally irresistible!
Prep Time: 20 minutes
Cook Time: 30 minutes
Total Time: 50 minutes
Servings: 36 brownies
Print Recipe
Equipment
- 9 x 13-inch baking pan
- Parchment paper
- Large microwave-safe bowl
- Wooden spoon or spatula
- Small mixing bowl
- Whisk
- Sharp knife
Ingredients
For the Brownies:
- 18 ounces semi-sweet chocolate chips (3 cups, or 1 and 1/2 of a 12-ounce bag)
- 9 tablespoons unsalted butter, cut into cubes
- 1 cup + 2 tablespoons granulated sugar
- 1/2 tablespoon vanilla extract
- 4 large eggs
- 1 large egg yolk
- 6 tablespoons Dutch-process cocoa powder (Hershey’s dark cocoa powder is Dutch-process)
- 1/2 cup cornstarch
- 3/4 teaspoon fine sea salt
- 1-1/2 cups chocolate chips (milk, semi-sweet, or dark – your preference)
Optional Frosting:
- 1-1/2 cups semi-sweet chocolate chips
- 1/2 cup heavy cream
Instructions
- Line a light-colored metal 9×13-inch pan with parchment paper, leaving an overhang on the sides to easily remove the brownies. Lightly grease the parchment paper with cooking spray. Preheat your oven to 350°F (175°C).
- In a very large microwave-safe bowl, combine the 18 ounces of chocolate chips and the cubed butter. Microwave in 15-second bursts, stirring well between each burst, until the mixture is completely melted and smooth. Be careful not to burn the chocolate.
- Remove from the microwave and immediately stir in the sugar until well combined. Add the vanilla extract, then add one egg, stirring until fully incorporated. One at a time, add the remaining eggs and the extra egg yolk, stirring with a wooden spoon after each addition until thoroughly integrated. The mixture will be thick; avoid using an electric mixer as it incorporates too much air.
- In a separate, small bowl, stir together the cocoa powder, cornstarch, and salt. Add this dry mixture to the brownie batter, along with the 1 1/2 cups of additional chocolate chips. Stir gently until just smooth and combined.
- Pour the batter into your prepared baking pan and spread it evenly.
- Bake for 27–33 minutes. Begin checking around 27 minutes. The brownies are done when a toothpick inserted into the center comes out with moist crumbs (ensure it doesn’t hit a melted chocolate chip!). This is typically around 29–30 minutes in my oven, but ovens vary.
- Remove from the oven and allow the brownies to cool completely at room temperature before topping or cutting.
- Optional Frosting: If frosting, add 1 1/2 cups semi-sweet chocolate chips to a large, heat-safe bowl. Place the heavy cream in a small microwave-safe bowl and microwave on high for 1 minute until simmering. Pour the hot cream over the chocolate chips. Cover the bowl (e.g., with a cookie sheet or plate) and let stand for 4 minutes to melt the chocolate. Stir until smooth. If any chocolate is not completely melted, microwave for another 15 seconds and stir again. Once smooth, pour over the completely cooled brownies and spread evenly. Chill, covered, for 1–2 hours or until the frosting is firm.
- To cut, use the parchment-paper overhang to lift the brownies from the pan. For clean cuts, run a sharp knife under hot water, wipe it dry, make a cut, and repeat for each slice. Store any leftovers in an airtight container in the fridge. Brownies are often best served chilled.
Recipe Notes
- Gluten-Free: This recipe is naturally gluten-free. Always double-check ingredient labels to confirm that all products are processed in a gluten-free environment, especially for cocoa powder and chocolate chips.
- Nutrition Note: Nutritional figures provided do not include the optional frosting.
- Storage: Store unfrosted brownies in an airtight container at room temperature for up to 3 days. Store frosted or unfrosted brownies in the fridge for up to 5 days; the frosting tends to get melty at room temperature. To freeze, wrap individual brownies tightly in plastic wrap, then place them in a freezer-safe bag. Freeze for 2-3 months and thaw at room temperature before eating.
Nutrition Information
Serving: 1 brownie
Calories: 145 kcal
Carbohydrates: 15g
Protein: 2g
Fat: 9g
Saturated Fat: 5g
Cholesterol: 27mg
Sodium: 58mg
Potassium: 100mg
Fiber: 1g
Sugar: 11g
Vitamin A: 121 IU
Calcium: 13mg
Iron: 1mg
Nutrition information is automatically calculated and should only be used as an approximation.
Enjoyed this recipe? Leave a comment below and share your thoughts!