
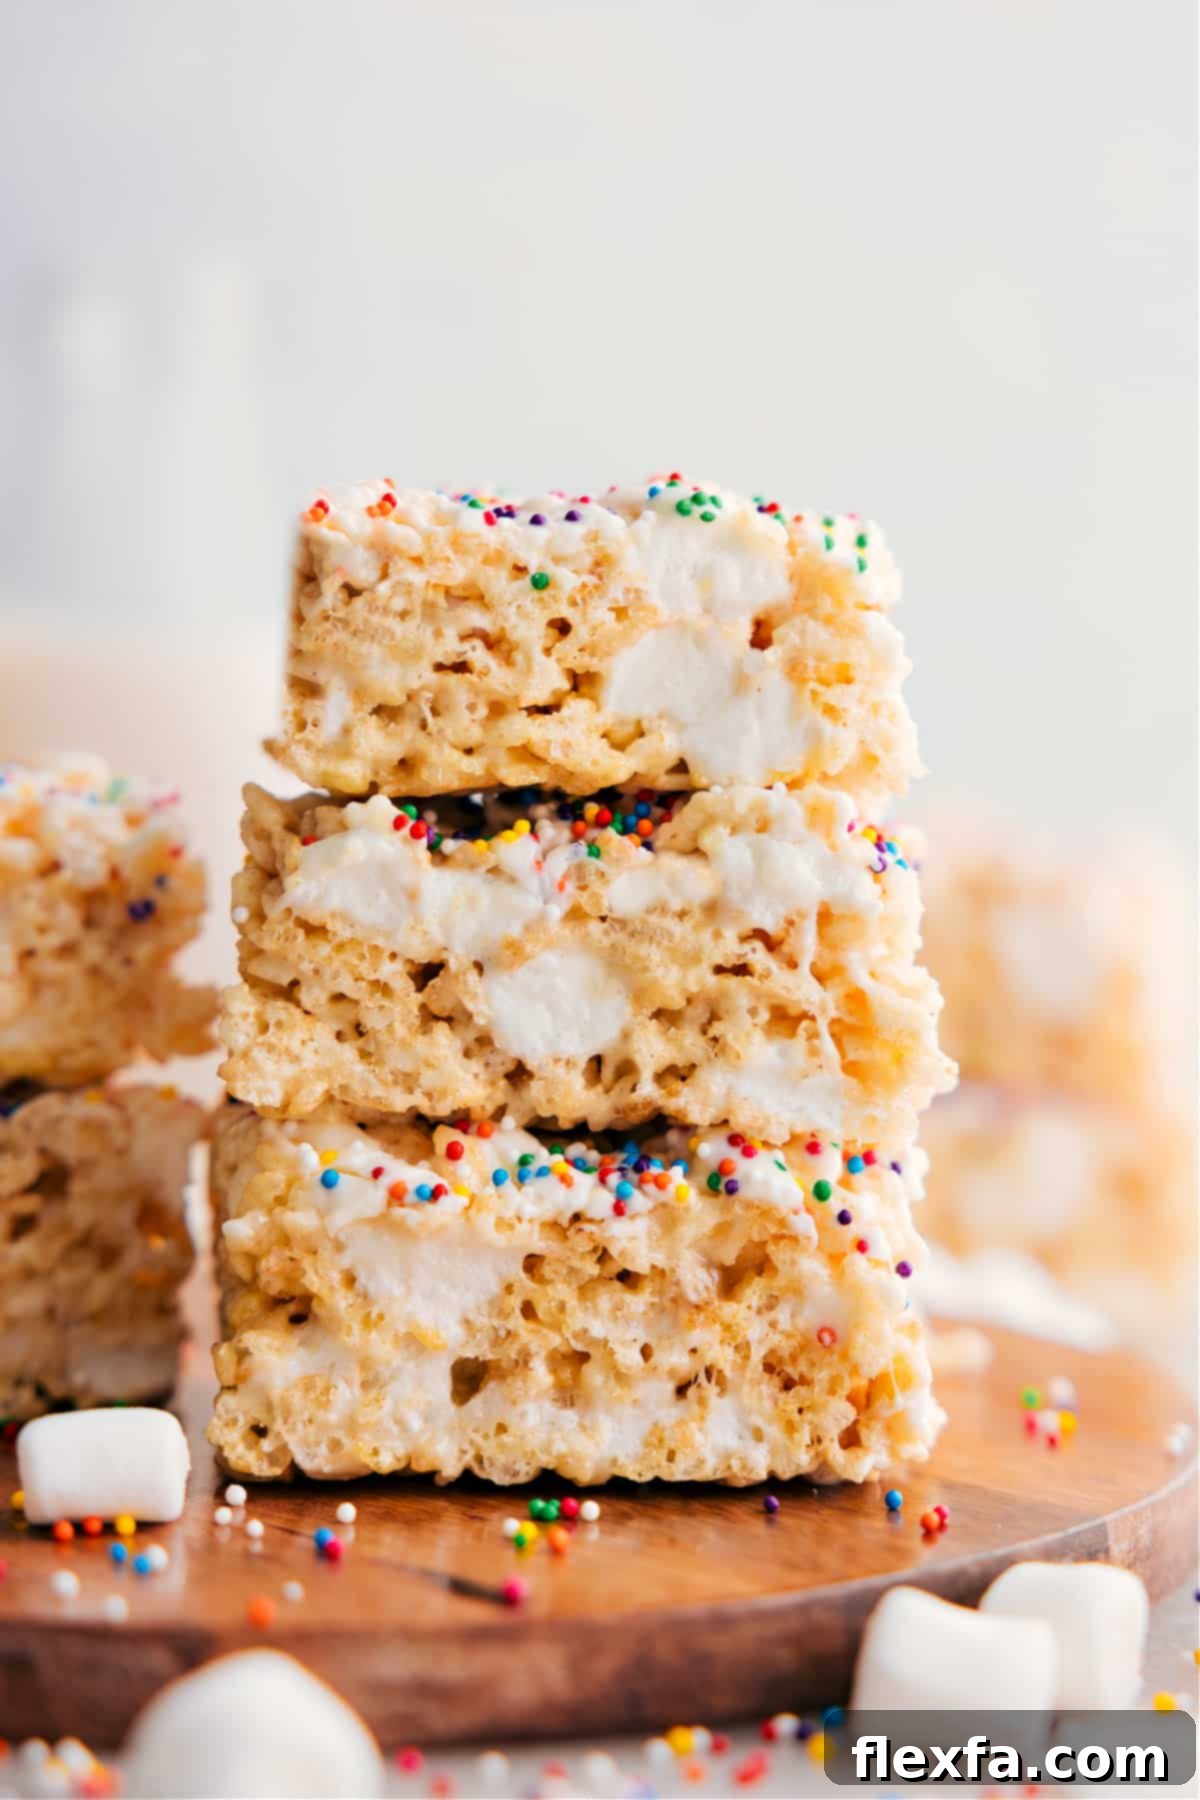
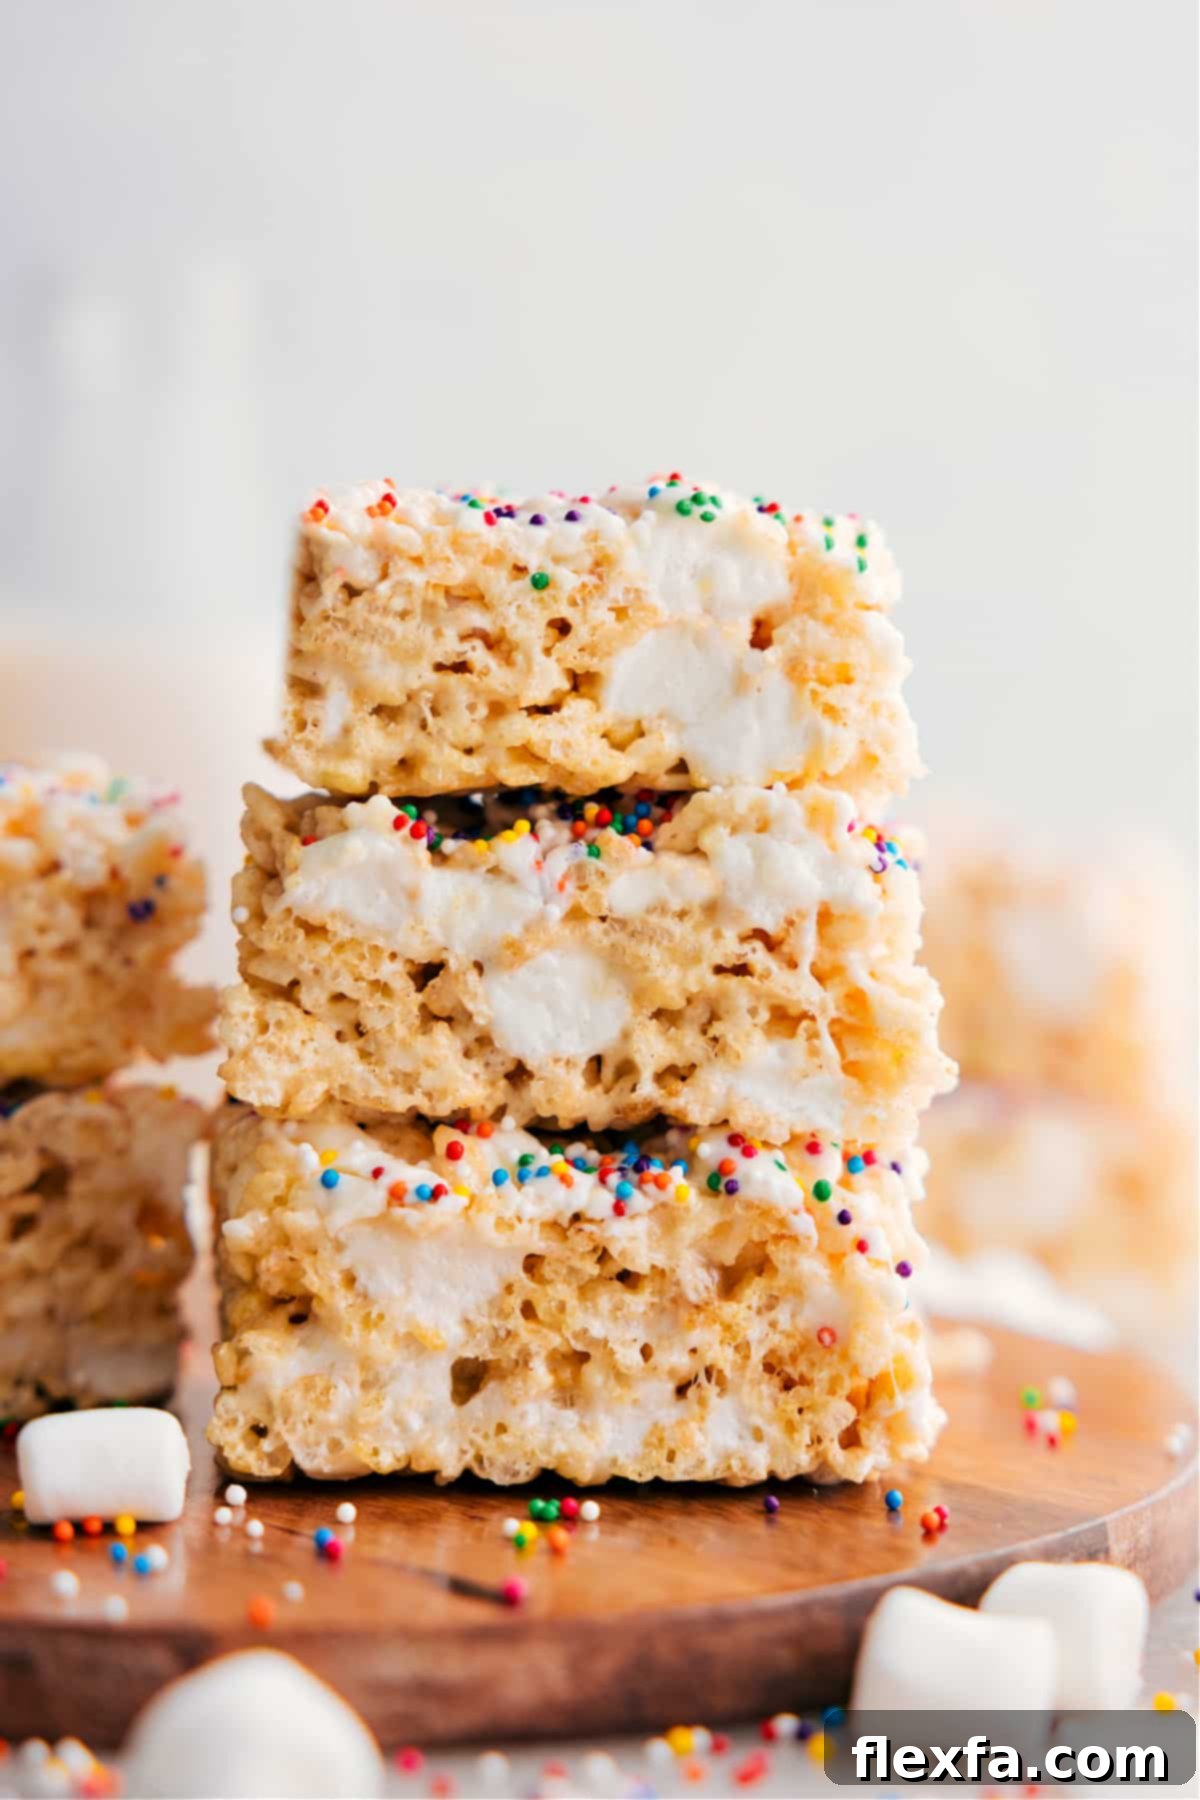
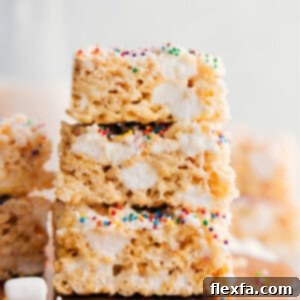
Welcome to the ultimate guide for crafting the **Best Rice Krispie Treats Recipe**! Prepare for an indulgence that is thick, delightfully chewy, and generously packed with gooey marshmallows. This isn’t just another easy dessert; it’s a nostalgic journey to perfect, homemade crispy treats that truly stand out. Forget dry, crumbly versions – we’re sharing all our insider tips and tricks to make these classic no-bake bars even better than what you’d find at your favorite bakery, ensuring every bite is a soft, sweet, and utterly irresistible experience.
Once you master this classic, why not explore a world of crispy treat variations? Elevate your snack game with these delicious takes on the original: delve into the rich flavors of Peanut Butter Rice Krispie Treats, enjoy the irresistible combination of sweet and salty with Scotcheroos, satisfy your cocoa cravings with decadent Chocolate Rice Krispie Treats, or add a vibrant, fruity twist with Fruity Pebble Rice Krispie Treats. Each variation offers a unique flavor profile while maintaining that beloved chewy texture.

author’s note
Gooey, Chewy, Perfect Rice Krispie Treats!
There’s something truly magical about Rice Krispie Treats. For me, they represent a cherished slice of childhood. My mom frequently whipped up these delightful, **easy no-bake treats** when I was growing up. They were her go-to because they were quick, simple, and always disappeared from the plate in record time. On special occasions, or when she had a bit more time for baking, she would surprise us with her incredible Carmelitas – another family favorite!
I remember how much she loved to add a personal touch to these crispy bars, especially during holidays. A colorful drizzle of chocolate or a generous sprinkle of festive nonpareils could instantly transform them into a holiday masterpiece, bringing smiles to everyone’s faces. This tradition of making and decorating **homemade Rice Krispie Treats** filled our home with warmth and joy, creating lasting memories.
Today, making these classic treats for my own family evokes the same heartwarming nostalgia. It’s a simple act that connects me to my past and creates new, happy moments with my kids. Over the years, through countless batches and a bit of experimentation, I’ve diligently refined the process to discover the **perfect marshmallow-to-cereal ratio**. This crucial balance is what makes these **gooey and chewy Rice Krispie Treats** truly exceptional, ensuring they’re never too hard or too sticky. While I still love to finish them with a sweet chocolate drizzle and a scattering of colorful sprinkles, just like my mom did, I can wholeheartedly say that these **classic crispy treats** are just as good, if not better, when served plain. They are pure comfort in every bite!
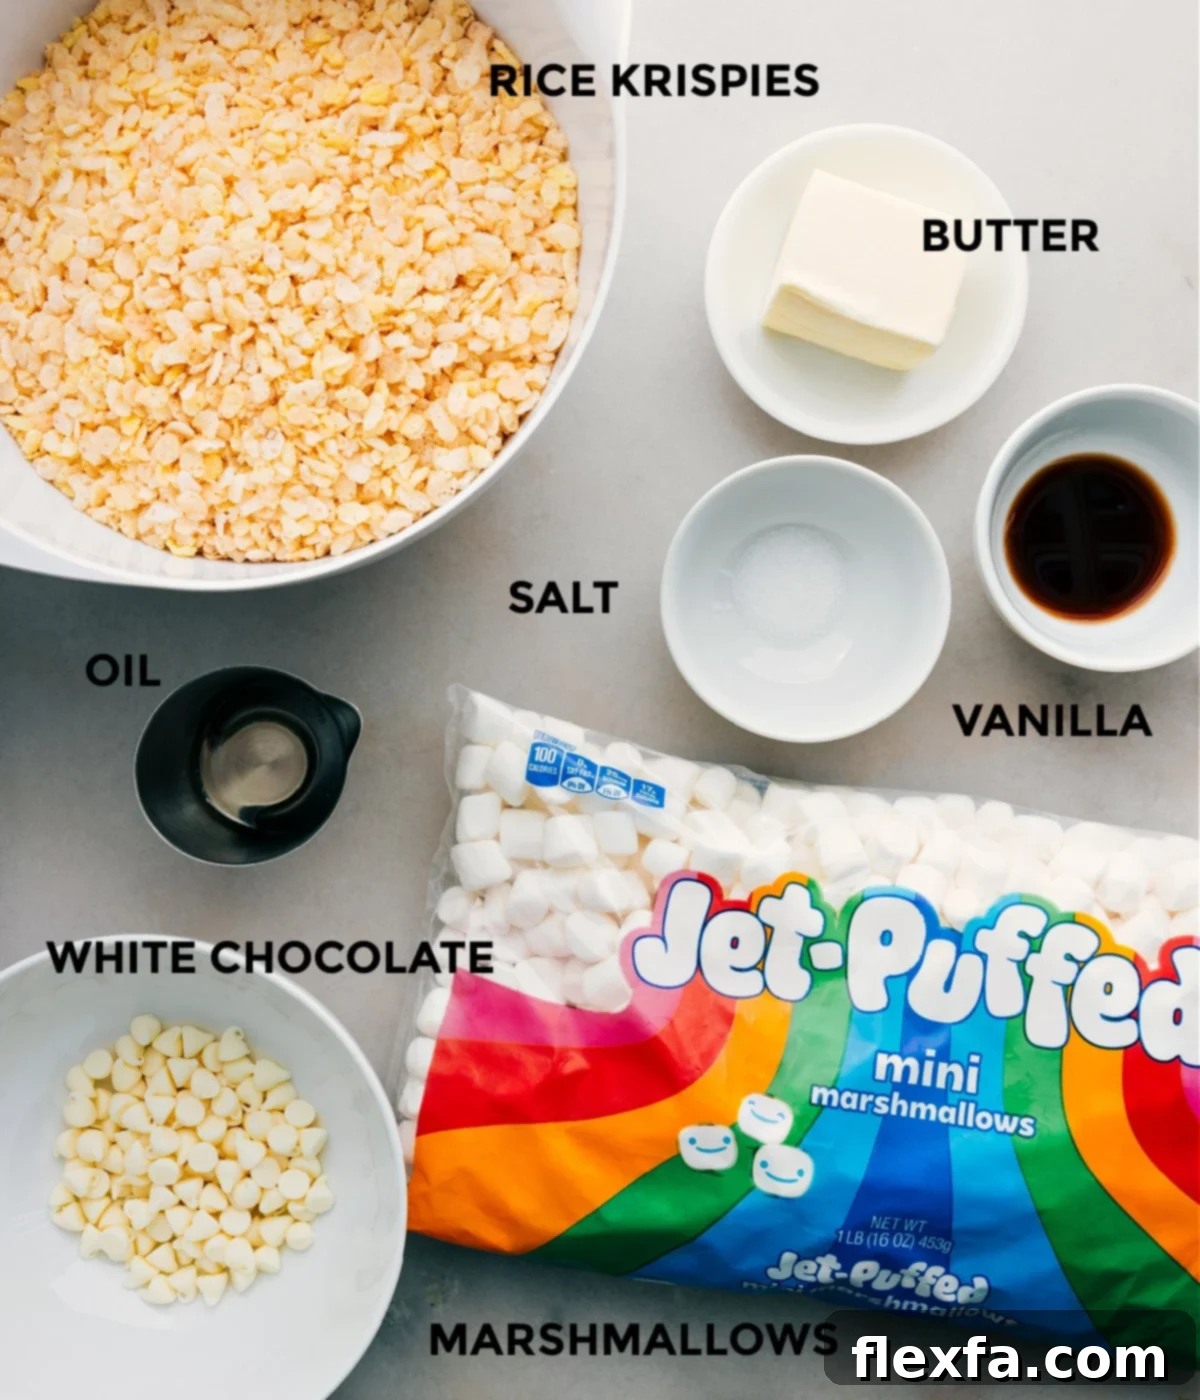
Essential Ingredients for The Best Rice Krispie Treats Recipe
Creating truly exceptional **homemade Rice Krispie Treats** begins with selecting the right ingredients. While the list is short and simple, the quality and type of each component play a significant role in achieving that sought-after thick, chewy, and perfectly gooey texture. Here’s a detailed look at what you’ll need and some expert tips to ensure your crispy treats are nothing short of amazing.
| Ingredient | Swaps or Tips for Perfection |
|---|---|
| Butter | Always opt for unsalted butter. This gives you complete control over the saltiness of your treats, allowing the flavors to balance beautifully. For the best texture, melt the butter slowly over low heat. Browning the butter can add a delicious nutty flavor, but for classic treats, avoid letting it brown too much, as this can alter the final taste and color of your treats. |
| Mini Marshmallows | Fresh, soft mini marshmallows are an absolute must for achieving that signature gooey texture. Old or stale marshmallows will result in dry, stiff treats. A secret tip for extra pockets of delightful gooeyness: save about 1 to 1.5 cups of marshmallows and stir them in *after* the main batch has melted and combined with the cereal. They’ll soften just enough without fully dissolving, creating lovely marshmallow pockets throughout. |
| Rice Krispies Cereal | While generic crispy rice cereals are available, we highly recommend sticking with the name brand, Kellogg’s Rice Krispies. The brand-name cereal maintains its crispness and texture far better when mixed with the marshmallow mixture, preventing your treats from becoming soggy or losing their satisfying crunch. This is key for the “krispie” in Rice Krispie Treats! |
| Salt | A tiny pinch of fine sea salt is crucial! It doesn’t make the treats salty, but rather enhances and balances the sweetness of the marshmallows, bringing out a richer, more complex flavor profile. Fine sea salt dissolves evenly into the mixture. |
| Vanilla Extract | Pure vanilla extract is non-negotiable for the richest, most authentic flavor. Avoid imitation vanilla if possible. Adding vanilla at the very end, off the heat, preserves its delicate aroma and taste, infusing the entire batch of **chewy Rice Krispie Treats** with a wonderful warmth. |
| White Chocolate Chips | For an optional, elegant topping, white chocolate chips are fantastic. To ensure a smooth, easy drizzle, add a tiny amount of neutral-flavored oil (like vegetable or coconut oil) to the chocolate as it melts. This helps it achieve the perfect consistency for decorating. You can also experiment with milk, dark, or semi-sweet chocolate. |
| Sprinkles | Sprinkles are an easy way to add festive color and texture. Nonpareils offer a satisfying crunch and visual appeal, while classic jimmies provide a softer, melt-in-your-mouth bite. Choose colors to match any holiday or celebration! |
Crafting the Perfect Rice Krispie Treats: A Step-by-Step Guide
Making **classic Rice Krispie Treats** is incredibly straightforward, but a few key techniques can elevate them from good to absolutely phenomenal. Follow these detailed steps to ensure your homemade treats are perfectly gooey, chewy, and irresistibly delicious every time.
- Prepare Your Pan: First, line a 9×9-inch baking pan with parchment paper or aluminum foil, leaving a slight overhang on the sides. This “sling” will make it incredibly easy to lift the entire block of treats out once cooled. Lightly spray the parchment/foil and the inside of the pan with a non-stick cooking spray. This crucial step prevents sticking and ensures a clean release.
- Melt Butter to Perfection: In a very large, heavy-bottomed pot (you’ll need plenty of room for mixing), melt the butter over **medium-low heat**. The emphasis here is on *low* heat. Stir occasionally. Melting butter too quickly or over high heat can cause it to brown or even burn, which imparts an unwanted nutty or burnt flavor to your treats. We’re aiming for melted, not browned, butter for the classic taste.
- Gooey Marshmallow Magic: Once the butter is fully melted, reduce the heat to **low**. Add 8 cups (approximately 340g) of the mini marshmallows to the pot. Stir constantly with a heat-resistant spatula until the marshmallows are *just* melted and form a smooth, gooey liquid. It’s vital not to overcook the marshmallows; too much heat or prolonged cooking will make them tough and brittle once cooled, rather than soft and chewy. Remove the pot from the heat as soon as they are melted to stop the cooking process.
- Combine & Infuse Flavor: Immediately remove the pot from the heat. Stir in the salt, ensuring it distributes evenly to enhance the sweetness. Next, add the vanilla extract. Adding vanilla off the heat preserves its delicate flavor, making your treats truly aromatic and delicious. Finally, add the 6 cups of Rice Krispies cereal. Mix gently but thoroughly until every piece of cereal is well coated with the marshmallow mixture.
- The “Gooey Pockets” Secret: This is where the magic happens for extra chewiness! Once the cereal is fully incorporated, add the remaining 2-1/2 cups of fresh mini marshmallows. Gently fold them into the mixture. These late additions will soften but won’t completely melt, creating those wonderful, soft, gooey pockets that make these **the best Rice Krispie Treats**. Continue stirring until everything is well combined.
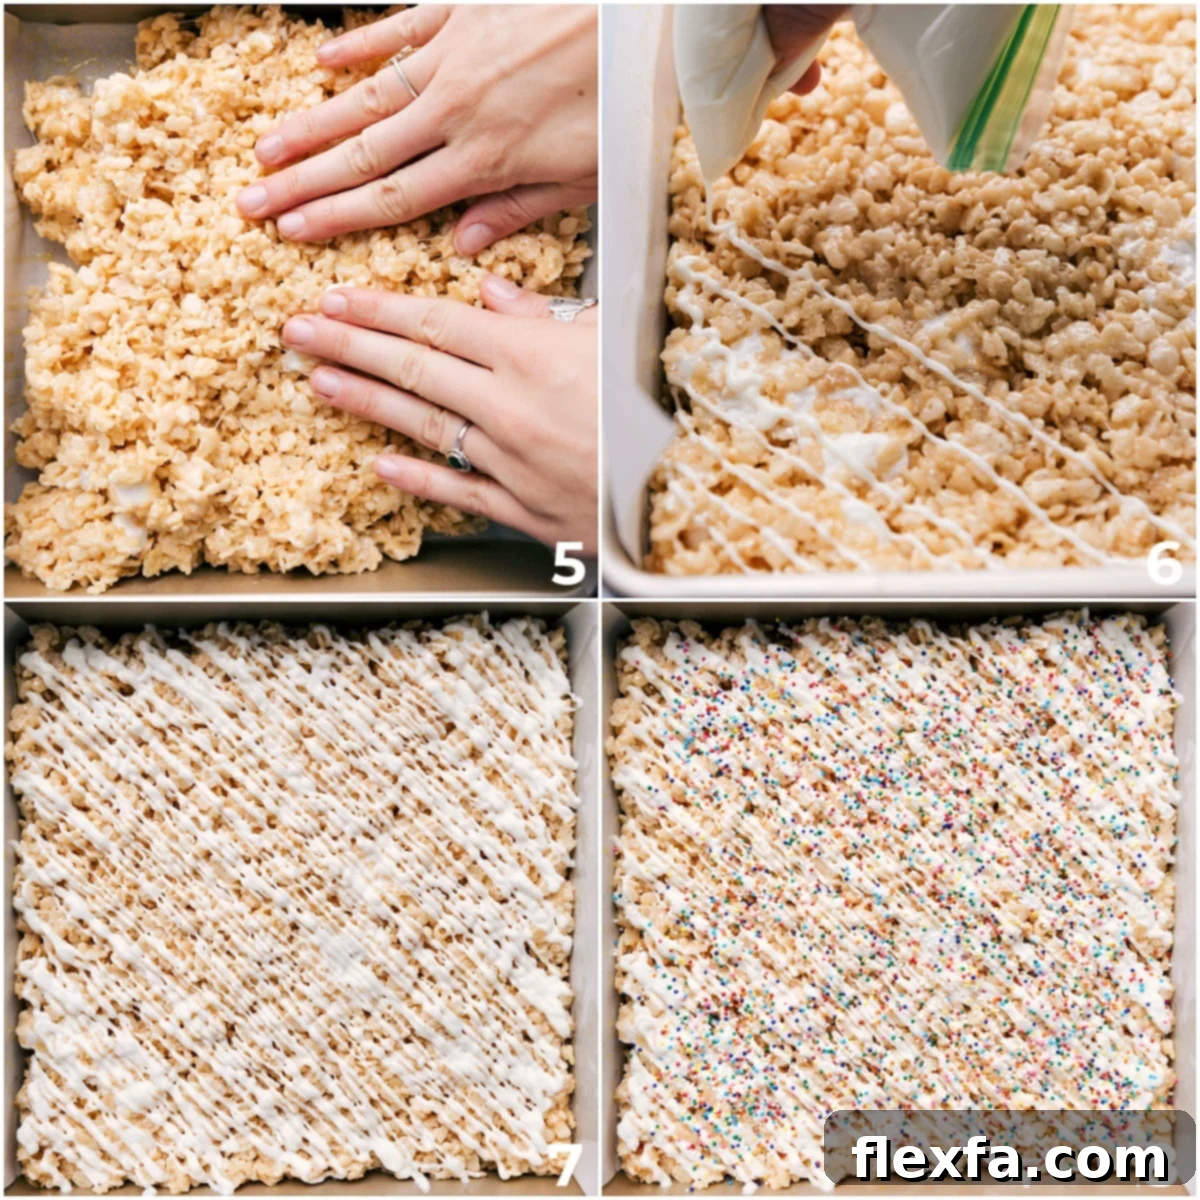
- Pressing for Perfection: Promptly pour the warm, sticky mixture into your prepared 9×9-inch pan. Now, here’s a critical tip for achieving tender, chewy bars: lightly spritz your hands or the back of a spatula with cooking spray and **gently press** the mixture into the pan. Do NOT press too hard or compact the mixture excessively. Over-compressing the treats will crush the cereal and marshmallows, resulting in hard, dense, and brick-like bars instead of the light, airy, and chewy texture we crave. Just a light, even press is all it takes. Let the treats cool completely at room temperature for at least 30 minutes, or until set.
- Optional: Drizzle with Decadence (and Sprinkles!): While your **homemade crispy treats** are cooling, prepare your optional white chocolate topping. In a microwave-safe bowl, combine the white chocolate chips and 1/4 teaspoon of vegetable oil. Microwave in short 15-second bursts, stirring well after each burst, until the chocolate is completely melted and smooth. The oil helps achieve a perfect drizzling consistency. Transfer the melted chocolate to a resealable plastic bag, snip off a tiny corner, and drizzle evenly over the cooled bars. Immediately, before the chocolate sets, sprinkle generously with your chosen nonpareils or jimmies. Allow the chocolate to harden at room temperature for a beautiful, firm topping.
- Slice & Savor: Once the treats are fully cooled and set (and the chocolate topping, if used, has hardened), use the parchment paper overhang to carefully lift the entire block of **gooey Rice Krispie Treats** out of the pan. For the cleanest, easiest cuts, run a sharp knife under hot water, wipe it dry, and then slice the bars. Repeat this step for each cut. This technique warms the blade, preventing the marshmallow from sticking and tearing the treats. Slice into 16 bars (or any size you prefer) and get ready to enjoy your perfectly crafted **classic Rice Krispie Treats**!
Creative Variations to “Switch Things Up”
Unleash Your Creativity: Fun Twists on Rice Krispie Treats
While the classic Rice Krispie Treat is undeniably perfect, these **easy no-bake bars** are also incredibly versatile! They serve as a fantastic canvas for your culinary creativity. Here are some exciting ways to “switch things up” and customize your homemade crispy treats for any occasion or craving:
- Decadent Chocolate Toppings: Go beyond white chocolate! You can top your **Rice Krispie Treat Recipe** with a variety of melted chocolates. Experiment with rich milk chocolate, intense dark chocolate, balanced semi-sweet chocolate chips, or even colorful candy melts to match a party theme. You can drizzle it artfully, spread a thick, indulgent layer, or even create a marbled effect by swirling two types of melted chocolate together for an extra special touch.
- Festive & Seasonal Treats: Transform your **homemade crispy treats** into holiday showstoppers! Use themed sprinkles for Christmas, Halloween (see my favorite Halloween Rice Krispie Treats ideas!), Valentine’s Day, or birthdays. Food coloring can also be added to the melted marshmallow mixture to create vibrant, colored bars that fit any celebration. Imagine green for St. Patrick’s Day or pastel hues for Easter!
- Exciting Mix-Ins: Take your treats to the next level by folding in your favorite candies or baked goods. Roughly chopped chocolate bars (like Kit-Kats, Snickers, or Hershey’s), crushed Oreos, mini Reese’s Peanut Butter Cups, M&M’s, or even toasted nuts like pecans or walnuts add fantastic texture and flavor. Just be sure to add them in with the cereal or at the very end to prevent them from melting completely.
- Sweet & Savory Swirls: For a more gourmet twist, swirl in a tablespoon or two of peanut butter, almond butter, or even a hint of dulce de leche into the melted marshmallow mixture before adding the cereal. The creamy swirl adds a new dimension of flavor and extra richness to your **chewy Rice Krispie Treats**.
- Ice Cream Sandwich Deluxe: For the ultimate summer indulgence, make them into a Rice Krispies Treats Ice Cream Sandwich! Simply cut the cooled treats into your desired shape (squares or rounds work well), add a scoop of your favorite ice cream between two pieces, and lightly press. Freeze for a few minutes to set, and enjoy a truly unforgettable frozen dessert.
Optimal Storage for Freshness
To truly enjoy the peak of their perfect texture, these **thick and chewy Rice Krispie Treats** are always best enjoyed the day they are made. The freshly melted marshmallows are at their absolute gooiness, and the cereal retains its ultimate crispness. However, if you find yourself with leftovers (a rare but possible occurrence!), proper storage is key to maintaining their deliciousness.
- Room Temperature Storage: For short-term storage, keep your **homemade crispy treats** in an airtight container at room temperature. This is generally the best method for preserving their soft, chewy texture for up to 2-3 days. Avoid direct sunlight or warm spots in your kitchen, which can cause them to soften too much or become sticky.
- Refrigeration: While it can extend their shelf life, storing Rice Krispie Treats in the fridge for longer periods or in warm climates may cause them to become firmer and dry out faster. If you must refrigerate them, ensure they are in a very well-sealed airtight container to minimize moisture loss. Bring them back to room temperature for 15-30 minutes before serving for a softer bite.
- Freezing for Long-Term Freshness: For extended storage, **freezing Rice Krispie Treats** is an excellent option! To freeze, wrap each individual bar tightly in plastic wrap, then place parchment paper between layers of wrapped bars in an airtight freezer-safe container or freezer bag. They can be frozen for 6-8 weeks. Thaw frozen treats at room temperature for an hour or two before serving. This method is perfect for meal prepping desserts or ensuring you always have a quick, delicious treat on hand.
More Easy Dessert Bars You’ll Love:
Desserts
Classic 7 Layer Bars Recipe
Desserts
Irresistible S’mores Cereal Bars
Desserts
Festive Funfetti Bars
Desserts
Chewy Snickerdoodle Blondies
Pin
Perfectly Gooey & Chewy Rice Krispie Treat Recipe
Recipe Video
Equipment Needed
-
9 x 9-inch baking pan
-
Parchment paper or aluminum foil for easy lifting
-
Large pot for melting and mixing
Ingredients for Gooey Rice Krispie Treats
- 5 tablespoons unsalted butter
- 1 (16-ounce) bag miniature marshmallows divided for extra gooeyness (see Note 1 in recipe notes)
- 6 cups Rice Krispies cereal or another high-quality crispy rice cereal
- 1/4 teaspoon fine sea salt
- 1 teaspoon pure vanilla extract
- 1/3 cup white chocolate chips or milk, semi-sweet, or dark chocolate
- 1/4 teaspoon vegetable oil or coconut oil
- Sprinkles optional, for decoration
Step-by-Step Instructions
-
Line a 9×9-inch pan with parchment paper or aluminum foil, leaving an overhang on all sides. Lightly spray the lined pan with cooking spray. Set aside.
-
In a very large pot, melt the 5 tablespoons of unsalted butter over medium-low heat, stirring occasionally. Once the butter is completely melted, reduce the heat to low. Add 8 cups (approximately 340g) of the mini marshmallows. Stir constantly until the marshmallows are just melted and smooth. Be careful not to overcook.
-
Remove the pot from the heat. Stir in the salt and vanilla extract until well combined. Add the 6 cups of Rice Krispies cereal and mix gently until the cereal is thoroughly coated. Once well mixed, fold in the remaining 2-1/2 cups of mini marshmallows. Continue stirring until everything is incorporated, leaving delightful pockets of softened marshmallows.
-
Pour the warm mixture into the prepared pan. Lightly spritz your hands or the back of a spatula with cooking spray. Gently press the mixture evenly into the pan. Avoid pressing too firmly, as this can lead to hard, dense treats. Allow the treats to cool and set at room temperature for about 30 minutes.
-
Optional White Chocolate Topping: While the treats cool, prepare the topping. Add the 1/3 cup white chocolate chips and 1/4 teaspoon vegetable oil to a microwave-safe bowl. Microwave in 15-second intervals, stirring thoroughly after each interval, until the chocolate is fully melted and smooth. Transfer the melted chocolate to a resealable plastic bag, snip a small tip off one corner, and drizzle it evenly over the cooled bars. Immediately add your chosen sprinkles for decoration. Allow the chocolate to harden at room temperature.
-
Once fully set, use the parchment paper overhang to lift the entire block of treats out of the pan. For easier and cleaner slicing, run a sharp knife under hot water, dry it, and then slice the bars into your desired serving sizes (typically 16 squares). These delicious, chewy treats are best enjoyed the same day for optimal freshness.
Recipe Notes & Tips for Success
Storage for Optimal Texture: While these **homemade crispy treats** are undeniably at their peak perfection the day they are made, they can be stored to enjoy later. For short-term storage, keep them in an airtight container at room temperature for up to 2-3 days. If you prefer or if your climate is warm, you can store them in the fridge for longer, but be aware they may firm up and potentially dry out a bit quicker. To restore some softness, let them sit at room temperature for a while before serving. For longer preservation, wrap individual bars tightly in plastic wrap and freeze them for 6–8 weeks, placing parchment paper between layers to prevent sticking. Thaw at room temperature for an hour or two before indulging.
Nutrition Information
Nutrition information is automatically calculated and should be used as an approximation only. Factors such as exact ingredient brands, preparation methods, and serving sizes can vary these values significantly.