
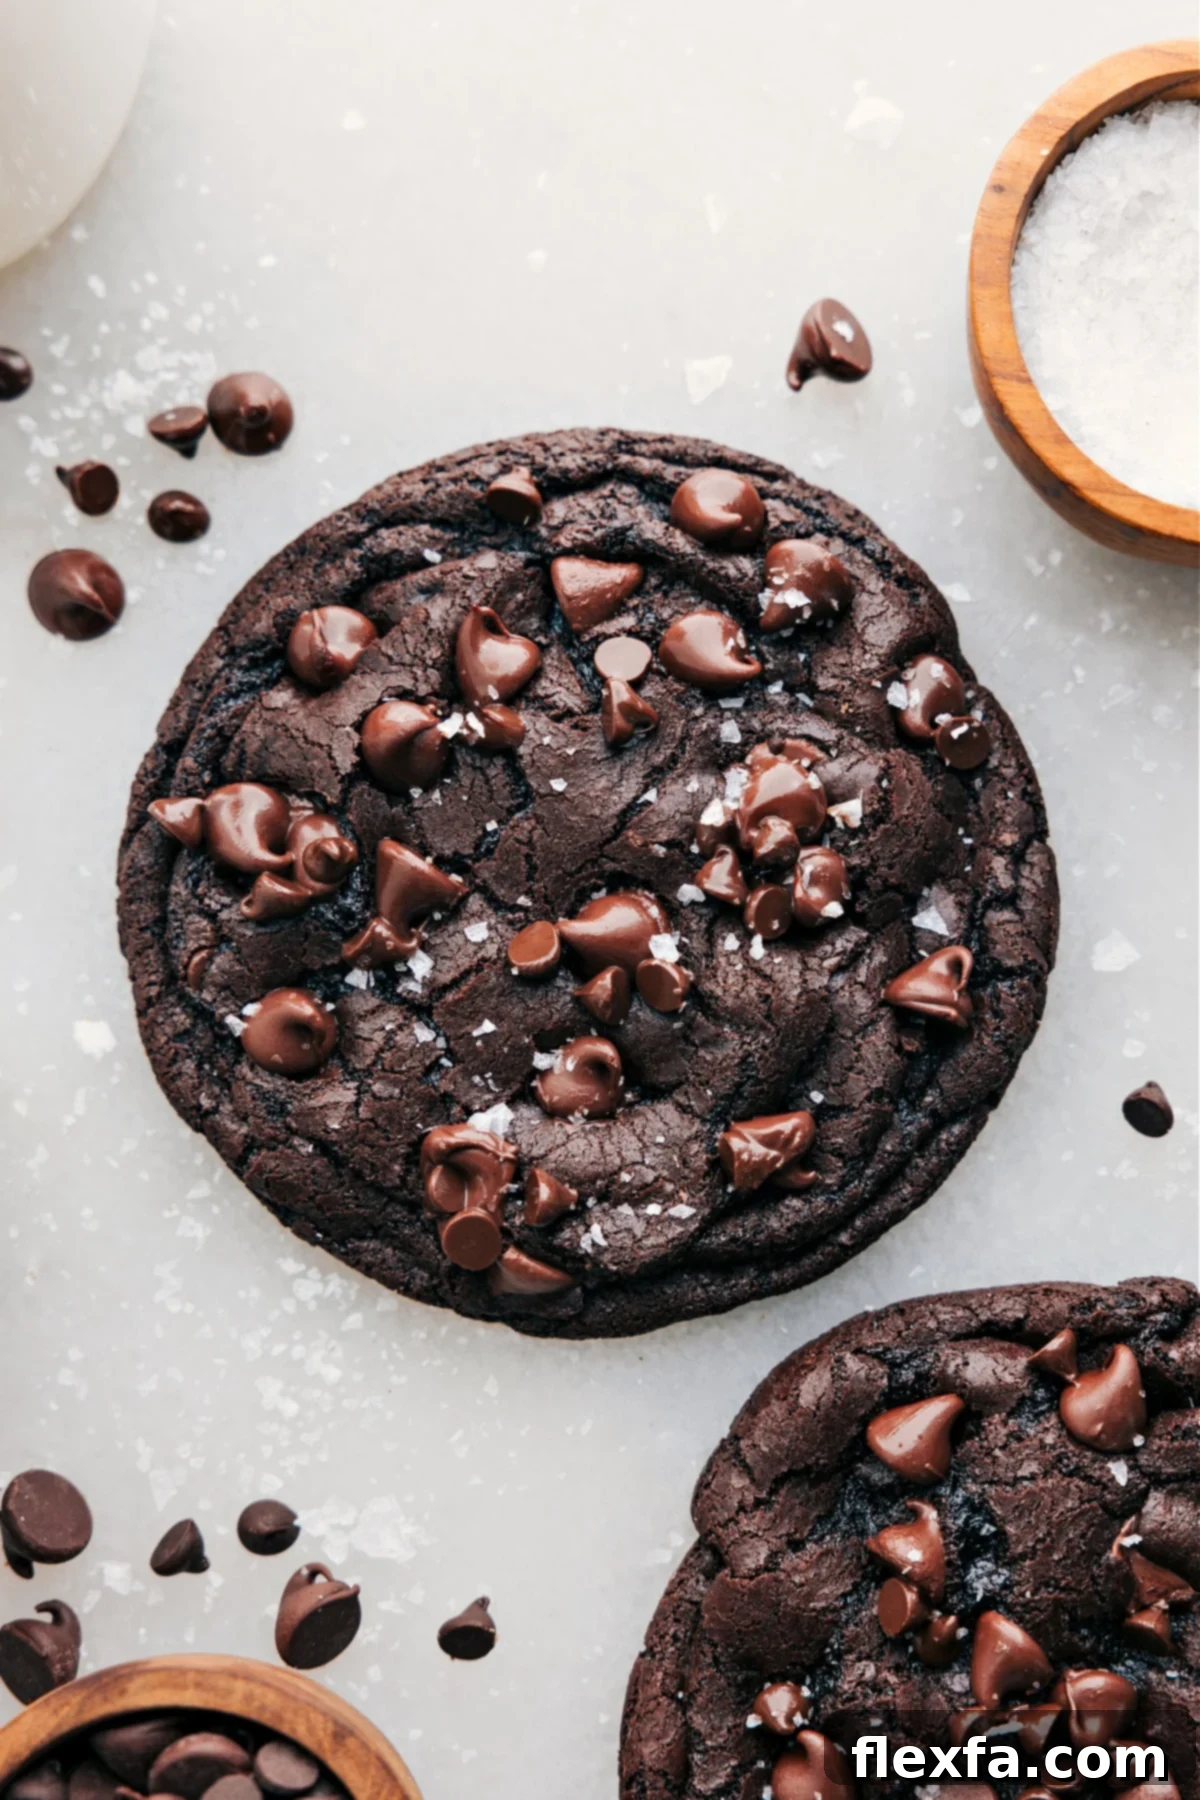
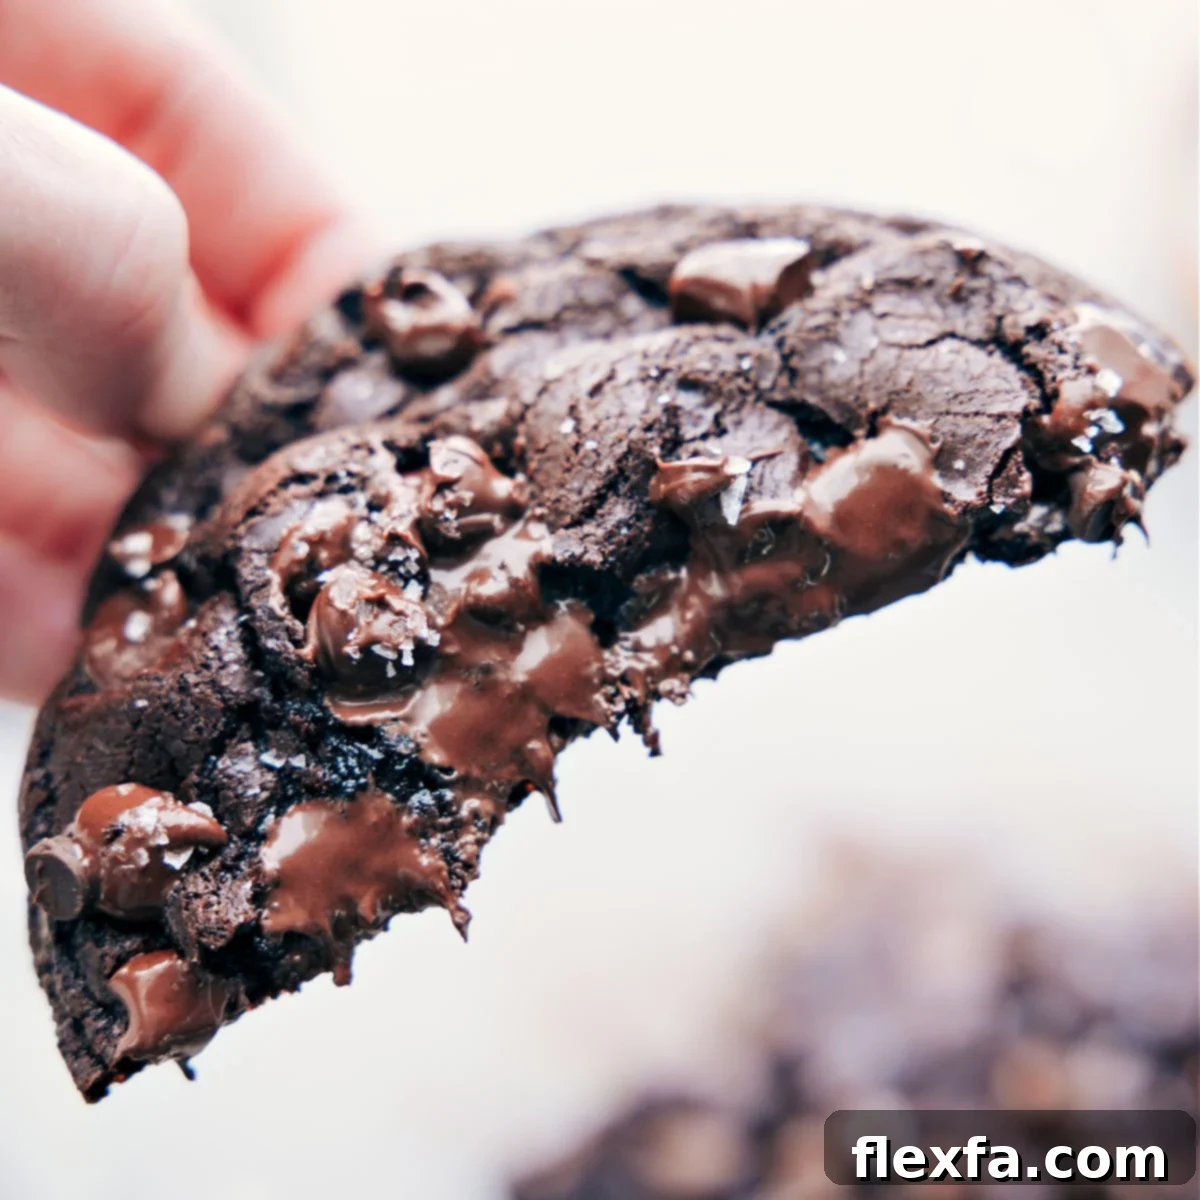
The Single Serve Double Chocolate Cookie is a dream come true for chocolate enthusiasts! It’s intensely rich, perfectly sweet, delightfully soft, and wonderfully chewy, all while boasting crisp edges and an abundance of melty chocolate chips in every bite.
Imagine a warm, gooey chocolate cookie emerging from the oven in just a matter of minutes, ready to satisfy your deepest dessert cravings. This exceptional single-serve recipe is designed precisely for those moments when you desire a luxurious sweet treat but don’t want the commitment (or the tempting leftovers!) of an entire batch of cookies. Even better, it’s remarkably quick to prepare, requiring no chilling time, making it the ultimate instant gratification dessert for busy weeknights or spontaneous indulgences.
If you’re looking for more delicious small-batch ideas to keep your cravings in check, make sure to also try this mega-popular Single Serve Chocolate Chip Cookie or my delightful Small Batch Oatmeal Chocolate Chip Cookies recipe. These recipes are perfect for anyone seeking a quick, satisfying treat without excess.
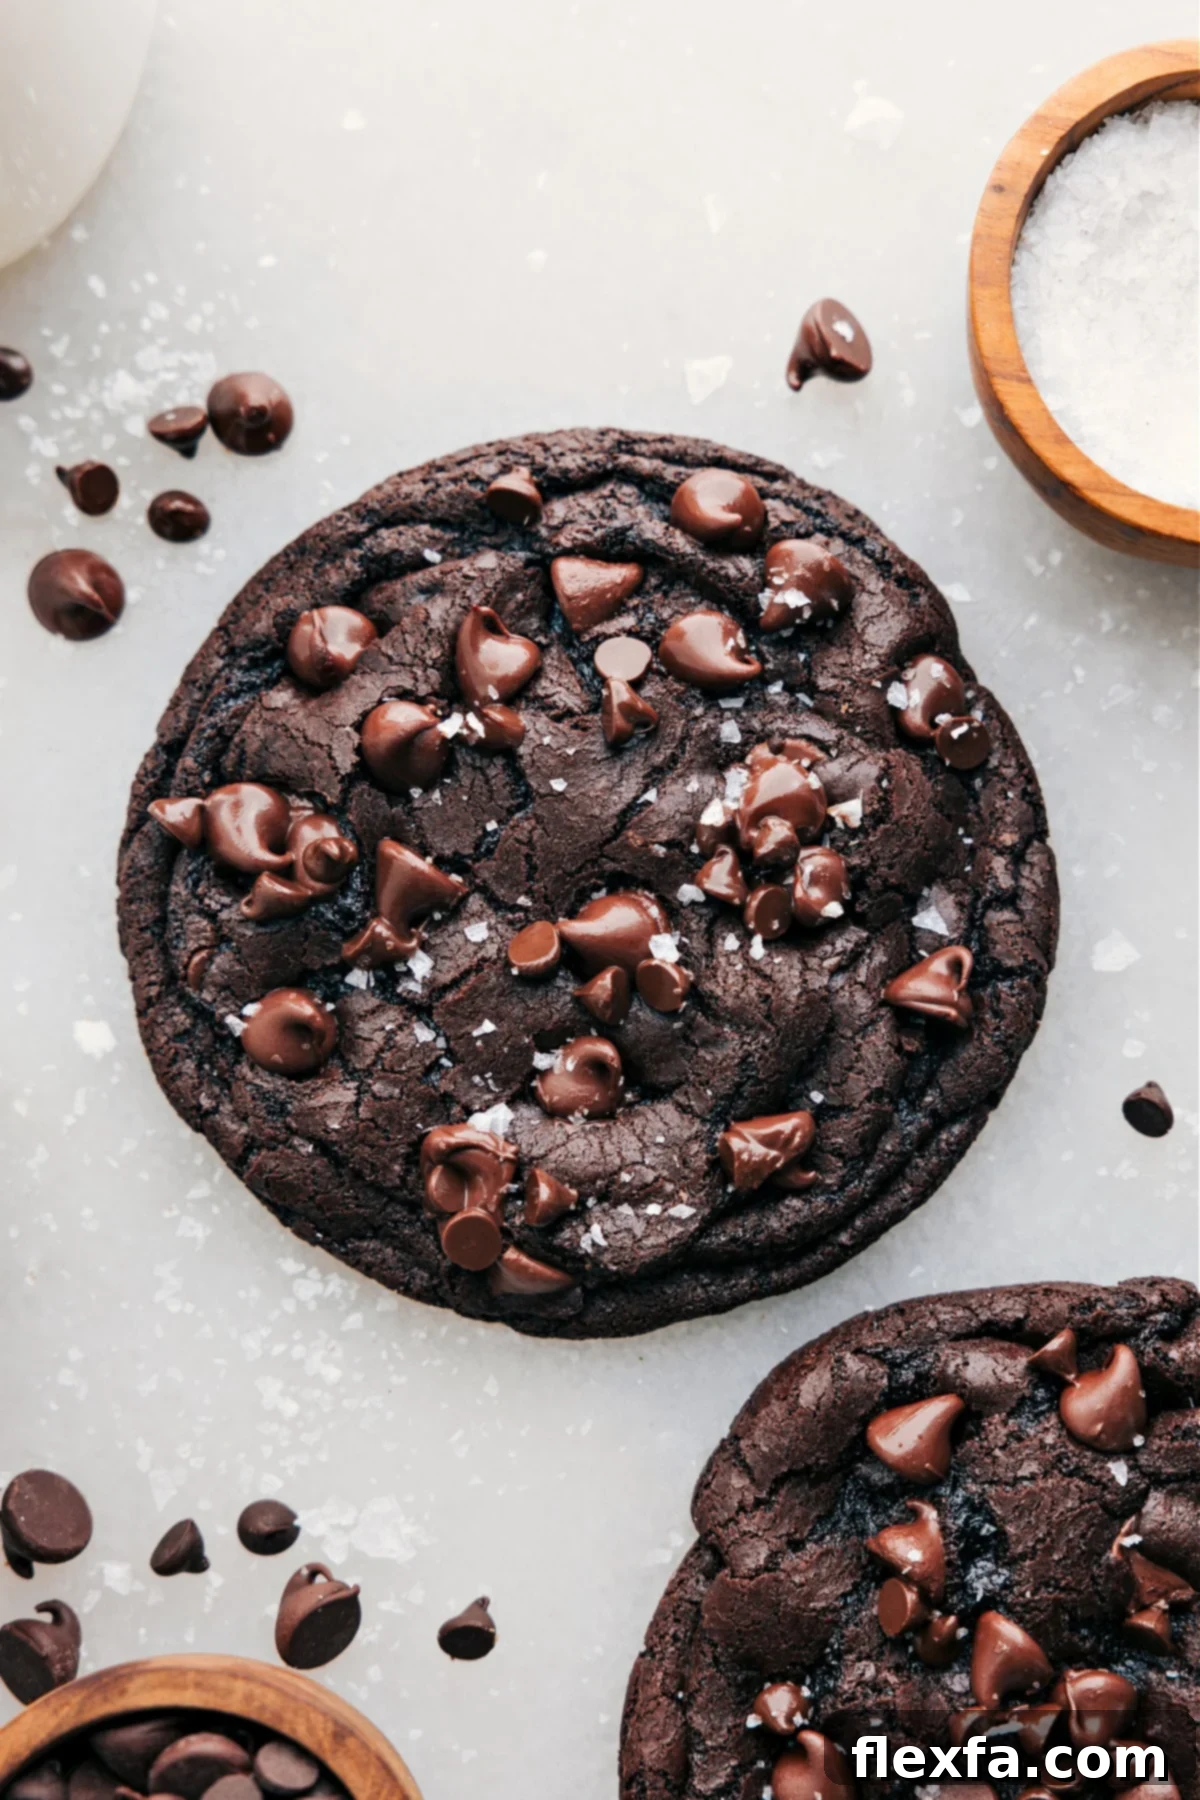
Unveiling the Perfect Single Serve Double Chocolate Cookie: A Culinary Journey
If you’re a devoted follower on Instagram, you’re undoubtedly aware of my profound and unwavering love for chocolate cookies. They are, without a doubt, my ultimate go-to comfort treat, and any day that features a fresh batch feels like a truly great day. My absolute favorite way to indulge in these decadent delights is when they’re warm, straight from the oven, generously crowned with a scoop of creamy vanilla ice cream and a luscious drizzle of homemade hot fudge sauce! The combination is pure bliss.
While I personally adore intensely chocolatey desserts, I’ve observed that my family often leans towards less rich options, frequently preferring lighter, brighter flavors like lemon cookies or the classic, subtly sweet charm of Swig sugar cookies. This delightful difference in dessert preferences sparked an exciting culinary challenge: to create a smaller, single-batch version of my beloved chocolate cookies – one that could wholeheartedly satisfy my personal chocolate cravings without leaving an entire tray of tempting, decadent cookies for me (and them!) to navigate. The goal was to find a perfect balance: all the indulgence, none of the excess.
My ambition for this single-serve recipe was considerable: it simply had to live up to the high standards and intense hype that my favorite full-sized chocolate cookies consistently deliver. Achieving this perfect equilibrium of richness, chewiness, and flavor in a reduced quantity, however, proved to be a more intricate and demanding challenge than I initially anticipated. This seemingly simple recipe underwent an astounding eighteen rigorous tests, each iteration meticulously refined, tweaked, and re-tested until every element – from the precise ratio of sugars to the ideal baking time – was just right. The silver lining in all this dedication? Testing in small batches, while undeniably demanding in its own way, is considerably more manageable (and less overwhelming!) than dealing with dozens of cookies after each attempt, making the process a bit more fun, even amidst the perfectionist pursuit.
Because I have personally invested such extensive time, effort, and passion into testing, tasting, and perfecting this recipe—testing it again and again (and then some more!)—I am now absolutely thrilled to equip you with all the essential tips, invaluable tricks, and detailed insights gathered throughout my journey. My ultimate aim is to ensure that your very first attempt at making this Single Serve Double Chocolate Cookie is nothing short of perfection, consistently delivering that ultimate, melt-in-your-mouth chocolate experience you so deeply crave. Get ready to bake a masterpiece!
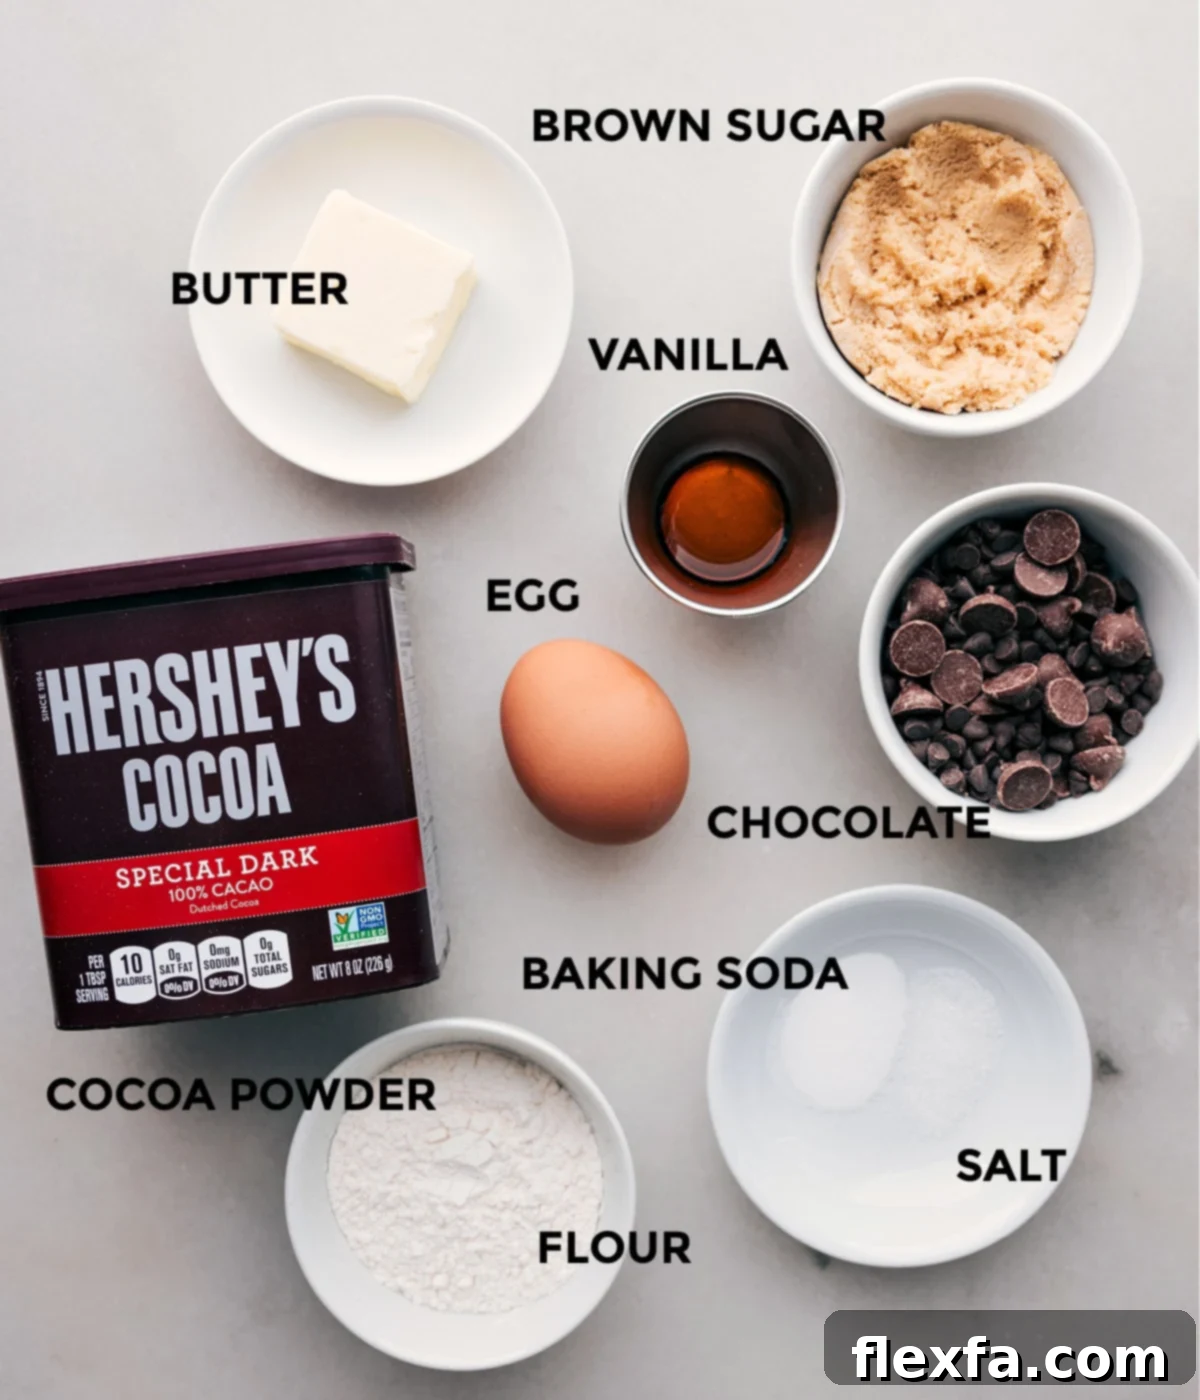
Key Ingredients for Your Perfect Double Chocolate Cookie
Crafting the perfect single-serve double chocolate cookie begins with a thorough understanding of the unique role each ingredient plays. This thoughtful selection and precise measurement are what transform simple components into an extraordinary treat. Here’s a detailed look at what you’ll need and precisely why each element is crucial for achieving cookie perfection:
- Unsalted Butter: The foundation of many great cookies, unsalted butter is critical because it gives you absolute control over the salt content in your cookies. This precision allows you to perfectly balance the sweetness and deeply enhance the robust chocolate flavor. Melted butter also contributes to a chewier texture compared to creamed butter.
- Light Brown Sugar: This isn’t merely for sweetness; light brown sugar is the secret weapon for achieving an incredibly moist, soft, and wonderfully chewy cookie texture. Its natural molasses content adds a rich, complex, caramel-like depth of flavor that beautifully complements and accentuates the intense chocolate. Remember to gently pack it into your measuring cup and level off the top for accuracy, as this impacts the final cookie structure.
- Egg Yolk: The single egg yolk is the magic touch that makes these cookies exceptionally rich and tender. It acts as a powerful binder, helping to hold the cookie together, while also introducing emulsifying fats that contribute significantly to its luxurious, almost fudgy texture. Make sure to use just the yolk – separate it carefully and consider saving those whites for other delightful, lighter recipes like airy meringue cookies!
- Vanilla Extract: While often considered optional, a dash of pure vanilla extract is highly recommended. It’s a flavor enhancer that works tirelessly to boost and round out all the other flavors, particularly the chocolate. It adds a subtle warmth, an inviting aroma, and an overall aromatic complexity that elevates the cookie from merely good to truly unforgettable.
- All-Purpose Flour: Serving as the structural backbone of your cookie, all-purpose flour provides the necessary framework to keep your cookie firm, yet remarkably tender. Accurate measurement is absolutely vital here; too much flour can lead to a dry, dense, or cakey cookie, while too little can cause excessive spreading, resulting in a thin, crispy cookie rather than the desired chewy one. Weighing is best!
- Dutch Process Cocoa Powder: This is unequivocally the star ingredient for achieving that distinctive deep, smooth, and intensely chocolatey flavor characteristic of a double chocolate cookie, alongside a beautiful, rich dark color. Dutch process cocoa has undergone an alkalizing treatment to reduce its acidity, causing it to react differently with baking soda than natural cocoa. This results in a less bitter, more mellow, and profound chocolate taste, and helps create that signature dark hue without making the cookie dry.
- Baking Soda: A crucial leavening agent, baking soda works in perfect harmony with the Dutch process cocoa powder. It helps the cookies rise slightly during baking, contributing significantly to their soft, tender, and slightly puffy texture. Always ensure your baking soda is fresh for optimal leavening power – old baking soda can lead to flat cookies.
- Salt: A small but mighty pinch of salt is absolutely essential in this recipe. It doesn’t just add a hint of salinity; it acts as a powerful flavor enhancer, cutting through the sweetness, bringing out the profound depth of the chocolate, and balancing the overall taste profile. Adjust the amount based on whether you’re using salted or unsalted butter, and consider a sprinkle of flaky sea salt on top for an extra gourmet touch.
- Chocolate Chips: What would a double chocolate cookie be without an abundance of melty chocolate chips? They are indispensable, adding bursts of concentrated chocolate flavor and creating luscious pockets of gooey texture throughout the cookie. Opt for high-quality chocolate chips – whether semi-sweet, dark, or milk chocolate – as their quality significantly impacts the final taste experience.
Crafting Your Perfect Single Serve Double Chocolate Cookie: Expert Tips & Tricks
Making this cookie is surprisingly straightforward, but a few key techniques and careful attention to detail will guarantee outstanding results every time. The full recipe with precise measurements is detailed below, but here are my top, tried-and-true tips for mastering this decadent single-serve treat, ensuring it turns out perfectly rich, chewy, and utterly delicious:
- Number 1 Tip: Precision in Measurement is Paramount: In baking, especially with small batches where ratios are highly sensitive, precision is everything! For the most accurate and consistent results, I cannot recommend using a food scale enough. If your recipe platform allows, switch to “metric” measurements and add ingredients directly to your mixing bowl using those precise gram measurements—this eliminates the guesswork of volume measuring cups. If you are relying on traditional cups and spoons, ensure you carefully level off the tops completely to get the exact amounts needed. Even a slight excess or deficit, particularly with flour, can drastically alter the cookie’s final texture, leading to a dry or overly spread cookie.
- Measure Butter Right: Butter is a foundational ingredient that significantly impacts texture. To ensure you’re using precisely the right amount of butter (2 tablespoons), cut it from the middle of the stick. Often, the wrapping on butter sticks isn’t perfectly even, so cutting from the end might inadvertently give you slightly more or less than desired. Consistency in butter content is key for the ideal spread and chewiness.
- Cool the Melted Butter Completely: This step is absolutely non-negotiable for the perfect cookie! After melting your butter, it is crucial to allow it to cool down completely to room temperature. Mixing warm butter with sugar can lead to an oily dough and a cookie that spreads too much in the oven, resulting in a thin, greasy, and brittle texture instead of the desired soft and chewy center. Patience here is immensely rewarded – it ensures a stable emulsion with the egg yolk and sugar.
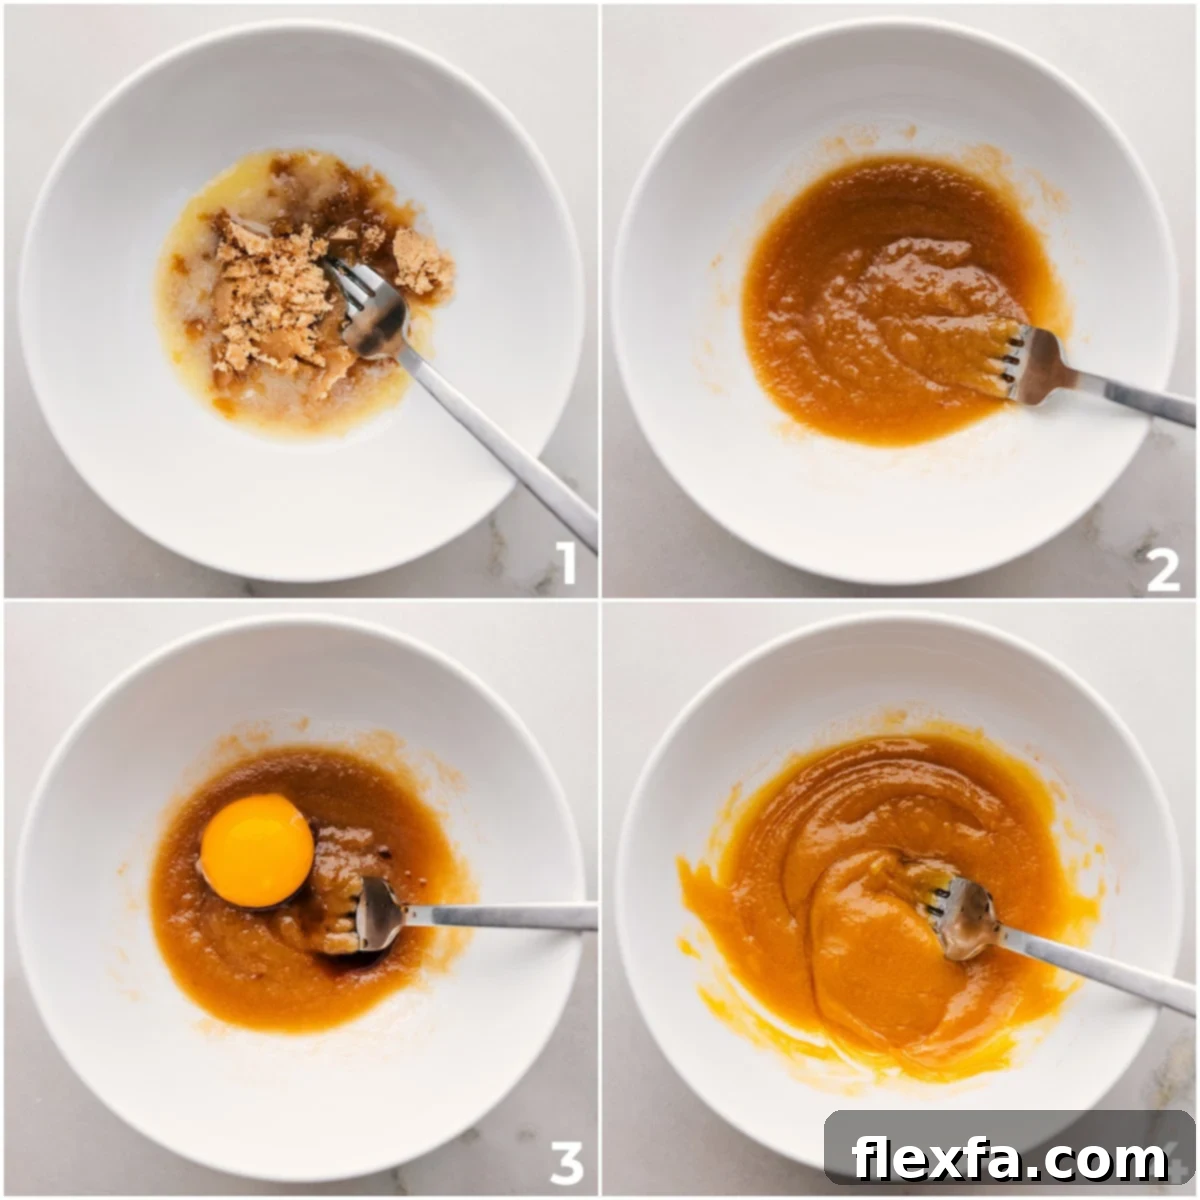
- Emulsify Wet Ingredients Thoroughly: Once your butter is perfectly cooled, vigorously mix it with the brown sugar, egg yolk, and vanilla extract. Don’t just combine; whisk these ingredients until the mixture becomes visibly light in color, creamy, and beautifully emulsified. This creates a stable base for your dough, preventing separation and ensuring an even distribution of moisture and flavor throughout the cookie, leading to a superior final product.
- Slightly Underbake for Ultimate Chewiness: This is a crucial secret to achieving that coveted soft, gooey center characteristic of a perfect chocolate cookie. Take your cookies out of the oven when the edges appear set and are just starting to turn a light golden-brown, but the very center still looks a tiny bit underdone or slightly soft and glossy. They will continue to set and firm up as they cool on the hot baking sheet, resulting in a wonderfully soft, moist, and chewy interior. Overbaking leads to dry, hard cookies.
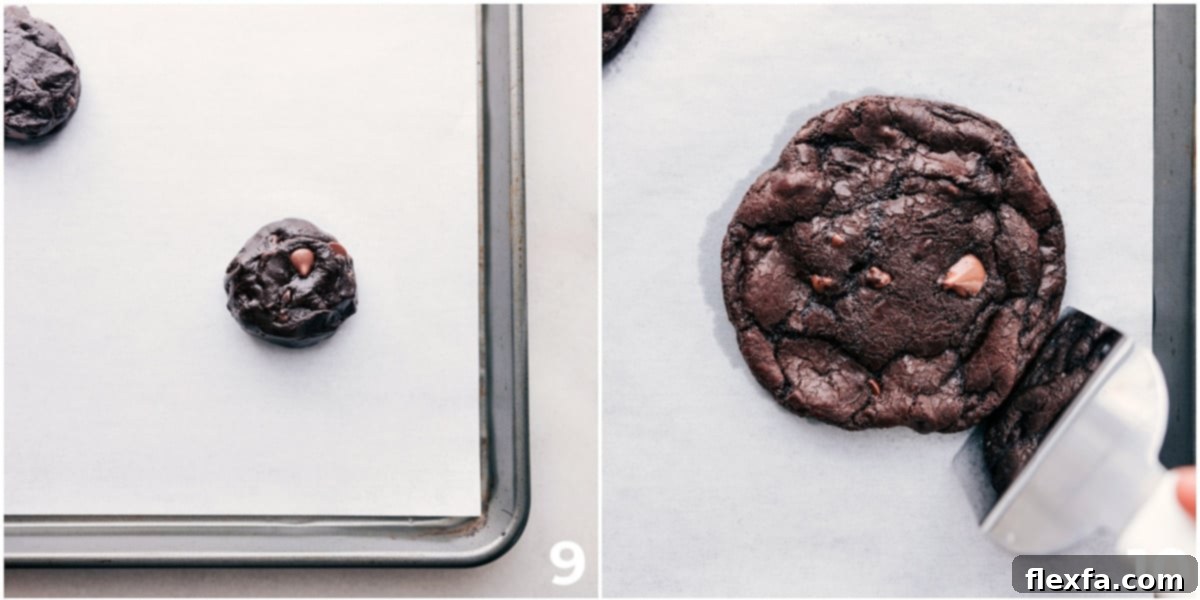
- Flatten If Needed: Sometimes, even with precise measurements, cookies can puff up a little too much in the oven, especially if your ingredients aren’t perfectly calibrated or if there are slight variations in oven temperature. If you notice your cookie is overly dome-shaped right out of the oven, gently but firmly tap the baking pan on the counter a few times. This helps to release trapped air, causing the cookie to flatten slightly and creating those desirable crinkly, thin edges.
- Shape After Baking for a Bakery-Style Finish: For that professional, perfectly round cookie shape often seen in bakeries, grab a metal spatula or a round cookie cutter that is slightly larger than your baked cookie. Immediately after removing the cookies from the oven (while they’re still warm and pliable), use the spatula or cutter to gently push and swirl any rough or uneven edges inwards. This simple trick creates beautifully uniform, aesthetically pleasing cookies. As a final flourish, press a few extra chocolate chips onto the top of the warm cookies; this not only makes them look stunningly appealing but also guarantees that every single bite is packed with glorious pockets of melted chocolate!
Essential Baking Tools for Your Single Serve Double Chocolate Cookies
Having the right tools at hand can significantly streamline your baking process and make all the difference in ensuring your single-serve double chocolate cookie comes out perfectly. Here’s a detailed list of the essential equipment you’ll need to create this delectable treat:
- Microwave-Safe Bowls: You’ll need at least one small microwave-safe bowl for melting the butter and subsequently mixing your wet ingredients. I personally find these cereal bowls to be the ideal size for small batches like this. Porcelain or ceramic bowls are excellent choices as they heat evenly in the microwave and, crucially, help the butter cool down quickly and efficiently to room temperature, preventing an oily dough.
- Fork: A simple kitchen fork is surprisingly versatile and indispensable for this recipe! It’s perfect for vigorously mixing the sugars with the melted butter, ensuring a smooth, lump-free base. It’s also ideal for whisking in the egg yolk and vanilla extract until the mixture is beautifully creamy and thoroughly emulsified. Its tines help break down any sugar clumps and incorporate air.
- Silicone Spatula: As your cookie dough comes together and thickens, a fork might become inadequate for proper mixing. A sturdy silicone spatula is invaluable for continuing to mix the dough, ensuring all ingredients are thoroughly combined and no dry streaks of flour or cocoa powder remain. Its flexible yet firm edge is also fantastic for scraping every last bit of delicious dough from the bowl, minimizing waste and ensuring you get every morsel of flavor.
- Baking Tray and Liner: A standard baking tray (approximately 15″ x 10″ is ideal) is essential for baking. To prevent your precious cookie from sticking to the pan and to promote even baking, always use a liner. Parchment paper is a fantastic, disposable choice for easy cleanup, or consider investing in a reusable silicone baking mat. A silicone mat not only simplifies cleanup but also helps improve the texture of the cookie bottoms, giving them a slight crispness without overbaking the interior.
- Metal Spatula: This tool becomes your best friend right after the cookies come out of the oven. While the cookies are still warm and pliable, use the metal spatula to gently shape them, pushing any rough or uneven edges inwards to achieve a perfectly round, professional-looking finish. This is also excellent for carefully transferring your delicate warm cookies from the baking sheet to a cooling rack without damaging them.
- Food Scale (Highly Recommended): While not strictly essential for everyone, a reliable food scale (preferably one capable of measuring in grams) provides the most accurate and consistent measurements for dry ingredients like flour and cocoa, and even butter. Precision is paramount in small batch baking, and a scale eliminates common measurement errors that can affect texture and spread.
Frequently Asked Questions About This Double Chocolate Cookie
Here are answers to some common questions you might have when baking your ultimate single-serve double chocolate cookie. These insights will help you troubleshoot and achieve the best possible results:
- Can I use salted butter instead of unsalted butter? Yes, you absolutely can use salted butter in this recipe if that’s what you have on hand. If you opt for salted butter, simply omit the additional 1/8 teaspoon of salt listed in the recipe’s ingredients. This ensures your cookie isn’t overly salty and maintains the perfect flavor balance between sweet and chocolatey.
- What if I don’t have Dutch process cocoa powder? Dutch process cocoa is genuinely the “secret ingredient” that elevates these single-serve double chocolate cookies to another level. It provides a smoother, richer, and less bitter chocolate flavor, and also contributes significantly to the cookies’ moistness and beautiful, deep, dark color. Using regular natural cocoa powder will result in a drier, lighter-colored cookie with a more acidic and different flavor profile. For the best possible outcome – that truly decadent, dark chocolate experience – I strongly recommend waiting until you have Dutch process cocoa powder on hand. Hershey’s Special Dark cocoa powder is an excellent and readily available Dutch-process option found at most grocery stores.
- Can I add nuts or other mix-ins to this recipe? Absolutely! Feel free to customize your cookie to your heart’s content. Chopped nuts, such as walnuts, pecans, or even macadamia nuts, are a fantastic addition for extra texture and a nutty flavor complement. You can also experiment with other delightful mix-ins like mini marshmallows, dried cranberries, a sprinkle of espresso powder for a mocha twist, or even a different type of chocolate chip (e.g., white chocolate or peanut butter chips). If adding nuts, I suggest replacing about 2 tablespoons of the chocolate chips with your chosen nuts to maintain the overall dough consistency and ensure the cookie bakes properly.
- What should I do if my cookies didn’t spread much during baking? If your cookie comes out looking too thick, overly puffy, or hasn’t spread adequately, the most common culprits are typically too much flour and/or cocoa powder (often due to inaccurate measuring), or the melted butter wasn’t fully cooled to room temperature before mixing. Don’t worry, there’s a quick fix! Immediately after removing the baking tray from the oven, rap it firmly on a flat surface (like your countertop) a few times. This action helps to release trapped air, causing the cookie to gently flatten slightly and encouraging it to spread more, developing those desirable crinkly edges.
- What should I do if my cookies spread too much? Conversely, if your cookie spreads excessively and becomes too thin, it’s usually due to too little flour and/or cocoa powder, or perhaps the butter was too warm when initially mixed with the sugars. To remedy this while the cookie is still piping hot and pliable, work quickly with a metal spatula. Gently use the spatula to push the edges of the cookie inwards towards the center. This will help the cookie hold a better, more compact shape and prevent it from becoming overly thin and crispy, preserving its chewy texture.
Storage Tips for Your Double Chocolate Cookie
These single-serve double chocolate cookies are, without a doubt, at their absolute peak of deliciousness when enjoyed warm, fresh out of the oven! The melty chocolate chips and perfectly soft, chewy texture are simply irresistible at this stage. However, if you happen to have any leftover dough or a baked cookie you want to save, here’s how to store them:
For Baked Leftovers: While it’s rare to have leftovers with a single-serve recipe, if you do, store the baked cookie in an airtight container or bag at room temperature. It will remain fresh and delicious for 1-2 days. To re-create that warm, fresh-baked experience, simply warm it briefly in the microwave for about 10-15 seconds.
For Unbaked Dough: This recipe is fantastic for making ahead or preparing a quick treat later. If you have unbaked dough and wish to save it, wrap it tightly in an airtight bag or container to prevent freezer burn and store it in the freezer for up to 2-3 months. When a chocolate craving strikes, you can bake the dough directly from the freezer. You might need to add an extra minute or two to the baking time to ensure it cooks through perfectly.
Why Choose a Single Serve Cookie? The Irresistible Benefits!
In a world often dominated by giant cookie batches and overflowing dessert trays, why would you specifically opt for a single-serve version? The advantages are plentiful, making it a brilliant, often overlooked choice for any home baker, whether you’re a novice or an experienced pro:
- Instant Gratification: When a sudden, intense sweet craving hits, waiting hours for a full batch to mix, chill, and bake just isn’t an option. This recipe delivers a warm, fresh, and utterly delicious cookie in under 30 minutes – often even quicker! It’s the epitome of instant dessert satisfaction.
- Effortless Portion Control: It’s incredibly easy to overindulge when a dozen (or more!) freshly baked cookies are staring invitingly at you. A single-serve recipe naturally helps manage portions, allowing you to enjoy a perfectly satisfying treat without any guilt or the temptation to eat more than you intended.
- Minimal Waste: Say goodbye to stale leftovers! With a single-serve recipe, you bake exactly what you need, when you need it. This significantly reduces food waste and ensures that every single cookie is enjoyed at its absolute freshest and most delicious peak.
- Quick & Easy Preparation and Cleanup: The beauty of a small batch isn’t just in the serving size. It translates directly to a minimal ingredient list, a no-chill dough, and consequently, less prep time and far less cleanup afterward. It’s truly perfect for busy weeknights, last-minute cravings, or spontaneous baking urges.
- Experimentation Friendly: Have you always wanted to try a new mix-in, a different spice, or a slightly varied flavor profile? A small batch is the ideal canvas for culinary experimentation. You can easily test new ideas without committing to a large quantity of potentially ‘experimental’ cookies.
- Personalized Treat: Sometimes, you just want *your* kind of cookie, tailored precisely to your preferences. Whether you like extra chocolate chips, a sprinkle of sea salt, or a touch of a specific extract, this recipe allows you to craft one perfect cookie exactly how you envision it.
- Less Temptation: For those trying to manage sweet intake, having only one perfectly portioned cookie can be a game-changer. It satisfies the craving completely without the lingering temptation of a full cookie jar.
Serving Suggestions for Your Decadent Single Serve Cookie
While this Single Serve Double Chocolate Cookie is utterly delightful and satisfying on its own, here are a few ideas to elevate your dessert experience and make it even more memorable:
- Classic Ice Cream Pairing: As mentioned, my personal favorite way to enjoy this cookie is warm, straight from the oven, topped with a generous scoop of premium vanilla bean ice cream. The exquisite contrast of the warm, gooey cookie with the cold, creamy ice cream is simply divine – a classic for a reason!
- Hot Fudge Drizzle: For an extra layer of unparalleled indulgence, add a luscious drizzle of rich, warm homemade hot fudge sauce over your cookie and ice cream. This creates a luxurious sundae experience in a single serving.
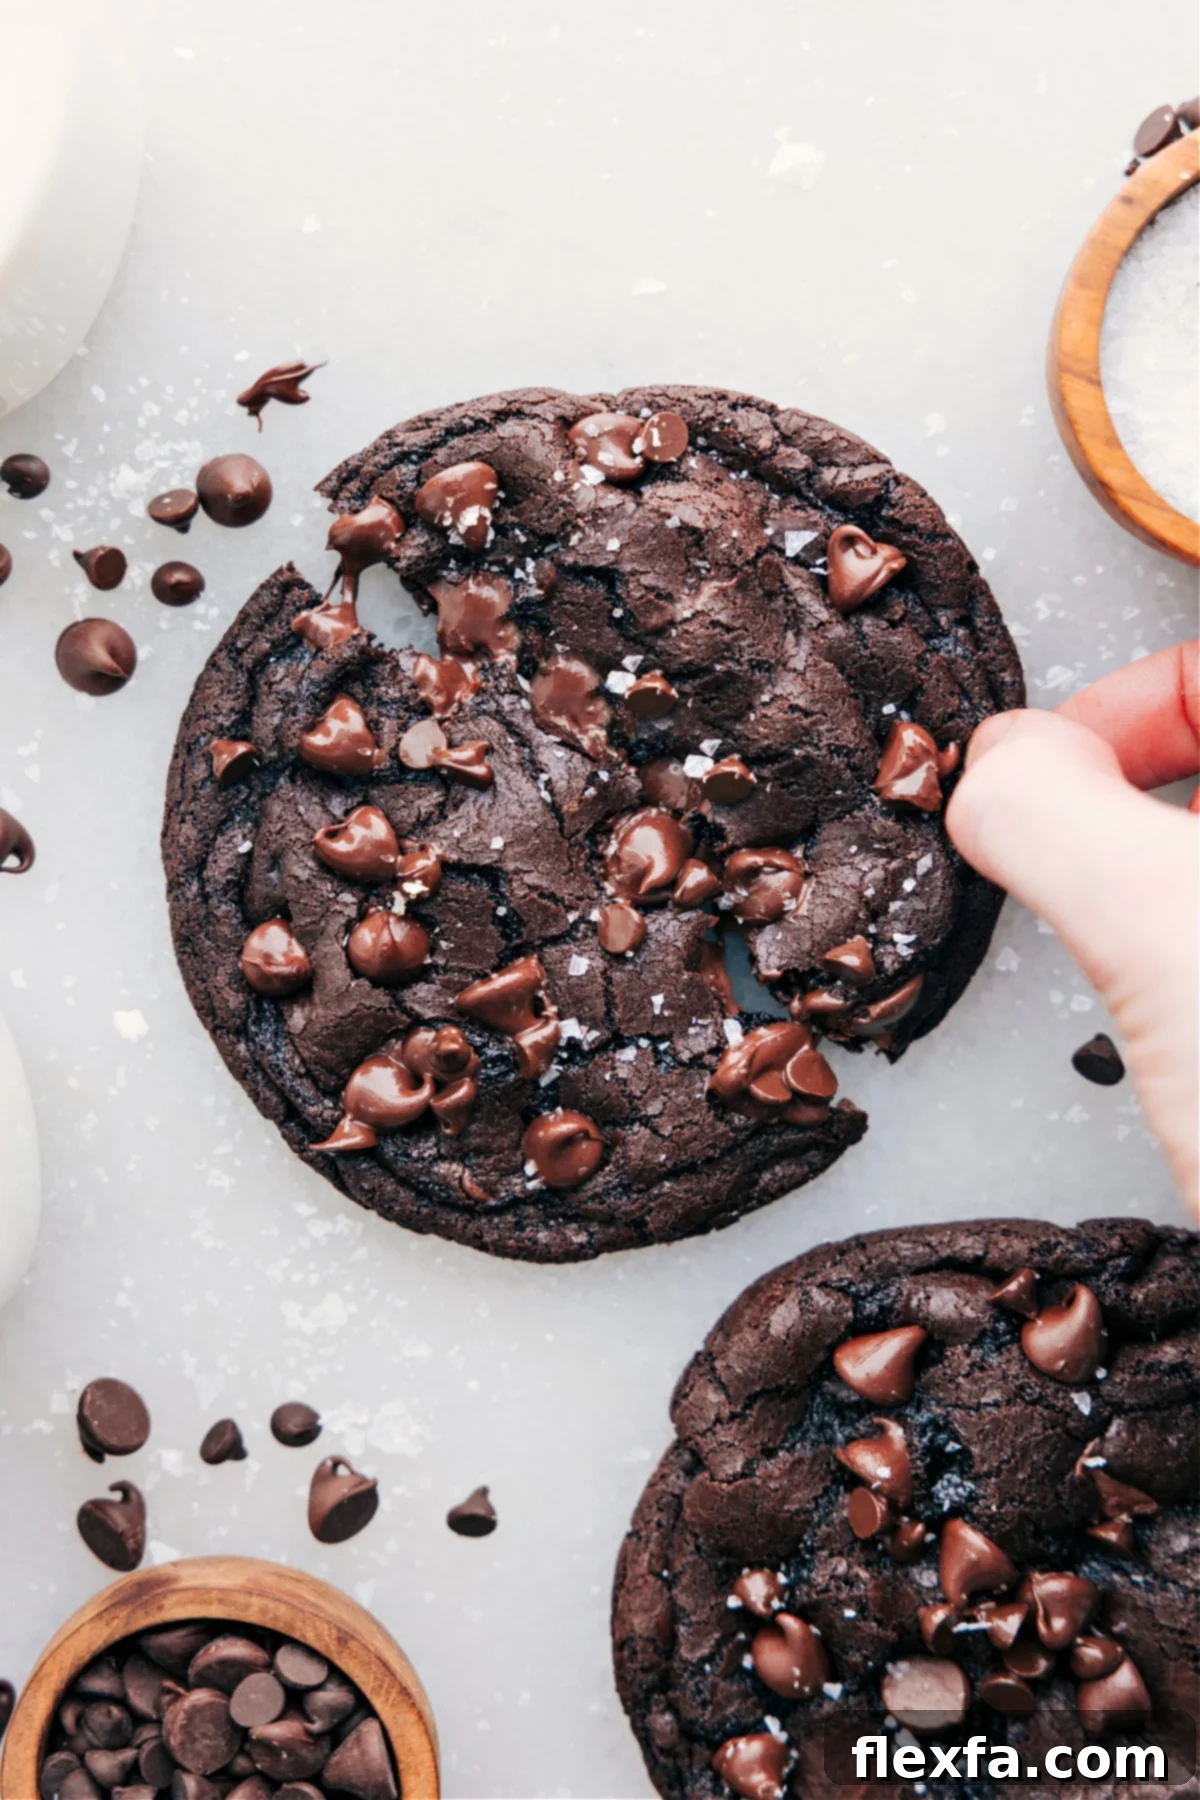
- A Sprinkle of Flaky Sea Salt: For an easy gourmet touch that truly enhances the flavor, a tiny pinch of flaky sea salt sprinkled on top of the warm cookie not only adds a delightful textural crunch but also intensifies the chocolate’s depth and perfectly balances its sweetness.
- With a Perfectly Paired Beverage: Complement your warm cookie with a tall, frosty glass of cold milk for a comforting classic combination. Alternatively, pair it with a hot cup of freshly brewed coffee or a soothing tea for a perfect afternoon pick-me-up or a relaxing evening indulgence.
- Creative Toppings: Don’t be afraid to experiment! A dollop of freshly whipped cream, a sprinkle of chopped toasted nuts (like pecans or walnuts), a few fresh raspberries or strawberries for a hint of tartness, or even a dusting of cocoa powder or powdered sugar can transform your single cookie into a bespoke dessert masterpiece.
Explore More Decadent Chocolate Dessert Recipes:
If this single serve double chocolate cookie has ignited your passion for chocolate, you’ll love these other rich and irresistible dessert recipes:
- Chocolate Chip Cookie Bars: All the deliciousness and chewy texture of classic chocolate chip cookies, without any tedious dough rolling or individual scooping needed! A perfect fuss-free crowd-pleaser.
- Silky Chocolate Truffles: Impressively elegant and surprisingly simple to make, these luxurious chocolate truffles require only 3 main ingredients and are perfect for gifting or a sophisticated indulgence.
- Nutella Stuffed Chocolate Chip Cookies: Dive into these soft and wonderfully chewy cookies that conceal an irresistible, gooey, molten Nutella center. A delightful surprise in every bite!
- Classic Chocolate Peanut Butter Pie: A rich, creamy, and utterly irresistible no-bake dessert featuring a decadent chocolate peanut butter filling, perfectly complemented by a crunchy Oreo pie crust.
- Best Chocolate Cake Recipe: A timeless classic that delivers a wonderfully moist crumb and is generously slathered with a rich, luscious chocolate frosting. This is the go-to recipe for any celebration or serious chocolate craving.
Single Serve Double Chocolate Cookies
This Single Serve Double Chocolate Cookie is everything you could wish for—rich, wonderfully chewy, and perfectly sweet with crisp edges and an abundance of melty chocolate chips in every single bite. It’s the ultimate answer to your chocolate cravings, fast and without the fuss of a large batch.
By: Chelsea Lords
Recipe At a Glance:
- Prep Time: 10 minutes
- Cook Time: 10-12 minutes
- Total Time: Approximately 20-22 minutes
- Servings: This recipe yields enough dough for three large cookies, perfect for sharing a little or saving for later. It’s easily adaptable to make just one at a time.
Equipment You’ll Need:
- Sheet pan (15″ x 10″)
- Parchment paper or silicone baking mat
- Microwave-safe bowl
- Fork
- Silicone spatula
- Metal spatula
- Food scale (optional, but highly recommended for precision)
Ingredients:
- 2 tablespoons unsalted butter (see note 1 for measurement tip)
- 1/4 cup light brown sugar, firmly packed
- 1 large egg yolk (no whites, see note 2 for separation tip)
- 1/4 teaspoon vanilla extract (optional, but highly recommended for flavor depth)
- 1/4 cup all-purpose flour (see note 3 for weighing tip)
- 2 tablespoons Dutch process cocoa powder (see note 4 for type and weighing tip)
- 1/4 teaspoon baking soda
- 1/8 teaspoon salt
- 6 tablespoons chocolate chips (or your preferred amount for melty goodness)
- Flaky sea salt (optional, for garnish and flavor enhancement)
Instructions:
- For optimal baking results, it is crucial to use exact measurements. If using measuring cups and spoons, ensure you meticulously level off the tops completely to avoid discrepancies.
- Preheat your oven to 350°F (177°C). In a microwave-safe bowl, gently melt the butter until it is just liquid (be careful not to let it get hot or boil). Once melted, set the bowl and butter aside to cool completely to room temperature. This step is critical for achieving the desired cookie texture.
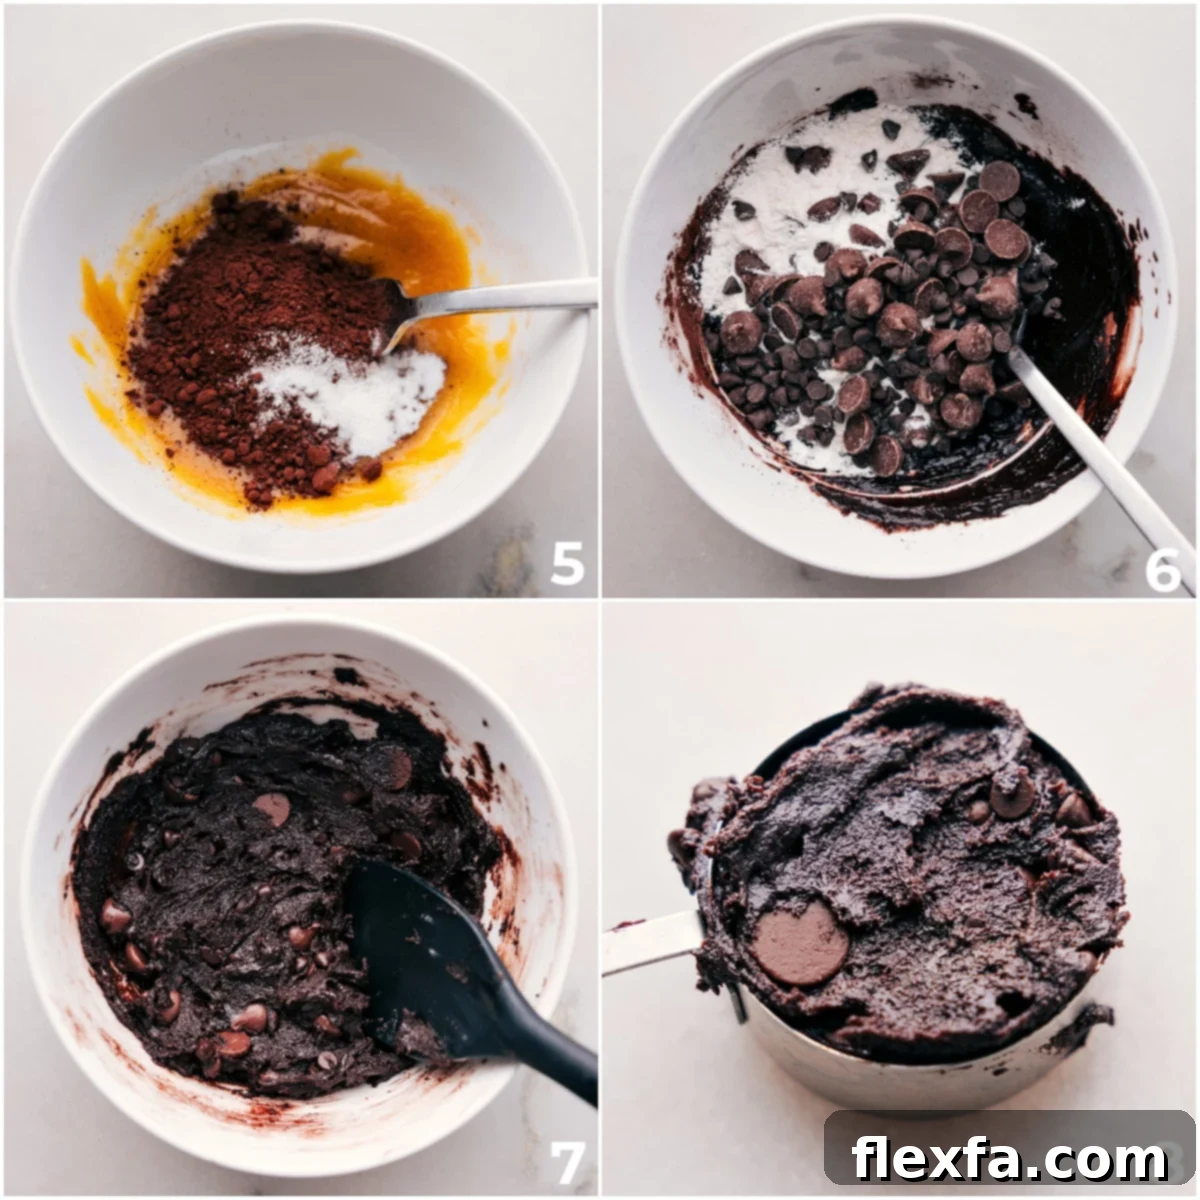
- Once the butter has cooled, add the light brown sugar to it. Mix vigorously with a fork until the butter and sugar are thoroughly combined and no lumps remain. Next, add the single egg yolk and vanilla extract, continuing to mix until the mixture is beautifully creamy, light in color, and well emulsified.
- To the prepared wet ingredients, add the baking soda, salt, and Dutch process cocoa powder. Mix thoroughly with a fork until all dry ingredients are fully incorporated and no streaks of cocoa powder are visible. Then, add the all-purpose flour and chocolate chips. Begin mixing with a fork until the dough starts to thicken and becomes difficult to stir. At this point, switch to a sturdy silicone spatula and continue folding and mixing until the dough is uniform, thick, and no dry streaks of flour remain.
- Measure out approximately 1/4 cup of the prepared dough to form a large, round ball. Repeat this process until all the dough is used. This recipe should yield three generous large cookies. Any small amount of dough leftover is your personal chef’s treat!
- Place the formed dough balls onto a lined sheet pan, ensuring they are adequately spaced to allow for slight spreading. Bake for 10–12 minutes. The cookies are ready when the edges appear set and are just starting to turn a light golden-brown, and the tops no longer look gooey, though the very center might still seem slightly soft and glossy. Immediately upon removing the pan from the oven, use a metal spatula to gently press the edges of the cookies inwards to create a perfect round shape. Optionally, press a few additional chocolate chips onto the tops of the warm cookies for an even more decadent visual appeal, and sprinkle lightly with flaky sea salt.
- Allow the freshly baked cookies to cool on the sheet pan for a minimum of 5 minutes before carefully transferring them to a wire rack or serving them warm. This crucial cooling period allows them to set properly, firm up slightly, and fully develop their wonderfully chewy texture.
Recipe Notes:
Note 1: Butter Measurement Precision: Accurate butter measurement is absolutely vital for the success of this cookie. Often, the wrapping on butter sticks isn’t perfectly aligned. For precisely 2 tablespoons, it’s best to cut from the middle of the stick if possible, or use a kitchen scale for ultimate accuracy.
Note 2: Separating Egg Yolk Carefully: When separating the egg yolk from the whites, take extra care to ensure absolutely no egg white makes it into the dough. Even a tiny bit of egg white can affect the cookie’s final texture, potentially making it tougher or cakier. Also, gently pull off and discard the stringy white part (chalaza) attached to the yolk using your fingers.
Note 3: Flour Measurement for Texture: For the best results and to avoid common issues like cakey cookies or excessive spreading, I highly recommend using a food scale to weigh out exactly 34 grams of all-purpose flour. Too much flour can lead to a dry, dense, or cakey cookie, while too little will cause the cookie to spread excessively and become thin.
Note 4: The Magic of Dutch Process Cocoa Powder: I cannot stress enough the importance of using Dutch process cocoa powder for this recipe. Using plain natural cocoa powder will result in drier cookies with a less rich, more acidic, and less flavorful chocolate profile. Hershey’s® “Special Dark” cocoa powder is an excellent and widely available Dutch-process option found at most grocery stores. When measuring, do not pack it into the measuring cup; weighing it is always the most accurate method.
Storage: Store any leftover baked cookies in an airtight container or bag at room temperature for 1-2 days. For unbaked dough, wrap it tightly in an airtight bag or container to prevent freezer burn and store in the freezer for up to 2-3 months. You can bake the dough directly from frozen, simply adding an extra minute or two to the baking time.
Nutrition Information:
Nutrition information is automatically calculated and should be used as an approximation. Per serving (1 cookie):
- Calories: 336 kcal
- Carbohydrates: 44.6g
- Protein: 4.7g
- Fat: 17.8g
- Cholesterol: 81.8mg
- Sodium: 211.1mg
- Fiber: 3.3g
- Sugar: 32.3g
Loved this recipe? Share your thoughts and leave a comment below! We’d love to hear from you.