
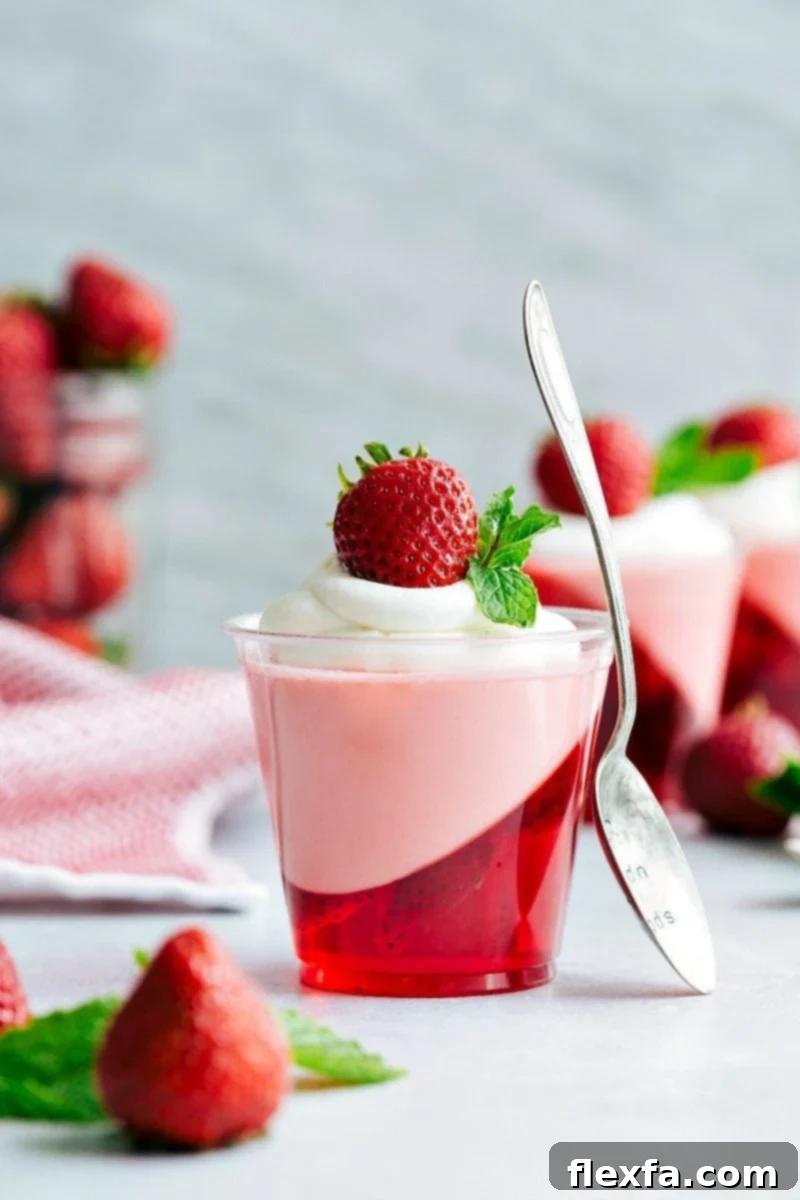
Unveiling the secret to visually stunning and incredibly simple dessert magic: these 5-Ingredient Double-Layered Strawberry Jello Parfait Cups. Featuring a vibrant, perfectly angled Jello layer at the bottom and crowned with a light, creamy strawberry mousse, these parfaits are a delightful treat that looks far more complicated than it actually is. Ideal for any gathering, a refreshing summer snack, or simply a sweet indulgence, prepare to impress with minimal effort!
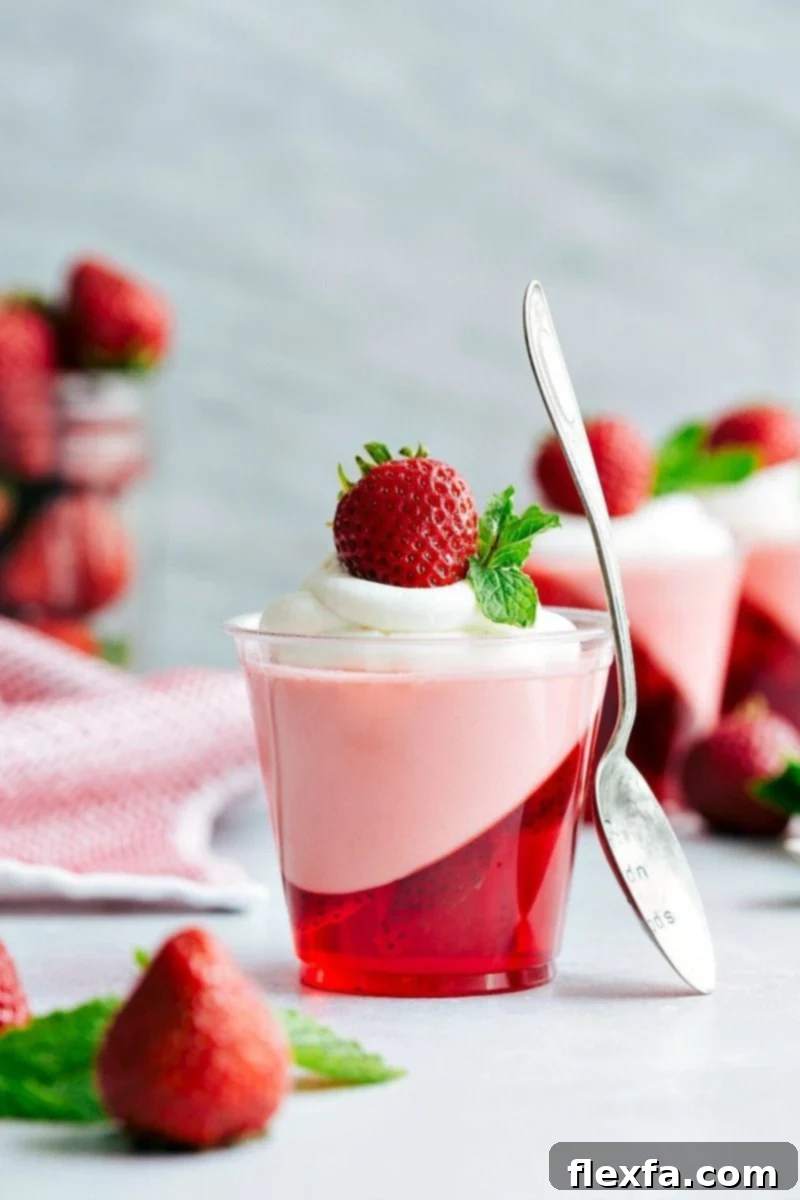
Irresistible Strawberry Jello Parfait Cups: An Easy Guide to a Show-Stopping Dessert
Prepare to amaze your guests and delight your family with these incredibly easy-to-make, yet stunningly elegant, Strawberry Jello Parfait Cups. While their unique slanted Jello layer might suggest advanced culinary skills, the truth is delightfully simpler: it’s all thanks to a clever hack involving a standard muffin tin! This recipe transforms a handful of common ingredients into a refreshing, visually appealing dessert that’s perfect for any occasion, from casual backyard BBQs to elegant dinner parties.
The beauty of these parfaits lies in their vibrant layers and contrasting textures. The bottom layer bursts with the classic fruity flavor of strawberry Jello, enhanced by fresh strawberry slices. Perched delicately on top is a cloud-like strawberry mousse, light, airy, and wonderfully creamy. This harmonious blend of tangy Jello and sweet, smooth mousse creates a symphony of flavors and sensations in every bite. Forget complicated baking; this no-bake wonder is all about chilling and layering, making it an accessible project for even novice dessert makers.
The Magic Behind the Slanted Jello Layer: A Simple Trick for an Elegant Look
The signature slanted Jello layer is the real showstopper of these parfait cups, adding a touch of sophistication that belies its simple creation. You don’t need special equipment or intricate techniques to achieve this eye-catching design. All it takes is a clever use of a muffin tin and a few small props. To create the perfect angle, you’ll simply prop your clear plastic cups within the muffin tin. Small, sturdy items like foil balls, marbles, or even crumpled paper tucked tightly into the muffin cavities will provide the necessary support to keep your cups tilted precisely as the Jello sets.
Once your cups are securely angled, carefully pour in the prepared strawberry Jello, infused with fresh strawberry slices. The key here is patience; pour slowly and deliberately to ensure the cups maintain their tilt and the Jello fills evenly. After the first Jello layer has fully set in the refrigerator – a process that requires mostly hands-off chilling time – you’ll remove the cups from the muffin tin to reveal the beautifully slanted base. The final step involves adding the luscious strawberry mousse on top, followed by another round of chilling, and voilà – your elegant parfaits are ready to be savored! While it does require a bit of waiting for the Jello to set, the minimal active preparation makes these one of the most rewarding and visually impressive Jello treats you’ll ever make.
Essential Ingredients for Your Strawberry Jello Parfaits
This recipe prides itself on its simplicity, requiring just five core ingredients (plus water for the Jello) to create a truly spectacular dessert. Each component plays a crucial role in achieving the perfect balance of flavor, texture, and visual appeal. Here’s a closer look at what you’ll need and why each choice matters:
- Strawberry Jello: The foundation of this dessert! We use both a standard Jello layer and incorporate Jello into the mousse for that irresistible strawberry flavor throughout. For the best texture, always ensure the Jello powder fully dissolves in hot liquid before adding cold water. This prevents grainy textures and guarantees a smooth, consistent set.
- Boiling & Cold Water: These are essential for activating the Jello and ensuring it sets properly. The hot water dissolves the gelatin, while the cold water cools it down to the optimal temperature for setting.
- Fresh Strawberries: Not just for garnish! Sliced strawberries are incorporated directly into the Jello layer, adding bursts of fresh fruit flavor and a beautiful visual element. Choose ripe, vibrant strawberries. Slicing them evenly will not only make for a prettier presentation but also ensure a consistent bite.
- Lemon-Lime Soda (like Sprite): This is the secret ingredient for the incredibly light and airy strawberry mousse. The carbonation in the soda creates tiny bubbles, giving the mousse its characteristic fluffy texture. Using cold soda when blending is critical as it helps the mousse set faster and maintains its airy consistency.
- Cream Cheese: Provides a rich, tangy counterpoint to the sweetness of the Jello and contributes to the mousse’s creamy, stable texture. Always use softened, full-fat cream cheese for the smoothest blend, ensuring there are no lumps in your mousse.
- Cool Whip (Frozen Whipped Topping): This convenient ingredient is key to achieving a light and fluffy mousse with minimal effort. Remember to let it thaw fully in the refrigerator before using to ensure the best, most consistent texture. A partially thawed Cool Whip will result in a lumpy mousse.
- Whipped Topping or Fresh Whipped Cream (Optional): For an extra touch of elegance and indulgence, a dollop of fresh whipped cream or additional Cool Whip can be added just before serving. This not only enhances the visual appeal but also adds another layer of creamy texture.
- Fresh Mint (Optional): A sprig of fresh mint offers a beautiful color contrast and a refreshing aromatic garnish.
Quick Tip: Securing Your Slanted Cups
To keep the cups steady and perfectly angled while pouring the Jello, stability is key! Wedge foil balls, marbles, or even crumpled paper tightly into the empty spaces of your muffin tin around each cup. This prevents any slipping or shifting, helping you create that flawless, perfectly slanted Jello layer that makes these parfaits so impressive.
How To Make Strawberry Jello Parfait Cups: A Step-by-Step Guide
Creating these delightful strawberry Jello parfait cups is a straightforward process, broken down into two main phases: preparing the vibrant Jello layer and whipping up the creamy mousse. Follow these steps for perfect results every time:
- Prepare Your Cups for the Slant: This is where the magic begins! Use a standard 9-cavity muffin pan. Gather small, sturdy items like marbles, small rubber balls, or simply wad up aluminum foil or paper into tight balls. Place these props strategically into the muffin tin cavities. Carefully place 9 clear plastic cups on top of these balls, tilting them at your desired angle. Ensure they are stable and won’t easily shift. A slight tilt is usually sufficient to create a dramatic effect.
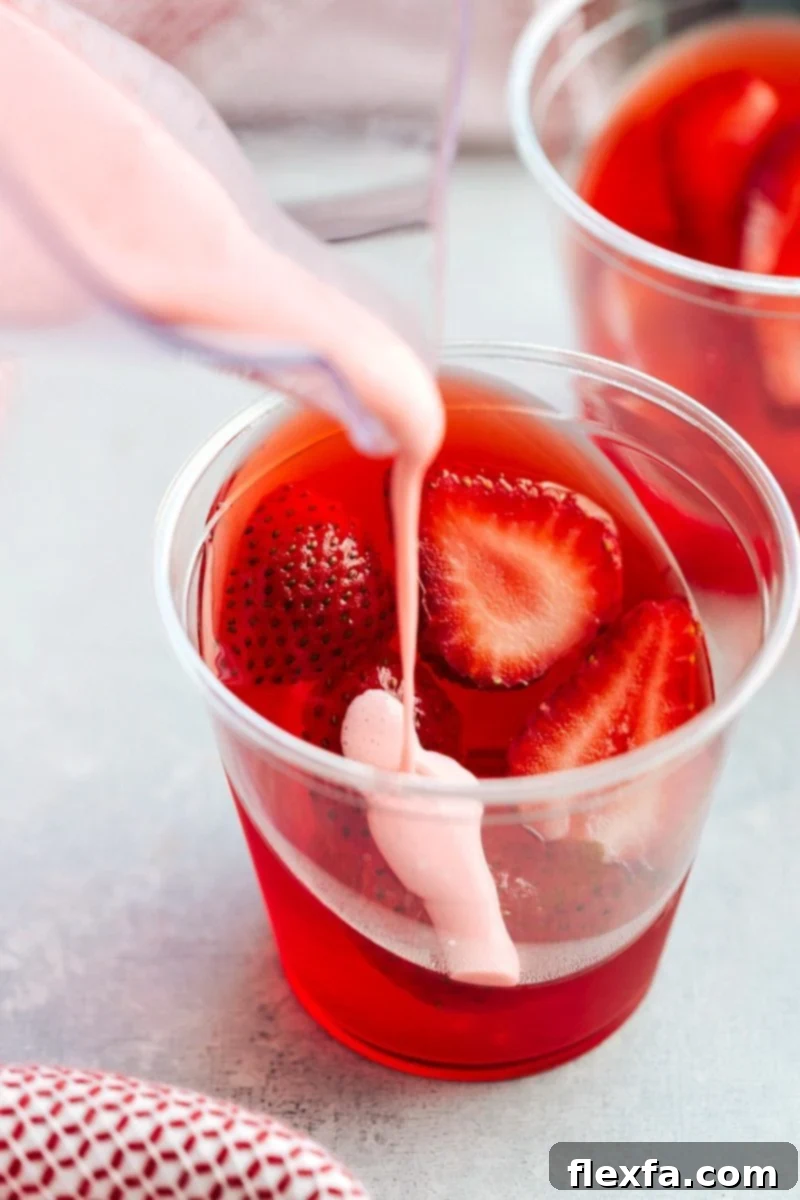
- Create the Strawberry Jello Layer: Following the package directions for a regular set (not quick set), prepare both packets of strawberry Jello. Once thoroughly mixed, carefully and slowly pour the liquid Jello into each tilted cup. Take your time to ensure the cups remain angled and the Jello fills evenly along the base.
- Incorporate Fresh Strawberries: While the Jello is still liquid, hull and slice your fresh strawberries into thin, even pieces. Gently press a few slices into the Jello in each cup. Lightly pressing them down will help prevent them from floating to the top once the Jello begins to set.
- Chill the Jello Layer: Carefully transfer the muffin pan with the tilted cups to your refrigerator. Allow the Jello to set completely. This is a crucial step that can take several hours (up to 2-3 hours), so patience is key! You can begin preparing the mousse when the Jello is nearly set.
- Start the Jello Mousse: In a microwave-safe bowl or cup, measure out 1½ cups of lemon-lime soda (like Sprite). Heat it in the microwave until it just comes to a boil. Remove from heat and immediately whisk in one 3-ounce packet of strawberry Jello mix until it is fully dissolved.
- Blend for Creaminess: Transfer this hot Jell-O-soda mixture to a high-powered blender. Add the softened, full-fat cream cheese. Blend until the mixture is completely smooth and free of any lumps. Then, add the remaining 1 cup of *cold* lemon-lime soda and blend again until well combined and smooth. Using cold soda here helps cool the mixture and maintain the desired airy texture.
- Achieve Fluffy Mousse: Finally, add the completely thawed Cool Whip to the blender. Blend only until the mixture is just smooth and fully incorporated. Avoid over-blending, as this can deflate the mousse and prevent it from achieving its signature fluffy texture. If you plan to garnish with extra Cool Whip, set aside about ½ cup before adding it to the blender.
- Add the Mousse Layer: Once the initial Jello layer in your cups is firm, carefully pour the prepared strawberry mousse evenly over the Jello. A good guideline is to use slightly less mousse than the Jello layer to ensure the flavors remain balanced and neither overpowers the other.
- Final Chill & Serve: Return the parfait cups to the refrigerator and allow the mousse layer to set completely, which will take at least 1-2 hours. Once firm, they are ready to serve! For the best taste and texture, garnish with a dollop of fresh whipped cream or extra Cool Whip, a fresh strawberry slice, or a sprig of mint just before serving.
Storage and Make-Ahead Tips
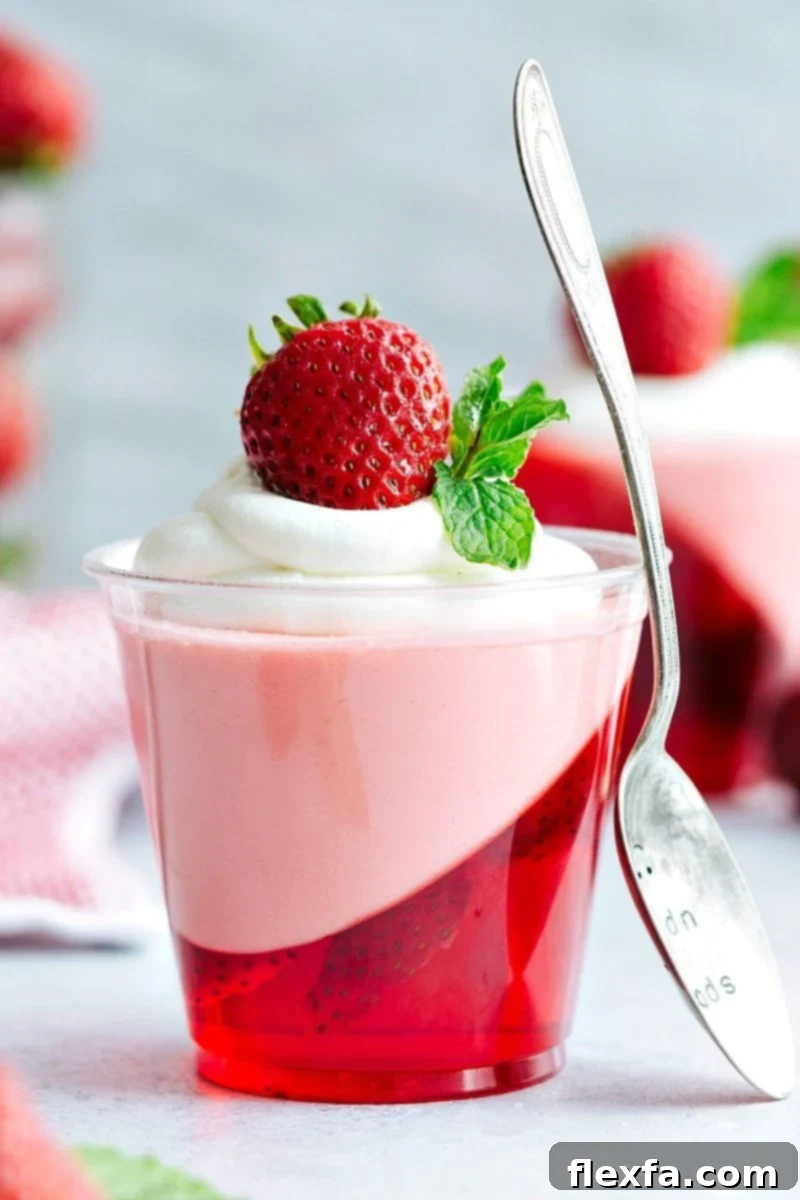
These Strawberry Jello Parfait Cups are a fantastic make-ahead dessert, perfect for busy hosts or for enjoying over several days. To keep them at their best, ensure each cup is covered tightly with plastic wrap or individual airtight lids. This prevents them from drying out and shields them from absorbing any unwanted odors from the refrigerator.
Store your parfaits in the fridge for up to 3 days. While they will still be delicious after this time, the texture and freshness are optimal within the first three days. Always add any desired toppings, such as fresh whipped cream or mint, just before serving to maintain their pristine appearance and delightful texture.
Pro Tips for Perfect Jello Parfait Cups Every Time
- Choose Clear Cups: Using clear plastic or glass cups is essential to showcase the beautiful double layers and the signature slant.
- Even Strawberry Slices: For the most appealing presentation and consistent flavor, aim for uniform thickness when slicing your strawberries.
- Gentle Pouring: When pouring both the Jello and the mousse layers, do so gently and slowly to avoid disturbing the previous layer or shifting the cups.
- Patience with Chilling: The most crucial “cooking” in this recipe is chilling time. Ensure each layer is fully set before adding the next to prevent them from mixing. Rushing this step will compromise the distinct layers.
- Room Temperature Cream Cheese: For a lump-free, silky-smooth mousse, make sure your cream cheese is truly softened to room temperature. This allows it to blend seamlessly with the other ingredients.
- Don’t Over-blend the Mousse: Once you add the Cool Whip, blend only until just combined. Over-blending can incorporate too much air initially, but then quickly deflate the mousse, resulting in a less airy texture.
- Creative Garnishes: Beyond fresh strawberries and mint, consider a sprinkle of white chocolate shavings, a drizzle of strawberry syrup, or even a mini cookie for an extra flourish.
Frequently Asked Questions (FAQs)
- Can I use sugar-free Jello and Cool Whip? Yes, you can! While the recipe hasn’t been specifically tested with sugar-free products, they typically perform well in Jello-based desserts. Be aware that the texture might be slightly different, potentially a bit lighter or less firm, but it should still set.
- Can I use other Jello flavors and fruits? Absolutely! This recipe is incredibly versatile. Experiment with lime Jello and kiwi, orange Jello with mandarin oranges, or even blue raspberry Jello for a fun color twist. Adjust the fruit slices to match your Jello flavor.
- What if my strawberries float in the Jello layer? To prevent strawberries from floating, ensure your Jello has slightly thickened (but isn’t fully set) before adding the fruit. Gently press the slices down. If they still float, you can wait a few more minutes for the Jello to become more viscous, then try again.
- Can I make these in larger bowls or as a single large dessert? While the slanted effect is best achieved in individual cups within a muffin tin, you can certainly make a layered Jello and mousse dessert in a large serving bowl. The visual impact will be different, but the taste will be just as delicious!
- What’s the best way to transport these parfaits? If traveling, ensure the cups are tightly sealed with lids or plastic wrap. Place them in a cooler with ice packs to maintain their chill and prevent melting or becoming too soft.
More Delightful Fruity Dessert Ideas:
Desserts
Raspberry Jello Cheesecake Bars Recipe
Salads
Creamy Orange Fluff Salad Recipe
Desserts
Classic Strawberry Pretzel Salad Recipe
Desserts
Decadent Snickers Salad Recipe

Strawberry Jello Parfait Cups
Chelsea Lords
These Double-layered Strawberry Jell-O Parfait Cups offer a delightful combination of fruity strawberry Jell-O on the bottom and a fluffy, creamy strawberry Jell-O mousse on top. Light, sweet, and perfectly refreshing, they are an ideal treat for any party, special occasion, or simply as a wonderful snack!
20 minutes
20 minutes
9 parfait cups (see note 1)
Video Overview
For a visual guide on how to perfectly tilt your cups and master the layering technique, consider watching the original recipe video. (Refer to the original source for video instructions).
Equipment
-
Blender (high-powered recommended for smooth mousse)
-
9-cavity Muffin Pan
-
9 Clear Plastic Cups
-
Foil balls, marbles, or crumpled paper (for propping cups)
-
Microwave-safe bowl or cup
-
Whisk
Ingredients
- 2 (3-ounce) packages strawberry jell-o mix (plus boiling and cold water as directed on package for regular set)
- 1 pint fresh strawberries (hulled and sliced, about 2 cups, plus 1 for garnish if desired)
- 2½ cups lemon-lime soda (like Sprite), divided
- 1 (3-ounce) package strawberry jell-o mix
- 4 ounces cream cheese (full-fat, softened to room temperature)
- 1 (8-ounce) container frozen whipped topping (like Cool Whip, completely thawed; plus additional whipped topping if desired for topping)
- Fresh mint (optional, for garnish)
Instructions
-
1. Prepare Muffin Pan for Slanted Cups: Set up a 9-cavity muffin pan. Gather small items like marbles, small rubber balls, or tightly wadded balls of aluminum foil or paper. Place these items in the muffin pan cavities to act as props. Carefully place 9 clear plastic cups on top of these props at an angle. Ensure the cups are stable and won’t tip over when liquid is poured into them.
-
2. Prepare the Jell-O Layer: Following the package directions for a regular set (not quick set), prepare both 3-ounce packets of strawberry Jell-O mix. This typically involves dissolving the mix in boiling water, then adding cold water. Once fully prepared, carefully and slowly fill each angled cup evenly with the Jell-O mixture. Pour gently to avoid disturbing the cup’s angle.
-
3. Add Strawberries and Chill: Hull and slice the fresh strawberries into thin, even pieces. Gently place a few slices of strawberries into each Jell-O cup. Lightly press them down so they are partially submerged and less likely to float. Carefully transfer the muffin pan, with the angled Jell-O-filled cups, to the refrigerator. Allow the Jell-O layer to set completely, which will take approximately 2-3 hours. You can start preparing the mousse when the Jell-O is nearly firm.
-
4. Dissolve Mousse Jell-O: In a microwave-safe bowl or cup, measure out 1½ cups of lemon-lime soda (like Sprite). Microwave until the soda just comes to a boil. Immediately remove from the microwave and whisk in the single 3-ounce packet of strawberry Jell-O mix until it is fully dissolved. Ensure there are no granules remaining.
-
5. Blend Cream Cheese and Soda: Transfer the hot Jell-O and soda mixture to a high-powered blender. Add the softened cream cheese. Blend until the mixture is completely smooth and creamy, with no lumps of cream cheese visible. Then, add the remaining 1 cup of *cold* lemon-lime soda and blend again until smooth and well combined. The cold soda helps cool the mixture and contribute to the mousse’s light texture.
-
6. Incorporate Cool Whip: Add the completely thawed 8-ounce container of Cool Whip to the blender. Blend only until the mixture is just smooth and fully incorporated. Be careful not to over-blend, as this can deflate the mousse and reduce its fluffy consistency. If you plan to use extra whipped topping for garnish, you can reserve about ½ cup before adding the rest to the blender.
-
7. Add the Mousse Layer: Once the bottom Jell-O layer in your cups is fully set, carefully pour the prepared strawberry mousse mixture evenly over the Jell-O. A good practice is to use slightly less mousse than the Jell-O layer to maintain a pleasant balance of flavors and textures.
-
8. Final Chill: Return the parfait cups to the refrigerator. Allow the mousse layer to set completely, which typically takes another 1-2 hours. The parfaits should be firm to the touch before serving.
-
9. Garnish and Serve: If desired, garnish each parfait cup just before serving with a dollop of fresh whipped cream (or the reserved Cool Whip), a fresh strawberry slice, or a small sprig of fresh mint for a pop of color and freshness. Enjoy your beautiful and delicious Strawberry Jello Parfait Cups!
Recipe Notes
Note 1: Yield Variation: The total yield of this recipe can vary slightly depending on the size and shape of the cups you choose to use. The ‘Total Time’ listed for this recipe refers to active preparation time and does not include the essential chilling time, which can be up to 4 hours in total for both layers to fully set.
Ingredient Substitutions: While this recipe uses full-fat ingredients for optimal richness and texture, you may experiment with low-fat or sugar-free alternatives for the cream cheese, Jell-O, and whipped topping. Be aware that such substitutions might affect the final consistency, potentially resulting in a slightly less firm set or a more watery texture. We recommend sticking to the specified ingredients for the best results.
Storage Best Practices: To maintain the freshness and prevent your Jello parfaits from drying out or absorbing any refrigerator odors, it is crucial to cover each cup properly. Use plastic wrap pressed gently onto the surface of the mousse or individual airtight lids if your cups come with them. Keep them stored in the refrigerator, where they will remain fresh and delicious for up to 3 days. Always add any garnishes immediately before serving to ensure peak visual appeal and taste.
Nutrition
Calories: 237kcal
Nutrition information is automatically calculated and should only be used as an approximation. It is not a substitute for professional nutritional advice.
Love this recipe? Share your thoughts below!
We’d love to hear about your experience making these delightful Jello Parfait Cups. Leave a comment and let us know how they turned out!