
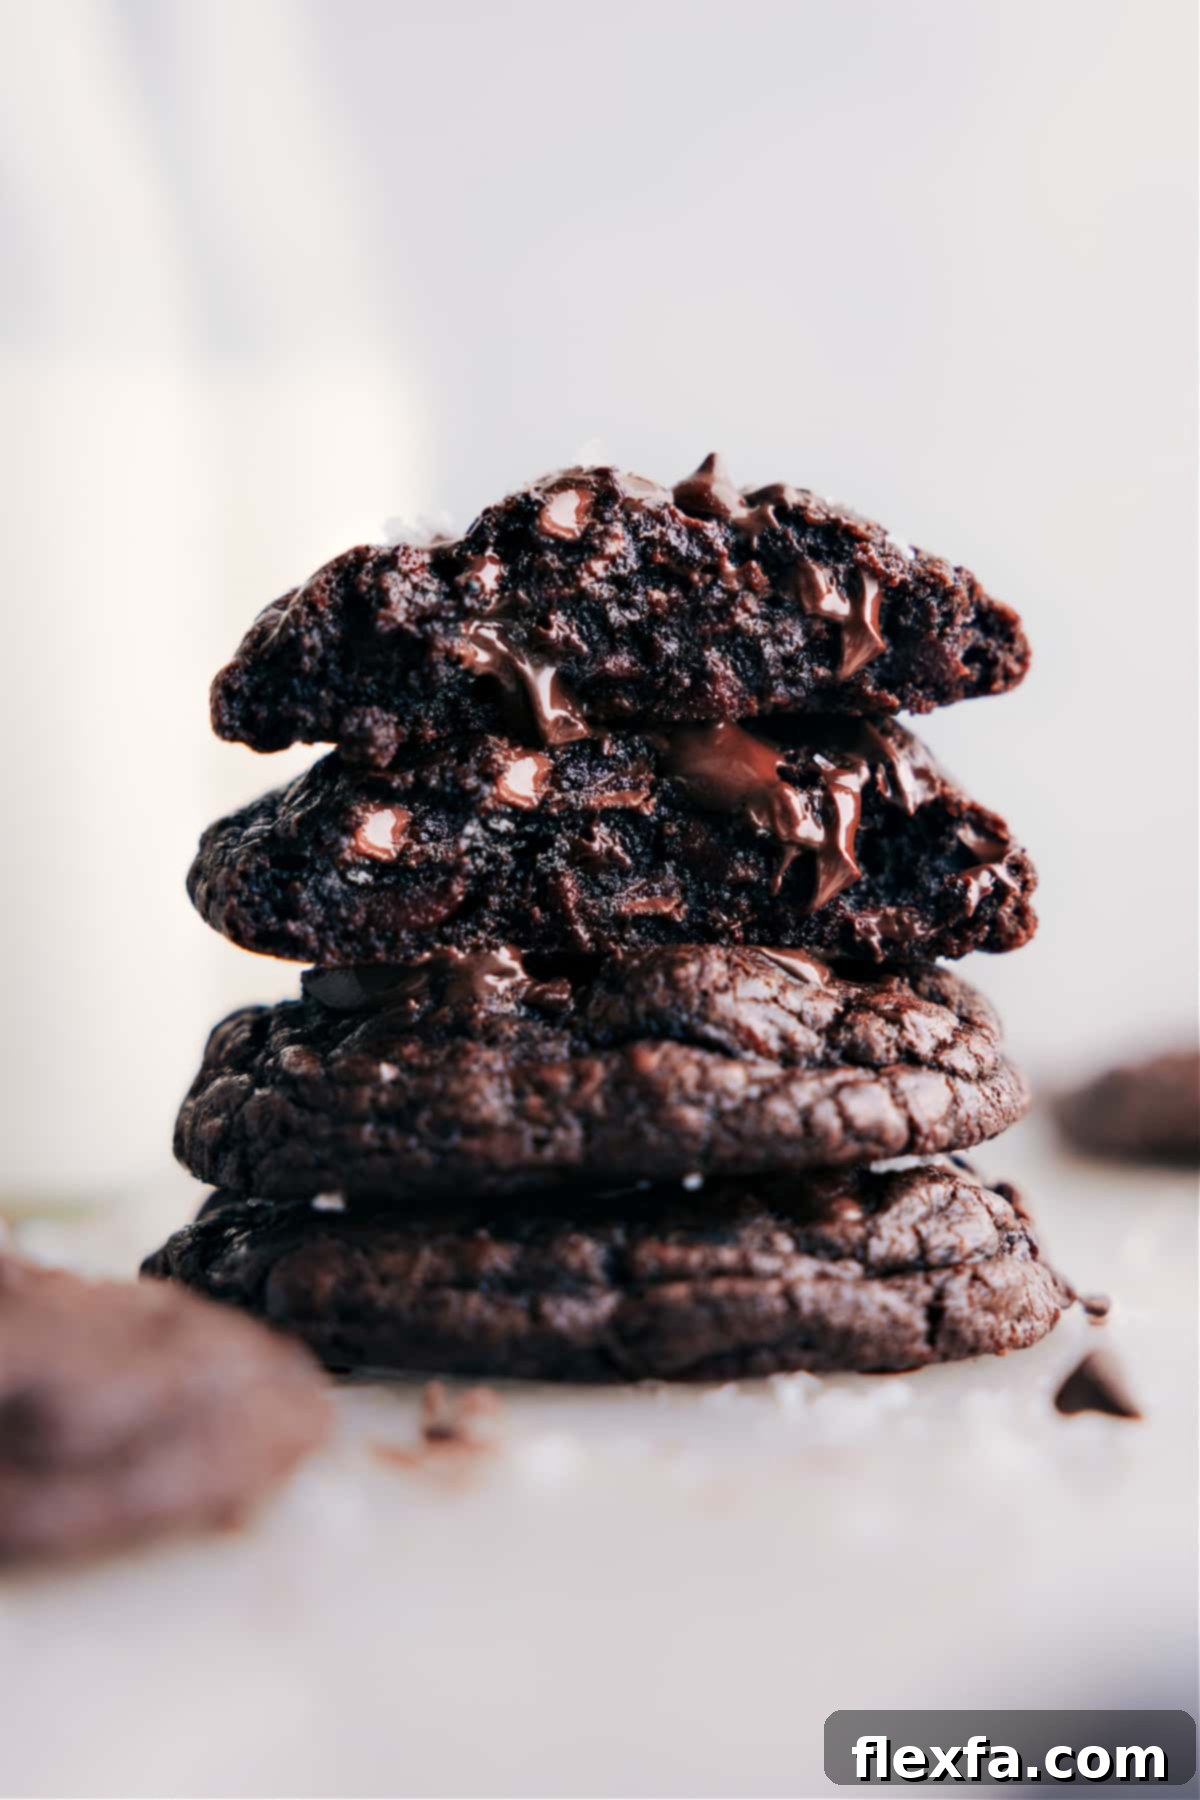
The Ultimate Fudgy Chocolate Cookies Recipe: Chewy, Rich, and Perfectly Salty
This Ultimate Chocolate Cookies Recipe delivers on every promise: rich, irresistibly fudgy, and delightfully chewy, bursting with two distinct kinds of chocolate, all crowned with a delicate sprinkle of flaky sea salt. Prepare for a truly exceptional homemade cookie experience.
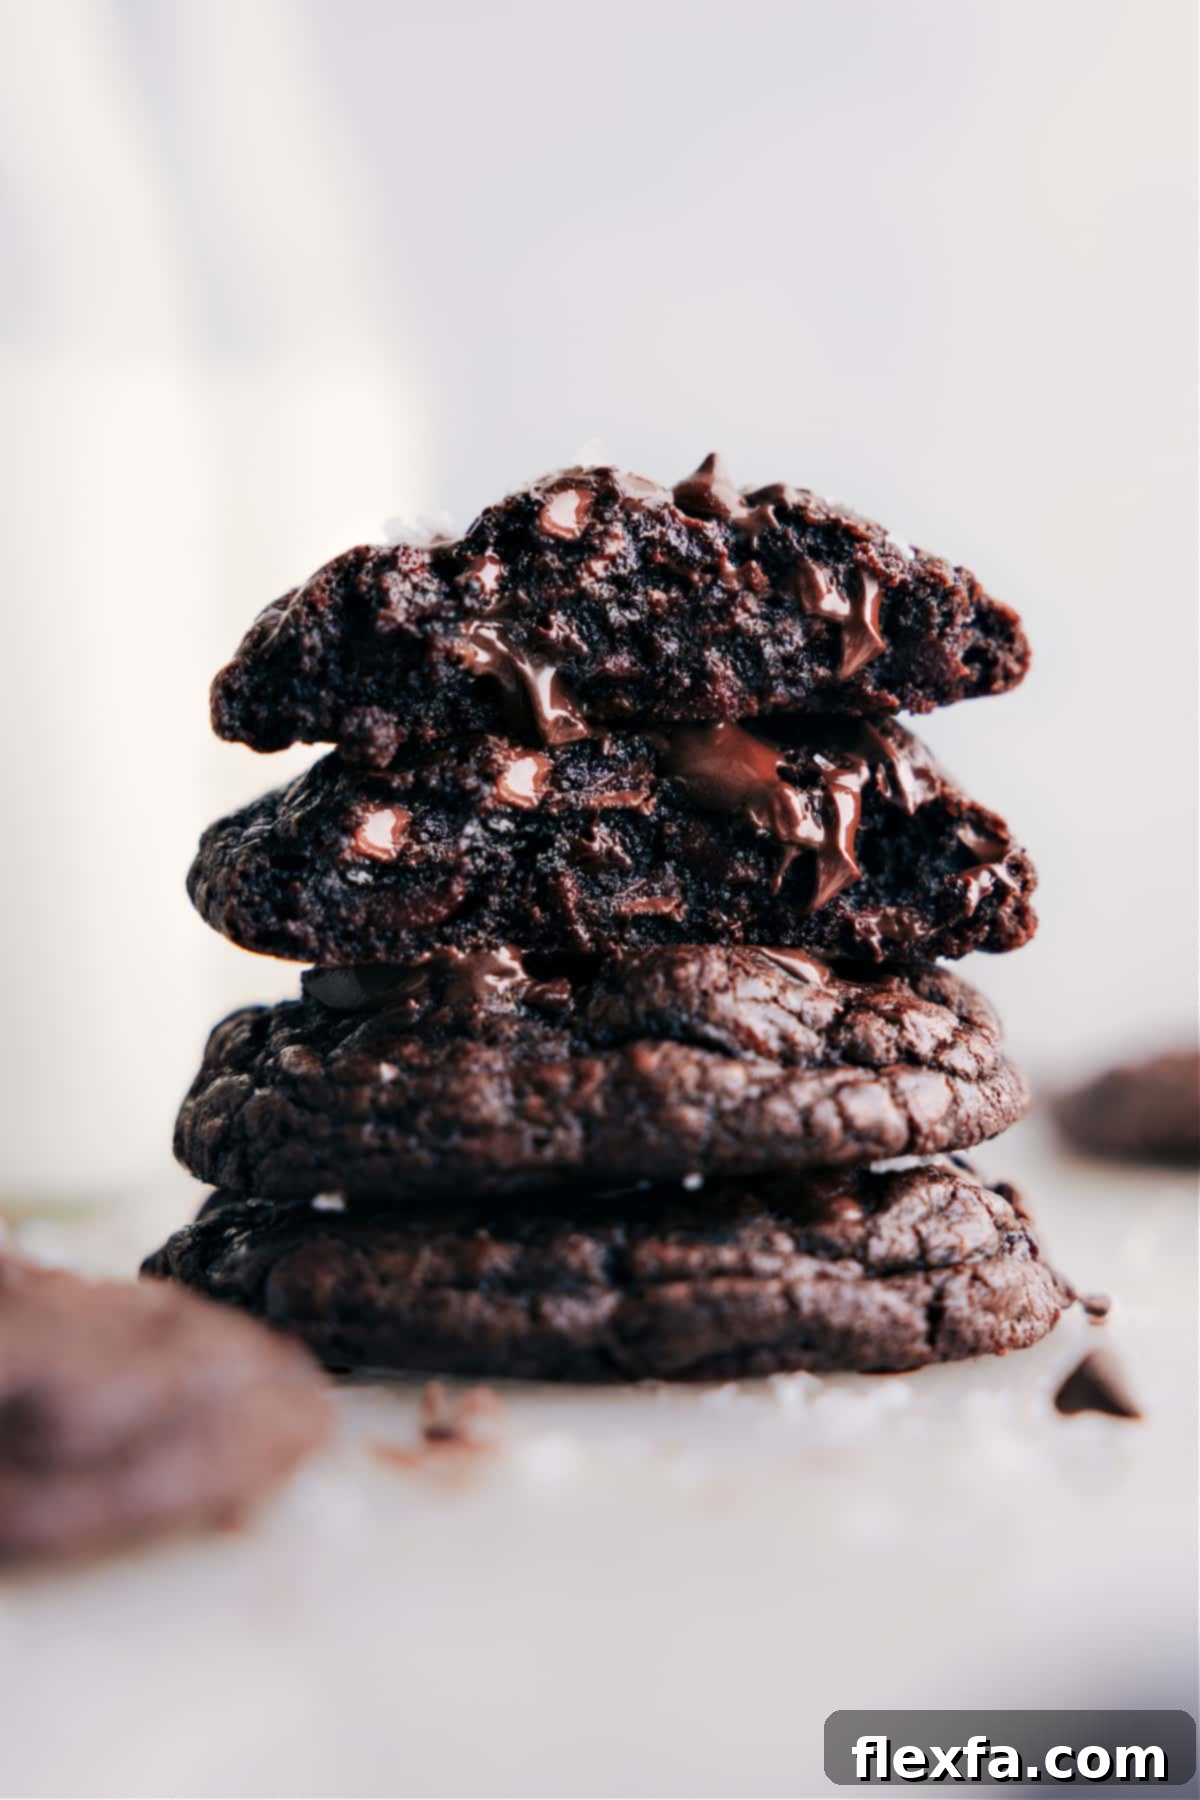

Author’s Note
My Forever Chocolate Cookie Recipe — Years in the Making!
There’s an undeniable magic in a warm, freshly baked chocolate cookie. It’s more than just a treat; it’s a nostalgic hug, a moment of pure, unadulterated comfort. For me, the perfect chocolate cookie must have crisp, slightly caramelized edges, a gloriously soft and gooey center, and a deep, complex chocolate flavor that lingers delightfully. This specific chocolate cookies recipe isn’t just a recipe; it’s the culmination of years of relentless pursuit, countless batches, and meticulous tweaking to achieve that elusive perfection.
My journey to this recipe was long and filled with trials. I recall baking batch after batch, each one bringing me closer, yet never quite hitting the mark. Some cookies turned out too dry, crumbling instead of melting in the mouth. Others spread too thin, losing that desirable thickness. And then there were the cakey versions, which, while tasty, lacked the essential chewiness I craved. I experimented with everything: different brands of cocoa powder, varying flour ratios, precise chilling times, and even the exact temperature of the butter. Each iteration was a learning experience, a step on the path to understanding the delicate science and art behind a truly phenomenal chocolate cookie.
I wasn’t just aiming for a good cookie; I was on a quest for *the* chocolate cookie. The kind that remained wonderfully soft for days after baking, the kind that made people pause mid-bite, eyes widening in delightful surprise, uttering an involuntary, “Oh wow.” That moment of pure bliss, that shared joy, was my ultimate goal.
And finally, after all the effort and dedication, I can confidently say: I nailed it. This recipe consistently delivers cookies that are magnificently fudgy, intensely rich, wonderfully soft in the center, perfectly chewy on the edges, and absolutely packed with a symphony of chocolate flavors. This is the ultimate chocolate cookie I’ve been chasing all along, and I’m thrilled to share it with you.
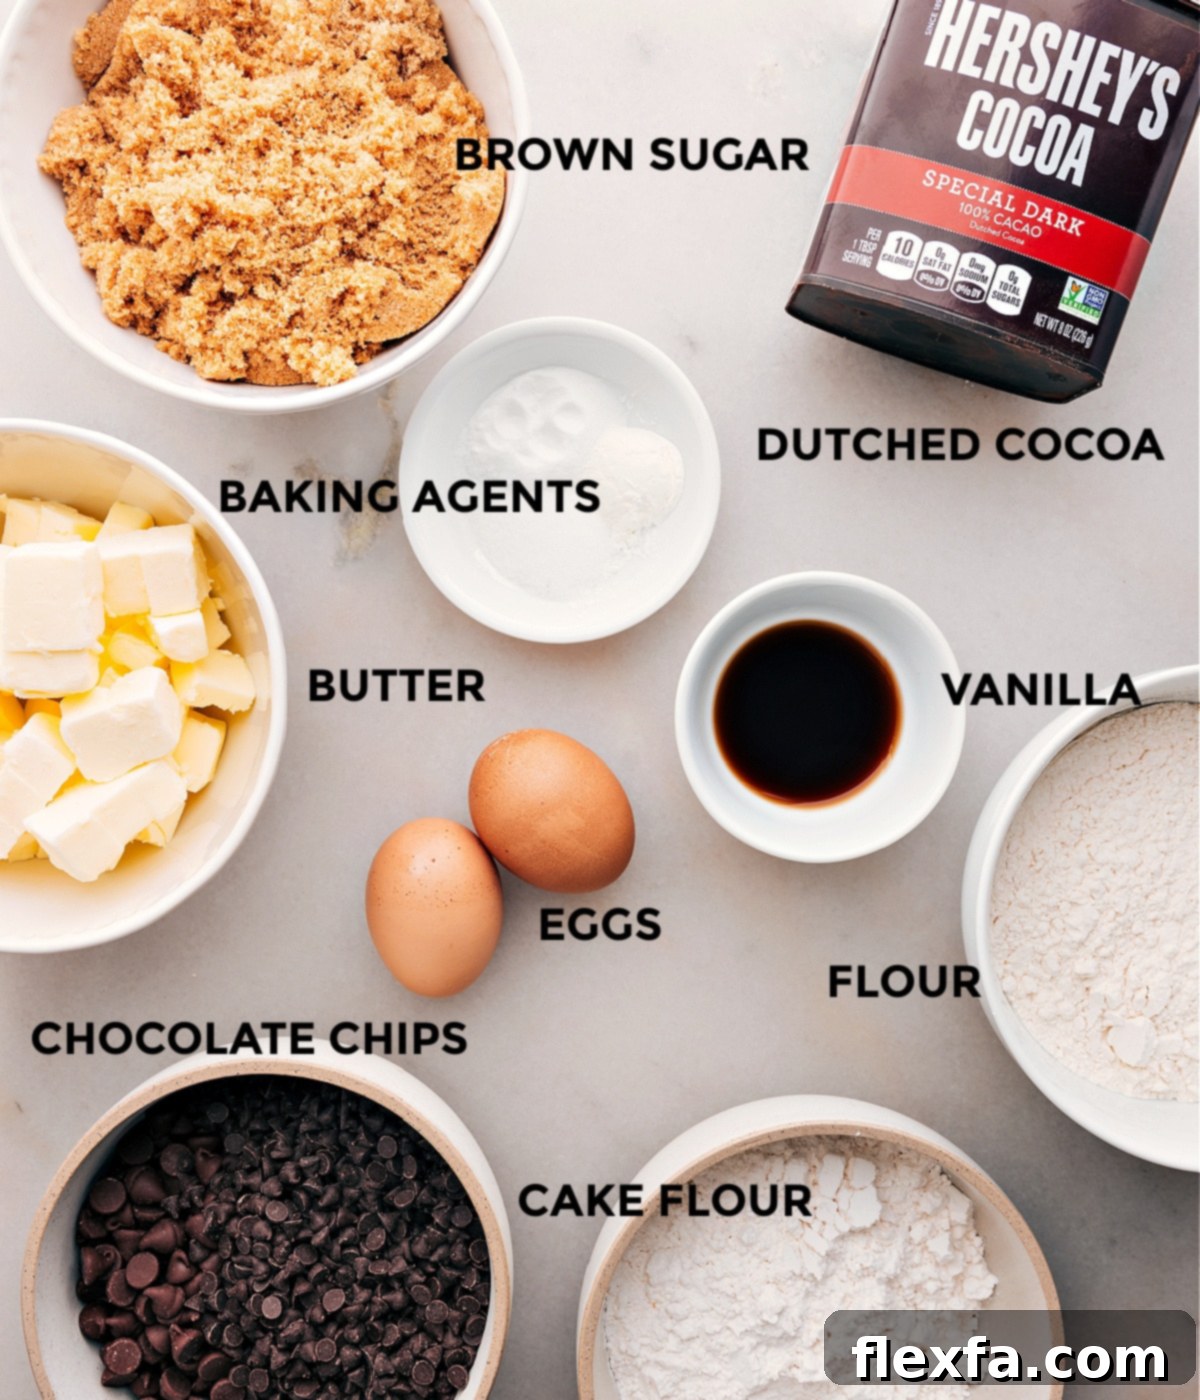
Essential Ingredients for Perfect Chocolate Cookies
Achieving the perfect fudgy, chewy chocolate cookie requires specific ingredients and techniques. Here’s a detailed look at the key components of this recipe and why they matter:
| Ingredient | Why it’s Crucial & Tips for Best Results |
|---|---|
| Dutch-process cocoa powder | This is non-negotiable for a truly rich, deep, and dark chocolate flavor that truly elevates these cookies. Dutch-process cocoa is less acidic than natural cocoa, which affects how it interacts with baking soda, resulting in a more mellow, sophisticated chocolate taste and a darker crumb. If you only have natural cocoa, it will work, but expect a lighter color and a slightly more acidic, less intense chocolate flavor. Measure carefully by spooning into the cup and leveling. |
| Cornstarch | Don’t even think about skipping this! Just a small amount of cornstarch is the secret weapon for making these cookies incredibly soft and wonderfully thick. It helps tenderize the dough and prevents excessive spreading, ensuring a plump, bakery-style cookie. |
| Cake flour | This is another secret ingredient that guarantees an unparalleled texture. Cake flour has a lower protein content than all-purpose flour, leading to a more tender, delicate crumb. It’s what gives these cookies their distinctive melt-in-your-mouth quality. While you might be tempted, avoid attempting a DIY cake flour substitute (removing tablespoons of all-purpose flour and adding cornstarch) as the results will not be the same for this specific recipe. Invest in cake flour for the best outcome. |
| Light brown sugar (packed) | Brown sugar is crucial for both moisture and chewiness. Its molasses content adds depth of flavor and keeps the cookies soft and moist long after baking. Always pack it firmly into your measuring cup to ensure consistent sweetness and the correct dough consistency. |
| Two kinds of chocolate chips (mini + regular) | Using both mini and regular-sized chocolate chips creates a dynamic texture in every bite. The mini chips melt seamlessly into the dough, distributing chocolate flavor throughout, while the larger chips provide pockets of gooey, melted chocolate. Feel free to mix milk, dark, or semi-sweet varieties to customize the chocolate depth to your preference. |
| Flaky sea salt | A light sprinkle of flaky sea salt on top of the cookies immediately after they come out of the oven is a game-changer. It doesn’t just add a touch of elegance; it brilliantly contrasts with and enhances the deep chocolate flavor, making every bite pop and come alive. |
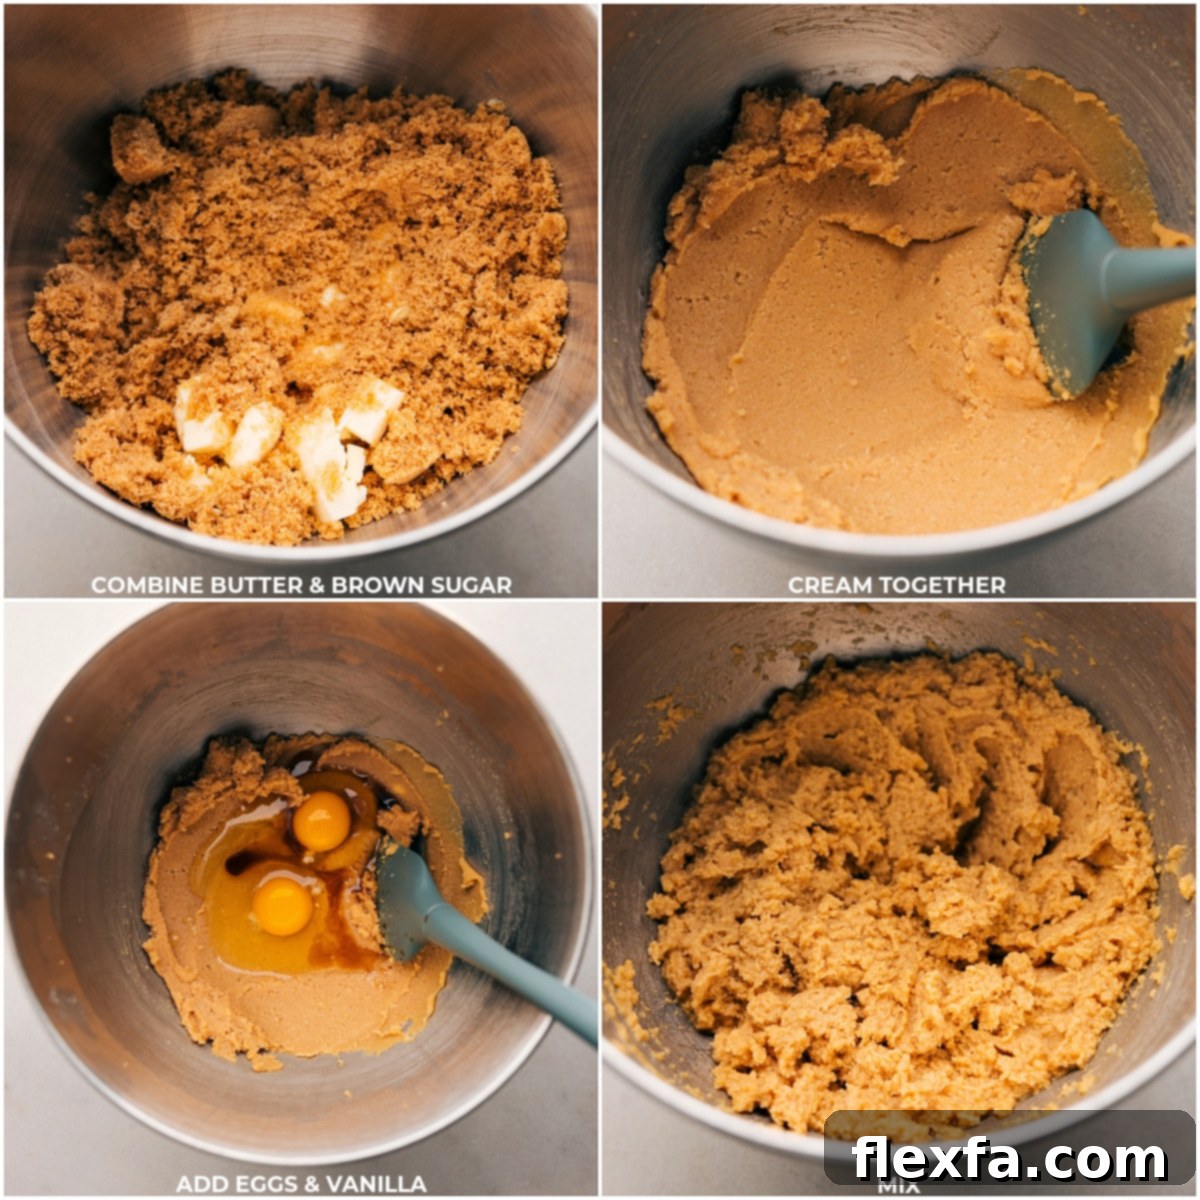
How To Bake the Best Chocolate Cookies: Step-by-Step
Follow these precise steps to create the fudgiest, chewiest chocolate cookies you’ve ever tasted. Attention to detail in each stage will ensure spectacular results:
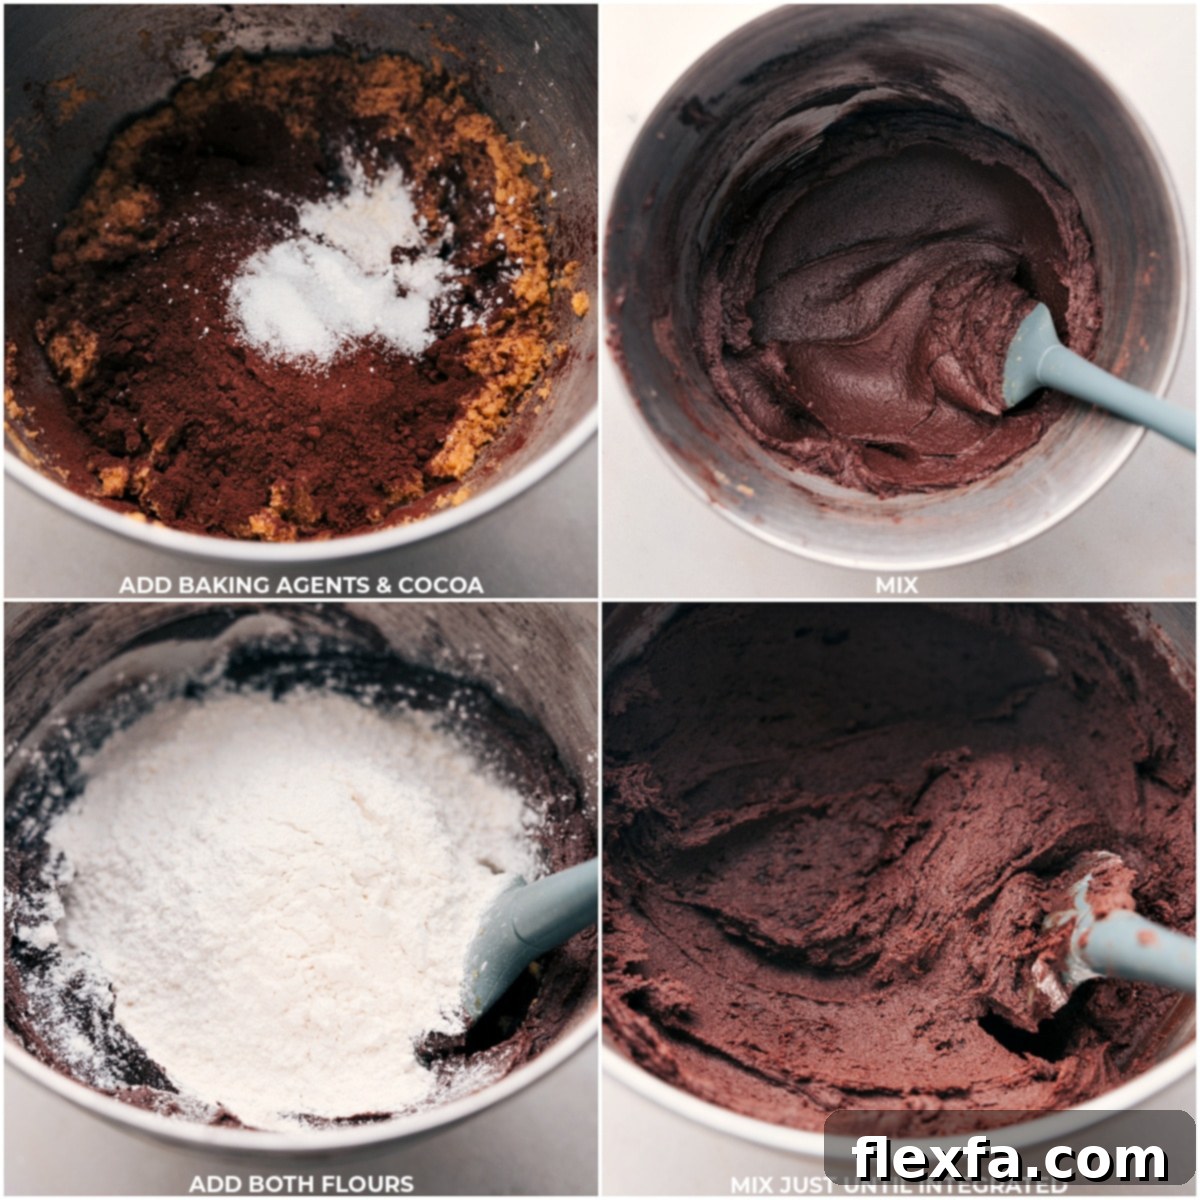
- Cream Butter & Sugar: Begin by cutting your cold, unsalted butter into cubes. In the bowl of a stand mixer fitted with a whisk attachment (or using a large bowl and a hand mixer), cream together the cubed cold butter and packed light brown sugar. Beat them for 3-4 minutes until the mixture is light, fluffy, and resembles the consistency of creamy peanut butter. This step incorporates air and creates a tender crumb.
- Combine Wet & Dry Ingredients: Add the large eggs and vanilla extract to the creamed mixture, beating until just combined. In a separate bowl, whisk together the dry ingredients: salt, baking soda, cornstarch, Dutch-process cocoa powder, cake flour, and all-purpose flour. Gradually add the dry mixture to the wet ingredients, mixing on low speed until no streaks of flour remain. Be careful not to overmix the dough, as this can lead to tough cookies.
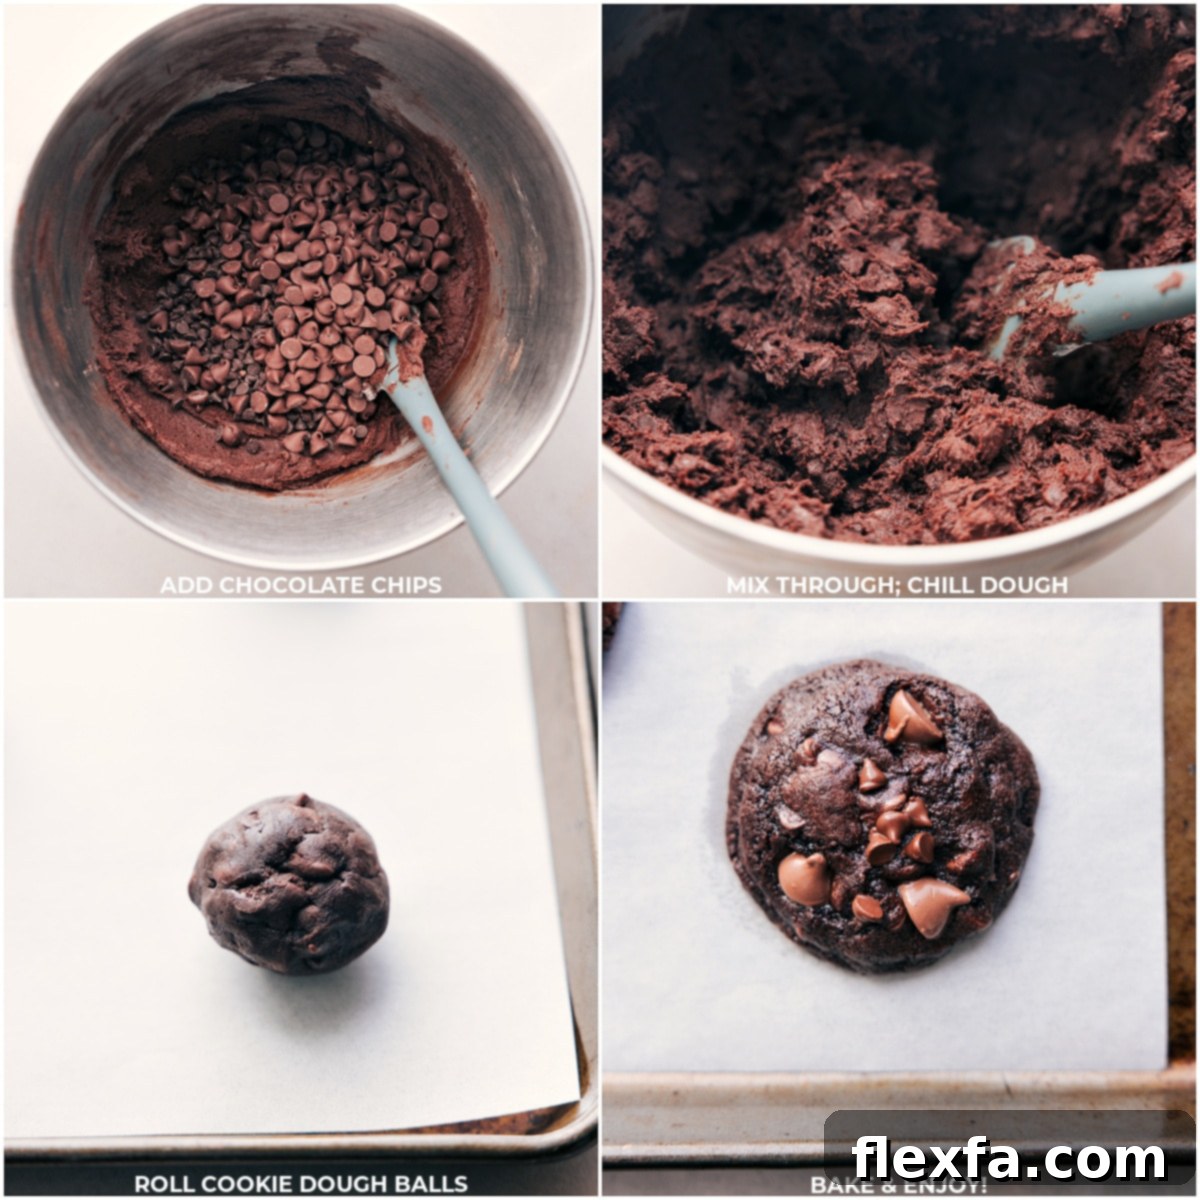
- Fold in Chocolate Chips: Gently fold in both the mini and regular chocolate chips until they are evenly distributed throughout the dough. Avoid overmixing during this stage to prevent the chocolate from breaking down too much.
- Chill the Dough (Crucial Step): Cover the dough bowl tightly with plastic wrap and refrigerate for a minimum of 1 hour, or ideally, overnight. Chilling the dough allows the flavors to meld, the butter to firm up, and prevents the cookies from spreading too much during baking, resulting in thicker, more flavorful cookies.
- Form & Re-Chill Dough Balls: If the dough was chilled for longer than an hour, let it sit at room temperature for about 10-15 minutes to soften slightly, making it easier to work with. Scoop the dough into 2-tablespoon sized balls. For ultimate accuracy and evenly sized cookies, a food scale is highly recommended. Once formed, place the cookie dough balls back in the fridge for another 10 minutes to ensure they are firm before baking.
- Bake to Perfection: Preheat your oven to 325°F (160°C). Arrange the chilled cookie balls 2 inches apart on a baking sheet lined with parchment paper or a silicone baking mat. Bake for 8-12 minutes. For the ultimate fudgy texture, err on the side of underbaking; the edges should be set, but the centers should still look slightly glossy and soft. Immediately after removing from the oven, use the back of a spatula to gently press any wayward edges inward to create perfectly round cookies. Optionally, press a few extra chocolate chips on top for a beautiful presentation and sprinkle lightly with flaky sea salt. Let the cookies rest on the hot baking sheet for 5 minutes before transferring them to a wire rack to cool completely. Enjoy the warm, decadent results!
Expert Tips for Baking the Best Chocolate Cookies
Even with a perfect recipe, a few insider tips can elevate your chocolate cookie game from good to absolutely phenomenal. Pay attention to these details for consistently perfect results:
- Use Cold Butter: This tip is paramount. Starting with cold, cubed butter (not softened, not melted) ensures that the butter slowly melts during baking, allowing the cookies to hold their shape and preventing excessive spreading. This leads to thicker, chewier, and more substantial chocolate cookies.
- Accurate Measuring (Especially Flour): Baking is a science, and precision matters. Especially for flour, always spoon it into your measuring cup and then level it off with a straight edge. Scooping flour directly from the bag can pack it too densely, resulting in too much flour, which can lead to dense, dry, or cake-like cookies instead of soft and fudgy ones.
- Don’t Over-mix: Once you’ve added the dry ingredients to the wet, mix only until they are *just* combined and no streaks of flour are visible. Overmixing develops gluten in the flour, which can make your cookies tough and chewy in an undesirable way, rather than tender and soft.
- Double Chill the Dough: This recipe calls for two chilling periods for a reason. Chilling the dough after mixing allows the butter to solidify, preventing the cookies from spreading too much in the oven. More importantly, it gives the flour time to fully hydrate and the flavors to deepen, resulting in a richer, more complex cookie. The second chill after shaping ensures the dough balls are firm, contributing to a perfect rise and texture.
- Don’t Over-bake: This is perhaps the most crucial tip for achieving that signature fudgy, gooey center. Take the cookies out of the oven when the edges are set but the centers still look slightly glossy and soft. They will continue to bake and set on the hot baking sheet as they cool. Over-baking, even by a minute or two, can transform your perfectly fudgy creations into hard, dry, and less flavorful cookies.
Storage & Freezing for Future Enjoyment
To keep your delicious chocolate cookies tasting their best, proper storage is key:
- Room Temperature Storage: Store baked chocolate cookies in an airtight container at room temperature. They are best enjoyed fresh, ideally within 2-3 days, before they start to lose their optimal soft and chewy texture. While they remain edible for up to a week, their quality will diminish.
- Reheating Leftovers: If you find your cookies have firmed up slightly, a quick zap in the microwave for 10-15 seconds can bring back some of that warm, gooey freshness.
How To Freeze Chocolate Cookies (Dough for Best Results)
Freezing cookie dough is a fantastic way to have fresh, warm cookies on demand without the full preparation time. Freezing the dough yields much better results than freezing baked cookies.
- Freeze Dough Instead of Baked Cookies: For the freshest taste and texture, freeze the unbaked dough balls rather than fully baked cookies.
- Preparation for Freezing: Roll the dough into 2-tablespoon sized balls as per the recipe. Place these dough balls on a baking sheet lined with parchment paper, ensuring they don’t touch. Freeze until they are solid (this usually takes about 1-2 hours).
- Long-Term Storage: Once solid, transfer the frozen dough balls to a freezer-safe, airtight bag or container. They can be stored in the freezer for up to 3 months. Clearly label the bag with the date and baking instructions.
- Baking from Frozen: When a cookie craving strikes, simply preheat your oven to 325°F (160°C). Place the frozen dough balls directly on a lined baking sheet. There’s no need to thaw them! You will need to add a few extra minutes to the baking time, typically 2-4 minutes, compared to fresh dough. Bake until the edges are set and the centers are still slightly soft. This method ensures you always have warm, homemade chocolate cookies ready to bake in minutes!
More Delicious Cookie Recipes You’ll Love:
If you’re a fan of homemade cookies, explore these other delightful recipes from my kitchen:
Desserts
Coconut Oil Chocolate Chip Cookies
Desserts
Peanut Butter Blossom Cookies
Cookies
No Bake Cookies Recipe
Desserts
Salted Caramel Cookies
Print Recipe
5 from 1 vote
Chocolate Cookies Recipe
Chelsea Lords
30 minutes
10 minutes
1 hour 10 minutes
1 hour 50 minutes
40 cookies
Equipment
- Sheet pan (15″ x 10″) lined with parchment paper or silicone baking mat
- Stand mixer
- Large mixing bowl
- Whisk attachment or hand mixer
- Measuring cups and spoons
- Rubber spatula
- Wire cooling rack
Ingredients
- 16 tablespoons unsalted butter cold, cubed
- 1-1/2 cups light brown sugar packed
- 2 large eggs
- 2 teaspoons vanilla extract
- 1 teaspoon salt
- 1 teaspoon baking soda
- 1 teaspoon cornstarch
- 1/2 cup Dutch process cocoa powder see note 1
- 1 cup cake flour see note 2
- 1-1/2 cups all-purpose flour
- 1 cup mini chocolate chips
- 2 cups chocolate chips see note 3
- Flaky sea salt optional, for sprinkling
Instructions
- Cut cold butter into cubes. In a stand mixer with a whisk attachment, or a large bowl with a hand mixer, cream together the cubed cold butter and packed light brown sugar for 3–4 minutes until the consistency is similar to creamy peanut butter.
- Beat in eggs and vanilla extract until just combined. In a separate bowl, whisk together cornstarch, baking soda, salt, and cocoa powder. Gradually add the cocoa mixture and both flours to the wet ingredients, mixing until no streaks of flour remain. Avoid overmixing. Gently fold in both types of chocolate chips. Cover the dough and refrigerate for at least 1 hour, or ideally overnight, for best results.
- If the dough was chilled longer than 1 hour, allow it to soften slightly at room temperature for 10-15 minutes. Roll the dough into 2 tablespoon-sized balls. For consistent sizing, a food scale is recommended. Place the formed cookie balls back into the fridge to chill for another 10 minutes before baking.
- Preheat oven to 325°F (160°C). Space the chilled cookie balls 2 inches apart on a sheet pan lined with parchment paper or a silicone baking mat. Bake for 8–12 minutes. For truly fudgy cookies, lean toward underbaking; the edges should be set, but the centers should still appear soft and slightly glossy (see note 4). Upon removal from the oven, immediately use the back of a spatula to gently press any wayward edges inward to create perfectly round cookies. Optionally, press a few extra chocolate chips onto the tops of the warm cookies and sprinkle lightly with flaky sea salt. Let cookies rest on the baking sheet for 5 minutes before carefully transferring them to a wire rack to cool completely.
Recipe Notes
Note 1: For optimal flavor and moisture, use Dutch-process cocoa powder, such as Hershey’s® Special Dark. Regular natural cocoa powder is more acidic and may result in a less flavorful, drier cookie. When measuring cocoa, spoon it into the cup and level it off; excess cocoa can lead to dry cookies.
Note 2: Cake flour is absolutely essential for achieving the fluffy, tender crumb that makes these cookies so special. Its lower protein content cannot be replicated by attempting to make a DIY cake flour substitute (removing tablespoons of all-purpose flour and replacing with cornstarch); it simply doesn’t work the same way in this specific recipe. Please use actual cake flour for the best texture.
Note 3: While milk chocolate chips are my personal preference for a sweeter, creamier chocolate flavor, feel free to customize! You can certainly use semi-sweet, dark chocolate, or a combination of your favorite chocolate chips to suit your taste.
Note 4: If your cookies are not spreading sufficiently by 7–8 minutes into baking, don’t worry! Carefully take the baking sheet out of the oven and gently tap it 2–3 times firmly on the counter. This minor shock will encourage the cookies to spread. Return them to the oven to finish baking for the remaining time.
Storage: Store baked cookies in an airtight container at room temperature for up to a week. They are best fresh for 2-3 days, but can be rewarmed briefly in the microwave for a fresh-baked feel. For longer storage, freeze unbaked dough balls (as detailed in the “Storage & Freezing” section above) and bake from frozen when desired, adding a few extra minutes to the bake time.
Nutrition
Serving: 1 cookie | Calories: 184kcal | Carbohydrates: 23.9g | Protein: 2.4g | Fat: 9.8g | Cholesterol: 21.5mg | Sodium: 64.8mg | Fiber: 1.7g | Sugar: 17g
Nutrition information is automatically calculated and should only be used as an approximation. It may vary based on specific ingredients and brands used.
Loved this recipe? Leave a comment and rating below!