
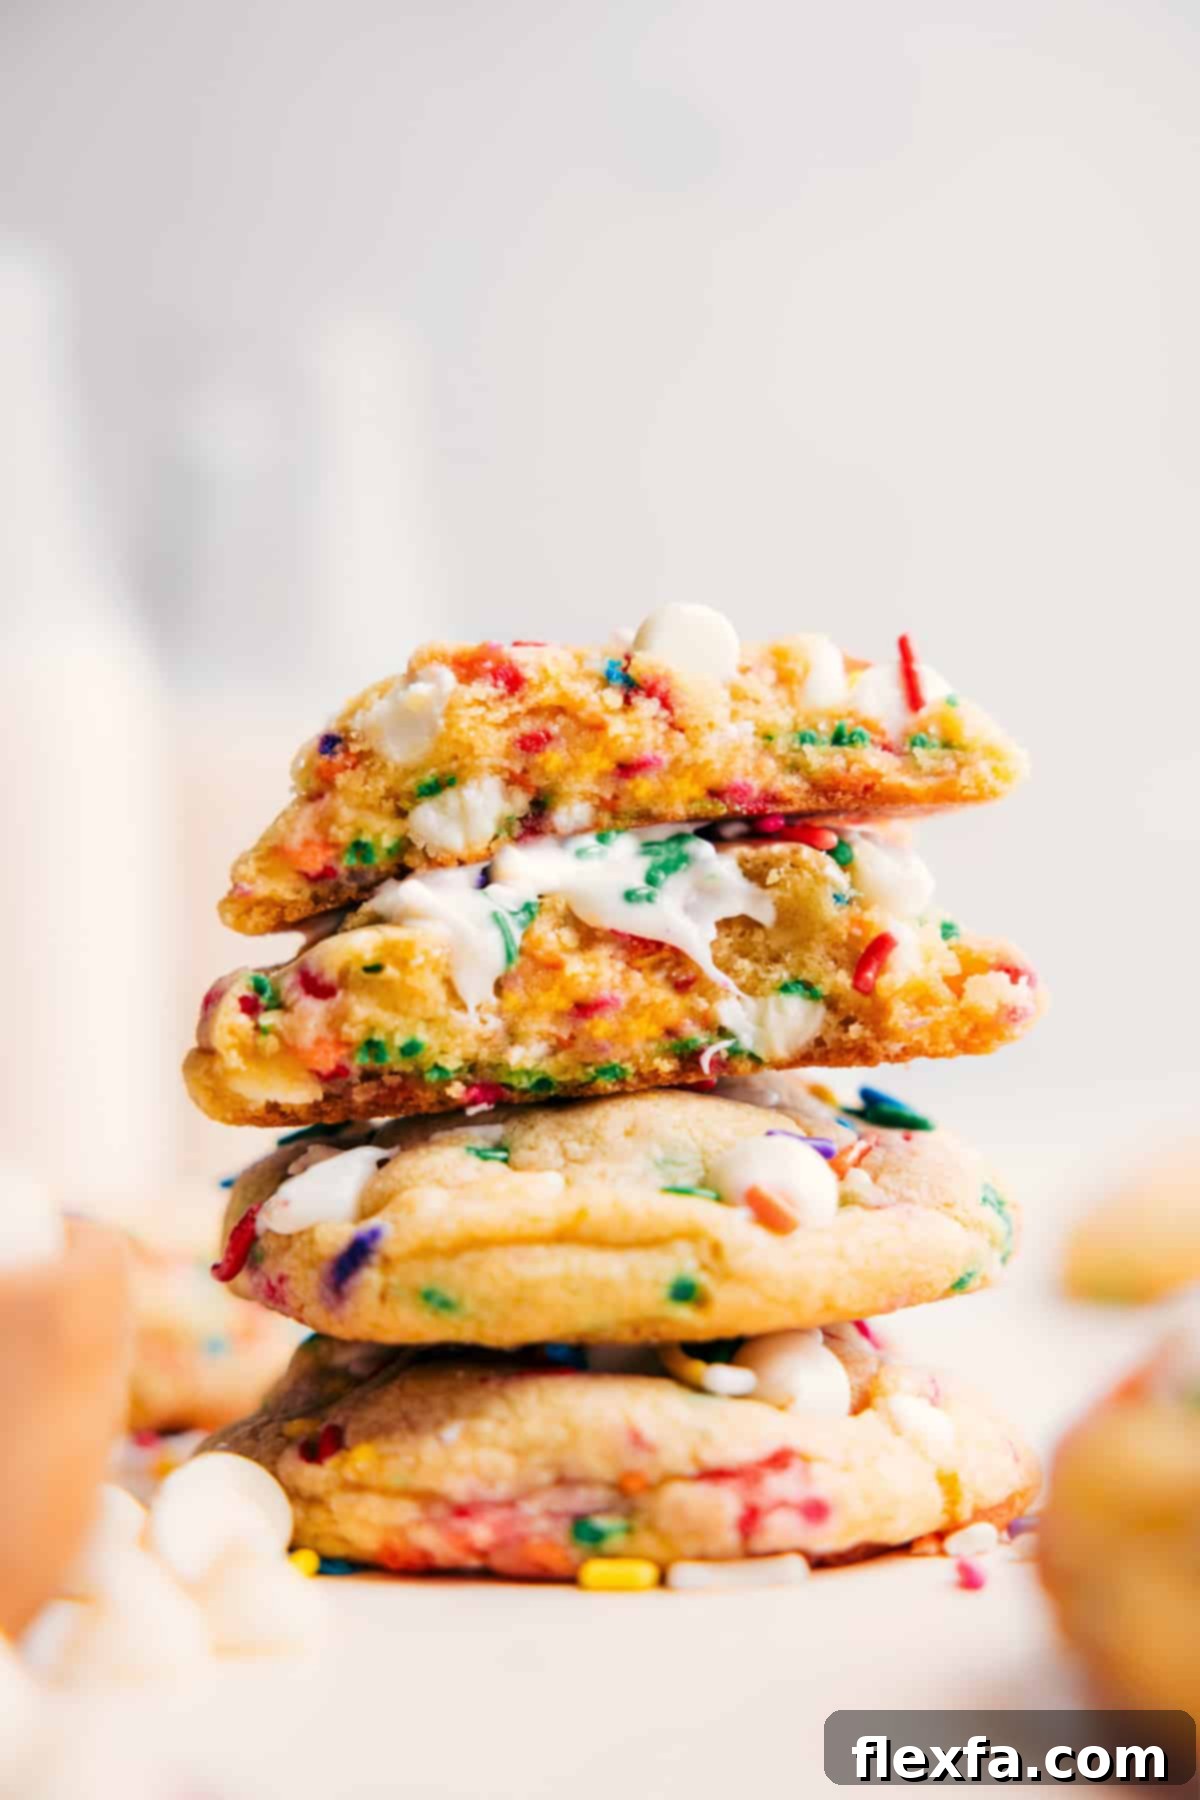
Irresistible Cake Batter Cookies: Your New Favorite Funfetti Treat
Dive into pure joy with these **Cake Batter Cookies**, a magical fusion of your favorite cake flavors packed into delightfully soft and chewy cookies. Each bite is an explosion of vibrant sprinkles and luscious, melty white chocolate, making every occasion feel like a birthday celebration. This easy-to-follow recipe brings the festive spirit of a birthday cake right into your cookie jar, promising a dessert that’s both nostalgic and incredibly satisfying.
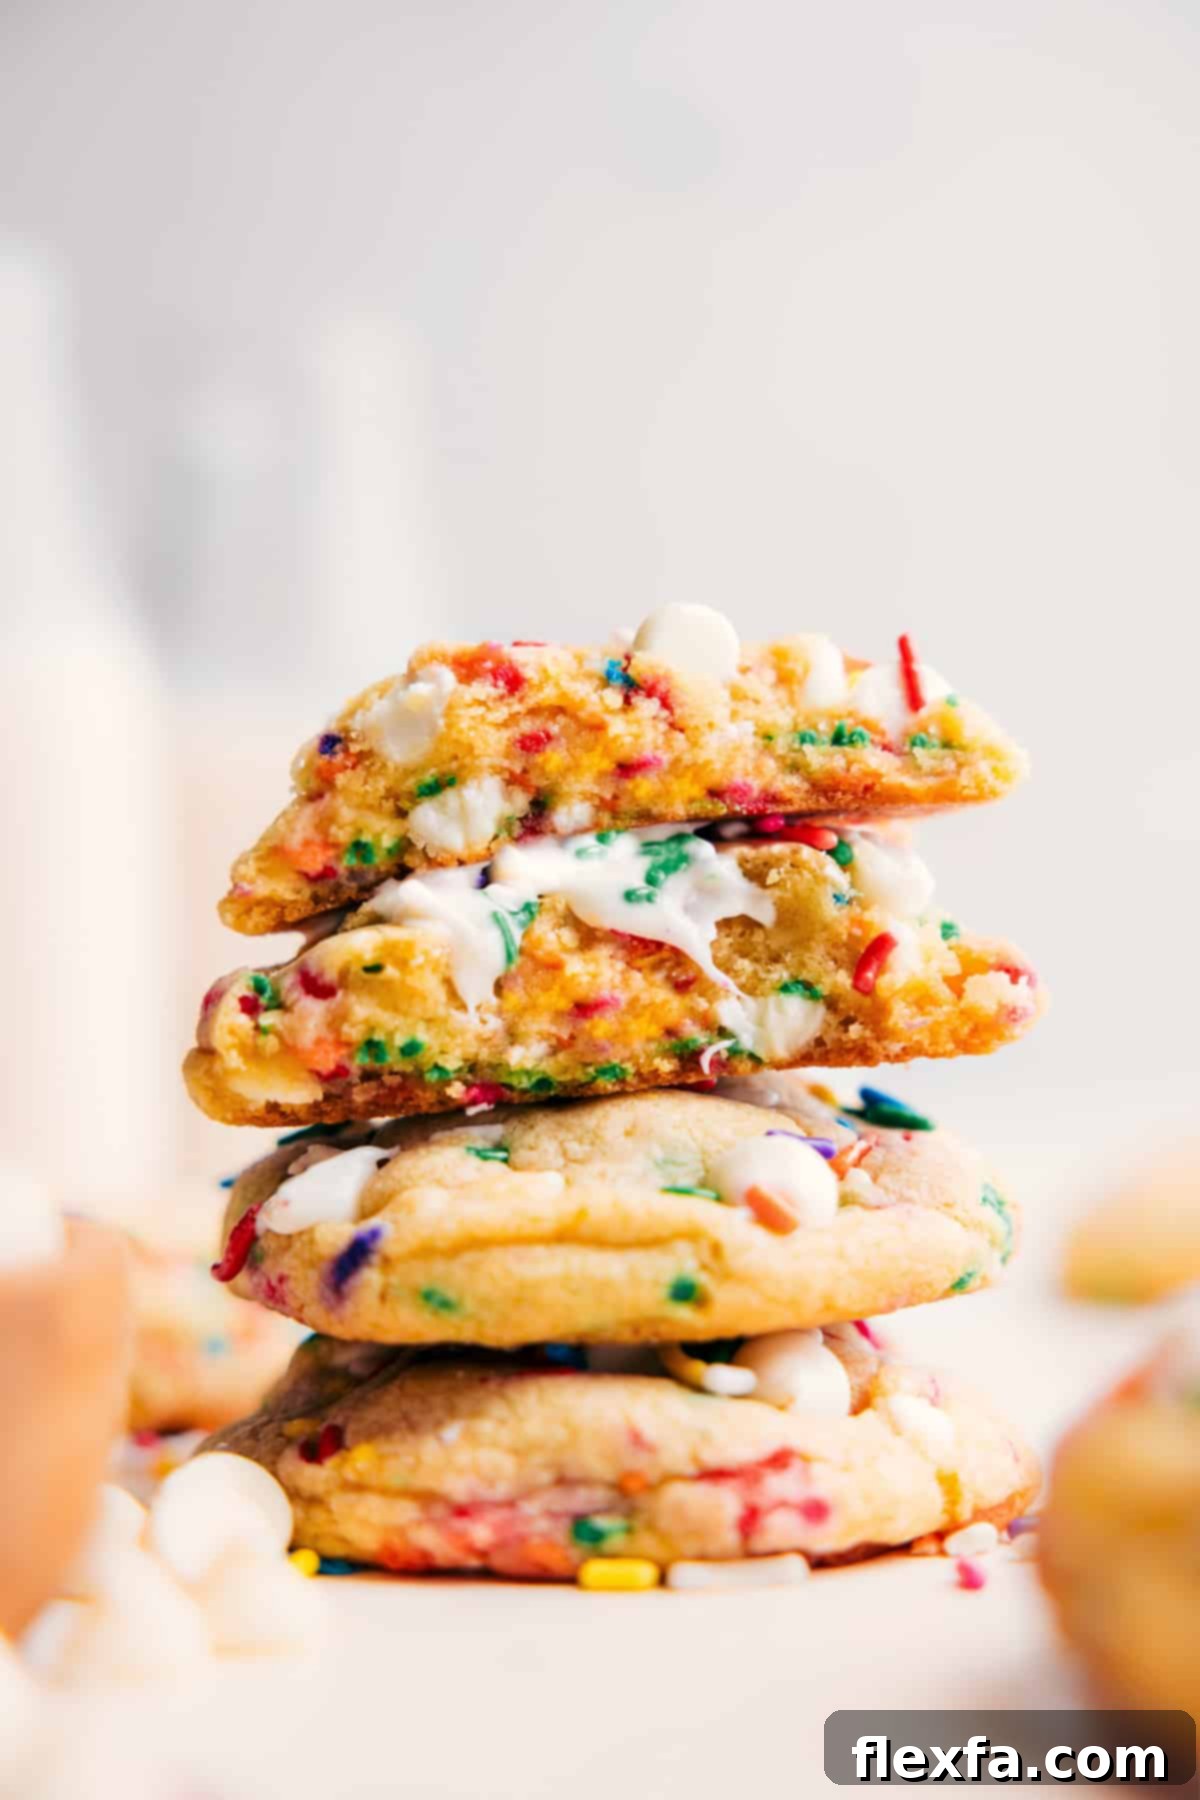

A Personal Note from the Baker
My Journey to the Perfect Melt-In-Your-Mouth Cake Batter Cookies!
It wasn’t long ago that I stumbled upon a truly remarkable cookie at a baby shower – a cookie so incredibly soft, moist, and bursting with that iconic birthday cake flavor. I was instantly captivated, needing to know the secret behind such a delightful treat. When my friend revealed her ingenious method of using both cake mix and pudding mix, I was genuinely surprised and, frankly, in awe. That moment sparked a mission: to recreate and perfect these cookies in my own kitchen, ensuring they delivered on every promise of flavor and texture.
After several rounds of dedicated testing, tweaking ratios, and experimenting with different ingredients, I finally landed on a recipe that surpassed all my expectations. This version quickly became my absolute favorite, achieving that perfect balance of chewiness, softness, and rich cake batter taste. It’s a recipe I’m now beyond thrilled to share with all of you, hoping it brings as much joy to your homes as it does to mine.
My daughter, who has an undeniable obsession with sprinkles, declares these the best cookies ever – and honestly, I wholeheartedly agree! Every single batch I bake disappears almost instantly, beloved by both kids and adults alike. There’s never a single cookie left when I bring them to gatherings, which is always a good sign! These cookies aren’t just a dessert; they’re pure fun and a burst of unforgettable flavor in every single bite, guaranteed to bring smiles all around and make any day feel like a special occasion.
Why You’ll Adore These Easy Cake Batter Cookies
These Cake Batter Cookies aren’t just another dessert; they’re a celebration in every bite! Here’s why they’re destined to become a beloved staple in your baking repertoire:
- Unforgettable Birthday Cake Flavor: They truly taste like a slice of funfetti birthday cake in cookie form, with a rich, buttery, and deeply vanilla base. It’s the perfect way to satisfy that cake craving without baking a whole cake.
- Incredibly Soft & Chewy Texture: Thanks to a genius secret ingredient – instant pudding mix – these cookies boast an unbeatable soft, pillowy texture that remains moist and chewy for days. Say goodbye to dry, crumbly cookies!
- Visually Stunning & Festive: Loaded with colorful jimmie sprinkles and luscious, melty white chocolate chips, they are as fun and vibrant to look at as they are to eat. They instantly brighten any dessert platter.
- Remarkably Easy to Make: Utilizing a standard cake mix as a base significantly simplifies the baking process, making these cookies accessible and enjoyable for bakers of all skill levels, even beginners.
- Perfect for Any Occasion: Whether it’s a birthday party, a holiday gathering, a school bake sale, a potluck, or simply a delightful treat at home, these cookies are always a crowd-pleaser. Kids and adults alike will rave about their deliciousness!
- Customizable: Easily adapt them with different cake mix flavors, various chocolate chip types, or additional mix-ins to suit your taste or theme.
Essential Ingredients for Perfect Cake Batter Cookies
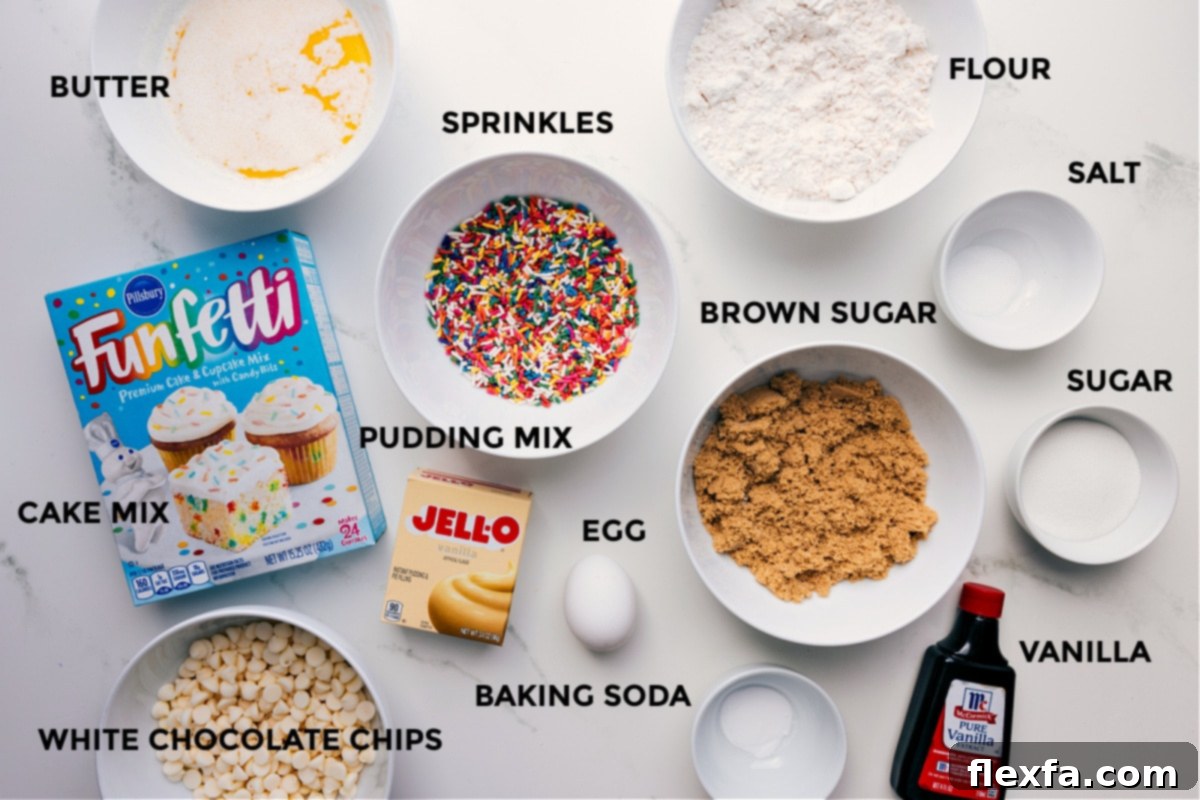
Crafting these delectable cake batter cookies requires a few key ingredients, each playing a vital role in achieving their signature taste and irresistible texture. Understanding the purpose of each component will help you bake with confidence and achieve consistent, delicious results every time. Here’s a detailed look at what you’ll need and why:
| Ingredient | Helpful Notes and Substitutions |
|---|---|
| Unsalted Butter & Sugars (Brown & Granulated) | Start with softened unsalted butter; it creams effortlessly with sugar, creating a light, airy base for your cookie dough. Fresh, soft light brown sugar is crucial for adding moisture, chewiness, and a subtle molasses flavor that enhances the overall richness and depth of taste. Granulated sugar provides additional sweetness, contributes to those desirable slightly crisp edges, and helps the cookies spread just enough. |
| Cake Mix (Funfetti or Yellow) | The foundation of these fantastic cookies! For that authentic birthday cake vibe, opt for Funfetti or a classic yellow cake mix. White or French vanilla cake mixes are also excellent choices, offering a subtly different but equally delicious flavor profile. Remember, you’re using the *dry* cake mix from the box, not prepared batter, to create the unique dough. |
| Instant Vanilla Pudding Mix | This is our absolute secret weapon for unbelievably soft, moist, and chewy cookies! You must use *instant* vanilla pudding mix, and it must be the dry powder – do not prepare it. Avoid sugar-free or prepared pudding, as these will not deliver the desired texture or flavor. The pudding mix acts as a tenderizer and moisture-enhancer, while also adding a delicate, creamy vanilla essence that perfectly complements the cake mix. |
| All-Purpose Flour, Baking Soda & Salt | All-purpose flour provides the necessary structure and body to the cookies, preventing them from spreading too thin. Baking soda acts as a leavening agent, ensuring your cookies rise beautifully and have a tender crumb. Salt is essential for balancing the sweetness, enhancing all the other flavors, and preventing the cookies from tasting one-dimensional. |
| Large Egg & Vanilla Extract | A large egg binds the ingredients together, adding richness and contributing significantly to the desired chewy texture. High-quality pure vanilla extract is indispensable for boosting that classic “cake” flavor and adding an aromatic depth to your cookies. Do not skimp on the vanilla! |
| Jimmie-Style Sprinkles | For the best visual appeal and to prevent unsightly color bleeding, always use jimmie-style sprinkles (the longer, cylindrical ones). These sprinkles are designed to hold their shape and vibrant colors during baking, ensuring your cookies look as festive as they taste. Nonpareils (the tiny, round ball sprinkles), while pretty, tend to dissolve and bleed into the dough, creating muddy or faded colors. |
| White Chocolate Chips | These delightful additions melt beautifully and add a creamy sweetness and another layer of richness that pairs wonderfully with the cake batter flavor. Feel free to swap them for milk chocolate chips, semi-sweet chocolate chips, dark chocolate chunks, or even chopped chocolate bars for a different twist, or a combination of your favorites! |
The Secret to Perfect Sprinkles, Cake, and Pudding Mixes
When it comes to creating these delightful Cake Batter Cookies, the specific choices you make for your sprinkles, cake mix, and pudding mix can significantly impact the final appearance, texture, and flavor. Let’s delve deeper into these crucial components to ensure your cookies are nothing short of spectacular:
Choosing the Best Sprinkles for Visual Appeal
For a truly festive and vibrant cookie that looks as good as it tastes, the type of sprinkles you use is incredibly important. We strongly recommend opting for **jimmie-style sprinkles** (those longer, cylindrical rods, often called “strand” or “rod” sprinkles). These sprinkles are specifically designed to hold their color and shape during the baking process, ensuring that your cookies emerge from the oven with distinct, bright bursts of color that pop against the golden dough. Conversely, it’s best to avoid using nonpareils (the tiny, round ball sprinkles). While charming on unfrosted treats, nonpareils tend to dissolve and bleed their colors into the cookie dough when subjected to oven heat, often resulting in a muddy, faded, or dull appearance. Stick with jimmies for that classic, joyful cake batter look!
Selecting the Right Cake and Pudding Mixes for Optimal Flavor & Texture
The foundation of our Cake Batter Cookies lies in the judicious selection of both cake and pudding mixes. These two dry ingredients work synergistically to create the signature flavor and unbelievably soft texture:
- Cake Mix: For the most authentic and beloved “birthday cake” flavor, you’ll want to stick with a classic. Our top recommendations are:
- **Yellow Cake Mix:** This provides a rich, buttery vanilla flavor that is quintessential to the taste of birthday cake.
- **Funfetti Cake Mix:** If you desire an extra layer of sprinkles already integrated into the mix and an even more pronounced celebratory feel, Funfetti is an excellent choice. It amplifies the fun!
Ensure you are using a standard, non-sugar-free box of dry cake mix – do not add any wet ingredients or prepare it beforehand.
- Instant Vanilla Pudding Mix: This is the ultimate game-changer for these cookies. The key is to use **instant vanilla pudding mix** and to use it *dry*, straight from the box as a powder. Do NOT prepare the pudding according to its package directions. The dry pudding mix acts as a powerful tenderizer and moisture-enhancer, contributing significantly to the cookies’ incredibly soft, moist, and delightfully chewy texture. It also subtly boosts the vanilla flavor, making your cookies even more irresistible and giving them that perfect bakery-style chew. As with the cake mix, make sure to avoid sugar-free or fat-free pudding varieties, as these will alter the chemical composition and will not yield the desired results in terms of texture and taste.
Expert Tips for Baking the Best Cake Batter Cookies
Achieving bakery-quality cake batter cookies is easy when you follow these insider tips and tricks. These small steps can make a big difference in the texture, appearance, and overall deliciousness of your homemade treats:
- **Don’t Skip the Chill Time! (It’s Crucial):** This is perhaps the most crucial step for perfect cookies. Chill your dough for at least an hour, and ideally up to 24 hours. Chilling the dough solidifies the butter within, which is vital for preventing the cookies from spreading too much and becoming flat “pancakes” in the oven. The result? Thicker, chewier cookies that hold their beautiful round shape. Furthermore, chilling allows the flavors to deepen and meld, giving you a richer, more complex tasting cookie. Patience here truly pays off!
- **Roll Dough Balls Consistently for Even Baking:** Aim for uniformly sized dough balls, roughly 3 tablespoons (or about 1/4 cup) each. For utmost precision, especially if you want perfectly consistent cookies, use a food scale to weigh each ball to approximately 60 grams. Consistent sizing ensures that all your cookies bake evenly at the same rate, preventing some from being overdone while others are underbaked. This leads to a batch of uniformly perfect cookies.
- **Bake Until Just Set (The Secret to Softness):** Keep a very close eye on your cookies during the baking process! They should bake until their edges are lightly golden brown, but their centers still look slightly soft, puffy, and even a tiny bit underbaked. This “underbaked” center is the key to achieving that wonderfully soft and delightfully chewy texture after they cool. Overbaking will cause the cookies to dry out and become crumbly, losing their signature tenderness. My sweet spot is usually around 10-11 minutes in a preheated oven, but every oven can vary.
- **Cool on the Baking Sheet for a Few Minutes:** Resist the immediate urge to transfer your cookies directly to a wire rack after pulling them from the oven. Let them cool on the hot baking sheet for 3-4 minutes. This brief period allows the cookies to continue cooking gently from the residual heat of the pan and firm up just enough to be safely transferred without breaking or falling apart. It helps them set without becoming overcooked.
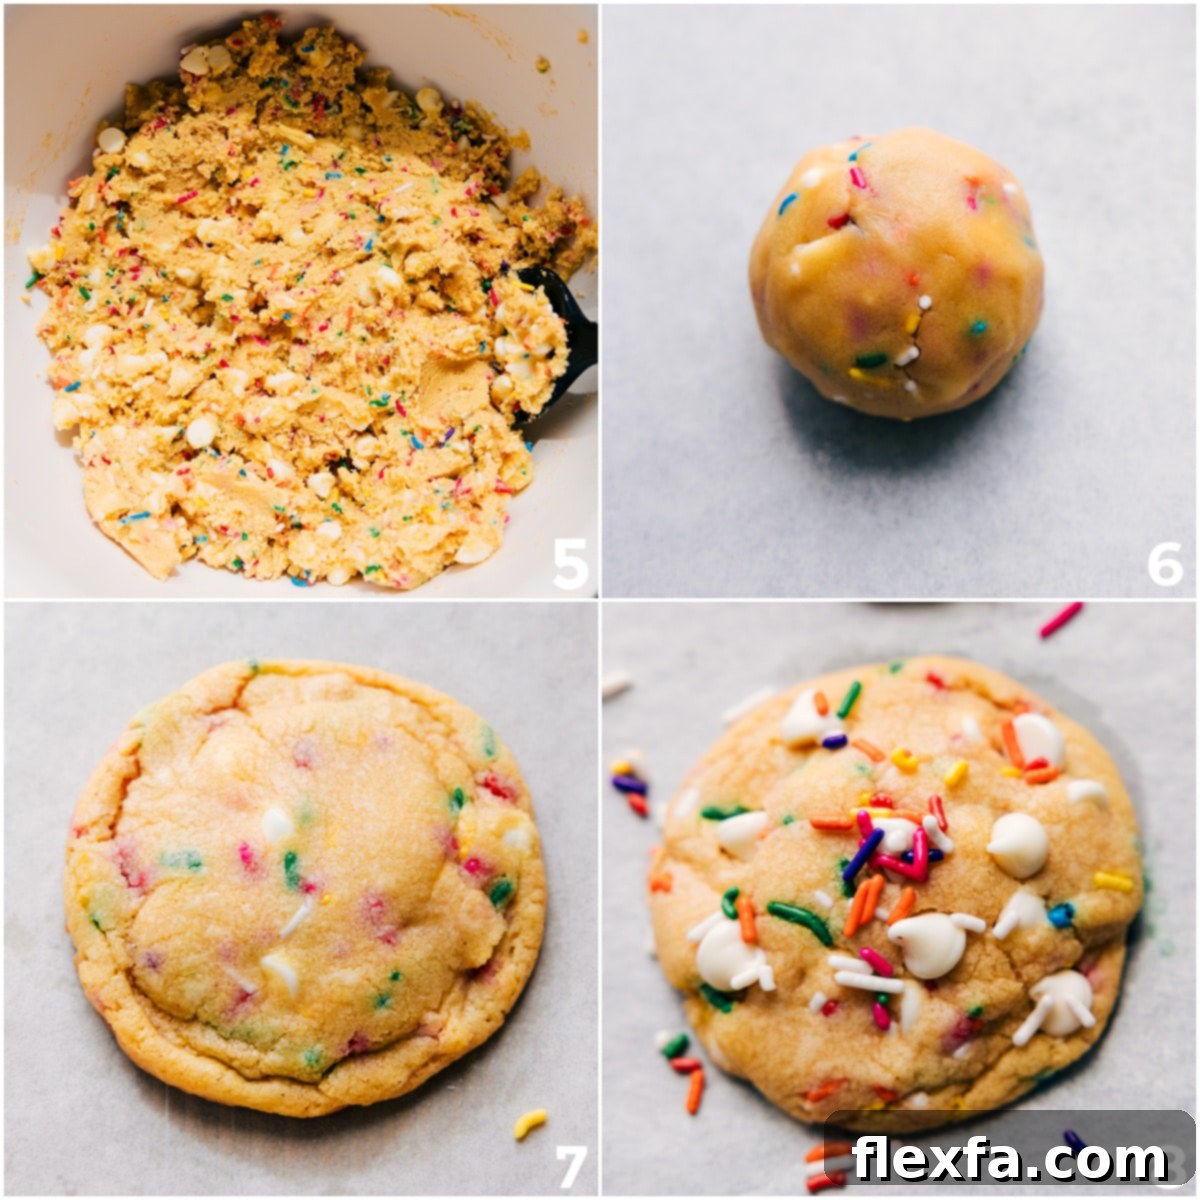
- **Optional: Add Extra Toppings Post-Bake:** For an extra beautiful, professional-looking presentation, immediately after removing the cookies from the oven, gently press a few more white chocolate chips and a sprinkle of fresh jimmies onto the tops of each warm cookie. The warmth of the cookies will slightly melt the chocolate, making it adhere perfectly and creating an even more inviting and visually appealing finish.
Storage and Make-Ahead Options for Cake Batter Cookies
These delightful Cake Batter Cookies are so good, you’ll want to make sure you can enjoy them fresh for as long as possible, or even prepare them ahead of time for future enjoyment. Here are the best ways to store and freeze them:
Smart Storage Solutions
- **Room Temperature Storage for Baked Cookies:** Once your delicious cake batter cookies have completely cooled to room temperature, store them in an airtight container. This helps seal in their moisture and maintain their incredible softness and fresh taste for up to 3 days. For best results, you can place a slice of bread in the container to help keep them extra soft.
- **Freezing Baked Cookies:** For longer storage, cooled, baked cookies can be frozen in an airtight freezer-safe container or a heavy-duty freezer bag for up to 3 months. To prevent sticking, you can layer them with parchment paper. Thaw frozen cookies at room temperature for a few hours, or gently warm them in the microwave for a few seconds for a delightful “fresh-baked” feel.
- **Freezing Cookie Dough for Future Baking:** Want to have fresh, warm cookies on demand whenever a craving strikes? This is a fantastic make-ahead option!
- **Scoop & Freeze:** Scoop the raw cookie dough into individual balls (3 tablespoons each) and place them on a parchment-lined baking sheet or plate.
- **Flash Freeze:** Freeze the dough balls until they are completely solid (this usually takes 1-2 hours).
- **Store:** Once solid, transfer the frozen dough balls to a freezer-safe bag or container, labeling with the date. They can be stored for up to 3 months.
- **Bake from Frozen:** When you’re ready to bake, simply place the frozen dough balls directly onto a prepared baking sheet. You don’t need to thaw them! Just add 1-2 minutes to the usual baking time (so, bake for approximately 11-14 minutes), keeping an eye on them for those golden edges and slightly soft centers.
Frequently Asked Questions (FAQs)
Got questions about baking these fun and festive Cake Batter Cookies? We’ve got answers!
Can I use a different flavor of cake mix?
Absolutely! While yellow or Funfetti cake mix gives that classic birthday cake flavor, you can certainly experiment with other standard cake mix flavors for a unique twist. Chocolate cake mix will yield a rich chocolate cookie, strawberry cake mix will give a fruity essence, or even lemon cake mix for a zesty treat. Just ensure it’s a standard, non-sugar-free mix for the best texture.
What if I don’t have instant pudding mix? Is it essential?
The instant pudding mix is a critical ingredient for achieving the signature super soft and remarkably chewy texture of these cookies. While you *could* technically make these cookies without it, the texture would be noticeably different – likely less moist, less tender, and possibly more crumbly. It’s highly recommended to use instant pudding mix for the best, most authentic cake batter cookie experience.
My cookies spread too much and ended up flat. What went wrong?
This is a common issue and usually has a few culprits:
- **Insufficient Chilling:** The most frequent reason is not chilling the dough long enough (or at all). Cold butter in the dough prevents excessive spreading.
- **Butter Too Soft:** If your butter was overly soft or melted when you started, it can lead to flat cookies. Use butter at a cool room temperature, where it’s still firm but pliable.
- **Warm Baking Sheet:** Always use a cool baking sheet for each batch. Placing dough on a warm sheet will cause the butter to melt too quickly and spread.
- **Oven Temperature:** An inaccurate oven temperature (too low) can also contribute to spreading. Using an oven thermometer can help.
How can I make these cookies even more festive or customize them?
There are many ways to enhance their festive appeal! Beyond the recommended sprinkles and white chocolate chips, consider:
- **Colorful Glaze:** Drizzle with a simple powdered sugar glaze tinted with food coloring.
- **Cream Cheese Frosting:** Top cooled cookies with a swirl of cream cheese frosting.
- **Extra Mix-ins:** Add chopped nuts, different types of chocolate, or even crushed candies.
- **Food Coloring:** Add a few drops of gel food coloring to the dough itself for vibrant, colorful cookies!
The Ultimate Cake Batter Cookies Recipe
Ready to bake a batch of pure happiness? Here’s the complete recipe for these irresistible, soft, and chewy cake batter cookies!
More Delicious Cookie Recipes You’ll Love:
Cookies
The BEST Snickerdoodle Recipe
Desserts
Classic Oatmeal Chocolate Chip Cookies
Cookies
Easy White Chocolate Macadamia Nut Cookies
Desserts
Light and Airy Meringue Cookie Recipe
Classic Cake Batter Cookies
By Chelsea Lords
These Cake Batter Cookies deliver all the fun and flavor of birthday cake in a soft, chewy cookie, complete with golden edges, rich white chocolate chips, and a rainbow of sprinkles. They’re guaranteed to be a crowd-pleaser!
Print Recipe
Watch the Recipe Video
For a visual guide, watch the recipe video below to see each step in action! This video provides helpful tips and shows you exactly how to achieve perfect results.
Note: This link provides direct access to the video content. For an embedded player on a live site, JavaScript would typically be used.
Equipment You’ll Need
- Large Mixing Bowls (at least two)
- Electric Mixer (stand mixer with paddle attachment or a hand mixer)
- Measuring Cups and Spoons
- Rubber Spatula
- Sheet Pan (15″ x 10″) or larger, preferably two, lined with parchment paper or a silicone baking mat
- Cookie Scoop (optional, but highly recommended for even sizing)
- Wire Cooling Rack
Ingredients
- 12 tablespoons (1 ½ sticks) unsalted butter, softened to room temperature
- 3/4 cup light brown sugar, lightly packed
- 1/4 cup granulated sugar
- 1 large egg, at room temperature
- 1-1/2 teaspoons pure vanilla extract
- 1/2 teaspoon baking soda
- 1/2 teaspoon fine sea salt
- 1/3 cup instant vanilla pudding mix (dry powder, *not* sugar-free or fat-free, *do not prepare*)
- 1 cup Funfetti cake mix (dry powder, or classic yellow cake mix)
- 1-1/4 cups all-purpose flour
- 1/2 cup jimmie-style sprinkles, plus extra for topping (optional)
- 1 cup white chocolate chips, plus extra for topping (optional)
Instructions
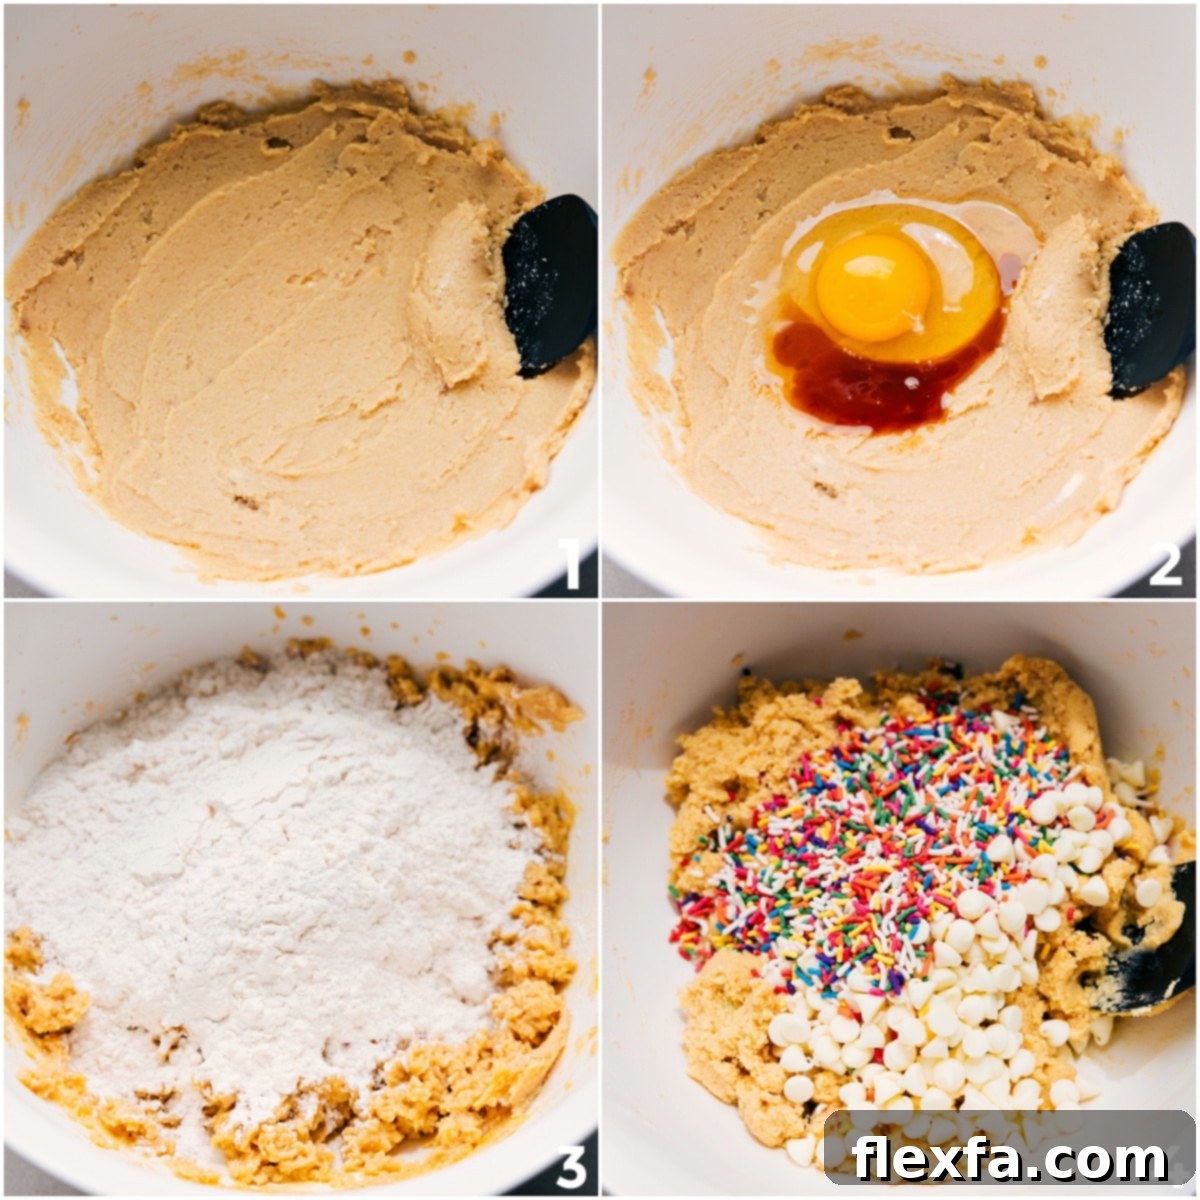
- Cream Wet Ingredients: In a large mixing bowl, using an electric mixer (either a stand mixer with the paddle attachment or a hand mixer), beat together the softened unsalted butter, light brown sugar, and granulated sugar. Continue beating on medium speed until the mixture is completely smooth, light in color, and creamy in texture (this usually takes about 2-3 minutes). Next, add the large egg and vanilla extract, mixing until they are just combined and fully incorporated. Be sure to scrape down the sides of the bowl with a rubber spatula as needed to ensure everything is evenly mixed.
- Combine Dry Ingredients: In a separate medium-sized bowl, whisk together the baking soda, salt, the dry, unprepared instant vanilla pudding mix, and the dry, unprepared cake mix. Whisk thoroughly until all these dry ingredients are evenly distributed and no lumps remain. This step ensures that the leavening and flavor agents are well-dispersed throughout the dough.
- Mix Dough: Gradually add the dry ingredient mixture from the medium bowl into the wet ingredients in the large bowl. Begin mixing on low speed until the ingredients are just combined and a cohesive dough forms. It’s crucial not to overmix the dough at this stage, as overmixing can lead to tougher cookies. The cookie dough will become quite thick.
- Fold in Add-ins: Once the dough is formed, gently fold the 1/2 cup of jimmie-style sprinkles and 1 cup of white chocolate chips into the thick cookie dough using a sturdy rubber spatula. Mix just until the sprinkles and chocolate chips are evenly distributed throughout the dough.
- Chill Dough (Don’t Skip This!): Using a cookie scoop (approximately 3 tablespoons in size) or your hands, form round cookie dough balls. If you prefer precision, weigh each dough ball to about 60 grams for consistent baking. Place the formed dough balls on a plate or a small baking sheet, cover them tightly with plastic wrap, and chill them in the refrigerator for at least 1 hour. This crucial step is essential for preventing the cookies from spreading too much in the oven and ensures you get thick, wonderfully chewy cookies.
- Prepare for Baking: Preheat your oven to 350°F (175°C). Line a large baking sheet with parchment paper or a silicone baking mat. If you’re baking multiple batches, prepare a second lined baking sheet.
- Bake Cookies: Arrange no more than 6 chilled cookie dough balls on the prepared baking sheet, ensuring there is ample space between them (about 2 inches apart) to allow for even spreading during baking. Bake for 9-13 minutes, or until the edges are lightly golden brown and the centers still appear slightly soft, puffy, and a tiny bit underbaked. The ideal baking time for my oven is typically around 11 minutes, but adjust according to your oven’s specific characteristics.
- Cool and Serve: Once baked, remove the sheet pan from the oven. Let the cookies cool on the hot baking sheet for an additional 3-4 minutes. While they are still warm on the pan, you can optionally and gently press a few extra white chocolate chips and sprinkles onto the tops for a more decorative and inviting finish. After this initial cooling on the pan, carefully transfer the cookies to a wire cooling rack to cool completely. These cookies are truly at their absolute best when enjoyed fresh on the same day they are made, but they will remain deliciously soft and flavorful for days if stored properly.
Recipe Notes
Storage for Baked Cookies: Once your delicious Cake Batter Cookies have completely cooled to room temperature, store any leftovers in an airtight container at room temperature for up to 3 days. To keep them extra soft, you can place a slice of plain bread in the container with the cookies. For longer storage, cooled baked cookies can be frozen for up to 3 months (refer to the “Storage and Make-Ahead Options” section above for detailed freezing instructions).
Nutrition Information
Approximate nutritional values per serving. These values are automatically calculated and may vary based on specific brands and ingredients used.
- Serving Size: 1 cookie
- Calories: 289 kcal
- Carbohydrates: 43g
- Protein: 3g
- Fat: 12g
- Saturated Fat: 7g
- Cholesterol: 31mg
- Sodium: 215mg
- Potassium: 73mg
- Fiber: 1g
- Sugar: 27g
- Vitamin A: 239 IU
- Vitamin C: 1mg
- Calcium: 62mg
- Iron: 1mg
Nutrition information is automatically calculated and should be used as an approximation only. Individual results may vary significantly based on specific ingredient brands, preparation methods, and exact serving sizes. This information is not a substitute for professional dietary advice.
Love this recipe? Leave a comment and a star rating below! Your feedback helps other bakers discover delicious treats and makes this community even better. Happy baking!