
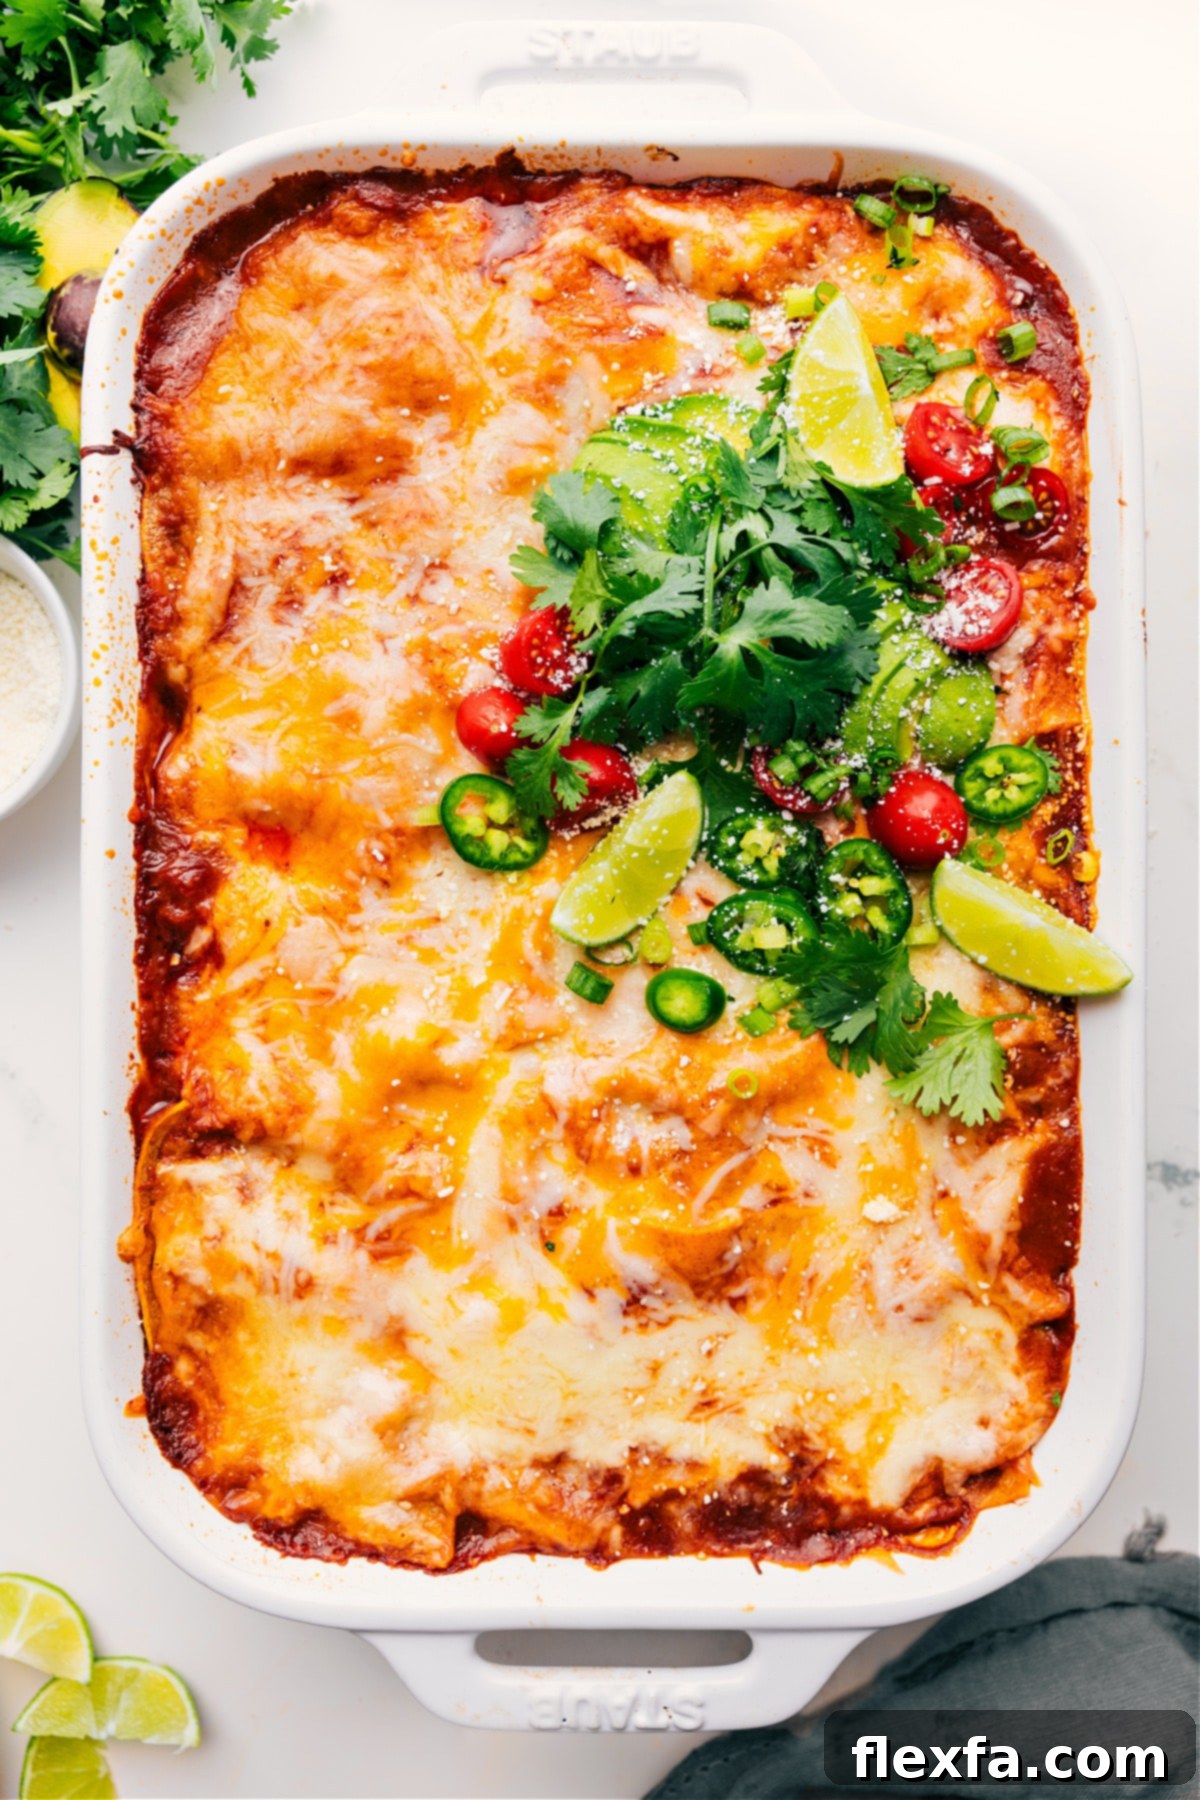
Chicken Enchilada Casserole is a true culinary delight – deeply saucy, incredibly flavorful, and guaranteed to satisfy even the pickiest eaters! Imagine tender layers of corn tortillas generously coated in a rich enchilada sauce, embracing a hearty filling of seasoned chicken and beans, all crowned with a luscious blanket of bubbly, melted cheese. This casserole transforms the classic enchilada experience into an effortless, bake-and-serve dish that’s perfect for any occasion.
Elevate your meal by pairing this hearty casserole with vibrant Roasted Vegetables for a balanced plate, or add a burst of refreshing sweetness with a zesty Mandarin Orange Salad. Both options complement the rich flavors of the enchiladas beautifully, creating a well-rounded and memorable dinner.
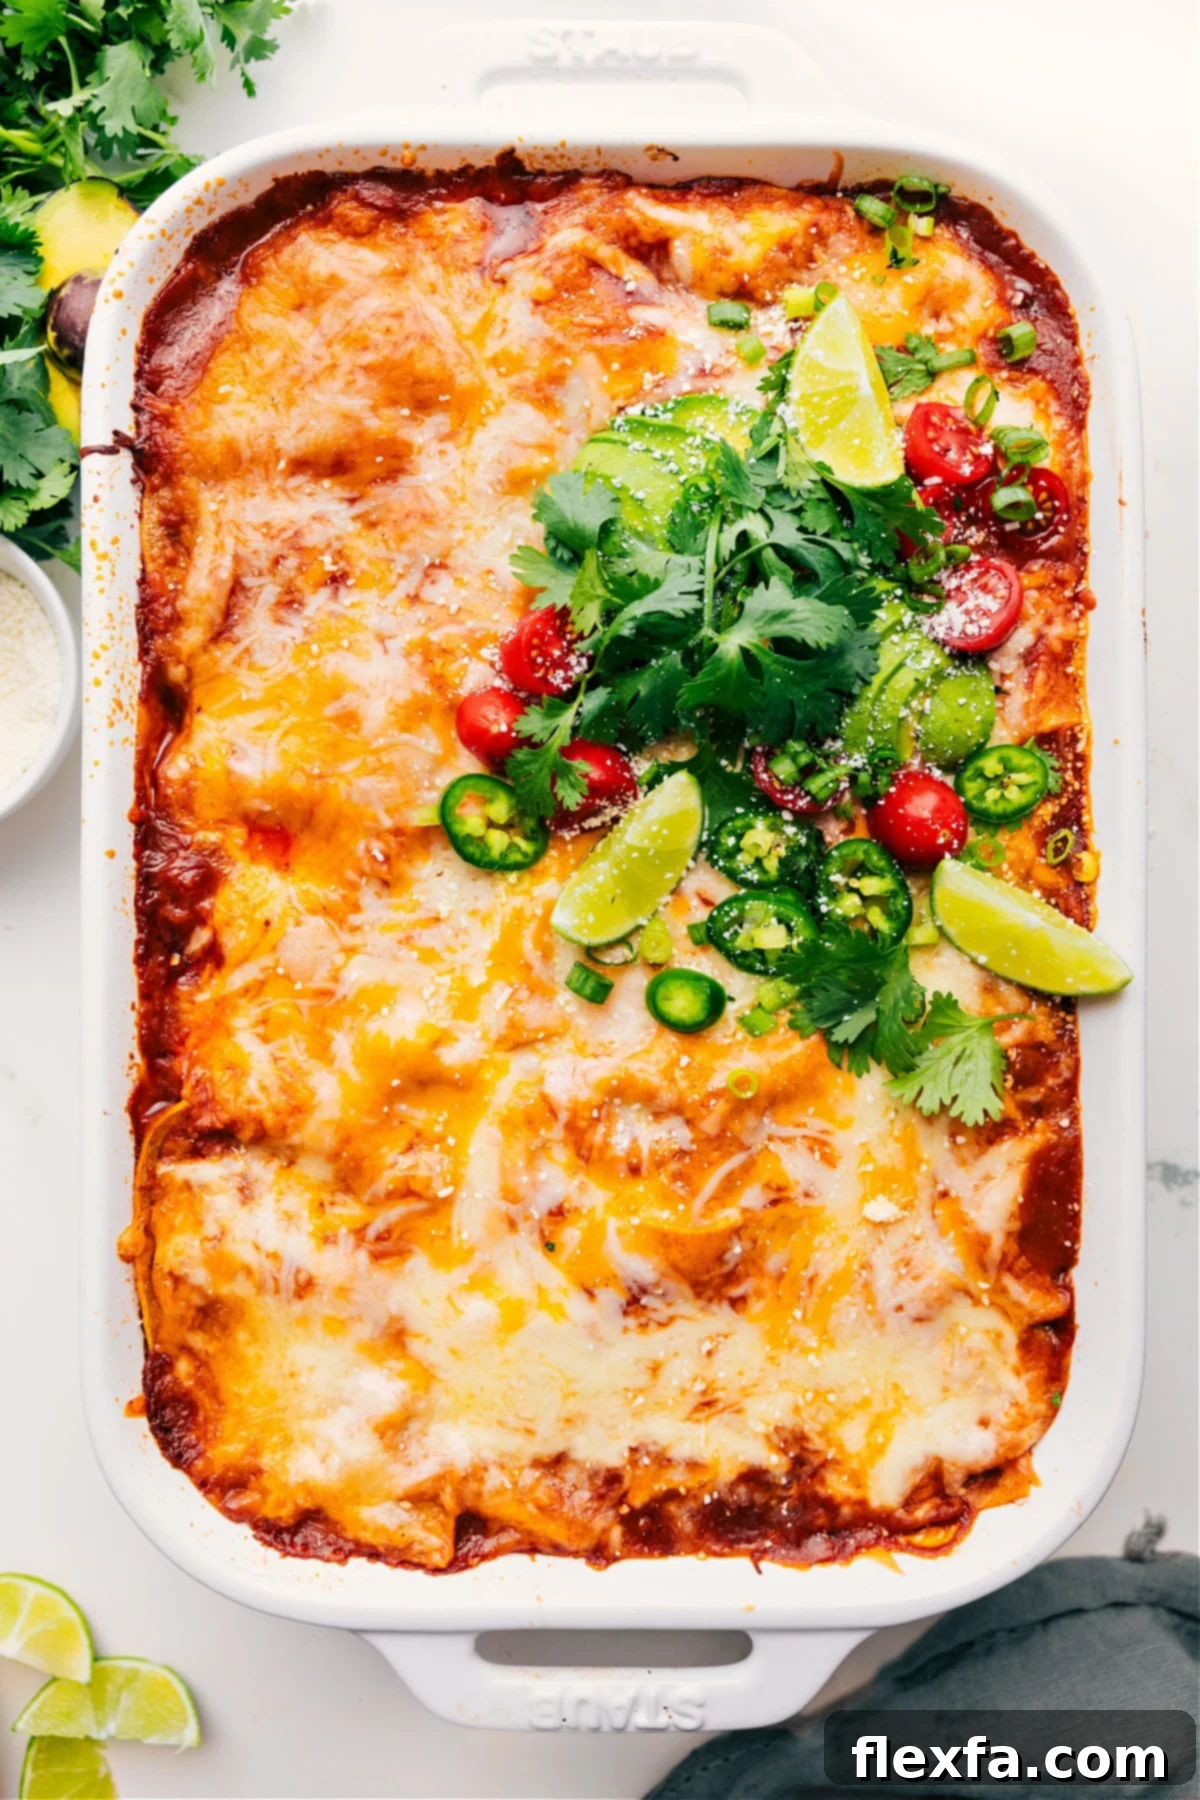
The Ultimate Cheesy Chicken Enchilada Casserole
There’s something inherently comforting about a well-made chicken enchilada, but I have to confess, this casserole version takes the crown for me. It masterfully achieves the perfect harmony of textures and flavors in every single bite – from the soft, sauce-soaked tortillas to the robust, savory filling, and the irresistible gooey cheese. This dish isn’t just a meal; it’s an experience, delivering a profound sense of satisfaction that makes it an instant family favorite.
I genuinely believe I could enjoy this chicken enchilada casserole multiple nights a week without ever growing tired of its deliciousness – well, unless perhaps some mouth-watering Chicken Gyros were also gracing the dinner table!
Beyond its incredible taste, this casserole shines as a thoughtful and practical gesture. It’s an ideal dish to prepare for a family in need, perhaps after a major life event, or for a dear friend celebrating the arrival of a new baby. Its heartwarming, substantial nature makes it a perfect comfort food offering. What’s more, it’s exceptionally freezer-friendly, allowing you to prepare it in advance and bake it when convenience calls. I’ll delve deeper into the wonders of freezing this casserole later on, ensuring you can enjoy its goodness whenever you desire.
Key Ingredients for Your Chicken Enchilada Casserole
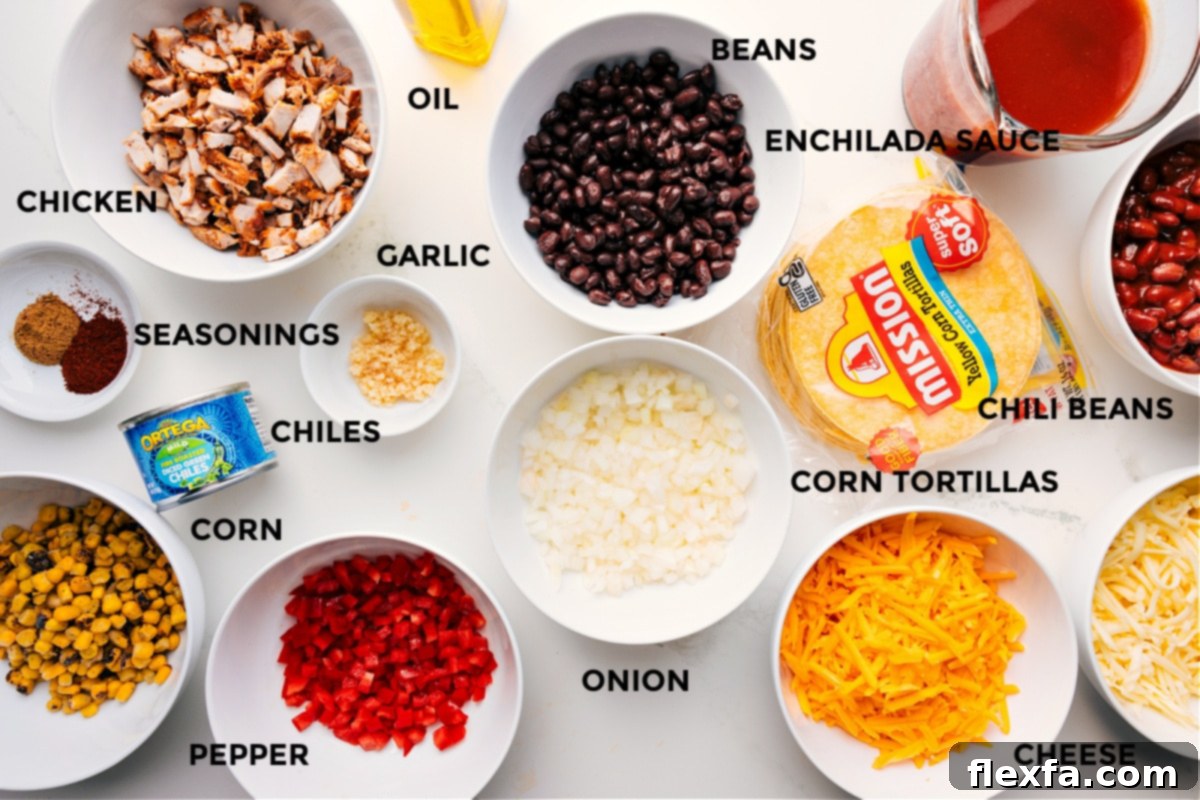
Crafting a truly memorable chicken enchilada casserole begins with understanding the role each ingredient plays. Here’s a closer look at what you’ll need and why it matters:
- Olive Oil: The foundation for flavor. A tablespoon of good quality olive oil helps to gently sauté your aromatics, preventing them from sticking while infusing a subtle richness into the base of your filling.
- Onion, Bell Pepper, Garlic: These three ingredients form the aromatic trifecta that creates a robust and deeply flavorful base for your chicken filling. Sautéing them until softened brings out their natural sweetness and savory notes.
- Chili Powder, Cumin: The essential spices for authentic Tex-Mex flavor. Cooking these spices briefly with the vegetables helps to “bloom” their flavors, releasing their full fragrant potential and adding warmth and depth to the dish.
- Green Chiles: A secret weapon for adding a mild, earthy heat and complex flavor. There’s no need to drain these; the liquid adds extra moisture and a subtle tang to the filling, enhancing the overall taste profile.
- Black & Chili Beans: A fantastic duo for texture and protein. Remember to rinse your black beans thoroughly to remove excess sodium. For the chili beans, simply dump the entire can into the pan; their savory sauce contributes significantly to the filling’s depth and sauciness. You can also opt for drained pinto beans if chili beans are unavailable.
- Frozen Corn: A convenient way to add a burst of sweetness and vibrant color. No thawing is necessary; simply add it directly to the pan. It will warm through and soften perfectly within the filling.
- Rotisserie Chicken: The ultimate time-saver! Pre-cooked rotisserie chicken provides tender, flavorful meat with minimal effort. Chop it finely to ensure even distribution throughout the casserole, making every bite satisfying.
- Enchilada Sauce: The heart of any enchilada dish. Choose your favorite brand of mild or medium red enchilada sauce. The quality of your sauce will significantly impact the overall flavor, so pick one you love, or consider making your own for an extra fresh touch.
- Corn Tortillas: The traditional choice for authentic enchiladas. Halving them makes them easier to layer neatly in a casserole dish, ensuring every section gets that comforting tortilla base. For an alternative, see our tip below!
- Cheddar & Monterey Jack Cheese: A classic and beloved combination. Using freshly shredded cheese (rather than pre-shredded) is key here, as it melts more smoothly and yields a creamier, more luxurious texture. The sharp cheddar provides a bold flavor, while Monterey Jack offers a beautiful stretch and mild creaminess.
- Toppings (Optional): While the casserole is divine on its own, toppings offer a fresh contrast and personalize each serving. Prep these while the casserole bakes for a quick and impressive finish. Think fresh cilantro, diced avocado, a dollop of sour cream, or a squeeze of lime.
Crafting Your Casserole: Step-by-Step Perfection
Making this chicken enchilada casserole is surprisingly straightforward, delivering maximum flavor with minimal fuss. Follow these simple steps for a dish that tastes like it took hours, but comes together in a flash:
- Prepare Your Workspace and Oven: Begin by preheating your oven to 375°F (190°C). This ensures the oven is at the perfect temperature when your casserole is ready to bake, leading to even cooking and a golden-brown top. Lightly grease a 9×13-inch baking pan with cooking spray or a thin layer of oil. This prevents sticking and makes serving easier.
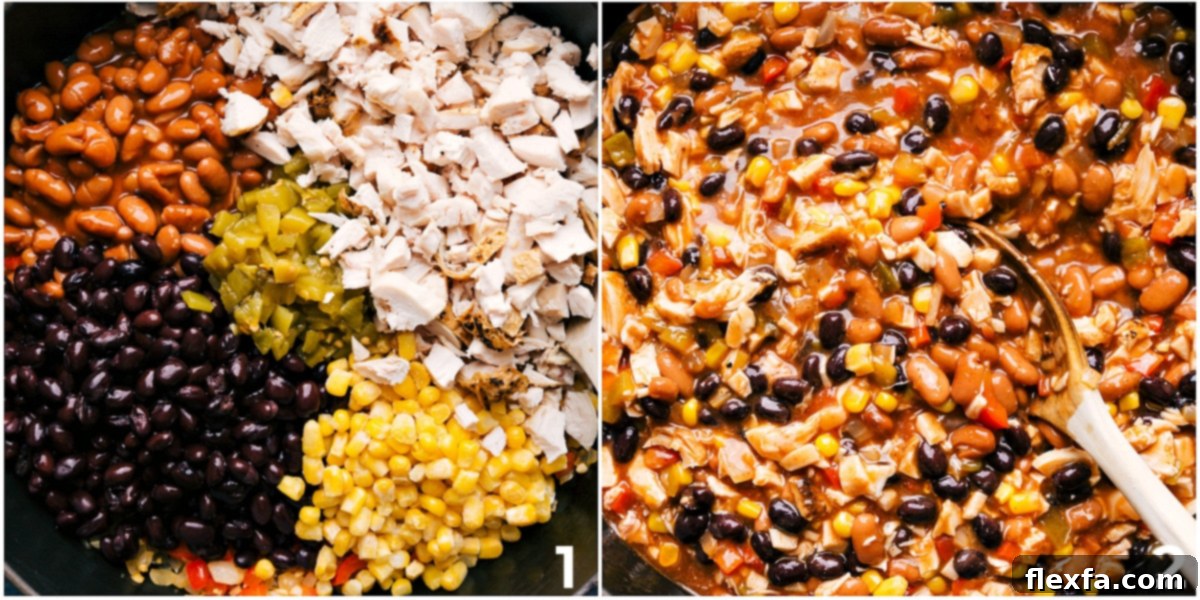
- Cook the Flavorful Filling: In a large skillet or pan, heat the olive oil over medium heat until it shimmers. Add the diced yellow onion and red bell pepper, sautéing for 5-6 minutes until they become tender and slightly translucent. Next, stir in the minced garlic for just 30 seconds until fragrant, being careful not to burn it. Reduce the heat if necessary. Introduce your chili powder and ground cumin, stirring for another 30 seconds to “bloom” the spices and release their aromatic oils. Turn the heat to low, then add the undrained green chiles, rinsed black beans, chili beans (undrained), frozen corn, and chopped rotisserie chicken. Pour in 2 cups of the enchilada sauce. Stir gently to combine all ingredients, allowing them to warm through. Taste the mixture and season with salt and pepper as needed. Remove the filling from the heat once combined.
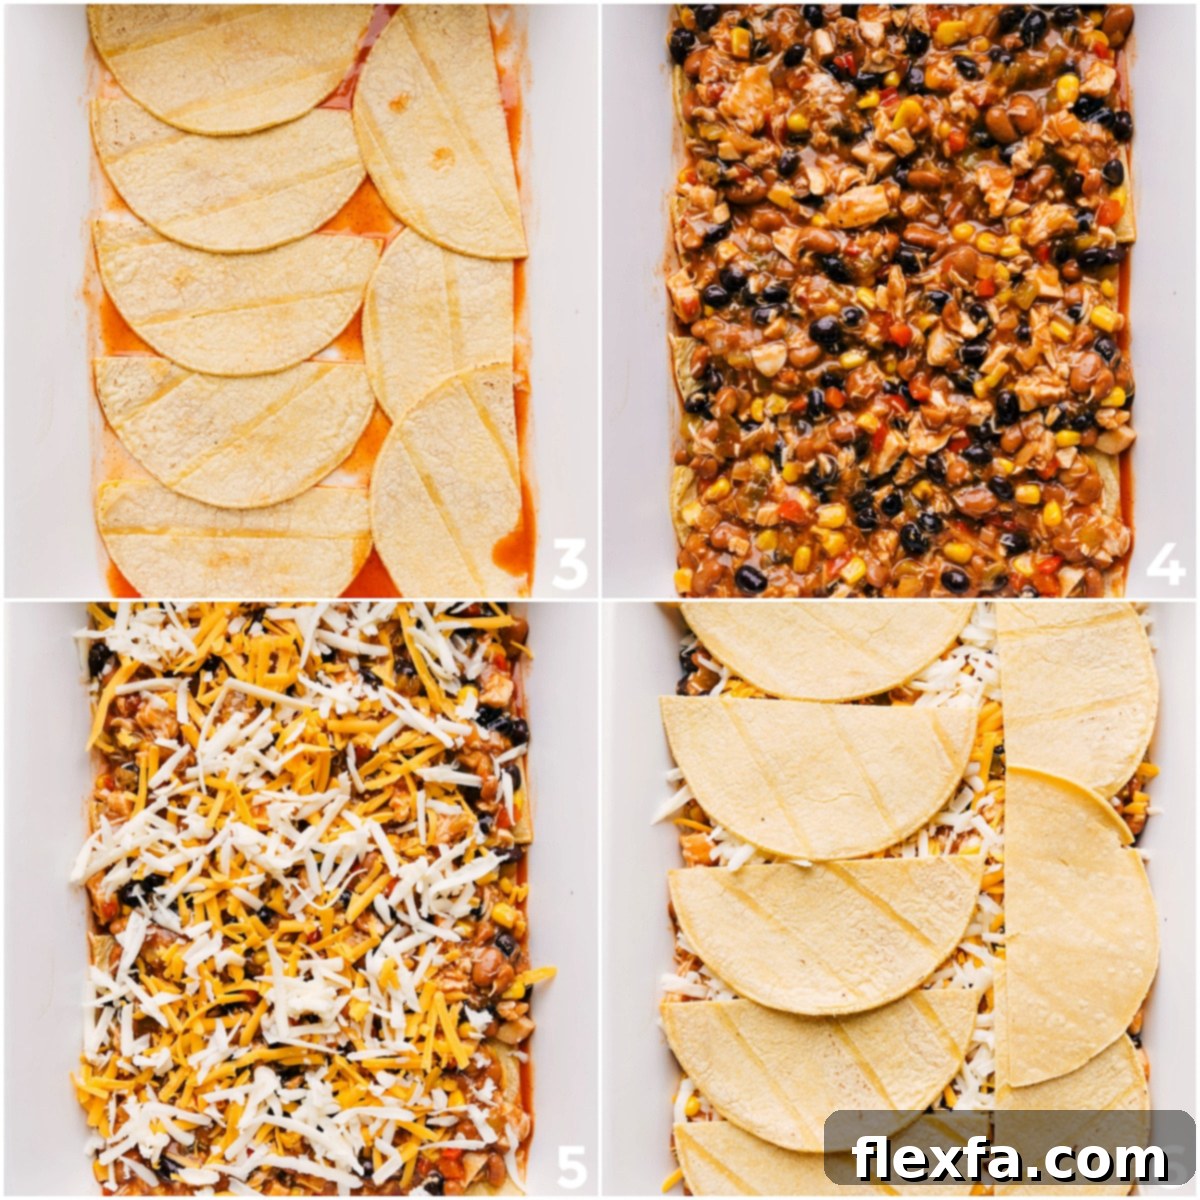
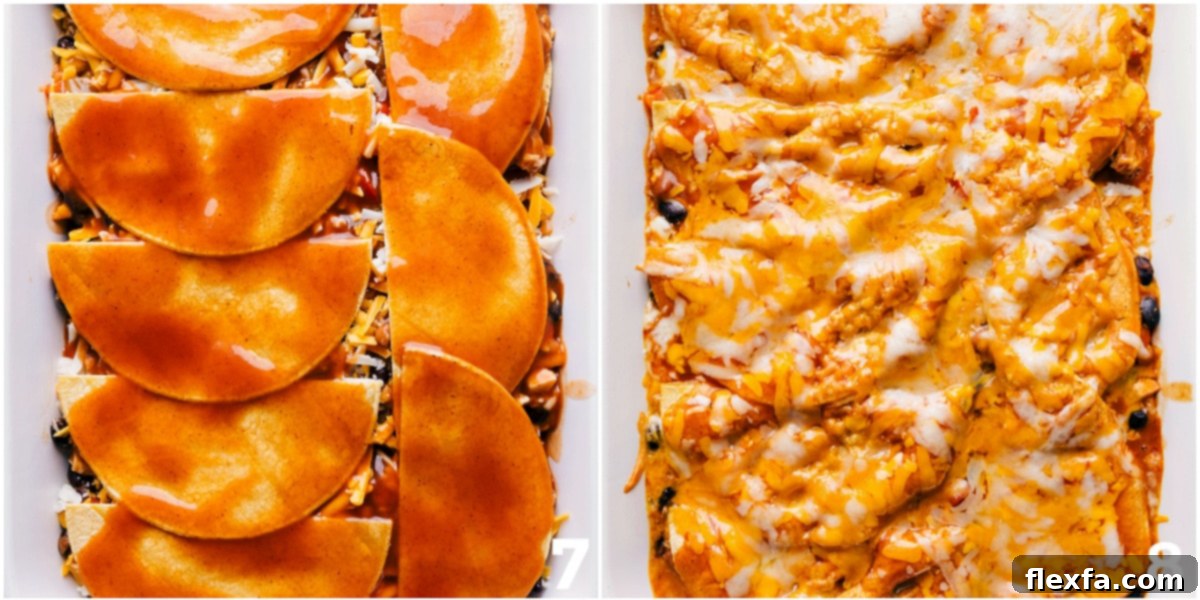
- Master the Layers: This is where the magic happens! Pour about 1/2 cup of the remaining enchilada sauce onto the bottom of your prepared 9×13-inch pan, spreading it evenly. This layer prevents tortillas from sticking and adds moisture from the bottom up. Arrange 8 halved corn tortillas over the sauce, overlapping slightly to cover the base. Spoon one-third of your delicious chicken and bean mixture evenly over the tortillas. Sprinkle generously with 1/2 cup of shredded sharp Cheddar cheese and 1/2 cup of shredded Monterey Jack cheese. Repeat this layering process: add another 8 tortilla halves, followed by another third of the chicken mixture, and then another 1/2 cup of each cheese. For the final layer, place the last 8 tortilla halves, the remaining chicken mixture, and another 1/2 cup of each cheese. Finish with a final layer of tortilla halves, the last 1/2 cup of enchilada sauce, and the remaining 1/2 cup of Cheddar and 1/2 cup of Monterey Jack cheese, ensuring a beautiful cheesy top.
- Bake to Bubbly Perfection: Lightly spray one side of a piece of aluminum foil with cooking spray (to prevent cheese from sticking) and carefully cover the casserole dish. Bake in the preheated oven for 20 minutes. This initial covered bake allows the flavors to meld and the casserole to heat through evenly without the top browning too quickly. After 20 minutes, remove the foil and continue baking for another 10-15 minutes, or until the cheese is gloriously melted, bubbly, and slightly golden brown around the edges.
- Rest and Serve with Flair: Once out of the oven, resist the urge to dive in immediately! Let the casserole stand for 5-10 minutes. This crucial resting period allows the layers to set, making it much easier to cut and serve neat portions. Serve your comforting casserole hot with your favorite toppings. I personally love a refreshing splash of fresh lime juice, a sprinkle of bright cilantro, creamy fresh sliced avocado, a few juicy cherry tomatoes, and a dollop of cooling sour cream to complete this culinary masterpiece. Enjoy every saucy, cheesy bite!
Quick Tip: Tortilla Swaps
Not a fan of corn tortillas or prefer a softer bite? Feel free to swap them for wheat or flour tortillas. They will absorb the sauce slightly differently but still create a delicious casserole. If using flour tortillas, you might want to lightly toast them in a dry skillet for a minute per side before layering to prevent them from becoming too soft. For a gluten-free option, ensure your corn tortillas are certified gluten-free or look for specific gluten-free tortilla brands.
Customizing Your Casserole: Delicious Variations
Creative Twists for Your Enchilada Casserole
One of the joys of cooking casseroles is their incredible versatility. Feel free to experiment with these variations to tailor the Chicken Enchilada Casserole to your taste and dietary preferences:
- Vegetarian Delight: Easily transform this into a hearty vegetarian meal by swapping out the chicken. Add an extra can of black beans, or incorporate cooked lentils, crumbled firm tofu, sautéed mushrooms, or even roasted sweet potato cubes for a delicious plant-based filling.
- Dial Up the Spice: If you crave more heat, don’t hesitate to add a finely diced jalapeño (seeds removed for moderate heat, left in for extra kick) or a serrano pepper to the sautéed vegetables. You can also opt for a hot enchilada sauce instead of mild, or stir in a pinch of cayenne pepper or a dash of your favorite hot sauce into the filling mixture.
- Embrace Homemade Sauce: While store-bought enchilada sauce offers convenience, making your own homemade enchilada sauce from scratch can elevate the flavor profile with a fresher, more customized taste. It’s surprisingly simple and allows you to control the spice and richness.
- Cheese Adventures: Don’t limit yourself to just Cheddar and Monterey Jack. For a spicier kick, replace Monterey Jack with Pepper Jack cheese. Other fantastic melting cheeses include Oaxaca, Asadero, or even a sprinkle of crumbled Cotija cheese after baking for a salty finish. A blend of Mexican cheeses also works wonderfully.
- Add More Veggies: Boost the nutritional value and texture by incorporating other vegetables. Sautéed spinach, zucchini, or bell peppers of different colors (yellow, orange) can be added to the chicken and bean mixture.
- Pork or Beef Instead of Chicken: If you have leftover cooked pork carnitas or seasoned ground beef, they make excellent substitutes for the chicken, offering a different but equally delicious flavor profile.
Storage & Freezing for Future Feasts
Make Ahead and Freezer-Friendly Tips
This Chicken Enchilada Casserole is a fantastic make-ahead meal, perfect for busy weeknights or for sharing with loved ones. Its ability to freeze beautifully means you can enjoy this comforting dish with minimal effort whenever the craving strikes.
To Make Ahead and Refrigerate:
Assemble the casserole as directed, covering it tightly with plastic wrap and then aluminum foil. Store in the refrigerator for up to 2-3 days before baking. When ready to bake, remove the plastic wrap and foil, then bake as per the recipe instructions. You might need to add an extra 5-10 minutes to the baking time if starting from cold.
To Freeze (Unbaked):
Prepare the casserole exactly as instructed, but do not bake it. Use an oven-safe, freezer-friendly container (such as an aluminum foil pan or a Pyrex dish). Cover the casserole tightly first with a layer of plastic wrap, ensuring it touches the surface of the casserole to prevent freezer burn, then with a layer of heavy-duty aluminum foil. Label with the date and cooking instructions. Freeze for up to 3 months.
Baking from Frozen:
When you’re ready to enjoy, remove the frozen casserole from the freezer. Discard the plastic wrap, but keep the foil cover on. Place the casserole in a cold oven, then set the temperature to 350°F (175°C). Baking from a cold oven helps prevent thermal shock to your dish. Bake, covered, for approximately 1 hour and 15 minutes. Then, remove the foil and continue baking for another 15-20 minutes, or until the cheese is melted, bubbly, and the center is thoroughly hot. A meat thermometer inserted into the center should read at least 165°F (74°C). Allow it to rest for 5-10 minutes before serving.
To Freeze (Baked):
If you have leftovers or prefer to bake the entire casserole and then freeze portions, allow the baked casserole to cool completely. Cut it into individual servings, then wrap each portion tightly in plastic wrap and then foil. Store in freezer-safe bags or containers for up to 2-3 months. Reheat individual portions in the microwave or oven until warmed through.
Serving Suggestions and Perfect Pairings
While our Chicken Enchilada Casserole is a complete meal in itself, pairing it with the right sides can elevate your dining experience. Here are some fantastic suggestions:
- Fresh Green Salad: A simple mixed green salad with a light vinaigrette or a vibrant Mandarin Orange Salad offers a refreshing contrast to the rich casserole.
- Roasted Vegetables: Our easy Roasted Vegetables are a perfect match, adding nutritious and delicious balance. Think zucchini, bell peppers, or broccoli florets.
- Rice: A classic side for Tex-Mex dishes. Serve with fluffy white rice, savory Mexican rice, or a refreshing cilantro lime rice.
- Beans: If your casserole isn’t packed with enough beans for your liking, a simple side of seasoned black beans or refried beans is always a welcome addition.
- Chips and Dips: Tortilla chips served with fresh salsa, guacamole, or a creamy queso dip can turn your meal into a festive spread.
- Mexican Street Corn (Elote): For an authentic touch, serve with grilled or roasted corn on the cob slathered in a creamy, tangy sauce and sprinkled with cotija cheese and chili powder.
Frequently Asked Questions (FAQ)
Here are some common questions about making Chicken Enchilada Casserole:
- Can I use raw chicken? For best results and to save time, we recommend using pre-cooked chicken like rotisserie chicken. If using raw chicken breast or thighs, cook and shred them first before adding to the filling mixture.
- How do I prevent soggy tortillas? A common concern! Ensuring the tortillas are lightly dipped in sauce or quickly fried (not deeply, just a quick dip in warm oil for a few seconds per side) before layering can create a barrier that prevents them from becoming too soft. Also, starting with a layer of sauce on the bottom helps.
- How long does this casserole last in the refrigerator? Leftovers, properly stored in an airtight container, will keep well in the refrigerator for 3-4 days.
- Can I use a different type of beans? Absolutely! Pinto beans, kidney beans, or even cannellini beans can be substituted for black beans or chili beans, though the flavor profile will shift slightly.
- Is this casserole spicy? As written, this recipe is designed to be mild. You can easily adjust the spice level by choosing a hot enchilada sauce, adding fresh jalapeños or serranos, or incorporating a pinch of cayenne pepper into the filling.
More Easy Chicken Recipes You’ll Love
- Pesto Chicken Salad – a fantastic, flavorful lunch option.
- Quinoa Enchilada Bake – a wholesome and delicious dish featuring sweet potatoes.
- Rotisserie Chicken Tacos – quick and easy, ready in about 20 minutes for a vibrant weeknight meal.
- Chicken Gnocchi Soup – a comforting Olive Garden copycat that’s perfect for chilly evenings.
- Chicken Enchilada Pasta – a cheesy and utterly delicious one-skillet wonder.

Chicken Enchilada Casserole
Equipment
-
9 x 13-inch baking pan
-
Large pan
-
Aluminum foil
Ingredients
- 1 tablespoon olive oil
- 1 cup diced yellow onion
- 1 cup diced red bell pepper
- 2 teaspoons minced garlic
- 1 teaspoon ground chili powder
- 1 teaspoon ground cumin
- 1 (4-ounce) can green chiles undrained
- 1 (15-ounce) can black beans drained and rinsed
- 1 (15-ounce) can chili beans undrained
- 1 cup frozen corn
- 3 cups chopped rotisserie chicken
- 3 cups mild red enchilada sauce divided
- 16 corn tortillas halved
- 2 cups shredded sharp Cheddar cheese
- 2 cups shredded Monterey Jack cheese
- Salt and pepper
- Toppings as desired such as cilantro, diced avocado, sour cream
Instructions
-
Preheat oven to 375°F (190°C). Spray a 9×13-inch pan with cooking spray and set aside.
-
Heat the oil in a large pan over medium heat. Once oil is shimmering, add in diced yellow onion and diced red pepper. Stir for 5–6 minutes or until softened. Add garlic and stir for 30 seconds; reduce heat if it starts to burn. Add chili powder and ground cumin. Stir for another 30 seconds or until fragrant. Reduce heat to low. Add diced green chilies, black beans, chili beans, frozen corn, chopped rotisserie chicken, and 2 cups mild enchilada sauce. Season sauce to taste with salt and pepper. Stir gently until combined and warmed through, then remove from the heat.
-
Pour 1/2 cup of the remaining enchilada sauce in the prepared 9×13-inch pan. Add 8 tortilla halves to cover the bottom of the pan. Spoon 1/3 of the chicken sauce on top. Add 1/2 cup sharp Cheddar cheese and 1/2 cup Monterrey Jack cheese. Add another 8 tortilla halves on top. Another 1/3 of the chicken mixture, 1/2 cup more Cheddar cheese and 1/2 cup more Monterrey Jack cheese. Add another layer of 8 tortilla halves, the remaining 1/3 of chicken mixture, another 1/2 cup Cheddar cheese, and another 1/2 cup Monterrey jack cheese. Finish by adding one more layer of tortilla halves, the final 1/2 cup enchilada sauce, and the final 1/2 cup Cheddar cheese and 1/2 cup Monterrey Jack cheese.
-
Lightly spray a piece of aluminum foil with cooking spray and secure over dish. Bake for 20 minutes. Remove the foil and bake for 10 more minutes or until cheese is melty and gooey on top.
-
Remove casserole from the oven and let stand for 5–10 minutes before cutting into it. Serve casserole with toppings of choice; I like a splash of fresh lime juice, a sprinkle of cilantro, fresh sliced avocado, a few cherry tomatoes, and some sour cream. Enjoy hot.
Recipe Notes
Note 2: I love to top this casserole with cilantro, diced red onion, thinly sliced green onion, and diced avocado.
Storage: Prepare according to the directions and either bake immediately or freeze unbaked in a freezer-to-oven container, covering tightly with plastic wrap and foil. To bake from frozen, remove the plastic and foil, then bake at 350°F for 1-1/2 hours or until the cheese is melted and the center is warm.
Nutrition
Calories: 625kcal |
Carbohydrates: 55.8g |
Protein: 36.5g |
Fat: 33.2g |
Cholesterol: 98mg |
Sodium: 710.4mg |
Fiber: 15.4g |
Sugar: 7g
Nutrition information is automatically calculated, so should only be used as an approximation.