
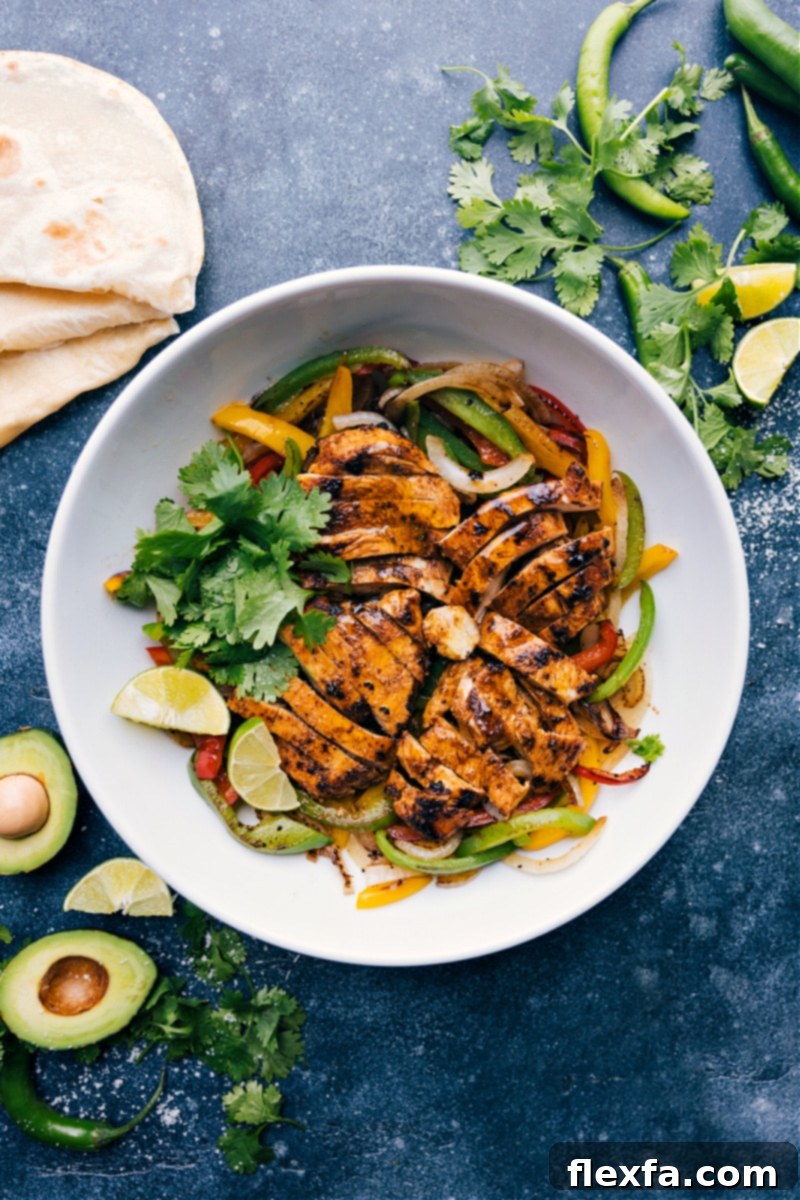
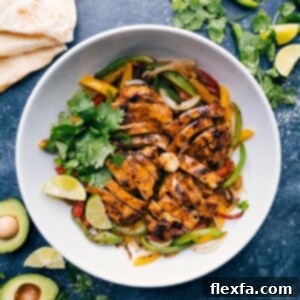
Chicken Fajitas offer a vibrant, flavor-packed dinner solution that brings the excitement of Tex-Mex cuisine right to your kitchen. Featuring tender, perfectly seasoned chicken, alongside sizzling sautéed onions and colorful bell peppers, this dish is a true crowd-pleaser. Whether you nestle these savory fillings into warm tortillas or serve them over a bed of rice, complemented by your favorite toppings, you’re in for an unforgettable culinary experience.
Once you master this classic, you might explore other delightful variations such as Sheet Pan Chicken Fajitas for minimal cleanup, rich Steak Fajitas, succulent Shrimp Fajitas, or even a wholesome Vegetarian Fajitas option for plant-based diners.
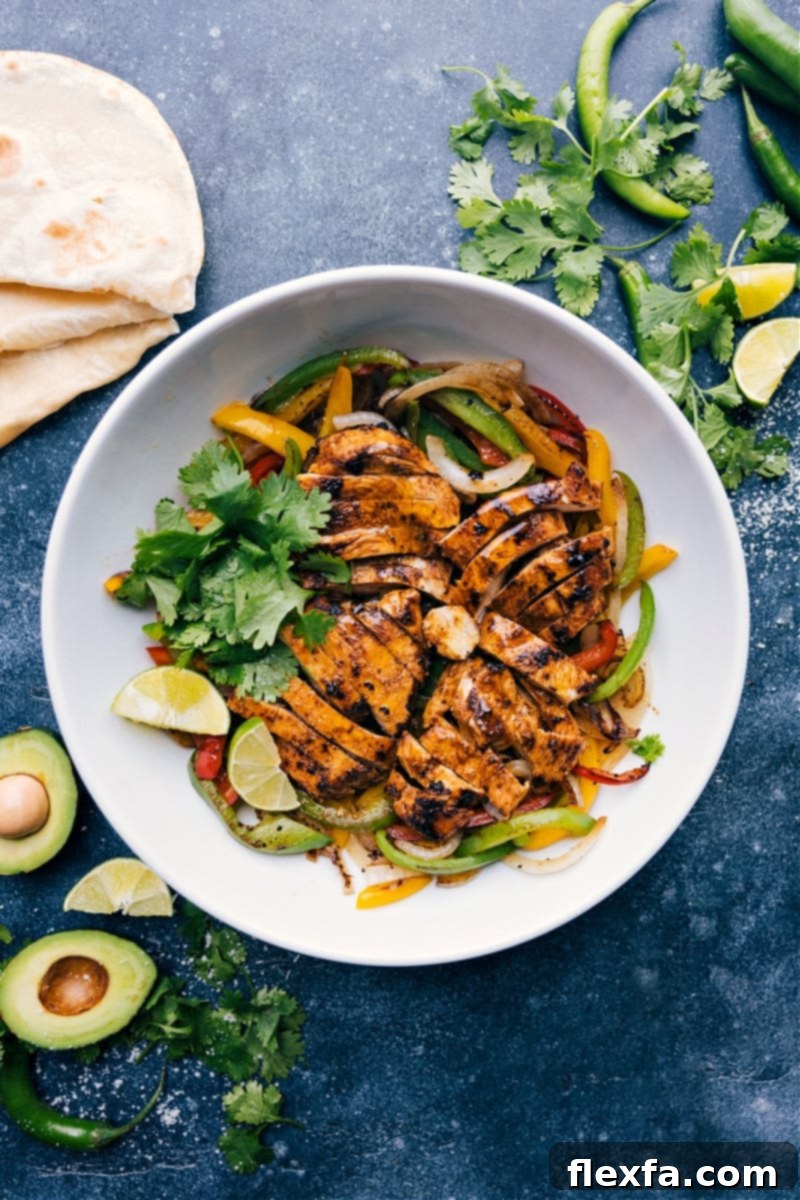
Unlock the Secret to the Best Homemade Chicken Fajitas!
These Chicken Fajitas are more than just a recipe; they’re a revelation in home cooking. We are absolutely devoted to this dish, making it a regular and much-anticipated staple in our home. It’s a testament to how effortlessly you can recreate restaurant-quality flavors and an exciting dining experience right in your own kitchen.
What makes these fajitas truly exceptional is their perfect balance of lean protein and an abundance of fresh vegetables. This thoughtful combination not only results in a meal that is profoundly protein-loaded, nourishing, and incredibly satiating but also bursts with layers of complex, vibrant flavors. It’s a meal that consistently delights every member of the family, providing that satisfying, authentic taste you’d typically seek out at your favorite Mexican eatery, especially when served with a lavish spread of fun, customizable toppings and additions piled high on the tender chicken and perfectly charred veggies.
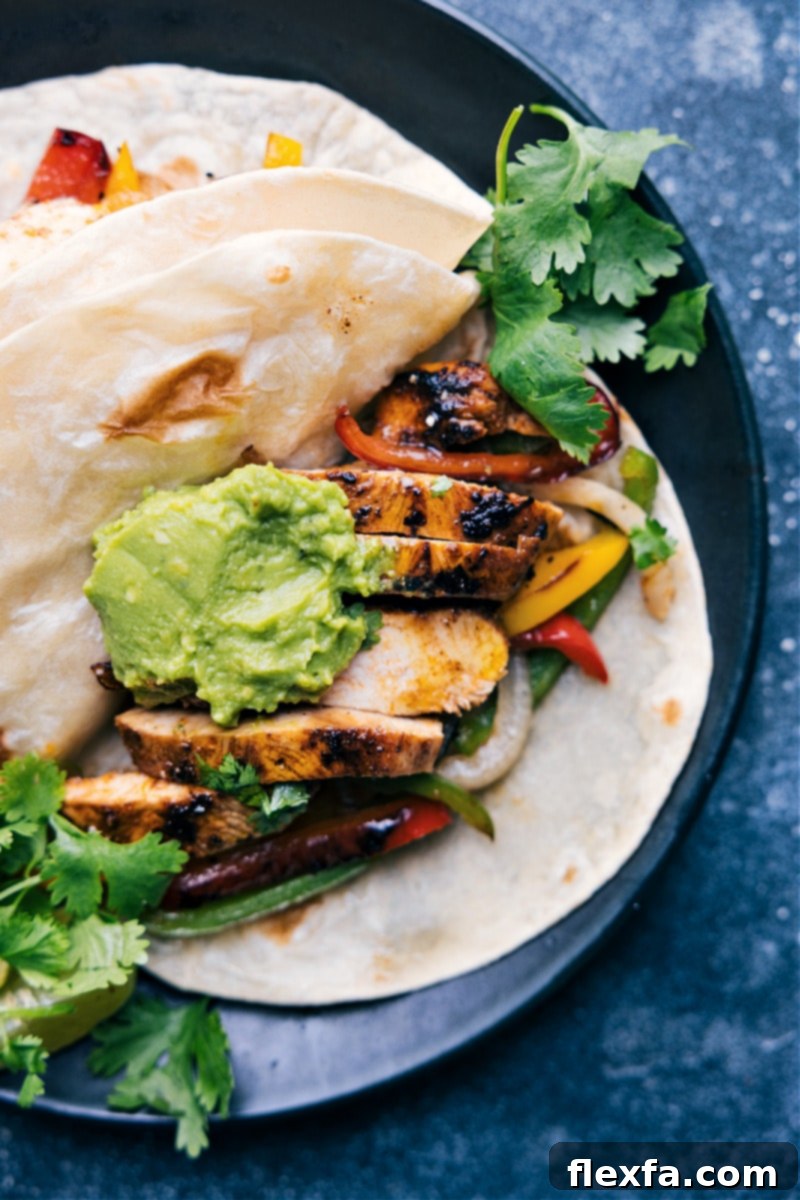
Essential Ingredients for Authentic Chicken Fajitas
Crafting the bulk of this incredible recipe requires just a handful of fresh, simple ingredients. You’ll need succulent **chicken** (breasts or thighs), vibrant bell **peppers**, aromatic **onions**, zesty **lime** juice, and a blend of savory **spices**. Beyond these core components, the magic truly unfolds when you select your favorite **toppings** and warm **tortillas** or opt for another serving foundation. It’s this combination of fresh produce, perfectly seasoned protein, and personalized garnishes that elevates a simple meal into a festive feast.
Elevate Your Fajita Experience: The Ultimate Toppings Guide
While chicken fajitas are undeniably delicious on their own, the selection of toppings and sides is where they truly transform into an extraordinary culinary delight. These additions are the “secret” to achieving outstanding flavors, textures, and a genuinely restaurant-style experience. For that authentic fajita spread, remember to prepare an abundant variety of toppings alongside soft, warm flour tortillas.
Here’s a breakdown of must-have toppings to customize your fajitas:
- Indulge in our exquisite Guacamolerecipe, a vibrant and creamy dip with roots in Hawaiian traditions. Alternatively, simply dice or thinly slice fresh, ripe avocados. If ripe avocados are hard to come by, convenient pre-made options like WHOLLY GUACAMOLE Minis can be a lifesaver.
- Enhance the tang and freshness with a quick, homemade food processor Salsa, easily prepared from canned tomatoes. For a chunkier, fresher option, add a scoop of bright Pico de Gallo or a creamy, zesty AvocadoSalsa.
- Drizzle with our practically famous Cilantro Lime Sauce, a bright and herbaceous dressing that adds an extra layer of zing.
- A squeeze of fresh lime from wedges and a sprinkle of chopped fresh cilantro provide immediate freshness and a burst of aromatic flavor.
- Cool and creamy sour cream (available in fat-free, lite, or regular versions) offers a delightful contrast to the warm, spicy fillings.
- Add a satisfying crunch with a handful of finely shredded lettuce.
- Complete the experience with a generous sprinkle of freshly grated or shredded cheese. Popular choices include a Mexican blend, sharp Cheddar, creamy queso fresco, or crumbly cotija cheese.
- For those who love a little extra kick, incorporate some thinly sliced jalapeños (fresh or pickled) to bring a pleasant heat.
Versatile Serving Suggestions: How to Enjoy Your Chicken Fajitas
Chicken fajitas are incredibly versatile and can be served in a myriad of ways, catering to different preferences and dietary needs. Here are some popular options to enjoy your perfectly cooked chicken and peppers:
- The classic choice: piping hot, warmed tortillas, piled high with your chicken, veggies, and a colorful array of your favorite toppings (as listed above).
- For a heartier meal, serve alongside fragrant Cilantro Lime Rice or fluffy quinoa. For a low-carb alternative, consider serving over a bed of cauliflower rice or fresh lettuce wraps.
- Round out your meal with savory Black Beans as a fulfilling side dish.
- Add a touch of sweetness and smoky flavor with a side of creamy Elote (Mexican street corn) or simple grilled corn on the cob.
Mastering Chicken Preparation for Tender Fajitas
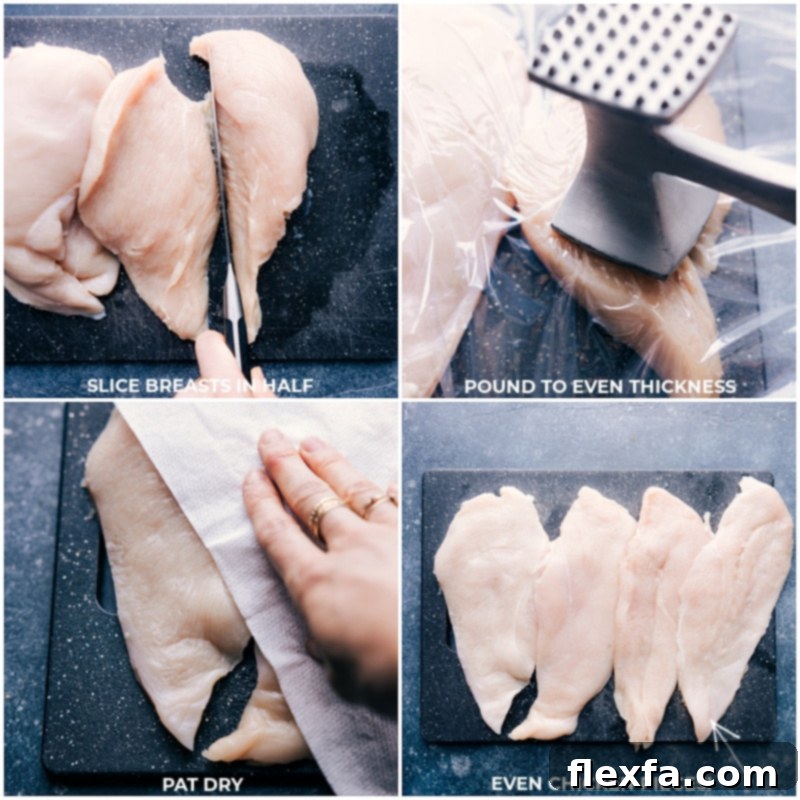
The secret to achieving perfectly cooked, juicy chicken fajitas quickly and easily lies in proper chicken preparation before it even hits the pan. Attempting to cook whole chicken breasts in a skillet can be time-consuming and often results in uneven cooking, with the exterior potentially burning before the interior is fully done. This is precisely why **we recommend cutting larger chicken breasts in half horizontally**, creating thinner cutlets.
Once halved, the next crucial step is to **gently pound the chicken breasts into evenly thick pieces**. The goal isn’t to flatten them excessively but rather to ensure a uniform thickness throughout each piece. This consistency guarantees that every part of the chicken cooks at the same rate, preventing dry spots and ensuring tender, succulent results with every bite. I personally find this meat mallet to be an excellent tool for the job. If you don’t own a meat mallet, don’t fret! The base of a sturdy frying pan or even your fist can effectively achieve the desired even thickness.
After the chicken is cooked to perfection and has had a chance to rest, it’s time to slice it. For the most tender slices, always cut the chicken into strips **perpendicular to (across) the grain of the meat**. This technique shortens the muscle fibers, resulting in incredibly tender and easy-to-chew strips, perfect for fajitas.
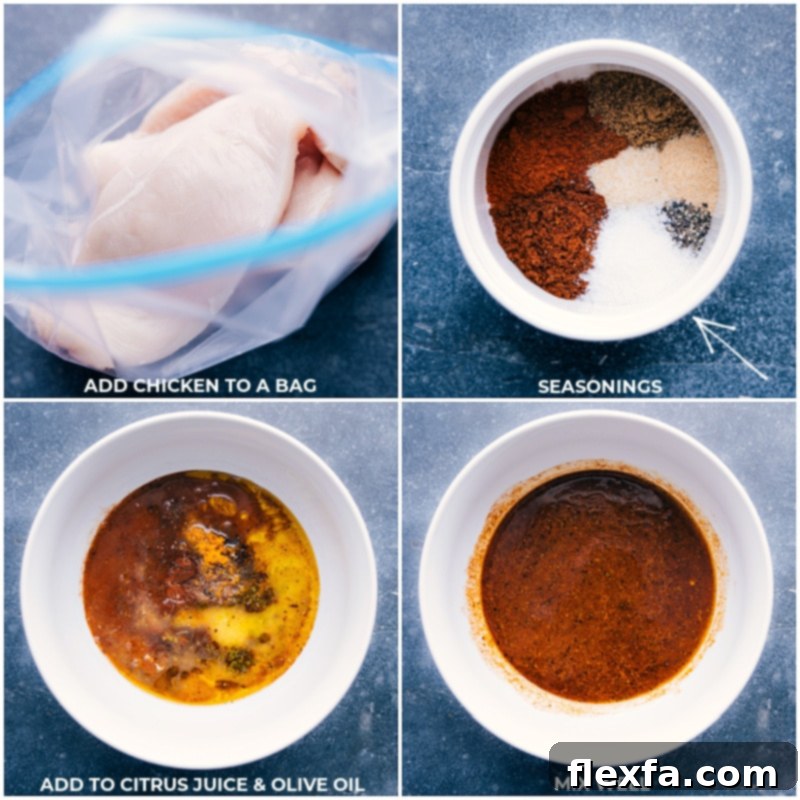
Crafting the Perfect Chicken Fajita Seasoning Blend
While pre-packaged seasoning packets offer undeniable convenience, nothing quite compares to the vibrant, authentic flavor of a quickly assembled homemade fajita seasoning. Not only is it far more economical, but it also allows you to completely avoid unwanted fillers, excessive sodium, and artificial ingredients often found in store-bought mixes. Creating your own blend ensures peak freshness and a customizable flavor profile that will make your chicken fajitas truly stand out.
Here’s a detailed breakdown of the essential spices that form the heart of this incredible homemade chicken fajita seasoning blend:
- Chili Powder: Forms the base with a mild, earthy heat and deep, rich color.
- Paprika: Adds a sweet, smoky flavor and a beautiful reddish hue. Consider using smoked paprika for an extra layer of complexity.
- Cumin: Provides that distinct, warm, and slightly pungent Tex-Mex aroma and taste, crucial for authentic fajita flavor.
- Onion Powder: Delivers concentrated onion flavor without the moisture or texture of fresh onion, ensuring even seasoning.
- Garlic Powder: Offers a pervasive, savory garlic essence that complements all the other spices.
- Cayenne Pepper: For those who love a little extra kick, cayenne pepper introduces a pleasant, lingering heat. Adjust to your preferred spice level.
- Salt & Pepper: The foundational seasonings that enhance and balance all the other flavors.
Pro Tip: DIY Fajita Seasoning Packets for Future Meals
Streamline your meal prep by making your own DIY fajita seasoning packets in advance. The next time you’re preparing this recipe, simply double or triple the seasoning ingredients and assemble 5 or 6 extra packets. Since you’re already measuring out the individual spices, it will only take a few additional minutes of effort. Label these spice-filled, snack-size bags with the date and store them in a cool, dark place. This simple foresight will make your next chicken fajita night significantly easier and quicker, as all you’ll need to do is grab a pre-mixed packet!
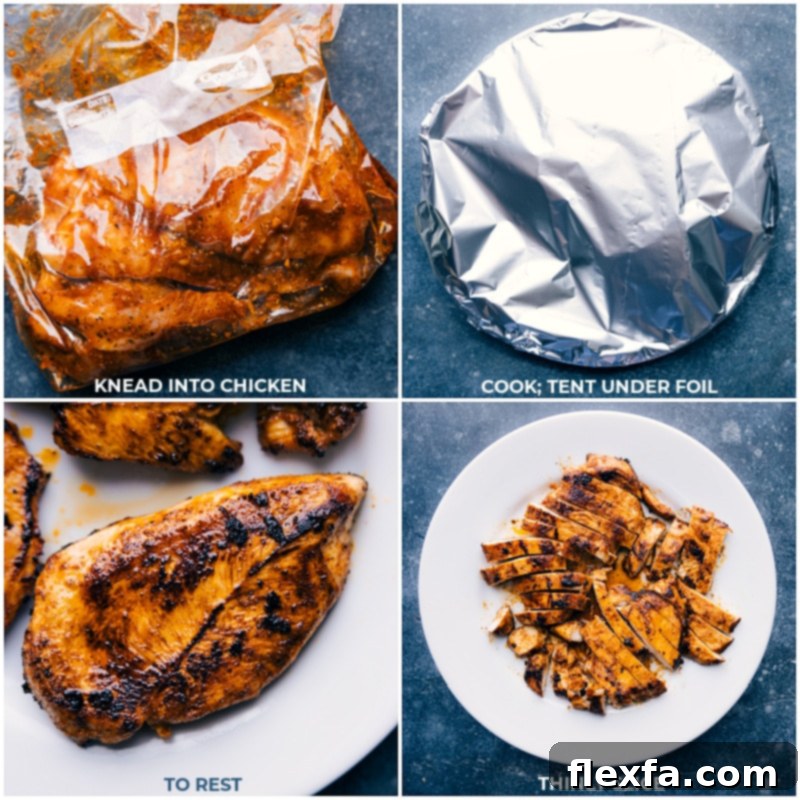
Expert Tips for Perfectly Cooked Chicken Fajitas Every Time
Achieving restaurant-quality chicken fajitas at home is surprisingly simple when you follow a few key techniques. Here are our top tips to ensure your easy Chicken Fajitas recipe turns out perfectly juicy, flavorful, and wonderfully charred:
- Rely on a Digital Meat Thermometer for Precision: Remove all guesswork from cooking poultry! A reliable digital meat thermometer is your best friend in the kitchen.
- Cooking times can vary significantly based on factors like chicken thickness, pan temperature, and heat intensity. Always use a thermometer to accurately test your chicken as it cooks. Aim to remove the chicken from the heat when it reaches **160 degrees Fahrenheit**. The concept of “carry-over heat” means the internal temperature will continue to rise a few degrees after it’s off the heat, bringing it safely to the recommended 165 degrees Fahrenheit. This method prevents both undercooked (unsafe) and overcooked (dry and rubbery) chicken, ensuring perfectly juicy results.
- Always Let the Chicken Rest: This step is non-negotiable for tender, juicy chicken. After the chicken is cooked, transfer it to a plate, loosely tent it with aluminum foil, and allow it to rest for 5-10 minutes before slicing. This resting period is crucial as it allows the internal juices, which have been pushed to the center during cooking, to redistribute throughout the meat. The result is consistently juicier, more flavorful chicken strips.
- Maximize Efficiency with Two Skillets: While it might mean a few extra dishes, using two skillets simultaneously is a game-changer for speed and serving temperature. Cook the seasoned chicken in one pan while the peppers and onions sizzle in the other. This ensures both components are ready around the same time, allowing you to serve everything hot and fresh, creating a truly enjoyable fajita experience without compromising on quality or waiting for batches to finish.
Choosing the Right Pan: Is a Cast Iron Skillet Essential?
While a cast iron skillet is often lauded for its ability to impart a beautiful char and deep sear to both your chicken and vegetables, delivering that signature fajita sizzle, it’s not strictly a requirement. The robust heat retention of cast iron does indeed create an exceptional crust and caramelization, enhancing the flavor profile significantly.
That said, if you don’t own a cast iron skillet, a good quality nonstick or stainless steel skillet can be used just as effectively to create delicious fajitas. The key is to get your pan hot enough and not overcrowd it. If you do opt for a cast iron skillet, ensure it is properly seasoned. This not only prevents food from sticking and burning but also contributes to the longevity and performance of the pan.
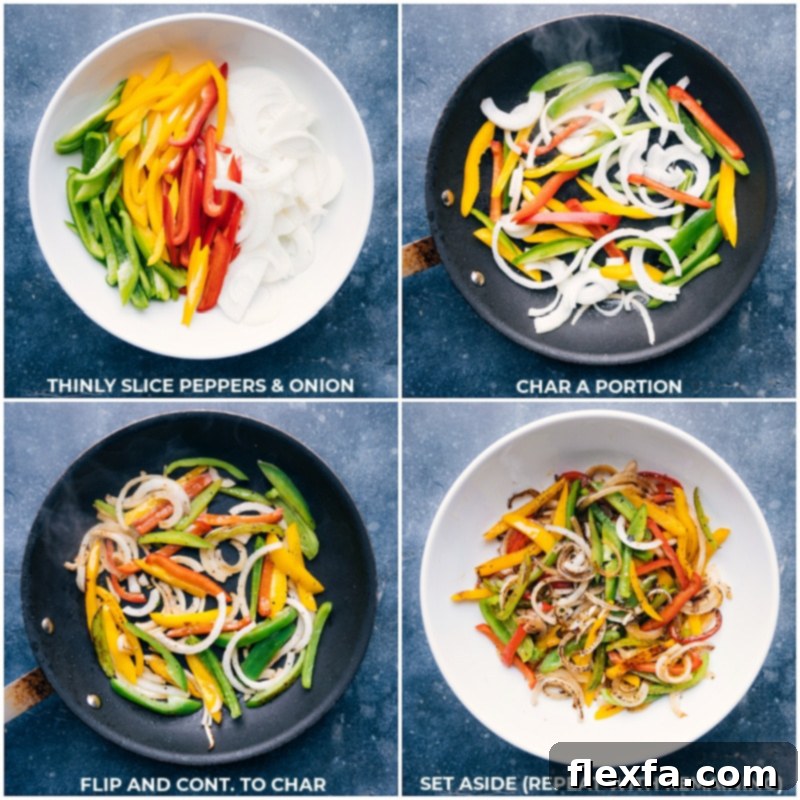
The Art of Perfecting Fajita Peppers and Onions
The bell peppers and onions are more than just an accompaniment to the chicken; they are integral to the fajita experience, adding essential sweetness, texture, and visual appeal. While these vegetables cook relatively quickly, achieving that ideal crisp-tender texture with a beautiful char requires a bit of attention and technique at the stovetop. We’re not aiming for overly soft or fully caramelized vegetables here; instead, the goal is a delightful “crisp-tenderness” complemented by enticing charred edges – because char equals flavor!
To master this perfect char, follow these simple guidelines:
- Cook in a Single Layer (in Batches if Necessary): This is perhaps the most crucial tip. To get that desirable char, the peppers and onions need direct contact with the hot pan. If they are overlapping or piled too high, they will steam rather than sear, resulting in soft, uncharred vegetables. Work in batches, adding only enough vegetables to cover the base of your pan in a single, even layer.
- Toss Frequently for Even Charring: Once your vegetables are in the hot pan, allow them to sit undisturbed for about 45 seconds to a minute to develop a char on one side. Then, toss them quickly and spread them out again. Repeat this process every 45 seconds or so, ensuring all sides get nicely charred and cook to that perfect crisp-tenderness. This technique allows for even cooking and prevents burning on just one side.
- Repeat Until Perfection: Continue this process, batch by batch, until all your peppers and onions boast those beautiful charred spots and are cooked just right. The slight resistance when you bite into them, combined with the smoky char, will elevate your fajitas to a new level. Don’t be afraid of a little browning – that’s where the best flavor develops!
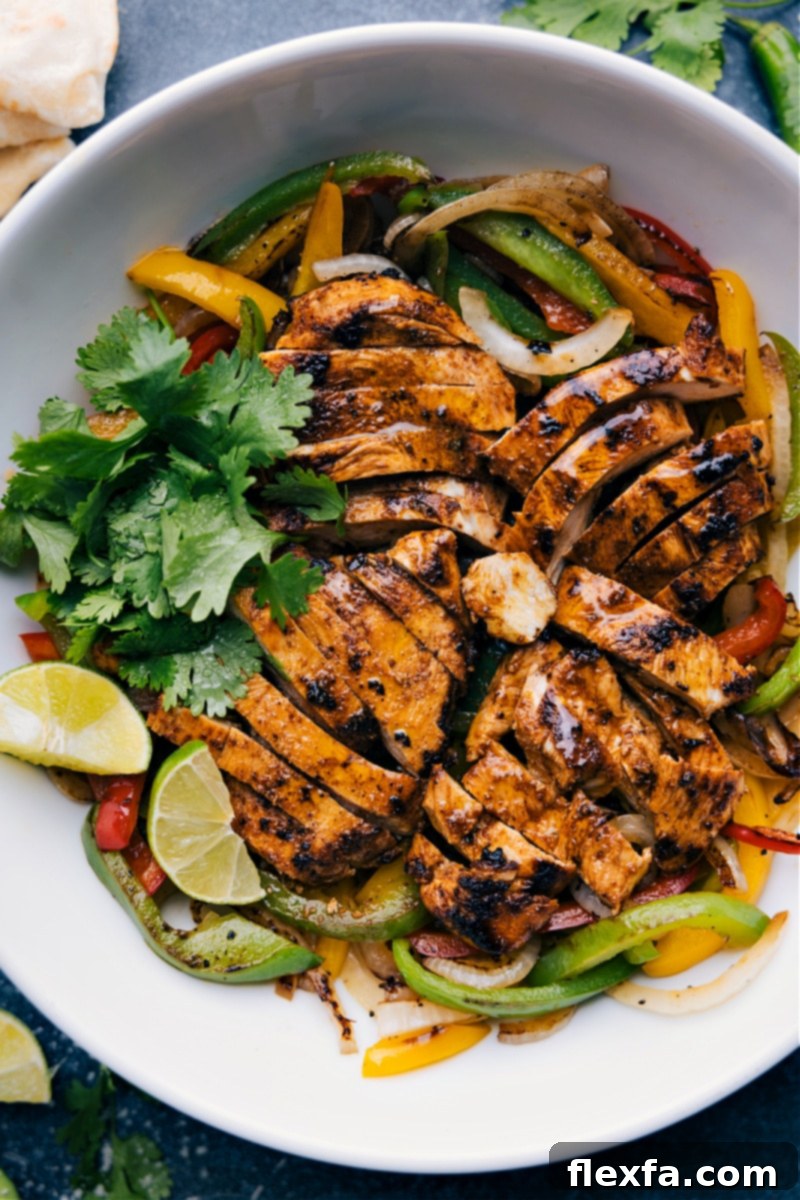
Smart Storage & Meal Prep for Chicken Fajitas
Maximizing Freshness: How to Store Your Chicken Fajitas
Chicken Fajitas are not only a fantastic fresh dinner but also an excellent candidate for weekly meal prep. I frequently prepare a double batch, storing the cooked chicken and sautéed vegetables in separate airtight containers. The toppings are also stored individually. This organized approach makes reheating quick and easy, perfect for swift lunches or a hassle-free dinner later in the week. You can then serve the reheated filling in fresh tortillas or atop a crisp salad. When stored properly in the fridge in an airtight container, both the chicken and veggies will maintain their freshness and flavor for **3-5 days**.
When ready to reheat, gently warm the chicken and vegetables in a skillet over medium heat, or briefly microwave until heated through. This ensures they retain their texture and taste, ready for assembly into another delightful fajita meal.
Explore More Mexican-Inspired Culinary Delights:
If you loved these chicken fajitas, you’re sure to enjoy these other vibrant and flavorful Mexican favorites, perfect for any occasion:
- Our signature Mexican Rice Recipe, a convenient and delicious side dish prepared and baked all in ONE pan!
- Hearty Loaded Sweet Potatoes, uniquely inspired by the irresistible flavors of Mexican Street Corn.
- Crisp and fresh Chicken Tacos, featuring a delightful corn and avocado topping that adds creamy texture and bright flavor.
- Wholesome Mexican Zucchini Boats, filled with savory ingredients and smothered in rich enchilada sauce for a lighter take on comfort food.
- Flavorful Pozole, a traditional Mexican stew made even quicker with smart shortcuts without compromising on its deep, satisfying taste!
Pin
Chicken Fajitas
Video
Equipment
-
Large pan
Ingredients
- 1 pound boneless, skinless chicken breast or thighs
- 3 tablespoons olive oil
- 1 orange
- 2 limes
- 2 teaspoons ground chili powder
- 1 teaspoon paprika
- 1 teaspoon ground cumin
- 1 teaspoon salt
- 1/2 teaspoon onion powder
- 1/2 teaspoon garlic powder
- 1/2 teaspoon pepper
- 1/8 teaspoon ground cayenne pepper optional
- 2 tablespoon olive oil divided
- Salt and pepper
- 3 large bell peppers
- 1 large yellow onion
- Toppings as desired see note 1
Instructions
-
Slice chicken breasts in half horizontally. Use a meat mallet or the base of a frying pan to pound all four pieces to an even thickness. The goal is uniformity, not extreme flattening. If using chicken thighs, no specific preparation is needed beyond trimming.
-
Using a citrus juicer, extract 3 tablespoons of fresh orange juice from the orange. Repeat the process with the limes to yield 3 tablespoons of fresh lime juice.
-
Place the prepared chicken into a large resealable plastic bag. In a separate small bowl, combine all the remaining “Chicken” ingredients, including the freshly squeezed orange and lime juices. Whisk thoroughly until the marinade is smooth and well combined. Pour this marinade over the chicken in the bag, seal tightly, and gently knead with your hands to ensure every piece of chicken is thoroughly coated. Refrigerate for a minimum of 30 minutes, ideally 3–4 hours, to allow flavors to meld. Do not marinate for longer than 8 hours to maintain chicken texture.
-
Thinly slice the bell peppers and onion. We will cook these in stages to achieve a perfect char. Place your largest pan over high heat. Add 1 tablespoon of olive oil, and once it shimmers, add a handful of the sliced vegetables, ensuring they cover the entire base of the pan without overlapping. Let them cook undisturbed for about 45 seconds to char. Toss quickly, spread them out again, and cook for another 45 seconds. Season lightly with salt and pepper, stir once more, and spread out for a final 30 seconds or until nicely charred. Remove from the pan, set aside, and repeat this process with the remaining vegetables until all are perfectly cooked.
-
Add the remaining 1 tablespoon of olive oil to a large pan and set to medium-high heat. Using tongs, remove the chicken from the marinade bag, allowing any excess marinade to drip off. Place the chicken flat in the pan in an even layer, making sure not to overcrowd. Let the chicken sear and char for approximately 3–4 minutes per side, then flip and cook for another 3–4 minutes. The chicken should be nicely charred and cooked through, reaching an internal temperature of 165°F. Transfer the cooked chicken to a plate, cover loosely with foil, and let it rest for 5–10 minutes before thinly slicing against the grain.
-
If using, prepare your tortillas (refer to note 2 for warming instructions). Assemble your fajitas by piling the charred peppers, onions, and sliced chicken onto the warm tortillas. Add your favorite toppings generously, wrap them up, and savor every delicious bite!
Recipe Notes
Note 2: For warming tortillas, I highly recommend unbaked tortillas by TortillaLand® (this is not a sponsored recommendation, just a personal preference!). To achieve a delightful char on your tortillas, lightly spray both sides with cooking spray. Using tongs, hold each tortilla over an open flame on your stovetop, very lightly charring each side for a few seconds. If an open flame isn’t available, simply warm them in a dry pan for 10–15 seconds per side. Immediately remove the warmed tortilla from the heat, fold it in half, and place it under a clean kitchen towel to keep warm and pliable. Repeat this process until all tortillas are heated and ready to serve.
Nutrition Note: Please be aware that the provided nutrition information pertains exclusively to the fajita filling (chicken and vegetables). The nutritional values will vary depending on your choice of tortillas and any additional toppings you decide to include.
Storage: To ensure optimal freshness, store the cooked chicken and vegetables in separate airtight containers in the refrigerator. They will remain delicious for 3–5 days.
Nutrition
Nutrition information is automatically calculated, so should only be used as an approximation.