
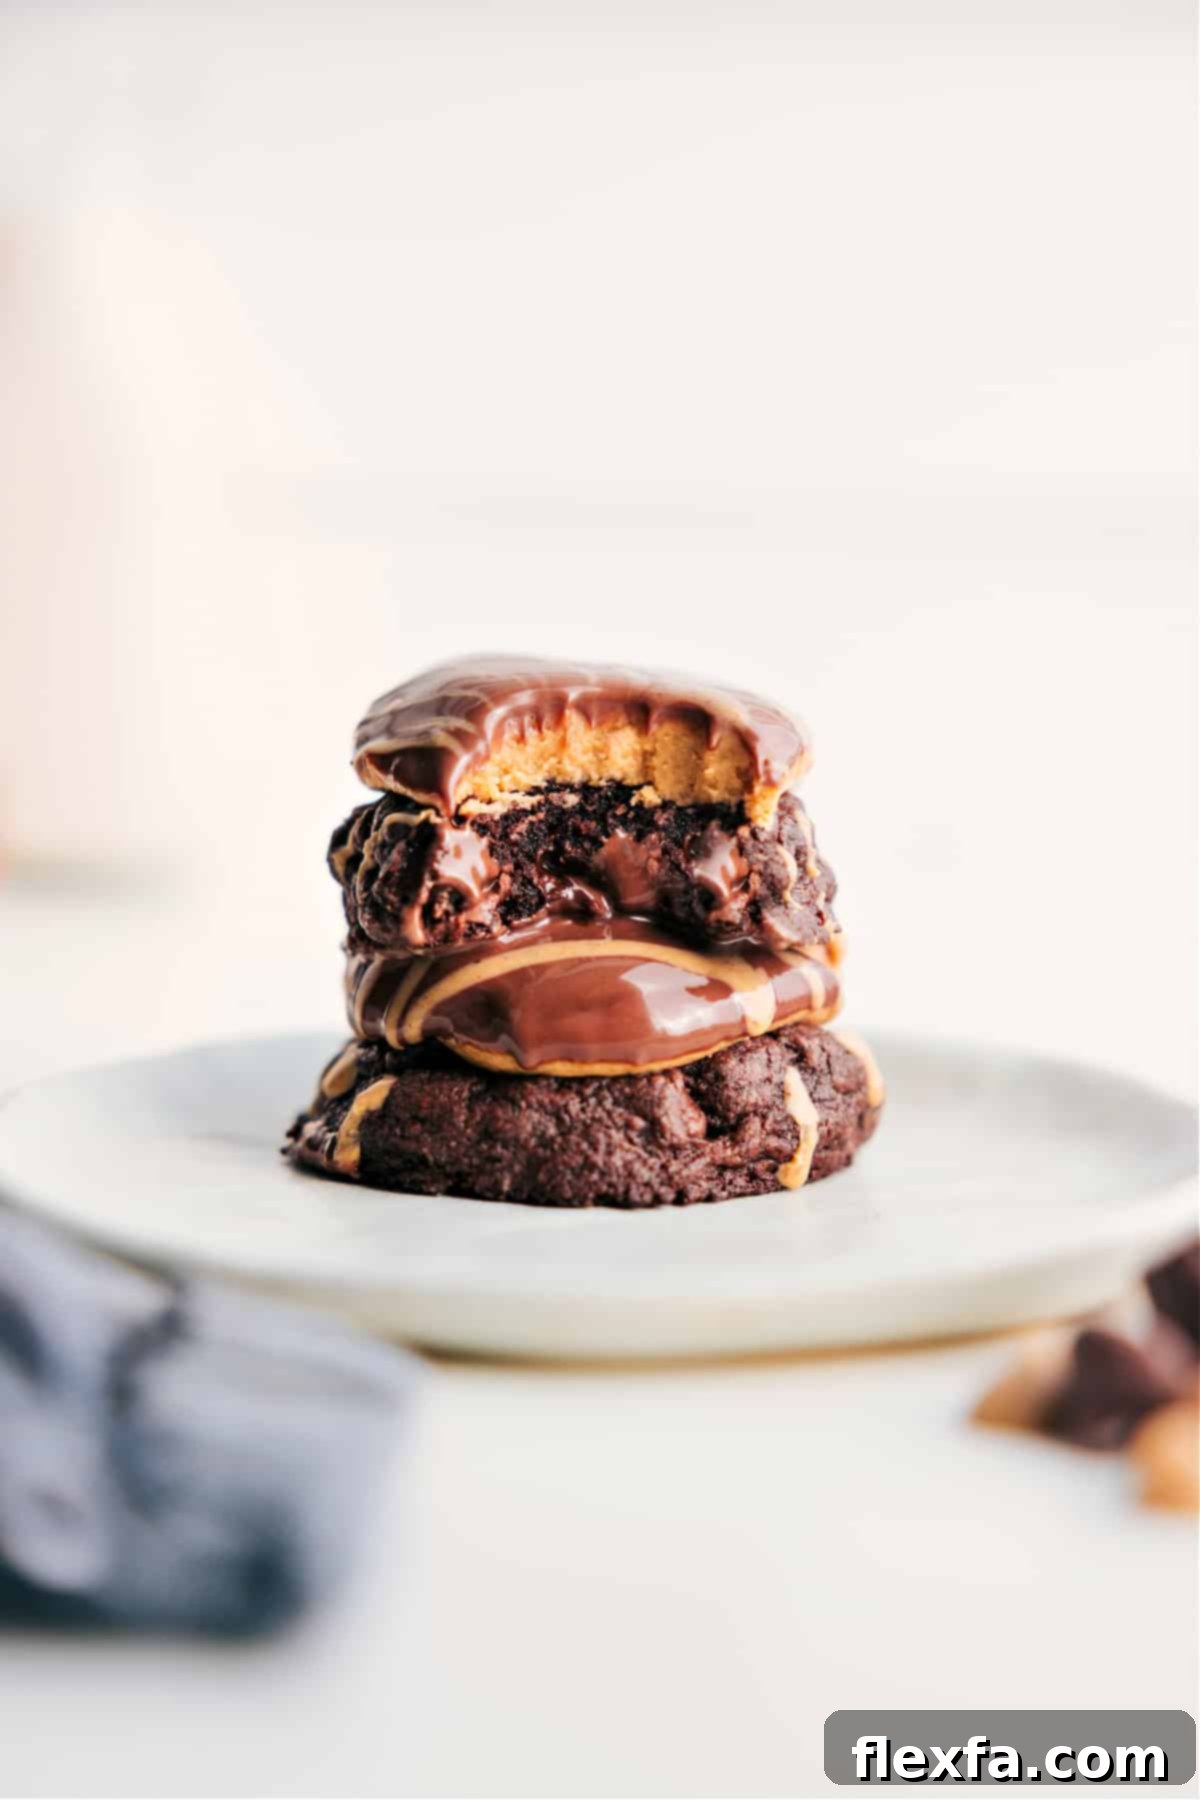
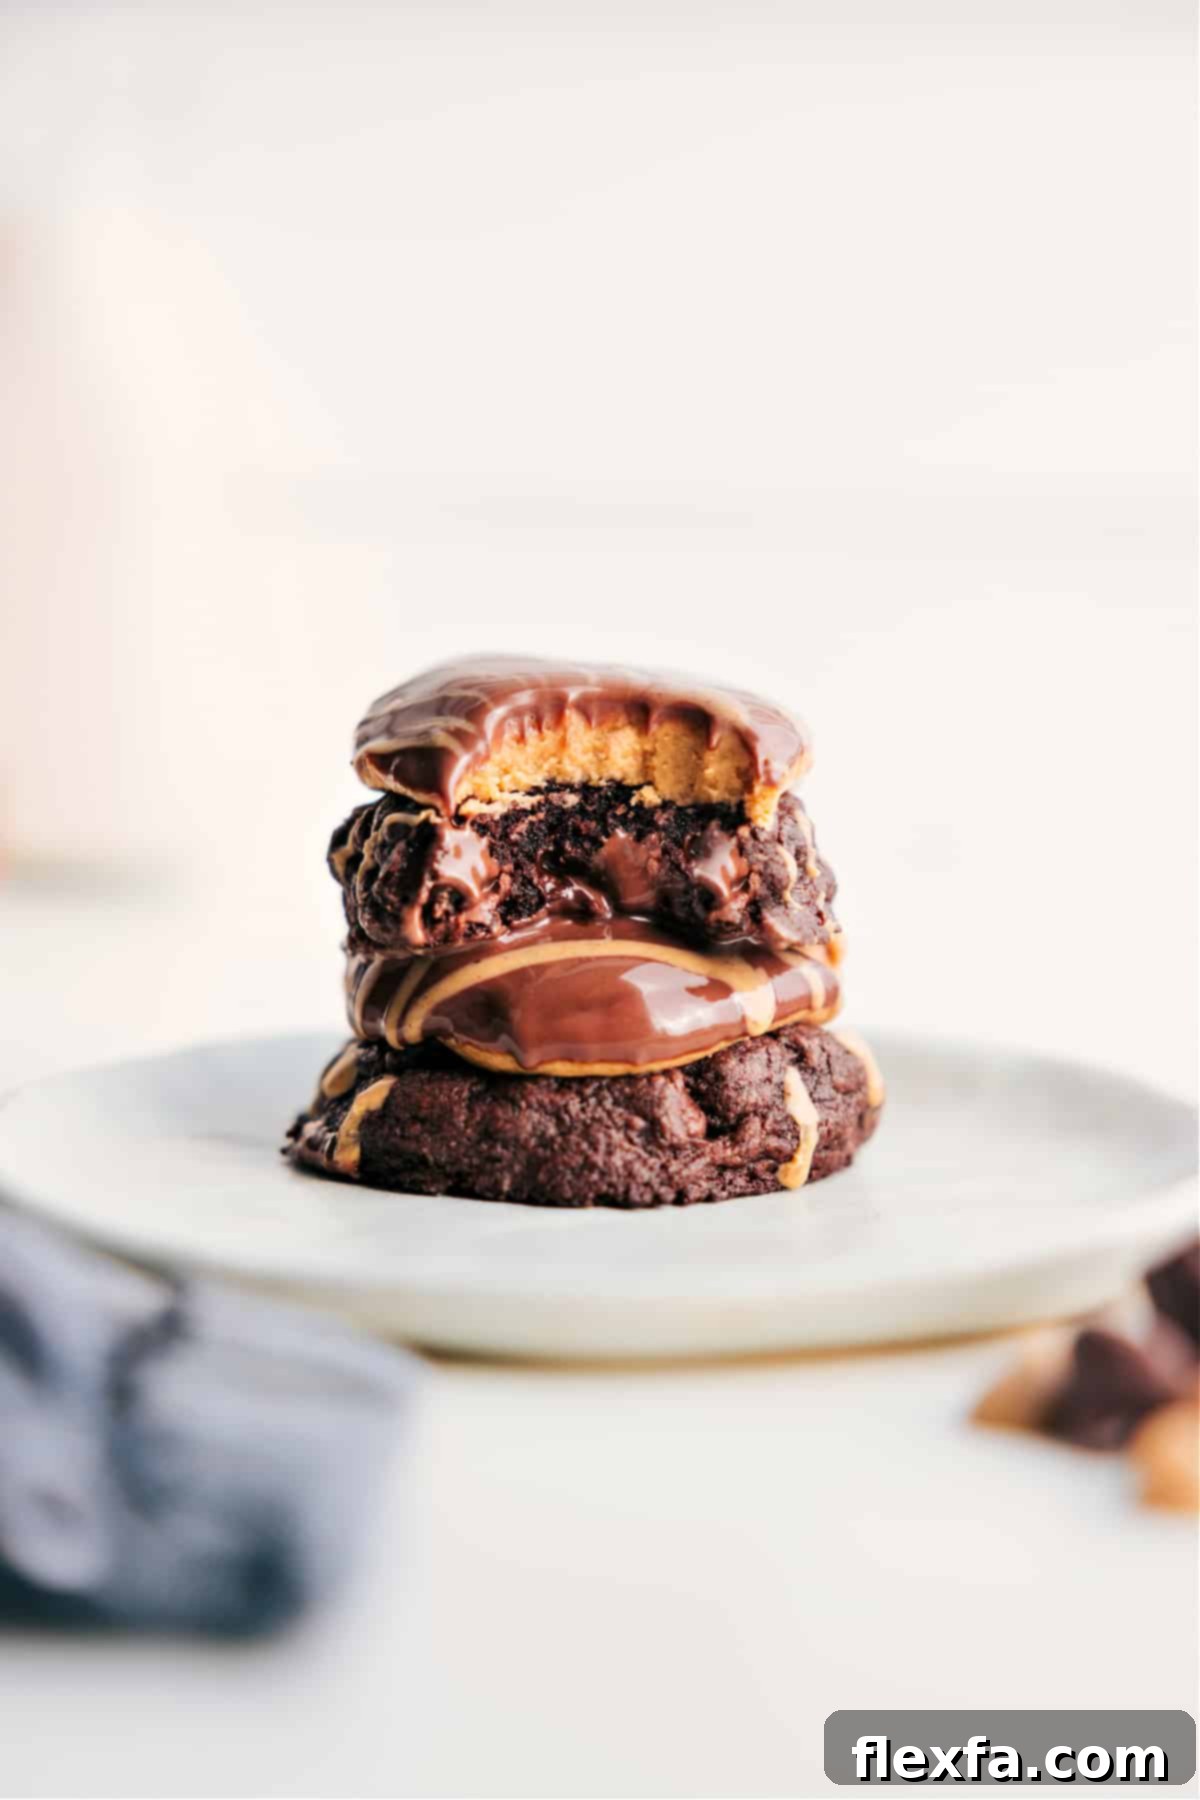
Buckeye Brownie Cookies are a dream come true for anyone who loves the classic combination of peanut butter and chocolate. Imagine your favorite intensely fudgy brownie merging with the rich, creamy heart of a traditional buckeye candy – that’s exactly what this ridiculously good treat delivers. It’s a decadent, two-bite wonder that promises to disappear fast from any dessert platter, leaving everyone craving more.

Author’s Notes
A Buckeye Obsession Takes Over the Kitchen
Okay, it’s safe to say I’m fully immersed in my “buckeye era” right now. This delightful obsession truly kicked off when I first shared my recipe for Buckeye Graham Crackers. Not only did I fall head over heels for their simple yet irresistible charm, but I ended up baking three batches in just as many days – a testament to their addictive nature! I even brought them to a gathering, and despite an abundance of other delicious treats, those buckeye graham crackers were the undisputed star. Everyone was completely *obsessed*!
That whirlwind experience made me realize something significant: in all my years of sharing recipes, I had somehow never posted a classic buckeye candy recipe. I quickly remedied that oversight, perfecting and finally sharing my go-to recipe for those iconic peanut butter and chocolate confections. Once I had that foundational recipe in hand, my culinary mind started buzzing with new possibilities. I couldn’t stop thinking about how incredibly delicious those *perfect* buckeyes would be if they were nestled atop a rich, chewy brownie cookie. The idea was so exciting that I could barely sleep, eager to get into the kitchen and experiment!
And honestly, these Buckeye Brownie Cookies might just be my absolute favorite creation out of all my new buckeye-inspired recipes. They evoke wonderful memories of my popular Buckeye Brownies – a recipe that my son’s friends famously declare is the best on my entire site (and they’re tough critics, haha!). So, if you’re a fan of that classic combination, I have a strong feeling you are going to absolutely adore these cookies!
Why You’ll Adore These Buckeye Brownie Cookies
These aren’t just any cookies; they’re an experience! Here’s why these Buckeye Brownie Cookies are destined to become your new favorite:
- Irresistible Flavor Fusion: They perfectly marry the deep, intense chocolate flavor of a rich brownie with the sweet, salty, and creamy goodness of a buckeye candy. It’s a match made in dessert heaven!
- Delightfully Fudgy Texture: The brownie cookie base is designed to be ultra-fudgy and chewy, creating a sensational mouthfeel that contrasts beautifully with the smooth peanut butter filling.
- Crowd-Pleasing Perfection: Whether you’re bringing them to a potluck, serving them at a party, or simply treating your family, these cookies are guaranteed to be a hit. Expect rave reviews and requests for the recipe!
- Surprisingly Simple: Despite their impressive appearance and complex flavor, this recipe is straightforward, especially with the use of a convenient brownie mix.
- Perfect for Any Occasion: From holiday baking to everyday indulgence, these cookies fit right in. They look festive and taste incredible, making them versatile for all your baking needs.
Essential Buckeye Brownie Cookies Ingredients
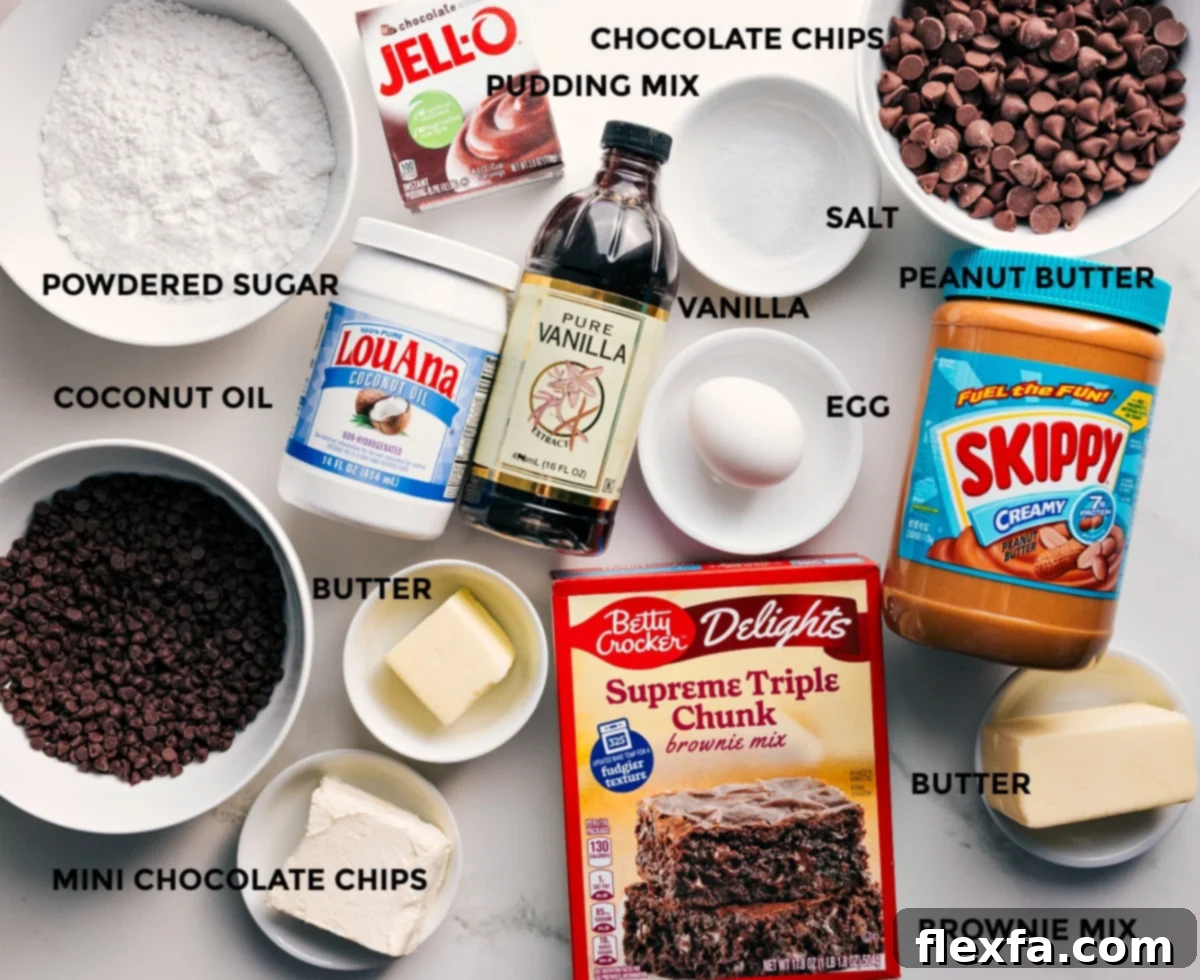
Crafting these delectable Buckeye Brownie Cookies starts with understanding each ingredient’s role. Here’s a detailed look at what you’ll need and some helpful tips to ensure your cookies turn out perfectly:
| Ingredient | Helpful Tip |
|---|---|
| Cream cheese & butter | For a silky-smooth cookie dough that incorporates effortlessly, ensure both your full-fat, brick-style cream cheese and unsalted butter are fully softened to room temperature. This prevents lumps and ensures even mixing, contributing to the fudgy texture of the cookies. Avoid melting them, as this can alter the dough’s consistency. |
| Brownie mix & pudding mix | The specific sizes of these mixes are crucial for the dough’s correct formation and texture. Stick to the exact measurements specified in the recipe. I’ve found that Betty Crocker’s Supreme Triple Chunk brownie mix yields the best results, adding to the richness and depth of flavor. Remember to use the instant pudding mix dry; do not prepare it! |
| Egg & vanilla | These seemingly simple additions are vital for both structure and flavor. The large egg binds the dough ingredients together, providing moisture and richness, while pure vanilla extract elevates the overall taste profile, adding a warm and inviting aroma to your cookies. |
| Mini chocolate chips | While mini chocolate chips are recommended for their even distribution and delicate melt within the cookies, regular-sized chocolate chips will also work beautifully if that’s what you have on hand. They add delightful pockets of melted chocolate throughout the brownie base. |
| Peanut butter filling & chocolate topping | Achieving that perfect buckeye-like finish requires proper chilling. Make sure your assembled Buckeye Brownie Cookies are thoroughly chilled before applying the chocolate topping. This ensures the peanut butter filling holds its shape firmly and allows the chocolate coating to set beautifully and quickly, giving you that signature crisp shell. |
Crafting Your Buckeye Brownie Cookies: A Step-by-Step Guide
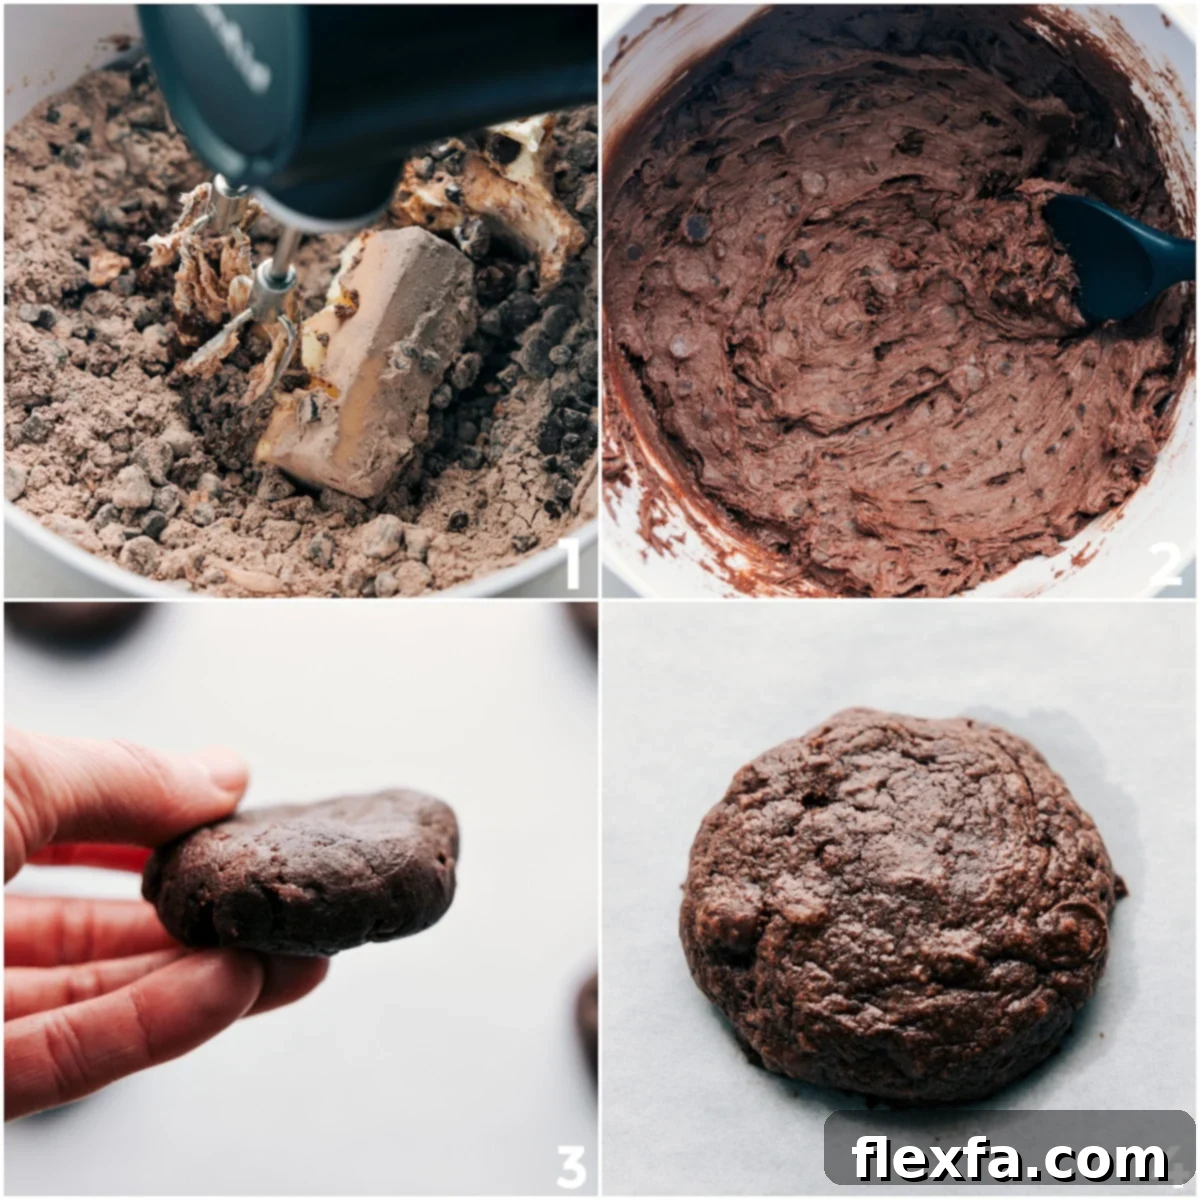
Making these decadent Buckeye Brownie Cookies is a rewarding process that combines a few simple steps to create a truly impressive dessert. Here’s a quick overview of the making process:
- Prepare the Fudgy Dough: Begin by creaming together softened cream cheese and butter, then incorporate the egg, vanilla, dry pudding mix, and brownie mix until a thick, rich dough forms.
- Chill for Perfection: Gently stir in the mini chocolate chips, then chill the dough briefly to make it easier to handle and ensure optimal cookie texture during baking.
- Shape and Bake: Roll the chilled dough into uniform balls, flatten them slightly into thick discs, and bake until they are perfectly fudgy with slightly set edges.
- Whip Up the Creamy Filling: While the cookies cool, prepare the irresistible peanut butter filling by mixing together peanut butter, softened butter, powdered sugar, salt, and vanilla until smooth and creamy. Form into small discs.
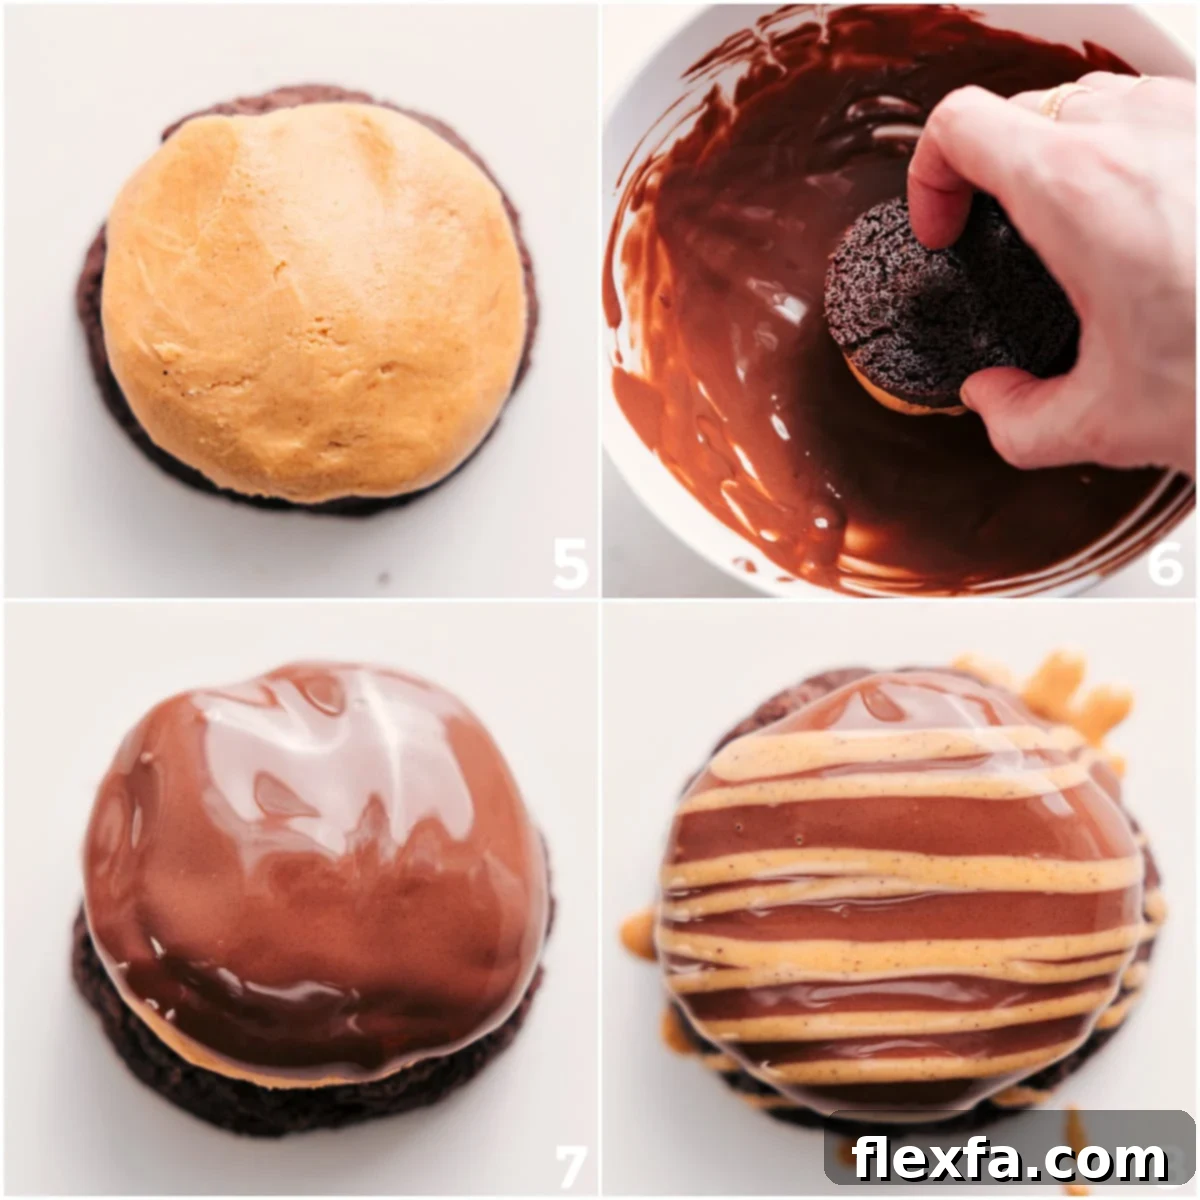
- Assemble and Top: Place a peanut butter disc on each cooled brownie cookie. Then, melt your chocolate topping ingredients until smooth and either dip the cookies or spoon the chocolate over the peanut butter layers, allowing it to set for that classic buckeye finish.
Storage Tips for Your Buckeye Brownie Cookies
Ensuring your Buckeye Brownie Cookies stay fresh and delicious is key. Here’s how to properly store them, whether baked or as dough:
What To Do With Leftovers
- Freezing Unbaked Dough: For future cravings, scoop and shape the cookie dough into balls. Place them on a sheet pan and freeze until completely firm. Once solid, transfer the dough balls to an airtight freezer bag or container. You can bake them straight from frozen, adding just an extra minute or two to the baking time if needed, for freshly baked cookies anytime.
- Storing Assembled Cookies: Once you’ve added the creamy peanut butter filling and the rich chocolate topping, these Buckeye Brownie Cookies are at their peak freshness and best enjoyed within 2 days. Store them in an airtight container at room temperature or in the refrigerator, depending on your climate, to maintain their quality.
- Plain Cookie Base Storage: If you’re planning ahead or want to assemble them closer to serving, you can store the baked brownie cookie bases (without the peanut butter and chocolate layers) in an airtight container at room temperature for up to 3 days. This gives you flexibility for assembly.
- No Long-Term Storage for Assembled Cookies: It’s important to note that once the peanut butter and chocolate layers are added, these cookies do not store or freeze well for extended periods. The peanut butter can become dry, and the chocolate coating may develop an undesirable texture. For the best flavor and texture experience, apply the toppings right before you plan to serve them.
More Fun Cookie Recipes to Try:
Desserts
Almond Joy Cookies Recipe
Desserts
Cinnamon Roll Cookie Recipe
Desserts
Circus Animal Cookies
Cookies
Chocolate Marshmallow Cookies

Print Recipe
Buckeye Brownie Cookies
Chelsea Lords
30 minutes
10 minutes
30 minutes
1 hour
10 minutes
22 cookies
Equipment
-
Large sheet pan with silicone liners (highly recommended for non-stick baking)
-
Hand mixer or a stand mixer with a paddle attachment for effortless mixing
-
Mixing bowls (various sizes)
-
Measuring cups and spoons
-
Rubber spatula or spoon
-
Small microwave-safe bowl for melting chocolate
-
Cooling rack
Ingredients
- 4 ounces cream cheese full-fat, brick-style, softened to room temperature
- 8 tablespoons unsalted butter softened to room temperature
- 1 large egg
- 1 teaspoon vanilla extract
- 1 (3.9-ounce) package instant chocolate fudge pudding mix use it dry, do not prepare as directed on the box
- 1 (18-ounce) package brownie mix I highly recommend Betty Crocker Delights Supreme Triple Chunk for the best results, see Note 1
- 1 cup mini chocolate chips or regular chocolate chips if mini are unavailable
- 3/4 cup creamy peanut butter such as Skippy or Jif, avoid natural, oily peanut butter
- 4 tablespoons unsalted butter softened
- 1-1/4 cups powdered sugar confectioners’ sugar
- 1/8 teaspoon salt
- 1 teaspoon vanilla extract
- 1/2 cup milk chocolate chips or semi-sweet chocolate chips, if preferred
- 1-1/2 teaspoons coconut oil helps create a smooth, dippable chocolate consistency
Instructions
Making the Fudgy Brownie Cookies
- Prepare Baking Sheet: Line a large baking sheet with a silicone liner or parchment paper; set aside. Bring the cream cheese and unsalted butter to room temperature. This can be done by leaving them out for about 1 hour. Alternatively, for a quicker method, microwave unwrapped cream cheese in 5-10 second intervals until soft. For the butter, microwave it for 5 seconds, flip, and microwave for another 5 seconds. Be careful not to melt or over-soften either ingredient, as this can affect the cookie texture.
- Cream Wet Ingredients: In a large mixing bowl, using a stand mixer fitted with the paddle attachment (or a hand mixer), cream together the softened cream cheese and butter until the mixture is completely smooth and light. Add the large egg and vanilla extract, then beat again until everything is fully incorporated, smooth, and creamy.
- Incorporate Dry Mixes: Gradually add the dry instant chocolate fudge pudding mix and the brownie mix to the wet ingredients. Beat on low speed to combine. The dough will initially be quite thick and may take some time to come together. This is absolutely normal! Continue mixing until a cohesive, thick dough forms. Be patient; it will all blend.
- Add Chocolate Chips & Chill: Once the dough is formed, gently stir in the mini chocolate chips until evenly distributed. Cover the dough tightly with plastic wrap and refrigerate for 20 to 30 minutes. This chilling period helps firm up the dough, making it much easier to handle and preventing the cookies from spreading too much during baking.
- Shape the Cookies: Preheat your oven to 350°F (175°C). Measure out each dough ball to be a full, packed 2 tablespoons (approximately 40 grams if using a food scale for consistency). Roll each portion into a smooth ball between your palms. Then, gently flatten each ball into a wide, thick disc, about 2 inches in diameter and 1/2-inch thick. Arrange 6-8 cookies on your prepared baking sheet, ensuring ample space between them for even baking.
- Bake to Fudgy Perfection: Bake each batch for 10-14 minutes. For an incredibly chewy and ultra-fudgy brownie-like texture, it’s best to slightly underbake these cookies. The edges should be set, but the centers should still look slightly soft. Remove from the oven and let them cool on the sheet pan for 5 minutes before carefully transferring them to a wire cooling rack to cool completely. Ensure cookies are entirely cool before adding the peanut butter filling.
Preparing the Creamy Peanut Butter Filling
- Mix the Filling: In a separate large bowl, using electric hand mixers, combine the creamy peanut butter, softened butter, powdered sugar, salt, and vanilla extract. Beat until the mixture is completely smooth, creamy, and well combined. This should resemble a thick, pliable dough.
- Shape and Apply: Roll the peanut butter mixture into small, equal-sized balls, aiming for one ball per baked cookie. Gently flatten each peanut butter ball into a disc, then place one disc on top of each completely cooled brownie cookie. Lightly press to adhere the filling to the cookie, and use your finger to smooth the top of the peanut butter layer, creating a nice, even surface for the chocolate topping.
Adding the Decadent Chocolate Topping
- Melt the Chocolate: In a small microwave-safe bowl, combine the milk chocolate chips and coconut oil. Heat in 20-second bursts, stirring thoroughly for 20 full seconds after each interval, until the chocolate is completely melted and smooth. The coconut oil helps achieve a perfectly glossy and dippable consistency.
- Dip or Drizzle: Carefully dip each cookie, peanut butter side down, into the melted chocolate. Lift gently, allowing excess chocolate to drip off, and lightly tap the cookie to help the chocolate spread evenly. If the peanut butter topping shows any sign of slipping off during dipping, an alternative is to use a spoon to lightly pour and spread the melted chocolate over the peanut butter center instead. Aim to just cover the peanut butter filling, allowing a small ring of the peanut butter to show around the edges for that classic buckeye look. Let the chocolate set at room temperature or briefly in the refrigerator for quicker setting.
Final step! Please let us know how it was by leaving a review.
Recipe Notes
Storage for Best Results: Store plain baked cookies (without the peanut butter and chocolate layers) in an airtight container at room temperature for up to 3 days. If you prefer to bake ahead, you can scoop and shape the dough balls, freeze them on a sheet pan until firm, and then transfer them to a freezer bag for up to 3 months. Bake directly from frozen, adding an extra minute or two to the baking time. However, once the cookies are fully assembled with the peanut butter and chocolate, they are best enjoyed within 2 days. Assembled cookies do not freeze or store well long-term, as the peanut butter filling can dry out and the chocolate may change texture. It’s always best to add the toppings just before serving for optimal freshness and flavor.
Frequently Asked Questions About Buckeye Brownie Cookies
- Can I use natural peanut butter for the filling?
It’s generally recommended to use creamy, processed peanut butter like Skippy or Jif for the filling. Natural peanut butter tends to be oilier and can separate, making the filling too soft and difficult to shape. Stick with the classic creamy varieties for the best texture. - How can I ensure my cookies are perfectly fudgy?
The key to fudgy cookies is to slightly underbake them. The edges should look set, but the centers should still appear a bit soft when you pull them from the oven. They will continue to set as they cool on the hot baking sheet. - My chocolate topping is too thick for dipping. What should I do?
If your melted chocolate thickens, simply microwave it in short 5-10 second bursts, stirring well after each, until it reaches a smooth, dippable consistency again. A little extra coconut oil (1/2 teaspoon) can also help thin it out without affecting flavor. - Can I make the cookie dough ahead of time?
Yes, absolutely! The cookie dough can be made up to 2-3 days in advance and stored, tightly covered, in the refrigerator. This can be a great time-saver for busy schedules. Just let it sit at room temperature for about 10-15 minutes before shaping if it’s too firm. - What if my peanut butter filling is too sticky to roll?
If your peanut butter filling is too sticky, try chilling it in the refrigerator for 15-30 minutes. Slightly cold hands can also help when rolling the balls. If it’s still too soft, you can add a tablespoon or two more powdered sugar until it’s workable. - Can I use dark chocolate for the topping?
Certainly! While milk chocolate chips are listed for a traditional buckeye flavor, dark chocolate chips can be substituted if you prefer a richer, less sweet topping. The coconut oil will still help it melt smoothly.
Nutrition Information
Serving: 1cookie
|
Calories: 326kcal
|
Carbohydrates: 39g
|
Protein: 5g
|
Fat: 18g
|
Cholesterol: 10mg
|
Sodium: 195mg
|
Fiber: 2g
|
Sugar: 30g
|
Iron: 1mg
Nutrition information is automatically calculated and should be used as an approximation only.
Love this recipe? Leave a comment below!
Additional Tips for Making Perfect Buckeye Brownie Cookies
- Use Cold Hands for Dough: When rolling the cookie dough into balls, work quickly and use slightly cold hands. This helps prevent the dough from becoming too sticky or soft, making it easier to shape and ensuring the cookies maintain their form during baking.
- Weigh Your Dough for Consistency: For perfectly uniform cookies that bake evenly and look professional, I highly recommend using a food scale to weigh each portion of dough. Aim for around 40 grams (2 tablespoons) per cookie. Consistency in weight leads to consistency in baking and appearance.
- Ensure Cookies Are Fully Cooled: It’s crucial that your brownie cookies are completely cooled before you add the peanut butter filling. If the cookies are even slightly warm, the peanut butter will begin to melt and become messy, making assembly difficult.
- Flatten Peanut Butter Tops Gently: After placing the peanut butter disc on each cooled cookie, gently press and flatten it slightly. This creates a smooth, even surface for the chocolate topping, ensuring a neat and attractive finish.
- Warm Chocolate Gently and Stir Well: When melting the chocolate topping, use short intervals (like 20 seconds) and stir thoroughly between each. This prevents the chocolate from burning or seizing. If the chocolate starts to thicken, a few extra seconds in the microwave or stirring vigorously can help restore its smooth consistency.
- Chill to Set the Chocolate: Once you’ve dipped or drizzled your cookies with chocolate, refrigerate them briefly (10-15 minutes) to help the chocolate topping set quickly and firmly. This makes the cookies easier to handle and ensures a crisp chocolate shell.