
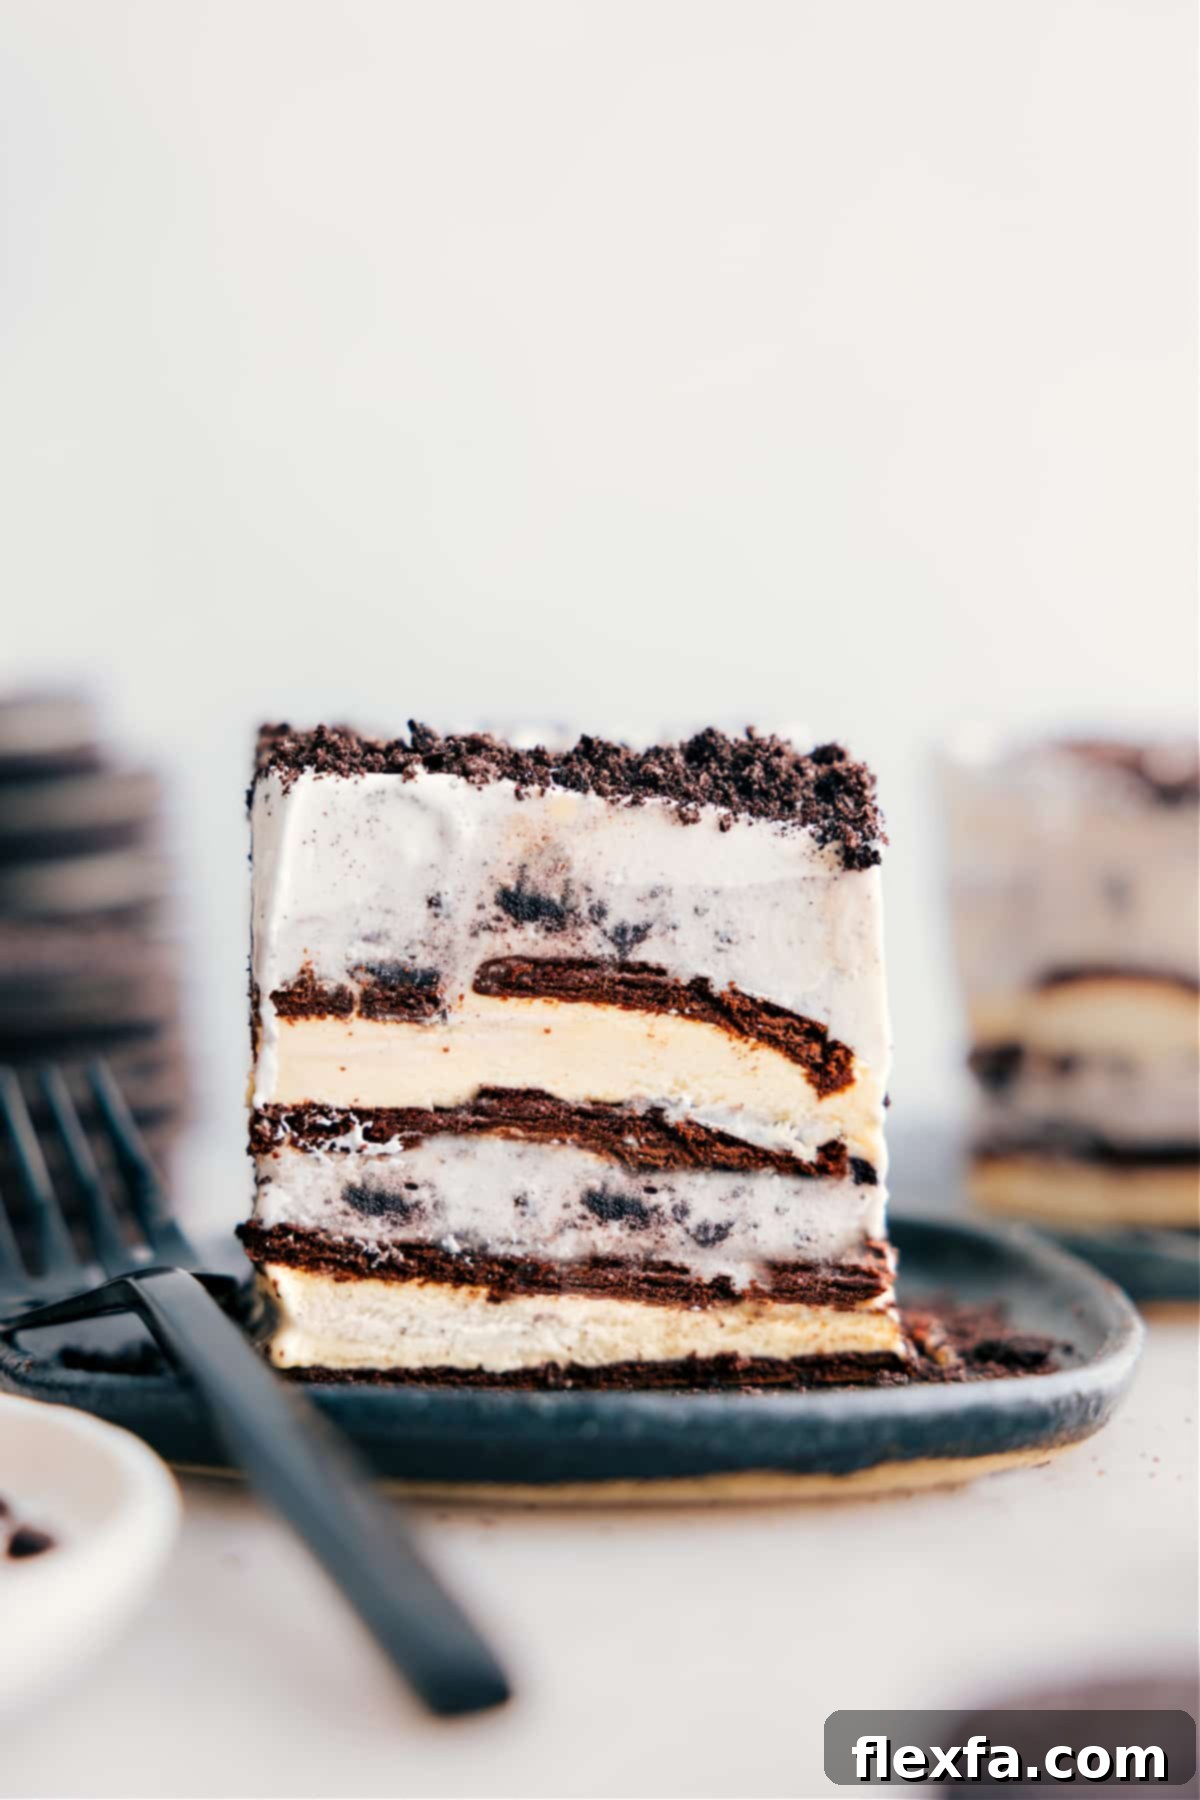
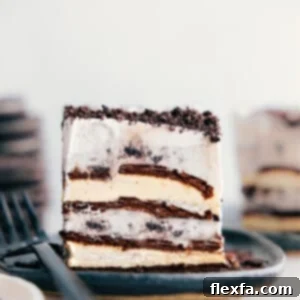
This 4-Ingredient Ice Cream Sandwich Cake Recipe is a delightfully simple, no-bake dessert that promises maximum flavor with minimal effort. Crafted from layers of classic ice cream sandwiches, rich cookies and cream ice cream, and a light, airy whipped cream topping, it’s an instant crowd-pleaser perfect for any occasion.

Author’s Note
The 4-Ingredient Dessert Everyone Absolutely Loves!
This ice cream sandwich cake holds a special place in my heart, much like my mom’s famous Ice Cream Pie. Growing up, it was one of those legendary desserts that would disappear almost as soon as it hit the table. The sheer joy it brought was contagious; I vividly remember always asking for another batch before the first one was even fully gone!
A few summers ago, I whipped up this nostalgic treat for a group of neighborhood kids, and their reactions were priceless. They couldn’t get enough, declaring it “the best dessert ever” as they eagerly came back for seconds (and thirds!). It’s truly a testament to how universally loved this simple cake is.
This is the ultimate dessert for parties, barbecues, and all your summer get-togethers. What truly sets it apart is its incredible simplicity. With just four ingredients and a mere 10 minutes of active prep time, you can create an ice cream cake that consistently vanishes in a flash. It’s the kind of effortless recipe that leaves you more time to enjoy your guests and the summer fun, rather than being stuck in the kitchen.
Essential Ingredients for Your Ice Cream Sandwich Cake
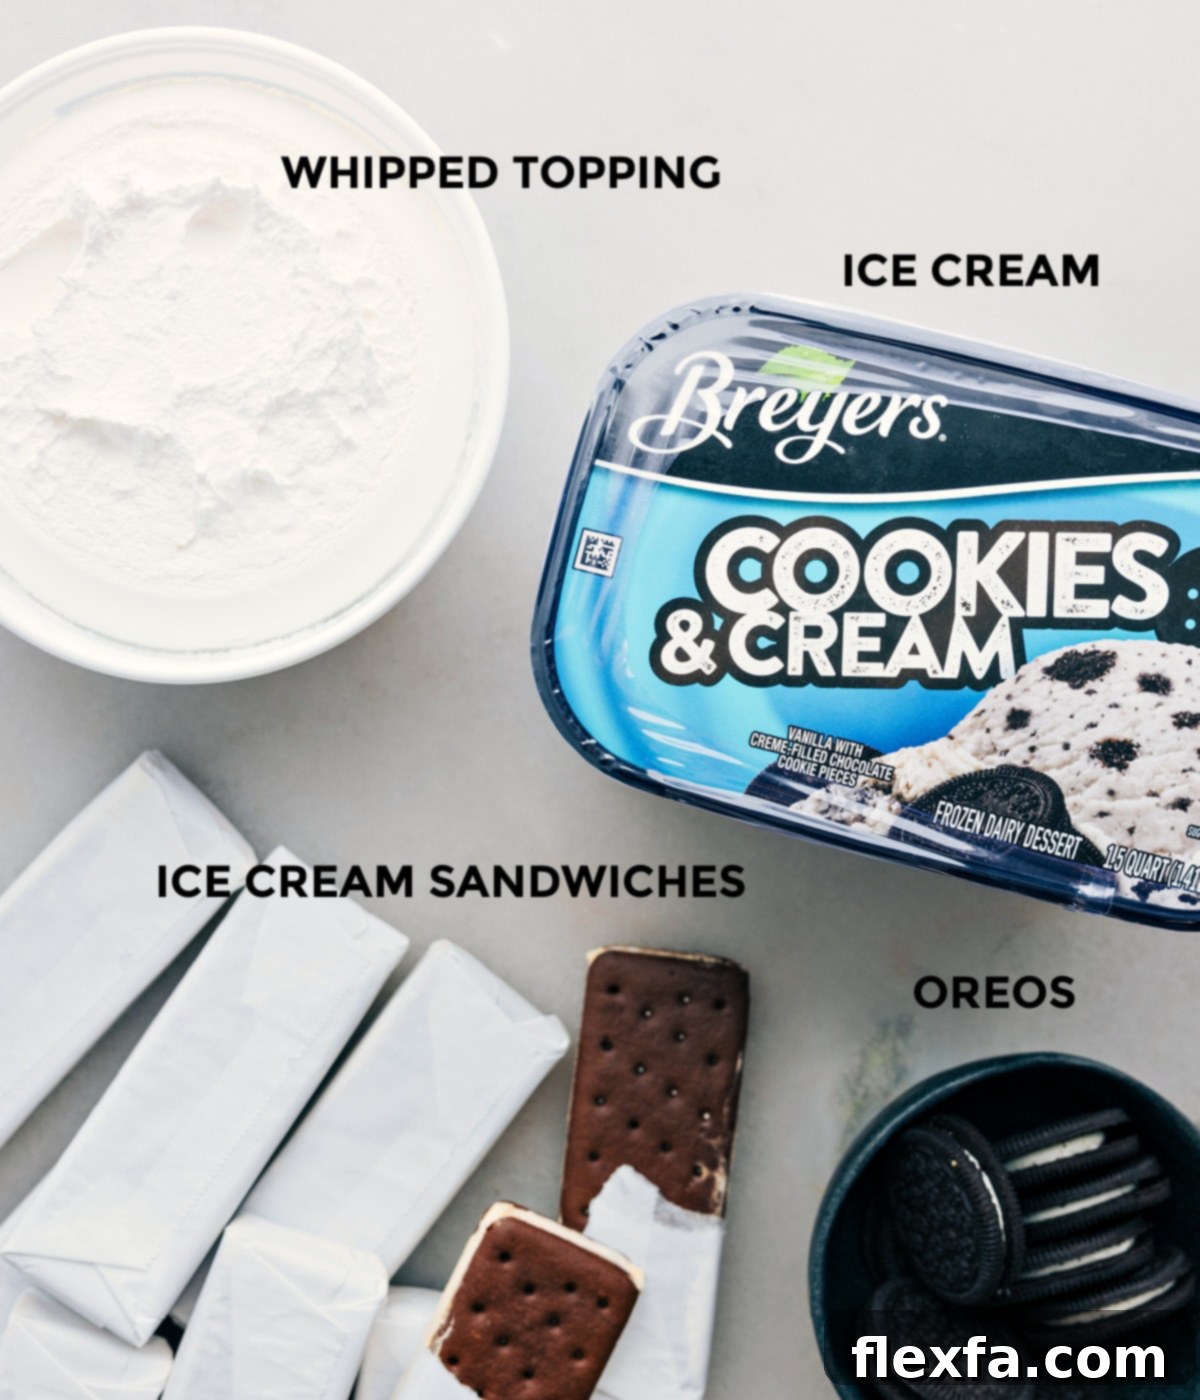
You only need four simple ingredients to create this incredibly delicious and impressive frozen dessert!
| Ingredient | Tips or Flavor Swaps |
|---|---|
| Vanilla Ice Cream Sandwiches | Classic vanilla works perfectly, but feel free to experiment with chocolate ice cream sandwiches for a richer flavor profile. Remember to unwrap all of them before you start layering for a smooth assembly process. |
| Cookies and Cream Ice Cream | This is a fantastic choice for added texture and flavor, but any of your favorite ice cream flavors will work beautifully. Consider chocolate, vanilla bean, mint chip, or even strawberry. For easier spreading, let the ice cream soften at room temperature for about 5 to 10 minutes before use. |
| Frozen Whipped Topping | A staple for its convenience and stability. If you prefer to make your own, homemade whipped cream can be used, but ensure it’s stabilized to prevent it from deflating and becoming watery as it thaws slightly. |
| Oreo Cookies | Crushed Oreos provide a wonderful crunch and classic flavor. For variety, you can swap them out for other crushed candy bars (like Heath, Skor, or Butterfinger), chocolate chips, or even graham cracker crumbs for a different kind of base. |
How to Assemble Your Easy Ice Cream Sandwich Cake
Creating this stunning ice cream cake is incredibly straightforward. Follow these simple steps for a flawless dessert every time.
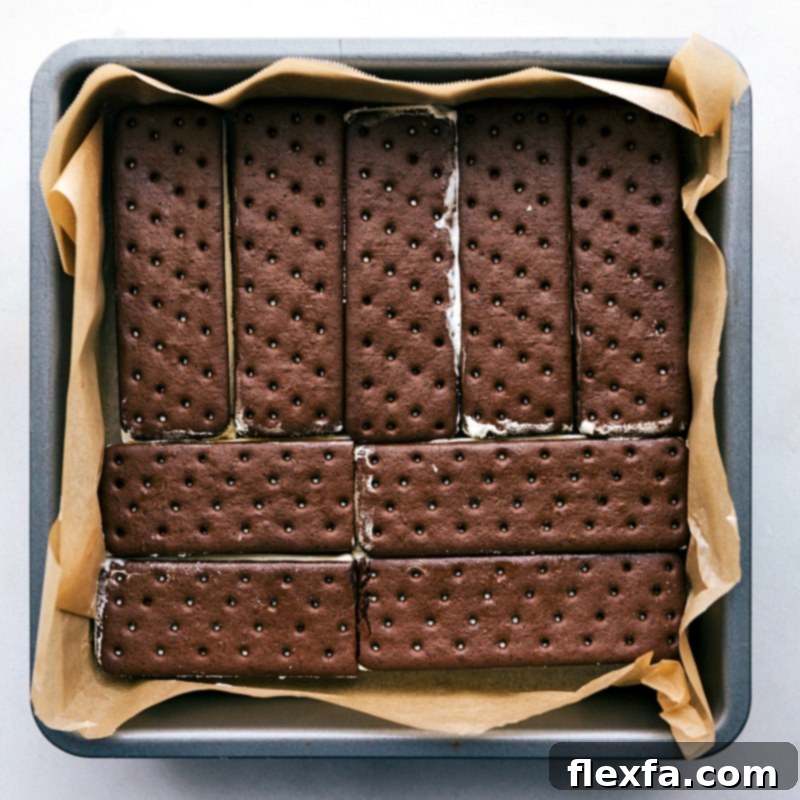
- Prepare Your Pan: Start by lining a 9×9-inch baking pan with parchment paper. It’s crucial to leave an overhang on all sides. This excess paper will act as handles, making it significantly easier to lift the entire frozen cake out of the pan once it’s set. Binder clips can be helpful to secure the parchment paper in place initially while you’re arranging your layers.
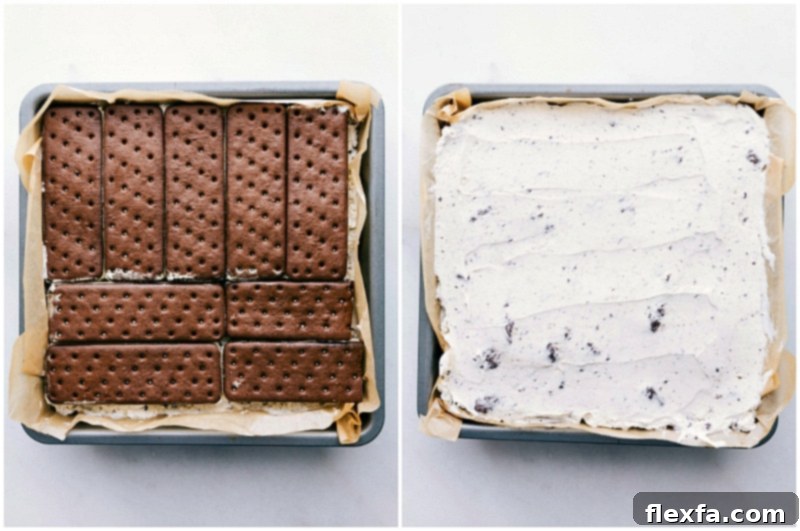
- Lay the First Sandwich Layer: Unwrap all your vanilla ice cream sandwiches. Arrange 9 of them tightly across the bottom of the prepared pan. You might need to gently cut one or two sandwiches to ensure they fit snugly and create a complete, even layer. If the sandwiches start to melt too quickly during this step, pop the pan into the freezer for a few minutes to firm them up before proceeding.
- Spread the First Ice Cream Layer: Once your base of sandwiches is set, retrieve your slightly softened cookies and cream ice cream. Using the back of a large spoon or an offset spatula, carefully spread half of the ice cream evenly over the ice cream sandwich layer. Make sure to press down gently but firmly to eliminate any air pockets and create a compact layer.
- Repeat and Freeze: Place the remaining 9 ice cream sandwiches firmly on top of the first ice cream layer, cutting to fit as needed. Then, spread the remaining half of the cookies and cream ice cream over this second layer of sandwiches, again pressing down firmly to create a smooth, even surface. Cover the pan tightly with plastic wrap or aluminum foil and place it in the freezer for at least 1 hour, or until the layers are thoroughly firm.
- Add Topping & Cookies: Once the cake layers are firm, remove the pan from the freezer. Evenly spread the thawed frozen whipped topping over the entire top surface of the cake. For the Oreo topping, place 6-8 regular Oreos in a sturdy zip-top bag and crush them using a rolling pin, the bottom of a glass, or any solid kitchen item until you have coarse crumbs. Sprinkle these crushed Oreos generously over the whipped topping. Return the cake to the freezer, gently covered, until it is very firm, ideally for at least another hour, or even overnight.
- Slice & Serve with Ease: When you’re ready to serve, use the parchment paper overhang to gently lift the entire cake out of the pan and onto a cutting board. For perfectly clean slices, run a sharp knife under hot water for a few seconds, wipe it dry, make one slice, and then repeat the process for each subsequent cut. This prevents the knife from dragging and sticking to the frozen layers. Serve immediately and enjoy!
Quick Tip for Larger Servings
For those larger gatherings requiring a 9×13-inch pan, simply scale up your ingredients. You will typically need about 24 ice cream sandwiches, approximately 1 and a half containers of your chosen ice cream, and 2 containers of frozen whipped topping to fill the larger pan adequately.

Creative Variations to Customize Your Ice Cream Cake
This basic ice cream sandwich cake recipe is incredibly versatile! Don’t be afraid to get creative with flavors and toppings:
- Neapolitan Delight: Create a vibrant, multi-flavored cake by using Neapolitan ice cream sandwiches and pairing them with Neapolitan-flavored ice cream.
- Festive Peppermint Ice Cream Bars: Perfect for holidays! Use peppermint chocolate ice cream sandwiches and peppermint ice cream for a refreshing and festive twist.
- Candy Bar Dream: Stick with vanilla ice cream sandwiches, choose any of your favorite ice cream flavors (chocolate fudge or caramel swirl would be amazing!), and then top it with a generous sprinkle of crushed candy bars like Heath, Snickers, or Butterfinger.
- Drizzle with Decadence: Elevate your cake by adding a layer of warm Hot Fudge or rich Caramel Sauce between the ice cream layers, or as a decadent drizzle over the top, similar to how I do in these indulgent brownie ice cream bars.
- Fruity Freshness: For a lighter, summery option, add a layer of thinly sliced fresh berries (strawberries, raspberries) between the ice cream layers, or as a colorful garnish on top.
- Coffee Lover’s Treat: Use coffee-flavored ice cream and top with crushed chocolate-covered espresso beans for an adult-friendly version.
Chelsea’s Recipe Tips
My Best Ice Cream Sandwich Cake Recipe Tips for Success
Achieve an effortlessly perfect ice cream cake every time with these insider tips:
- Line the Pan Well for Easy Removal: Don’t skip lining your baking pan with parchment paper, ensuring a generous overhang on all sides. This simple step is a game-changer, allowing you to easily lift the entire frozen cake out of the pan without any sticking or breaking. It makes slicing and serving a breeze!
- Slightly Soften the Ice Cream (But Not Too Much!): For the smoothest possible spread, let your ice cream sit at room temperature for about 5 to 10 minutes before you start. It should be pliable enough to spread easily with a spoon or spatula, but not so soft that it becomes a liquid mess. Over-softened ice cream will result in a messy, less defined cake.
- Press the Layers Down Firmly: As you add each layer – whether it’s ice cream sandwiches or ice cream – take a moment to gently but firmly press it down. This crucial step helps to compact the cake, remove any air gaps, and ensures that all the layers adhere well to each other. A compact cake is not only more stable but also much easier to slice neatly.
- Achieve Clean Slices with a Hot Knife: For those picture-perfect, clean slices, a simple trick works wonders. Run a sharp knife under hot tap water for several seconds, then quickly wipe it dry. Make one slice, and repeat the hot water/wipe dry process for each subsequent cut. The warm blade glides through the frozen cake without dragging, giving you beautifully defined portions.
- Work Quickly: Remember, you’re working with ice cream! Minimize the time the ingredients spend at room temperature to prevent excessive melting. Have all your ingredients prepped and ready to go before you start assembling.
- Plan for Chill Time: This is a no-bake dessert, but it does require ample freezer time to set properly. Allow at least 1-2 hours for the initial freeze and ideally several hours, or even overnight, for the final set before serving. Patience here will be rewarded with a perfectly firm cake.
Storage Information
To keep any leftover Ice Cream Sandwich Cake at its best, store it in an airtight container or wrap it very tightly with plastic wrap and then foil. Place it back in the freezer promptly. For optimal taste and texture, it’s best enjoyed within 2 weeks.
More Delightful Ice Cream Treats You’ll Love:
If you enjoyed this incredibly easy ice cream cake, you’ll love exploring these other frozen delights!
Frozen Treats
Ice Cream In A Bag
Desserts
Churro Ice Cream Sandwiches
Desserts
Spumoni Ice Cream Recipe
Beverages
Malted Milkshake
Print Recipe
Ice Cream Sandwich Cake
By Chelsea Lords
This four-ingredient Ice Cream Sandwich Cake is a remarkably easy and satisfying no-bake dessert, featuring delectable layers of classic ice cream sandwiches, creamy cookies-and-cream ice cream, and a fluffy whipped cream topping finished with crushed Oreos. It’s the perfect treat for any occasion, especially during warm weather!
Prep Time: 15 minutes
Chilling Time: 1 hour
Total Time: 1 hour 15 minutes
Servings: 16 pieces
Rated 5 out of 5 stars by 2 users.
Equipment
- 9 x 9-inch baking pan
- Parchment paper
- Large spoon or offset spatula
- Zip-top bag and rolling pin (for crushing Oreos)
- Sharp knife
Ingredients
- 18 regular vanilla ice cream sandwiches, unwrapped
- 1 (48-ounce) container cookies and cream ice cream (approximately 3 pints), slightly softened
- 1 (8-ounce) container frozen whipped topping, thawed to room temperature
- 6–8 regular Oreos, crushed (see note 1 for alternative toppings)
Instructions
- Line a 9×9-inch pan with parchment paper, ensuring there’s an overhang on all sides for easy removal of the cake. If your ice cream is very firm, allow it to stand at room temperature for about 5 minutes until it’s slightly softened but not melted.
- Unwrap all your ice cream sandwiches. Arrange 9 sandwiches onto the bottom of the prepared pan, pressing them down to form an even layer. You may need to trim or cut 1-2 sandwiches to fit perfectly (refer to images in the post for visual guidance).
- Using a large spoon or an offset spatula, spread half of the slightly softened cookies and cream ice cream evenly over the first layer of ice cream sandwiches. Press down firmly to create a compact and smooth layer.
- Firmly press the remaining 9 ice cream sandwiches on top of the first ice cream layer. Spread the remaining ice cream evenly over these sandwiches, again pressing firmly to flatten the layer. Cover the pan tightly and place it in the freezer until the layers are firm, which usually takes about 1 hour.
- Remove the partially frozen dessert from the freezer. Evenly spread the thawed whipped topping over the entire surface of the cake. Crush the Oreos (as described in the equipment section or step 5 above) and sprinkle them generously over the whipped topping. Return the cake to the freezer, covered gently, until it is very firm, typically for at least 1-2 more hours or overnight.
- To serve, use the parchment paper overhang to lift the entire cake from the pan onto a cutting board. For clean, neat slices, run a sharp knife under hot water for a few seconds, wipe it dry, make one slice, and then repeat this process for each subsequent cut.
- Immediately return any leftover Ice Cream Sandwich Cake to the freezer, ensuring it is covered tightly in an airtight container or tightly wrapped to prevent freezer burn.
Recipe Notes
Note 1: For alternative toppings, consider using a crushed candy bar of your choice (such as Heath, Skor, Butterfinger, or even Snickers) instead of Oreos if desired.
Storage: Store any leftover Ice Cream Sandwich Cake in an airtight container in the freezer. It is best enjoyed within 2 weeks for optimal freshness and texture.
Nutrition
Serving: 1 serving | Calories: 423kcal | Carbohydrates: 60g | Protein: 7g | Fat: 19g | Saturated Fat: 9g | Polyunsaturated Fat: 2g | Monounsaturated Fat: 5g | Trans Fat: 0.003g | Cholesterol: 46mg | Sodium: 194mg | Potassium: 327mg | Fiber: 1g | Sugar: 42g | Vitamin A: 561IU | Vitamin C: 1mg | Calcium: 167mg | Iron: 1mg
Nutrition information is automatically calculated and should only be used as an approximation.
We hope you thoroughly enjoy creating and sharing this fantastic 4-ingredient Ice Cream Sandwich Cake! Its ease, versatility, and irresistible taste make it a staple for any gathering. Whether it’s a casual backyard BBQ or a special celebration, this no-bake wonder is guaranteed to bring smiles.
If you loved this recipe and found it helpful, please consider leaving a review or a comment below! Your feedback helps others discover and enjoy this delightful frozen treat. Happy chilling!