
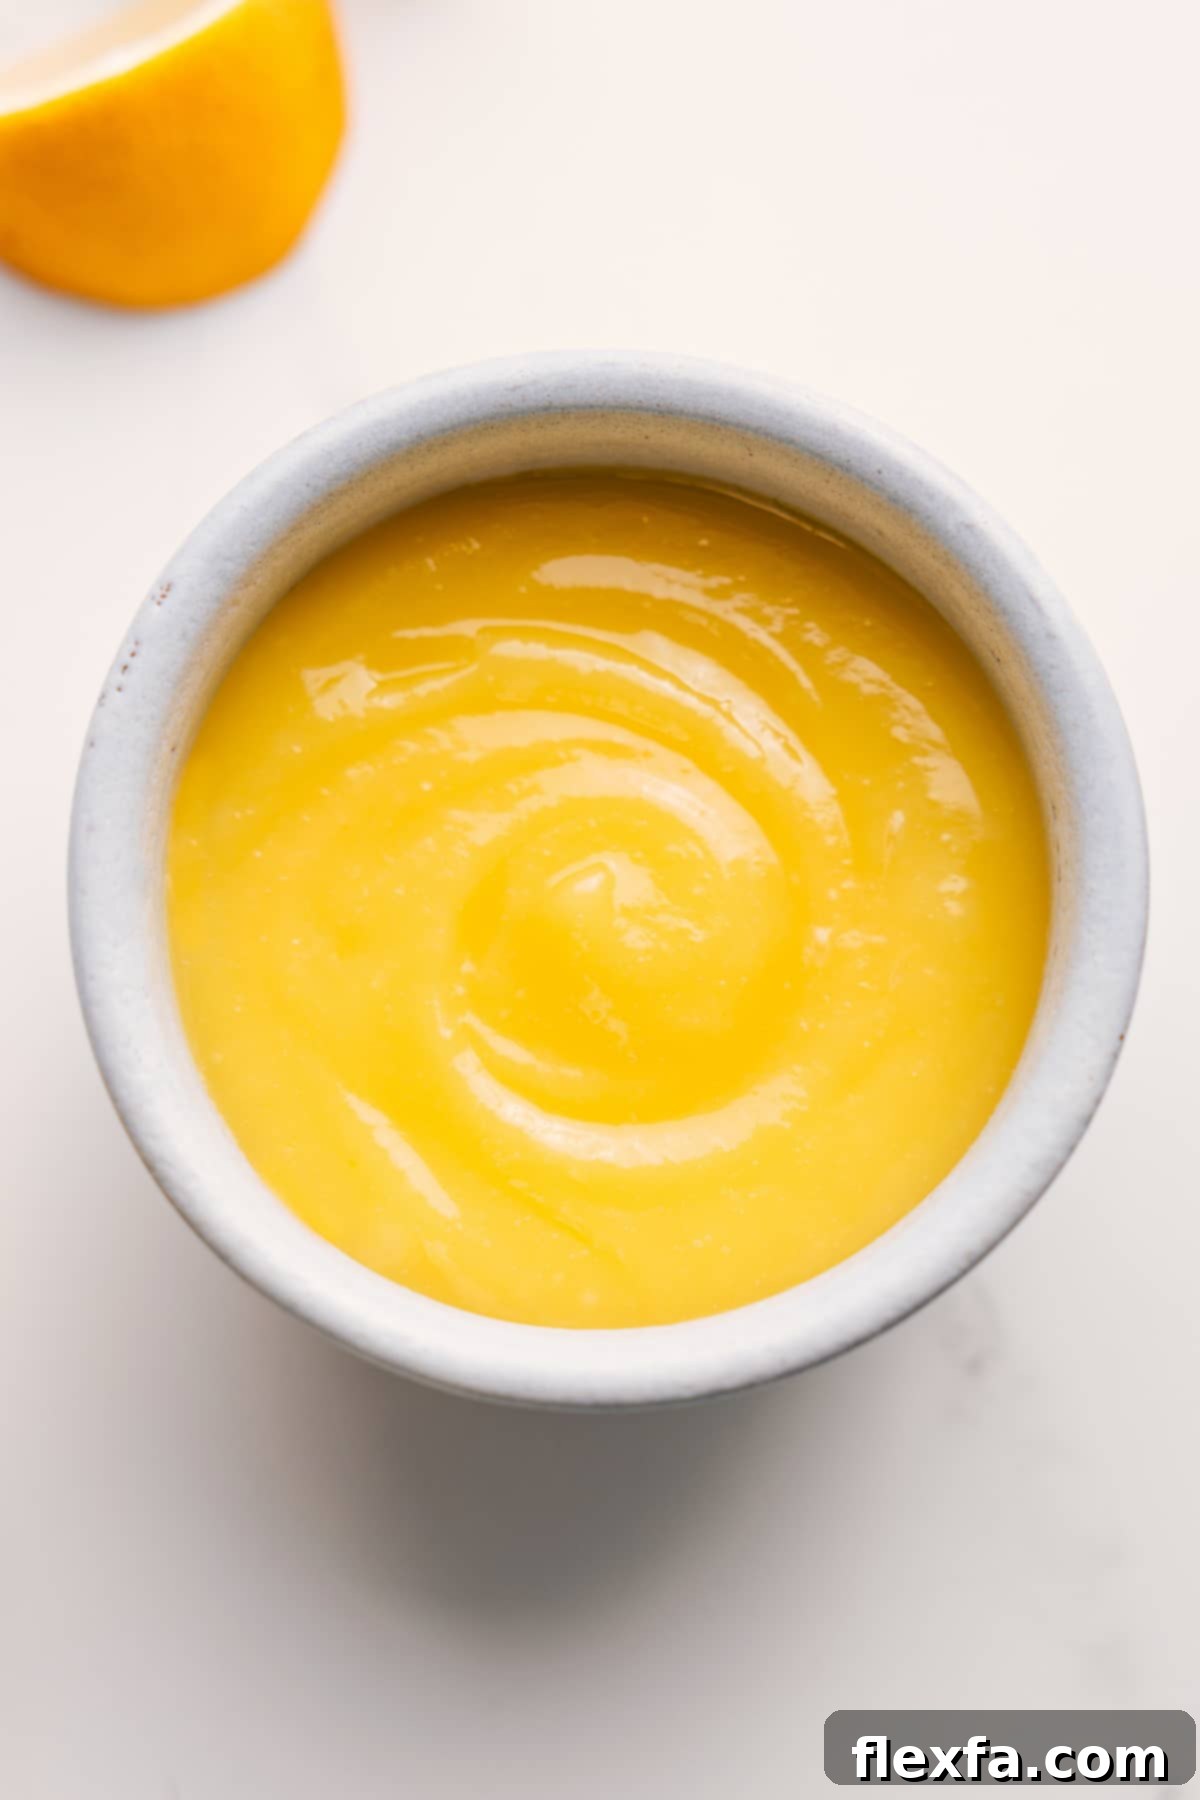
Master the art of creating the most exquisite homemade Lemon Curd – a truly rich, tangy, and velvety spread crafted from the freshest lemons, creamy butter, fine granulated sugar, and farm-fresh eggs. This vibrant culinary delight far surpasses any store-bought version, offering unparalleled depth of flavor and a luxuriously smooth texture. It’s incredibly versatile, serving as the perfect accompaniment to fluffy scones, warm biscuits, elegant desserts, or your morning pancakes, instantly elevating any dish it graces.

Author’s Insight
Why Homemade Lemon Curd Is an Absolute Must-Make
I am a firm believer in simple culinary enhancements that truly elevate a dish. However, when it comes to lemon curd, I simply refuse to compromise. Store-bought varieties, no matter how premium, just cannot compete with the incredible vibrancy and luscious texture of a homemade batch. Lemon curd is, without a doubt, my all-time favorite dessert sauce, and its versatility means I find myself incorporating it into almost everything.
I adore spooning it generously over delicate crepes and fluffy pancakes for a bright breakfast treat. It’s fantastic swirled into creamy yogurt, especially when paired with crunchy crushed meringues for an extra layer of texture. And there’s nothing quite as comforting or indulgent as spreading a thick, warm layer of lemon curd over a freshly baked biscuit, allowing its tartness to cut through the richness beautifully.
Because of my profound love for this zesty spread, I was determined to perfect this recipe. I wasn’t willing to settle for anything less than the absolute best lemon curd I had ever tasted – one that boasted the ideal balance of sweet and tart, along with an irresistibly silken consistency.
After numerous batches and meticulous testing, I uncovered the ultimate secret to achieving perfect results every single time: employing a candy thermometer. This essential tool completely removes the guesswork from the cooking process, guaranteeing that the curd reaches the exact temperature needed to thicken properly. The outcome is consistently flawless lemon curd, distinguished by its exquisite silky texture and a brilliantly balanced, authentically fresh lemon flavor that will impress even the most discerning palates.
The Unmatched Joy of Homemade Lemon Curd
Embarking on the journey of making your own lemon curd is a culinary revelation. Once you experience the profound freshness, the vibrant, intense lemon flavor, and the luxurious, melt-in-your-mouth texture that only homemade can offer, you’ll understand why it’s a staple in countless kitchens. This isn’t merely about avoiding artificial ingredients; it’s about crafting a spread that bursts with authentic zest and a delicate sweetness, a taste profile far superior to anything you’ll find pre-packaged.
Creating your own batch allows for complete control over the ingredients, from the quality of the lemons to the precise balance of sugar and butter. This means you can tailor the tartness and sweetness to your exact preference, crafting a truly personalized condiment. Beyond its incredible flavor, the process itself is wonderfully rewarding, transforming simple components into a gourmet delight with minimal effort. This guide is designed to empower every home cook, regardless of experience level, to achieve a consistently perfect, bright, and utterly delicious lemon curd. Prepare to captivate your taste buds and impress everyone with this versatile, sunshine-yellow creation!
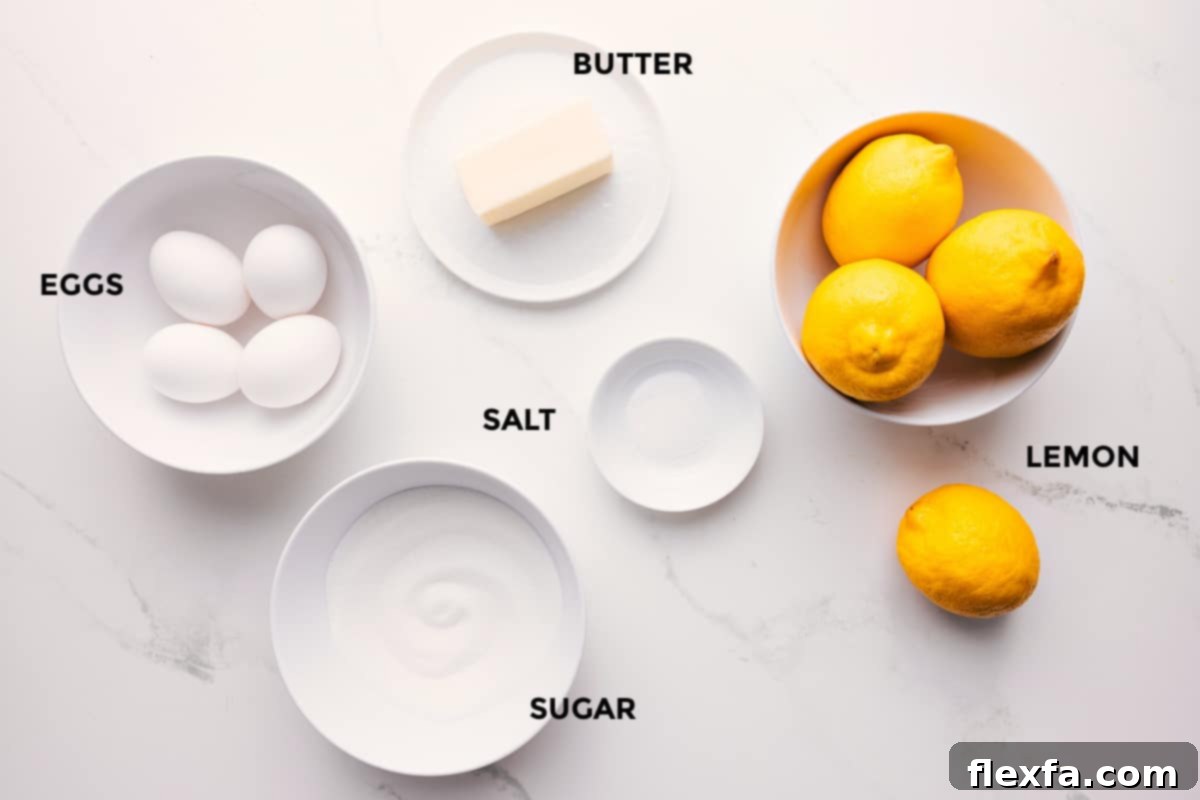
Essential Ingredients for a Luscious Lemon Curd
Creating a truly remarkable lemon curd requires just five core ingredients, each playing a vital role in achieving its signature bright flavor and exquisite silky texture. The key is to use high-quality ingredients and pay attention to their preparation. Here’s a detailed look at what you’ll need and the importance of each component:
| Ingredient | Tips & Importance |
|---|---|
| Fresh Lemons | The undisputed star of our recipe! You will need both the vibrant, aromatic zest and freshly squeezed juice from ripe lemons. It is absolutely crucial to use fresh lemons; the essential oils found in the zest and the bright, complex acidity of fresh juice cannot be replicated by bottled alternatives. Bottled lemon juice will result in a flat, one-dimensional flavor. Choose firm, bright yellow lemons with smooth, unblemished skin for the best zest and juice yield. |
| Granulated Sugar | More than just a sweetener, sugar contributes to the curd’s glossy finish and helps achieve that desirable tender consistency. For an intensified lemon flavor that truly pops, I highly recommend pulsing the granulated sugar with the fresh lemon zest in a food processor before combining it with other ingredients. This process releases the flavorful essential citrus oils directly into the sugar crystals, creating a more deeply aromatic and flavorful curd. |
| Large Eggs | Whole eggs are the primary thickening agent in this recipe, transforming the liquid mixture into a rich, custardy spread. Unlike some recipes that rely solely on yolks for richness, using whole eggs provides both effective thickening and a beautiful, natural pale yellow hue. For optimal emulsification and a consistently smooth texture, ensure your eggs are at room temperature before you begin. Cold eggs can cause the butter to seize, leading to a grainy or curdled appearance. |
| Unsalted Butter | Butter is key to imparting the incredible richness, luxurious smoothness, and luscious mouthfeel that defines a truly great lemon curd. Opting for unsalted butter is vital, as it gives you complete control over the overall salt content, allowing for a perfectly balanced flavor that harmonizes with the tartness of the lemons. Just like the eggs, it’s imperative that your butter is at room temperature – softened but not melted – for proper creaming with the sugar. |
| Salt | Often overlooked, even a small pinch of salt plays a significant role in enhancing the overall flavor profile of your lemon curd. It acts as a crucial balancer, tempering the intense sweetness and bright tartness of the lemon. This subtle addition prevents the curd from tasting overly sweet or overwhelmingly sour, ensuring a well-rounded, complex, and incredibly satisfying flavor experience that makes all the other ingredients shine. |
Pro Tip: Your Secret Weapon for Perfect Curd
Take all the guesswork out of achieving the perfect consistency for this Lemon Curd recipe with a reliable candy thermometer! Reaching the precise temperature of 170°F (77°C) is absolutely critical for the curd to thicken correctly and achieve its signature velvety smoothness. This versatile kitchen tool isn’t just for lemon curd; it’s also perfect for crafting other delightful confections like crisp buttercrunch candy and rich, buttery toffee, making it an invaluable asset in any baker’s arsenal.
Crafting Your Homemade Lemon Curd: A Step-by-Step Guide
Making a truly exceptional lemon curd from scratch is a surprisingly simple and gratifying process that yields incredible results. By following these clear and detailed steps, you’ll achieve a perfectly smooth, rich, and tangy curd every single time. Pay close attention to ingredient temperatures and cooking consistency for the best outcome.
Step 1: Prepare Your Ingredients to Perfection
- Bring to Room Temperature: The very first step is crucial: pull out your eggs and butter from the refrigerator well in advance, allowing them to reach true room temperature. This is absolutely critical for proper emulsification, preventing a grainy texture, and ensuring the butter creams correctly.
- Zest the Lemons: Using a fine microplane zester, carefully zest the lemons. You’re aiming for approximately 3 tablespoons of finely grated zest. Be meticulous to only remove the bright yellow outer layer, avoiding the bitter white pith directly underneath.
- Juice the Lemons: After zesting, halve and juice your lemons using a citrus juicer. Measure out exactly 1/2 cup of fresh lemon juice. Strain it through a fine-mesh sieve to catch any seeds or pulp, ensuring a perfectly smooth curd.
Step 2: Infuse the Sugar for Maximum Lemon Flavor
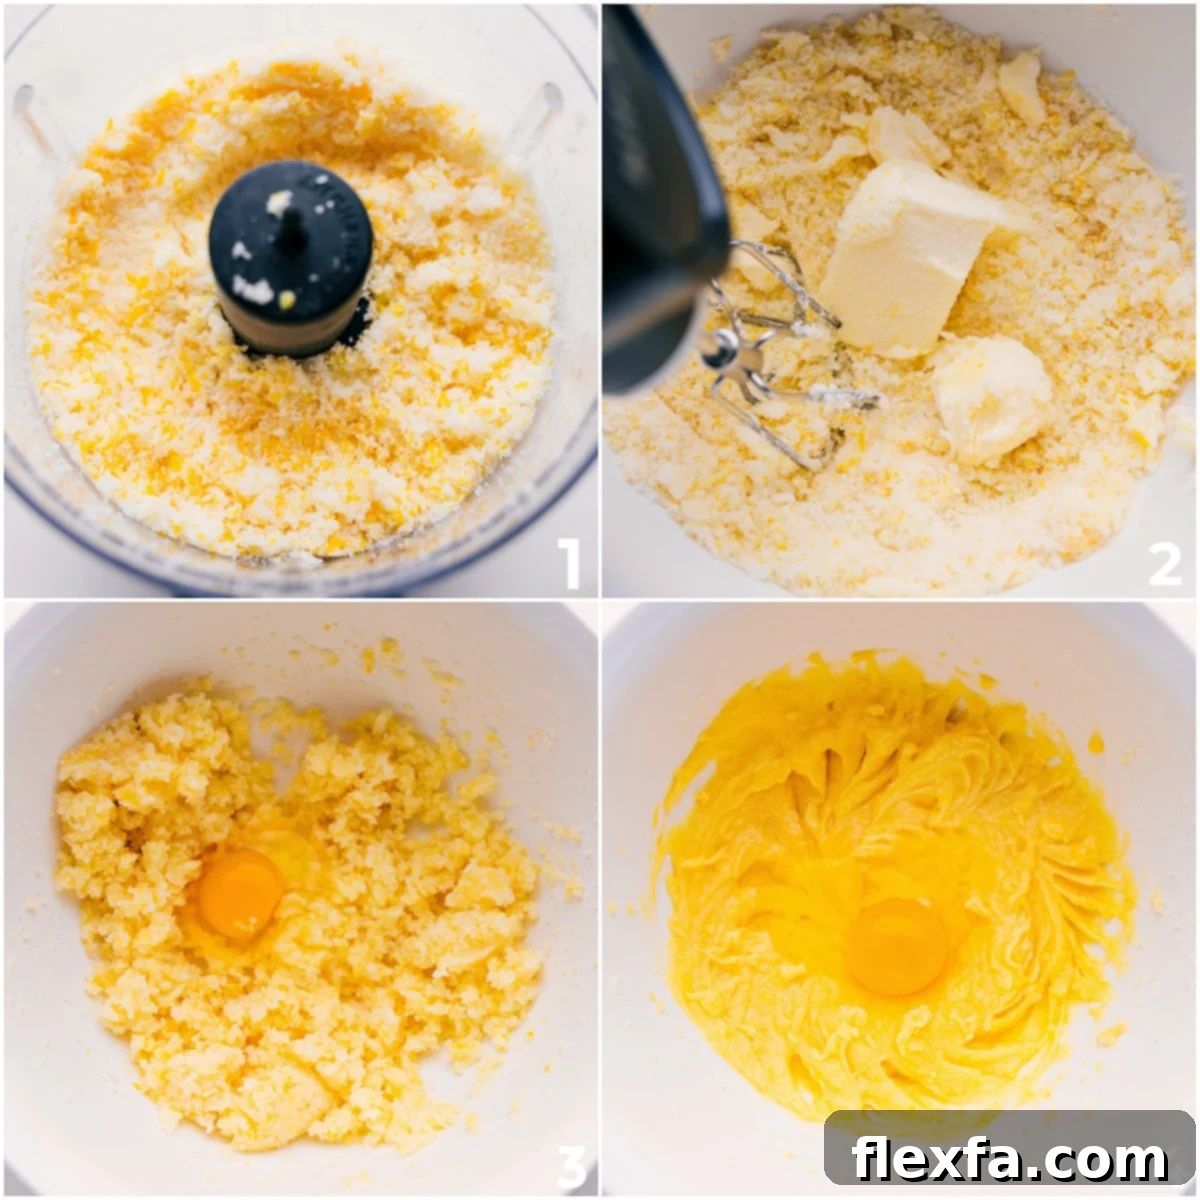
- Pulse Zest and Sugar: In the bowl of a food processor, combine the granulated sugar and the prepared lemon zest. Pulse the mixture 15-20 times, or until the zest is very finely broken down and thoroughly incorporated into the sugar. This technique effectively releases the lemon’s essential oils, infusing the sugar with intense citrus aroma and flavor.
- Transfer to Mixing Bowl: Carefully transfer this aromatic lemon-infused sugar to a large mixing bowl, or the bowl of a stand mixer if you are using one.
Step 3: Cream the Butter Until Light and Fluffy
- Cream Butter with Sugar: Add the softened, room-temperature (crucially, not melted!) unsalted butter to the lemon-sugar mixture. Using a hand mixer on medium speed (or the whisk attachment for a stand mixer), beat the ingredients together for about 2-4 minutes until the mixture becomes noticeably lighter in color, fluffy, and creamy. Remember to scrape down the sides of the bowl frequently with a rubber spatula to ensure all ingredients are thoroughly combined and no pockets of butter remain.
Step 4: Incorporate Eggs and Lemon Juice Gently
- Add Eggs One by One: Beat in the room-temperature large eggs, adding them one at a time. After each egg, mix just briefly on low speed until it is incorporated into the butter mixture before adding the next. Overmixing at this stage is not necessary and can lead to a less tender curd.
- Final Liquid Additions: Once all eggs are mixed in, add the 1/8 teaspoon of salt and the measured 1/2 cup of freshly squeezed lemon juice. Mix briefly again, just enough to combine all the ingredients into a smooth, cohesive liquid mixture. Avoid over-mixing once the lemon juice is added.
Step 5: Cook and Thicken the Curd to Perfection
- Begin Cooking: Pour the entire liquid mixture into a medium-sized, heavy-bottomed saucepan. Place the saucepan over consistently low heat.
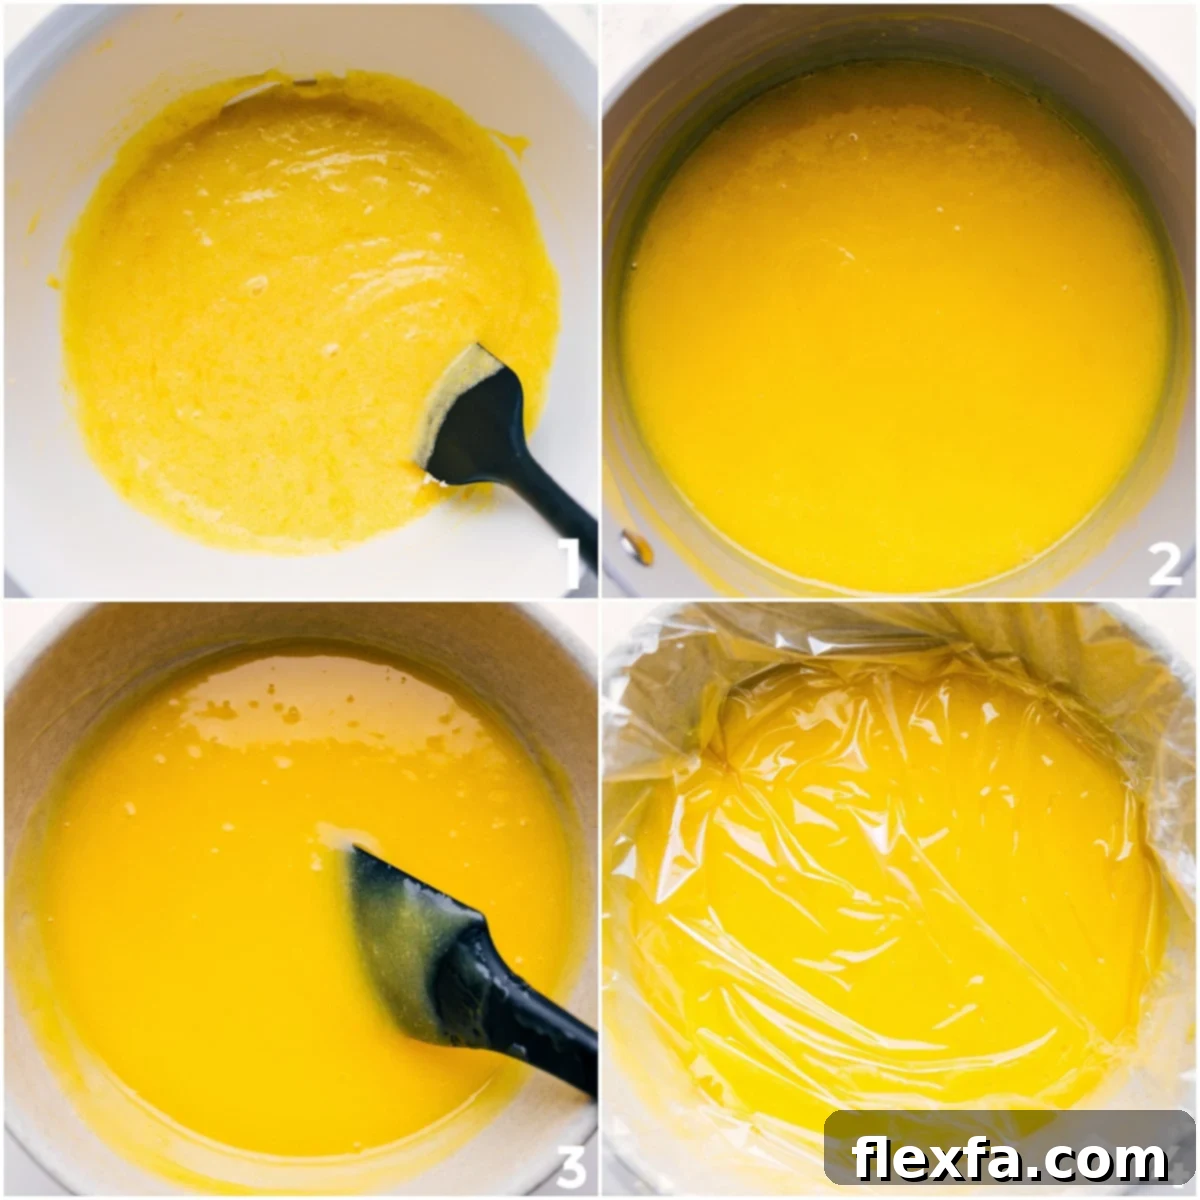
- Stir Constantly: This is arguably the most critical cooking phase. Stir the mixture constantly with a heat-resistant rubber spatula, ensuring you continuously scrape the bottom and sides of the pan. This prevents the eggs from scrambling and ensures even heating and thickening. Continue stirring for approximately 10-15 minutes, or until the curd visibly thickens to a pourable pudding-like consistency.
- Monitor Temperature: Crucially, insert your candy thermometer into the curd and continue cooking and stirring until it reaches a precise temperature of 170°F (77°C). If the curd does not reach this specific heat, the egg proteins will not sufficiently denature and coagulate, and your curd will not properly set, remaining runny.
Step 6: Strain and Chill for Ultimate Silkiness
- Strain Immediately: As soon as the curd reaches 170°F, remove it from the heat without delay. Immediately pour the hot curd through a fine-mesh sieve (also known as a chinois) set over a clean, airtight container or bowl. Use your rubber spatula to press the curd through the sieve, ensuring any tiny bits of cooked egg or stray zest particles are removed. This straining step is essential for achieving that exquisitely smooth, velvety texture.
- Prevent a Film: To prevent an undesirable “skin” or film from forming on the surface as the curd cools, immediately press a piece of plastic wrap directly onto the surface of the hot lemon curd. Ensure the plastic wrap makes full contact, touching every part of the curd.
- Chill Thoroughly: Store the covered lemon curd in the refrigerator for at least one hour to begin setting, but for the best flavor development and ideal snack-pudding-like consistency, chilling for 8 hours or even overnight is highly recommended before serving.
Visual Cues for Doneness: The Spoon Test
Beyond the thermometer, there’s a classic visual test for doneness. When hot, your lemon curd should be thick enough to generously coat the back of a spoon. To perform the “spoon test,” simply lift the spoon from the curd and immediately run your fingertip across the back of the coated spoon. If the line you trace holds cleanly without the curd running back together into the gap, it’s perfectly cooked and ready! At this stage, it should have the consistency of a thick, pourable pudding. As it chills in the refrigerator, it will continue to firm up beautifully, reaching a delightful snack-pudding texture, ideal for spreading or spooning.
Chelsea’s Recipe Tip
My Favorite Ways to Savor This Luscious Lemon Curd:
This homemade lemon curd is an absolute dream ingredient—so incredibly versatile that it’s hard to pick just one favorite way to enjoy it. Its vibrant, zesty flavor adds a touch of gourmet elegance and brightness to both sweet and even some savory applications. Here are some of my most cherished methods for incorporating this liquid gold into meals, snacks, and desserts, guaranteed to bring a burst of sunshine to your palate:
- Elevate Your Breakfast & Brunch: Transform ordinary morning meals into extraordinary treats. Spoon generous dollops over delicate, thin crepes, fluffy slices of French toast, towering stacks of warm pancakes, or crispy golden waffles. The curd’s tartness provides a perfect, refreshing counterpoint to the sweetness of syrups, fruits, and pastries.
- Classic Pairings with Baked Goods: There’s a reason why lemon curd and freshly baked goods are a match made in culinary heaven. Serve it lavishly over warm, flaky biscuits or tender, homemade scones. It’s the quintessential addition to an elegant afternoon tea spread, bringing sophistication and a burst of flavor.
- Divine Cheesecake Topping: Take any cheesecake from simply delicious to absolutely divine. Whether you opt to buy a creamy plain cheesecake or meticulously bake a batch of homemade cheesecake bars, a generous spoonful (or three!) of vibrant lemon curd on top adds a brilliant burst of flavor and a silky, contrasting texture that perfectly complements the rich cream cheese.
- Irresistible Cookie Filling: For a truly delightful and unexpected dessert, incorporate this curd directly into your baking repertoire. I absolutely adore it nestled as a bright, tangy surprise in the center of tender lemon curd cookies, offering a burst of zesty pleasure with every bite.
- Create Lemony Whipped Cream: Whip up some freshly whipped cream until soft peaks form, then gently fold in a few spoonfuls of your homemade lemon curd. The result is an incredibly light, airy, and irresistible lemony whipped cream that is fantastic on fresh fruit tarts, alongside pies, or simply by itself as a spoonful of joy.
- Decadent Cake Filling: During my time working at a restaurant, our famous carrot cake was renowned for a special secret ingredient: a thin, luscious layer of lemon curd delicately spread between the layers of rich cream cheese frosting. It introduces a sophisticated tang that beautifully cuts through the sweetness and spice of the cake, creating an unforgettable and perfectly balanced dessert experience. Don’t hesitate to try this with your favorite layer cakes!
Storage Solutions for Your Homemade Lemon Curd
Proper storage is essential to ensure your delicious homemade lemon curd remains fresh, vibrant, and flavorful for as long as possible. Whether you plan to enjoy it within a couple of weeks or save it for a special occasion later, here’s how to store it effectively:
- Refrigerate for Short-Term: Once your lemon curd has completely cooled to room temperature, transfer it to a clean, airtight container or a sealed glass jar. Store it securely in the refrigerator, where it will maintain its peak freshness and delightful flavor for up to 2 weeks. Always ensure the lid is tightly sealed to prevent the absorption of other fridge odors and to preserve its smooth texture.
- Freeze for Longer-Term: For extended enjoyment, homemade lemon curd freezes exceptionally well. Transfer the thoroughly cooled curd into a suitable freezer-safe container, leaving about half an inch of headspace to allow for any slight expansion during freezing. Alternatively, you can use a heavy-duty zip-top freezer bag, pressing out as much air as possible before sealing. Freeze for up to 3 months. Don’t forget to label the container or bag with the date of freezing for easy tracking.
- Thawing Frozen Curd: When you’re ready to indulge in your frozen lemon curd, simply transfer it from the freezer to the refrigerator overnight. This allows it to thaw gently and evenly, maintaining its creamy consistency. Once thawed, give it a good whisk or stir before serving to restore its smooth texture and vibrant appeal. Avoid thawing at room temperature to maintain food safety and quality.
Troubleshooting Common Lemon Curd Issues
Even seasoned bakers can encounter a hiccup or two. Here are solutions to common problems you might face when making lemon curd, ensuring your next batch is flawless:
- Curd is Too Thin or Runny: This is the most common issue and almost always indicates that the curd was not cooked long enough or did not reach the crucial temperature of 170°F (77°C). Don’t despair! Return the curd to the saucepan over very low heat and continue stirring constantly, monitoring the temperature with your candy thermometer. It will eventually thicken. Be patient!
- Curd Has a Grainy or Scrambled Texture: This usually occurs if your butter and eggs were not at room temperature, causing the butter to seize or the eggs to cook too quickly and unevenly. While you can’t entirely reverse scrambled eggs, immediately straining the hot curd through a very fine-mesh sieve (and pressing it through with a spatula) will significantly improve the texture by removing any small cooked egg bits or lumps.
- Curd Tastes Too Sour or Too Sweet: The balance of flavors is subjective and can vary with lemon acidity. If your finished curd is too sour, you can try gently whisking in a small amount of powdered sugar (start with a tablespoon) to adjust. If it’s too sweet, a tiny squeeze of fresh lemon juice might help, but be careful not to make it too thin. Make a note for your next batch to adjust the sugar or lemon juice accordingly.
The History and Enduring Appeal of Lemon Curd
Lemon curd, a beloved classic British confection, boasts a rich history spanning centuries. Its origins can be traced back to 17th-century England, where it was initially prepared as “lemon cheese” and served in thin slices alongside bread or scones during afternoon tea, much like a savory accompaniment rather than a modern spread. This early version was a precursor to the smoother, richer curd we know today, often made by simply cooking lemon juice, sugar, butter, and eggs until thickened, then strained for a refined texture. Its popularity surged significantly in the Victorian era, becoming an indispensable staple in many households and a celebrated component in exquisite tarts, cakes, and pastries.
The enduring appeal of lemon curd lies squarely in its uniquely captivating flavor profile. It’s a delightful culinary dance between the bright, invigorating tartness of fresh citrus and a sumptuously creamy sweetness. Lighter and more vibrant than traditional custards, yet richer and more complex than typical fruit jams, lemon curd occupies a special place in the dessert world. This remarkable versatility allows it to shine in an expansive array of culinary applications, from transforming a simple breakfast into an indulgent treat to serving as a sophisticated component in elaborate desserts. Its timeless charm and ability to instantly brighten any dish solidify its status as a cherished and indispensable confection.
More Zesty Lemon Delights to Explore:
If you’ve fallen head over heels for the vibrant, tangy flavor of this homemade lemon curd, you’re in for a treat! Discover these other delightful lemon-infused recipes that are perfect for satisfying any citrus craving. Expand your repertoire of bright, zesty creations!
Desserts
The BEST Lemon Bars Recipe
Desserts
Lemon Pie Recipe
Beverages
Peach Lemonade
Breakfast
Lemon Blueberry Sweet Rolls
Quick Recipe Card: Homemade Lemon Curd
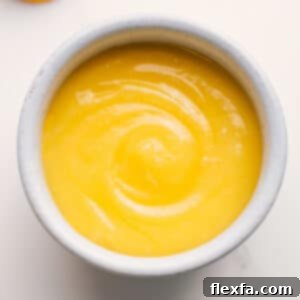
Lemon Curd Recipe
By Chelsea Lords
This delightful Lemon Curd Recipe guides you through making a vibrant, zesty homemade spread using fresh lemons, rich butter, sugar, and eggs. Boasting a luxurious texture and bright flavor, it’s a truly superior alternative to store-bought varieties, perfect for enhancing scones, desserts, or pancakes.
Prep Time: 20 minutes
Cook Time: 15 minutes
Chilling Time: 8 hours
Total Time: 8 hours 35 minutes
Yields: 16 servings
Equipment
- Candy Thermometer (highly recommended for accuracy)
- Food processor
- Hand mixer or stand mixer
- Medium, heavy-bottomed saucepan
- Fine mesh sieve
- Heat-resistant rubber spatula
- Airtight container or glass jar for storage
Ingredients
For the Lemon Curd:
- 1-1/2 cups granulated sugar
- 4 large lemons (for approximately 3 tbsp zest and 1/2 cup juice)
- 8 tablespoons (1/2 cup) unsalted butter, at room temperature
- 4 large eggs, at room temperature (see note on temperature)
- 1/8 teaspoon salt
Instructions
- Prepare Ingredients: Ensure eggs and butter are at room temperature. Zest lemons to get 3 tablespoons of pure yellow zest (avoid white pith). Juice zested lemons to yield 1/2 cup fresh lemon juice; strain to remove pulp/seeds.
- Infuse Sugar: In a food processor, combine granulated sugar and lemon zest. Pulse 15-20 times until zest is finely broken down and incorporated into the sugar. Transfer to a large mixing bowl.
- Cream Butter: Add room-temperature unsalted butter to the lemon-sugar mixture. Using a hand mixer (or stand mixer), beat until light and creamy, about 2-4 minutes, scraping down bowl sides as needed.
- Incorporate Eggs & Juice: Beat in eggs one at a time, mixing briefly after each. Finally, mix in salt and the 1/2 cup freshly squeezed lemon juice until just combined.
- Cook to Thicken: Pour mixture into a medium saucepan. Cook over low heat, stirring constantly with a rubber spatula for 10-15 minutes, until significantly thickened. The curd must reach 170°F (77°C) on a candy thermometer to set properly.
- Strain & Chill: Immediately remove from heat and pour through a fine mesh sieve into an airtight container. Press plastic wrap directly onto the curd’s surface to prevent a film. Refrigerate for at least 1 hour, preferably 8 hours (or overnight), before serving to allow it to fully set.
Recipe Notes
- Candy Thermometer: Using a candy thermometer is highly recommended for accuracy, ensuring your curd thickens perfectly every time.
- Room Temperature Ingredients: It is critical that your butter, lemon juice, and eggs are all at the same room temperature. Cold ingredients can cause the butter to seize or the mixture to curdle, leading to a grainy texture.
- Doneness Test: The hot curd should be thick enough to coat the back of a spoon. When you run your finger across the spoon, the line should remain clear. It will be like a pourable pudding when hot and will firm up to a snack-pudding consistency once chilled.
- Nutrition: Nutrition information provided is an approximation for a 2-tablespoon sized serving.
- Storage: Store cooled lemon curd in an airtight container in the fridge for up to 2 weeks, or freeze for up to 3 months. Thaw frozen curd in the fridge overnight before use.
Nutrition Information
Serving: 1 serving | Calories: 151kcal | Carbohydrates: 21g | Protein: 2g | Fat: 7g | Saturated Fat: 4g | Polyunsaturated Fat: 0.5g | Monounsaturated Fat: 2g | Trans Fat: 0.2g | Cholesterol: 62mg | Sodium: 37mg | Potassium: 57mg | Fiber: 1g | Sugar: 19g | Vitamin A: 258IU | Vitamin C: 14mg | Calcium: 16mg | Iron: 0.4mg
Nutrition information is automatically calculated and should be used as an approximation.
Loved this homemade lemon curd recipe? We’d be thrilled to hear about your experience! Please consider leaving a review and rating it below.
Your feedback is incredibly valuable to us and helps other home cooks discover this delightful recipe. Share your thoughts and culinary successes in the comments section!