

The Best Chocolate Chip Scones Recipe
Indulge in these irresistible Chocolate Chip Scones, a bakery-style treat you can easily make at home. Experience the delight of buttery, golden-brown edges giving way to a soft, tender center, studded with pockets of gooey, melted chocolate. What’s the secret to achieving that perfect scone texture? Greek yogurt! It adds a subtle tang and ensures your scones are incredibly moist and delicious.

The Secret Ingredient: Why Greek Yogurt Makes These Scones Special
While cottage cheese might be trending on social media, let’s not forget the unsung hero of the dairy aisle: Greek yogurt. It’s versatile, it’s healthy, and, dare I say, it tastes better than forcing cottage cheese into every recipe imaginable! For me, Greek yogurt is the go-to ingredient for adding moisture and a delightful tang to baked goods.
Using Greek yogurt in scones is a game-changer. Traditional scone recipes often rely on heavy cream and a generous amount of sugar. While delicious, I wanted to create a lighter version without sacrificing that classic bakery-style texture. By reducing the sugar and swapping heavy cream for Greek yogurt, I achieved just that.
After a few trials, I perfected a recipe that yields incredibly tender, moist, and flavorful scones. You won’t believe they’re any lighter than traditional versions. In fact, they might just be my new favorite!
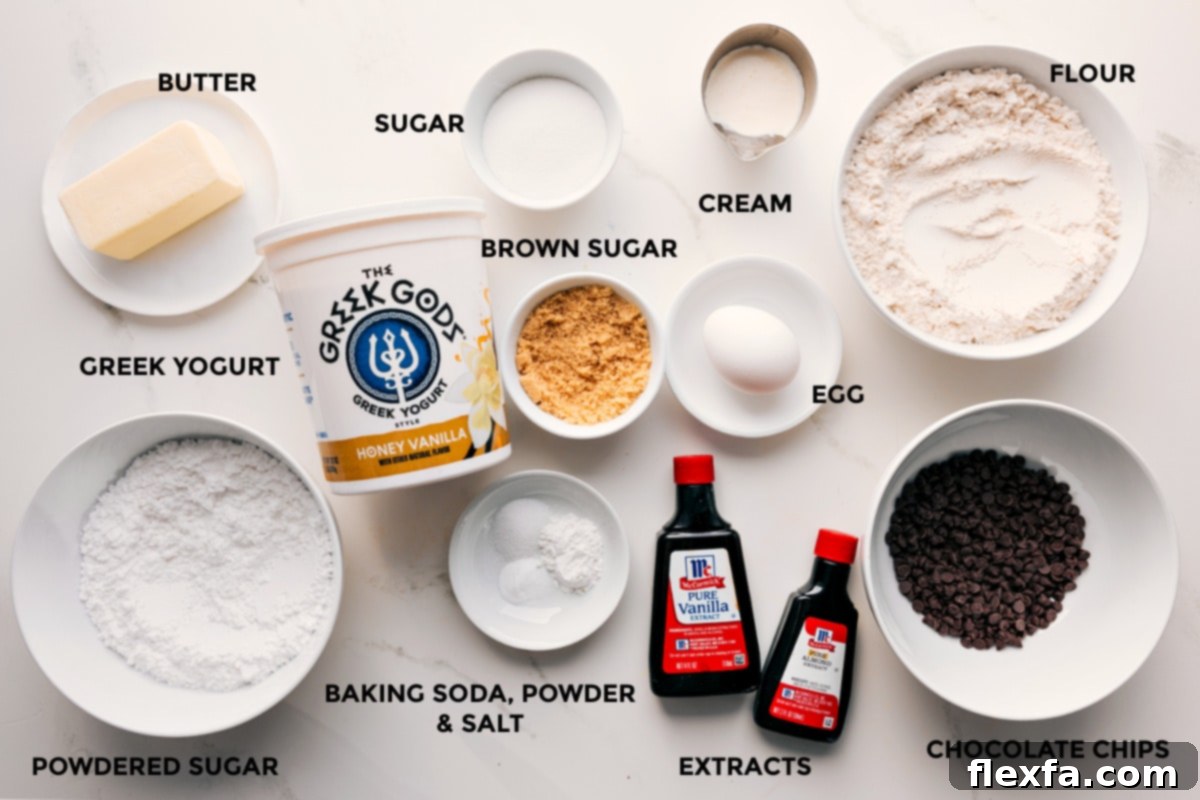
Key Ingredients for Perfect Chocolate Chip Scones
Let’s break down the essential ingredients you’ll need to create these delightful treats. Each component plays a vital role in achieving that perfect balance of flavor and texture.
| Ingredient | Tips for Success |
|---|---|
| Flour, Sugar, Baking Powder, Baking Soda, Salt | Ensure your brown sugar is fresh and soft, not clumpy. Fresh baking agents are crucial for proper leavening. |
| Frozen Butter | Grate the butter straight from the freezer. Work quickly to keep it cold. Cold butter creates those beautiful, flaky layers we all love. |
| Greek Yogurt, Egg, Extracts | Use thick, full-fat Greek yogurt for the best texture and richness. Honey-vanilla Greek yogurt adds an extra layer of flavor to these scones. A touch of almond extract complements the chocolate beautifully. |
| Chocolate Chips | Opt for mini chocolate chips. They disperse evenly throughout the dough and melt perfectly into every bite. Larger chips don’t work as well in this recipe. |
| Heavy Cream, Sugar (for brushing) | Brush the tops of the scones lightly with heavy cream for a golden-brown finish. A sprinkle of sugar adds a touch of sweetness and sparkle. |
| Milk, Powdered Sugar, Vanilla Extract (for Glaze) | The glaze should be thick and glossy and be gently drizzled on top of your scones once cooled. |
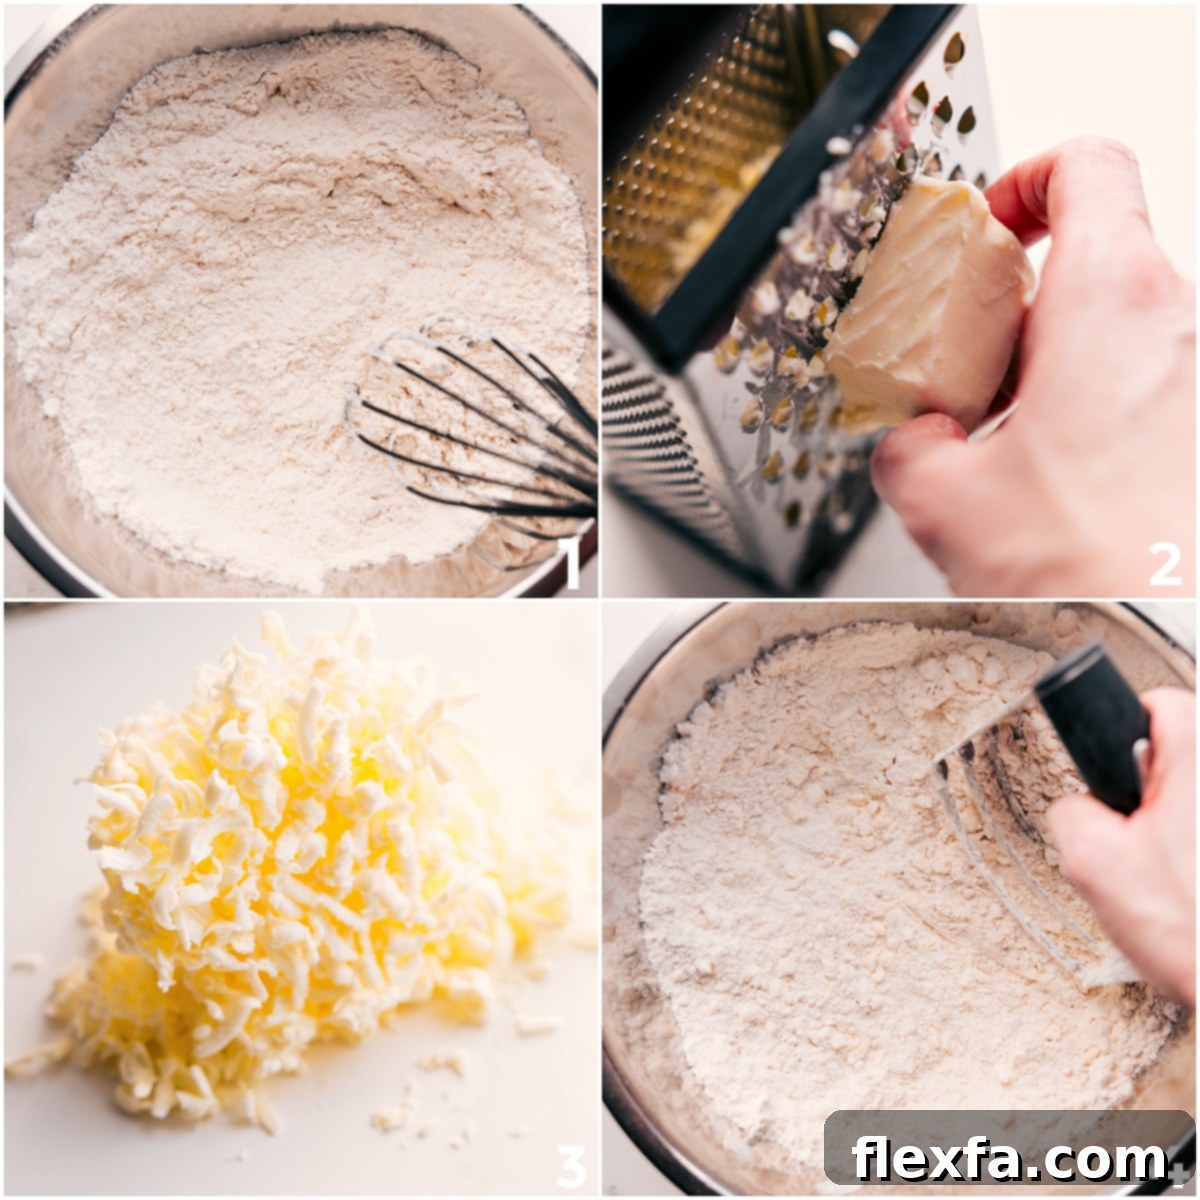
Step-by-Step Guide: How to Make Chocolate Chip Scones
Follow these simple steps to create bakery-worthy chocolate chip scones in your own kitchen. With a little preparation and attention to detail, you’ll be enjoying warm, delicious scones in no time!
- Prep: Freeze your butter for at least 30 minutes. Preheat your oven to 400°F (200°C) and line a baking sheet with parchment paper or a silicone mat.
- Mix Dry Ingredients: In a large bowl, whisk together the flour, granulated sugar, brown sugar, baking powder, baking soda, and salt.
- Incorporate Butter: Grate the frozen butter into the dry ingredients using a box grater. Alternatively, cut the butter into small cubes. Use a pastry blender or your fingers to quickly work the butter into the flour mixture until it resembles coarse crumbs.
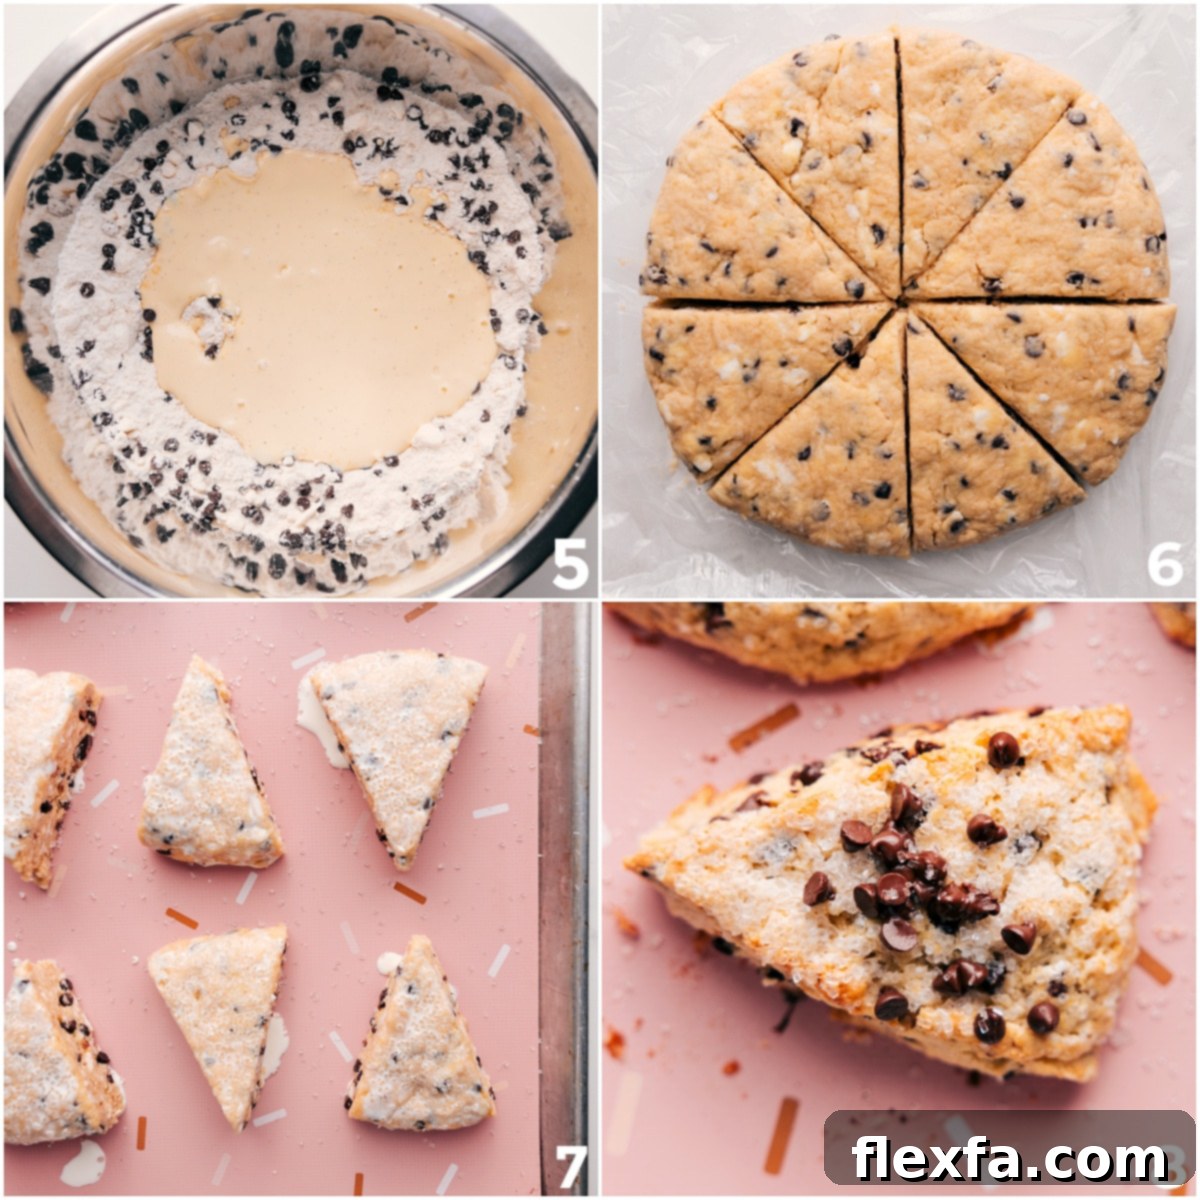
- Add Wet Ingredients: In a separate bowl, whisk together the Greek yogurt, egg, vanilla extract, and almond extract (if using). Pour the wet ingredients into the dry ingredients and gently mix until just combined. Be careful not to overmix.
- Add Chocolate Chips: Gently fold in the mini chocolate chips.
- Shape the Dough: Turn the dough out onto a lightly floured surface. Gently pat it into a disc about 1 inch thick and 5-6 inches in diameter.
- Cut into Wedges: Use a sharp knife or a dough scraper to cut the disc into 8 equal triangles (wedges).
- Chill: Place the scones onto the prepared baking sheet, leaving some space between them. Brush the tops with heavy cream and sprinkle with granulated sugar. Chill in the refrigerator for at least 20 minutes. This helps prevent the scones from spreading during baking.
- Bake: Bake for 15-20 minutes, or until the scones are golden brown and cooked through.
- Cool & Glaze: Let the scones cool on the baking sheet for a few minutes before transferring them to a wire rack to cool completely. While the scones are cooling, prepare the glaze by whisking together the powdered sugar, milk (or heavy cream), and vanilla extract until smooth. Drizzle the glaze over the cooled scones.
Essential Tools for Scone-Making Success
Having the right tools can make the scone-making process easier and more enjoyable. These are a few of my favorite tools for achieving consistent and delicious results:
- Box Grater: For quickly grating frozen butter without it melting.
- Pastry Cutter: To cut the butter into the flour efficiently, without overworking the dough.
- Flexible Measuring Tape: Helps ensure consistent size and shape of the dough disc.
- Dough Scraper: Makes shaping, cutting, and transferring the delicate dough a breeze.
- Baking Mat: Prevents sticking and promotes even baking.
- Pastry Brush: For evenly brushing the tops of the scones with cream.
Troubleshooting Tips: Common Scone-Making Mistakes and How to Avoid Them
Even with the best recipe, scone-making can sometimes be tricky. Here are some common issues and how to troubleshoot them:
Why Are My Scones Always Hard?
Hard scones are often the result of overmixing or overbaking. Overmixing develops too much gluten, making the scones tough. Overbaking dries them out. To avoid this, mix the dough just until it comes together and watch the baking time closely.
What Are The Secrets To Making Good Scones?
The secrets to perfect scones are simple: Keep the butter cold, mix the dough as little as possible, and don’t over-bake. Cold butter creates flaky layers, gentle mixing keeps the scones tender, and timely removal from the oven prevents dryness. Chilling the shaped scones before baking also helps them bake up taller and hold their shape.
Storage Instructions
These chocolate chip scones are best enjoyed on the same day they’re baked. Due to their moisture content, they tend to soften overnight. If you won’t be eating them all at once, I recommend freezing them before baking.
To freeze, place the unbaked scones on a lined baking sheet and freeze until solid. Once frozen, transfer them to an airtight bag and store them in the freezer for up to 1 month. When ready to bake, simply bake them straight from the freezer, adding 1 to 3 minutes to the baking time.
More Delicious Chocolate Recipes to Try
If you loved these chocolate chip scones, why not explore other decadent chocolate treats?
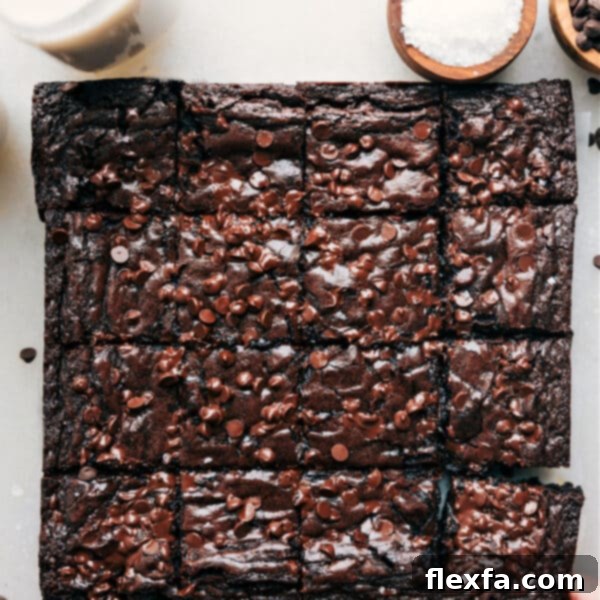
Brownie Recipe

Chocolate Crinkle Cookies

Chilis Lava Cake
Chocolate Chip Baked Oatmeal
Recipe Card
Chocolate Chip Scones Recipe

Yields: 8 scones
Prep time: 30 mins
Cook time: 15 mins
Chilling Time: 20 mins
Total time: 1 hr 5 mins
Ingredients:
- 2 cups all-purpose flour
- 1/4 cup + 1 teaspoon granulated sugar, divided
- 1/4 cup light brown sugar, lightly packed
- 1/4 teaspoon baking soda
- 1 teaspoon baking powder
- 1/2 teaspoon salt
- 8 tablespoons (1 stick) unsalted butter, frozen
- 1/2 cup mini chocolate chips
- 1-1/2 teaspoons vanilla extract
- 1 drop almond extract (optional)
- 1/2 cup honey vanilla Greek yogurt
- 1 large egg
- 3 tablespoons heavy cream
Glaze:
- 2 tablespoons milk or heavy cream
- 1 cup powdered sugar
- 1/4 teaspoon vanilla extract
Instructions:
- Pop butter in the freezer. Move the oven rack to the lower third of the oven and preheat to 400°F (200°C). Line a large sheet pan with a silicone baking mat and set aside.
- In a large bowl, whisk together the flour, 1/4 cup granulated sugar, brown sugar, baking soda, baking powder, and salt.
- Grate the frozen butter on the large holes of a cheese grater, or cut it into small cubes (pea-sized) and pop it back in the freezer until solid.
- Use a pastry cutter or two butter knives to press and slice the butter into the dry ingredients until you have a crumbly mixture with small chunks of butter. These cold butter pieces help create flaky layers. Stir in chocolate chips. Refrigerate while preparing wet ingredients.
- In another bowl, combine vanilla extract, almond extract, Greek yogurt, and egg. Whisk until well combined and smooth.
- Add the wet ingredients to dry and mix with a strong spatula until just combined. Use your hands to press the dough into a large ball. The dough will be slightly sticky, and it may seem too dry to form a ball. Keep kneading and pressing it gently, and it will come together. Keep in mind that the less you mix and knead, the better the texture will be (see note 1).
- Using your hands, shape the mixture into a 5.5-inch disc about 1 inch thick. Tightly wrap disc with plastic wrap and pop in the freezer for 20 minutes. Remove and unwrap. With a sharp knife, cut the disc into 8 equal triangles, using decisive, swift cuts instead of a sawing motion. Separate the triangles and place them on the prepared cookie sheet, leaving about 1 inch of space between each.
- Brush the tops of the scones with heavy cream. Sprinkle with the remaining 1 teaspoon of sugar. Place the sheet pan with the scones in the fridge and chill for 20 minutes.
- Remove scones from fridge and place in the fully heated oven. Bake until lightly golden around the edges and barely golden on top, about 14–16 minutes.
- For the glaze, whisk the milk or heavy cream, powdered sugar, and vanilla extract together until smooth. Add more milk or heavy cream as needed but keep the glaze thick.
- Remove the scones from the oven and let sit on the sheet pan for 5 minutes to finish cooking. Allow them to cool to room temperature, then drizzle the glaze on top using a spoon.
Note: Nutrition information is estimated and varies based on product brands and cooking methods.