
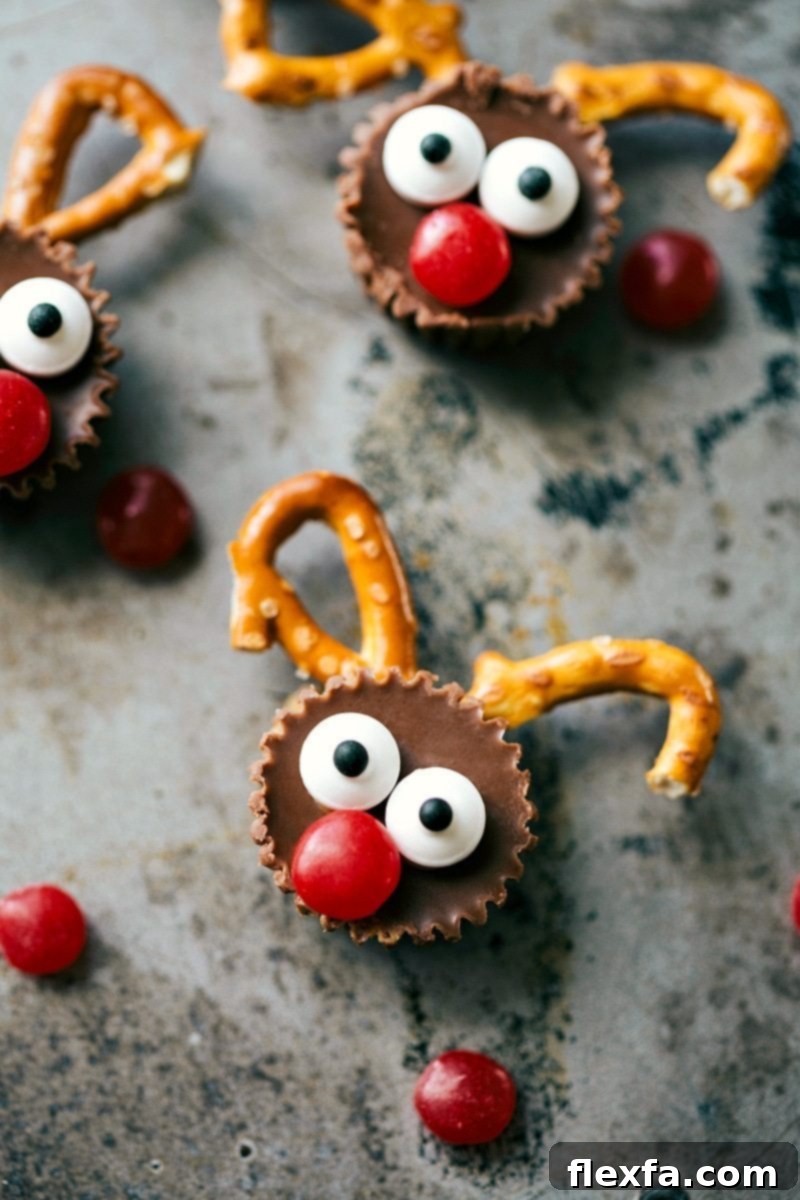
Reindeer Treats are hands down the easiest and most delightful Christmas treat you can whip up this holiday season! Requiring only 5 simple ingredients and less than 20 minutes, these adorable mini reindeer candies are an absolute must-have for holiday gatherings, school parties, or simply to add a sprinkle of festive cheer to your home.
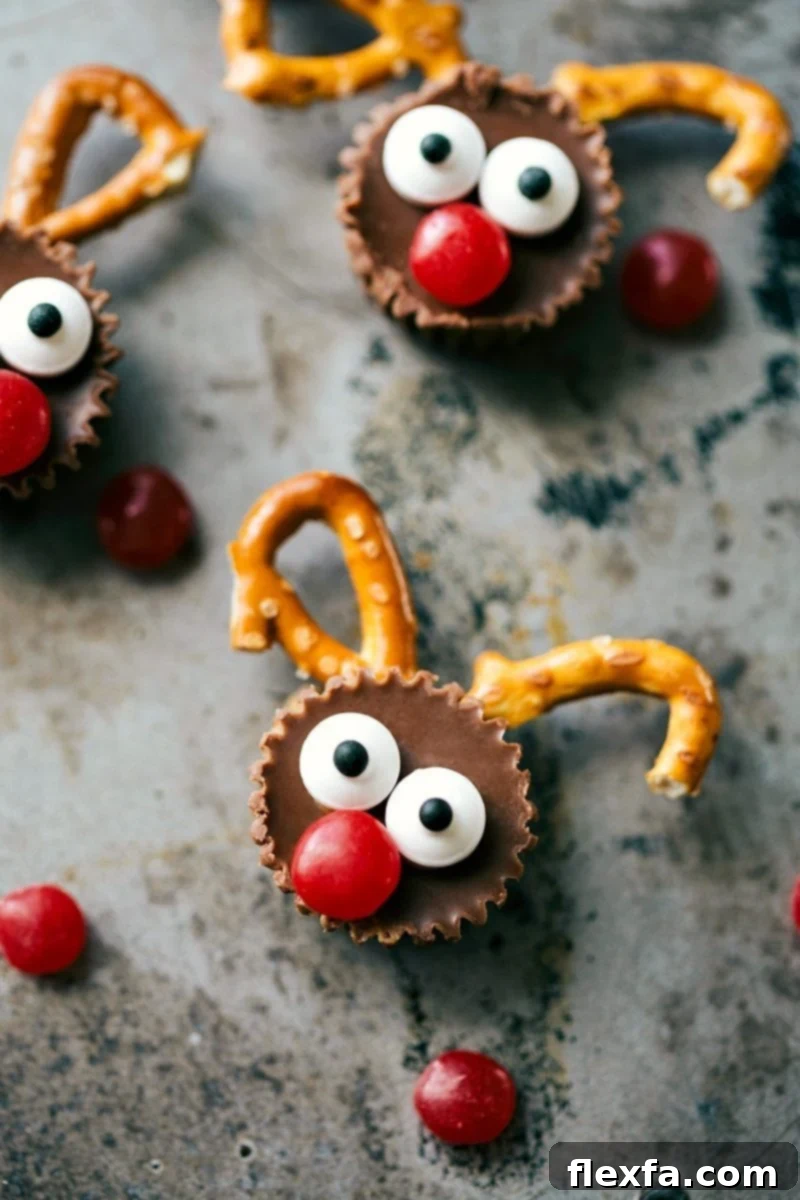
Easy 5-Ingredient Mini Reindeer Treats: Your Go-To Holiday Recipe
The holiday season is synonymous with joy, laughter, and of course, irresistible treats! While the thought of elaborate Christmas baking might seem daunting amidst all the hustle and bustle, these mini reindeer treats offer a refreshing escape. After the success of our 4-ingredient bat bites, a festive Christmas version was simply inevitable. So, get ready to meet their equally charming and utterly delicious counterparts: the Mini Reindeer Treats!
These delightful no-bake candies are not only incredibly simple to assemble but also serve as a fantastic, fun (and tasty!) craft activity for kids of all ages. Imagine the smiles on their faces as they transform everyday ingredients into these iconic Rudolph-inspired characters. Perfect for last-minute party contributions, edible gifts, or just a sweet afternoon project, these reindeer treats are guaranteed to be a hit. Forget complicated recipes and long hours in the kitchen; this is holiday magic made easy!
Why You’ll Adore These Rudolph-Inspired Treats
There are countless reasons why these mini reindeer treats deserve a spot on your holiday dessert table:
- Effortlessly Simple: With just 5 basic ingredients, you won’t need to hunt for obscure items. They’re likely already in your pantry!
- Lightning-Fast Preparation: From start to finish, these treats come together in under 20 minutes, making them ideal for busy schedules.
- No Baking Required: Skip the oven and the heat! These are 100% no-bake, perfect for small kitchens or hot climates.
- Kid-Friendly Fun: The assembly process is intuitive and safe, offering a wonderful opportunity for children to get involved in holiday preparations. It’s a craft and a snack rolled into one!
- Irresistibly Cute: Who can resist a tiny reindeer with a bright red nose? They add an undeniable charm to any festive spread.
- Perfect for Parties: Their individual size makes them easy to serve and enjoy at any holiday gathering, big or small.
- Customizable: While the core recipe is simple, there’s room for creativity and variations to suit different tastes or themes.
- Budget-Friendly: Made with common, affordable ingredients, these treats are gentle on your holiday budget.
The Magic Behind the 5 Key Ingredients
Each component plays a crucial role in bringing our adorable reindeer to life. Here’s a closer look at what you’ll need and why:
- Cream Cheese Frosting or Peanut Butter (The Edible Adhesive): This is the secret to holding all the delightful pieces together. Cream cheese frosting provides a sweet, creamy flavor that complements the Reese’s cups perfectly, while peanut butter offers a richer, nuttier base that many will love. For ease of application, soften your chosen adhesive slightly and transfer it to a piping bag (or a resealable plastic bag with the corner snipped off). Chilling the Reese’s cups beforehand helps the adhesive set faster and prevents the chocolate from melting during assembly.
- Mini Reese’s Cups (The Reindeer Face): These iconic chocolate and peanut butter cups form the perfect foundation for our reindeer. Their flat base and distinct shape make them ideal for the reindeer’s head. The delightful combination of chocolate and peanut butter is universally loved, ensuring these treats are a crowd-pleaser. Remember to chill your Reese’s cups in the fridge for at least 15-20 minutes before starting. This crucial step prevents them from melting and becoming messy while you handle them, making the assembly process much smoother.
- Pretzel Twists (The Majestic Antlers): Regular pretzel twists are transformed into whimsical antlers. This step adds a wonderful salty crunch that perfectly balances the sweetness of the candy. Gently breaking the pretzels into antler-like shapes might require a bit of patience and a few extra pretzels, as some pieces might not break perfectly. Don’t worry if your antlers aren’t identical – each reindeer will have its own unique charm! The irregular shapes of broken pretzels lend themselves beautifully to creating realistic-looking antlers, giving each treat character.
- Mini Red M&M’s (Rudolph’s Iconic Red Nose): No reindeer is complete without a bright red nose, especially if we’re channeling Rudolph! Mini red M&M’s are the perfect size and color to recreate this beloved feature. Their vibrant hue instantly brings these treats to life. If you can’t find mini red M&M’s, regular red M&M’s can be used, or even a small red candy button or a dot of red icing could work in a pinch for a creative twist.
- Candy Eyeballs (The Glimmering Gaze): These whimsical edible eyes are essential for giving your reindeer personality and charm. Position them relatively close together above the red nose to create a cute, animated, and friendly expression. They instantly transform a simple candy into a recognizable character. You can find candy eyeballs in most baking aisles of supermarkets or craft stores during the holiday season. Using two per reindeer ensures they look lively and engaging.
How To Make These Adorable Reindeer Treats: A Simple Step-by-Step Guide
Creating these festive little guys is incredibly easy. Follow these steps for perfect reindeer every time:
- Prepare Your Frosting “Glue”: Take your softened cream cheese frosting or peanut butter and spoon it into a piping bag fitted with a small round tip (like a #2 or #3). If you don’t have a piping bag, a resealable plastic bag works just as well. Simply snip a tiny bit off one corner with scissors. This precision will allow you to apply the adhesive neatly and sparingly.
- Craft Your Pretzel Antlers: Carefully break your pretzel twists into pieces that resemble reindeer antlers. This might take a bit of trial and error, so have a few extra pretzels on hand. Look for pieces with two “prongs” or a natural curve. Don’t strive for perfection; the rustic look adds to their charm! Breaking them into various sizes can also give each reindeer a unique character.
- Attach the Antlers to the Reese’s: Take one chilled mini Reese’s cup. Using your frosting bag, pipe two small dots of frosting onto the top, curved edge of the Reese’s cup, spaced slightly apart. Gently press two pretzel antler pieces into these dots. Hold them in place for a few seconds to ensure they adhere securely. The chilled Reese’s will help prevent excessive melting.
- Add the Expressive Eyes: Below the newly attached antlers, pipe two more small dots of frosting for the candy eyeballs. Place the candy eyeballs onto these dots, positioning them close enough to give your reindeer a sweet, wide-eyed look. The closer they are, the more endearing your reindeer will appear.
- Give Rudolph His Iconic Nose: Finally, pipe a small dot of frosting directly below the candy eyeballs, right in the center. Carefully press one mini red M&M onto this frosting dot to create Rudolph’s bright, shiny nose. This is the finishing touch that brings your reindeer to life!
- Secure and Set: Once all the pieces are in place, gently press on each component (antlers, eyes, nose) to ensure they are firmly attached. You can briefly place the finished treats in the refrigerator for about 5-10 minutes to help the frosting set completely, especially if your kitchen is warm. This step guarantees your reindeer will hold their shape beautifully.
5-Ingredient Mini Reindeer Treats
Chelsea Lords
20 minutes
20 minutes
20 mini reindeer treats
Video
Equipment
-
Piping bag or resealable plastic bag
Ingredients
- 1/3 cup cream cheese frosting or homemade frosting or peanut butter
- 20 Miniature Reese’s Cups (chilled)
- 1 bag pretzel twists (for antlers)
- 20 Miniature Red M&M’s (for noses)
- 40 candy eyeballs (2 per reindeer)
Instructions
-
Fit a frosting bag with a #2 or #3 tip and fill with frosting. Alternatively, fill a resealable plastic bag with frosting and cut off the very tip of the corner of the bag with scissors. This will work as a frosting bag for precise application.
-
Break the pretzel twists into antler shapes. You’ll want pieces that resemble small branches or forks. Many pieces may not work out perfectly, so have extra pretzels on hand and be patient. It gets easier with practice.
-
Using the frosting in your piping bag, apply a small dot to the back of each pretzel “antler”. Gently press these frosted pretzel pieces into the top of each chilled Reese’s cup, creating the reindeer’s head and antlers.
-
Pipe two more small dots of frosting below the pretzel antlers on each Reese’s cup. Carefully attach the candy eyeballs onto these dots, positioning them close together for a whimsical, animated look.
-
To complete Rudolph’s signature feature, pipe a final small dot of frosting directly below the edible eyes. Press a mini red M&M onto this spot to create the iconic red nose.
-
Gently press all the attached pieces (antlers, eyes, and nose) to ensure they are secure and don’t easily fall off. If necessary, briefly chill the finished reindeer treats in the refrigerator to help the frosting set firmly. Enjoy your adorable creations!
Recipe Notes
Nutrition Information (per serving)
- Serving:
- 1 serving
- Calories:
- 98 kcal
- Carbohydrates:
- 12g
- Protein:
- 1g
- Fat:
- 5g
- Saturated Fat:
- 2g
- Polyunsaturated Fat:
- 0.5g
- Monounsaturated Fat:
- 1g
- Cholesterol:
- 2mg
- Sodium:
- 60mg
- Potassium:
- 38mg
- Fiber:
- 0.5g
- Sugar:
- 9g
- Vitamin A:
- 10IU
- Calcium:
- 10mg
- Iron:
- 0.2mg
Nutrition information is automatically calculated and should only be used as an approximation. It may vary based on specific brands and ingredients used.
Tips for Reindeer Treat Success
While these treats are straightforward, a few tips can help ensure your reindeer are perfectly festive:
- Chill Your Reese’s Cups: This is a game-changer! Cold Reese’s cups are firmer and easier to handle, preventing them from melting as you work, and allowing the frosting to set quicker.
- Work in Batches: If making a large quantity, consider assembling them in small batches to keep ingredients cool and prevent the frosting from drying out.
- Have Extra Pretzels: Breaking pretzels can be a bit tricky. It’s always good to have a few extra on hand, as some might not break into ideal antler shapes.
- Use a Small Piping Tip: A small round tip (like a #2 or #3) or a finely snipped corner of a plastic bag gives you better control over the frosting, ensuring neat attachments.
- Patience with Antlers: Don’t get discouraged if the pretzel antlers aren’t uniform. The unique shapes add character!
- Secure All Elements: Gently press each candy and pretzel piece into the frosting to ensure they are well-adhered before moving on to the next.
- Storage is Key: Store in an airtight container at room temperature. For best results and to prevent sticking or damage, place parchment paper between layers if stacking.
Creative Variations and Customizations
Feeling adventurous? These mini reindeer treats are incredibly versatile and can be customized to your heart’s content:
- Different Candy Bases: While Reese’s Cups are classic, you could experiment with other mini chocolate candies like inverted Hershey’s Kisses, chocolate covered caramels, or even large chocolate buttons for a different base.
- Flavorful Frosting: Instead of cream cheese frosting, try chocolate frosting, vanilla frosting, or even a homemade peanut butter frosting to enhance the flavor profile. Melted chocolate or candy melts can also be used as an adhesive for a firmer set.
- Alternative Noses: If red M&M’s are hard to find, small red candy dots, red gummy candies (cut small), or even a tiny dab of red food coloring mixed into frosting could create the nose.
- Sprinkle Magic: Add a touch of edible glitter or holiday sprinkles around the base of the treats for extra sparkle and festivity.
- White Chocolate Drizzle: Drizzle melted white chocolate over the finished reindeer for a snowy effect, or use it to create delicate details.
- Dietary Adaptations: For gluten-free options, ensure you use certified gluten-free pretzels. For dairy-free, choose suitable chocolate cups and a dairy-free frosting. Peanut-free options are possible by substituting the Reese’s Cup with another chocolate candy and using a nut-free frosting.
Serving Suggestions and Gifting Ideas
These adorable reindeer treats are perfect for a variety of festive occasions:
- Holiday Parties: Arrange them on a festive platter as a centerpiece or alongside other Christmas cookies and desserts.
- School & Office Potlucks: They’re a guaranteed hit and easy to transport.
- Edible Gifts: Package a few treats in small clear bags with a festive ribbon for a thoughtful homemade gift for teachers, neighbors, or friends.
- Kids’ Activity: Set up a “reindeer making station” with all the ingredients and let the kids assemble their own treats during a holiday playdate or party.
- After-School Snack: A delightful surprise for kids during the busy holiday season.
- Gingerbread House Decor: Use them to add charming characters to your gingerbread house village.
Frequently Asked Questions (FAQs)
- Can I make these reindeer treats ahead of time?
- Absolutely! These treats can be made up to 5 days in advance. Store them in an airtight container at room temperature, ideally in a single layer or with parchment paper between layers to prevent them from sticking or damaging the decorations.
- What if my pretzels keep breaking into unusable pieces?
- This is a common issue! Try gently twisting the pretzels rather than snapping them directly. Also, having a generous extra supply of pretzels is key. Remember, imperfect antlers still look charmingly rustic.
- Can I use regular-sized Reese’s Cups?
- You certainly can, but they will yield much larger treats, and you’ll need more of the other ingredients (larger pretzels, more frosting, larger M&M’s, and perhaps more candy eyeballs). Mini Reese’s Cups are ideal for bite-sized portions.
- Is peanut butter a good alternative if I don’t have frosting?
- Yes, peanut butter works wonderfully as an adhesive and adds another layer of flavor that complements the Reese’s Cups. Ensure it’s a creamy variety for easier piping.
- How can I make these treats more stable?
- Chilling the Reese’s Cups first and briefly chilling the assembled treats in the refrigerator after completion will help the frosting set more firmly, securing all the pieces in place.
Love this festive recipe? Share your thoughts below!
Creating these 5-ingredient mini reindeer treats is more than just making a dessert; it’s about crafting joy and spreading holiday cheer with minimal effort. Whether you’re a seasoned baker or just starting your holiday traditions, these easy, no-bake candies are a fantastic way to bring smiles to everyone’s faces. Gather your loved ones, get creative, and enjoy the magic of making these adorable Rudolph treats!