
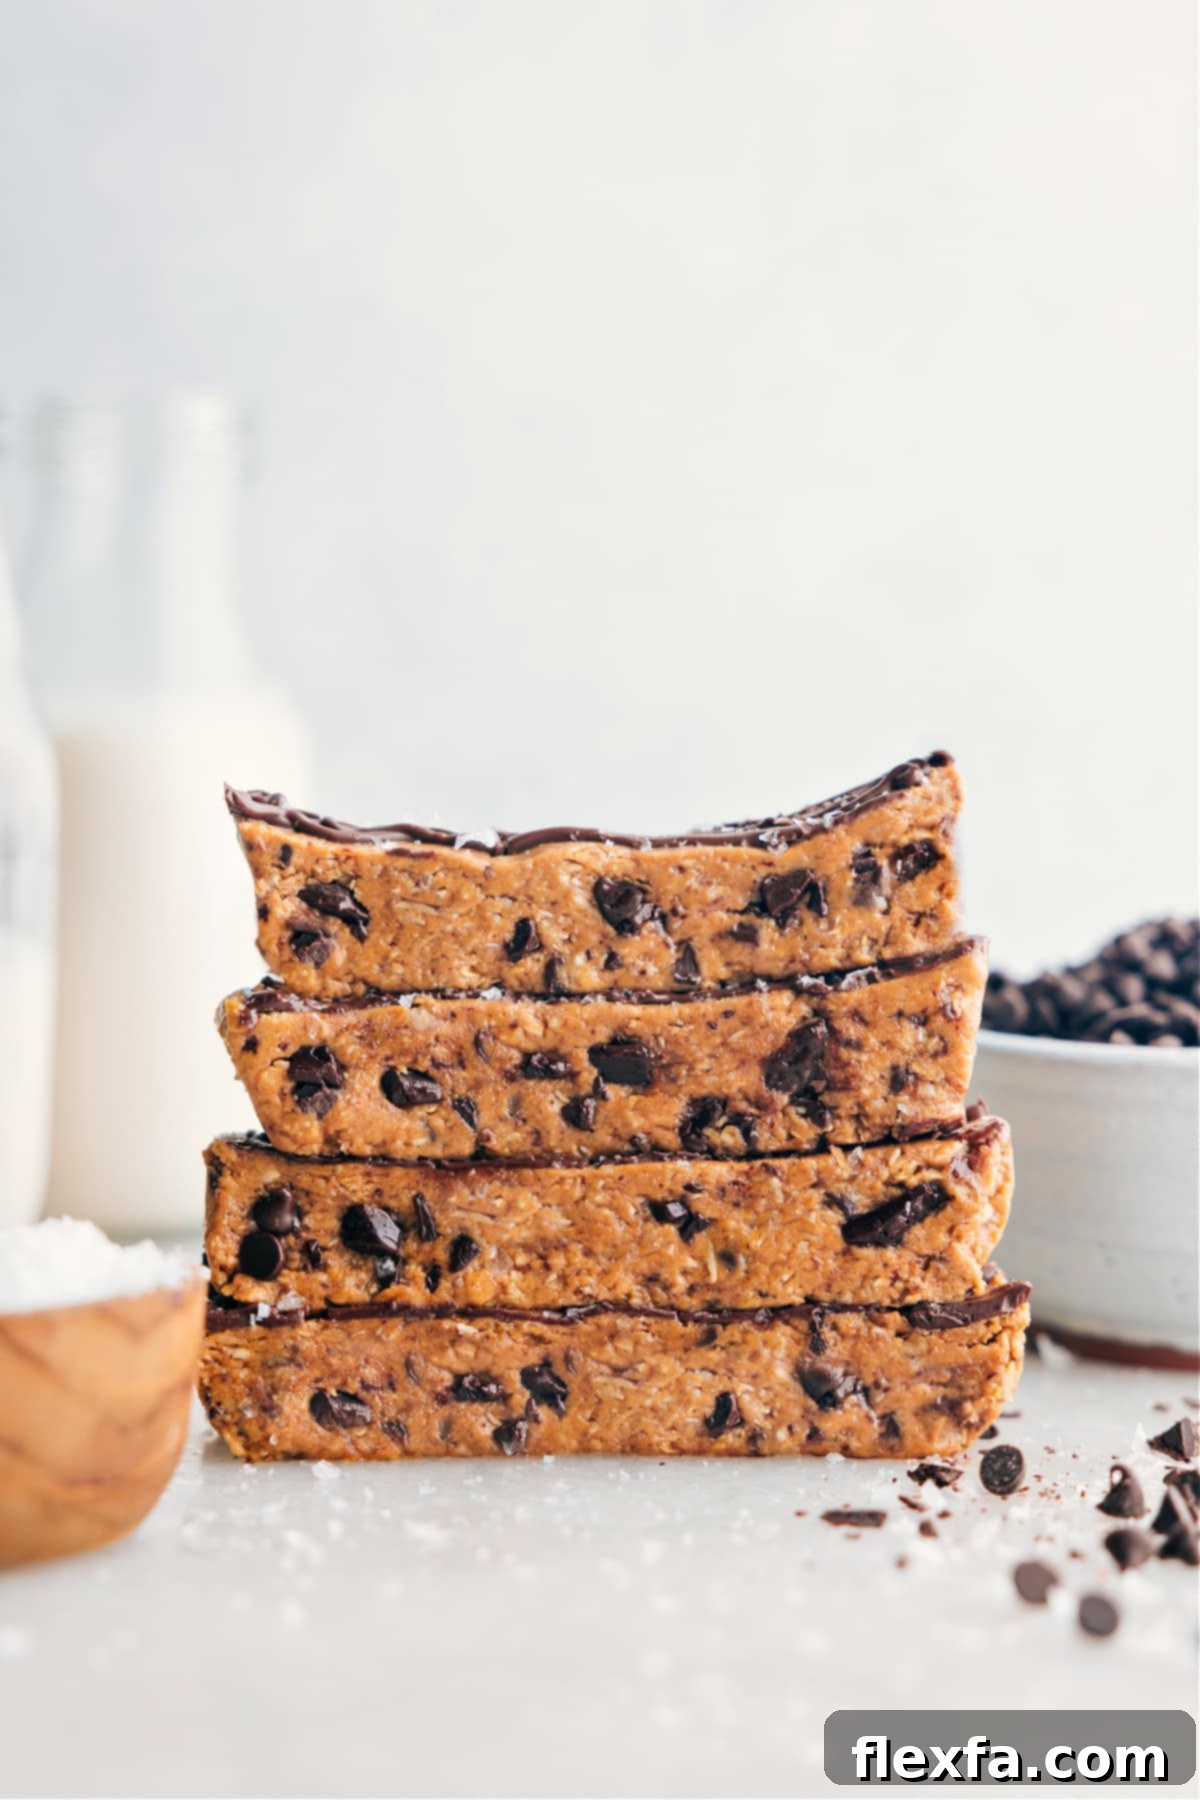
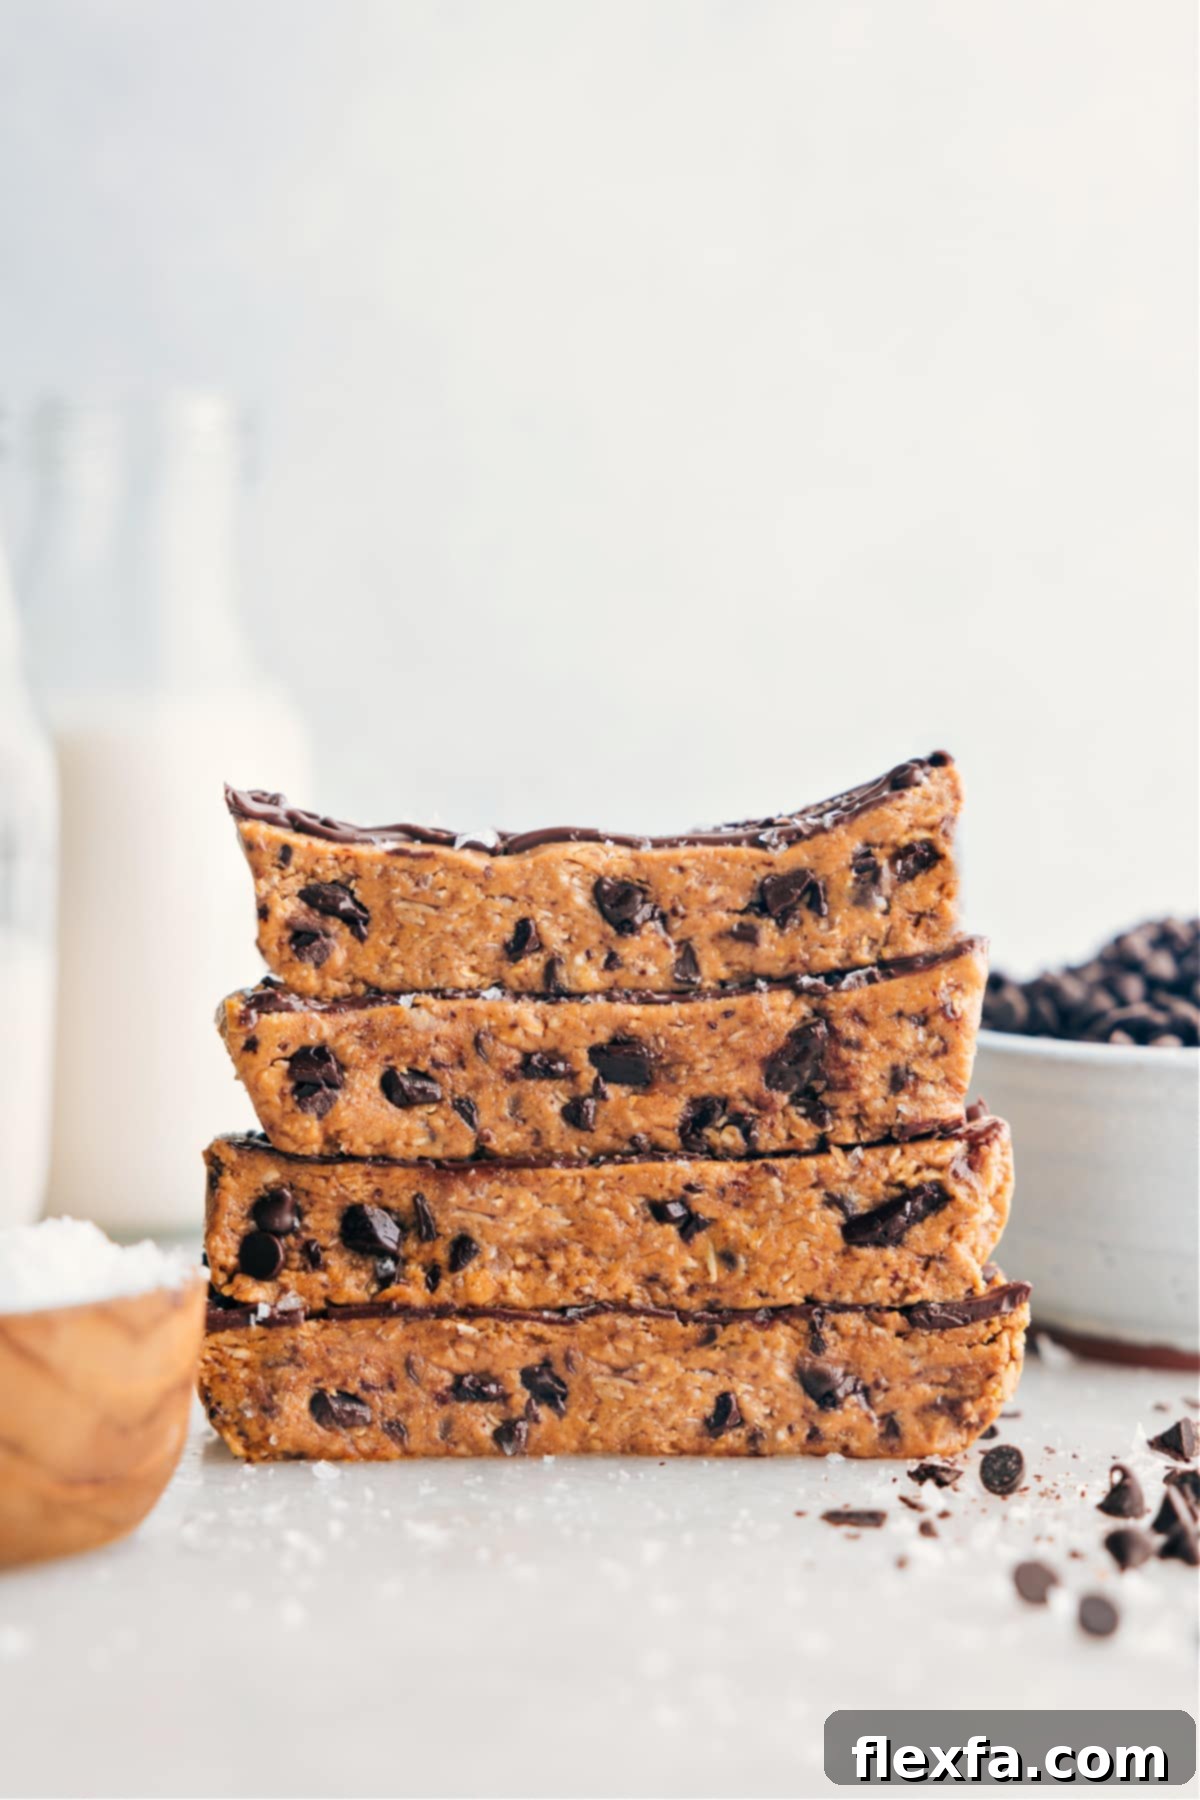
Welcome to the ultimate guide for crafting your own delicious and wholesome Homemade Protein Bars. This incredibly easy, no-bake recipe requires no oven or stove, making it a perfect solution for busy schedules. Using simple, everyday ingredients you likely already have in your pantry, you can create nutritious and satisfying snacks without special shopping trips or complicated steps.

A Personal Note from the Kitchen
Homemade Bars Always Win Over Store-Bought!
Like many of you, I’ve often found myself on the hunt for convenient, protein-packed snacks. Last year, my husband’s trainer recommended increasing his protein intake, and he needed a quick, portable option. The problem? He’s never been a fan of traditional protein or granola bars. This sparked a mission: to create a homemade protein bar that not only tasted incredible but also avoided the long, unpronounceable ingredient lists found in many commercial products.
My inspiration came from popular brands like Perfect Bars, G2G Bars, and Go Macro Bars, which I’ve always appreciated for their superior flavor, delightful texture, and more transparent ingredient panels. I aimed for that same satisfying “vibe” in my own kitchen experiments. After several rounds of testing and tweaking, I finally perfected a recipe that exceeded all expectations. These bars are so utterly delicious, they disappear almost as quickly as I make them! I now consistently double every batch just to keep up with demand.
Beyond the amazing taste and texture, these homemade protein bars offer another significant benefit: they’re incredibly budget-friendly. Making your own snacks can significantly reduce your grocery bill, proving that homemade truly is the winning choice all around!
Why Choose Homemade Protein Bars?
In a world full of convenience foods, opting for homemade protein bars offers a multitude of benefits that extend beyond just taste. These no-bake wonders empower you to take control of your nutrition, satisfy cravings, and save money.
Unmatched Freshness and Quality Ingredients
When you make your own protein bars, you know exactly what goes into them. This means no artificial preservatives, questionable additives, or excessive sugars often found in store-bought options. You can select high-quality, fresh ingredients, ensuring maximum nutritional value and pure, authentic flavors. This transparency is crucial for anyone conscious about their diet and seeking healthier alternatives.
Ultimate Customization for Every Dietary Need
One of the biggest advantages of homemade protein bars is the ability to customize them to your specific preferences and dietary requirements. Whether you’re vegan, gluten-free, nut-free, or simply have a favorite flavor profile, you can easily adjust the ingredients. This flexibility ensures that your protein bars are not just healthy, but also perfectly tailored to your lifestyle and taste buds. Experiment with different nut butters, sweeteners, protein powders, and mix-ins to create endless variations.
Significant Cost Savings
While the initial cost of ingredients might seem higher, making protein bars in bulk at home is almost always more economical than consistently buying individual bars from the store. Commercial protein bars can range from $1.50 to $3.00 (or more!) each. When you factor in the cost per serving for homemade bars, you’ll find substantial savings over time, making healthy snacking much more accessible for your budget.
Perfect for Meal Prep and Busy Lifestyles
These no-bake protein bars are a dream come true for meal prep. In just about 15 minutes of active preparation, you can whip up a batch that provides healthy, grab-and-go snacks for an entire week or even longer if frozen. This convenience is invaluable for busy mornings, post-workout refueling, or satisfying that afternoon hunger pang when you need a quick energy boost.
Essential Ingredients for Your Homemade Protein Bars
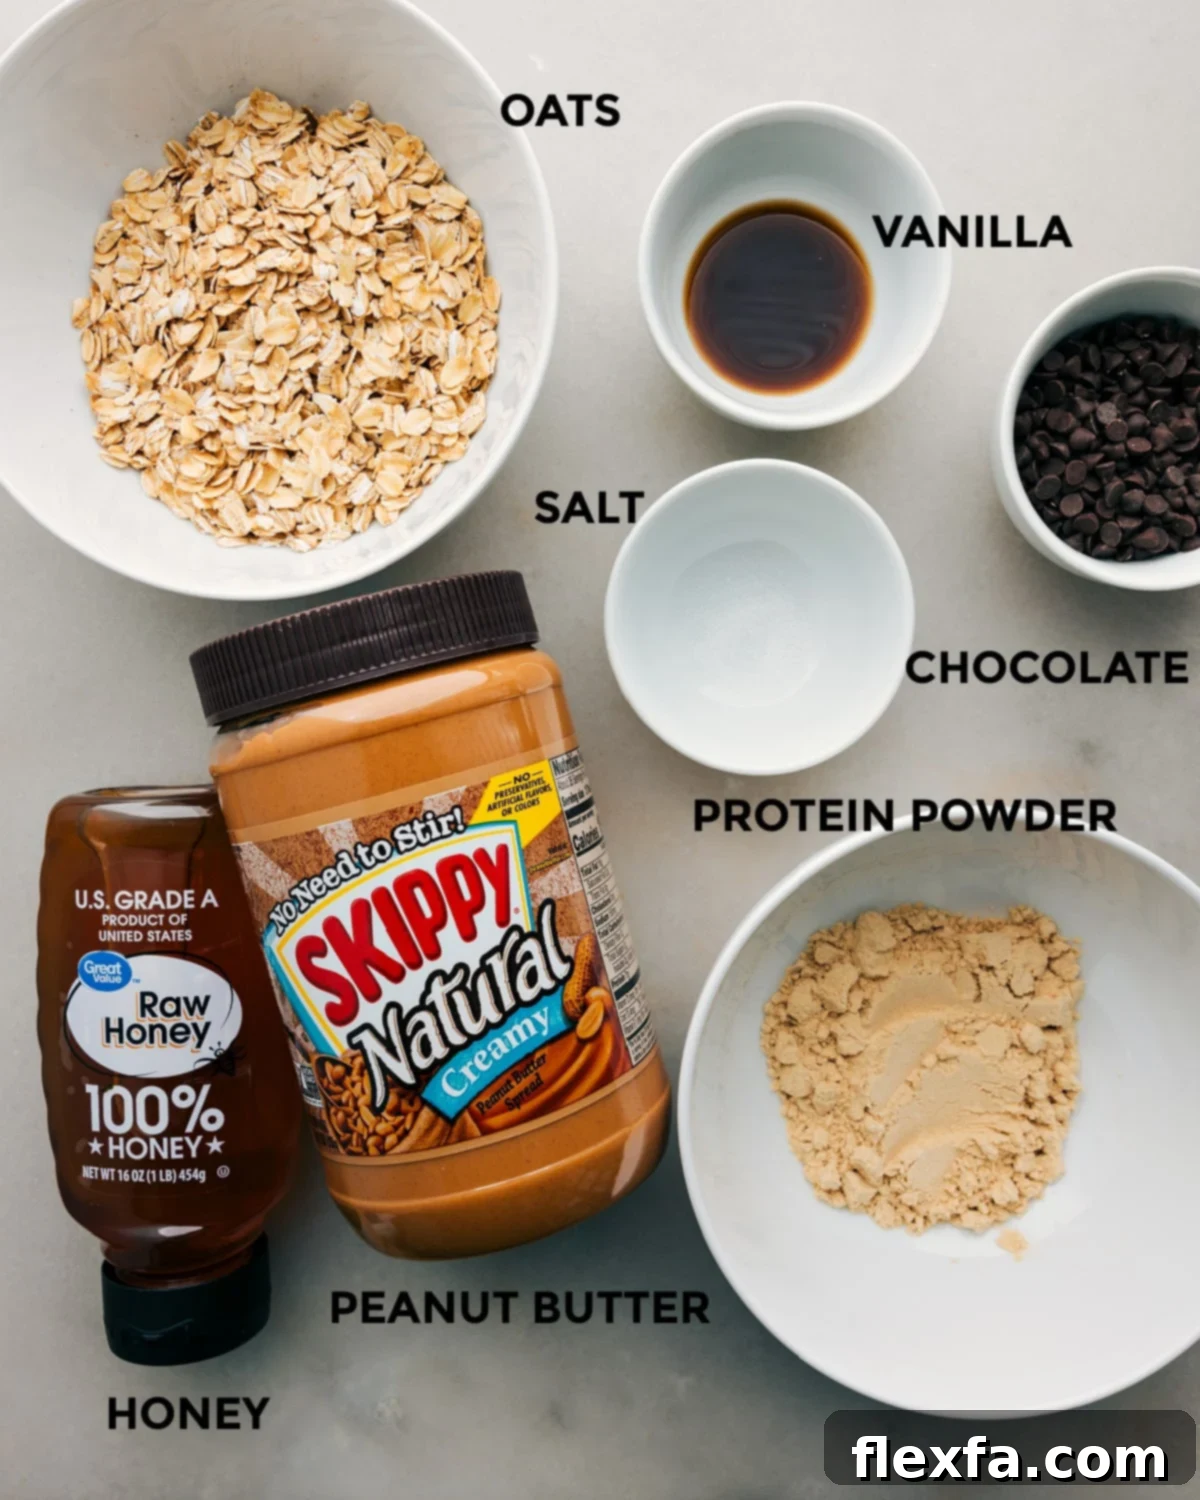
Crafting these delightful protein bars is incredibly simple, relying on a handful of staple ingredients. Here’s what you’ll need, along with some fantastic options for customization:
| Ingredient | Swaps & Tips for Customization |
|---|---|
| Old-fashioned oats | These provide structure, fiber, and sustained energy. For a softer bar, use quick oats. If you prefer a smoother texture, pulse the oats even finer in your food processor. Ensure they are certified gluten-free if needed. |
| Peanut butter | The creamy base that binds everything together and adds healthy fats and protein. Feel free to use almond butter, cashew butter, or even sunflower seed butter for a nut-free option. Natural, stir-well varieties work best for consistency. |
| Honey | A natural sweetener and crucial binding agent. For a vegan alternative, maple syrup works wonderfully, though the bars might have a slightly softer consistency. Adjust sweetness to your liking. |
| Vanilla protein powder | This is your protein boost! Choose a high-quality protein powder with a flavor you genuinely enjoy, as it significantly impacts the taste of the finished bar. Vanilla is versatile, but chocolate protein powder can transform these into a brownie-like treat. Consider plant-based proteins for vegan bars. |
| Mini chocolate chips | A touch of indulgence! Use mini chips for even distribution. You can skip them entirely for less sugar, or swap them for other delightful additions like dried fruit (cranberries, chopped apricots), chopped nuts (almonds, walnuts), or seeds (chia, flax, hemp seeds) for added texture and nutrition. |
| Optional drizzle | A simple melted chocolate drizzle elevates these bars both visually and in taste. Dark, milk, white, or even flavored chocolates can be used. A sprinkle of sea salt on top of the drizzle adds a gourmet touch. |
| Vanilla extract (optional) | Enhances the overall flavor profile. |
| Salt | A pinch of salt balances the sweetness and brings out the flavors of the other ingredients. |
How To Make Homemade Protein Bars: A Simple Guide
Creating your own batch of delicious and nutritious protein bars is remarkably straightforward. Follow these easy steps to whip up a batch in no time:
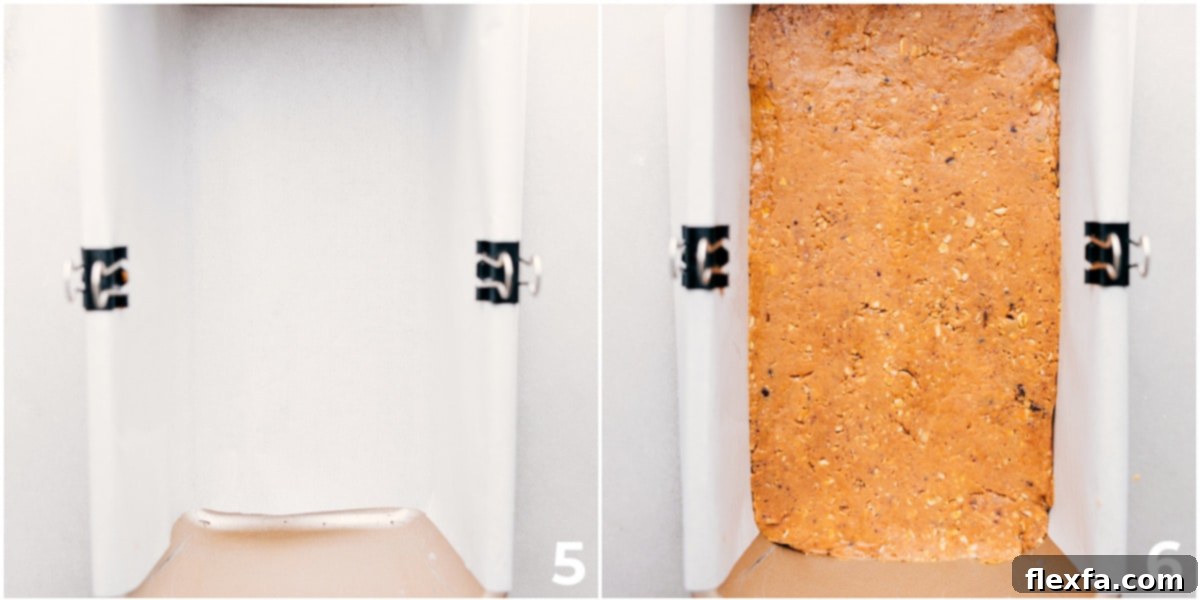
- Prepare Your Pan: Begin by lining a standard 8.5 x 4.5-inch bread pan with parchment paper or foil. Make sure to leave an overhang on the sides; this acts as convenient handles, allowing you to easily lift the set bars out later. Set this prepared pan aside.
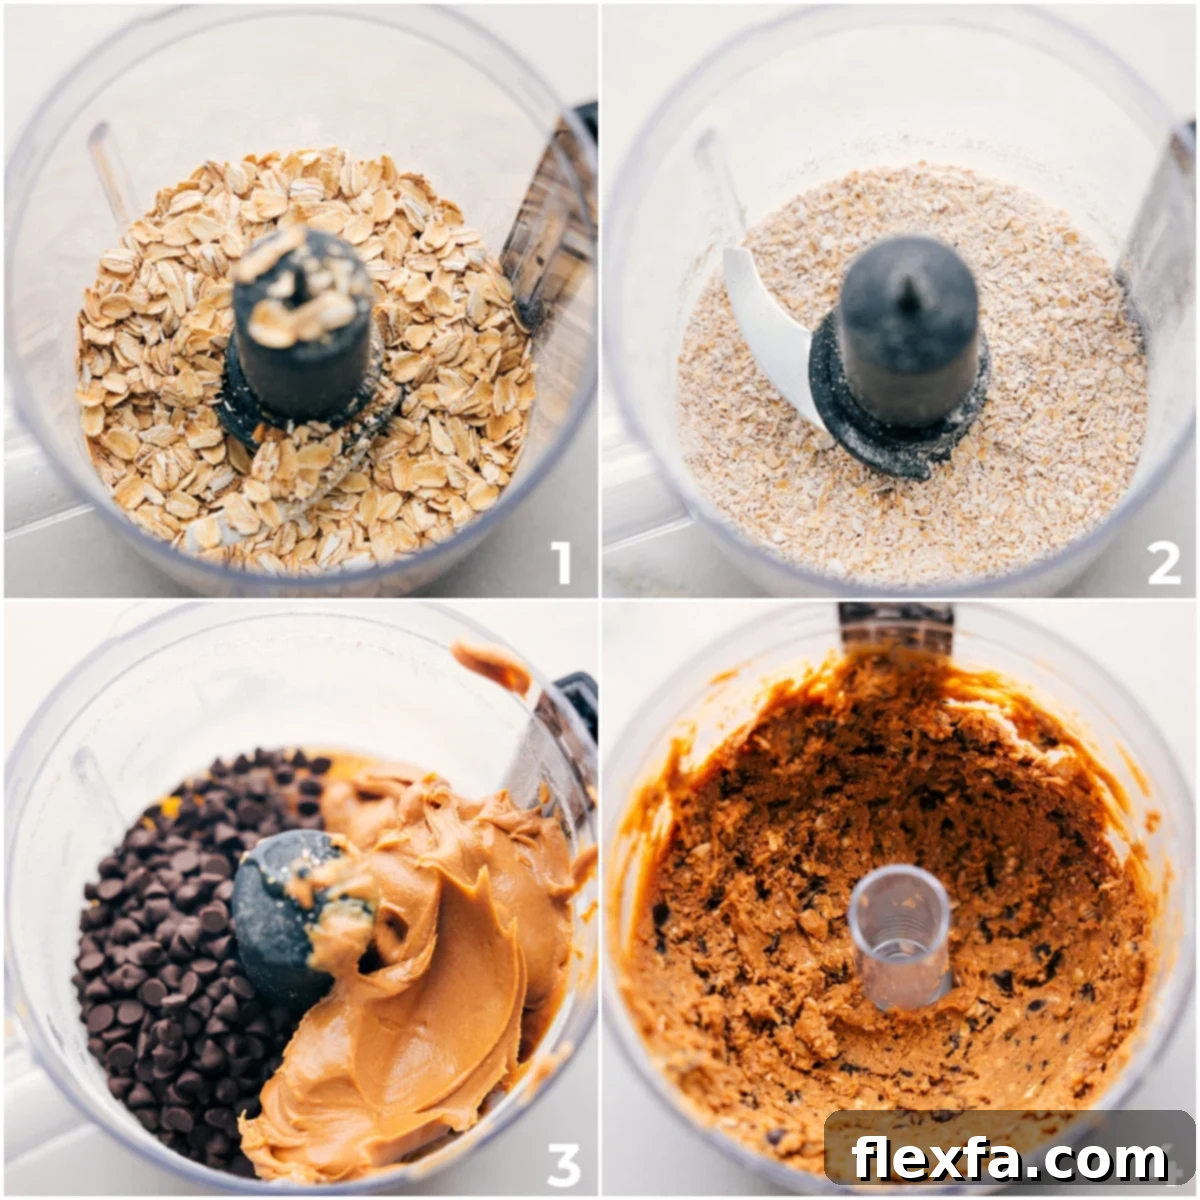
- Process the Oats: In a small blender or food processor, add your old-fashioned oats. Pulse for approximately 15-20 seconds until the oats break down into a coarse flour-like consistency. This helps bind the bars and provides a smoother texture.
- Combine All Ingredients: Add the remaining “Protein Bars” ingredients to the food processor with the pulsed oats. This includes the peanut butter, honey, vanilla extract (if using), salt, vanilla protein powder, and mini chocolate chips. Pulse all ingredients together until a thick, cohesive dough forms. You may need to stop and scrape down the sides of the food processor bowl occasionally to ensure everything is thoroughly combined. The dough should be sticky but firm enough to hold its shape.
- Press into Pan: Transfer the protein bar dough into your prepared bread pan. Using the back of a spoon, a spatula, or even your hands, press the mixture down very firmly and evenly across the bottom of the pan. The more compact you make it, the less likely your bars will crumble when sliced.
- Optional Chocolate Drizzle: If you desire a luscious chocolate topping, combine the dark chocolate chips and melted coconut oil in a microwave-safe bowl. Microwave in short bursts of 15 seconds, stirring well after each interval, until the chocolate is completely smooth and melted. Transfer the melted chocolate to a small plastic bag, snip a tiny corner off the tip, and drizzle it decoratively over the pressed bars. For an extra touch, sprinkle a light dusting of flaky sea salt on top of the chocolate before it sets.
- Chill & Cut: Place the pan in the refrigerator for at least one hour (or until the bars are completely firm). Once chilled, use the parchment paper overhang to lift the entire block of bars out of the pan. Place it on a cutting board and slice into 10 to 12 evenly sized bars. Serve immediately or store for later enjoyment!
Optimal Storage for Your Protein Bars
Proper storage is key to maintaining the freshness and texture of your homemade protein bars. Being no-bake, they are sensitive to warmer temperatures.
- Refrigerator: Store your protein bars in an airtight container in the refrigerator for 1 to 2 weeks. They will remain firm and fresh, perfect for a quick snack.
- Freezer: For longer storage, wrap individual bars tightly in parchment paper or plastic wrap, then place them in a freezer-safe bag or container. They can be frozen for up to 3 months. Thaw frozen bars in the refrigerator overnight, or enjoy them straight from the freezer for a wonderfully chewy, almost frozen dessert-like experience.
Endless Customization Ideas for Your Protein Bars
The beauty of making your own protein bars lies in their incredible versatility. Beyond the basic recipe, you can easily adapt them to suit your taste preferences, dietary needs, and what you have on hand. Here are some inspiring ideas to get you started:
Flavor Variations:
- Chocolate Lover’s Dream: Use chocolate protein powder instead of vanilla. Add a tablespoon of unsweetened cocoa powder to the mixture and increase the chocolate chips.
- Pumpkin Spice: Introduce 1-2 teaspoons of pumpkin pie spice (or cinnamon, nutmeg, ginger blend) and swap some of the chocolate chips for dried cranberries or chopped pecans.
- Lemon Poppy Seed: Add 1-2 tablespoons of lemon zest and 1 tablespoon of poppy seeds. A squeeze of fresh lemon juice can also brighten the flavor.
- Mocha Blast: Mix in a teaspoon of instant espresso powder with the dry ingredients for a coffee-infused treat.
- Berry Bliss: Fold in freeze-dried berries (crushed or whole) for a fruity punch and vibrant color.
Texture and Nutritional Boosts:
- Nut & Seed Powerhouse: Incorporate chopped almonds, walnuts, pecans, chia seeds, flax seeds, hemp seeds, or pumpkin seeds. These add healthy fats, fiber, and an extra crunch.
- Dried Fruit Delight: Mix in finely chopped dried apricots, raisins, dates, or cherries for natural sweetness and a chewy texture.
- Coconut Creaminess: Add shredded coconut (toasted or untoasted) for a tropical flair and extra chewiness.
- Spice it Up: Experiment with spices like cardamom, allspice, or a touch of cayenne pepper for a subtle kick.
Dietary Adaptations:
- Vegan-Friendly: Ensure you use maple syrup instead of honey and choose a plant-based protein powder (like pea, soy, or rice protein). Also, verify that your chocolate chips are dairy-free.
- Gluten-Free: Always use certified gluten-free oats to ensure your bars are safe for those with gluten sensitivities.
- Nut-Free: Opt for sunflower seed butter (like SunButter) in place of peanut or almond butter. You can also use toasted seeds (pumpkin, sunflower) instead of nuts for crunch.
Don’t be afraid to experiment! Start with the base recipe and gradually introduce new ingredients to discover your favorite combinations. The possibilities are truly endless when you’re crafting your own healthy protein bars.
Is Making Your Own Protein Bars Cheaper? Let’s Talk Savings!
One of the most compelling reasons to make your own protein bars is the significant cost savings compared to purchasing them pre-made. While the initial grocery trip might feel like a larger investment, especially if you’re buying ingredients like a new tub of protein powder or a large jar of nut butter, the long-term financial benefits are undeniable.
Consider the average price of a single store-bought protein bar, which typically ranges from $1.50 to $3.00, and sometimes even more for specialty brands or organic options. If you consume one protein bar a day, that quickly adds up to $45 to $90 per month, or potentially over $1,000 annually!
In contrast, when you buy ingredients in bulk and make a batch of 10-12 homemade protein bars, the cost per bar often drops dramatically. For instance, a large container of oats is very inexpensive, and while protein powder can be an investment, it’s typically much more cost-effective per serving when used at home. Nut butters and sweeteners, when bought in larger quantities, also offer better value.
By making your own, you’re not paying for brand marketing, individual packaging, or transportation costs. You’re simply paying for the raw ingredients. This means each delicious, nutrient-dense bar can cost you as little as $0.50 to $1.00, depending on your chosen ingredients and any premium additions like organic nuts or specialty protein powders. Over time, these savings truly add up, making homemade protein bars a smart choice for both your health and your wallet.
Homemade Protein Bars
Chelsea Lords
These Homemade Protein Bars are incredibly easy to make with no baking or stove-top needed. This recipe uses everyday ingredients, so no special trips to specialty stores! They’re packed with wholesome oats, rich nut butter, and a touch of sweetness, customizable with a delicious chocolate drizzle. Perfect for a quick, healthy snack or a satisfying post-workout boost, these bars are a delicious treat anytime.
15 minutes
1 hour
1 hour 15 minutes
12 protein bars
Video Overview
For a visual guide on how to make these delicious homemade protein bars, watch our recipe video! (Original video player removed for HTML compliance)
Watch the Homemade Protein Bars Recipe Video Here
Equipment
-
8.5 x 4.5-inch bread pan
-
Small blender
or mini food processor
Ingredients
- 1 cup old-fashioned oats
- 1 cup peanut butter (stir well if using a natural butter)
- 1/4 cup honey
- 1/2 tablespoon vanilla extract (optional)
- 1/8 teaspoon salt
- 1/3 cup vanilla protein powder (see note 1)
- 1/4 cup mini chocolate chips
- 3 tablespoons dark chocolate chips
- 1/2 teaspoon melted coconut oil
Instructions
-
Line a bread pan (8.5 x 4.5-inch) with parchment paper or foil. Leave an overhang for easy removal of bars and set aside.
-
Add oats to a small blender or food processor. Pulse for about 15–20 seconds until oats resemble a coarse flour. Add remaining “Protein Bars” ingredients (peanut butter, honey, vanilla extract, salt, vanilla protein powder, and mini chocolate chips). Pulse until well combined into a thick dough. Scrape edges as needed.
-
Press the dough firmly and evenly into the prepared bread pan.
-
Optional Chocolate Drizzle: Combine chocolate chips with coconut oil in a microwave-safe bowl. Microwave in bursts of 15 seconds, stirring in between each burst for 10 seconds until the chocolate is smooth. Transfer chocolate to a plastic bag, cut off the tip of the bag, and drizzle chocolate over the bars. If desired, sprinkle a light dusting of sea salt.
-
Pop the pan in the fridge until bars are set and firm, about an hour.
-
Remove from the fridge and, using the overhang, pull the bars from the pan. Cut into 10 to 12 bars.
Recipe Notes
Note 1 (Protein Powder Choice): The selection of protein powder is critical as it significantly influences both the flavor and texture of your finished bars. Always opt for a protein powder that you personally enjoy the taste of. Depending on the inherent sweetness of your chosen powder, you may need to adjust the amount of honey; add it gradually and taste the mixture before pressing it into the pan to achieve your preferred sweetness.
Storage: Store your homemade protein bars in an airtight container or bag in the refrigerator. For best quality and texture, consume them within one week, although they can last up to two weeks. It’s important to note that these bars will become soft and melty if left out in a warm environment, so keeping them chilled is essential.
Nutrition
Nutrition information is automatically calculated, so should only be used as an approximation.
Enjoyed this recipe? Share your thoughts in a comment below!
More Protein-Packed Recipes to Fuel Your Day:
Breakfast
Protein Breakfast Cookies
Shakes And Smoothies
Pumpkin Protein Shake
Snacks
Chocolate Energy Bites
Desserts
Protein Cookie Dough