
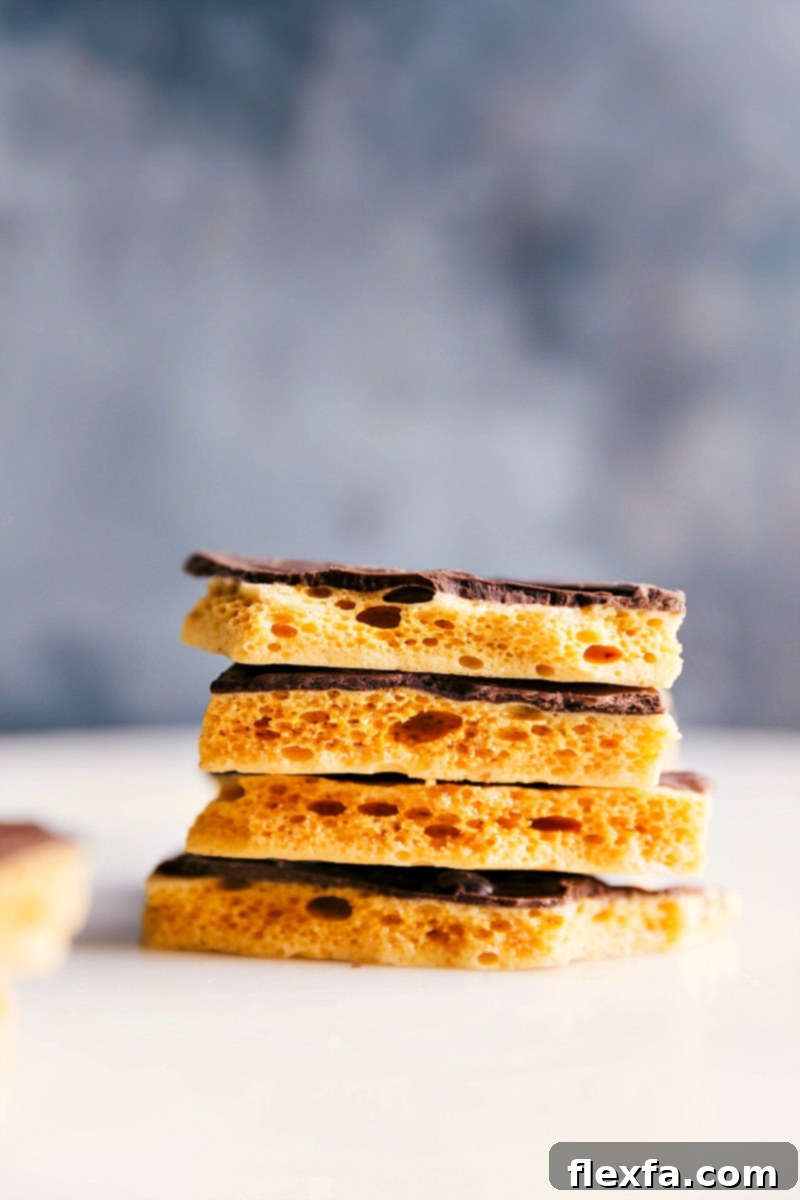
Unleash your inner confectioner with this incredibly simple recipe for **Homemade Honeycomb Candy**! Despite its elegant appearance, this golden, airy, and delightfully crunchy treat comes together effortlessly with just four core ingredients. Whether enjoyed plain or enrobed in a luscious layer of chocolate, it’s a sweet sensation that promises to impress and satisfy any craving for a unique, crispy indulgence.
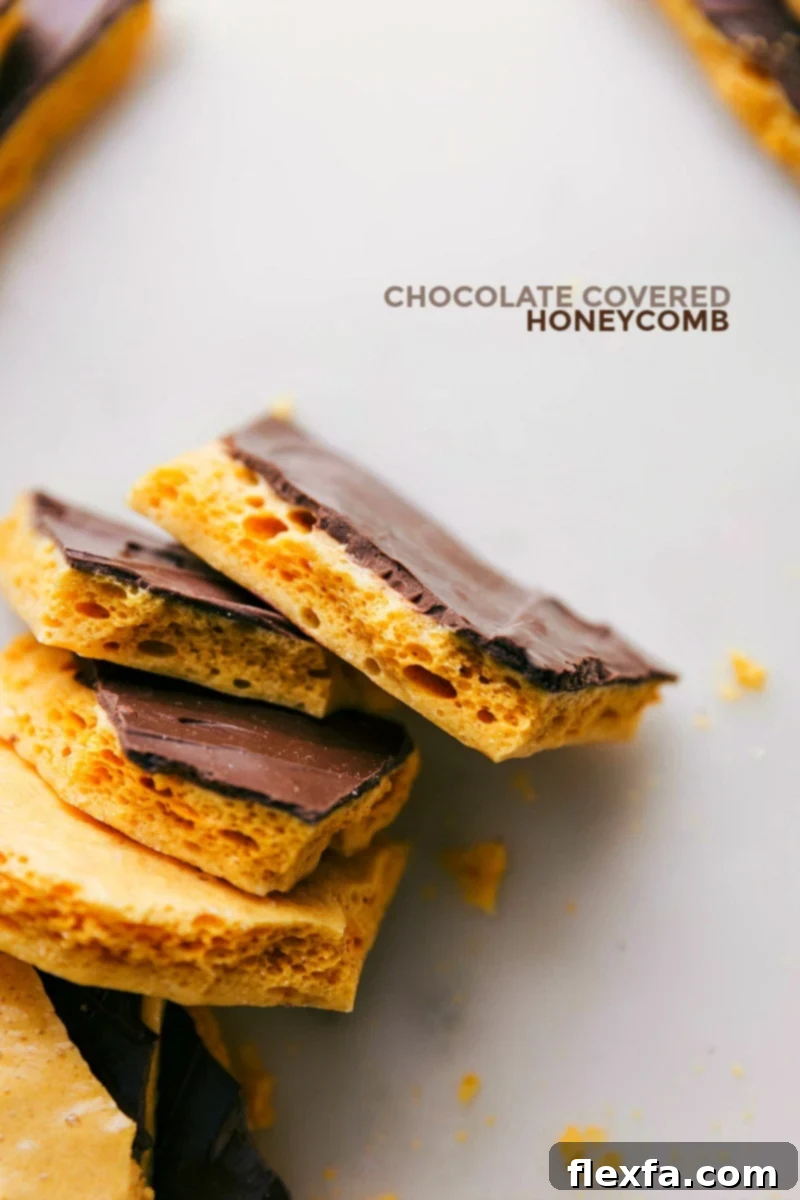
The Irresistible Charm of Honeycomb Candy
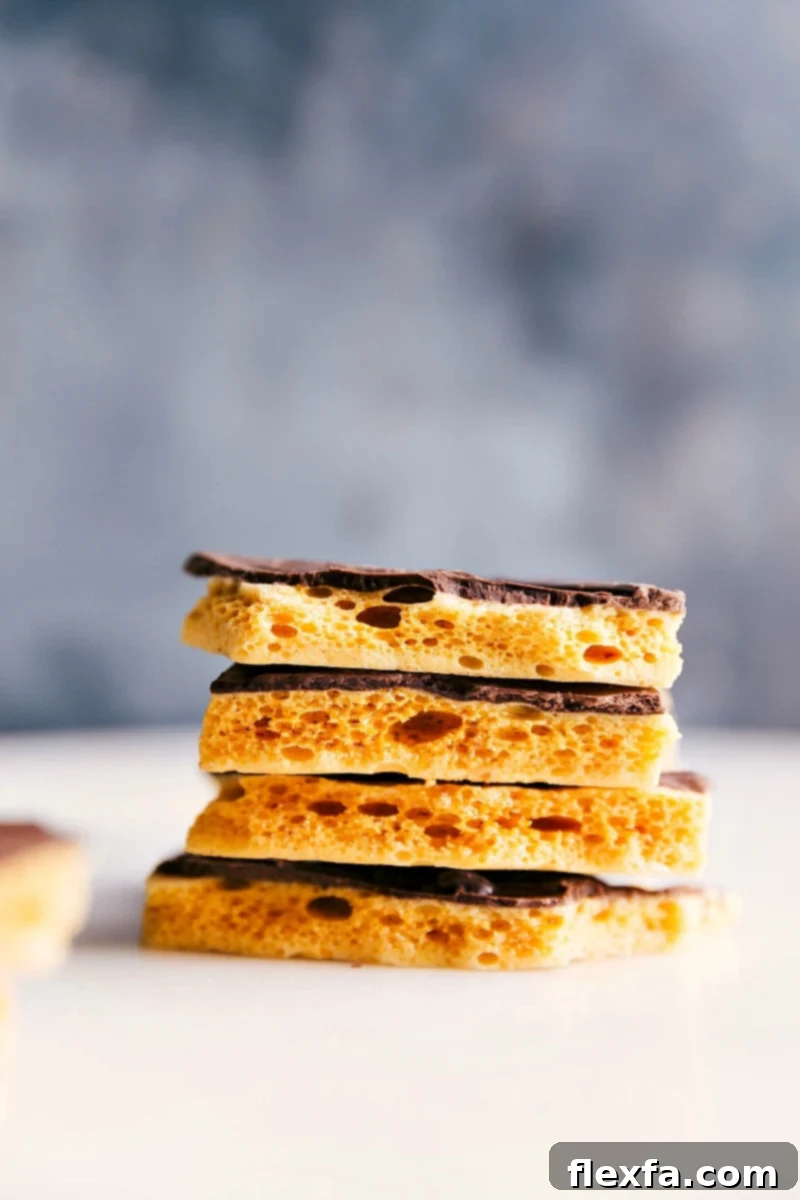
Known by a delightful array of names across the globe—including cinder toffee, sponge candy, seafoam candy, puff candy, and hokey pokey—Honeycomb Candy boasts a universal appeal. This beloved confection stands out with its signature light, crispy, and uniquely bubbly texture, strikingly reminiscent of a natural honeycomb structure, complemented by a sweet, slightly caramelized toffee flavor. Its versatility is part of its charm; while utterly delicious on its own, a generous dip in rich, melted chocolate elevates it to an even more luxurious, gourmet dessert.
Forget expensive gourmet candy store prices! Crafting this delightful treat at home is not only incredibly satisfying but also surprisingly economical. What starts as a simple sugar syrup transforms into an ethereal, golden sponge with a magical touch of baking soda. The process itself is a fun kitchen experiment, watching the mixture puff up dramatically. For many, including our family, homemade honeycomb candy has become a cherished holiday tradition, bringing joy, shared moments, and a touch of sweetness to gatherings. We hope it becomes a cherished tradition for you too, offering a rewarding and delicious experience that makes every bite feel special.
Why You’ll Love Making Homemade Honeycomb Candy
There are countless reasons why this easy homemade honeycomb candy recipe will become a staple in your dessert repertoire:
- **Effortlessly Impressive:** This candy looks sophisticated and complex, but the actual process is surprisingly straightforward, making it an excellent recipe even for beginner candy makers.
- **Minimal & Accessible Ingredients:** You likely already have most of the four essential ingredients—sugar, corn syrup, baking soda, and water—in your pantry.
- **Customizable & Versatile:** Enjoy it in its pure, golden form, dip it in various types of melted chocolate (dark, milk, or white), or experiment with additional toppings like sea salt, sprinkles, or crushed nuts for an extra layer of flavor and texture.
- **Perfect for Gifting:** Homemade honeycomb candy makes a thoughtful, unique, and delicious gift during the holidays, for birthdays, or any special occasion. Package it beautifully, and you have a show-stopping present.
- **Unique Texture & Flavor Profile:** The distinct airy crunch and sweet, caramelized toffee notes are truly one-of-a-kind, offering a delightful contrast to softer candies.
- **A Fun Family Activity:** Involving kids (under supervision for hot sugar) can turn candy making into a memorable and educational experience.
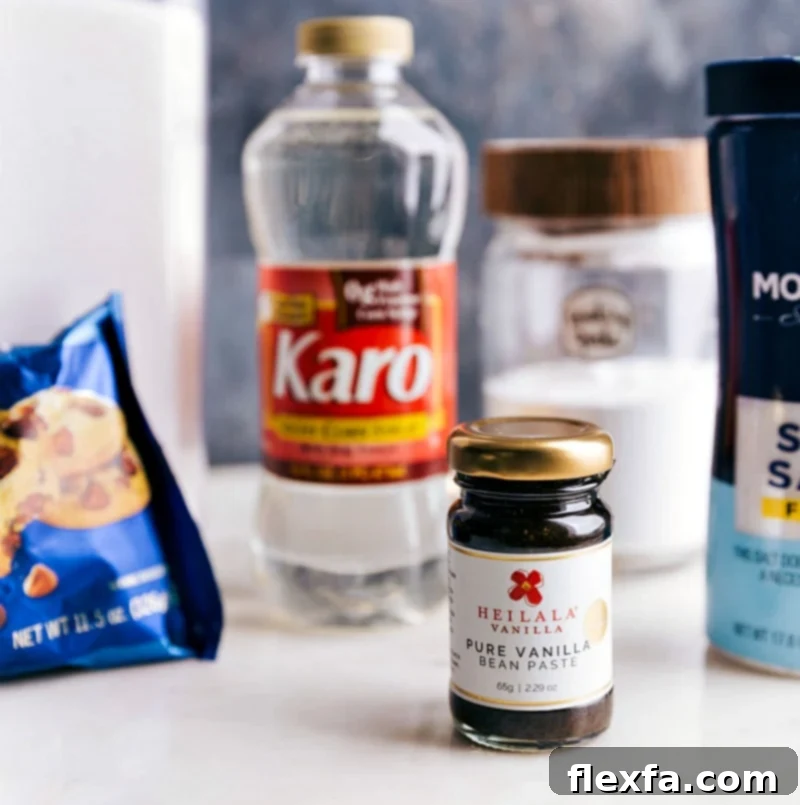
Essential Ingredients for Golden Honeycomb
Creating perfect honeycomb candy relies on a few simple, yet specific, ingredients. Each plays a crucial role in achieving that signature bubbly texture and rich, sweet flavor. Here’s a detailed look at what you’ll need and why:
- Light Corn Syrup: This ingredient is much more than just a sweetener; corn syrup is vital for preventing sugar crystallization, ensuring a smooth, glassy candy base. It helps control the formation of sugar crystals, which, if not managed, can make your candy grainy and unpleasant. Always opt for *light* corn syrup for the best results, as dark corn syrup contains molasses and will alter the flavor and color of your honeycomb. Brands like Karo® corn syrup are excellent and readily available choices.
- White Granulated Sugar: This is the primary sweetening agent and forms the bulk of your candy. It’s crucial to use white granulated sugar. Brown sugar contains molasses and will not achieve the desired light golden color or crisp texture, often leading to a chewier, denser candy that doesn’t “sponge” correctly. Stick to plain granulated sugar for that classic honeycomb finish.
- Salt: A small pinch of salt works wonders in candy making. It isn’t just for seasoning; it expertly balances the intense sweetness and amplifies the overall caramelized flavor profile of the candy. Don’t skip this tiny but mighty ingredient!
- Baking Soda: This is truly the ‘secret’ ingredient that gives honeycomb its characteristic airy, bubbly, sponge-like structure. When vigorously whisked into the hot sugar mixture, baking soda (sodium bicarbonate) reacts with the acid naturally present in corn syrup and sugar, releasing carbon dioxide gas. This gas gets trapped within the rapidly cooling, hardening sugar matrix, creating those beautiful, delicate pockets. Make sure your baking soda is fresh and active for the best rise and an impressive bubble structure.
- Vanilla Extract: While optional, a good quality pure vanilla extract adds a lovely depth of flavor and warmth that complements the sweet toffee notes beautifully. It can round out the sweetness and add a sophisticated aroma. You can also experiment with other extracts like almond, peppermint, or even a touch of orange zest for unique flavor variations.
- **Water:** Used to dissolve the sugar and corn syrup, creating a homogenous syrup. This allows the mixture to reach the precise high temperature needed for candy making without burning too quickly. Use room temperature water for even dissolving.
- **Optional Chocolate:** For an elevated and truly decadent experience, dark, semi-sweet, or milk chocolate can be melted and used for dipping or drizzling your finished honeycomb pieces. Dark chocolate provides a lovely bittersweet contrast to the intense sweetness of the candy, while milk chocolate offers a sweeter, milder combination that’s popular with many.
The Importance of a Candy Thermometer
When making honeycomb candy, precision is paramount, and a reliable candy thermometer is your most essential tool. Unlike general cooking or meat thermometers, candy thermometers are specifically designed to accurately measure the high temperatures crucial for sugar work, often reaching up to 400°F (200°C). Without one, it’s incredibly challenging to know exactly when your sugar syrup has reached the critical hard-crack stage (300°F/150°C), which is absolutely essential for achieving that perfect crispy, non-chewy texture. Guessing can lead to anything from overly soft and sticky candy to burnt, bitter sugar.
Investing in a good quality candy thermometer is a game-changer for all your candy-making endeavors. It takes the guesswork out of the process and significantly increases your chances of success. Here’s the type I use and highly recommend! Before you begin any candy recipe, it’s always a good idea to calibrate your candy thermometer to ensure its accuracy. You can easily do this by following this helpful guide, which involves testing it in boiling water. This simple step ensures your readings are spot-on and prevents common candy-making mishaps, giving you confidence in the kitchen.
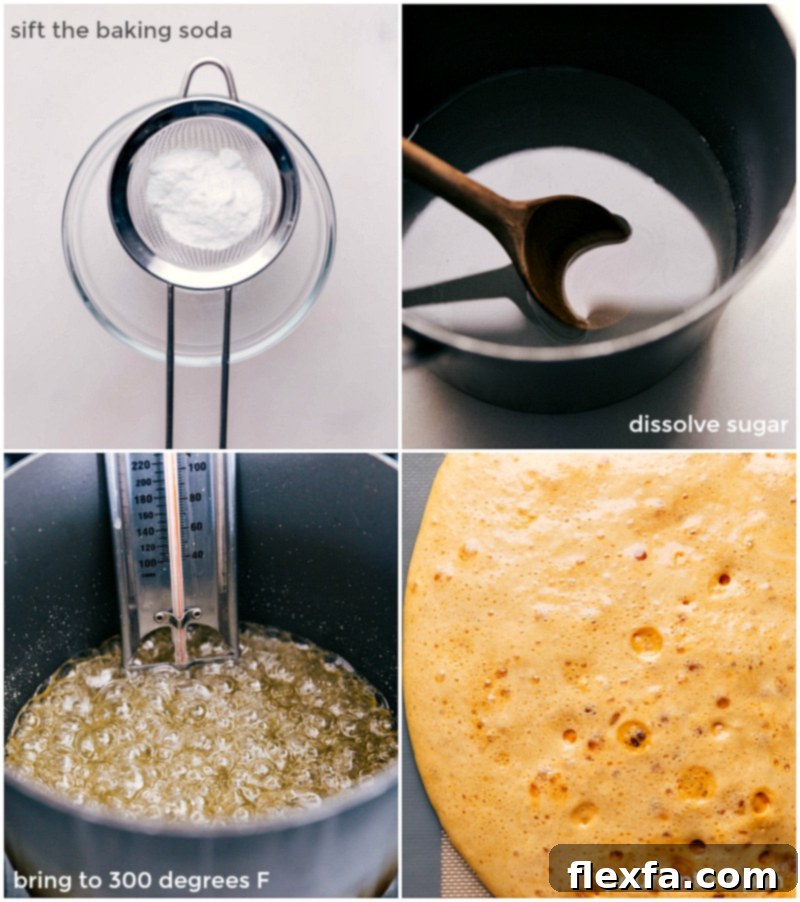
How To Make Perfect Honeycomb Candy: A Step-by-Step Guide
Making honeycomb candy is an exciting and rewarding process that requires careful attention to detail and impeccable timing. Follow these steps closely for a flawlessly bubbly and crispy batch of homemade goodness:
- **Preparation is Key:** Before you even think about turning on the stove, ensure all your ingredients are precisely measured out and your equipment is meticulously ready. Line a large, rimmed baking sheet (at least 15″ x 21″ is ideal) with parchment paper or a non-stick silicone baking mat. This crucial step prevents sticking and makes cleanup significantly easier. Place this prepared pan directly next to your stovetop, within easy reach. Sift your baking soda through a fine-mesh sieve into a small bowl to remove any clumps – this is absolutely crucial for ensuring an even, vigorous rise and uniform bubbly texture. Have this bowl, along with your measured vanilla extract and salt, ready and waiting near your cooking station.
- **Create the Syrup Base:** In a large, heavy-bottomed pot (it’s essential to choose one that is much larger than you think you’ll need, as the candy mixture will dramatically expand and triple in size!), combine the white granulated sugar and room temperature water. Stir gently with a wooden spoon or heat-resistant spatula until the sugar is dissolved. Next, add the light corn syrup and stir briefly to incorporate everything thoroughly.
- **Boil Without Stirring:** Place the pot over medium-high heat. Carefully insert your candy thermometer, ensuring its tip does not touch the bottom of the pot, as this can give inaccurate readings. Bring the mixture to a rolling boil. **Crucially, do not stir the mixture once it starts boiling.** Stirring at this stage can cause sugar crystals to form on the sides of the pot or within the syrup, leading to a grainy or brittle texture instead of a smooth, crunchy honeycomb. Maintain a consistent medium heat to prevent the sugar from burning, even if it seems to take a bit longer to reach temperature. Patience is a virtue here.
- **Reach Hard-Crack Stage (300°F):** Continue to heat the syrup without stirring until your candy thermometer reads precisely 300°F (150°C). This temperature indicates the “hard-crack stage,” which is absolutely vital for the candy’s crispness and ability to shatter. Watch the thermometer like a hawk in the final minutes; the temperature can rise rapidly in the final stages. Do not be tempted to increase the heat to speed up this process, as it almost certainly leads to burnt sugar and a bitter taste.
- **The Magic Expansion:** The very moment the mixture hits 300°F, immediately and carefully remove the pot from the heat. Working with utmost speed and precision, sprinkle the sifted baking soda, vanilla extract, and salt evenly over the entire surface of the hot syrup. Vigorously whisk these ingredients into the sugar syrup for no more than 5-10 seconds. You’ll instantly notice the mixture dramatically expand and bubble up, tripling in size—this impressive reaction is the baking soda releasing carbon dioxide gas!
- **Pour and Set:** Without a second’s delay, quickly pour the rapidly expanding, foamy candy onto your prepared baking sheet. Do not spread or touch the candy with a spatula; let it expand and settle on its own. Resist the urge to poke, prod, or smooth it out. Allow the candy to cool and harden completely at room temperature for at least 1-2 hours. This period of undisturbed cooling is crucial for developing its perfect, crisp texture.
- **Break and Enjoy:** Once the honeycomb candy is fully cooled and firm to the touch, it’s ready to be broken into delightful pieces. You can gently break it apart with your hands, or for a more satisfying, uniform shatter, use a blunt object like a meat mallet, the back of a chef’s knife handle, or a rolling pin. Break it into irregular, bite-sized pieces for easy enjoyment and that rustic homemade charm.
- **Optional Chocolate Dip:** For an extra special touch, melt your preferred chocolate (dark, semi-sweet, or milk) in a microwave-safe bowl. Heat in short bursts of 30 seconds, stirring thoroughly for 15-20 seconds between each burst, until smooth and fully melted (total heating time is typically 1 to 1 minute 15 seconds, depending on your microwave and chocolate type). If desired, stir in 1/4 teaspoon of vegetable oil or shortening to slightly thin the chocolate, making it easier to dip and achieving a smoother coating. Dip individual honeycomb pieces into the melted chocolate, or simply drizzle chocolate artfully over them. Place the chocolate-coated pieces back onto a parchment-lined sheet pan and let them stand at room temperature until the chocolate hardens, which usually takes about 1 hour.
Honeycomb Candy FAQs: Your Questions Answered
The most common culprit for chewy or sticky honeycomb candy is humidity. Sugar is hygroscopic, meaning it readily absorbs moisture from the air, which can cause your candy to lose its crispness and become soft and sticky. Therefore, it’s highly advisable to avoid making this candy on wet or humid days. Another significant factor is not reaching the correct temperature: the candy *must* hit 300°F (the hard-crack stage) to become properly crispy. Using an inaccurate or uncalibrated candy thermometer, or skipping it entirely, will almost always result in a chewier, less desirable texture. Ensure your thermometer is accurate and that you reach that critical temperature!
Even though the honeycomb candy may look relatively set shortly after you pour it onto the pan, it needs sufficient time to fully cool and harden throughout its bubbly structure. This typically takes a minimum of 1-2 hours at room temperature, sometimes longer in cooler environments. Rushing this process or trying to move it too soon can lead to pieces that are still slightly soft, gooey, or even deflated in the center.
Candy making can indeed leave pots with stubborn, hardened sugar residue, but cleanup is surprisingly simple. Here’s an easy method:
- Allow the pot to cool completely after pouring out the candy.
- Fill the pot roughly halfway with plain water.
- Place the pot back on the stovetop and bring the water to a boil. As the water boils, the hardened candy will gradually melt off the sides and bottom.
- Use a sturdy spatula to gently scrape down any remaining stubborn bits. Once the candy is fully dissolved and the water has boiled for a few minutes, carefully pour out the hot sugar water (ideally down a garbage disposal if you have one, or let it cool completely before discarding).
- Once the pot has cooled to a safe temperature, wash it thoroughly with soap and water as you normally would.
While technically possible for very experienced confectioners, it is *highly* discouraged for home cooks. Achieving the precise hard-crack stage (300°F/150°C) is absolutely critical for the characteristic crunch and texture of honeycomb. Without a thermometer, you’re relying on unreliable visual cues like the “cold water test,” which is much less accurate and prone to error. For consistent, perfect results every time, a candy thermometer is an indispensable and worthwhile investment.
Insufficient bubbling usually comes down to two main factors: either your baking soda isn’t fresh, or you didn’t work quickly enough when incorporating it. Baking soda loses its potency over time, so ensure you’re using a fresh batch for maximum effervescence. Also, the reaction happens incredibly fast: once the sugar syrup reaches the exact target temperature, you must immediately remove it from heat, add the baking soda, and whisk vigorously for a mere few seconds before pouring. Any delay can cause the carbon dioxide gases to escape prematurely, resulting in a denser, less airy candy.
Serving Suggestions & Creative Variations
Honeycomb candy is fantastic on its own, but its unique flavor and texture make it an incredibly versatile ingredient and an excellent base for creative culinary experiments. Here are some ideas to inspire you:
- **Chocolate Dipped Classic:** As already mentioned, dipping the cooled honeycomb in melted chocolate is a popular and undeniably delicious choice. Experiment with various types of chocolate—dark chocolate offers a sophisticated bittersweet contrast, milk chocolate provides a sweeter, creamier pairing, and white chocolate can add a different visual and flavor dimension.
- **Gourmet Dessert Topping:** Crush leftover honeycomb into smaller bits and sprinkle it generously over scoops of vanilla ice cream, creamy yogurt parfaits, rich chocolate puddings, or even hot chocolate for an irresistible added crunch and a burst of sweet, caramelized flavor.
- **Elegant Cake & Cupcake Decoration:** Use smaller, neatly broken pieces or finely crushed honeycomb as an elegant and surprisingly simple decoration for homemade cakes, cupcakes, brownies, or other baked goods. It adds both visual appeal and textural interest.
- **Exciting Rocky Road Addition:** Elevate your homemade rocky road by incorporating generous chunks of honeycomb. The airy, crunchy texture provides a fantastic contrast to the soft marshmallows and chewy nuts, making each bite more exciting.
- **Perfect Coffee & Tea Pairing:** Serve small, delicate pieces of honeycomb candy alongside a hot cup of freshly brewed coffee, espresso, or a comforting mug of tea for a delightful and sophisticated afternoon treat.
- **Flavor Infusions:** Before adding the baking soda, consider stirring in a dash of finely ground espresso powder for a mocha twist, a hint of fresh orange zest for a citrusy note, or a few drops of food-grade essential oils (such as peppermint, almond, or lavender) for unique and aromatic flavor twists.
- **Nutty Crunch Honeycomb:** For an added layer of flavor and crunch, lightly sprinkle chopped toasted nuts (like almonds, pecans, walnuts, or pistachios) over the surface of the candy immediately after pouring it onto the pan, while it’s still hot and sticky.
Storage Tips for Optimal Freshness
Proper storage is absolutely crucial for maintaining the delightful crispness and airy texture of your homemade honeycomb candy. Because it is highly susceptible to moisture, careful storage is key.
Keep leftover honeycomb candy in an airtight container in a cool, very dry spot, away from direct sunlight and any sources of heat or humidity. Stored correctly, it will retain its crunchy texture and quality **for up to 1 week**. A common mistake is refrigerating honeycomb, which should be strictly avoided. The moisture and condensation in the fridge will cause the candy to become soft, sticky, and eventually melt into a gooey mess.
If you live in a particularly humid environment, consider placing a food-safe desiccant packet (like silica gel, often found in vitamin bottles) inside your airtight container to absorb any excess moisture, further extending its crispness. For longer preservation, you can **freeze** honeycomb candy. Place individual pieces in an airtight, freezer-safe container, separating layers with parchment paper if needed to prevent sticking. It can be frozen for **up to 1 month**. Thaw at room temperature for several hours before enjoying, ensuring it returns to its original crisp texture.
More Delicious Dessert Recipes to Try
If you enjoyed the magic of making this homemade honeycomb candy, you might love exploring other fantastic and easy homemade treats from our kitchen:
- 3-Ingredient Christmas Candies: Quick, simple, and festive ideas for delightful holiday treats.
- Scotcheroos: Irresistible crunchy chocolate and peanut butter bars that are always a crowd-pleaser.
- Carmelitas: Decadent oatmeal bars generously filled with gooey caramel and rich chocolate chips.
- Oreo Balls: Simple yet addictive chocolate cookie truffles, perfect for any occasion.
- Buckeye Brownies: A delightful and rich combination of creamy peanut butter and luscious chocolate layers, all in fudgy brownie form.
Print Recipe
Homemade Honeycomb Candy
Chelsea Lords
10 minutes
20 minutes
2 hours
2 hours 30 minutes
14 pieces
Video Overview
Equipment
-
Fine mesh sieve
-
Large rimmed sheet pan (15″ x 21″ recommended)
-
Silicone baking mat or parchment paper
-
Large, heavy-bottomed pot (at least 5-quart capacity to accommodate expansion)
-
Candy Thermometer
-
Heat-resistant whisk
Ingredients
- 1 cup granulated sugar
- 1 cup light corn syrup
- 1/2 cup water at room temperature
- 1 tablespoon baking soda (do not substitute with baking powder)
- 1/8 teaspoon salt
- 1-1/2 teaspoons vanilla extract (or 1 teaspoon vanilla bean paste for richer flavor)
-
For Optional Chocolate Coating
- 1 cup dark chocolate (or semi-sweet or milk chocolate for a sweeter candy)
- 1/4 teaspoon vegetable oil (or shortening, optional, to thin chocolate for easier dipping)
Instructions
-
**1. Prepare Your Workspace:** Set out and precisely measure all ingredients. Have a whisk ready. Line a large, rimmed sheet pan (approx. 15″ x 21″) with parchment paper or a silicone baking mat and place it directly next to your stovetop.
-
**2. Sift Baking Soda:** Sprinkle the baking soda through a fine-mesh sieve into a small bowl. This critical step prevents clumps and ensures an even, airy texture. Keep this bowl, along with your vanilla extract and salt, close to the stovetop.
-
**3. Combine & Heat Syrup:** In a large, heavy-bottomed pot (choose one much larger than you anticipate needing, as the candy will triple in size!), add the granulated sugar and water. Stir until the sugar is dissolved. Add the light corn syrup and stir to incorporate. Turn the heat to medium-high.
-
**4. Boil to Hard-Crack Stage (300°F):** Insert your candy thermometer, ensuring it does not touch the bottom of the pot. Bring the mixture to a boil. **Do not stir the mixture while it is boiling**; stirring can cause sugar crystallization. Continue heating until the mixture reaches precisely 300°F (150°C). Watch carefully, as the temperature can rise quickly at the end.
-
**5. Rapid Expansion:** The moment the thermometer hits 300°F, remove the pot from the heat immediately. Working very quickly, sprinkle the sifted baking soda, vanilla, and salt evenly over the hot syrup. Vigorously whisk into the sugar syrup for no more than 5-10 seconds. The mixture will dramatically expand and foam. Quickly pour the bubbly candy onto your prepared sheet pan and allow it to expand and settle on its own (do not spread or touch). Do not touch or move the candy for at least 1 hour.
-
**6. Cool & Break:** Once the candy has completely cooled and set (about 1-2 hours), it will be hard. Carefully remove it from the pan. Use a blunt object (like a meat mallet or the handle of a chef’s knife) to gently shatter the candy into bite-sized pieces. Alternatively, you can break it up with your hands.
-
**7. Optional Chocolate Coating:** To add chocolate, melt 1 cup of dark, semi-sweet, or milk chocolate in a microwave-safe bowl. Heat in 30-second intervals, stirring thoroughly for 15-20 seconds after each burst, until smooth and fully melted (total heating time is typically 1 to 1 minute 15 seconds). If desired, stir in 1/4 teaspoon of vegetable oil or shortening to slightly thin the chocolate. Dip individual honeycomb pieces into the melted chocolate or drizzle it over them. Place the chocolate-coated candy on a parchment paper-lined sheet pan and let it stand at room temperature until the chocolate hardens, which takes approximately 1 hour.
Recipe Notes
- Let the pot cool completely. Once cooled, fill it just over halfway with water.
- Place the pot back on the stovetop and bring to a boil. Once water is boiling, the candy will begin to melt off the sides.
- Use a spatula to scrape down the sides and scrape off any stubborn candy. Pour it all down the drain (or disposal) and let the pot cool before doing a final clean with soap and water.
**Storage:** Store finished honeycomb candy in an airtight container in a very dry place at room temperature. This candy is best enjoyed within 1 week for optimal crispness. Honeycomb will become soft and chewy in a humid environment due to moisture absorption. Do not refrigerate. For longer storage, freeze in an airtight container for up to 1 month and thaw at room temperature before serving.
Nutrition Information
Calories: 252kcal |
Carbohydrates: 44g |
Protein: 2g |
Fat: 9g |
Saturated Fat: 5g |
Polyunsaturated Fat: 1g |
Monounsaturated Fat: 3g |
Trans Fat: 1g |
Cholesterol: 1mg |
Sodium: 315mg |
Potassium: 142mg |
Fiber: 2g |
Sugar: 40g |
Vitamin A: 8IU |
Calcium: 18mg |
Iron: 2mg
Nutrition information is automatically calculated and should be used as an approximation.
Loved this recipe? Share your thoughts below!
We always appreciate hearing from you!