
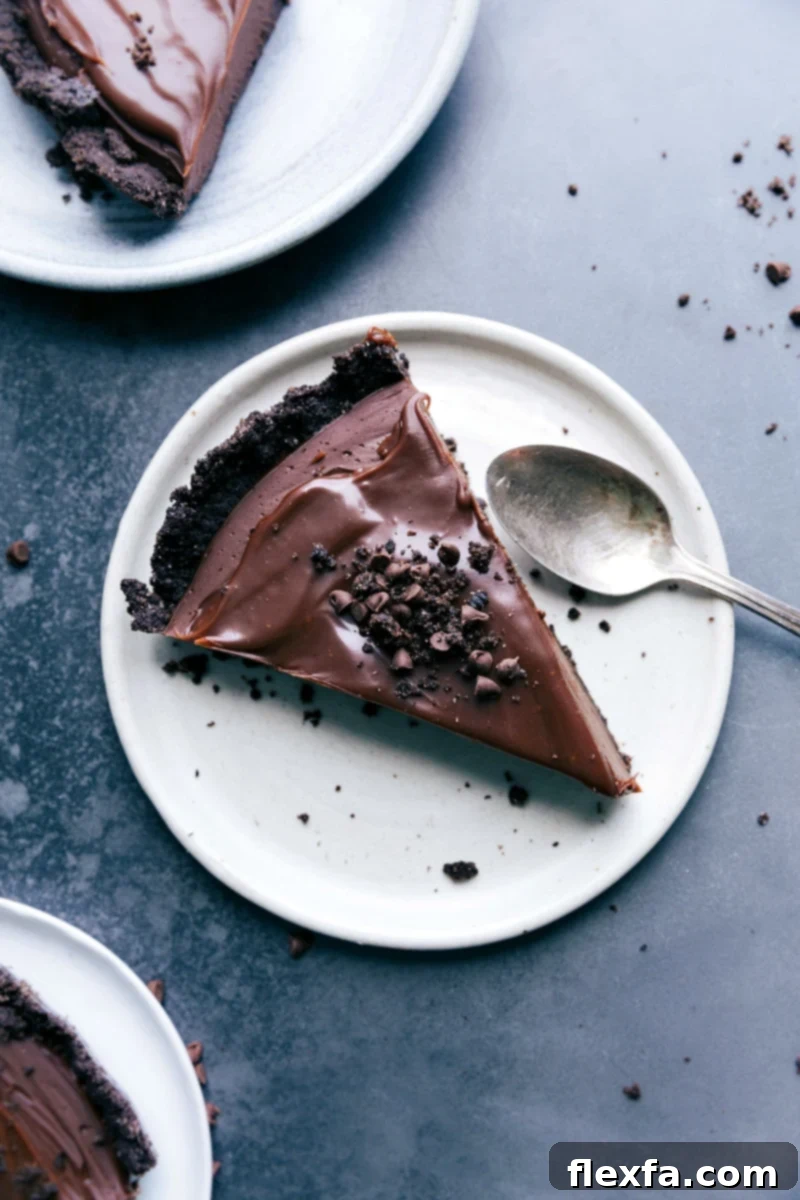
Indulge in the ultimate chocolate experience with this incredibly easy and utterly decadent Chocolate Tart Recipe. Imagine sinking your teeth into a crisp, buttery chocolate cookie crust, followed by a luxuriously thick and rich chocolate fudge filling that melts in your mouth, all crowned with a glistening, silky-smooth chocolate ganache. This isn’t just a dessert; it’s a celebration of chocolate in three magnificent layers, designed to impress even the most discerning palates while remaining remarkably simple to prepare. Perfect for special occasions or whenever a serious chocolate craving strikes, this homemade chocolate tart promises pure bliss with every single bite.
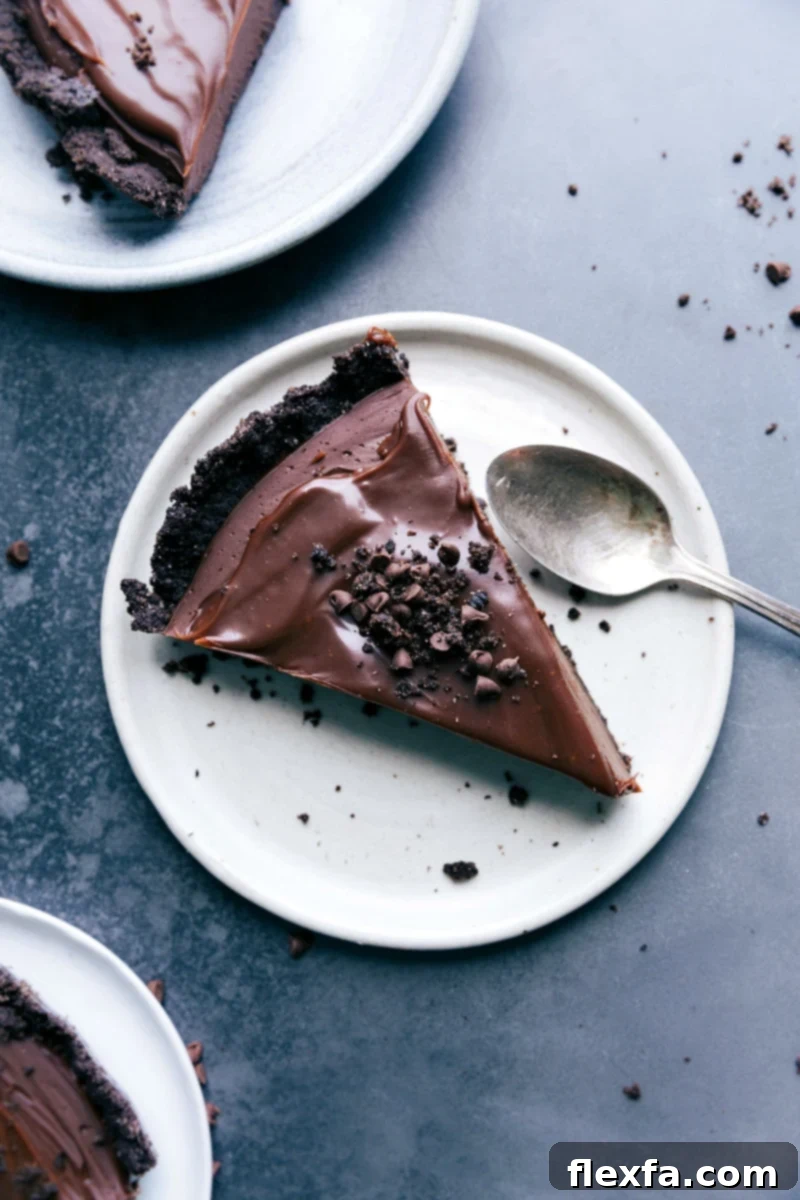

Author’s Note
The Decadent Chocolate Tart That Captured My Husband’s Heart!
This chocolate tart holds a special place in our home, mainly because it became a quest. My husband, a man of simple tastes but strong opinions when it comes to dessert, embarked on a work trip and returned raving about a chocolate tart he’d encountered. He couldn’t stop talking about its perfect balance of crust, filling, and topping, challenging me to recreate it – a tricky task, indeed, as I hadn’t even had a single bite myself!
Armed with his incredibly detailed (and somewhat passionate) descriptions, I learned the core components: a sturdy, flavorful chocolate cookie crust; an intensely rich, almost fudge-like chocolate filling; and a final elegant layer of silky chocolate ganache. It took a few delightful (and delicious!) experiments and some careful adjustments to perfect the texture and flavor profile. After several test runs, my husband officially crowned this rendition superior to his original, declaring it his absolute favorite dessert on our site. (My apologies to the beloved apple pie, but this chocolate tart has truly stolen the spotlight!)
A friendly word of caution: this homemade Chocolate Tart is exceptionally rich. A small slice is often all you need to satisfy your deepest chocolate cravings. It’s the epitome of decadence, indulgence, and pure, unadulterated deliciousness. Prepare for a dessert experience that’s truly unforgettable.
Unlock Superior Flavor: The Importance of Quality Chocolate
For a chocolate tart that truly shines, the secret lies in the quality of your chocolate. Investing in premium chocolate makes an enormous difference in both flavor and texture. High-quality chocolate melts more smoothly, boasts a richer, more complex flavor, and contributes significantly to the luxurious, fudgy consistency of the tart’s filling and the glossy finish of the ganache. I personally adore using brands like Ghirardelli® or Guittard® (these recommendations are purely based on personal preference and are not sponsored).
Avoid using cheaper chocolate chip brands, as they often contain a higher percentage of wax or vegetable fats. This can result in a less flavorful final product and a texture that feels waxy or gritty rather than smooth and creamy. For the best possible triple chocolate tart experience, opt for semi-sweet or dark chocolate chips with a cacao percentage between 55-70%. If you can find good quality baking bars, chopping them yourself will yield an even smoother melt for that truly professional finish. Your taste buds (and your guests!) will thank you for this crucial ingredient upgrade.
Decoding the Layers: What Makes This Chocolate Tart Irresistible
Every bite of this extraordinary chocolate tart offers a symphony of textures and flavors, thanks to its perfectly balanced three-layer construction. Understanding the role of each component is key to appreciating (and perfecting) this dessert.
The Foundation: A Crisp Chocolate Cookie Crust
Our journey begins with the simplest yet most satisfying crust. Made from crushed chocolate sandwich cookies, typically Oreos, this crust provides a delightful contrast to the smooth filling. Blended with a touch of sugar and melted butter, it bakes up into a firm, flavorful base that holds its shape beautifully. The slight bitterness of the chocolate cookies perfectly complements the sweetness of the filling, creating a harmonious start to each slice.
The Heart: An Ultra-Rich Chocolate Fudge Filling
This is where the magic truly happens. The middle layer is a luscious, ultra-dense chocolate fudge filling that is both intensely chocolatey and incredibly smooth. It’s crafted by gently heating heavy cream and egg yolks, then stirring in high-quality chocolate chips, salt, and vanilla. The careful cooking of the cream and yolks creates a custard-like base that, when combined with rich chocolate, transforms into a dense, decadent fudge that sets beautifully in the refrigerator.
The Crown: A Glistening Chocolate Ganache Topping
To finish, a glossy chocolate ganache provides a sophisticated sheen and an extra layer of chocolatey goodness. This simple mixture of heavy cream, chocolate chips, and a touch of light corn syrup creates a smooth, pourable glaze that hardens slightly to a soft set. The corn syrup is the secret to its mirror-like shine, making the tart not only a treat for the taste buds but also a feast for the eyes.
Essential Ingredients for Your Decadent Chocolate Tart
Crafting this incredible chocolate tart requires a few key ingredients, each playing a vital role in achieving its signature flavor and texture. Here’s a closer look at what you’ll need and why:
- Chocolate Sandwich Cookies (like Oreos): These form the delicious, sturdy base of our tart. While Oreos are classic, any brand of chocolate sandwich cookie will work perfectly. Ensure they are finely crushed to create a cohesive crust.
- Unsalted Butter: Essential for binding the cookie crumbs together into a perfect crust. Using unsalted butter allows you to control the salt content in the recipe. If you only have salted butter, simply omit the additional salt called for in the filling.
- Granulated Sugar: A small amount is added to the crust to enhance sweetness and contribute to its crisp texture after baking.
- Heavy Cream (36% Fat): This is a superstar ingredient for both the rich filling and the glossy ganache. Its high fat content is crucial for the filling to set properly, giving it that luxurious, fudgy consistency. For a dairy-free option, full-fat canned coconut cream can be an effective substitute for the filling.
- High-Quality Semi-Sweet or Dark Chocolate Chips: The backbone of our chocolate tart! Opt for chips with a cacao percentage between 55-70% for the best flavor and melting consistency. Better quality chocolate, as mentioned, results in a superior final product. Chopping a good quality baking bar often yields an even smoother melt.
- Large Egg Yolks: These are vital for enriching the fudge filling, giving it an incredibly smooth, creamy texture and helping it set beautifully. Separate your eggs when they are cold for easier handling, and save the whites for another recipe!
- Light Corn Syrup: This might seem like an unusual addition, but it’s the secret weapon for a perfectly glossy, professional-looking ganache. It prevents crystallization, ensuring your topping remains smooth and shiny. Do not skip this!
- Vanilla Extract: Pure vanilla extract deepens and enhances the overall chocolate flavor, adding a warm, aromatic note that elevates the entire tart.
- Salt (Fine Sea Salt Recommended): A tiny pinch of salt in the filling is crucial for balancing the sweetness and intensifying the chocolate flavor. It truly makes all the difference, preventing the tart from being overly sweet.
- Optional Flavor Boosters: A minuscule pinch of instant espresso powder or coffee granules can be added to the filling alongside the chocolate. It won’t make your tart taste like coffee but will wonderfully boost and deepen the chocolate notes.
Step-by-Step Guide: Crafting Your Decadent Chocolate Tart
Making this impressive chocolate tart is simpler than you might think, especially when you follow these clear, step-by-step instructions. Get ready to create a masterpiece!
- Prepare the Crust:
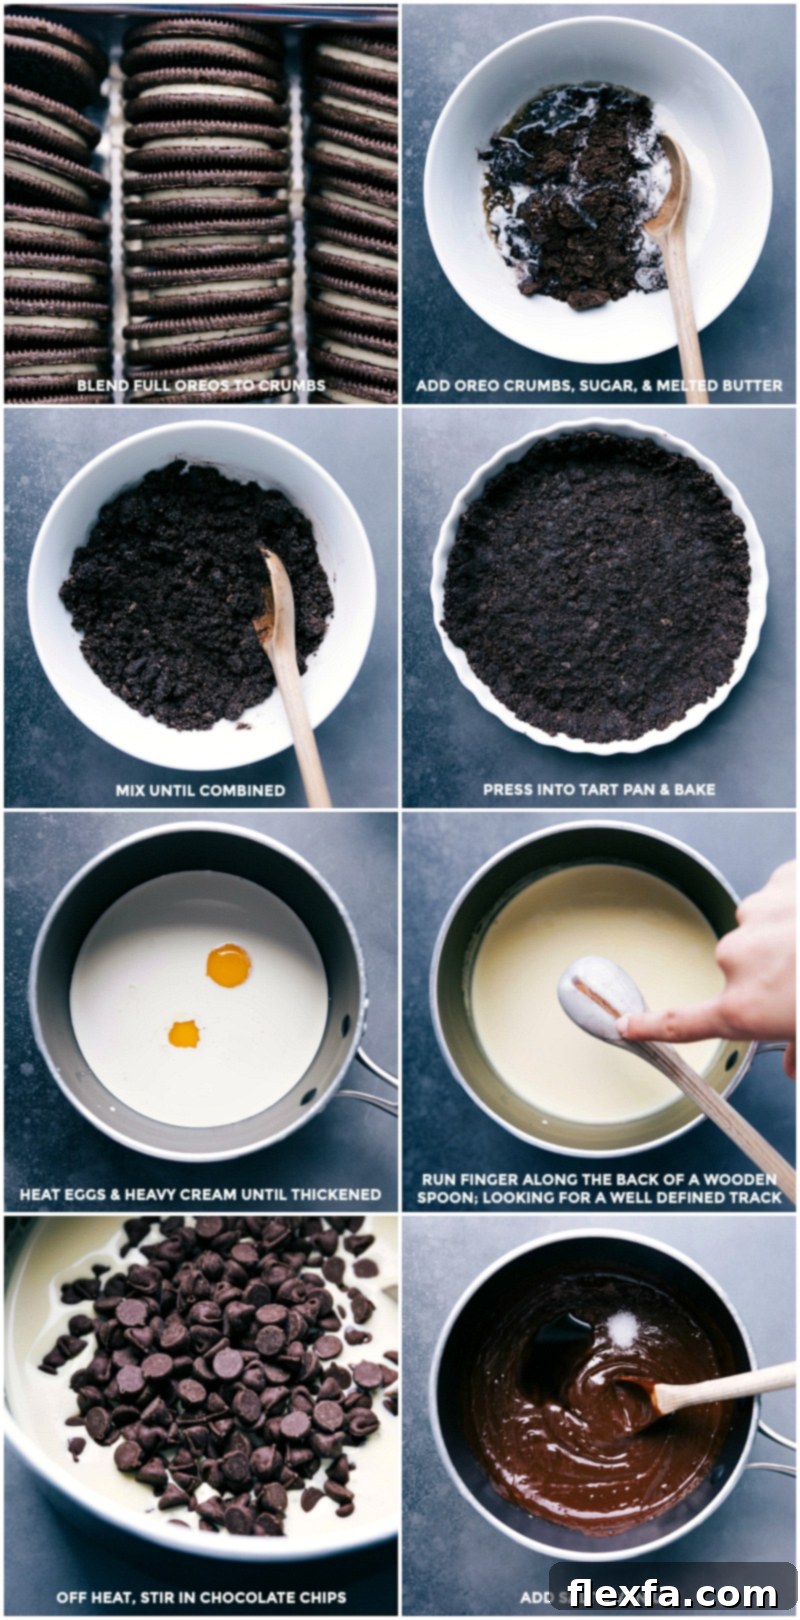
Preheat your oven to 325°F (160°C). Lightly grease a 9-inch tart or pie pan with cooking spray. In a powerful blender or food processor, pulse your chocolate sandwich cookies until they become fine, even crumbs. You’ll need about 1 level cup of these crumbs. Melt the unsalted butter, then set it aside for a minute to cool slightly before mixing. In a medium bowl, combine the cookie crumbs and sugar, then pour in the slightly cooled melted butter. Stir thoroughly until all the crumbs are moistened and well combined. Press this mixture firmly and evenly into the bottom of your greased tart pan, extending it approximately three-quarters of the way up the sides. Bake for 10 minutes, then remove from the oven and transfer to a wire rack to cool completely. A completely cool crust is essential before adding the filling.
- Craft the Rich Chocolate Fudge Filling:
In a small saucepan, combine the heavy cream and egg yolks. Place the pot over medium-low heat and whisk continuously. This constant stirring is crucial to prevent the egg yolks from scrambling. Heat the mixture until it becomes hot, but absolutely do not let it boil. It should thicken slightly; a good test is to run your finger along the back of a wooden spoon dipped in the mixture – it should leave a distinct, defined track. Immediately remove the pot from the heat. Stir in the high-quality semi-sweet or dark chocolate chips until they are completely melted and the mixture is silky smooth. Finally, mix in the salt and vanilla extract. At this point, you can also add a pinch of instant espresso powder if desired to boost the chocolate flavor.
- Chill the Filling:
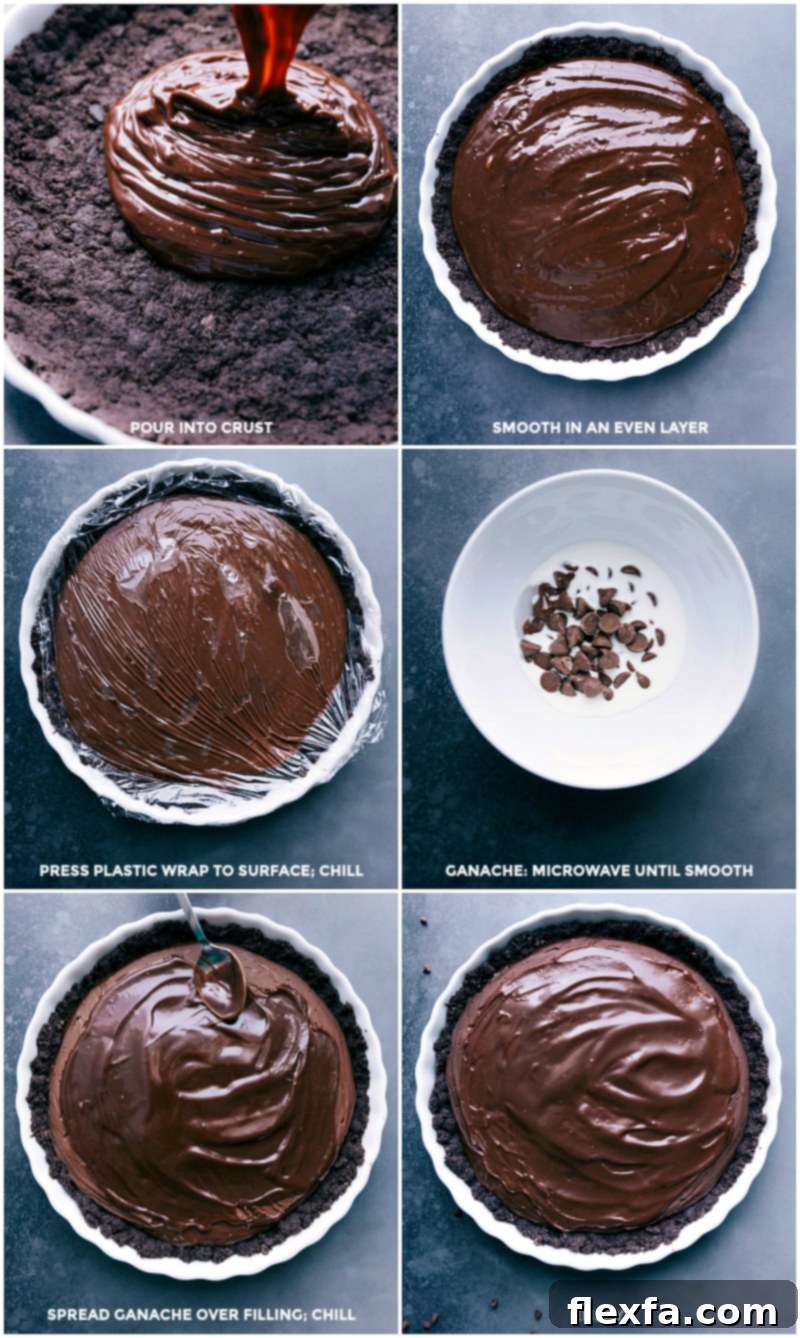
Carefully pour the warm chocolate filling into your cooled, prepared tart crust. Use the back of a spoon to spread it into an even layer. This next step is very important: cover the tart with plastic wrap, pressing the plastic directly onto the surface of the filling. This prevents a film from forming as it chills. Refrigerate the tart for a minimum of 3 hours, but ideally overnight, to allow the filling to set completely and achieve its signature fudgy texture.
- Prepare and Apply the Glossy Ganache:
Once the tart filling is thoroughly chilled and set, it’s time for the crowning glory. In a microwave-safe bowl, combine the heavy cream, chocolate chips, and light corn syrup. Microwave in short bursts of 15 seconds, stirring well after each burst for another 15 seconds, until the mixture is completely melted and smooth. This method ensures the chocolate doesn’t burn. Carefully spread this glossy ganache evenly over the chilled chocolate filling. Return the tart to the refrigerator for at least 1 more hour to allow the ganache to set.
- Slice and Serve:
For the cleanest slices, warm your knife under hot water and wipe it clean between each cut. This prevents the chocolate from sticking and creates beautiful, smooth edges. Serve your decadent chocolate tart as is, or garnish it as desired with additional cookie crumbs, mini chocolate chips, or a delicate dusting of powdered sugar. Store any leftovers in the refrigerator, covered, for up to 5 days.
Pro Tips for Chocolate Tart Perfection
Achieving a flawless chocolate tart is easy when you keep these expert tips in mind:
- Constant Whisking is Key for the Filling: When heating the heavy cream and egg yolk mixture, continuously whisk it over medium-low heat. This vigilance prevents the egg yolks from scrambling and ensures a smooth, uniform custard base for your fudge filling. Patience here is a virtue!
- Never Boil the Filling Mixture: It’s crucial that the cream and yolk mixture gets hot and thickens, but it should never reach a rolling boil. Boiling can cause the eggs to curdle, resulting in a grainy rather than smooth filling. Heat it just until it visibly thickens and coats the back of a spoon.
- Confirm Thickness Before Removing from Heat: The ideal consistency for your filling mixture is when it’s just thick enough to coat the back of a wooden spoon, and when you draw a line with your finger, the line holds. Remove it from the heat as soon as it reaches this point to prevent overcooking.
- Don’t Skimp on Salt: A small amount of salt, particularly fine sea salt, is essential. It doesn’t make the tart salty but rather enhances and balances the rich sweetness of the chocolate, making the chocolate flavor truly pop. Adjust to your personal taste, but don’t omit it entirely.
- Embrace the Chill Time: Adequate chilling is non-negotiable for this chocolate tart. Allow it to refrigerate for at least 3 hours, or even better, overnight. Ensure you press plastic wrap directly onto the surface of the filling to prevent any skin from forming and to lock in moisture, guaranteeing a smooth finish. This extended chill time allows the filling and ganache to set perfectly, making for clean, beautiful slices.
- Hot Knife for Perfect Slices: For bakery-worthy slices, dip your knife in hot water and wipe it clean before each cut. This technique warms the blade, allowing it to glide through the chocolate layers without dragging or cracking, resulting in pristine, elegant servings.
- Creative Garnishes: While this chocolate tart is stunning on its own, a simple garnish can elevate it further. Consider a dusting of cocoa powder, a sprinkle of extra finely crushed Oreo crumbs, mini chocolate chips, or even fresh berries (like raspberries or strawberries) for a pop of color and tartness that cuts through the richness.
Storage and Make-Ahead Tips for Your Chocolate Tart
Planning ahead for this chocolate tart is incredibly easy, making it an ideal dessert for entertaining or enjoying over several days.
Making Ahead:
You can prepare the chocolate cookie crust up to 2 days in advance. Once baked and cooled, cover it tightly and store it at room temperature. The entire chocolate tart, with its filling, can be assembled a day in advance. For the best visual appeal and glossiest finish, however, we recommend adding the ganache topping just an hour or two before you plan to serve it. This ensures the ganache is at its freshest and most reflective.
Storing Leftovers:
Any leftover chocolate tart should be stored covered tightly with plastic wrap or in an airtight container in the refrigerator. It will maintain its delicious flavor and texture for up to 5 days. For the best quality, make sure the plastic wrap touches the surface of the ganache to prevent it from drying out or absorbing refrigerator odors. Freezing this chocolate tart is generally not recommended, as the texture of both the filling and the ganache can degrade upon thawing, often becoming watery or grainy.
More Chocolate Desserts:
Desserts
Chocolate Cheesecake
Desserts
Easy Chocolate Fondue Recipe
Desserts
Buckeye Brownies Recipe
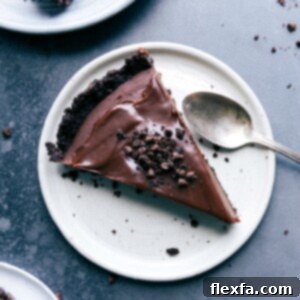
Chocolate Tart
Chelsea Lords
15 minutes
10 minutes
3 hours
3 hours 25 minutes
12 servings
Equipment
-
Tart pan or pie pan, 10-inch
-
Blender or food processor
-
Small pot
Ingredients
- Cooking spray
- 20 Oreos or chocolate sandwich cookies
- 2 tablespoons sugar
- 4 tablespoons unsalted butter melted
- 1-1/4 cups heavy cream
- 3 large egg yolks
- 2 cups semi-sweet chocolate chips or dark chocolate chips
- 1/4 teaspoon salt
- 1 teaspoon vanilla extract
- 2 tablespoons heavy cream
- 1/3 cup chocolate chips
- 1 teaspoon light corn syrup
- Toppings as desired see note 1
Instructions
-
Preheat oven to 325°F (160°C). Lightly grease a 9-inch tart or pie pan with cooking spray. In a powerful blender or food processor, blend the Oreos into crumbs. Measure out 1 level cup of crumbs. Melt the butter in the microwave and allow it to cool slightly.
-
In a medium bowl, combine cookie crumbs and sugar, then add melted butter. Stir until well combined. Press crust firmly into the bottom of the greased and prepared pan and 3/4 the way up the sides. Bake for 10 minutes, then remove to a wire rack and cool completely.
-
In a small pot, whisk together cream and egg yolks. Heat over medium-low heat, stirring constantly, until the mixture is hot but never boiling and thickens slightly. When you run your finger along the back of a wooden spoon, it should leave a defined track. Remove the pot from the heat and stir in the chocolate chips until they are completely melted and the mixture is smooth. Then, mix in the salt and vanilla extract.
-
Pour the filling into the prepared crust and spread into an even layer with the back of a spoon. Cover with plastic wrap (see note 2) and refrigerate for at least 3 hours, up to overnight.
-
Add the heavy cream, milk chocolate chips, and light corn syrup to a microwave-safe bowl. Microwave in bursts of 15 seconds, stirring between each burst for 15 seconds, until melted and smooth. Smooth this glaze evenly over the tart and chill for 1 more hour before serving.
-
Cut the tart into thin slices. Serve, if desired, garnished with mini chocolate chips, Oreo crumbs, or a sprinkle of powdered sugar.
Recipe Notes
Note 1: Optional garnish: additional cookie crumbs, miniature chocolate chips, or a sprinkle of powdered sugar.
Note 2: Press the plastic wrap so that it touches the surface of the pie; this will help keep a film from forming during the chilling.
Storage: Store covered and refrigerated for up to 5 days. This tart does not freeze or thaw well.
Nutrition
Nutrition information is automatically calculated, so should only be used as an approximation.
Chocolate Tart Recipe FAQs
Absolutely! This chocolate tart is an excellent make-ahead dessert. You can prepare the chocolate cookie crust up to two days in advance, storing it covered at room temperature. The entire tart, including the filling, can be assembled a day ahead and chilled. For the most stunning presentation and a perfectly glossy finish, we recommend preparing and spreading the ganache topping just an hour or two before you plan to serve. This strategy ensures both convenience and a beautiful, fresh-looking dessert.
No tart pan? No problem! While a tart pan with a removable bottom offers a classic presentation, this recipe is adaptable. A standard 9-inch pie dish or even a springform pan will work beautifully. Simply press the chocolate cookie crust about an inch up the sides of your chosen pan. The final appearance might be slightly different, but rest assured, the incredibly rich and delicious flavor will be just as exceptional.
The most common reason for a filling not setting is that the heavy cream and egg yolk mixture wasn’t heated sufficiently before the chocolate was incorporated. It needs to reach a specific temperature and thicken enough to coat the back of a spoon, leaving a clear track when you swipe your finger across it. Ensure you stir constantly over medium-low heat. Another contributing factor could be the quality or cacao percentage of your chocolate. Using chocolate with less than 55% cacao can result in a softer set, as it contains less cocoa solids. Always opt for good quality semi-sweet or dark chocolate chips (55-70% cacao) for the best results.
The secret to that dazzling, mirror-like ganache is the light corn syrup. It acts as an invert sugar, preventing crystallization and creating a smoother, shinier finish. Also, ensure you microwave the cream, chocolate chips, and corn syrup in short bursts, stirring thoroughly between each. This gentle heating prevents the chocolate from burning and helps create a perfectly emulsified, smooth, and glossy ganache.