
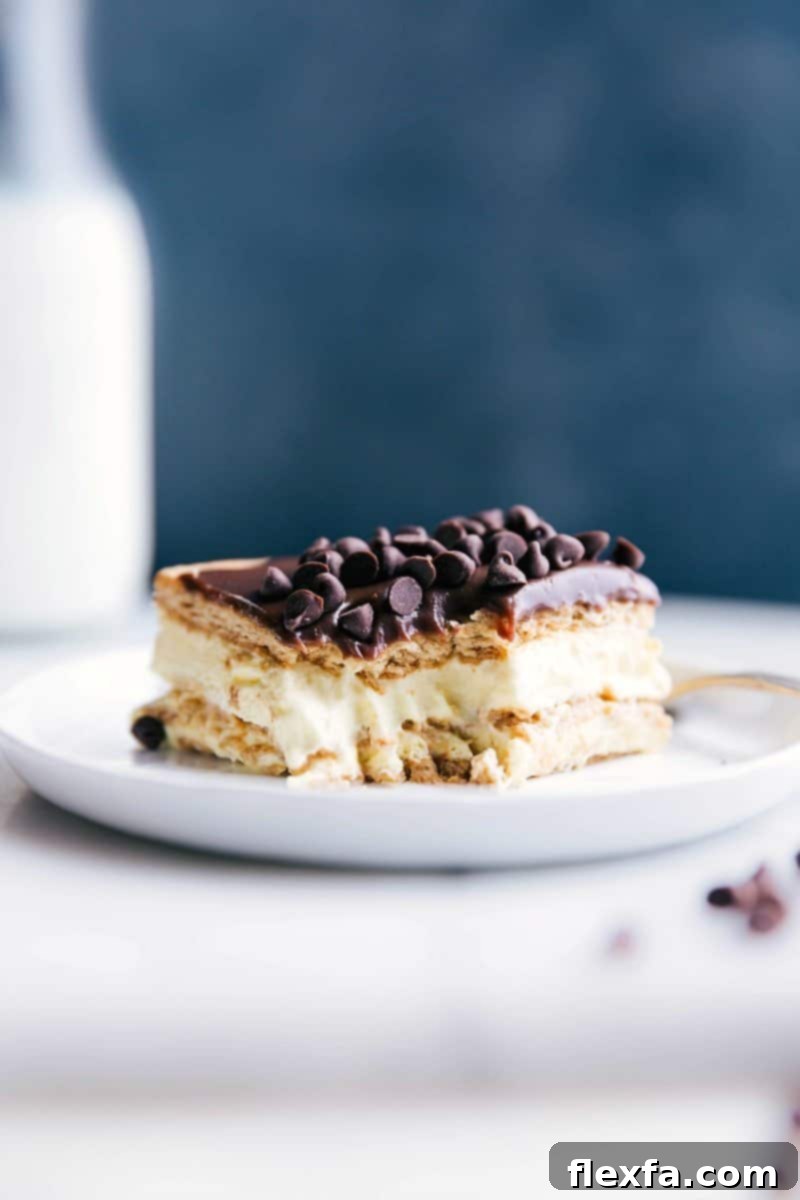
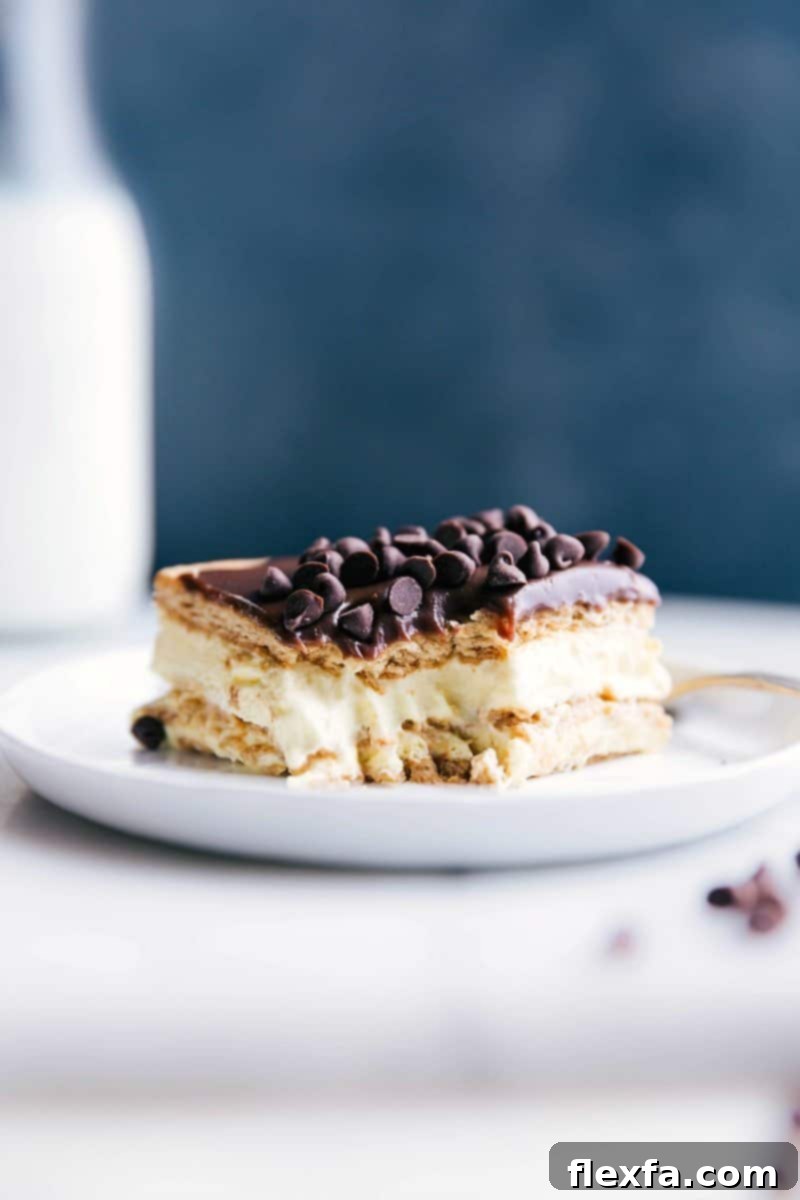
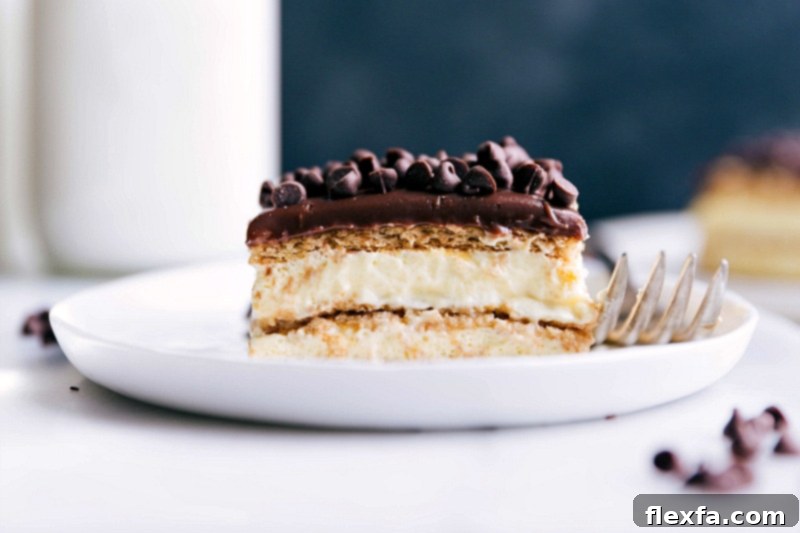
Welcome to the ultimate solution for your sweet cravings! This **No-Bake Eclair Cake Recipe** effortlessly delivers all the classic flavors you adore: crisp graham crackers, layers of luscious vanilla cream, and a rich, decadent chocolate ganache. It’s a remarkably easy-to-make dessert that requires no oven, and it’s perfectly suited for making ahead, ensuring a stress-free treat for any occasion.

Author’s Note
Your Dream Answer to Eclair Cravings – Without Any Baking!
Like many dessert lovers, I have a deep and abiding passion for the elegant simplicity of a classic French eclair. My husband often jokes that my culinary explorations abroad are secretly driven by a quest for the perfect eclair, and honestly, he’s not entirely wrong! The delicate choux pastry, the rich crème pâtissière, and the glossy chocolate glaze—it’s a symphony of textures and flavors that’s hard to resist. However, flying to France for a pastry isn’t a practical everyday solution, and let’s be realistic, mastering choux pastry and spending hours in the kitchen can be quite a commitment for a homemade version.
That realization sparked a mission: to create an **easy Eclair Cake recipe** that flawlessly captures those beloved flavors and textures, but with a fraction of the effort. This no-bake marvel is my secret weapon—a dessert that comes together in mere minutes but tastes like a gourmet creation that took hours of meticulous work. It’s the perfect shortcut for satisfying those deep eclair cravings without any of the traditional fuss.
The magic truly lies in its components. We start with a velvety vanilla pudding layer, expertly lightened with whipped topping, which perfectly mimics the smooth, rich pastry cream of an authentic eclair. This layer is perfectly sweet but never cloying, offering a delightful airy texture. To top it all off, we craft a thick, intensely chocolatey ganache, mirroring the elegant finishing touch of its classic inspiration. With just a handful of readily available ingredients and each simple layer prepared in under 10 minutes, this recipe is nothing short of pure kitchen enchantment. Get ready to impress your family and friends with an utterly delicious, effortlessly beautiful Eclair Cake that tastes like pure decadence!
Essential Eclair Cake Ingredients: What You’ll Need for This No-Bake Delight
Creating this irresistible no-bake eclair cake requires just a few readily available ingredients, each chosen for its crucial role in recreating that beloved classic eclair experience. Here’s a detailed look at what you’ll need, along with expert tips to ensure your cake turns out perfectly every time:
| Ingredient | Swaps & Expert Tips for Best Results |
|---|---|
| French vanilla instant pudding mix (2 x 3.4-ounce boxes) | French vanilla adds a wonderful depth of flavor, but regular vanilla instant pudding mix is a perfectly acceptable substitute and works just as well. **It is absolutely critical to use *instant* pudding mix, not the “cook and serve” variety.** The cook and serve type will not set properly without heat, resulting in a runny filling. Whisk the pudding and milk vigorously until completely smooth and lump-free to ensure a silky, creamy texture in your finished cake. |
| Whole milk (3-1/2 cups) | For the richest, creamiest, and best-setting pudding layer, whole milk is highly recommended. The higher fat content contributes significantly to the pudding’s luxurious texture. While 1% or 2% milk can be used, expect a slightly less creamy result. **Avoid skim milk and most non-dairy milk alternatives (such as almond milk, oat milk, or soy milk) as they typically lack the necessary fat and protein content for the pudding to set firmly and achieve the desired dense yet smooth consistency.** |
| Frozen whipped topping, thawed (1 x 8-ounce package, e.g., Cool Whip) | This ingredient is key to achieving the signature light and airy texture of the vanilla cream layer, mirroring a classic eclair’s pastry cream. Ensure the whipped topping is completely thawed before you gently fold it into the pudding mixture. This ensures a smooth, homogenous blend without any icy bits or uneven texture. If you prefer to make your own homemade whipped cream, make sure it is lightly sweetened and whipped to medium peaks so it can hold its structure when mixed with the pudding and layered in the cake. |
| Honey graham crackers (1 x 14.4-ounce package) | These versatile crackers form the “pastry” layers of your no-bake eclair cake. As the dessert chills, they soften beautifully by absorbing moisture from the pudding, transforming into a wonderfully tender, cake-like texture. Using whole sheets helps create neat and tidy layers, contributing to the cake’s elegant appearance. For a delightful flavor variation, consider using cinnamon graham crackers, which add a warm, comforting spice note that pairs exceptionally well with vanilla and chocolate. |
| Milk chocolate chips (1-1/4 cups) | Milk chocolate chips are perfect for crafting a classic, sweet, and comforting chocolate ganache. They melt smoothly and provide a familiar, universally loved chocolate flavor. However, if you desire a more intense, deeper, and slightly less sweet chocolate experience, **semi-sweet chocolate chips** are an excellent alternative. The quality of the chocolate chips you choose will directly impact the richness and overall flavor of your ganache, so opt for a brand you truly enjoy. |
| Heavy cream (2/3 cup) | Heavy cream is absolutely essential for creating a rich, smooth, and pourable chocolate ganache. When heating, do so gently in a microwave or saucepan until it just begins to simmer around the edges. It’s important not to bring the cream to a rolling boil. Once hot, pour it over your chocolate chips and let it sit undisturbed for a minute or two to allow the heat to melt the chocolate, then stir vigorously until it transforms into a luxurious, glossy topping. |
| Unsalted butter (1 tablespoon) | A small knob of unsalted butter stirred into the finished ganache isn’t just for flavor; it adds a beautiful, professional-looking glossy sheen to your topping and helps achieve an even smoother, more stable consistency. This step is optional, but it significantly elevates the presentation and mouthfeel of your Eclair Cake, making it highly recommended for that extra touch of perfection. |
Quick Tip for a Flawless Finish!
Don’t fret if your chocolate ganache doesn’t spread perfectly evenly or if you notice any minor imperfections on the surface of your **Eclair Cake**. This forgiving no-bake dessert offers an easy fix! You can effortlessly camouflage any blemishes by sprinkling some mini chocolate chips, finely crushed graham crackers, a dusting of cocoa powder, or even some colorful sprinkles over the top. These additions not only hide flaws but also add appealing extra texture and visual flair!
Mastering Your No-Bake Eclair Cake: Expert Tips for Success
While making this Eclair Cake is incredibly straightforward, a few key tips and techniques will guarantee your dessert turns out absolutely perfect every single time. Follow these guidelines for the best possible texture, flavor, and presentation:
- Whisk Pudding & Milk Thoroughly for a Smooth Cream: This is arguably the most critical step for the creamy vanilla filling. Start by pouring the cold milk into a large mixing bowl, then add both packages of instant pudding mix. Whisk briskly and continuously for a full 2 to 3 minutes until the mixture is completely smooth, thickened, and absolutely free of any lumps. Undissolved pudding mix can result in a grainy or uneven texture, compromising the luxurious feel of your cream layer. A hand mixer on low speed can also be used to achieve this quickly and efficiently.
- Embrace the Chill Time for Optimal Texture: Patience is truly a virtue when it comes to no-bake desserts! For the best possible results, allow your Eclair Cake to chill in the refrigerator for a minimum of 8 hours, and ideally, overnight (12-24 hours). This extended chilling period is vital for two primary reasons: it allows the vanilla pudding layers to fully set and firm up to their ideal consistency, and, crucially, it gives the graham crackers ample time to absorb moisture from the pudding, transforming them from crisp crackers into a wonderfully soft, moist, and cake-like texture that makes this dessert so unique. Do not rush this step!
- Perfecting the Chocolate Ganache Layer’s Temperature: When you prepare your chocolate ganache, pay close attention to its temperature before pouring. If the ganache is too hot when spread over the delicate pudding layers, it can cause the pudding to melt and mix, resulting in a less defined and potentially messy appearance. After melting and stirring until it’s perfectly smooth, allow the ganache to stand at room temperature for 5 to 10 minutes. It should still be pourable but slightly cooled and thickened. This ensures it forms a distinct, beautiful, and glossy layer on top of your cake that sets perfectly.
- Achieving Clean, Elegant Slices: For elegant, picture-perfect slices of your **Eclair Cake**, a simple but effective technique makes all the difference. Always use a sharp, serrated knife. For even cleaner cuts, run the knife under hot water for a few seconds, then wipe it completely dry with a paper towel before each slice. The warm, clean blade will glide effortlessly through the rich chocolate ganache and soft layers, preventing dragging or tearing, and giving you beautifully defined individual portions.
- Layering with Precision and Care: When spreading the pudding mixture over the graham cracker layers, work gently and methodically. It’s best to dollop large spoonfuls of the pudding across the entire surface of the crackers before carefully spreading it out with the back of a spoon or a small offset spatula to form an even layer. This technique minimizes the disturbance of the graham crackers underneath, helping to prevent them from sliding around. Don’t worry if the crackers overlap slightly or if you need to break pieces to fill gaps; they will soften and meld together seamlessly as the cake chills.
Storage Guidelines for Your Delicious Eclair Cake
- To keep this **Eclair Cake Recipe** fresh and delicious, store any leftovers tightly covered with plastic wrap or in an airtight container in the refrigerator for up to **4 days**. It’s worth noting that the graham crackers will continue to absorb moisture and soften further over time. They typically reach their ideal “cake-like” texture within the first 24-48 hours. For optimal texture and the freshest taste, it’s generally best to consume the cake within **2 days** of preparation.
- **Freezing** this cake is generally not recommended. The pudding base, which relies heavily on its smooth, creamy consistency for its appeal, tends to become watery, separates, and develops an unappealing texture when thawed. This significantly compromises the overall enjoyment of the dessert, so it’s best to stick to refrigeration for storage!
Why This No-Bake Eclair Cake Will Be Your New Favorite Dessert
If you’re on the hunt for a dessert that marries classic indulgence with effortless preparation, look no further than this incredible No-Bake Eclair Cake. It’s a culinary masterpiece designed to delight your taste buds and simplify your time in the kitchen, offering a plethora of compelling reasons why it deserves a permanent spot in your dessert repertoire:
- Effortlessly Delicious & No-Bake Convenience: The sheer simplicity of this recipe is its greatest allure. You can completely forget about turning on the oven, dealing with delicate pastries, or mastering complex baking techniques. This cake comes together with straightforward layering, making it the perfect dessert for both novice bakers and seasoned pros who appreciate a fantastic shortcut without compromising on flavor.
- Authentic Eclair Flavor Profile: Despite its no-bake nature and simplified process, this cake brilliantly captures the true essence of a classic eclair. The smooth, rich vanilla pudding cream, the subtle chew and tender texture of the softened graham crackers (which expertly mimic choux pastry), and the luxurious, glossy chocolate ganache combine to create a truly authentic and deeply satisfying taste experience.
- A Make-Ahead Marvel for Stress-Free Entertaining: This dessert is absolutely ideal for entertaining or for those with busy schedules because it actually *requires* ample chilling time. You can easily prepare it the day before your event, allowing it to fully set and for the flavors to meld beautifully. It will be perfectly ready to serve when you are, taking the pressure off last-minute dessert preparations.
- Universally Loved & Impressively Elegant: With its elegant layers, vibrant contrast, and decadent appearance, this eclair cake consistently impresses. It’s a guaranteed crowd-pleaser and a popular choice for potlucks, family gatherings, holiday celebrations, or simply as a special weeknight treat. Plus, yielding 24 servings means there’s always plenty to go around, satisfying even the largest gatherings!
- Minimal Cleanup for Maximum Enjoyment: One of the often-overlooked benefits of a no-bake recipe is the significantly reduced cleanup! With no baking sheets to scrub or complex equipment to wash, most of the preparation involves just a few mixing bowls and a single baking pan. This means your post-dessert routine will be a breeze, allowing you to enjoy your creation without the lingering chore.
- Endlessly Customizable Fun: While the classic version of this Eclair Cake is divine on its own, the recipe offers a fantastic base for endless customization. Feel free to experiment with different pudding flavors, incorporate fresh fruit between layers, or garnish with various sprinkles, chopped nuts, or even a drizzle of caramel to make it uniquely yours and perfectly suited to any occasion or preference.
Creative Variations & Customizations for Your Eclair Cake
While the classic Eclair Cake is undeniably exquisite, don’t hesitate to get creative and personalize this recipe to perfectly suit your taste, dietary needs, or the occasion. This recipe provides a fantastic canvas for culinary innovation! Here are some inspiring ideas to elevate your next no-bake masterpiece:
- Pudding Power-Ups: Dive beyond French vanilla! Experiment with other instant pudding flavors like luscious butterscotch, creamy cheesecake, sweet banana, or even a rich chocolate pudding to transform the cake entirely. For an extra decadent treat, consider creating alternating layers of vanilla and chocolate pudding.
- Cracker Creativity: While honey graham crackers are traditional, cinnamon graham crackers offer a delightful spiced twist. You could also try vanilla wafers, shortbread cookies, or even thin chocolate wafers for different flavor profiles and textures. Just ensure your chosen cracker is sturdy enough to absorb moisture without disintegrating too quickly, allowing for neat layers.
- Ganache Glamour: Beyond milk or semi-sweet chocolate, consider a dark chocolate ganache for a more intense, sophisticated flavor. For a sweeter, milder topping, a white chocolate ganache could be a lovely choice. A delicate swirl of salted caramel, a sprinkle of flaky sea salt, or a hint of chili powder can also dramatically elevate the chocolate layer, adding complexity.
- Fruity Freshness: Introduce a burst of freshness and color by adding a thin layer of fresh berries, such as sliced strawberries, raspberries, or blueberries, over one of the pudding layers. Just be sure to pat them thoroughly dry before adding to prevent any excess moisture from affecting the cake’s consistency.
- Nutty Crunch: For an appealing textural contrast, sprinkle a layer of finely chopped toasted nuts, like pecans, walnuts, or almonds, over the ganache, or even between the pudding layers. This adds a delightful crunch that complements the creamy filling.
- Flavorful Extracts & Zests: Elevate the flavor profile further by folding in a few drops of an extract (such as almond, coffee, or peppermint) or some finely grated orange or lemon zest into the vanilla pudding mixture. These subtle additions can add an unexpected layer of gourmet flavor.
- Adult Indulgence: For a grown-up version of this delightful dessert, consider gently folding a tablespoon or two of a liqueur like Kahlua, Irish cream, or a touch of rum extract into either the pudding mix or the ganache for an elegant, boozy kick.
More Irresistible No-Bake & Easy Dessert Bars:
Desserts
7 Layer Bars Recipe
Desserts
Carmelitas (My Favorite Dessert!)
Desserts
S’mores Cookie Bars
Desserts
Peanut Butter Rice Krispie Treats
Print Recipe
No-Bake Eclair Cake Recipe
Chelsea Lords
25
8
8 25
24 servings
Equipment
-
9 x 13-inch baking pan
-
Large Mixing Bowl
-
Whisk or Hand Mixer
-
Spatula
Ingredients
- 2 (3.4-ounce) boxes French vanilla instant pudding mix (or regular vanilla flavor; ensure it’s *instant* not cook and serve for proper setting)
- 3-1/2 cups whole milk (for the creamiest results, 1% or 2% will also work)
- 1 (8-ounce) package frozen whipped topping (completely thawed, such as Cool Whip, for a light and airy texture)
- 1 (14.4-ounce) package honey graham crackers (approximately 16 full sheets; see Recipe Note 1 for tips on quantities)
- 1-1/4 cups milk chocolate chips (or semi-sweet chocolate chips for a deeper, less sweet chocolate flavor)
- 2/3 cup heavy cream
- 1 tablespoon unsalted butter (optional, but highly recommended for extra gloss and smoothness)
Instructions
-
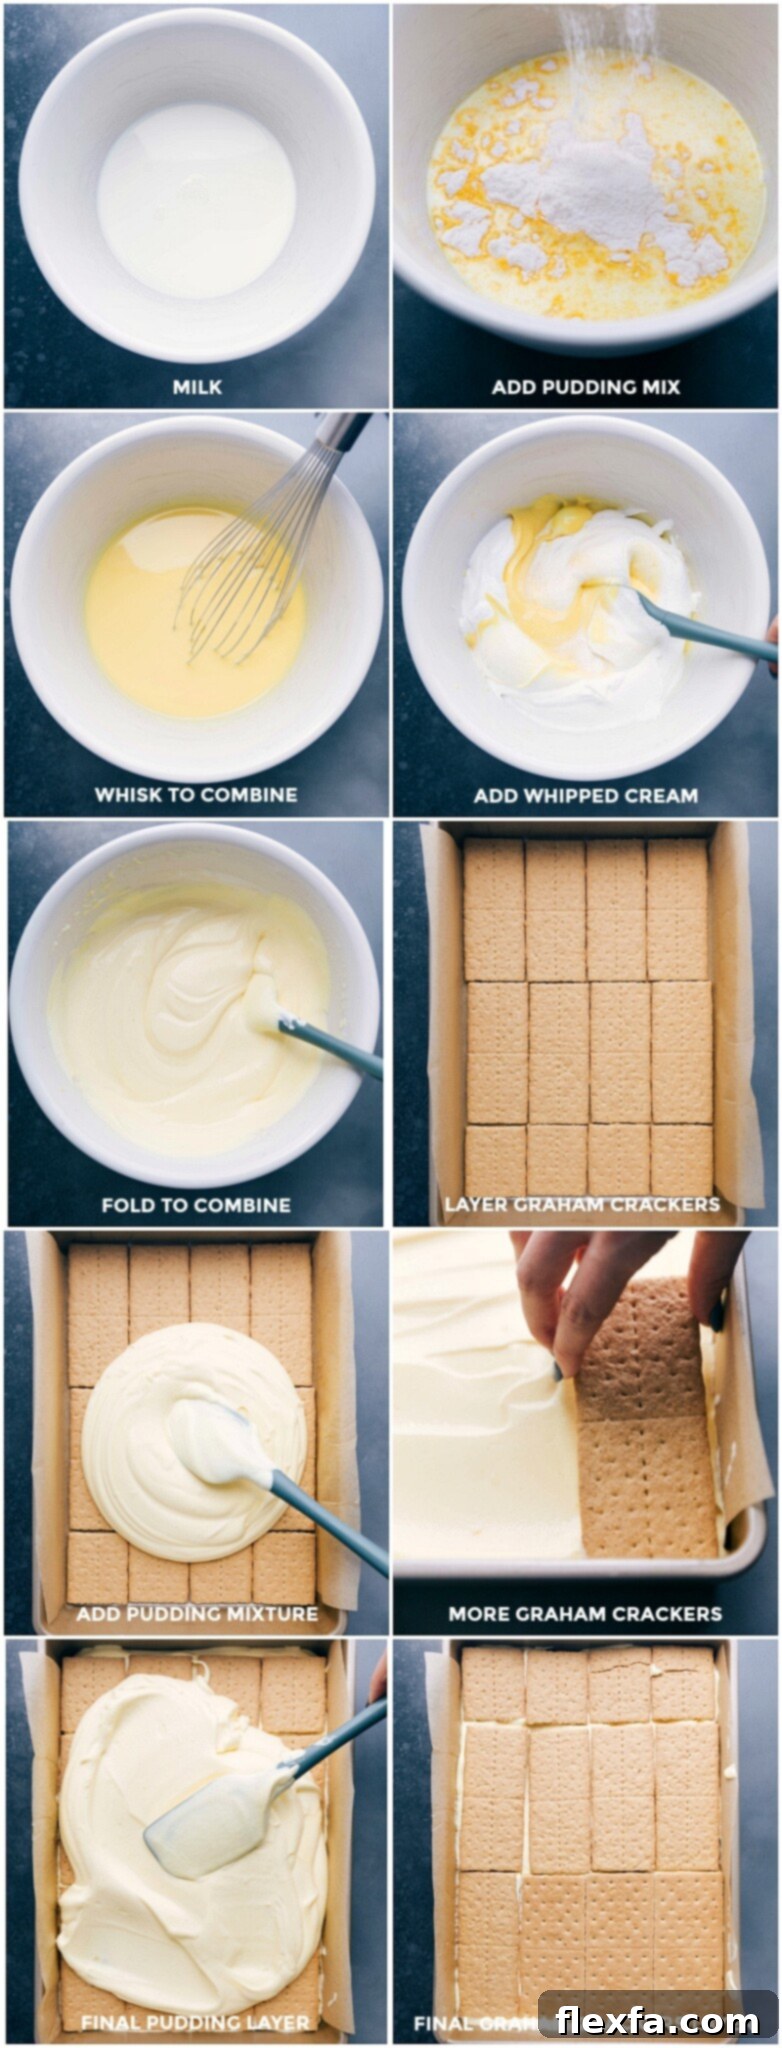
1. Prepare the Vanilla Cream Filling: In a large mixing bowl, pour in the 3-1/2 cups of cold whole milk. Add both packages of French vanilla instant pudding mix. Using a whisk or a hand mixer on low speed, whisk vigorously and continuously for 2 to 3 minutes. It is crucial to whisk until the mixture is completely smooth, thickened, and absolutely no lumps remain, ensuring a silky cream layer. Once smooth, gently fold in the completely thawed whipped topping using a spatula until it is well incorporated and the mixture appears light and airy. Set this delicious filling aside.
-
2. Assemble the First Layers: Lightly spray a 9×13-inch baking pan with cooking spray. This minor step helps prevent the dessert from sticking and makes serving easier. Arrange a single layer of whole graham crackers neatly on the bottom of the pan, covering as much surface as possible. You will likely need to break some graham crackers in half or into smaller pieces to fill any gaps and create a continuous, even base layer. Evenly spoon half of the prepared vanilla cream mixture over this graham cracker base. For best results, dollop large spoonfuls across the entire cracker surface, then gently spread it with the back of a spoon or a small offset spatula to form an even layer. Work patiently to prevent the graham crackers from sliding too much.
-
3. Add Remaining Layers: Place another layer of whole graham crackers directly on top of the first pudding layer, again filling any small gaps with broken pieces for a uniform surface. Spoon the remaining vanilla cream mixture over this second layer of graham crackers, spreading it out carefully and evenly to cover all the crackers. Finish with a final, third layer of graham crackers on top, ensuring the entire surface of the pudding is completely covered. Once assembled, place the cake into the refrigerator while you prepare the decadent chocolate ganache topping.
-
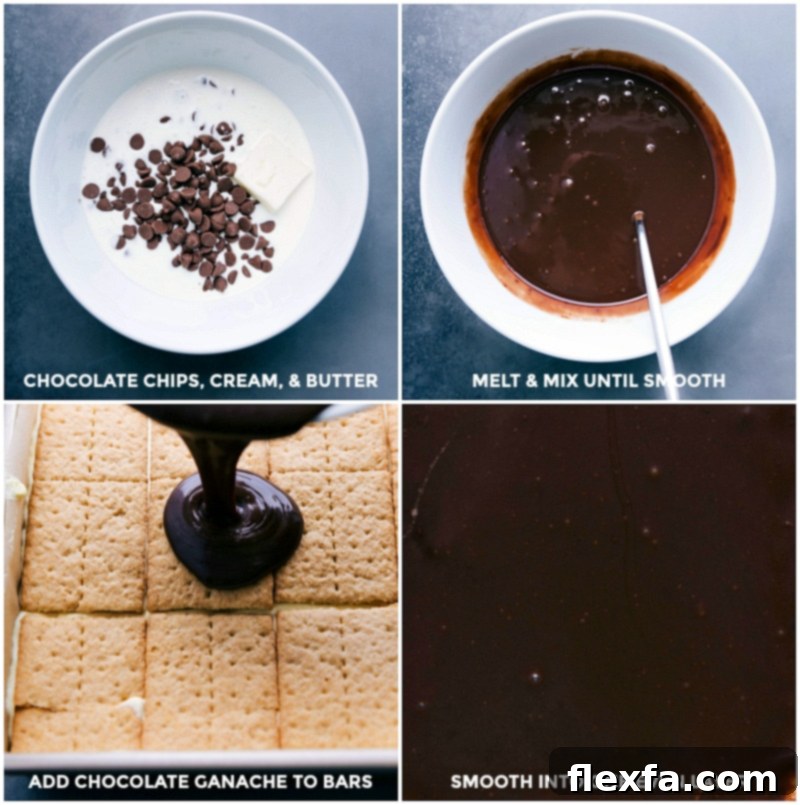
4. Make the Chocolate Ganache: In a medium microwave-safe bowl, combine the milk chocolate chips, heavy cream, and the unsalted butter (if you are using it for extra gloss). Microwave on high for 30 seconds. Remove from the microwave and stir thoroughly for at least 20 seconds. The mixture might not appear fully melted yet, but the residual heat will continue to melt the chocolate. Return to the microwave in additional bursts of 15 seconds, stirring well after each burst for 15-20 seconds, until the mixture is completely melted, smooth, and beautifully glossy. Once smooth, let the ganache stand at room temperature for 5-10 minutes to cool slightly and thicken a little. This crucial step prevents the warm ganache from melting into and mixing with the delicate pudding layers.
-
5. Top and Chill: Carefully pour the slightly cooled chocolate ganache over the final layer of graham crackers in the pan. Gently spread the ganache evenly to cover the entire top surface of the cake, creating a beautiful, uniform chocolate layer. Cover the pan tightly with plastic wrap to prevent any odors from the fridge affecting the cake and to maintain moisture. Place it in the refrigerator. Chill for a minimum of 8 hours, or preferably overnight (12-24 hours), to allow the pudding layers to fully set and the graham crackers to soften to that delightful, cake-like consistency that makes this dessert so special.
-
6. Serve and Enjoy: Before serving, remove the cake from the fridge and let it stand at room temperature for about 5 minutes; this makes cutting slightly easier. For clean, elegant slices, use a sharp, serrated knife. For an extra clean cut that glides through the ganache without tearing, run the knife under hot water for a few seconds, then wipe it completely dry between each slice. Use a metal spatula or cake server to carefully lift out individual servings. Serve immediately and return any remaining leftovers, tightly covered, to the refrigerator to maintain freshness and texture. Enjoy this simple yet incredibly decadent no-bake dessert!
Recipe Notes
Storage: Store any leftover Eclair Cake tightly covered with plastic wrap or in an airtight container in the refrigerator for up to 4 days. As mentioned, the graham crackers will continue to soften and meld with the pudding over time, typically reaching their peak “cakey” texture within the first 24-48 hours. For optimal texture and the freshest taste, it’s generally best to consume the cake within the first 2 days after preparation. Freezing this cake is not recommended because the pudding base can become watery, separate, and its creamy texture will be compromised upon thawing, significantly diminishing the dessert’s appeal.
Nutrition Information
Calories: 190kcal |
Carbohydrates: 31.1g |
Protein: 3.2g |
Fat: 5.9g |
Cholesterol: 7.8mg |
Sodium: 269.8mg |
Fiber: 1.4g |
Sugar: 19.4g
Nutrition information is automatically calculated, so should only be used as an approximation.
Love This Recipe? Leave a Comment Below!