
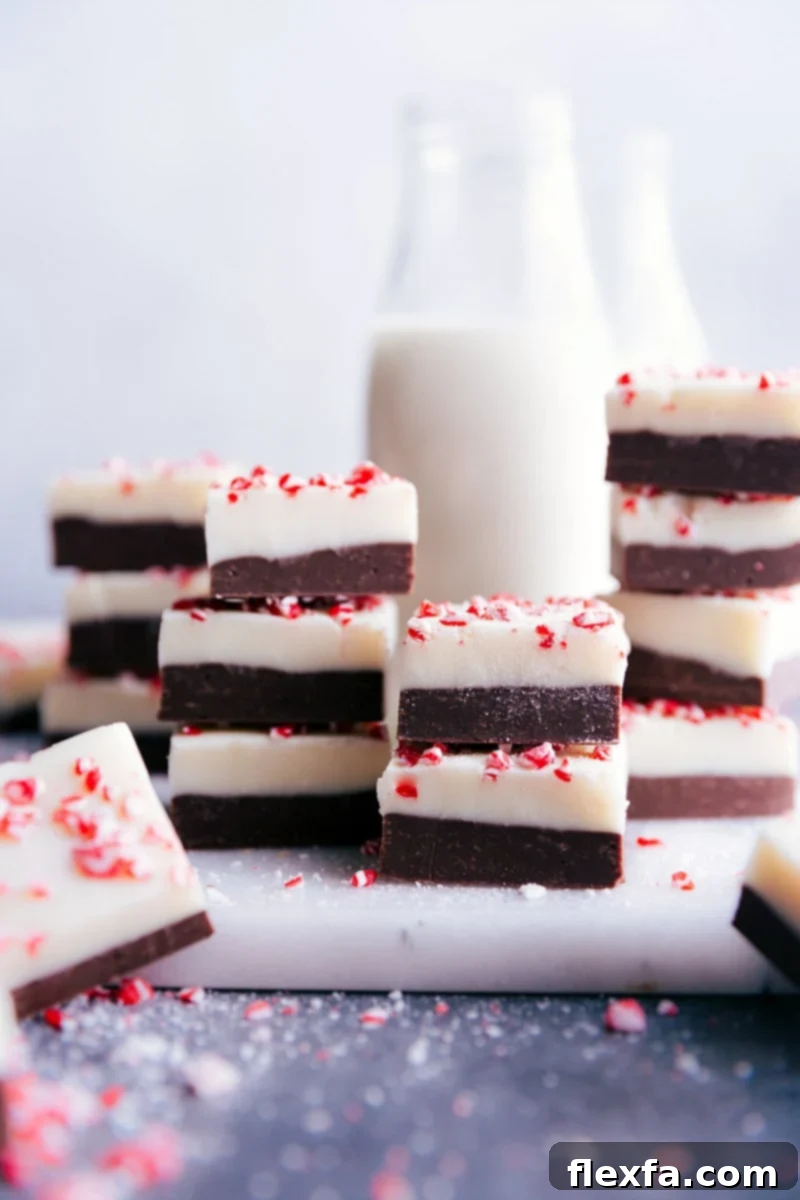
Indulge in the festive spirit with our incredibly easy and decadent Peppermint Fudge Recipe. Crafted with a luxurious blend of three distinct chocolates, this rich, layered treat comes together in 30 minutes or less, requiring no special equipment. It’s the perfect sweet addition to your holiday spread!
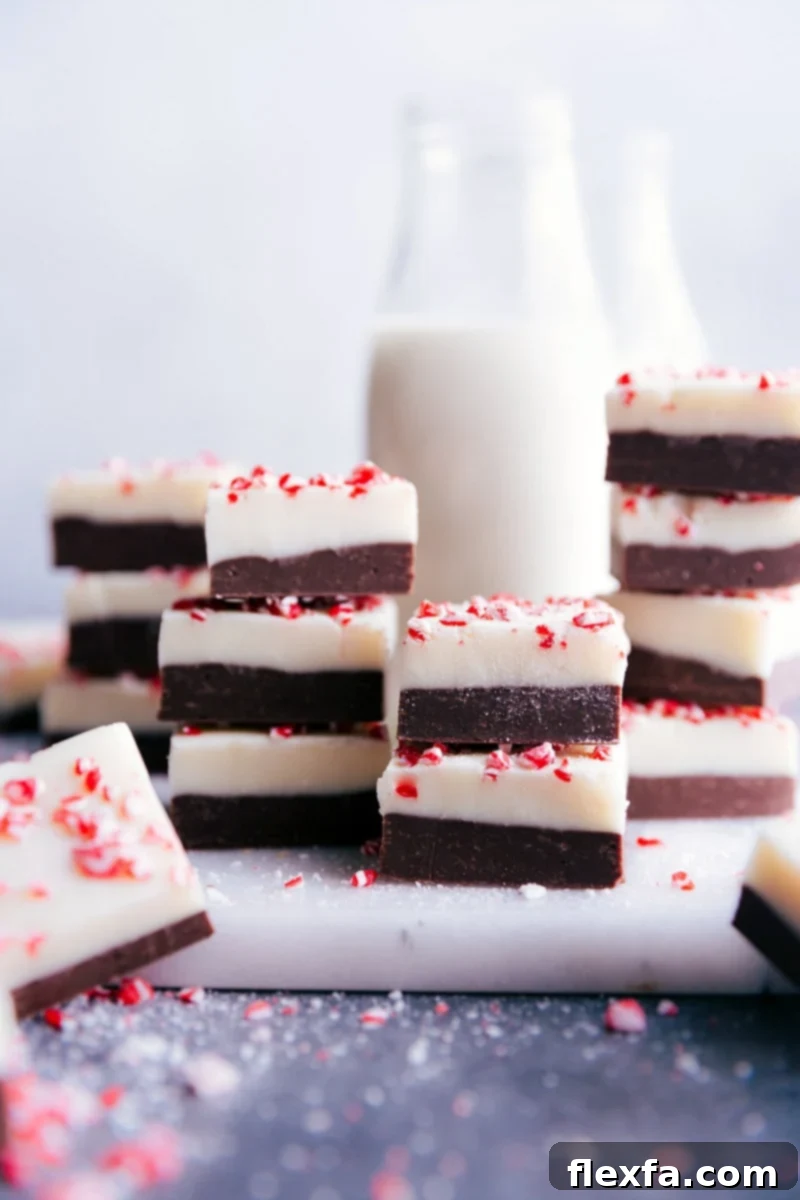
The Best Peppermint Fudge Recipe for a Festive Season
When the holiday season arrives, certain flavors instantly transport us to a cozy, joyous place. For many, that iconic duo is rich chocolate and refreshing peppermint. Our Peppermint Fudge recipe perfectly captures this festive essence, delivering a confection that is not only incredibly delicious but also remarkably simple to create. Forget complicated candy thermometers and endless stirring; this foolproof recipe ensures a perfect batch every time, making it truly the best peppermint fudge you’ll ever make.
My fondest childhood holiday memories often involve the bustling kitchen, filled with the aroma of freshly baked goods and the cheerful chatter of family. My mom had a wonderful tradition of spending a day making platefuls of homemade treats to share with neighbors, friends, and loved ones. Fudge was always a star on this lineup because of its incredible simplicity and reliability – even little hands could help! This recipe takes me right back to those cherished days. It’s easy, utterly delicious, and presents beautifully, making it an impressive gift or a delightful centerpiece for any holiday gathering.
Essential Ingredients for Perfect Peppermint Fudge
Creating this irresistible peppermint fudge requires a few simple ingredients, each playing a crucial role in achieving its rich flavor and smooth texture. Using high-quality ingredients will elevate your fudge from good to absolutely extraordinary.
- Unsalted Butter: This provides a rich, creamy base for both chocolate layers, contributing to the fudge’s melt-in-your-mouth texture. Using unsalted butter allows you to control the overall saltiness of the fudge.
- Milk Chocolate Chips & Dark Chocolate Chips: These form the foundational rich, deep chocolate layer. Combining milk chocolate for sweetness and creaminess with dark chocolate for intensity creates a perfectly balanced flavor profile. Choose a good quality brand for the best results. (See Note 1 for customization options).
- Sweetened Condensed Milk: The magic ingredient! Sweetened condensed milk is vital for both sweetening and binding the fudge, ensuring a smooth, creamy consistency without the need for a candy thermometer. It’s the secret to this recipe’s foolproof nature.
- Vanilla Extract: A touch of pure vanilla extract enhances the overall chocolate flavor in the base layer, adding depth and warmth.
- White Chocolate Chips: These create the beautiful, contrasting top layer. White chocolate can scorch easily, so it’s crucial to melt it slowly over low heat, as detailed in our instructions, to maintain its smooth texture and avoid a grainy outcome.
- Pure Peppermint Extract: This is where the signature peppermint flavor comes in. A little goes a long way, so start with the recommended amount. You can always add a tiny bit more if you desire a stronger minty kick, but be careful not to overpower the chocolate.
- Peppermint Crunch Candy Topping (optional): For that classic festive look and an delightful textural contrast, peppermint crunch candy topping is highly recommended. It adds a wonderful crunch and vibrant color, making your fudge truly sparkle. (See Note 2 for topping options).
Quick Storage & Serving Tip
To enjoy your Peppermint Fudge at its best, serve it chilled. Store it in an airtight container in the refrigerator to maintain its freshness. While the topping is crispiest within the first day or two, the fudge itself can last wonderfully for 1-2 weeks in the fridge, making it an excellent make-ahead holiday treat.
Step-by-Step Guide: How to Make Peppermint Fudge
Making this layered peppermint fudge is surprisingly straightforward. Follow these simple steps for a truly decadent and beautiful holiday treat:
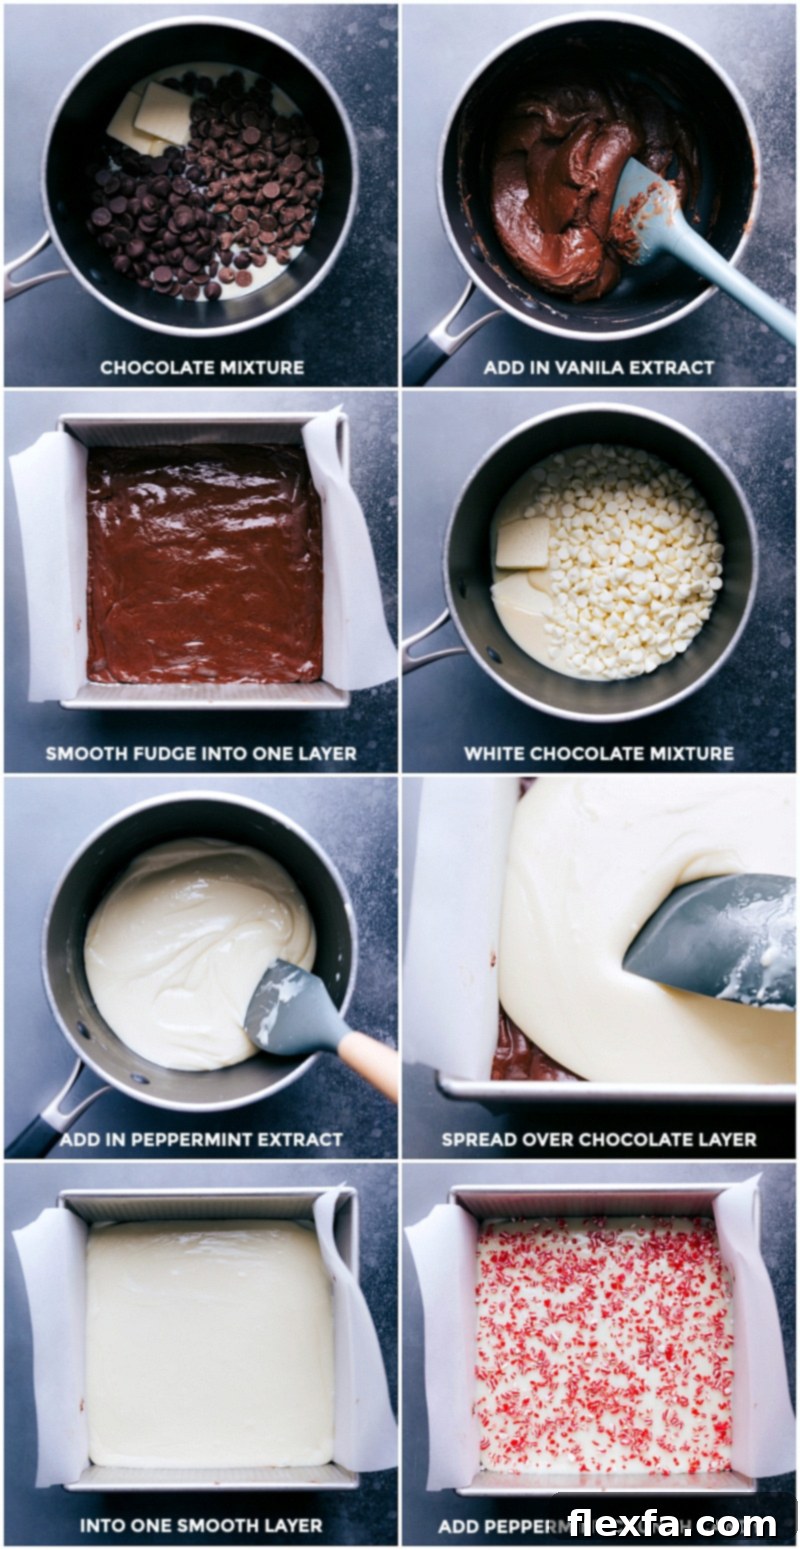
- Prepare Your Pan: Start by lining an 8×8-inch baking pan with parchment paper or aluminum foil. Make sure to leave an overhang on the sides; this acts as “handles” later, making it incredibly easy to lift the entire slab of fudge out for cutting.
- Craft the Rich Chocolate Base: In a sturdy, thick-bottomed nonstick pan, combine 2 tablespoons of unsalted butter, the milk chocolate chips, dark chocolate chips, half of the sweetened condensed milk (approximately 198g), and 1/8 teaspoon of salt. Place the pan over very low heat. Stir constantly with a heat-resistant spatula, ensuring you scrape the sides and bottom of the pan frequently. Patience is key here – resist the urge to increase the heat, as a slow melt guarantees a perfectly smooth, luscious chocolate mixture free of scorching.
- Set the Base Layer: Once all the chocolate and butter are melted and thoroughly combined into a smooth, uniform mixture, remove the pan from the heat. Stir in the vanilla extract until it’s fully incorporated. Pour this rich chocolate mixture into your prepared 8×8-inch pan. Use your spatula to spread it evenly across the bottom. Place the pan in the refrigerator to chill while you prepare the white chocolate peppermint layer; this helps it set quickly and creates a distinct separation between layers.
- Create the Vibrant Peppermint Layer: Clean and thoroughly dry the same nonstick pan. Add the remaining 2 tablespoons of unsalted butter, the white chocolate chips, the rest of the sweetened condensed milk, and the remaining 1/8 teaspoon of salt. Heat this mixture over low heat, stirring continuously, just as you did with the dark chocolate layer. White chocolate is particularly prone to burning, so maintain that low heat and constant stirring until it’s perfectly smooth and melted.
- Infuse and Layer the Peppermint: Once the white chocolate mixture is melted and smooth, remove it from the heat. Stir in the pure peppermint extract until well combined. Immediately pour this fragrant white chocolate mixture over the chilled dark chocolate base in your pan. Gently spread it evenly to create a beautiful, smooth top layer.
- Add the Festive Topping and Chill: Generously sprinkle the peppermint crunch candy topping over the still-soft white chocolate layer. Gently press the topping into the fudge to ensure it adheres well. Cover the pan loosely with plastic wrap and return it to the refrigerator. Allow the fudge to chill for a minimum of 4-8 hours, or preferably overnight, until it is completely firm and set.
- Slice and Serve: Once thoroughly chilled and firm, use the parchment paper overhang to carefully lift the entire slab of fudge out of the pan. Place it on a clean cutting board. For clean, sharp cuts, run a sharp knife under hot water and wipe it dry before each slice. Cut the fudge into small, bite-sized squares. Store any leftover fudge in an airtight container in the refrigerator. Consider adding these delicious squares to a Free Christmas Printable for charming homemade gifts!
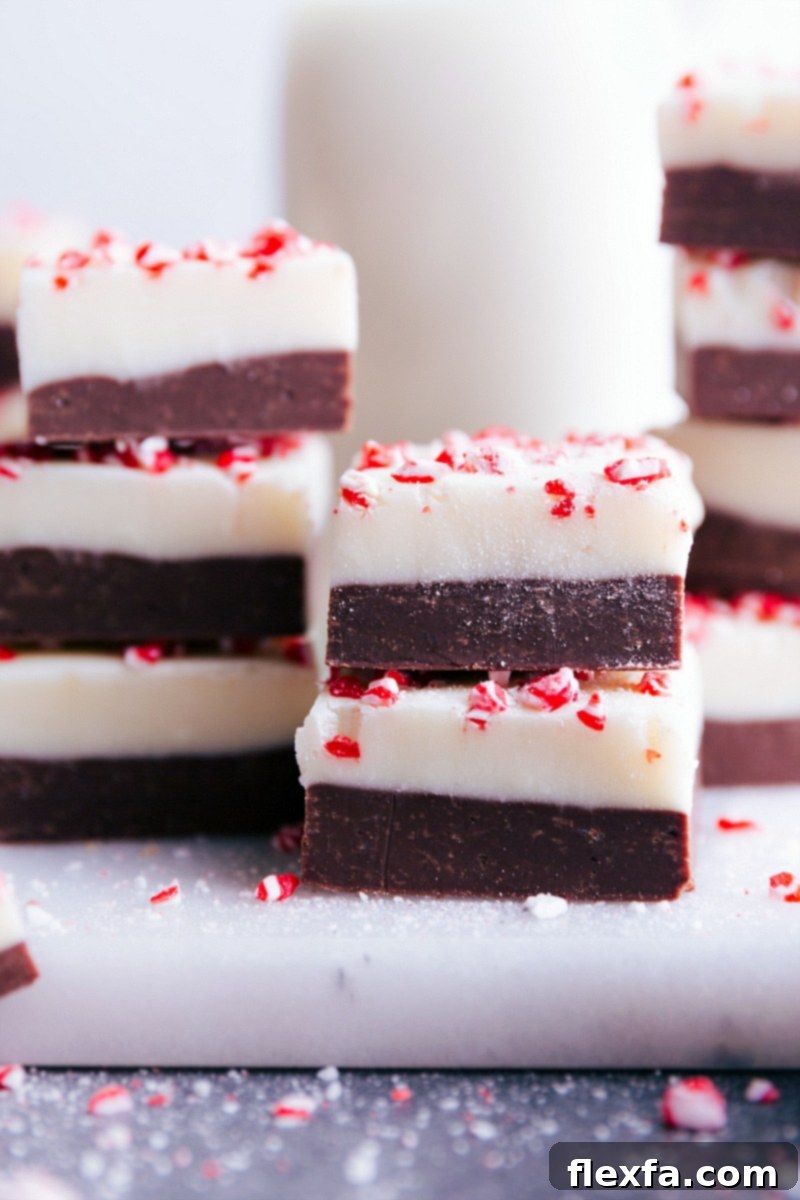
Peppermint Fudge Recipe Tips & Tricks for Success
Achieving perfectly smooth, luscious peppermint fudge is easy with a few key techniques. These tips will help ensure your holiday treat turns out flawless every time:
- Always Line Your Pan: This step is crucial for effortless removal. Whether you use parchment paper or aluminum foil, ensure there’s enough overhang on the sides. This creates convenient “handles” that allow you to lift the entire block of set fudge out of the pan without any sticking or breaking, making clean cuts much simpler.
- Invest in Quality Chocolate: The flavor of your fudge largely depends on the quality of your chocolate. Opt for good-quality chocolate chips or chopped chocolate bars from reputable brands like Ghirardelli, Guittard, or your preferred high-quality baking chocolate. Better chocolate melts more smoothly and provides a richer, more nuanced flavor.
- Embrace Low Heat: Patience is a virtue when melting chocolate for fudge. Always cook on the lowest possible heat setting. High heat can easily scorch chocolate, especially white chocolate, leading to a grainy, seized, or burnt texture. A slow, gentle melt ensures a consistently smooth and creamy fudge.
- Stir Constantly: To prevent sticking and ensure even melting, stir your chocolate mixture constantly with a heatproof spatula. Continuously scraping the sides and bottom of the pan prevents any chocolate from overheating and burning. This technique is particularly important for achieving a super smooth, uniform consistency in both fudge layers.
- Use a Heavy-Bottomed Pan: A thick, nonstick pan helps distribute heat more evenly, significantly reducing the risk of scorching. Thin pans tend to have hot spots that can burn the chocolate quickly, even on low heat.
- For Precise Measurements, Use a Food Scale: While not strictly necessary, a food scale is invaluable for measuring sweetened condensed milk precisely. Dividing the can accurately ensures both layers of fudge have the correct consistency and sweetness, leading to beautifully even layers.
- Chill Thoroughly: Do not rush the chilling process. Allow the fudge to chill in the refrigerator for the recommended 4-8 hours (or overnight) until it is completely firm. Attempting to cut warm or semi-set fudge will result in messy, uneven pieces.
- Hot Knife for Clean Cuts: For perfectly clean, sharp squares, dip your knife in hot water and wipe it dry before each cut. The warm blade glides through the fudge more easily, preventing crumbling or dragging.
Why This Peppermint Fudge is a Holiday Essential
Beyond its irresistible taste, this Peppermint Fudge embodies the very spirit of the holidays. Its vibrant layers and refreshing minty flavor make it a stand-out treat on any dessert table. It’s not just a recipe; it’s an experience:
- Perfect for Gifting: Homemade fudge is a thoughtful and impressive gift. Package these beautiful squares in decorative tins, treat boxes, or cellophane bags tied with festive ribbons. Friends, family, and neighbors will adore this personal touch.
- Party-Ready Perfection: This fudge is ideal for holiday parties, potlucks, and family gatherings. It’s easy to transport, requires no plates or utensils to eat, and offers a delightful burst of holiday flavor in every bite. Arrange it on a platter with other festive treats for a stunning display.
- Kid-Friendly Fun: The simplicity of this recipe makes it a fantastic activity to involve children in the kitchen. They can help with unwrapping chocolates, stirring (under supervision), sprinkling the topping, and of course, taste-testing!
- Make-Ahead Convenience: Since this fudge needs to chill and stores well in the refrigerator, it’s an excellent candidate for make-ahead baking. Prepare a batch a few days before your event, freeing up precious time during the busy holiday season.
Variations and Customizations for Your Peppermint Fudge
While the classic Peppermint Fudge is delightful, feel free to get creative and customize it to your taste or for different occasions:
- Chocolate Choices: Instead of a mix of milk and dark chocolate, you could use all semi-sweet chocolate for the bottom layer. For an extra rich experience, use high-quality baking chocolate bars chopped into small pieces.
- Mint Intensity: If you’re a true mint lover, you can slightly increase the peppermint extract in the white chocolate layer. However, add it incrementally (1/8 teaspoon at a time) and taste as you go, as extracts can be very potent.
- Topping Alternatives:
- Crushed Candy Canes: For a pure candy cane experience, crush regular candy canes.
- Chocolate Shavings: Sprinkle dark or white chocolate shavings on top for an elegant finish.
- Drizzled Chocolate: After the fudge has set, melt a small amount of dark or white chocolate and drizzle it decoratively over the top.
- Add a Swirl: Instead of distinct layers, try creating a marbled effect. After pouring the white chocolate layer over the dark, use a knife or skewer to gently swirl the two layers together before chilling.
- Nutty Crunch: For an added layer of texture and flavor, mix finely chopped pecans or walnuts into the dark chocolate base layer.
More Delightful Christmas Treats
Looking for more festive treats to round out your holiday baking? Here are some simple and delicious ideas:
- Christmas Snack Mix: An incredibly easy and addictive sweet and salty mix.
- Peppermint Bark Pretzels: Only 3 ingredients for a quick and impressive treat.
- Sugar Cookie Snack Mix: The perfect sweet snack for movie night or a cozy evening.
- Christmas Cookie Truffles: Five different creative ideas for these popular no-bake delights.
- Peppermint Brownies: Rich, fudgy brownies topped with an amazing peppermint frosting.
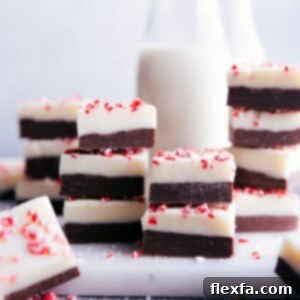
Peppermint Fudge
Chelsea Lords
30 minutes
4 hours
4 hours 30 minutes
36 pieces (from 1 (8 x 8) pan)
Equipment
-
8 x 8-inch baking pan
-
Parchment paper or aluminum foil
-
Medium pan nonstick, thick-bottomed
Ingredients
- 4 tablespoons unsalted butter divided
- 3/4 cup milk chocolate chips see note 1
- 3/4 cup dark chocolate chips
- 1 (14-ounce) can sweetened condensed milk divided
- 1/4 teaspoon salt divided
- 1 teaspoon vanilla extract
- 1-1/2 cups white chocolate chips
- 1/2 teaspoon peppermint extract
- 3 tablespoons peppermint crunch candy topping optional, see note 2
Instructions
-
Line an 8×8-inch pan with parchment paper or foil, ensuring a generous overhang on all sides for easy removal. Cut the butter into tablespoon portions, preparing it for both layers.
-
In a thick-bottomed, nonstick pan, combine 2 tablespoons of butter, the milk chocolate chips, dark chocolate chips, half of the sweetened condensed milk (approximately 198g), and 1/8 teaspoon of salt. Place the pan over low heat. Stir constantly with a heat-resistant spatula, diligently scraping the sides and bottom of the pan to prevent any sticking or scorching. Maintain low heat throughout; patience will ensure a smooth, lump-free mixture.
-
Once the chocolate mixture is completely melted and thoroughly combined into a smooth consistency, remove the pan from the heat. Stir in the vanilla extract until it’s fully incorporated. Pour this rich chocolate mixture into your prepared pan, spreading it evenly to form the base layer. Immediately transfer the pan to the refrigerator to chill while you prepare the second layer.
-
Clean and thoroughly dry the pan used for the first layer. Add the remaining 2 tablespoons of butter, the white chocolate chips, the remaining sweetened condensed milk, and the final 1/8 teaspoon of salt. Heat on low, stirring constantly, just as you did with the dark chocolate. Once the white chocolate is fully melted and smooth, remove it from the heat. Stir in the peppermint extract until well mixed. Pour this peppermint-infused white chocolate mixture evenly over the chilled dark chocolate base, ensuring it completely covers the bottom layer.
-
Generously sprinkle the peppermint crunch candy topping over the still-soft white chocolate layer. Gently press the topping down with your hands or the back of a spatula to ensure it adheres firmly to the fudge. Cover the pan and refrigerate for 4–8 hours, or until the fudge is completely firm and set.
-
Once firm, use the parchment paper overhang to lift the entire block of fudge from the pan and place it on a clean cutting board. For perfect, clean squares, run a sharp knife under hot water and thoroughly dry it before making each cut. Cut the fudge into small, bite-sized pieces. Store any unused fudge in an airtight container in the refrigerator.
Recipe Notes
Note 2 – Topping Options: For that signature festive crunch and appearance, we recommend Wilton Peppermint Crunch Sprinkles® or Candy Cane Crunch®. Alternatively, you can easily make your own crushed candy canes. Simply pulse whole candy canes in a food processor until they reach your desired fineness, or place them in a double-bagged plastic bag and crush them with a rolling pin or meat mallet until fine crumbs are achieved.
Storage: Store your delicious Peppermint Fudge in an airtight container in the refrigerator. It is best enjoyed cold within 2–3 days for the optimal crispness of the topping, but it will remain wonderfully fresh for up to 2 weeks. Avoid leaving the fudge out at room temperature for extended periods, as this can cause it to dry out and lose its perfect texture.
Nutrition Information
Serving: 1 serving
|
Calories: 97kcal
|
Carbohydrates: 10g
|
Protein: 1g
|
Fat: 6g
|
Saturated Fat: 4g
|
Cholesterol: 6mg
|
Sodium: 31mg
|
Potassium: 59mg
|
Fiber: 1g
|
Sugar: 8g
|
Vitamin A: 44IU
|
Vitamin C: 1mg
|
Calcium: 35mg
|
Iron: 1mg
Nutrition information is automatically calculated and should only be used as an approximation.