

Ultimate Quick & Easy Chicken Caesar Wrap Recipe: Your Go-To Meal Solution
Welcome to your new favorite go-to meal! This Chicken Caesar Wrap Recipe is exceptionally easy to prepare, requiring just a handful of ingredients and minimal effort. With a few smart shortcuts, you can have these flavorful and satisfying wraps ready in no time, perfect for a busy weeknight dinner, a quick lunch, or even an impressive meal prep solution.
Forget soggy salads and complicated meals. These wraps combine the classic, beloved flavors of Caesar salad with the convenience and portability of a tortilla. They’re packed with protein, fresh greens, and a creamy dressing that will tantalize your taste buds, making healthy eating both delicious and effortless.


Author’s Note
Whip Up a Delicious Chicken Caesar Salad Wrap in Just 10 Minutes!
As ordinary as they might seem, a well-made Caesar salad holds a special place in my heart. It’s one of my absolute favorites! Life gets busy, and often, I find myself grabbing a packaged Caesar salad to complement a more time-intensive meal like lasagna or a rich Ragu. Attempting to prepare both from scratch on a hectic weeknight, especially during the back-to-school rush, is simply asking for too much!
That’s where the brilliance of this wrap comes in. Today, I’m taking the convenience of a ready-made salad mix, elevating it with the fresh burst of tomatoes or the creamy richness of avocado for some extra “oomph,” adding satisfying chicken for sustained energy, and then gracefully wrapping it all up in a soft tortilla. The result? A simple, incredibly tasty, and wonderfully balanced meal that delivers on flavor without demanding hours in the kitchen!
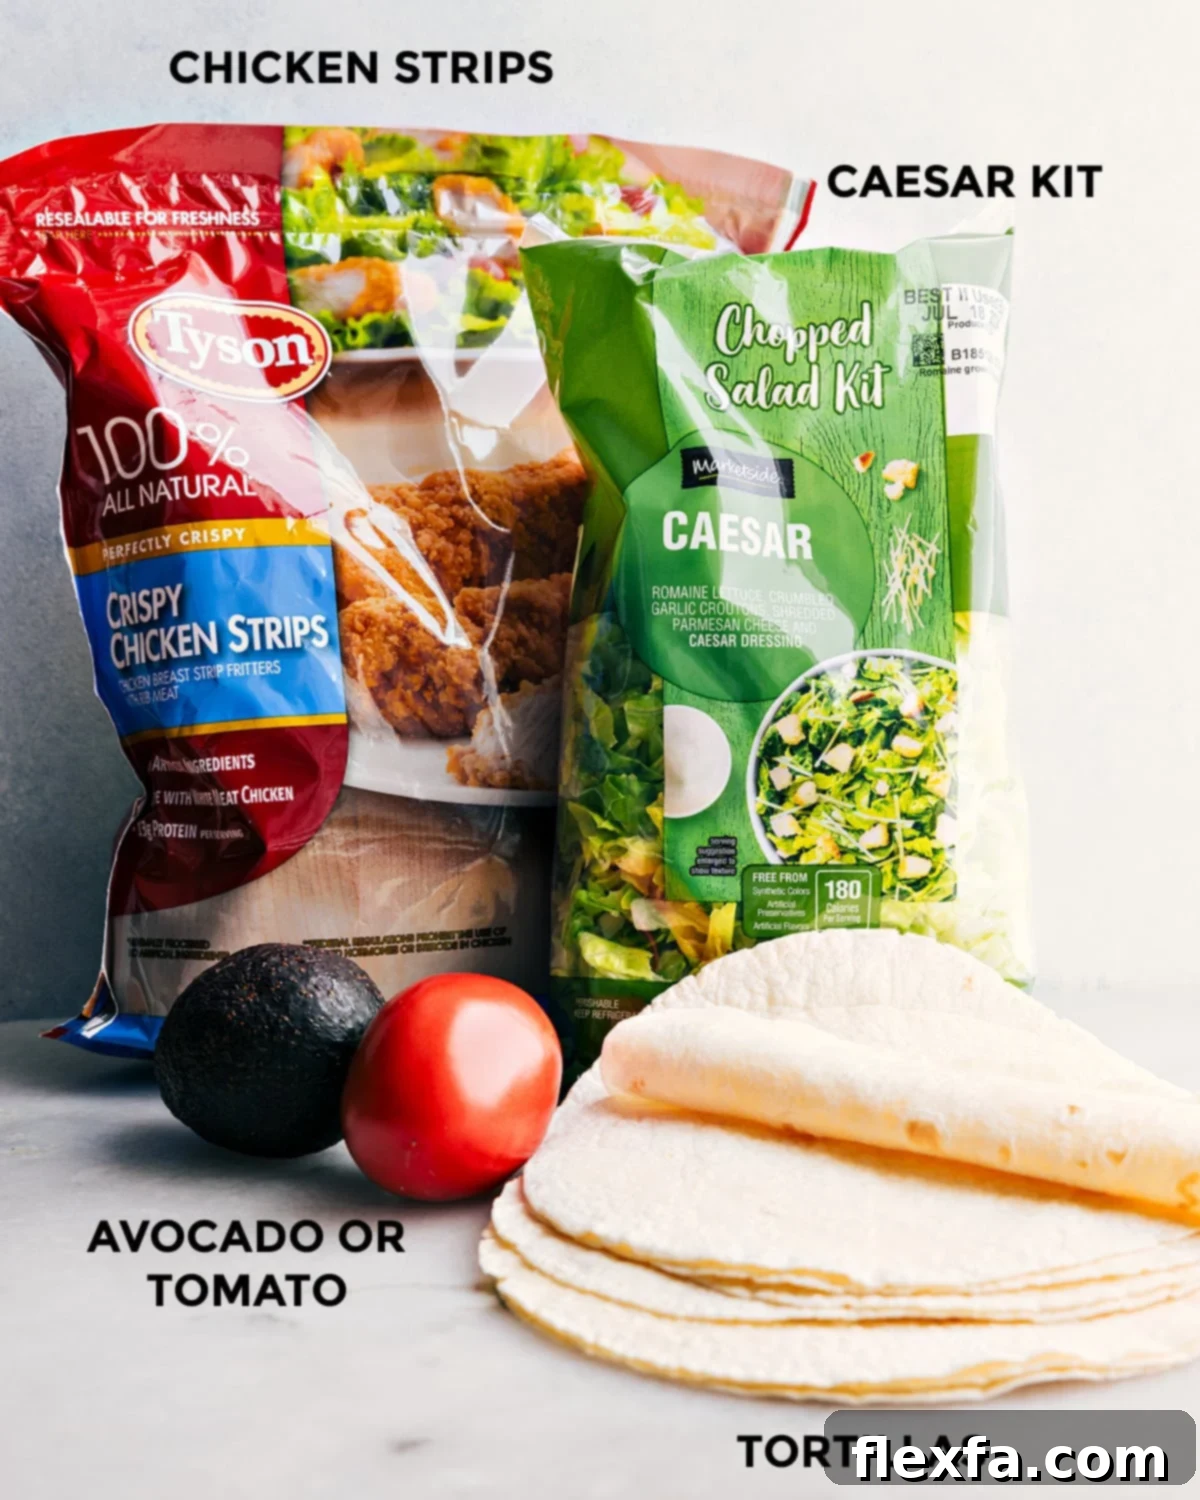
Essential Chicken Caesar Wrap Ingredients: Simple & Delicious
One of the best aspects of this recipe is its straightforward ingredient list. We focus on quality and convenience to create a truly satisfying wrap. Here’s what you’ll need:
- Flour Tortillas: The foundation of our wrap! Opt for medium to large-sized flour tortillas. These are ideal because their generous size allows for easier wrapping and ensures all your delicious fillings stay securely inside. Look for varieties that are soft and pliable, which makes rolling them without tearing a breeze. Whole wheat or spinach tortillas are also fantastic options for an added nutritional boost and a pop of color.
- Chopped Caesar Salad Kit: This is our ultimate time-saver! Any brand of chopped Caesar salad kit will work wonderfully. The key is to ensure it includes all the essential components: the fresh lettuce mix, a flavorful Caesar dressing, crispy croutons, and usually some Parmesan cheese. I particularly recommend the “chopped” bags because the lettuce is already cut into smaller, more manageable pieces, and the croutons are often crushed, integrating perfectly into the wrap without being too bulky. For an example, you can find a great option like the Marketside Caesar Chopped Salad Kit.
- Avocado or Tomato (or both!): These fresh additions bring a burst of flavor, texture, and nutrition. Choose a ripe avocado for its creamy texture and healthy fats, or a large, juicy tomato for its bright acidity and refreshing taste. You can absolutely use both for an even more dynamic flavor profile and added visual appeal. Sliced cucumber, bell peppers, or shredded carrots can also be delightful additions if you’re looking to boost your veggie intake even further.
- Frozen Crispy Chicken Strips: For protein and crunch! Brands like Tyson Crispy Chicken Strips or Bare Crispy Chicken cook up incredibly fast in an oven or air fryer, making them a fantastic, convenient choice. Their crispiness adds a wonderful textural contrast to the soft tortilla and fresh salad. If you prefer, you can easily substitute with shredded rotisserie chicken for an even quicker assembly, or use homemade crispy chicken tenders or even grilled chicken breasts for a lighter option. Just be sure your chicken is cooked and ready to be sliced or shredded.
Crafting Your Perfect Chicken Caesar Wrap: A Simple How-To Guide
Making these wraps is incredibly straightforward, even for the busiest home cooks. Follow these easy steps to assemble your delicious Chicken Caesar Wraps in minutes:
- Cook the Chicken Strips: Begin by preparing your crispy chicken strips according to the package directions. Whether you’re using an oven or an air fryer, ensure they are cooked through and golden brown. This step is crucial for achieving that delightful crunch that complements the creamy Caesar salad so well. Once cooked, let them cool slightly, then slice them into bite-sized pieces or strips that are easy to manage in a wrap.
- Prepare and Mix the Salad: While your chicken is cooking, open your chopped Caesar salad kit. Empty the salad mix (lettuce, croutons, cheese) into a large mixing bowl. Pour the included Caesar dressing over the salad components. Using tongs or clean hands, gently toss everything together until all the lettuce and ingredients are thoroughly coated in the dressing. This ensures every bite of your wrap is bursting with flavor.
- Lay Out and Portion Tortillas: Find a clean, flat surface to work on. Lay out each flour tortilla individually. If your tortillas feel a bit stiff, you can warm them briefly in a microwave for 10-15 seconds or in a dry skillet for a few seconds per side; this makes them more pliable and easier to roll without cracking. Divide the dressed Caesar salad mixture evenly among your prepared tortillas, arranging it slightly off-center to leave space for folding.
- Add Your Fresh Toppings: Next, place your desired fresh toppings—be it slices of ripe avocado or juicy tomato—on top of the salad mixture. Don’t overload the wrap at this stage; remember we still need to add the chicken and roll it up securely.
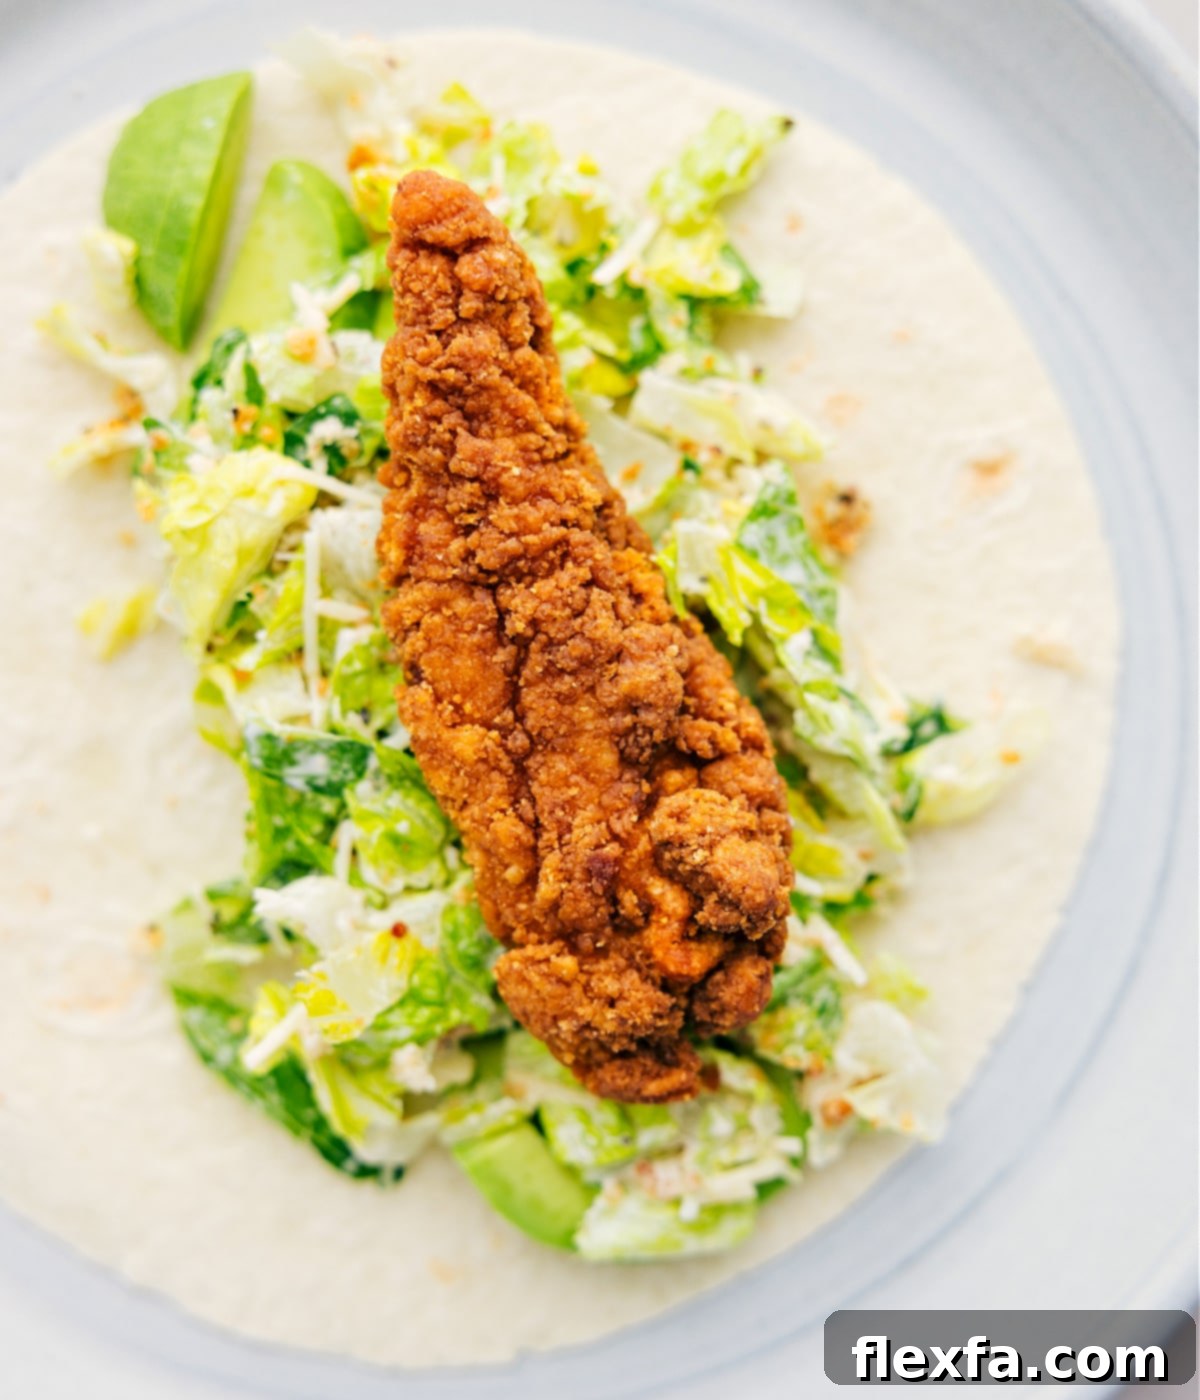
- Add the Cooked Chicken and Wrap It Up: Finally, lay your cooked and sliced crispy chicken strips on top of the salad and toppings. Now it’s time to roll! Fold in the sides of the tortilla over the filling, then starting from the bottom, tightly roll the tortilla upwards. Aim for a snug roll to prevent any fillings from falling out. Once rolled, you can cut the wrap in half diagonally for easier handling and a more appealing presentation. Serve immediately and enjoy your quick, delicious creation!
Smart Meal Prep Strategies for Your Chicken Caesar Wraps
These Chicken Caesar Wraps are an excellent candidate for meal prepping, allowing you to enjoy fresh, delicious meals throughout the week without daily effort. The key to successful meal prep for wraps is keeping components separate until you’re ready to eat, preserving freshness and preventing sogginess.
- Prepare and Store Chicken: Cook your crispy chicken strips according to package directions. Once fully cooked, let them cool completely before storing them in an airtight container in the refrigerator. Properly stored, the chicken will stay fresh for up to 3-4 days. You can reheat it quickly in a microwave or air fryer just before assembling your wrap for optimal warmth and crispiness.
- Separate Salad Components: If you’re using a Caesar salad kit, it’s best to keep the salad mix (lettuce), dressing, cheese, and croutons in their original separate packaging or in individual airtight containers. This prevents the lettuce from wilting and the croutons from becoming soggy.
- Prep Your Veggies: Slice your avocado and tomatoes (or any other desired vegetables like bell peppers or cucumbers) just before you plan to eat to ensure maximum freshness. However, you can pre-chop harder vegetables like bell peppers or carrots and store them in an airtight container for 2-3 days. For avocado, if pre-sliced, toss it with a little lemon or lime juice to prevent browning.
- Store Tortillas Correctly: Keep your flour tortillas in their original packaging or a sealed bag at room temperature. They generally have a good shelf life and don’t require refrigeration until opened.
- Assemble One Wrap When Ready: This is the golden rule for meal prepping wraps! When you’re ready for a fresh wrap, simply take a small amount of the salad mix and combine it with a desired amount of dressing in a bowl. Lay out a tortilla, add the dressed salad, your pre-cooked chicken, and any fresh veggies like avocado or tomato. Roll it up tightly and enjoy immediately. This method guarantees a crisp, fresh, and mess-free wrap every time!
Variations to Elevate Your Chicken Caesar Wrap
Explore Delicious Customization Options
The beauty of the Chicken Caesar Wrap lies in its adaptability. Don’t hesitate to experiment with these variations to suit your taste and dietary preferences:
- Add Some Heat: For those who love a spicy kick, a sprinkle of red pepper flakes or a dash of hot sauce (like Sriracha) on top of your chicken or salad mix can transform the flavor profile.
- Lower-Calorie Option: If you’re watching your calorie intake, consider using a light Caesar salad dressing instead of the one provided in the package, or opt for grilled chicken instead of crispy fried strips.
- Homemade Dressing: Elevate your wrap with a homemade touch! If you prefer making your own dressings from scratch, a fresh, vibrant homemade Caesar dressing can make all the difference. My favorite Caesar dressing recipe can be found with these Caesar Salad Pizzas.
- Extra Veggies: Boost the nutritional value and crunch by adding more vegetables. Sliced bell peppers, finely shredded carrots, crisp cucumber, or even some red onion can provide additional texture, flavor, and vitamins.
- Add Fresh Herbs: A sprinkle of fresh parsley or basil can add a delightful aromatic note and brighten up the overall flavor of your wrap. Chives or dill could also be interesting additions.
- Crispy Bacon: Everything’s better with bacon! Add some crispy, diced bacon bits for a smoky, savory crunch that pairs wonderfully with Caesar flavors.
- Cheese, Please!: While Parmesan is traditional, feel free to experiment with other cheeses. A sprinkle of crumbled feta, shredded cheddar, or a smoky provolone can add unique dimensions to your wrap.
- Gluten-Free Option: Easily make this recipe gluten-free by simply swapping out regular flour tortillas for your favorite gluten-free tortilla alternative.
- Vegetarian Twist: Omit the chicken and replace it with grilled halloumi, roasted chickpeas, seasoned tofu, or even some black beans for a satisfying vegetarian Caesar wrap.
Best Practices for Storing Your Chicken Caesar Wraps
Keeping Your Wraps Fresh and Delicious
Proper storage is crucial for maintaining the quality and taste of your Chicken Caesar Wraps, especially if you’re preparing them in advance. Follow these guidelines to keep your ingredients fresh:
- Storing Unwrapped Components: For optimal freshness and to prevent sogginess, it is highly recommended to store the salad mix (undressed), cooked chicken, and any prepared vegetables (like sliced tomatoes or avocado) in separate, airtight containers in the refrigerator. When stored this way, the components can remain fresh for up to 2 days. The golden rule: only combine and add the dressing to your wrap right before you are ready to eat. This keeps everything crisp and prevents the tortilla from becoming wet.
- Storing Wrapped (Assembled) Wraps: If you’ve already assembled a wrap and have leftovers, or if you must prepare them a few hours in advance, wrap each individual wrap tightly in plastic wrap or parchment paper, then place it in an airtight container. Store it in the refrigerator. It’s best to consume these assembled wraps within 1 day. To minimize sogginess, try to use less dressing, or ideally, add the dressing only when serving. The longer a dressed salad sits in a tortilla, the softer and less appealing the wrap will become.
- Avoiding Sogginess: The main culprit for a disappointing wrap is a soggy tortilla. To combat this, always ensure your chicken is cooled before adding it to the wrap, store wet ingredients (like dressed salad) separately, and only assemble the wrap when you’re about to enjoy it. If you’re packing it for lunch, a small container of dressing on the side is a game-changer!
Perfect Pairings: What to Serve With Chicken Caesar Wraps
While a Chicken Caesar Wrap is a complete and satisfying meal on its own, pairing it with a delicious side can elevate your dining experience. Here are some fantastic suggestions:
Salads
My Favorite Fruit Salad Recipe
A light and refreshing fruit salad provides a wonderful contrast to the savory wrap. The sweetness and acidity of fresh fruits cleanse the palate beautifully.
Appetizers
Elote (Mexican Street Corn)
For a bolder and more flavorful side, Elote offers a creamy, tangy, and slightly spicy kick that complements the Caesar flavors surprisingly well.
Side Dishes
Roasted Sweet Potatoes
If you’re looking for a heartier side, roasted sweet potatoes provide a comforting sweetness and earthiness that pairs beautifully with the savory wrap, offering a nutritious balance.
Salads
Pasta Salad Recipe
A simple pasta salad is another excellent, easy-to-prepare side, especially if you’re serving these wraps for a picnic or a larger gathering. It adds another layer of texture and flavor.
Frequently Asked Questions (FAQs) About Chicken Caesar Wraps
Here are answers to some common questions you might have about making and enjoying these delicious wraps:
- Can I use grilled chicken instead of crispy chicken strips?
Absolutely! Grilled chicken is an excellent, leaner alternative. Simply season and grill chicken breasts, then slice or shred them before adding to your wraps. It’s a great way to reduce calories while still enjoying a protein-packed meal. - How do I prevent my wraps from getting soggy?
The best way to avoid sogginess is to store all the wet ingredients (like dressed salad) and the chicken separately from the tortillas. Only assemble your wrap right before you plan to eat it. If you’re packing it for lunch, consider taking a small container of Caesar dressing on the side and adding it just before consumption. - Are these Chicken Caesar Wraps healthy?
Yes, they can be! They are packed with fresh vegetables and lean protein. You can further enhance their health benefits by using whole wheat tortillas, opting for grilled chicken, adding more vegetables, and using a light Caesar dressing or making one from scratch with healthier fats. - Can I make these wraps gluten-free?
Certainly! Many brands offer delicious gluten-free tortillas that can be used as a direct substitute for regular flour tortillas. Just make sure all other ingredients in your Caesar salad kit (especially croutons and dressing) are also certified gluten-free. - How long do Chicken Caesar Wraps last in the fridge?
If you store the components separately (undressed salad, cooked chicken, fresh veggies), they can last for up to 2-3 days. Once assembled, it’s best to eat the wrap within 24 hours to ensure optimal taste and texture, as the dressing will start to soften the tortilla and lettuce.

Print Recipe
Quick Chicken Caesar Wrap Recipe
Chelsea Lords
15 minutes
15 minutes
5 wraps
Equipment
-
Medium bowl
Ingredients
- 5 flour tortillas (medium to large)
- 1 (11.5-ounce) package Caesar salad kit (see note 1)
- 1 large ripe avocado (sliced)
- 1 large juicy tomato (sliced)
- 10 frozen crispy chicken strips (or equivalent rotisserie chicken, see note 2)
Instructions
-
Cook the chicken strips according to package directions in your oven or air fryer until golden and crispy. Let cool slightly, then slice.
-
While the chicken cooks, combine the salad mix and all accompanying ingredients (croutons, cheese) from the kit in a large bowl. Pour the dressing over and toss until evenly coated.
-
Lay out the tortillas on a clean surface. Divide the dressed salad evenly among them. Top the salad with sliced tomato and avocado. Lay the cooked and sliced chicken strips on top of the other fillings. Roll up the tortillas tightly, then cut each wrap in half diagonally and enjoy!
Recipe Notes
Note 2: For crispy chicken, I often use Bare Crispy Chicken or Tyson® Crispy Chicken Strips. Always cook them in the oven or air fryer for the best crispiness; avoid microwave heating if possible. Alternatively, you can prepare homemade crispy chicken strips or simply use pre-cooked, shredded rotisserie chicken for an even quicker assembly. You will typically use about 2 strips per wrap.
Storage: For optimal freshness, especially when meal prepping, store unwrapped components (salad mix, chicken, and veggies) in separate airtight containers in the fridge for up to 2 days. Add dressing and assemble just before eating. If a wrap is already made, wrap it tightly in plastic wrap and store it in the fridge; consume within 1 day. Avoid adding dressing to wraps intended for storage to prevent sogginess.
Nutrition Information
Calories: 453kcal |
Carbohydrates: 26g |
Protein: 29g |
Fat: 26g |
Saturated Fat: 5g |
Polyunsaturated Fat: 9g |
Monounsaturated Fat: 4g |
Cholesterol: 109mg |
Sodium: 937mg |
Potassium: 97mg |
Fiber: 1g |
Sugar: 11g |
Vitamin A: 126IU |
Vitamin C: 5mg |
Calcium: 50mg |
Iron: 1mg
Nutrition information is automatically calculated, so should only be used as an approximation.
Like this recipe? Leave a comment or ask a question below!