
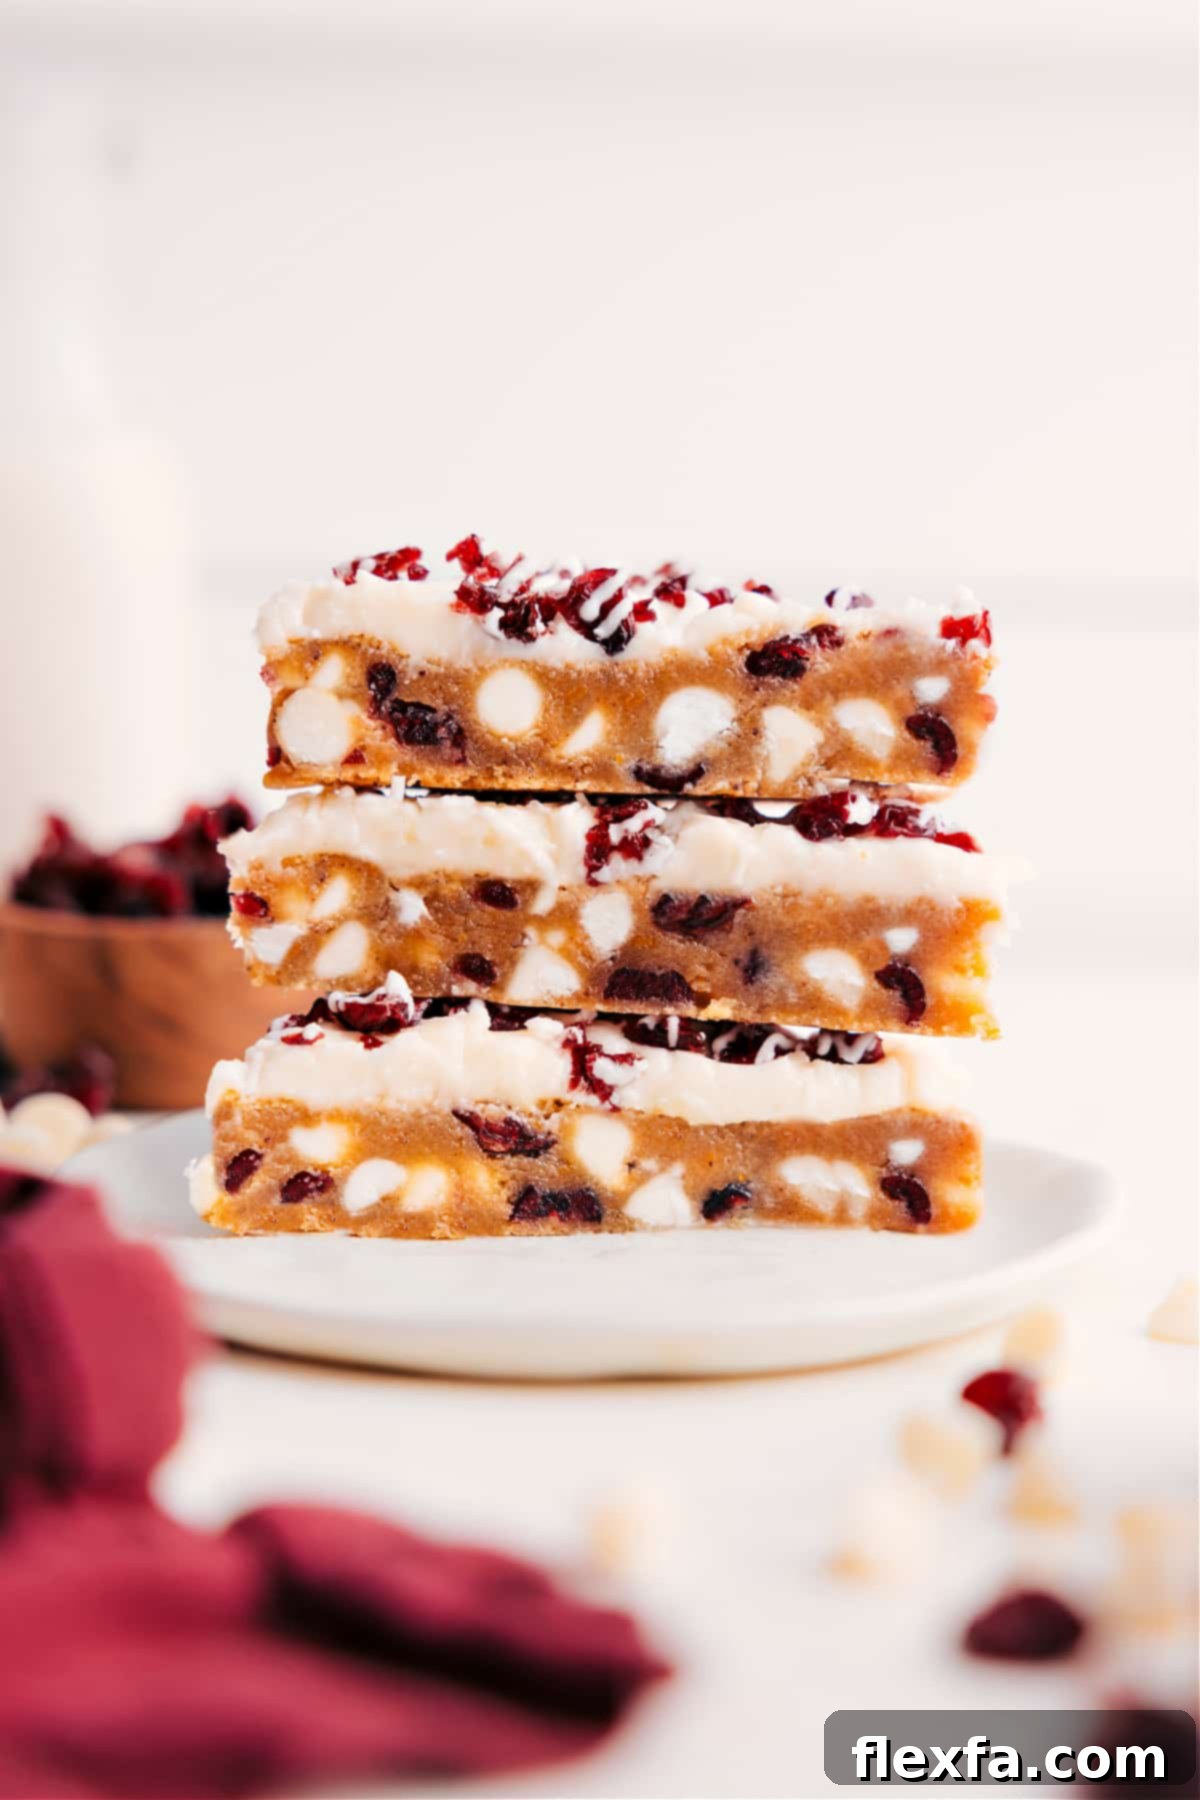
Cranberry Bliss Bars: Your Favorite Starbucks Treat, Mastered at Home
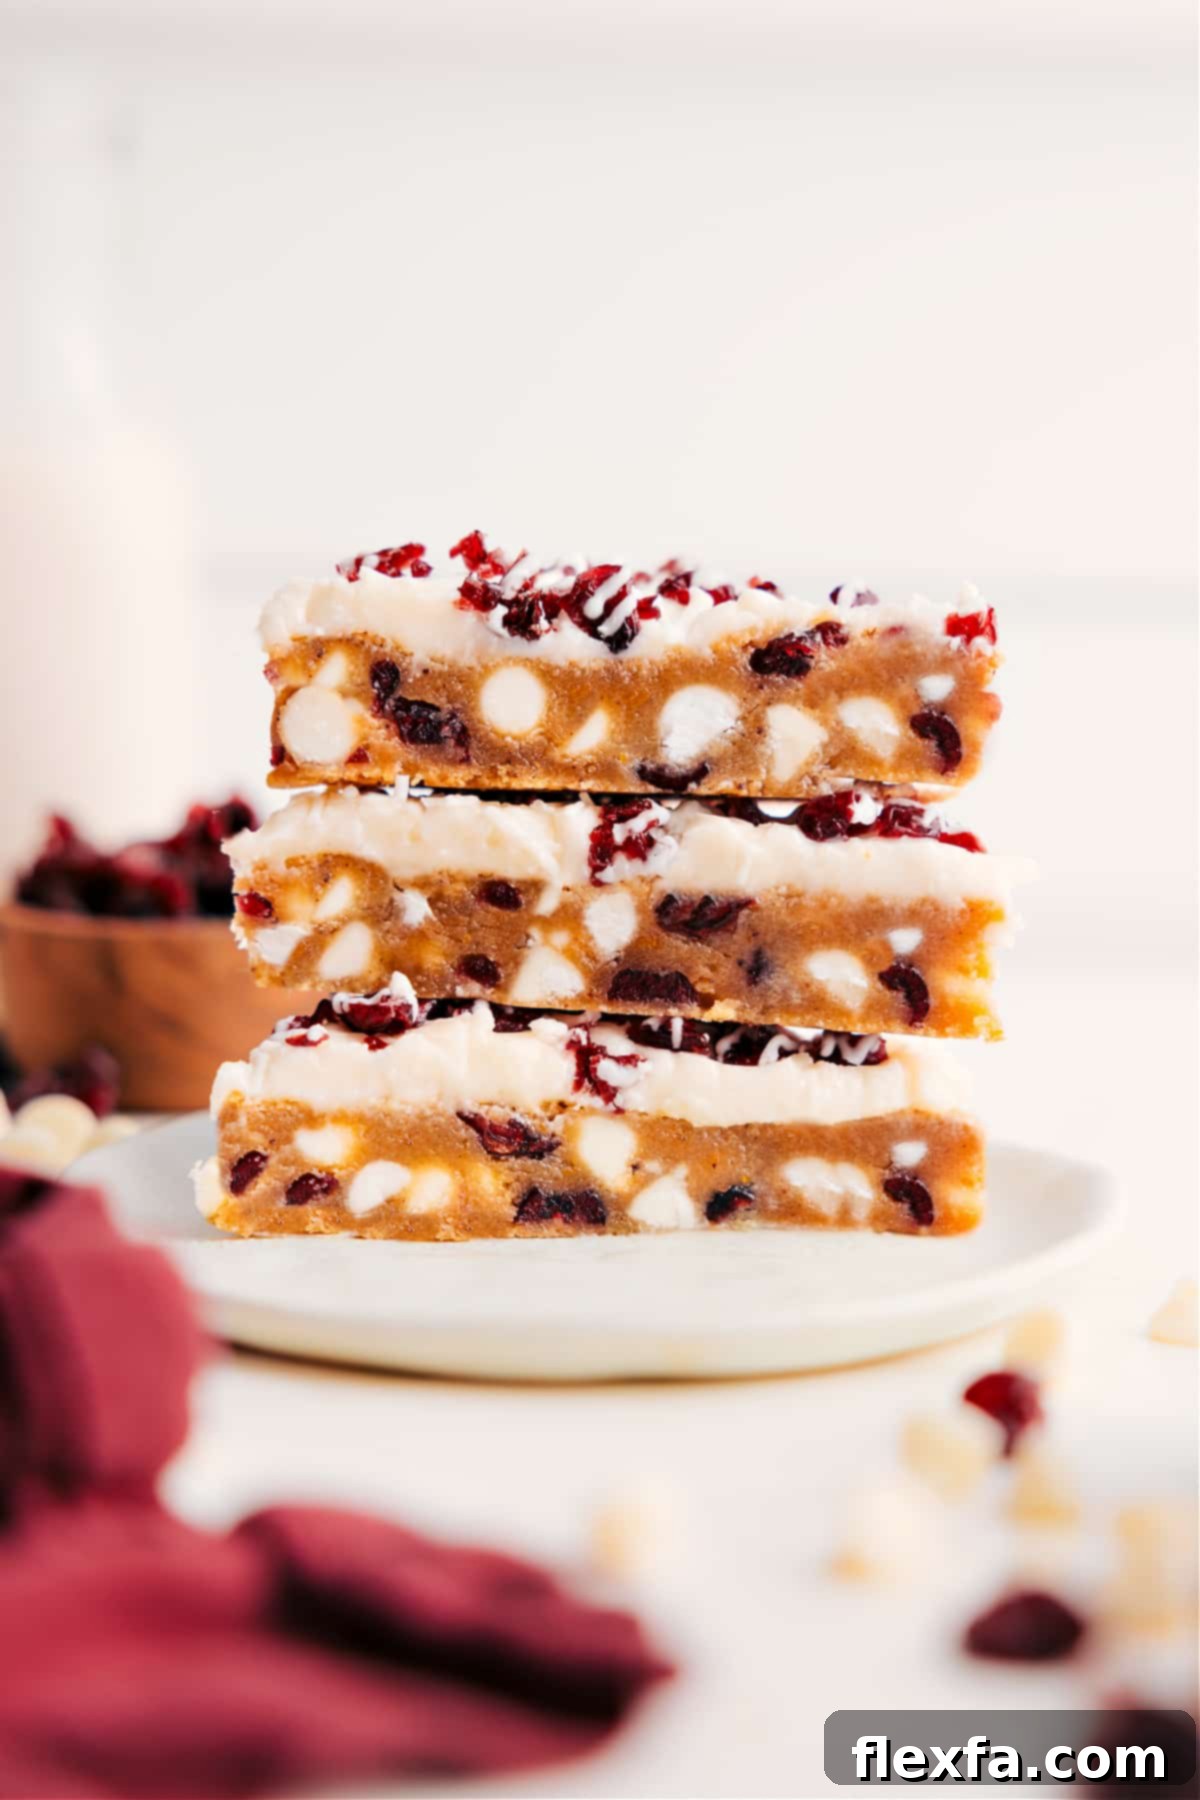
Prepare to be enchanted by these **Cranberry Bliss Bars**, a delightful confection that perfectly captures the essence of the beloved Starbucks original. These aren’t just any cookie bars; they are soft, wonderfully chewy, and crowned with a luscious, creamy frosting. Each bite is a symphony of flavors and textures, featuring the sweet-tart burst of dried cranberries, the rich, subtle warmth of brown butter, and an elegant zigzag of white chocolate drizzle. Ideal for holiday gatherings, a cozy afternoon treat, or simply satisfying that craving for a festive, bakery-quality dessert, these bars promise pure bliss.

Author’s Notes
After a Decade, I Finally Perfected This Starbucks Copycat!
For what feels like an eternity—a full ten years, in fact—I’ve been on a mission to recreate the iconic Starbucks Cranberry Bliss Bar. My quest began during my time in Cleveland, and since then, countless attempts have been made, many ending in disappointment. I vividly recall the very first batch I baked; they turned out disappointingly dry and cakey, a far cry from the moist, tender bars I adored.
But perseverance pays off! After years of tweaking ingredients, adjusting ratios, and refining techniques, I can proudly say I’ve cracked the code. And honestly? I believe my homemade version surpasses the original Starbucks treat. The depth of flavor, the perfect chewiness, and that irresistible frosting—it’s all there, and then some.
The moment I tasted the final version, the exact recipe I’m thrilled to share with you today, I knew it was something special. I immediately snapped a photo and texted my sisters: “This might be a top 5 dessert for me. You absolutely have to try these!” That’s how confident I am in this recipe.
I know I often say “you HAVE to make this” with nearly every new recipe I post (and for that, I apologize for my enthusiasm 🙈), but if you decide to bake just one thing this season, please let it be these Cranberry Bliss Bars. They truly are a game-changer and will bring immense joy to your kitchen and your taste buds.
Essential Ingredients for Your Perfect Cranberry Bliss Bars
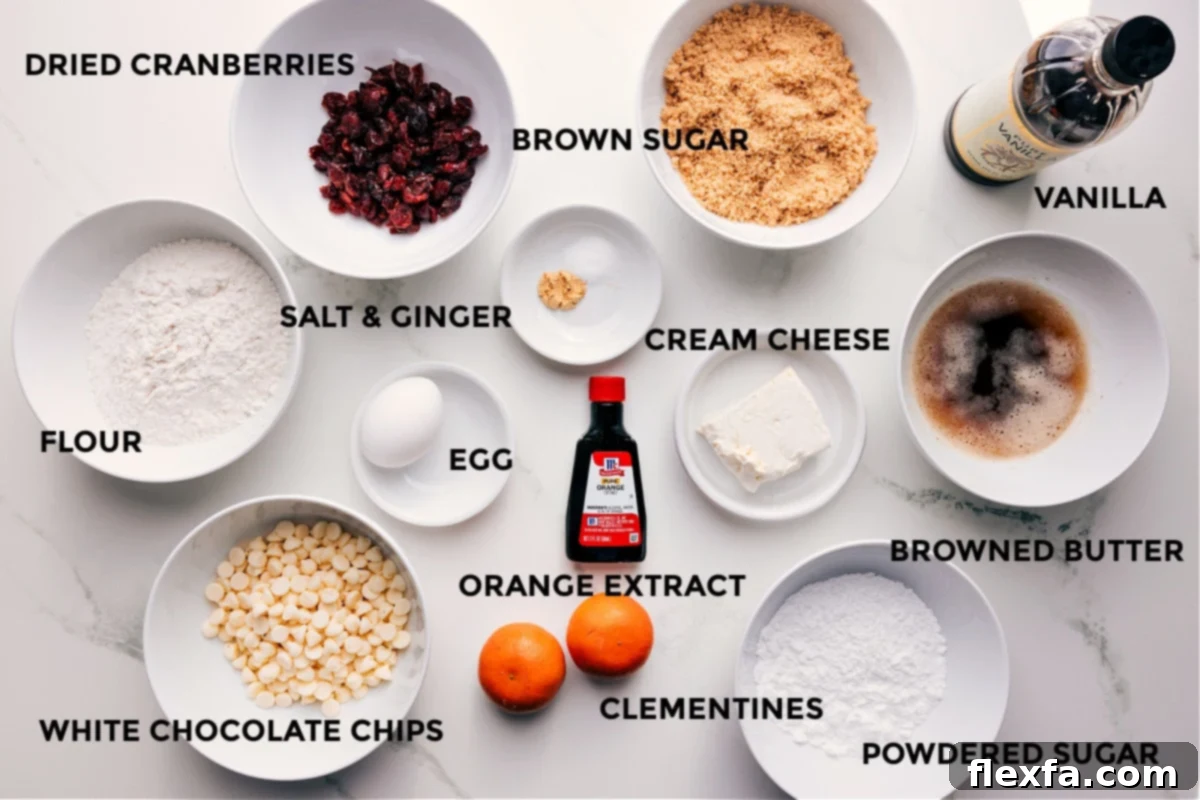
Crafting these irresistible Cranberry Bliss Bars starts with a selection of quality ingredients, each playing a crucial role in achieving that signature flavor and texture. Here’s a closer look at what you’ll need and why each component is important:
| Ingredient | Helpful Tip or Swap |
|---|---|
| Butter & Brown Sugar | Browning the butter is non-negotiable for these bars. It imparts a deep, rich, nutty flavor that beautifully complements the caramel notes of brown sugar, adding complexity that plain melted butter simply cannot. Ensure the browned butter cools slightly before mixing to prevent cooking the egg and to maintain the chewy texture of the bars. |
| All-Purpose Flour & Spices | Standard all-purpose flour provides the perfect structure. A touch of ground ginger is key here; it’s a subtle but vital spice that contributes to the unique warmth and holiday feel of Cranberry Bliss Bars, differentiating them from a standard cookie bar. |
| White Chocolate & Cranberries | Seek out soft, plump dried cranberries for the best texture and tartness. White chocolate chips are convenient, but high-quality chopped white chocolate will melt more smoothly and distribute better, ensuring delightful pockets of creamy sweetness throughout the bars. These two elements are the stars that define the “cranberry bliss.” |
| Cream Cheese Frosting | For the silkiest, lump-free frosting, it’s absolutely crucial to use full-fat, brick-style cream cheese that has been softened to room temperature. This allows it to whip up light and fluffy. Beat it thoroughly until smooth before incorporating other ingredients to ensure a uniform, creamy consistency. |
| Orange & Vanilla Extracts | These extracts are the secret behind the Cranberry Bliss Bar’s signature bright and complex flavor profile. Do not skip the orange extract! It’s the magical ingredient that infuses the bars with that distinctive citrusy zest, making them taste exactly like the Starbucks version, if not better. Vanilla extract rounds out the sweetness and adds depth. Using fresh orange zest from a clementine or mandarin further enhances this citrus burst. |
Step-by-Step Guide: How To Make Starbucks-Style Cranberry Bliss Bars
Follow these detailed steps to create your own batch of irresistible Cranberry Bliss Bars. Precision in each stage ensures a perfect result every time.
- Prepare Your Baking Pan: Begin by preheating your oven to 350°F (175°C). Take an 8×8-inch baking pan and lightly grease it with cooking spray. Then, line the pan with parchment paper, making sure to leave an overhang on two opposite sides. This “sling” will make it incredibly easy to lift the baked bars out of the pan once cooled.
- Brown the Butter to Perfection: In a light-colored, wide saucepan (a light interior helps you monitor the color), melt 8 tablespoons of unsalted butter over medium-high heat. Once melted, reduce the heat to medium and continue stirring constantly with a silicone spatula, scraping the bottom of the pan. The butter will first melt, then foam, and eventually, you’ll see small, fragrant brown specks forming at the bottom, and it will emit a rich, nutty aroma. This process takes about 5-7 minutes. As soon as you notice these signs, immediately remove the pan from the heat and pour the browned butter into a separate heat-safe bowl, ensuring you scrape all the flavorful brown bits from the bottom of the pan. Let the browned butter cool for about 5 minutes; it should still be warm but not scalding.
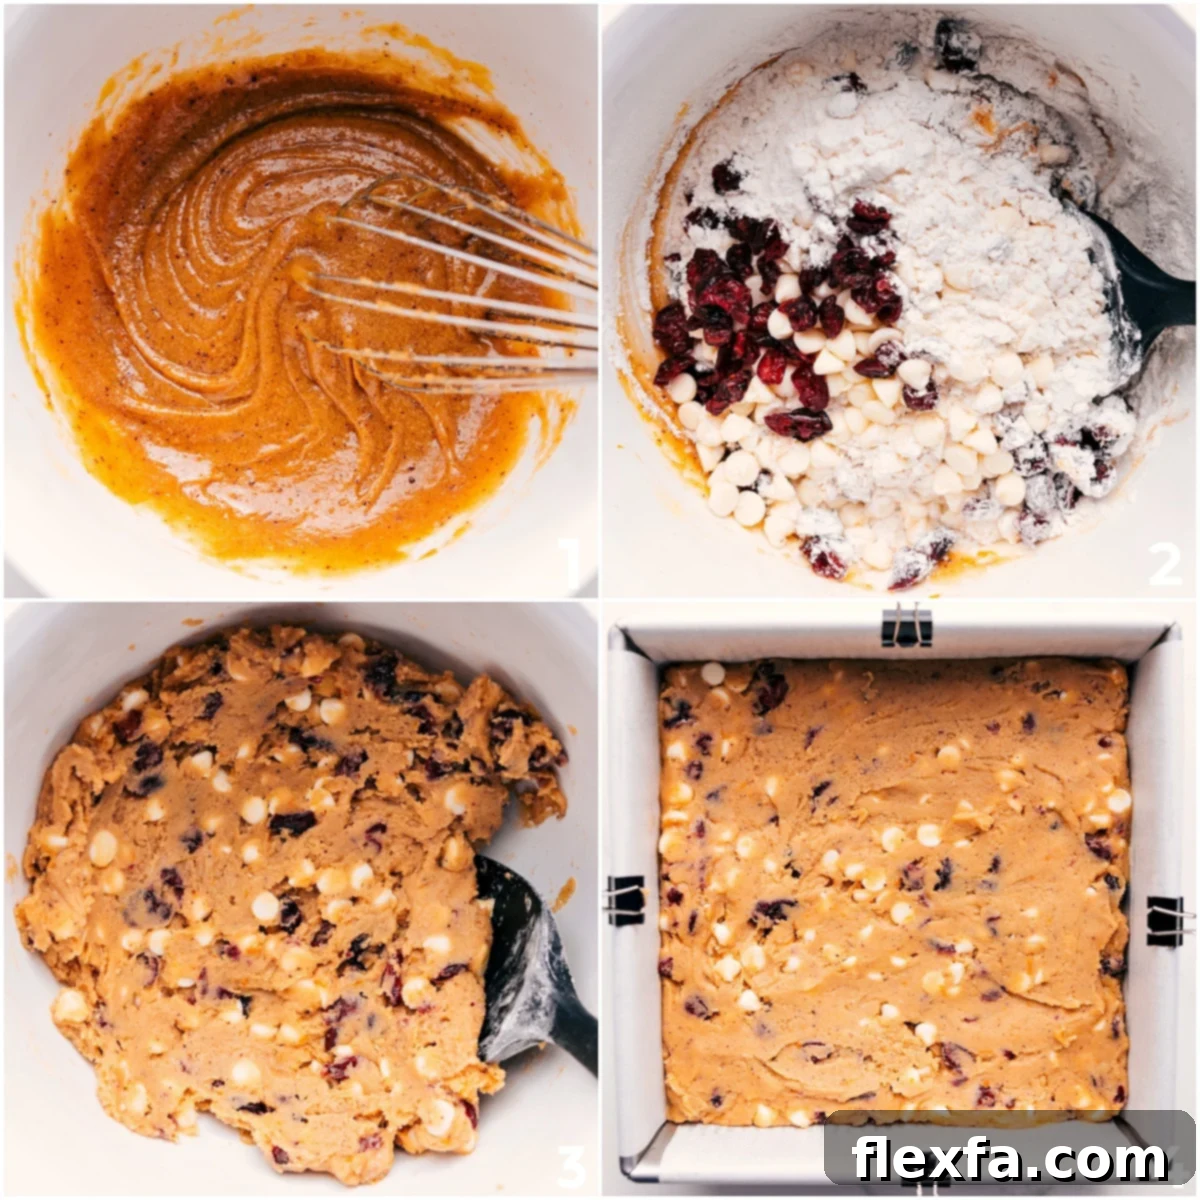
- Combine Wet Ingredients: Add 1 cup of packed light brown sugar to the slightly cooled browned butter. Whisk vigorously for about 1 minute until the mixture is well combined and takes on the consistency of wet sand. Next, incorporate the large egg, vanilla extract, orange extract, fresh orange zest, ground ginger, and salt. Whisk briskly for another 1-2 minutes until the mixture transforms into a very creamy, emulsified consistency. This step is crucial for the bar’s texture.
- Fold in Dry Ingredients and Add-ins: Gently fold in 1 cup of all-purpose flour, 1 cup of white chocolate chips, and 1/2 cup of dried sweetened cranberries using a spatula. Mix until just combined and no dry streaks of flour are visible. Be careful not to overmix, as this can lead to tough bars. The dough will be noticeably thick.
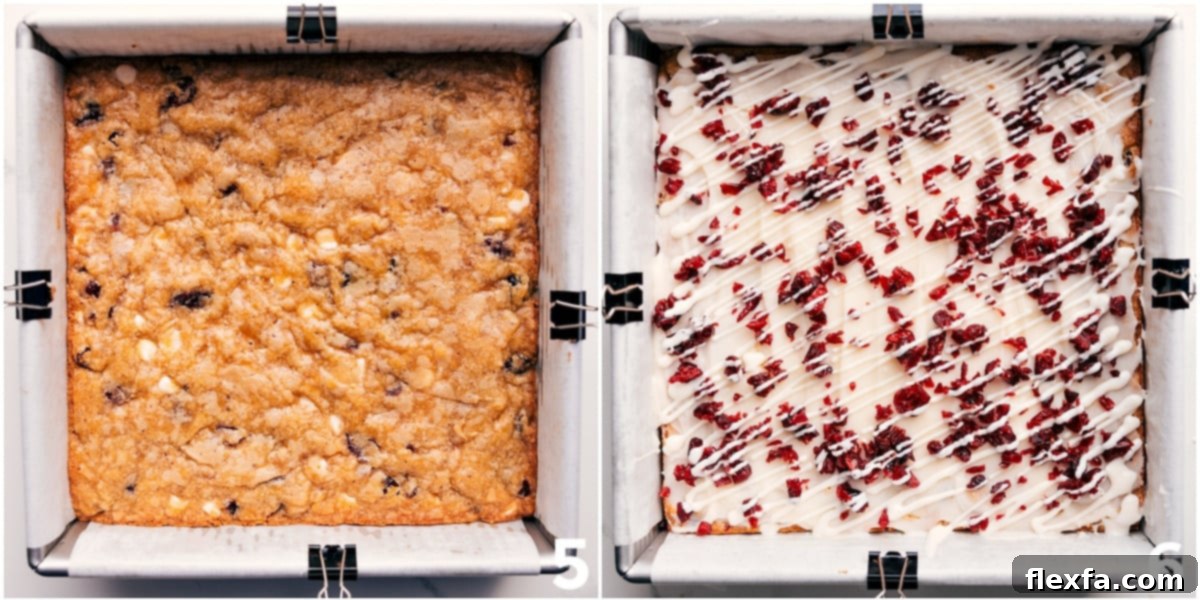
- Bake to Golden Perfection: Evenly spread the thick batter into your prepared 8×8-inch pan. Use the back of a spatula or your hands to press it down firmly and smooth the top. Bake for 25-27 minutes, or until the edges are lightly golden brown and the center is set. A wooden skewer inserted into the center should come out with moist crumbs, not wet batter.
- Cool and Frost: Once baked, remove the pan from the oven and let the bars cool in the pan for 10-15 minutes on a wire rack. Then, use the parchment paper overhang to carefully lift the partially cooled bars out of the pan and transfer them directly onto the wire rack. Slide the parchment paper out from underneath. Allow the bars to cool completely at room temperature before applying frosting – this is essential to prevent the frosting from melting.
- Prepare the Cream Cheese Frosting: While the bars cool, prepare the frosting. In a medium microwave-safe bowl, microwave the softened cream cheese in 10-second bursts, waiting 30 seconds between each, until it’s easily stirred and smooth. In a separate large bowl, combine the smoothed cream cheese with 3/4 cup powdered sugar, 1/4 teaspoon orange extract, 1/4 teaspoon vanilla extract, and a tiny pinch of salt. Beat with an electric mixer until the frosting is smooth, creamy, and lump-free, scraping down the sides of the bowl as needed.
- Frost and Decorate: Once the bars are completely cool, evenly spread the creamy orange-infused frosting over the top. Then, sprinkle the 3 tablespoons of coarsely chopped dried sweetened cranberries over the frosting.
- Prepare White Chocolate Drizzle: In a small microwave-safe bowl, combine 3 tablespoons of white chocolate chips with 1/2 teaspoon of coconut oil (the coconut oil helps make the chocolate smooth and easy to drizzle). Microwave in 15-second intervals, stirring thoroughly after each, until the white chocolate is completely melted and smooth.
- Drizzle and Chill: Transfer the melted white chocolate to a small zip-top bag. Snip a tiny corner off the bag to create a fine opening, and then artfully drizzle the white chocolate over the frosted bars in a zigzag pattern. Let the drizzle set at room temperature or chill briefly in the refrigerator to speed up the process.
- Slice and Serve: Once the white chocolate has set, cut the entire slab into 9 even squares. For the classic Starbucks look, slice each square diagonally to create 18 triangle-shaped bars. Serve and enjoy your homemade Cranberry Bliss Bars!
Expert Baking Tips for Flawless Cranberry Bliss Bars
Achieving bakery-perfect Cranberry Bliss Bars is easy when you keep a few key tips in mind. These insights will help you avoid common pitfalls and ensure your bars are as delicious as they are beautiful.
- Avoid Overmixing the Dough: Once you add the flour, mix the dough only until the dry streaks of flour just disappear. Overmixing develops the gluten in the flour, which can lead to tough, dense bars instead of the desirable soft and tender texture. Gently folding is always best.
- Embrace Room Temperature Ingredients: For a smooth, uniform batter and frosting, ensure your eggs, butter (for the frosting), and especially cream cheese are at room temperature. Cold ingredients don’t emulsify or blend together as easily, resulting in a lumpy texture. Planning ahead to let these ingredients warm up naturally is a simple step that makes a big difference.
- Allow Complete Cooling Before Frosting: Patience is a virtue, especially when it comes to frosting. Warm bars will cause your beautiful cream cheese frosting to melt and slide right off, creating a messy rather than blissful result. Ensure the bars are completely cool to the touch before even thinking about adding that creamy layer.
- Chill for Clean Slices: For perfectly neat, professional-looking cuts, chill your frosted bars in the refrigerator for at least 30 minutes (or even longer) before slicing. For ultra-clean cuts, run a sharp knife under hot water, wipe it dry, and then make confident, swift cuts. Repeat heating and drying the knife as needed between slices.
- Utilize Parchment Paper Overhang: The parchment paper sling isn’t just for easy removal; it’s a lifesaver. By leaving an overhang on two sides, you can effortlessly lift the entire slab of bars out of the pan, making frosting and cutting a breeze without damaging the delicate edges.
- Don’t Rush the Browning Butter: As discussed, browning butter is crucial. Don’t increase the heat too much to speed it up, as this can quickly lead to burning. Keep the heat at medium, stir consistently, and rely on your senses of smell and sight. The nutty aroma and golden-brown specks are your cues.
Quick Tip
Enhance your holiday experience by pairing these delightful Cranberry Bliss Bars with another beloved Starbucks copycat: my Kid-Friendly Pumpkin Spice Latte! It’s the perfect beverage to complement the sweet and tart flavors of the bars.
Storage Solutions for Cranberry Bliss Bars
While these Cranberry Bliss Bars are undeniably at their peak freshness and texture on the day they are made, you can certainly store them to enjoy later. Proper storage ensures they remain delicious for as long as possible.
Refrigeration: Store Cranberry Bliss Bars in an airtight container in the refrigerator for up to 5 days. Due to the cream cheese frosting, they must be kept chilled. For the best texture and flavor, allow them to sit at room temperature for 10–15 minutes before serving. This softens the frosting and restores the bar’s chewiness.
Freezing (Unfrosted): To freeze the bar base, allow the baked bars to cool completely (without frosting). Place them in a single layer on a baking tray and freeze until firm, about 1-2 hours. Once firm, transfer the unfrosted bars to a freezer-safe airtight container, placing parchment paper between layers to prevent sticking. They can be frozen for up to 3 months. When ready to enjoy, thaw them overnight in the refrigerator, then bring to room temperature before frosting and serving as usual.
Freezing (Frosted – with caution): While possible, freezing frosted bars can sometimes alter the texture of the cream cheese frosting upon thawing. If you choose to freeze frosted bars, ensure they are completely firm before wrapping individually in plastic wrap, then placing in an airtight container. Thaw overnight in the refrigerator and allow to come to room temperature before serving.
More Amazing Dessert Bars You’ll Love:
Desserts
Irresistible Raspberry Gooey Butter Bars
Desserts
Decadent Chocolate Rice Krispie Treats
Desserts
Carmelitas (My Absolute Favorite Dessert!)
Desserts
Simple Buckeye Brownies Recipe
Saved
Pin
Cranberry Bliss Bars
Equipment
-
8 x 8-inch baking pan plus parchment paper
Ingredients
- 8 tablespoons unsalted butter cut to small cubes
- 1 cup light brown sugar packed (use soft/fresh sugar for best moisture)
- 1 large egg
- 1 teaspoon vanilla extract
- 1 teaspoon orange extract
- 1 clementine or mandarin (finely grated, for 1 teaspoon zest)
- 1/4 teaspoon ground ginger
- 1/4 teaspoon salt
- 1 cup all-purpose flour
- 1 cup white chocolate chips
- 1/2 cup dried sweetened cranberries (ensure they are soft and fresh for best texture)
- 4 ounces cream cheese softened (full-fat, brick-style for best results)
- 3/4 cup powdered sugar
- 1/4 teaspoon orange extract
- 1/4 teaspoon vanilla extract
- Tiny pinch salt
- 3 tablespoons dried sweetened cranberries coarsely chopped, for topping
- 3 tablespoons white chocolate chips for drizzle
- 1/2 teaspoon coconut oil for white chocolate drizzle
Detailed Instructions
-
1. Preheat Oven & Prep Pan: Preheat your oven to 350°F (175°C). Lightly spray an 8×8-inch baking pan with cooking spray, then line it with parchment paper, allowing some overhang on two opposite sides. This parchment “sling” will make removing the baked bars much easier.
-
2. Brown the Butter: In a light-colored, wide saucepan, melt the cubed unsalted butter over medium-high heat. Once melted, reduce the heat to medium and stir continuously with a silicone spatula, scraping the bottom of the pan to prevent scorching. The butter will bubble and foam. Continue cooking until the butter smells distinctly nutty and you see light-brown specks forming at the bottom of the pan. Immediately remove from heat and pour the browned butter into a separate heat-safe bowl, ensuring all the flavorful brown bits are scraped out. Let it cool for about 5 minutes.
-
3. Mix Wet Ingredients: Add the packed light brown sugar to the slightly cooled browned butter and whisk vigorously until the mixture is uniform and resembles wet sand. Incorporate the large egg, vanilla extract, orange extract, fresh orange zest, ground ginger, and salt. Whisk briskly for 1-2 minutes until the mixture is very creamy, smooth, and well emulsified.
-
4. Fold in Dry & Add-ins: Gently fold in the all-purpose flour, white chocolate chips, and dried sweetened cranberries using a spatula. Mix until no dry streaks of flour remain. Be careful not to overmix the dough; it will be thick.
-
5. Bake the Bars: Evenly spread the thick batter into the prepared pan. Use the back of a spatula to smooth the top. Bake for 25–27 minutes, or until the edges are lightly golden and the top is set. A wooden skewer inserted into the center should come out with moist crumbs, not wet batter.
-
6. Cool the Bars: Remove the pan from the oven and let the bars cool in the pan on a wire rack for 10–15 minutes. Use the parchment paper overhang to carefully lift the bars out of the pan and transfer them to the wire rack. Slide the parchment out from underneath and allow the bars to cool completely at room temperature before proceeding to the frosting stage.
-
7. Prepare Cream Cheese Frosting: To make the frosting, microwave the softened cream cheese in 10-second bursts (waiting 30 seconds between each) until it is easily stirred and perfectly smooth. In a large mixing bowl, combine the smoothed cream cheese with the powdered sugar, 1/4 teaspoon orange extract, 1/4 teaspoon vanilla extract, and a tiny pinch of salt. Beat with an electric mixer until the frosting is light, fluffy, and completely smooth, scraping the sides of the bowl as needed.
-
8. Frost & Top: Once the bars are completely cool, spread the prepared cream cheese frosting evenly over the top. Immediately sprinkle the coarsely chopped dried sweetened cranberries over the frosting, pressing them gently to adhere.
-
9. Make White Chocolate Drizzle: In a small microwave-safe bowl, combine the 3 tablespoons of white chocolate chips with 1/2 teaspoon of coconut oil. Microwave in 15-second bursts, stirring well between each interval, until the white chocolate is fully melted and smooth.
-
10. Drizzle & Set: Transfer the melted white chocolate to a small zip-top bag. Snip a very tiny corner off the bag to create a fine opening, and then drizzle the white chocolate decoratively over the frosted and cranberry-topped bars in a zigzag pattern. Allow the white chocolate drizzle to set completely, either at room temperature or by chilling briefly in the refrigerator.
-
11. Slice & Serve: Once the drizzle is set, cut the entire slab of bars into 9 equal squares. Then, for the classic Cranberry Bliss Bar shape, slice each square diagonally to create 18 triangle-shaped bars. Your homemade Cranberry Bliss Bars are now ready to be served and savored!
Nutrition Information (Approximate)
Nutrition information is automatically calculated and is provided as an estimate. It should only be used as an approximation and may vary based on specific ingredient brands and preparation methods.
Mastering the Art of Browning Butter: A Crucial Step
Browning butter is a simple technique that elevates these Cranberry Bliss Bars from good to absolutely phenomenal. It adds a nutty, complex depth of flavor that is irreplaceable. Don’t skip this step, but do approach it with a little attention. Keep in mind that browned butter yields slightly less than regular melted butter because some of its water content evaporates during the cooking process.
- Choose the Right Pan: Always use a light-colored saucepan. A light interior allows you to clearly see the butter’s color change, which is crucial for preventing it from burning. In a dark pan, it’s very easy to miss the perfect moment.
- Cut Butter into Smaller Pieces: Before melting, cut your butter into small, uniform cubes. Smaller pieces melt more evenly, ensuring that the butter browns uniformly rather than having some parts burn while others are still melting.
- Stir Continuously: As the butter melts and begins to foam, stir it constantly with a heat-resistant silicone spatula. Make sure to scrape the bottom of the pan regularly. This prevents the milk solids (which are the parts that brown) from settling and burning on the bottom while the rest of the butter is still cooking.
- Watch for Visual Cues: The butter will go through several stages: it will melt, then foam, then the foam will subside slightly, revealing amber-colored liquid and small, fragrant brown bits at the bottom of the pan. These brown bits are the browned milk solids, full of flavor.
- Trust Your Sense of Smell: In addition to visual cues, your nose is your best friend here. When the butter achieves a beautiful golden-amber color and smells distinctly toasty, nutty, and caramelized, it’s ready! This is the peak flavor point.
- Act Quickly: As soon as you hit that perfect nutty aroma and color, immediately remove the pan from the heat and pour the browned butter into a separate, cool bowl. The residual heat in the pan can quickly take the butter from perfectly browned to burnt in a matter of seconds.
- Cool Before Using: Allow the browned butter to cool for a few minutes before incorporating it into your batter. It should still be warm enough to be liquid but not hot, as extremely hot butter can “cook” your eggs or alter the texture of other ingredients.