
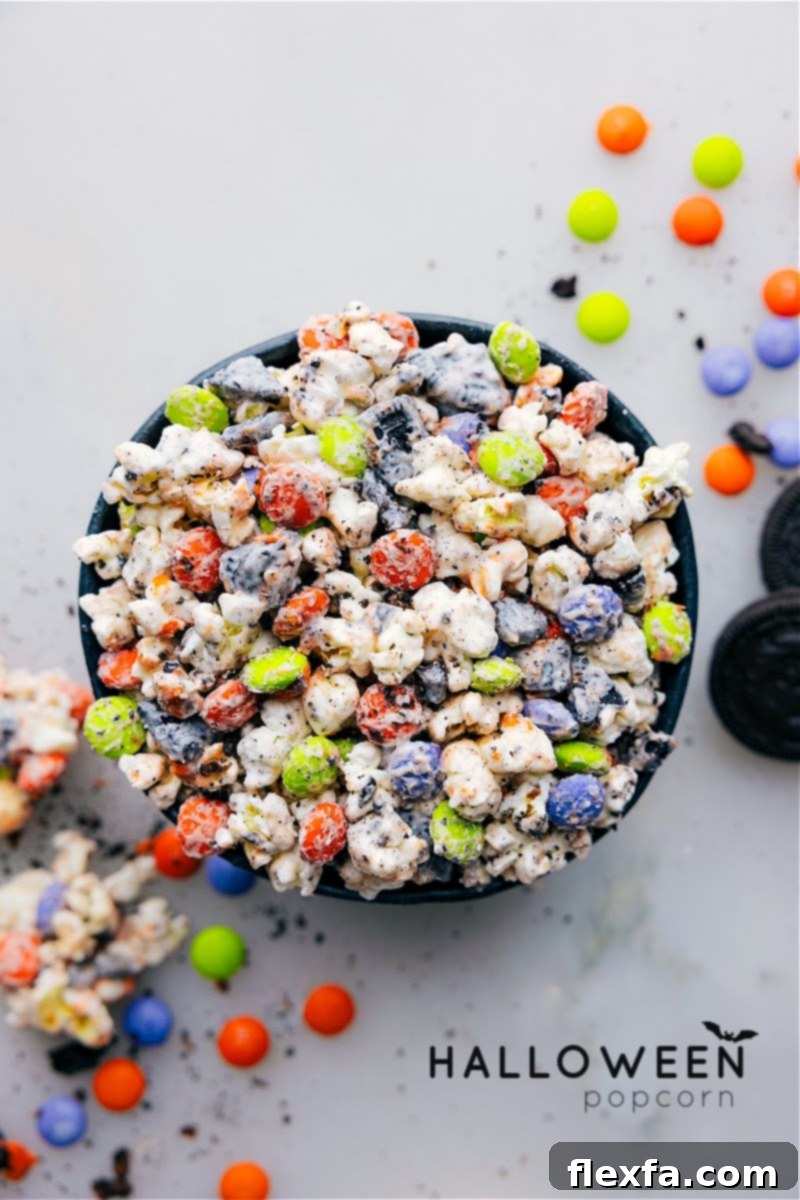
Halloween Popcorn is the ultimate Halloween treat that promises to be the star of any spooky gathering! Imagine freshly popped popcorn, generously coated in a decadent layer of creamy white chocolate, then studded with vibrant, crunchy M&M’s, and delightful festive Oreos. This isn’t just a snack; it’s a delicious, eye-catching centerpiece that perfectly captures the spirit of the season. Simple to prepare yet bursting with fun and flavor, this recipe is guaranteed to be a hit with both kids and adults alike!
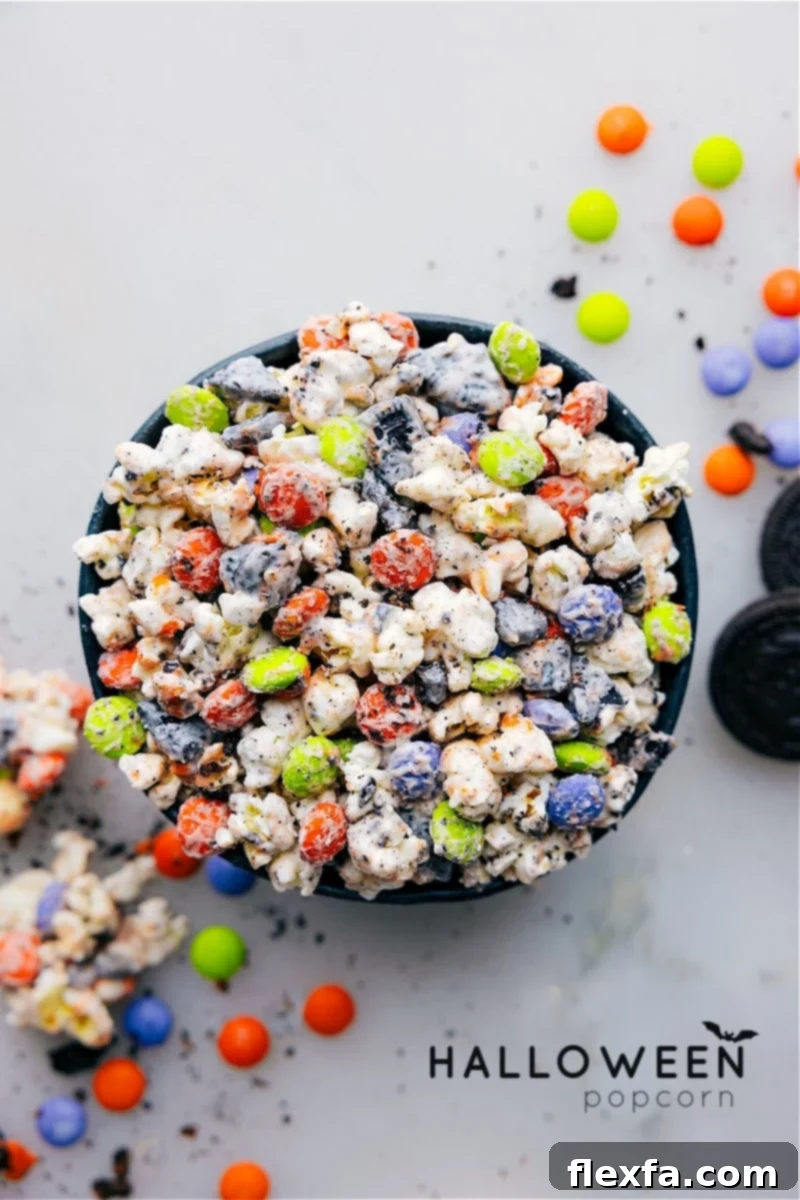
The Magic of Halloween Popcorn
If you’re anything like me, Halloween isn’t just a holiday; it’s a full-blown obsession, a truly magical time of year filled with spooky delights and cherished traditions. Every year, my family looks forward to our annual Halloween murder mystery party, a highlight that consistently tops our list of yearly memories. From intricate costumes to elaborate decor, every detail is carefully planned to create an unforgettable evening.
Last year, amidst a feast of comforting classics like hearty shepherd’s pie, a warming creamy pumpkin soup, fluffy homemade dinner rolls, and my personal favorite, a copycat Olive Garden salad, a truly unexpected star emerged. Just as our game night kicked off, I brought out a batch of this incredible Halloween Popcorn, and it was an instant, resounding hit. It wasn’t just another snack; it stole the show!
This isn’t your average popcorn with a meager sprinkle of candy. Oh no, this is a masterpiece of textures and tastes: perfectly fresh popcorn, generously enrobed in a rich, velvety white chocolate coating, then lavishly mixed with crunchy Halloween-themed Oreos® and colorful M&M’s®. The combination is simply irresistible. Everyone devoured it so quickly that I ended up whipping up a second batch on the spot to satisfy the clamor for more. It’s astonishingly simple to prepare, yet incredibly delicious and visually stunning – truly the quintessential festive treat for your Halloween celebrations!
Why This Halloween Popcorn Recipe is a Must-Make
There are countless reasons why this Halloween Popcorn should be at the top of your list this spooky season. First and foremost, its ease of preparation makes it accessible for even the busiest ghouls and goblins. You don’t need expert baking skills or fancy equipment; just a few simple steps stand between you and a mountain of deliciousness. Secondly, its vibrant appearance makes it a natural showstopper. The contrasting colors of white chocolate, orange and black Oreos, and brightly colored M&M’s create a visual feast that perfectly complements any Halloween theme. It’s more than just a snack; it’s edible decor!
Beyond its looks, the combination of flavors and textures is what truly sets this popcorn apart. The crispness of freshly popped corn, the luxurious melt of white chocolate, and the satisfying crunch of cookies and candies create a symphony in every bite. It’s sweet, salty, and utterly addictive. Whether you’re hosting a elaborate haunted house party, enjoying a cozy movie night, or simply looking for a fun activity to do with the kids, this Halloween Popcorn is adaptable and always a crowd-pleaser. Plus, it’s incredibly customizable, allowing you to tailor it to your favorite candies and spooky themes. Get ready to impress everyone with this delightfully spooky and supremely tasty treat!
Essential Halloween Popcorn Ingredients
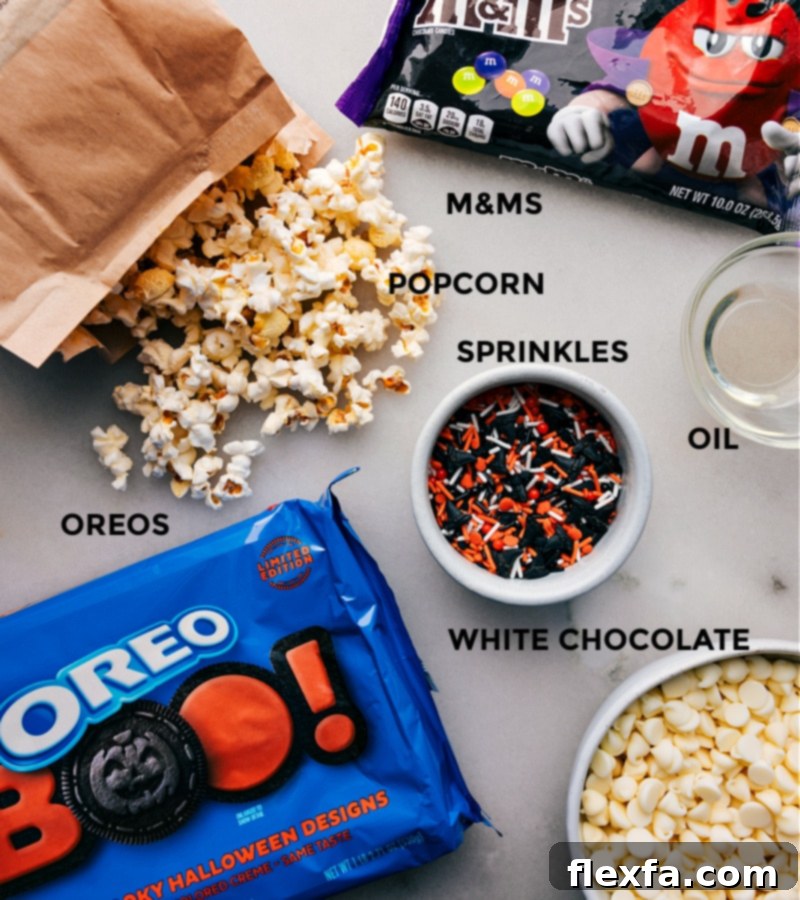
Crafting the perfect batch of Halloween Popcorn starts with selecting high-quality ingredients. Here’s a detailed look at what you’ll need and some helpful tips for each component:
- Popcorn: The foundation of our delightful snack! For ultimate convenience, you can absolutely use pre-popped popcorn – it’s a great shortcut, though often a bit pricier. If you prefer to make your own, aim for lightly salted varieties, such as microwave popcorn packets, or pop 8 cups of kernels using your preferred method (air popper, stovetop, or microwave). If your popcorn is unsalted, a small pinch of salt after popping will enhance all the flavors, balancing the sweetness of the chocolate and candies perfectly.
- Halloween Oreos: These festive sandwich cookies bring a delightful crunch and iconic chocolate flavor. The Halloween edition, often featuring orange cream filling, adds an extra touch of seasonal color. Can’t find the special Halloween version? No worries at all! Classic Oreos work just as wonderfully, providing the same beloved taste and texture. A pro tip: don’t discard those delicious cookie crumbs that form when chopping them – they add extra flavor and visual appeal to the mix!
- Halloween M&M’s: These colorful candies contribute a satisfying crunch and bursts of chocolate. The Halloween-themed M&M’s typically come in festive orange, black, and sometimes purple or green. If the themed bags aren’t available, simply grab a bag of regular M&M’s and pick out the orange, green, or yellow ones to maintain that vibrant Halloween aesthetic. For an exciting variation and extra texture, consider using peanut M&M’s or pretzel M&M’s; their added crunch and flavor dimension are absolutely delicious and highly recommended for an elevated snack experience.
- White Chocolate Chips: This is where the magic happens, coating everything in a luxurious, sweet embrace. The quality of your white chocolate truly matters here. Opt for higher-quality white chocolate chips or baking bars, as they tend to melt smoother and offer a superior flavor compared to cheaper alternatives. To prevent the chocolate from seizing (becoming clumpy and unusable), ensure that your melting bowl and all utensils are completely dry. Even a tiny drop of water can cause the chocolate to seize, so vigilance is key!
- Vegetable or Canola Oil: Our secret weapon for perfectly smooth chocolate! A mere splash of this neutral oil helps the white chocolate achieve a wonderfully fluid, glossy texture, making it easier to coat every single piece of popcorn and ensuring a beautifully even finish. It’s a small addition that makes a big difference in the final result.
Creative Variations for Your Halloween Popcorn
Feeling creative? This Halloween Popcorn recipe is wonderfully versatile and can be customized with various fun additions. Consider adding themed sprinkles for an extra pop of color and festivity – think orange, black, purple, or ghost-shaped sprinkles! If you do, make sure to add them immediately after spreading the popcorn mixture onto the baking sheet. The sprinkles need to adhere to the still-wet white chocolate before it begins to harden. Remember, white chocolate sets up quite quickly, so act fast!
Other fantastic additions include mini pretzels for a sweet and salty crunch, candy corn or candy pumpkins for classic Halloween flair, chopped nuts for an earthy depth, or even a drizzle of melted dark chocolate for a striking visual contrast and intensified chocolate flavor. You could also experiment with different flavored Oreos or M&M’s if you’re not strictly adhering to a Halloween theme, opening up a world of flavor possibilities!
Expert Tips for Perfectly Melting White Chocolate
Melting white chocolate can sometimes be tricky, but with these tips, you’ll achieve a smooth, silky coating every time:
- Use High-Quality Chocolate: This is paramount. Choose white chocolate that contains a good percentage of cocoa butter, as this naturally leads to smoother melting and a better-tasting final product. Cheaper varieties often contain more sugar and less cocoa butter, making them prone to seizing or burning.
- Melt Completely Before Combining: Ensure your white chocolate is fully melted and beautifully smooth before you even think about adding it to the popcorn. Any lumps or un-melted pieces will result in an uneven coating.
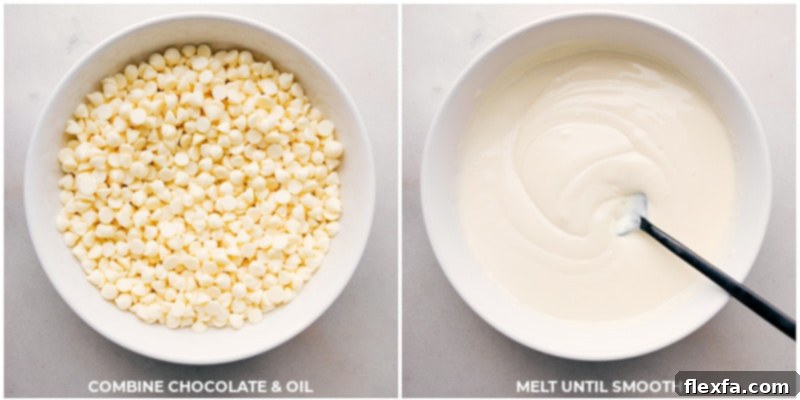
- Short Bursts for Microwave Melting: If using a microwave, heat the chocolate in very short intervals – think 20 to 30 seconds at a time. After each interval, remove the bowl and stir thoroughly, even if it doesn’t look like it’s melting. This distributes the heat and prevents scorching. Continue until just smooth.
- Keep Everything Dry: This cannot be stressed enough! Water is white chocolate’s worst enemy. Even a single drop can cause it to seize instantly, turning into a thick, gritty, unworkable paste. Use a completely dry bowl, spatula, and any other utensils. Humidity in the air can also sometimes be a factor, so choose a dry day if possible.
- Thin with Oil if Needed: If, after melting, your white chocolate seems a bit too thick or pasty, stir in a tiny bit more vegetable or canola oil, a teaspoon at a time, until it reaches your desired pourable consistency. This helps create that perfect, thin coating.
- Low and Slow is the Way to Go: White chocolate burns much faster than dark or milk chocolate due to its different composition. Always use low heat settings if using a double boiler, or short bursts in the microwave. Patience is key to avoiding a scorched, bitter mess.
Crafting Your Spooky Sweet Halloween Popcorn: A Step-by-Step Guide
Making this festive Halloween Popcorn is incredibly straightforward, but a few key tips will ensure your success and yield the best possible results:
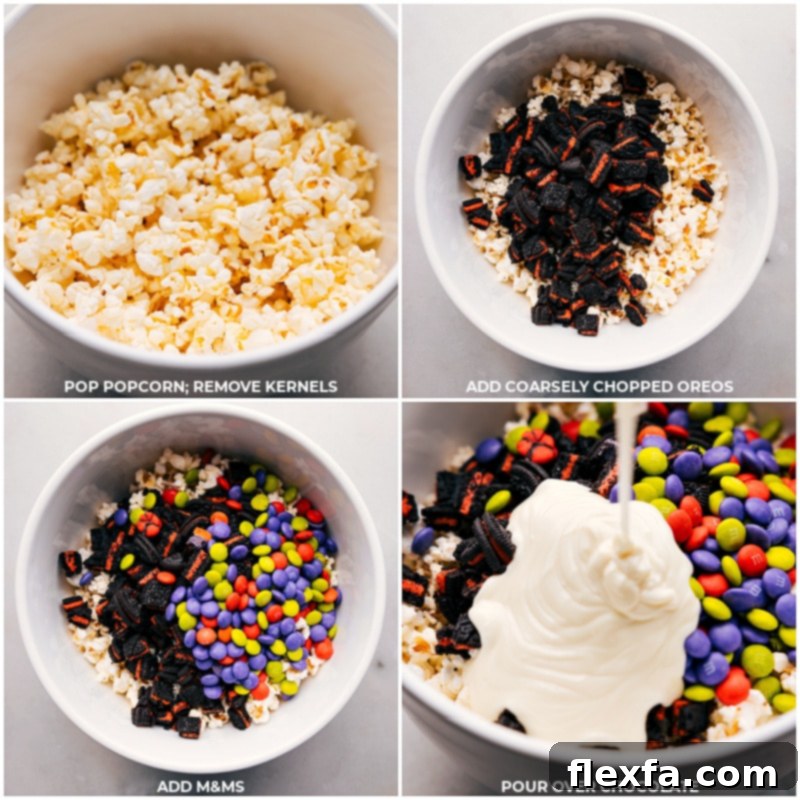
- Step 1: Prepare Your Workstation. First, line a large, rimmed baking sheet (approximately 15″ x 10″) with parchment paper, foil, or a silicone baking mat. This crucial step prevents the popcorn from sticking as it cools and makes for effortless cleanup. Set this aside; you’ll need it ready for when the popcorn is coated.
- Step 2: Prepare the Popcorn and Mix-ins. Begin with freshly popped popcorn for unparalleled flavor and crunch. Pop it right before you plan to mix, ensuring it’s as fresh and crisp as possible. Transfer the popcorn to an extra-large mixing bowl – choose one much larger than you think you’ll need! This generous space is essential for easily tossing and coating the popcorn without making a mess. Now, coarsely chop your Halloween Oreos into about 8 pieces each; don’t worry about perfect uniformity, rustic chunks add great texture. Add the chopped Oreos and your Halloween M&M’s to the popcorn in the large bowl.
- Step 3: Melt the White Chocolate. In a separate microwave-safe bowl, combine your white chocolate chips and the vegetable or canola oil. Microwave this mixture in 30-second intervals, stirring vigorously after each interval, until the chocolate is completely smooth and melted. Be extra careful not to overheat or burn the chocolate, as white chocolate is particularly sensitive to high heat.
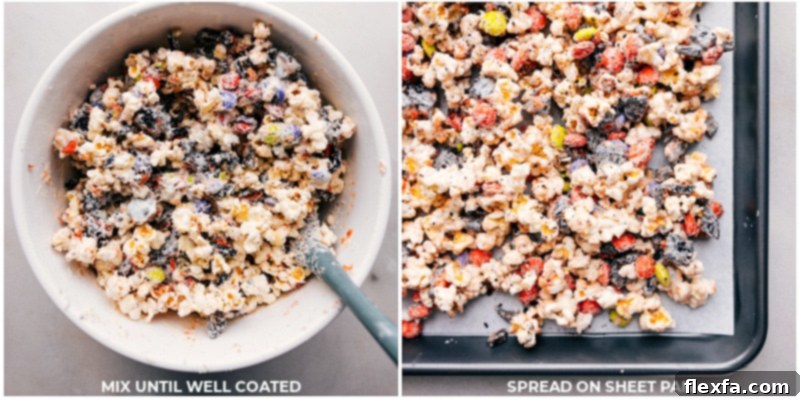
- Step 4: Combine and Coat. Once your white chocolate is perfectly melted and smooth, work quickly! Pour the melted chocolate evenly over the popcorn, Oreo, and M&M mixture in the large bowl. Using a sturdy spatula, gently but swiftly mix everything together until all the popcorn and candies are thoroughly coated with the white chocolate. Speed is key here to ensure an even coating before the chocolate begins to set.
- Step 5: Spread and Set. Immediately transfer the coated popcorn mixture onto your prepared baking sheet. Spread it out into a single, even layer. You can let it harden at room temperature, which usually takes about 30 minutes to an hour, or expedite the process by placing it in the refrigerator for about 15-20 minutes. Once the chocolate has completely set and hardened, break the large slab of popcorn into smaller, bite-sized pieces.
Presentation & Serving Suggestions
Elevate your Halloween Popcorn presentation by serving it in festive, Halloween-themed bowls. You can also spread it out artfully on a large platter or decorative tray to create a stunning centerpiece that doubles as an irresistible snack. For individual servings, scoop portions into small Halloween-themed paper bags or clear cello bags tied with spooky ribbons, making perfect party favors!
Storage Tips for Your Halloween Popcorn
Keeping Your Spooky Snack Fresh
For the absolute best flavor and crunch, aim to enjoy this Halloween Popcorn mix within the first day or two of making it. The fresher it is, the crisper the popcorn and the more vibrant the flavors. To maximize its shelf life and keep it delightfully crispy, store any leftovers in an airtight container at room temperature. This will protect it from moisture and air, which can cause the popcorn to soften.
A clever tip for extended freshness: Over time, especially if exposed to air, the white chocolate coating can gradually soften the popcorn, making it less crisp. If you anticipate having leftovers for more than a couple of days, or if you simply love a colder, chewier treat, consider storing them in an airtight bag or container in the freezer. There’s no need to thaw it before enjoying; this Halloween Popcorn is surprisingly delicious and wonderfully chewy straight from the freezer!
Frequently Asked Questions (FAQs) About Halloween Popcorn
Here are some common questions you might have when making this fun Halloween treat:
Q: Can I use different types of popcorn?
A: Absolutely! While plain, lightly salted popcorn works best to highlight the sweet additions, you can experiment. Just ensure it’s not heavily buttered or seasoned, as those flavors might clash with the white chocolate and candies. Air-popped or stovetop popcorn is generally preferred for its lighter texture.
Q: My white chocolate seized! What went wrong?
A: White chocolate is very sensitive to water and overheating. Even a tiny drop of water (from a damp bowl, spoon, or steam) can cause it to seize and become clumpy. Overheating can also cause it to become grainy. Always ensure all your equipment is completely dry and melt it slowly in short bursts, stirring frequently.
Q: How can I prevent the popcorn from getting soggy?
A: The key is to use freshly popped, dry popcorn. Ensure it has cooled completely before mixing with the melted chocolate. Also, storing it in an airtight container as recommended helps maintain its crispness. If it does get a little soft, a quick stint in the freezer can revive some of the crunch!
Q: Can I make this Halloween Popcorn ahead of time for a party?
A: Yes, you can! This popcorn mix holds up well. Prepare it a day or two in advance and store it in an airtight container at room temperature. For optimal freshness and crunch, aim to serve it within 48 hours. If you’re looking to make it further in advance, consider freezing it as per our storage tips.
Q: Are there any nut-free alternatives for M&M’s and Oreos?
A: If you need to avoid nuts, ensure you’re using classic M&M’s (not peanut or almond) and traditional Oreos, which are generally nut-free (always check labels for specific allergy information). You can also substitute with other nut-free candies like Skittles, gummy candies, or pretzel pieces for crunch.
More Spooktacular Halloween Fun: Delightful Recipes to Try!
Quick And Easy
Easy & Creative Halloween Donuts
Quick And Easy
Spooky Mummy Cookies
Halloween
Simple & Fun Halloween Cupcakes
Desserts
Goblin Goodies (Halloween Muddy Buddies)
Halloween Popcorn
Chelsea Lords
15
30
45
12
servings
Video
Equipment
-
Sheet pan (15″ x 10″)
-
Aluminum foil or parchment paper or a silicone baking mat
Ingredients
- 8 cups plain popped popcorn see note 1
- 2 cups Halloween Oreos, coarsely chopped
- 1 cup Halloween M&M’s see note 2
- 2 cups white chocolate chips (11- to 12-ounce bag, high quality recommended)
- 2 teaspoons vegetable or canola oil
Instructions
-
Line a rimmed sheet pan (15″ x 10″) with foil, parchment paper, or a silicone baking mat to prevent sticking and make cleanup easy. Set this prepared pan aside.
-
In a very large mixing bowl, add your freshly popped popcorn. Take a moment to remove any un-popped kernels (see note 3 for a clever trick!). Coarsely chop the Halloween Oreos into roughly 8 pieces each; these chunks will add fantastic texture. Add the chopped Oreos and Halloween M&M’s to the popcorn in the bowl.
-
In a separate microwave-safe bowl, combine the white chocolate chips and the vegetable or canola oil. Microwave the mixture in short 30-second intervals, stirring thoroughly between each interval. Continue until the chocolate is completely smooth and fully melted, being careful not to burn it (white chocolate melts quickly!).
-
Immediately pour the melted white chocolate evenly over the popcorn, Oreo, and M&M mixture in the large bowl. Using a sturdy spatula, quickly but gently mix everything together until all the popcorn and candies are thoroughly coated with the chocolate. Work efficiently before the chocolate begins to set.
-
Spread the coated popcorn mixture onto the prepared sheet pan in a single, even layer. Allow it to harden completely at room temperature (this may take 30-60 minutes) or speed up the process by placing it in the refrigerator for about 15-20 minutes. Once the chocolate is fully set, break the large pieces into smaller, bite-sized clusters. Serve and enjoy!
Recipe Notes
Note 2 (Candy Alternatives): If you can’t find the special Halloween editions of Oreos or M&M’s, don’t fret! Classic Oreos and regular M&M’s work perfectly well. To keep the festive vibe, simply select M&M’s in colors like orange and green, or orange and yellow. You can also mix in other Halloween-themed candies like candy corn or sprinkles.
Note 3 (Removing Un-popped Kernels): To effortlessly remove pesky un-popped kernels, place your popped popcorn in a very large bowl. Cover the top of the bowl with a wire cooling rack, then carefully flip the bowl over. Gently shake the bowl; the smaller, un-popped kernels will fall through the rack, leaving you with only the fluffy, popped pieces ready for coating.
Storage: Store any leftover Halloween Popcorn in an airtight container at room temperature. For the best flavor and crunch, it’s ideally enjoyed within 1–2 days. For longer storage, you can freeze it in an airtight bag and enjoy it straight from the freezer for a chewy treat!
Nutrition Information
Calories: 407kcal |
Carbohydrates: 54g |
Protein: 5g |
Fat: 20g |
Cholesterol: 9mg |
Sodium: 143mg |
Fiber: 2g |
Sugar: 39g
Nutrition information is automatically calculated and should only be used as an approximation. Individual results may vary based on ingredients and preparation methods.
Love this recipe? Leave a comment below!