
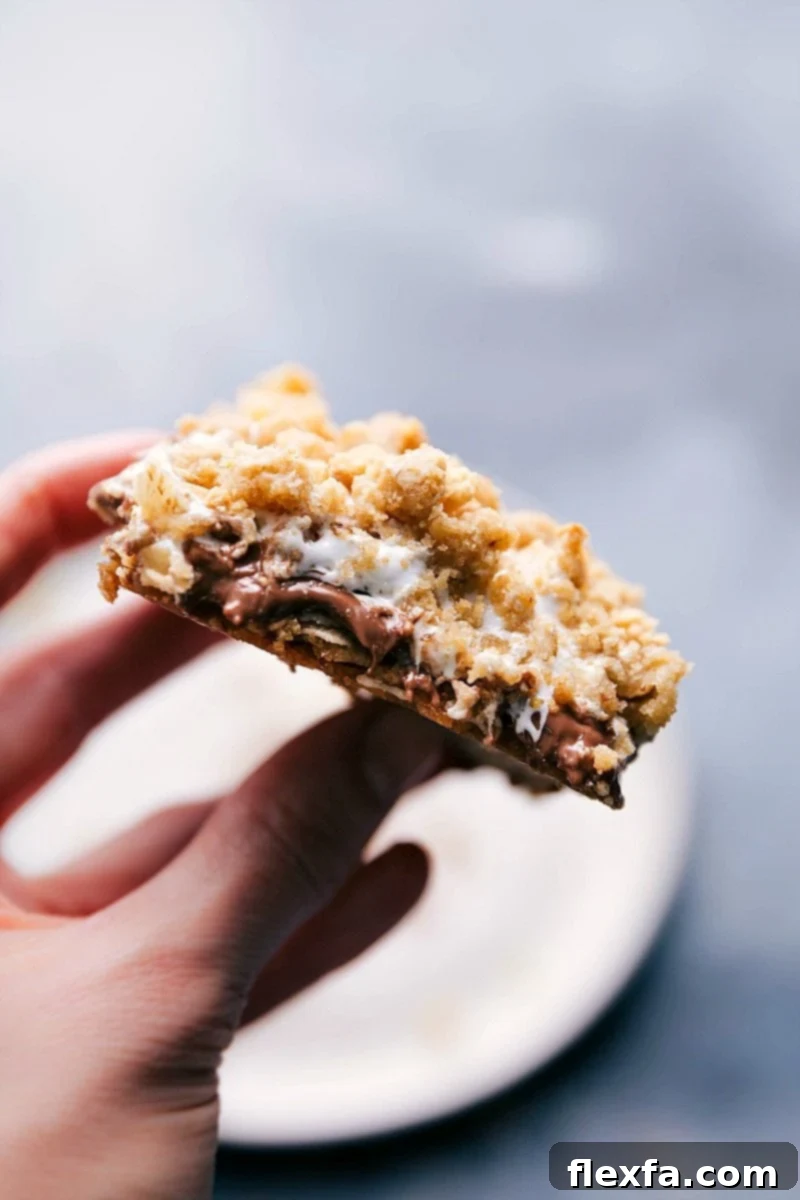
S’mores Cookie Bars are the epitome of dessert perfection – a delightful symphony of gooey, marshmallow-filled layers, rich, melty chocolate, and a uniquely textured graham-cracker oatmeal crumb topping. This recipe brings the beloved campfire classic right into your kitchen, transforming it into an easy-to-make, shareable treat that promises to satisfy any sweet craving.
If you’re a fan of the classic S’mores flavor profile, you might also enjoy these Golden Grahams® cereal S’mores bars or a batch of our chewy S’mores cookies next!
The Irresistible Charm of Homemade S’mores Cookie Bars
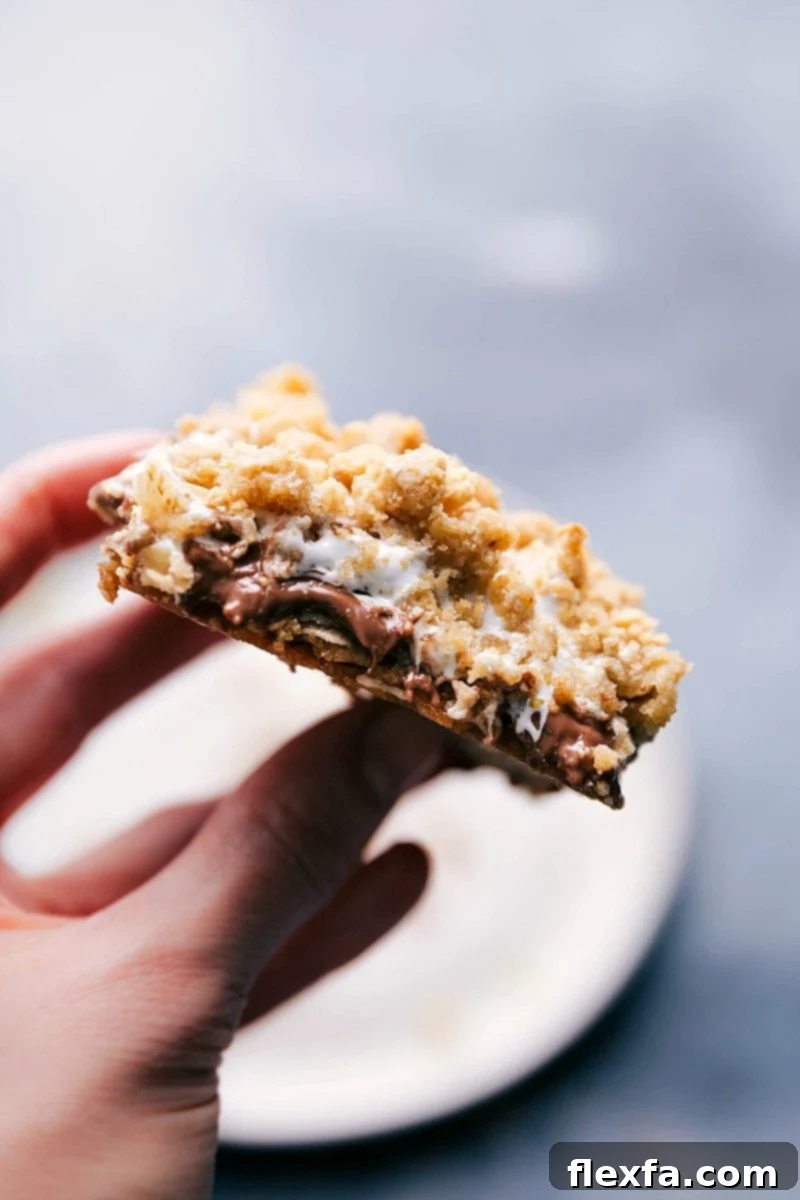
There’s an undeniable magic about S’mores that evokes feelings of summer nights, crackling bonfires, and joyful gatherings. While the traditional campfire experience is truly special, it’s not always practical or accessible. That’s precisely why these S’mores Cookie Bars have become one of my most cherished creations. They perfectly capture the essence of that beloved outdoor treat, delivering all the familiar flavors and textures without the need for a flame.
Imagine a warm, soft, and remarkably chewy oatmeal cookie base, infused with a hint of sweetness. Layered generously on top are creamy, rich milk chocolate chips that melt into a luscious pool, followed by an abundant spread of fluffy, sweet marshmallow crème. Finally, the entire ensemble is crowned with a delightful crumble made from graham crackers and more of that irresistible oatmeal cookie dough. Each bite is a harmonious blend of crisp, chewy, gooey, and utterly decadent – a truly must-make S’mores dessert that you can enjoy anytime, anywhere.
Essential Ingredients for Perfect S’mores Cookie Bars
Crafting these extraordinary S’mores Cookie Bars requires a thoughtful selection of ingredients, each playing a crucial role in achieving the perfect texture and flavor. Here’s a detailed look at what you’ll need:
- Unsalted Butter: Using unsalted butter is key to precisely controlling the salt content in your baking. For optimal results, ensure your butter is partially melted but then cooled before mixing. Adding hot butter to sugar can cause the sugar to melt prematurely, leading to a greasy and less appealing bar.
- Light Brown Sugar: This ingredient imparts a deep, molasses-rich sweetness and contributes to the bars’ wonderfully chewy texture. Always make sure to pack the brown sugar firmly into your measuring cup to ensure an accurate amount.
- Old Fashioned Oats: These provide the signature chewy texture and wholesome flavor for the cookie base and crumble topping. It’s crucial to use old-fashioned (rolled) oats; quick oats will result in a mushy texture, and steel-cut oats will be too hard and won’t integrate properly into the dough.
- All-Purpose Flour: The foundation of our cookie base, all-purpose flour provides the necessary structure. For the best consistency, ensure you measure your flour correctly using the spoon-and-level method.
- Baking Soda: This essential leavening agent reacts with the brown sugar to help the cookie base rise slightly and achieve its tender, cake-like yet chewy consistency. Do not skip or substitute this ingredient.
- Salt: A pinch of salt is vital for balancing the sweetness and enhancing the overall depth of flavor in the bars. It brings out the best in the chocolate and marshmallow.
- Milk Chocolate Chips: These melt beautifully into a smooth, rich layer. While milk chocolate chips offer a classic S’mores experience, feel free to experiment with semi-sweet or dark chocolate chips if you prefer a less sweet or more intense chocolate flavor. High-quality chocolate chips will make a noticeable difference in taste and melt.
- Marshmallow Crème (Fluff): For that signature gooey, stretchy S’mores experience, marshmallow crème is indispensable. Brands like Jet-Puffed Marshmallow Creme® are highly recommended for their perfect consistency and sweet flavor. Unlike regular marshmallows, crème spreads easily and creates a consistent layer.
- Graham Crackers: These provide the iconic S’mores crunch and flavor. Crush them to a coarse, crumbly texture rather than a fine powder. This ensures you get delightful small chunks of graham cracker throughout the topping, adding fantastic textural contrast without any large, hard pieces.
Step-by-Step Guide to Crafting S’mores Cookie Bars
Making these delightful S’mores Cookie Bars is straightforward, but a few key techniques will ensure perfect results every time. Follow these detailed steps for a truly irresistible treat:
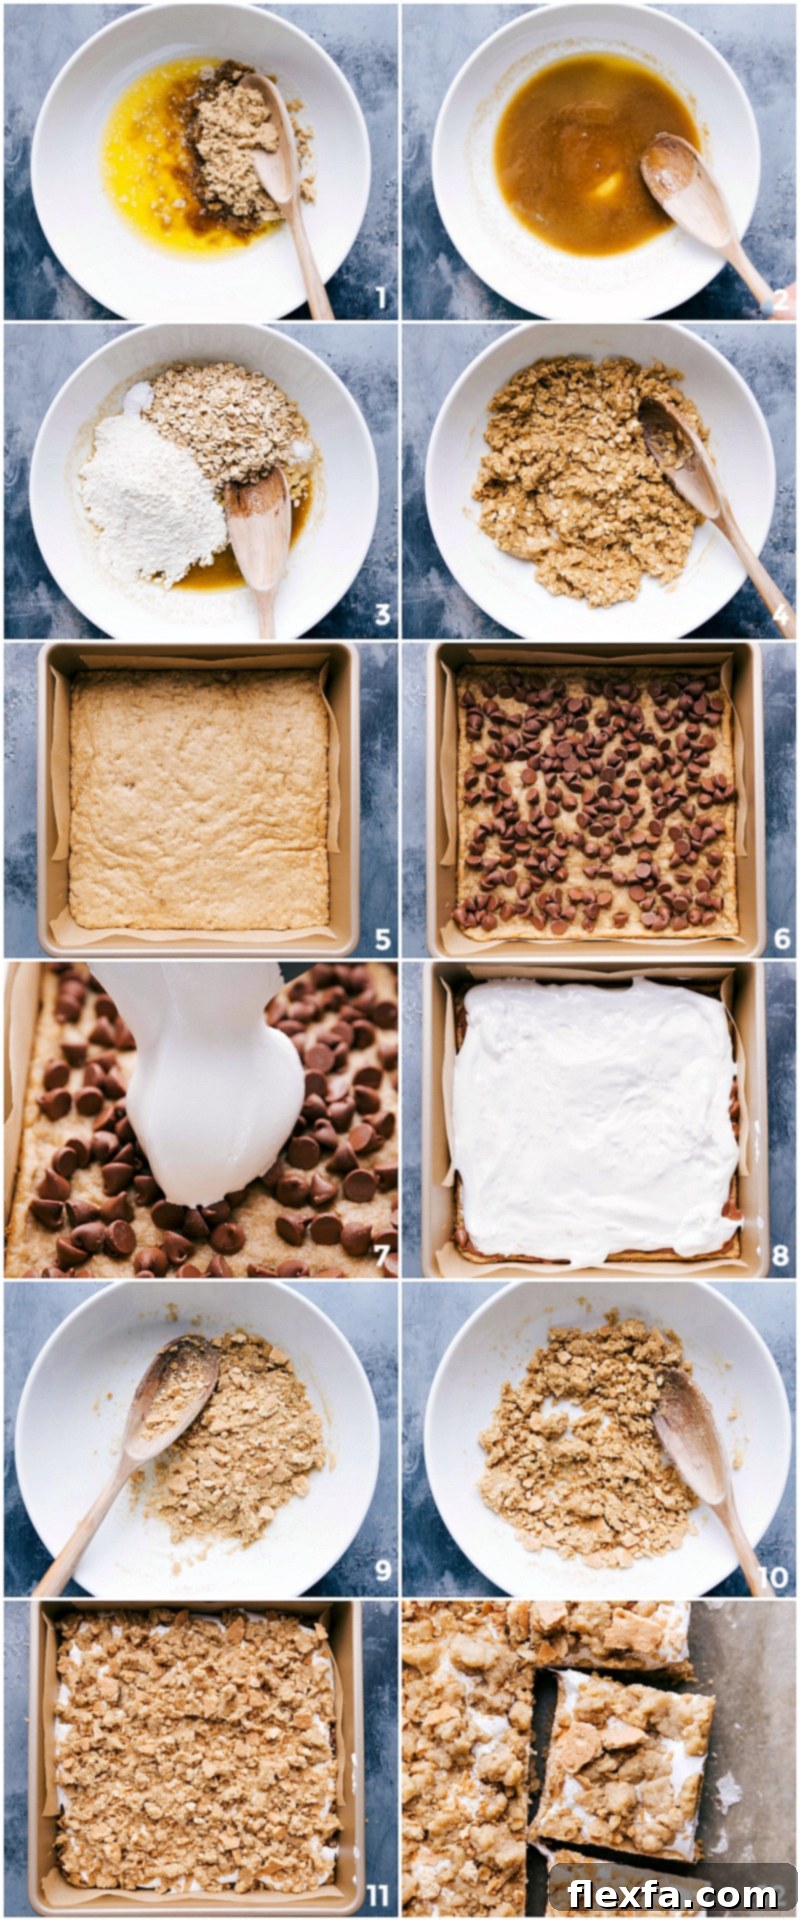
- Prepare Your Pan and Oven: Begin by preheating your oven to 350°F (175°C). It’s essential to prepare your baking pan properly to avoid sticky situations later. Line an 8×8-inch or 9×9-inch baking pan with parchment paper, allowing an overhang on the sides. This parchment paper sling will make lifting the finished bars out incredibly easy. An 8×8-inch pan will yield thicker, chewier bars, while a 9×9-inch pan will produce slightly thinner, but equally delicious, bars.
- Create the Oatmeal Cookie Dough: In a large mixing bowl, combine your partially melted and cooled unsalted butter with the firmly packed light brown sugar. Stir well until creamy. Then, add the all-purpose flour, old-fashioned oats, baking soda, and salt. Mix until all ingredients are just combined and a thick, cohesive cookie dough forms. Be careful not to overmix.
- Form the Base Layer: Divide the prepared cookie dough mixture roughly in half. Press one half of the dough evenly into the bottom of your parchment-lined baking pan. Ensure the layer is compact and level across the entire base. This creates a sturdy and delicious foundation for your S’mores bars.
- Pre-Bake the Base: Place the pan with the pressed cookie dough into your preheated oven and bake for 8 minutes. This initial bake sets the bottom crust, preventing it from becoming soggy when the wet layers are added, and gives it a slightly chewy edge. Remove the pan from the oven after 8 minutes.
- Layer with Chocolate and Marshmallow: Immediately after removing the pan from the oven, sprinkle the entire bag of milk chocolate chips evenly over the warm cookie crust. The residual heat will start to melt the chocolate, creating a smooth layer. Next, warm your marshmallow crème in the microwave for about 7 seconds (ensure there’s no foil or metal on the jar if microwaving). This slight warming makes the fluff much easier to spread. Carefully spoon the warmed marshmallow crème on top of the chocolate chips, then gently smooth it into an even layer using the back of a spoon or an offset spatula. Work slowly to avoid disturbing the chocolate layer too much.
- Prepare and Add the Crumb Topping: Take your graham crackers and crush them coarsely. You can do this by placing them in a Ziploc bag and crushing them with a wooden spoon or the handle of a knife. You want noticeable pieces, not a fine powder. Add the crushed graham crackers to the remaining half of the cookie dough mixture and stir gently to combine. Crumble this graham cracker-oatmeal dough mixture evenly over the marshmallow fluff layer. Don’t worry if it doesn’t cover every single spot; allowing some marshmallow to peek through adds to the visual appeal and signature gooeyness.
- Final Bake and Cool: Return the pan to the oven and bake for another 13-15 minutes, or until the top layer is lightly golden brown and the marshmallow is bubbling slightly around the edges. Keep a close eye on it to prevent overbaking, which can make the bars dry. Once baked, remove the bars from the oven and allow them to cool completely at room temperature for at least 1 hour. This cooling period is crucial for the layers to set properly, making them much easier to cut into neat squares.
- Slice and Serve: Once fully cooled, use the parchment paper overhang to gently lift the entire slab of S’mores Cookie Bars out of the pan. Place it on a cutting board and use a sharp knife (lightly greased if needed for sticky marshmallows) to cut them into individual squares. These bars are best enjoyed within 2-3 days, stored in an airtight container.
Expert Tips for S’mores Cookie Bar Perfection
Achieving truly perfect S’mores Cookie Bars is simple with a few insider tips. These pointers will help ensure your bars are consistently gooey, flavorful, and easy to handle:
- Always Line Your Baking Pan: These bars are wonderfully gooey and can be quite sticky! To prevent them from adhering to the pan and to ensure effortless removal, always line your baking dish with parchment paper. Leave a generous overhang on the sides; this creates a convenient “sling” that allows you to lift the entire slab of cooled bars out of the pan with ease before cutting.
- Measure Flour Accurately (Spoon and Level Method): The consistency of your cookie base largely depends on accurate flour measurement. Avoid scooping flour directly from the bag with your measuring cup, as this compacts the flour and leads to an excessive amount. Instead, gently spoon the flour into your measuring cup until it’s overflowing, then level it off with the back of a knife or a straight edge. For a visual guide, consider watching a video on how to spoon and level flour to ensure your cookie base isn’t too dense or dry.
- Choose High-Quality Milk Chocolate: The quality of your chocolate significantly impacts both the melt and the flavor of your S’mores Cookie Bars. Opt for a reputable brand of milk chocolate chips like Ghirardelli® or Guittard®. Cheaper brands often contain more wax, which can result in a less desirable texture and a flatter flavor profile once melted. Better quality chocolate will yield a smoother, richer, and more luxurious chocolate layer.
- Ensure Butter is Cooled (Not Hot): As mentioned in the recipe notes, it’s critical that your butter is only partially melted and then cooled before you mix it with the sugar and other ingredients. Hot butter will melt the sugar, leading to a greasy dough and potentially oily, dense bars rather than the soft, chewy texture we aim for.
- Don’t Overbake the Bars: Keep a watchful eye on your S’mores Cookie Bars during their final bake. The top layer should be lightly golden brown, and the marshmallow might be bubbling slightly. Overbaking can lead to a dry, hard cookie base and a tough marshmallow layer. Remove them once they look set and golden, even if they seem a little soft in the center—they will continue to set as they cool.
- Cool Completely for Clean Slices: Patience is a virtue when it comes to cutting these bars. While it’s tempting to dive in while they’re warm and gooey, allowing the bars to cool completely at room temperature (at least one hour, preferably longer) is essential. This gives the chocolate and marshmallow layers time to set, ensuring you can make clean, neat slices without everything sticking or falling apart.
- Get Creative with Variations: While the classic S’mores combination is divine, feel free to experiment! You can add a sprinkle of sea salt flakes over the chocolate layer for a gourmet touch, mix in chopped nuts (like pecans or walnuts) into the cookie dough, or even swap out the milk chocolate for dark chocolate or white chocolate chips to change the flavor profile.
Storage Solutions
Leftovers? Here’s How to Keep Them Fresh!
- Cool and Cut: For the best results and easiest handling, always allow your S’mores Cookie Bars to cool completely within the baking pan. Once fully cooled, use the parchment paper overhang to gently lift the entire block of bars out. Transfer them to a cutting board and slice them into individual squares using a sharp knife.
- Store Airtight: To maintain their freshness, place the cut bars in an airtight container. If stacking layers, place a sheet of parchment paper or wax paper between each layer to prevent sticking.
- Keep Fresh: These delightful bars can be stored at room temperature for up to 3 days. For extended freshness, especially in warmer climates, you can refrigerate them for up to 1 week. If refrigerating, allow them to come to room temperature for about 15-20 minutes before serving for optimal gooeyness.
- Freezing for Later: S’mores Cookie Bars also freeze wonderfully! Once completely cooled and cut, arrange the bars in a single layer on a baking sheet and freeze for about an hour until firm. Then, transfer the firm bars to a freezer-safe airtight container or bag, separating layers with parchment paper. They can be frozen for up to 2-3 months. Thaw at room temperature or gently warm in the microwave for a few seconds to restore their gooey texture.
Explore More Delicious Desserts
If you loved these S’mores Cookie Bars, you’re in for a treat with our other fantastic bar recipes. Each one offers a unique flavor and texture profile, perfect for any occasion:
- Funfetti Bars: A cheerful cookie base topped with marshmallows and colorful candy, perfect for celebrations.
- 7 Layer Bars: A classic indulgent treat featuring a delicious graham cracker crust layered with chocolate, butterscotch, nuts, and coconut.
- Carmelitas: Rich caramel and chocolate sandwiched between a hearty oatmeal cookie base and crumb topping.
- Caramel Cookie Bars: Melt-in-your-mouth shortbread cookie bars with a luscious, buttery caramel center.
- Vanilla Cheesecake Bars: Creamy vanilla cheesecake atop a buttery crust, often enhanced with a vibrant berry topping.
S’mores Cookie Bars
Chelsea Lords
25 minutes
21 minutes
46 minutes
14 bars
Equipment
-
8 x 8-inch baking pan or 9 x 9-inch for thinner bars
-
Parchment paper
Ingredients
- 3/4 cup unsalted butter partially melted and cooled
- 3/4 cup light brown sugar firmly packed
- 1 cup all-purpose flour
- 1 cup old fashioned oats do not use quick or steel oats
- 1 teaspoon baking soda
- 1/2 teaspoon salt
- 1 (12-ounce) bag milk chocolate chips
- 1 (7-ounce) jar marshmallow creme I use Jet-Puffed Marshmallow Creme
- 2 graham crackers
Instructions
-
Preheat oven to 350°F (175°C). Line an 8×8 or 9×9-inch baking pan with parchment paper, leaving an overhang on all sides for easy removal, and set aside. An 8×8-inch pan will yield thicker bars.
-
In a large bowl, combine the partially melted and cooled butter with the brown sugar. Mix until creamy. Add the flour, oats, baking soda, and salt. Stir until a thick cookie dough forms. Divide this mixture in half.
-
Press one half of the cookie dough evenly into the bottom of the prepared pan. Bake for 8 minutes, then carefully remove from the oven.
-
Immediately sprinkle the chocolate chips evenly over the warm, baked cookie crust. Warm the marshmallow crème in the microwave for 7 seconds (ensure no metal or foil is present if microwaving). Spoon the warmed marshmallow crème on top of the chocolate chips, then gently spread it into an even layer using a spoon or spatula.
-
Crush the 2 graham crackers into a coarse crumble (using a bag and a wooden spoon works well). Add the crushed graham crackers to the remaining half of the cookie dough mixture and stir to combine. Crumble this mixture evenly over the marshmallow fluff layer.
-
Return the pan to the oven and bake for another 13–15 minutes, or until the top layer is lightly golden brown. Remove from oven and allow to cool completely at room temperature for at least 1 hour before cutting.
-
Using the parchment paper overhang, lift the cooled bars out of the pan. Place on a cutting board and cut into squares with a sharp knife. These bars are best enjoyed within 2–3 days.
Recipe Notes
Storage: Store S’mores Cookie Bars in an airtight container at room temperature for up to 3 days, or refrigerate for up to 1 week. Place parchment paper between layers to prevent sticking.
Nutrition
Calories: 205 kcal |
Carbohydrates: 32.9 g |
Protein: 1.9 g |
Fat: 9.1 g |
Cholesterol: 23 mg |
Sodium: 42 mg |
Fiber: 1 g |
Sugar: 17 g
Nutrition information is automatically calculated and should only be used as an approximation. It may vary based on specific ingredients and brands used.
Loved this S’mores Cookie Bars recipe? Leave a comment below!