
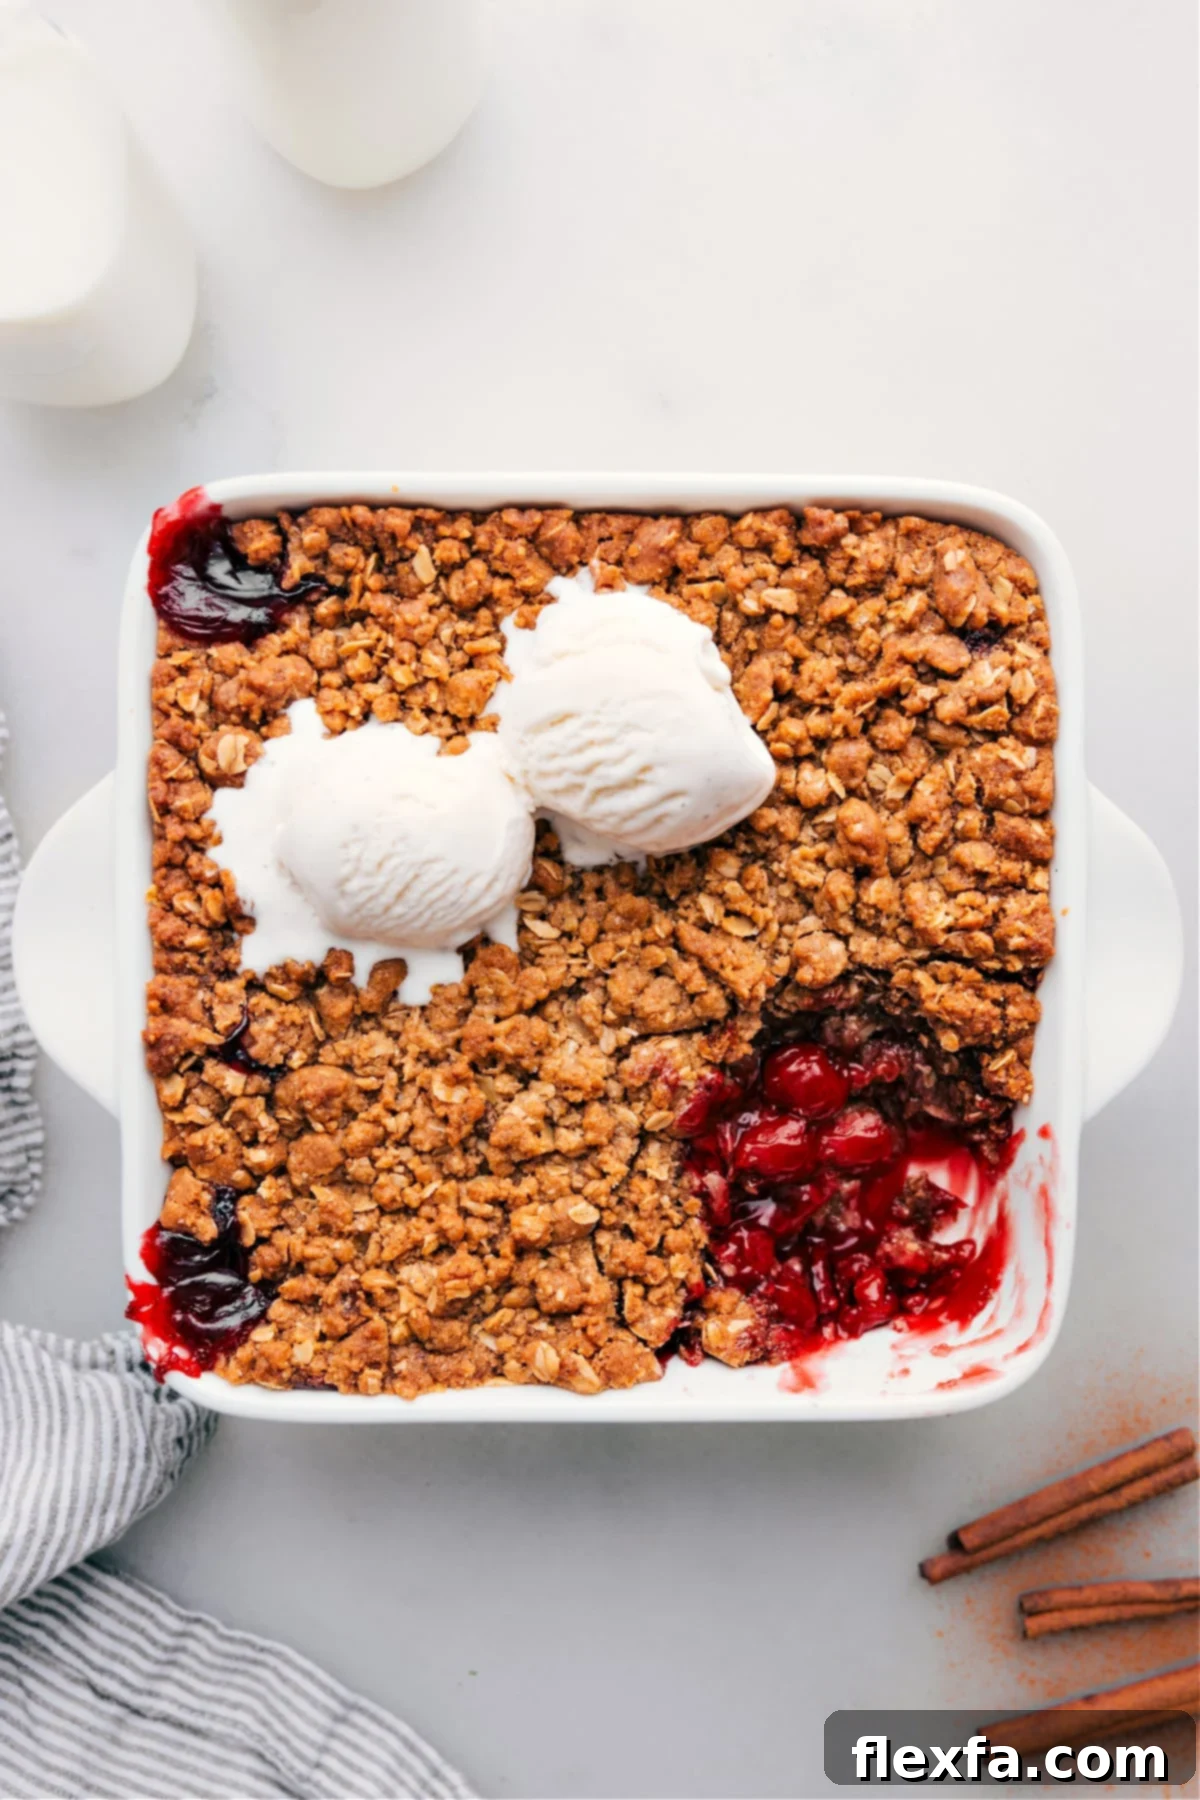
Indulge in the perfect dessert with this quick and delightful Cherry Crisp Recipe! Featuring luscious, saucy cherries crowned with a golden, buttery oat topping, this classic treat is simple to make and irresistibly delicious. Serve it warm with a generous scoop of vanilla ice cream for an unforgettable experience that will have everyone asking for seconds.

Author’s Note
Sweet & Simple Classic Cherry Crisp!
There’s something truly special about a homemade dessert, especially when it’s a classic like cherry crisp. My husband, for instance, has a deep fondness for fruit pies, with apple pie and cherry pie topping his list. While I enjoy baking him a few cherry pies each year, I must confess, the task of pitting countless cherries isn’t exactly my favorite! It’s a labor of love, to be sure, but one that sometimes makes me wish for a simpler path to cherry dessert bliss.
This Easy Cherry Crisp recipe is my go-to solution for those times. It allows me to create a wonderfully comforting and intensely flavorful dessert without the fuss of pie crusts or extensive fruit preparation. The beauty of this recipe lies in its promise of a **quick and easy** preparation while still delivering a dessert that tastes absolutely gourmet. It offers the perfect balance of intense cherry flavor, a delightfully crunchy oat topping, and just the right amount of sweetness to satisfy any craving.
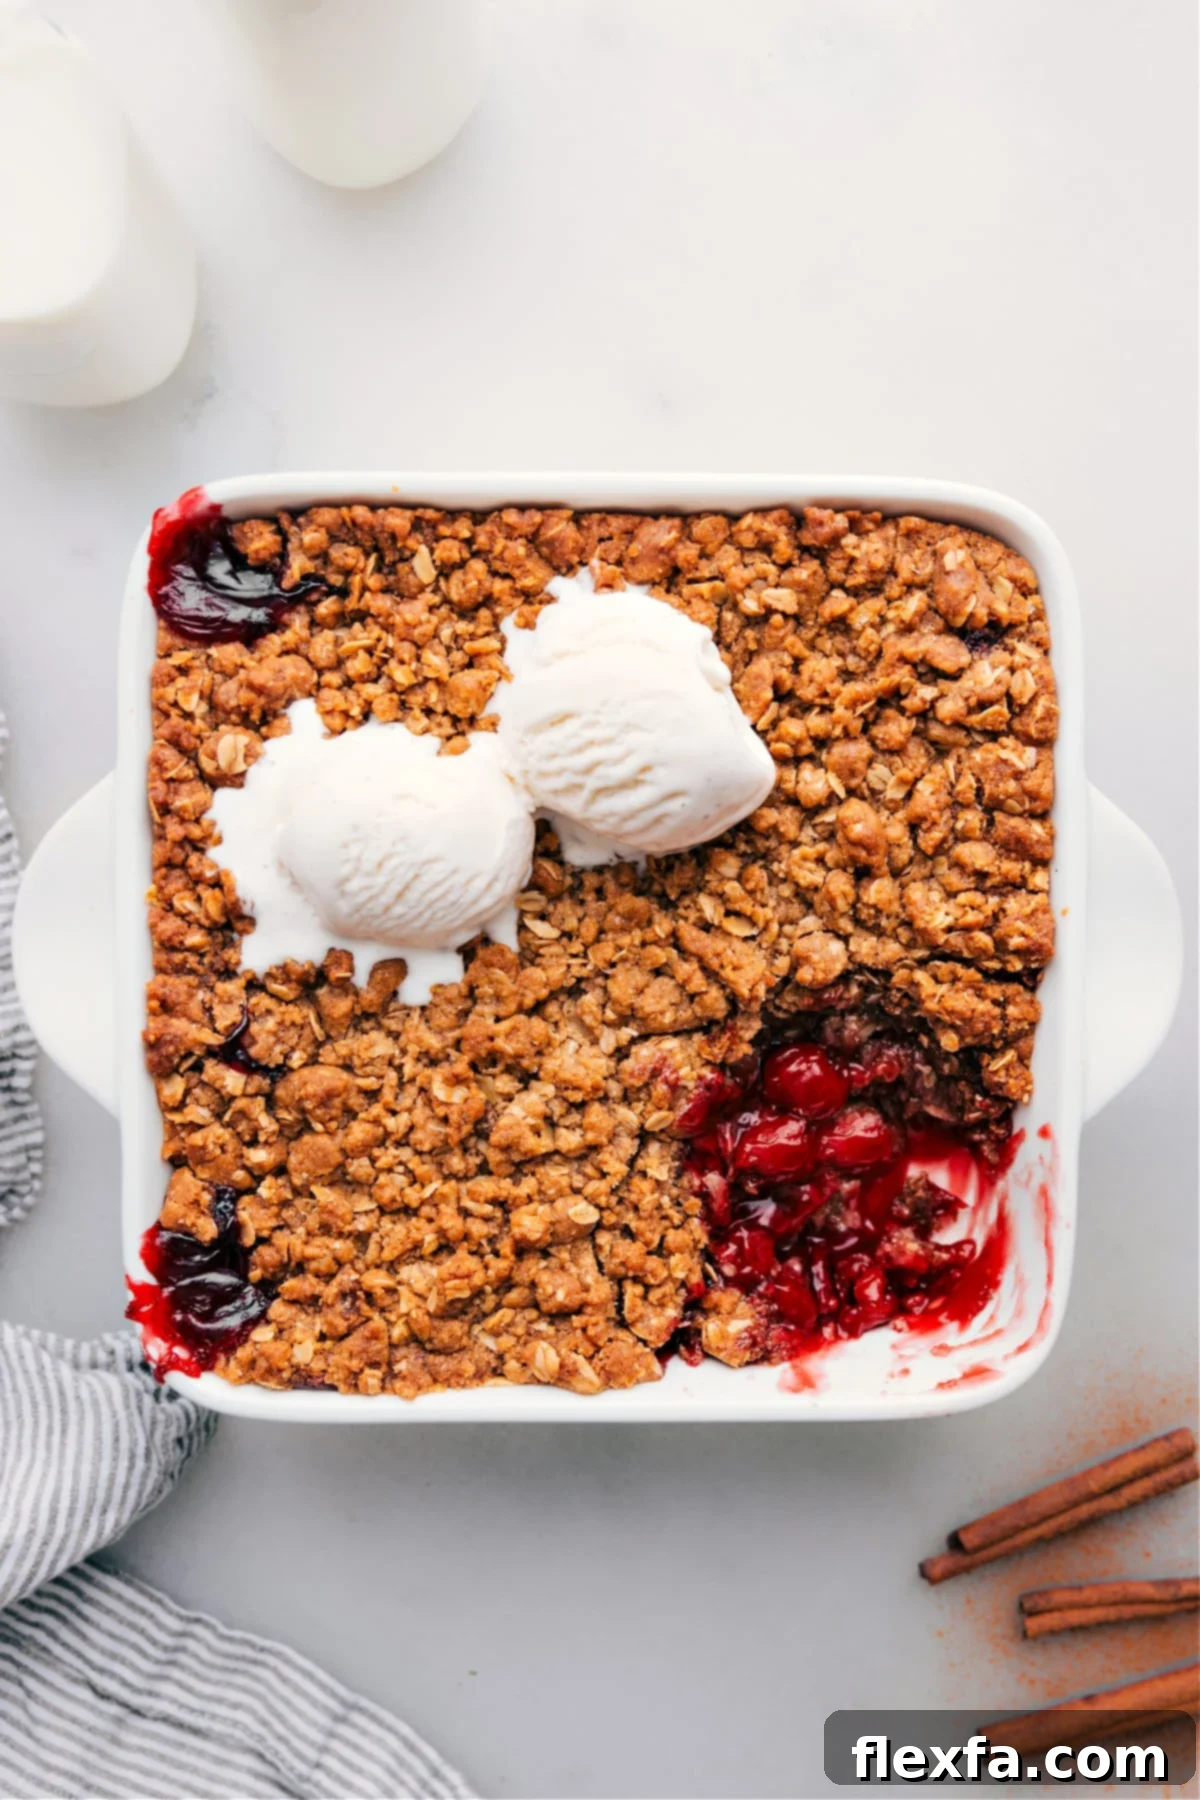
Imagine a spoonful of warm, bubbly cherry crisp, fresh from the oven, topped with a melting scoop of creamy vanilla ice cream or a cloud of homemade whipped cream. It’s a culinary experience that few other desserts can rival, embodying pure comfort and joy in every bite. This recipe isn’t just a dessert; it’s a shortcut to happiness, earning you all the “brownie points” with minimal effort!
Essential Ingredients for Your Perfect Cherry Crisp
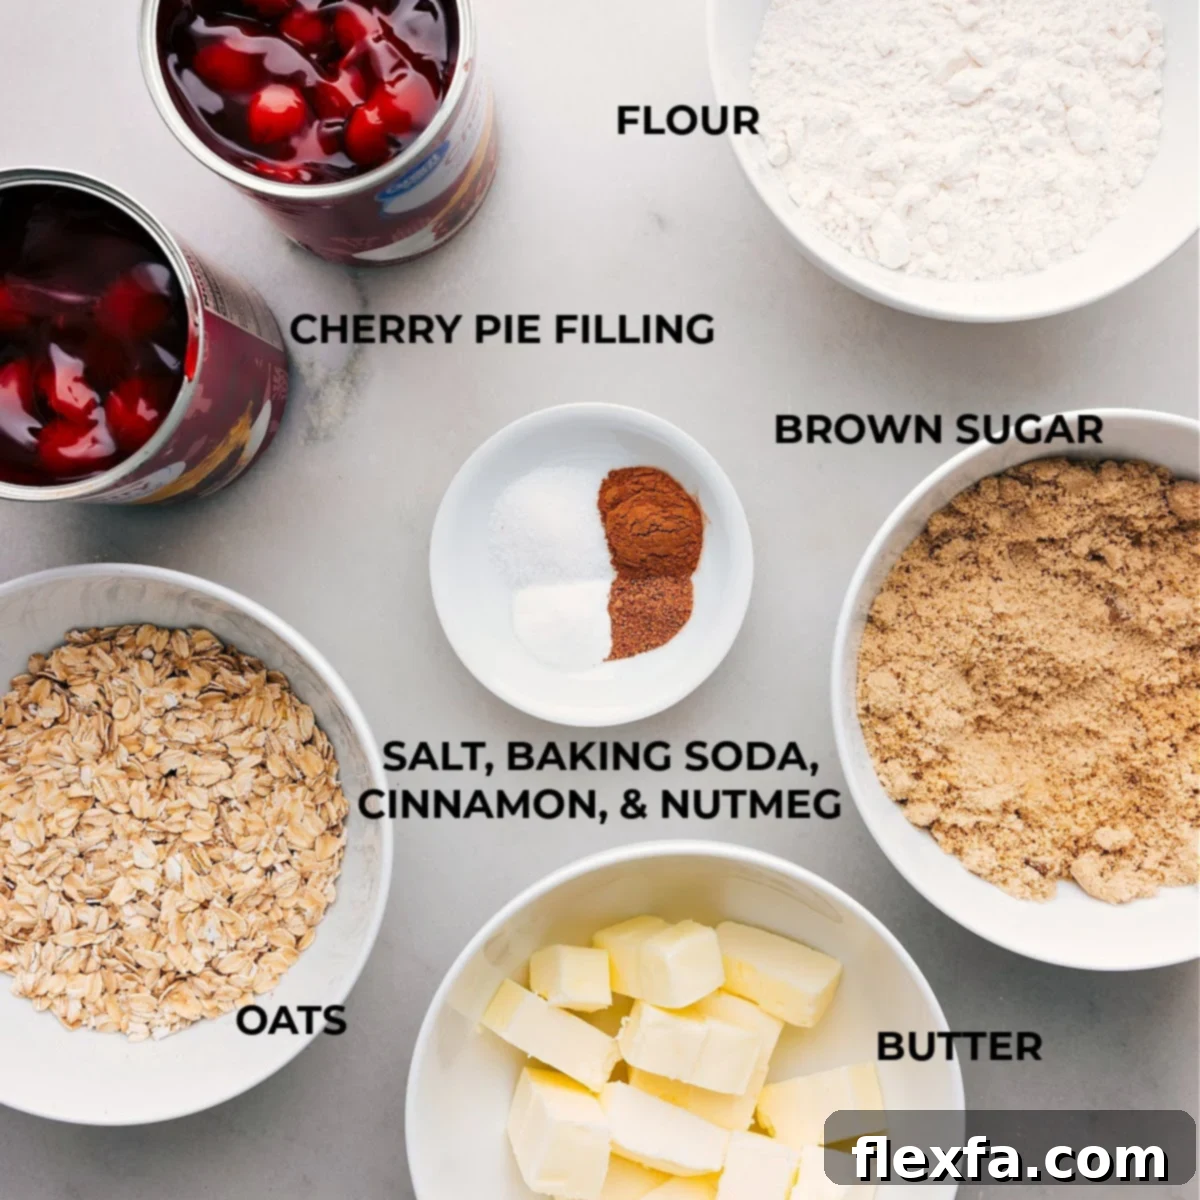
Crafting the perfect cherry crisp relies on a few simple, high-quality ingredients. Here’s a breakdown of what you’ll need and some helpful tips for substitutions or adjustments to fit your dietary needs or preferences.
| Ingredient | Swaps & Tips for Best Results |
|---|---|
| All-Purpose Flour | A staple for the crisp topping, providing structure and texture. For a gluten-free cherry crisp, a 1:1 gluten-free flour blend works beautifully without compromising flavor or texture. |
| Old-fashioned Oats | These are crucial for the signature chewy and crisp texture of the topping. Quick oats can be used for a slightly softer topping, but avoid instant oats as they can become mushy. Ensure they are certified gluten-free if needed. |
| Light Brown Sugar | Adds a deep, caramel-like sweetness and moisture to the topping, enhancing its rich flavor. You can swap with coconut sugar for a lighter, more unrefined sweetness, or use dark brown sugar for an even richer profile. |
| Ground Cinnamon + Nutmeg | These spices are the secret to a warm, inviting aroma and depth of flavor in the crisp topping. Cinnamon is non-negotiable, but you can skip nutmeg if you prefer a milder, less complex spice note, or enhance with a pinch of allspice. |
| Cold Unsalted Butter | Absolutely essential for a truly crumbly and crisp topping. Using cold, cubed butter ensures it doesn’t fully incorporate into the flour mixture, leading to pockets of butter that create steam and flakiness. For a dairy-free cherry crisp, a high-quality vegan butter substitute works wonderfully. |
| Cherries (Fresh, Canned, or Frozen) | The star of the show! Fresh cherries offer the best, brightest flavor when in season. Frozen cherries are a convenient alternative; just ensure they are thawed and excess liquid is drained. Canned cherry pie filling is the fastest option for those busy days, providing a ready-to-use fruit base. See our notes below for preparation tips for each type. |
| Baking Soda | A small amount helps with the crisp’s texture, giving it a slight lift and tender crumb. |
| Salt | A pinch of salt in both the filling and topping balances the sweetness and enhances all the flavors. Don’t skip it! |
How To Master This Easy Cherry Crisp Recipe
Creating this delicious cherry crisp is surprisingly straightforward. Follow these simple steps for a perfect dessert every time.
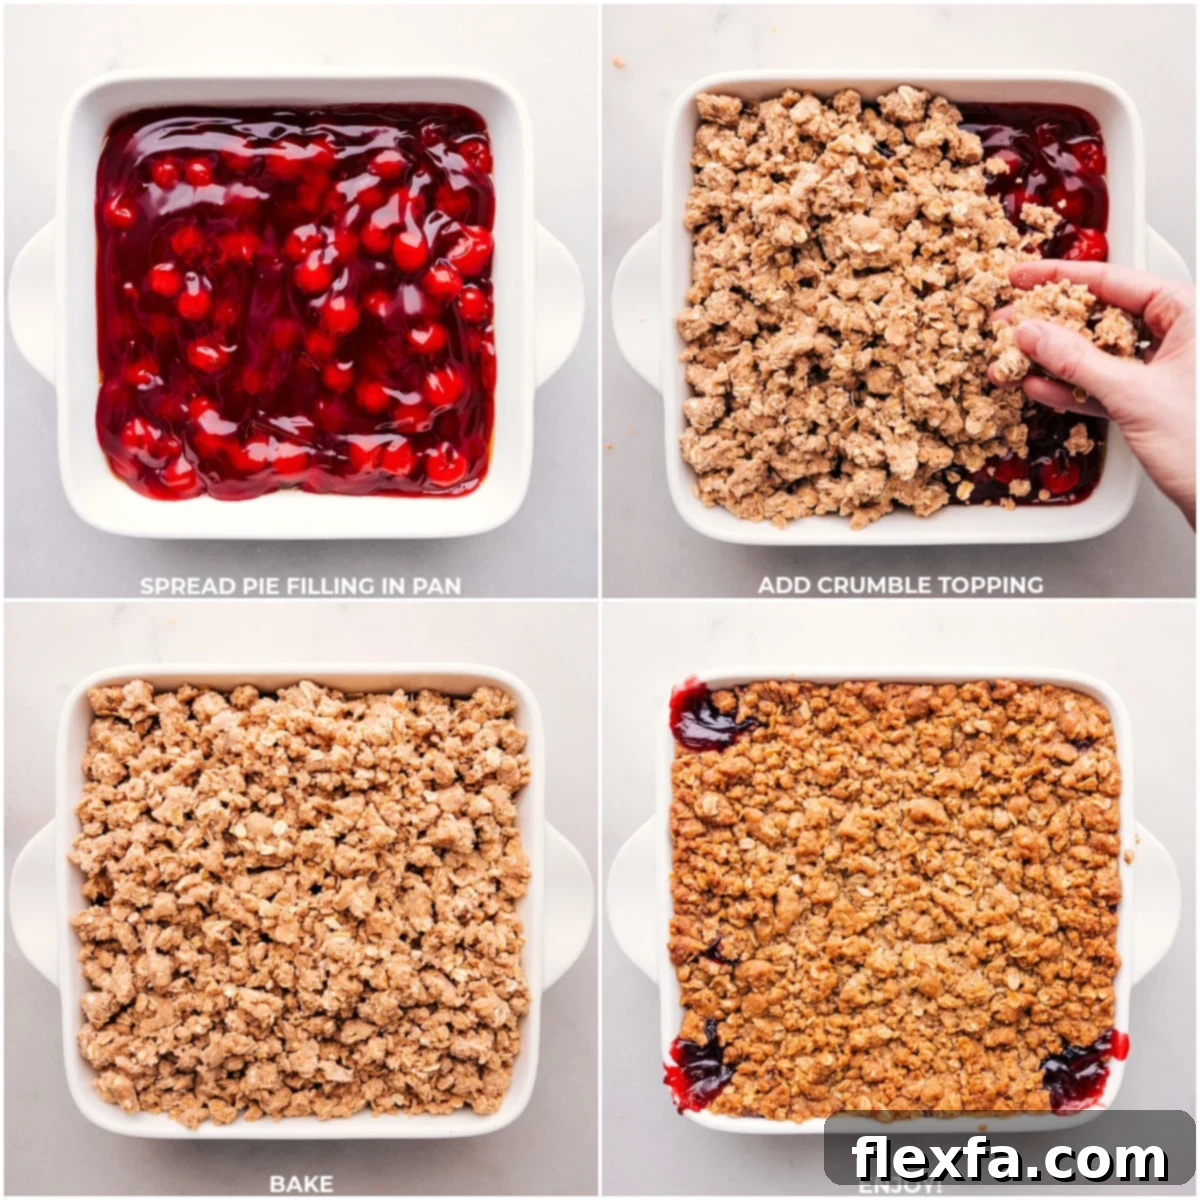
- Prepare Your Baking Dish & Oven: Begin by lining a sheet pan with parchment paper or a silicone baking mat. This is a smart trick to catch any bubbly overflow from the crisp during baking, making cleanup a breeze. Lightly grease a 9×9-inch or 2-quart baking pan – a quick spray or a swipe of butter will do. Set it aside and preheat your oven to 350°F (175°C) to ensure it’s ready for baking.
- Craft the Irresistible Cherry Filling: If you’re using canned cherry pie filling, simply scoop it directly into your prepared baking dish and smooth it out evenly. If opting for fresh or frozen cherries (see Note 1 in the recipe card for full details on preparation), gently combine your pitted cherries with a little granulated sugar, cornstarch (to thicken the juices), vanilla extract, optional almond extract, and fresh orange juice in a large bowl. Once mixed, spread this vibrant cherry mixture into the prepared pan.
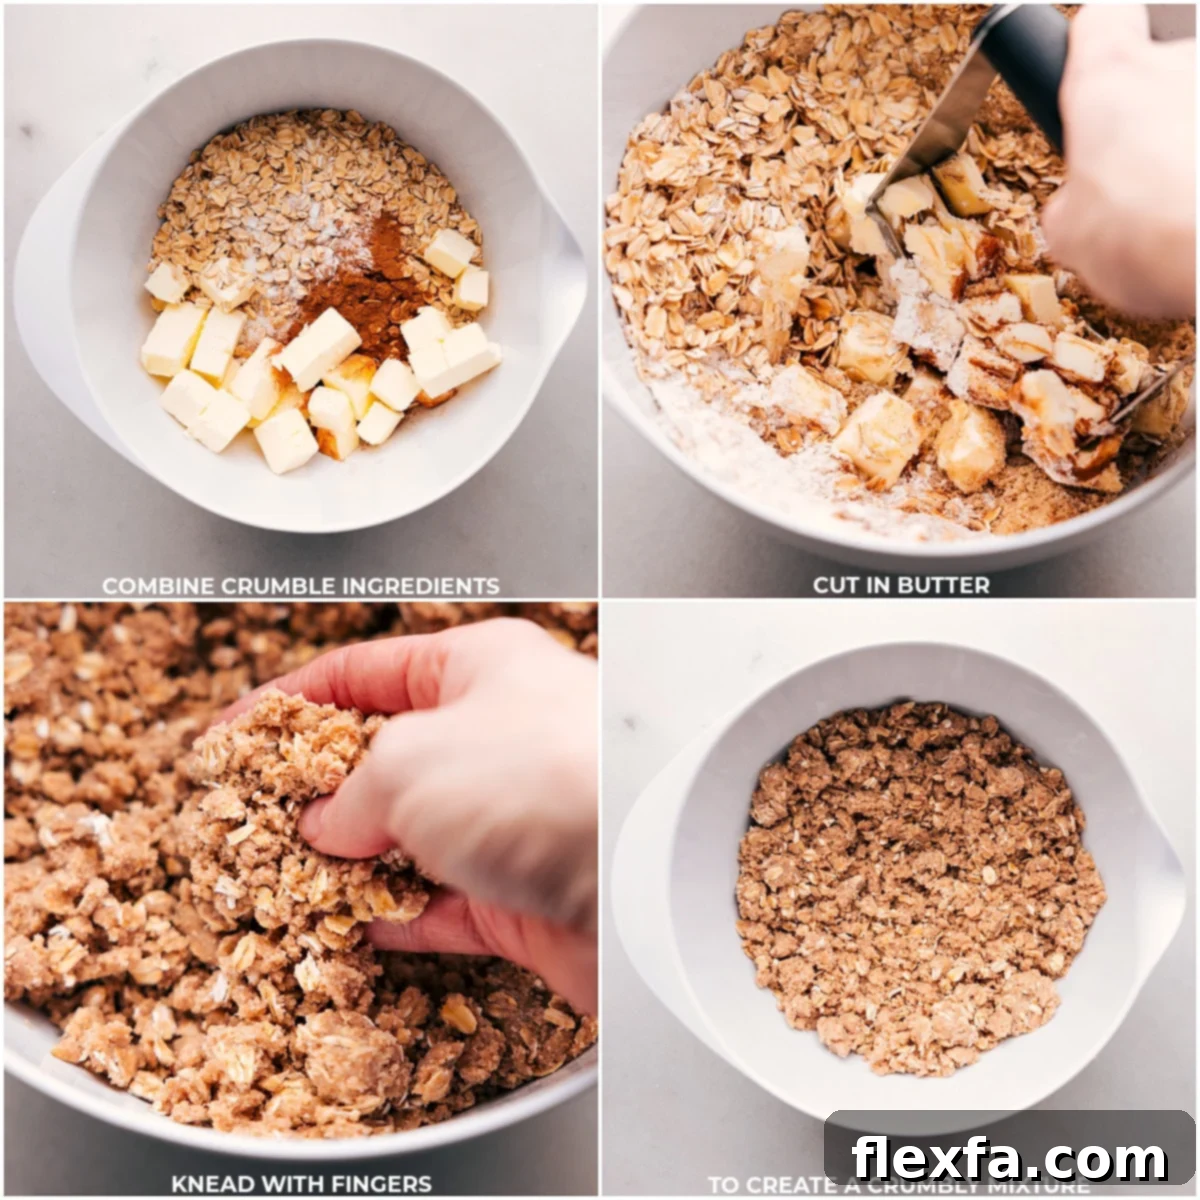
- Mix the Perfect Crumbly Topping: In a separate large mixing bowl, whisk together the flour, old-fashioned oats, light brown sugar, ground cinnamon, ground nutmeg (if using), baking soda, and salt. Make sure these dry ingredients are well combined. Next, add the cold, cubed unsalted butter to the dry mixture. Using a pastry cutter, your fingertips, or even a fork, “cut” the butter into the flour mixture until it resembles coarse crumbs, with some pea-sized pieces remaining. This is key for that perfect crisp texture. If the mixture starts to get warm and greasy, pop it into the fridge for 15-20 minutes to chill before proceeding.
- Assemble & Bake to Golden Perfection: Evenly sprinkle the crumbly oat topping over the cherry filling in your baking dish. Resist the urge to press it down; a loose sprinkle ensures maximum crispiness. Place the baking dish in the center of your lined sheet pan (remember that overflow prevention!) and bake for 40-50 minutes. You’ll know it’s done when the topping is beautifully golden brown and the cherry filling is bubbling enticingly at the edges. If you notice the topping browning too quickly, loosely tent the dish with aluminum foil for the remaining bake time.
- Cool & Serve with Delight: Once baked, remove the cherry crisp from the oven and let it cool on a wire rack for at least 15-20 minutes. This cooling period allows the filling to set slightly, preventing it from being too runny when scooped. While still warm, serve generous portions of this magnificent Cherry Crisp with a big scoop of premium vanilla bean ice cream or a dollop of freshly whipped cream. The warm-cold contrast is truly divine!
Tips for a Flawless Cherry Crisp Every Time
Achieving the perfect balance of gooey fruit and crunchy topping is simple with these expert tips:
- Always use cold butter in the topping for the best texture. Cold butter creates pockets of steam as it melts, which leads to a light, crumbly, and exceptionally crisp topping. If your butter is too warm, the topping will be dense and cake-like.
- Don’t press the crumble into the filling; just sprinkle it lightly on top. Pressing the topping can lead to a less airy, more compact texture. A loose sprinkle allows for better air circulation, resulting in a perfectly golden and crunchy finish.
- Bake on a sheet pan in case the filling bubbles over. Cherry fillings can be quite juicy, and sometimes they decide to overflow the edges of your baking dish. A sheet pan acts as a protective barrier, keeping your oven clean and preventing burnt messes.
- Serve this Cherry Crisp warm with ice cream for the ultimate contrast. The warmth of the bubbling cherry filling and the crisp topping, paired with the cold, creamy sweetness of vanilla ice cream, creates a magical sensory experience. It truly elevates the dessert!
- Adjust Sweetness to Your Taste: Depending on the sweetness of your cherries (especially if using fresh tart cherries), you might want to adjust the amount of sugar in the filling. Taste a cherry first!
Storage Solutions for Your Cherry Crisp
Wondering how to keep your delicious cherry crisp fresh? Here are the best ways to store and enjoy leftovers:
- Refrigerate Leftovers: Once completely cooled, cover the baking dish tightly with plastic wrap or aluminum foil and refrigerate for up to 3 days. The topping may soften slightly over time, but the flavors will still be fantastic. To revive its crispness, reheat uncovered in a 350°F (175°C) oven for 10-15 minutes, or until warmed through and the topping is crunchy again.
- Freeze (Unbaked) for Future Enjoyment: Assemble the cherry crisp as directed, but do not bake. Wrap the entire baking dish tightly with plastic wrap, then with aluminum foil, ensuring it’s airtight. Freeze for up to 3 months. When you’re ready to bake, remove from the freezer, unwrap, and bake from frozen at 350°F (175°C), adding an extra 10-15 minutes to the bake time, or until golden and bubbly. This is a fantastic make-ahead option!
- Freeze (Baked) for Quick Treats: Allow the baked cherry crisp to cool completely. Wrap it well in plastic wrap and then foil, and freeze. To enjoy, thaw it in the refrigerator overnight, then warm it in a 350°F (175°C) oven until heated through. While the topping might not be as crisp as freshly baked, it will still be a delightful treat.
Why You’ll Fall in Love with This Easy Cherry Crisp
This isn’t just another dessert recipe; it’s a culinary hug in a baking dish. You’ll adore this cherry crisp for countless reasons. First, its **simplicity** is unmatched. Forget complicated techniques or endless ingredients; this recipe streamlines the process without sacrificing flavor. Second, the **flavor profile** is exceptional. The tartness of the cherries perfectly complements the sweet, buttery oats, creating a harmonious blend that dances on your palate. It’s comfort food at its finest, evoking nostalgic memories of grandma’s kitchen with every spoonful.
Furthermore, the **texture contrast** is truly addictive. The soft, warm, and juicy cherry filling contrasts beautifully with the crunchy, golden-brown oat topping. This delightful interplay of textures is what makes a crisp so utterly satisfying. It’s also incredibly **versatile**. Whether you’re serving it for a casual weeknight dessert, a family gathering, or a holiday feast, it always fits the bill. Plus, with options for using fresh, frozen, or canned cherries, it’s a dessert you can enjoy year-round, adapting to what’s available and convenient. Prepare to make this your new favorite go-to recipe!
Choosing Your Cherries: Fresh, Frozen, or Canned?
The type of cherries you use can subtly change the flavor and texture of your crisp. Here’s how to decide and prepare them:
- Fresh Cherries: When cherries are in season, they are undoubtedly the best choice for the brightest, most vibrant flavor. Both sweet varieties (like Bing or Rainier) and tart varieties (like Montmorency) work wonderfully. For optimal flavor and balance, I love mixing sweet dark cherries with a few tart Rainier cherries. Remember to pit them thoroughly (a cherry pitter makes this quick!) and ensure they are fully dried after washing to prevent a watery filling. If using only tart cherries, you might want to increase the sugar slightly in the filling mixture.
- Frozen Cherries: A fantastic and convenient option for year-round enjoyment. Look for unsweetened frozen cherries. Before using, thaw them completely in a colander over a bowl to drain excess liquid. Gently press out any remaining liquid with paper towels to prevent your crisp from becoming too watery.
- Canned Cherry Pie Filling: The ultimate time-saver! Pre-sweetened and pre-thickened, canned pie filling requires minimal effort. Simply spoon it directly into your baking dish. Be aware that canned fillings are often quite sweet, so you might want to slightly reduce the brown sugar in your crisp topping if you prefer a less sweet dessert.
Perfect Pairings for Your Cherry Crisp
While vanilla ice cream and whipped cream are classic choices, don’t limit your horizons! Consider serving your warm cherry crisp with a drizzle of rich caramel sauce for an extra layer of decadence, or a dollop of crème fraîche for a sophisticated tangy counterpoint that cuts through the sweetness beautifully. A light dusting of powdered sugar or a sprinkle of toasted slivered almonds can also add an elegant touch and additional texture. For a cozy evening, enjoy it alongside a warm cup of coffee or a glass of dessert wine.
More Delicious Cherry Recipes:
Beverages
Cherry Smoothie Recipe
Breakfast
Cherry Scones
Desserts
Cinnamon Roll Cherry Danish
Salads
Cherry Balsamic Salad Dressing
Print Recipe
Cherry Crisp Recipe
Chelsea Lords
20
45
1
5
6
servings
Video
No video available for display without Javascript.
Equipment
-
Sheet pan (15″ x 10″) lined
-
9 x 9-inch baking pan
-
Pastry cutter
Ingredients
For the Crisp Topping:
- 1 cup all-purpose flour
- 1 cup old-fashioned oats
- 1 cup light brown sugar lightly packed
- 1 teaspoon ground cinnamon
- 1/4 teaspoon ground nutmeg optional
- 1/2 teaspoon baking soda
- 1 teaspoon salt
- 12 tablespoons unsalted butter cold, cubed
For the Cherry Filling:
- 2 (21-ounce) cans cherry pie filling or fresh/frozen cherries, see note 1
Instructions
-
Line a sheet pan with parchment paper or a silicone baking mat and lightly grease a 9×9-inch or 2-quart baking pan. Set aside. Preheat oven to 350°F (175°C).
-
In a large bowl, combine flour, oats, brown sugar, cinnamon, nutmeg, baking soda, and salt. Add cubed cold butter and coat it with the dry mix. Use a pastry cutter and your fingertips to blend the butter until it resembles coarse crumbs. If the mixture warms up, chill it for 20 minutes in the refrigerator.
-
Scoop cherry pie filling (or prepared fresh/frozen cherry mixture) into the 9×9-inch pan and smooth it evenly. Sprinkle the crumble topping evenly over the cherries without pressing it down. Place the baking dish in the center of the lined sheet pan.
-
Bake for 40–50 minutes until the topping is golden brown and the filling bubbles gently at the edges. If the topping browns too much before the filling is bubbly, loosely cover the dish with aluminum foil for the remaining bake time.
-
Cool the Cherry Crisp on a wire rack for 15–20 minutes before serving. This allows the filling to set slightly. Serve warm with vanilla bean ice cream or fresh whipped cream for the ultimate dessert experience.
Recipe Notes
- 4-1/2 cups pitted cherries, halved. For tart cherries, you may wish to increase the sugar slightly. Ensure fresh cherries are fully dried after washing. Thaw frozen cherries and gently press out excess liquid with paper towels.
- 2/3 cup granulated sugar
- 1/4 cup cornstarch
- 1 teaspoon vanilla extract
- 1/8 teaspoon almond extract, optional (enhances cherry flavor)
- 2 tablespoons fresh orange juice (adds brightness)
Storage: Cover cooled leftovers with plastic wrap and refrigerate for up to 3 days. The crisp is best enjoyed the same day it’s baked, as the topping will soften over time. To refresh and regain some crispness, warm leftovers uncovered in a 350°F (175°C) oven for 10–15 minutes.
Nutrition Facts
Calories: 708kcal |
Carbohydrates: 117g |
Protein: 5g |
Fat: 25g |
Saturated Fat: 15g |
Polyunsaturated Fat: 1g |
Monounsaturated Fat: 7g |
Trans Fat: 1g |
Cholesterol: 64mg |
Sodium: 716mg |
Potassium: 337mg |
Fiber: 3g |
Sugar: 36g |
Vitamin A: 1147IU |
Vitamin C: 7mg |
Calcium: 73mg |
Iron: 2mg
Nutrition information is automatically calculated and should only be used as an approximation. It may vary based on specific ingredients and preparation methods.
Enjoyed this recipe? Leave a comment below!
Your feedback makes our kitchen brighter!
Cherry Crisp Recipe FAQs
Absolutely, using canned cherry pie filling is the quickest and easiest option for this recipe. Simply spread it evenly into your baking pan and proceed with adding the crisp topping. It’s a fantastic shortcut that delivers delicious results.
Any variety of cherries will work beautifully in this crisp, whether sweet or tart. For a truly balanced flavor, I recommend mixing sweet dark cherries with brighter, tart Rainier cherries. If you opt for fresh cherries, be sure to pit them. Frozen cherries are also an excellent choice; just remember to thaw and pat them dry to remove excess moisture before use.
Yes, this recipe can be easily adapted to be gluten-free. Simply substitute the regular all-purpose flour with a high-quality 1:1 gluten-free flour blend. Additionally, ensure that the old-fashioned oats you use are certified gluten-free to avoid any cross-contamination.
To prevent a watery cherry crisp, especially when using fresh or frozen cherries, it’s crucial to remove as much excess liquid as possible. If using frozen cherries, thaw them completely and then pat them thoroughly dry with paper towels. For fresh cherries, ensure they are well-drained after washing. Adding cornstarch to the fruit filling also helps to thicken the juices during baking, creating that perfectly luscious, saucy consistency.
Yes, you can definitely prepare this cherry crisp in advance! You can assemble the entire crisp (filling and topping) and then cover it tightly and refrigerate for up to 24 hours before baking. Alternatively, you can follow our freezing instructions in the “Storage Solutions” section to prepare an unbaked crisp up to 3 months ahead, baking it directly from frozen when you’re ready for a warm treat.