

Discover the secrets to crafting heavenly, authentic Italian Gelato right in your own kitchen! After perfecting this Gelato Recipe during an immersive experience in Italy, I’m thrilled to share my two most beloved versions: the intensely rich Homemade Chocolate Gelato and the elegantly classic Stracciatella Gelato.


Author’s Note
Bringing the Essence of Italy Home: My Gelato Journey
Last summer was an unforgettable adventure through Italy, marked by exquisite flavors and culinary discoveries. Among them, a Sicilian-style gelato cooking class stood out, transforming my understanding of this beloved dessert. From the very first spoonful, I was captivated by its unparalleled creaminess and intense flavor. That obsession fueled countless experiments in my own kitchen upon returning home, alongside perfecting my ragu recipe. Homemade Gelato quickly became our cherished summer treat.
Now, after nearly a year of meticulous testing and refinement, I am excited to finally share this authentic Homemade Gelato Recipe. It embodies all the valuable insights and techniques I gathered from that incredible Italian class, allowing you to recreate that magical taste experience for your family and friends. Get ready to churn up some pure joy!
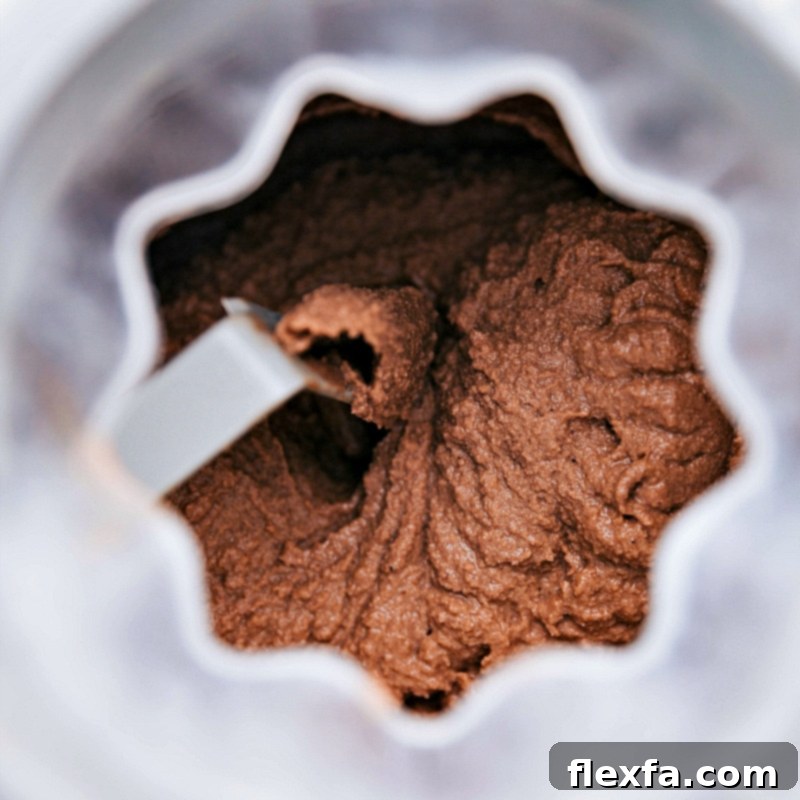
What Makes Authentic Italian Gelato Unique?
While often confused with ice cream, Italian gelato is a distinct frozen dessert with a heritage as rich as its flavor. The differences are subtle yet profound, contributing to its signature dense, silky texture and vibrant taste. Understanding these nuances is key to appreciating and mastering this homemade gelato recipe.
Firstly, gelato contains less fat than traditional ice cream. It typically uses more milk and less cream, and often no egg yolks, resulting in a lighter yet more concentrated flavor. This lower fat content means gelato is served at a slightly warmer temperature than ice cream, allowing its delicate flavors to truly blossom on the palate. When you taste a spoonful of authentic homemade gelato, you’ll notice how the flavors hit you immediately and intensely.
Secondly, the churning process for gelato is significantly slower than for ice cream. This slower churn incorporates less air into the mixture, making gelato much denser and richer. While ice cream can be up to 50% air, gelato typically contains only 20-35% air. This reduced air content gives gelato its signature smooth, elastic texture that melts slowly and luxuriously in your mouth. This gelato recipe utilizes these principles to ensure you achieve that desirable density and mouthfeel, distinguishing it from regular ice cream.
In essence, gelato isn’t just “Italian ice cream”; it’s a completely different culinary art form focused on highlighting the true essence of its ingredients through careful temperature control, precise ingredient ratios, and a distinctive churning method. When you embark on making your own homemade gelato, you’re embracing a time-honored tradition.
Essential Ingredients for Perfect Homemade Gelato
Crafting exceptional homemade gelato starts with selecting the right ingredients. Each component plays a vital role in achieving that characteristic creamy texture and intense flavor. For this gelato recipe, pay attention to these key elements:
- Whole Milk: This is the foundation of our gelato base. Whole milk provides the necessary liquid and a small amount of fat for creaminess without making the gelato heavy. I strongly advise against using lower-fat milk or dairy-free alternatives for this traditional recipe, as they will significantly alter the texture and may result in an icy product.
- Heavy Cream: Used sparingly compared to ice cream, heavy cream adds just enough richness to contribute to the silky mouthfeel without overpowering the milk’s flavor or increasing the fat content too much.
- Cornstarch: A secret weapon in many traditional Italian gelato recipes, cornstarch acts as a stabilizer. It helps to thicken the base and, crucially, inhibits the formation of large ice crystals during freezing. This is vital for maintaining gelato’s signature smooth texture, especially since it has a lower fat content.
- Granulated Sugar: Beyond sweetness, sugar plays a critical role in depressing the freezing point of the mixture, contributing to the gelato’s soft, scoopable consistency.
- Semi-Sweet Chocolate (for Chocolate Gelato): For the rich chocolate gelato version, high-quality semi-sweet chocolate is essential. It provides a deep, authentic chocolate flavor that isn’t overly sweet. Milk chocolate is generally not recommended as it can make the gelato too sweet and less intense, masking the true cocoa notes.
- Dutch Process Cocoa Powder (for Chocolate Gelato): This type of cocoa powder has been treated to reduce its acidity, resulting in a darker color and a smoother, less bitter chocolate flavor. It greatly enhances the depth of the chocolate gelato, giving it that classic indulgent taste.
- Vanilla (for Stracciatella Gelato): For Stracciatella Gelato, the vanilla flavor is paramount. I recommend using vanilla bean paste or the seeds from a fresh vanilla bean for the most intense and authentic vanilla notes. If using vanilla extract, opt for a high-quality pure extract and adjust the amount to your preference, noting that paste or beans offer a superior aromatic profile.
- Bittersweet, Dark, Semi-Sweet, or Milk Chocolate (for Stracciatella Gelato): The chocolate “shards” in Stracciatella offer a delightful textural contrast. You have more flexibility here; choose your preferred type of chocolate. In Italy, dark chocolate is often favored for its robust flavor and elegant contrast with the vanilla base.
- Coconut Oil (for Stracciatella Gelato): A small amount of coconut oil is melted with the chocolate for Stracciatella. This helps the chocolate become fluid enough to drizzle into the churning gelato and creates thin, crispy shards upon contact with the cold mixture, which is the hallmark of true Stracciatella.
- Salt: A tiny pinch of salt acts as a flavor enhancer, balancing the sweetness and intensifying the notes of chocolate and vanilla in both gelato versions. Do not skip this!
Mastering the Homemade Gelato Making Process
Making homemade gelato is a rewarding experience, and following these steps carefully will ensure you achieve the authentic Italian texture and flavor. This guide covers the essential techniques, including a simplified process for creating both Chocolate Gelato and Stracciatella Gelato.
- Prepare the Velvety Base: The heart of any great gelato is its base. Begin by gently heating the whole milk and heavy cream in a large pot until it reaches a low simmer, ideally between 140°F and 175°F. Avoid a rolling boil. For chocolate gelato, this is also the stage where you’ll melt in your chopped semi-sweet chocolate, stirring constantly to prevent burning and ensure a smooth, homogeneous mixture.
- Whisk in Dry Ingredients: In a separate large bowl, combine your dry ingredients—cornstarch, salt, and granulated sugar (and cocoa powder for the chocolate version). Whisk them thoroughly to ensure there are no lumps.
- Temper and Thicken: Gradually ladle some of the hot milk/cream mixture into the dry ingredients, whisking continuously to temper the cornstarch and sugar. This prevents shocking the mixture. Once well combined, pour this entire tempered mixture back into the pot with the remaining hot liquid. Continue to cook over medium-low heat, stirring constantly with a rubber spatula, scraping the bottom of the pot. The mixture will begin to thicken noticeably. Use a reliable candy thermometer to ensure it reaches 170°F (77°C), which is crucial for the cornstarch to fully activate and thicken the base correctly.
- Cool to Room Temperature: Once thickened, remove the pot from the heat. Transfer the base to a clean bowl and let it cool completely to room temperature. Stir in your vanilla extract or paste at this stage.
- Thoroughly Chill the Base: This is a critical step for perfect homemade gelato. Cover the cooled mixture with plastic wrap, pressing the wrap directly onto the surface to prevent a “skin” from forming and to minimize ingredient separation. Refrigerate the bowl until the base is thoroughly chilled—at least 2-3 hours, but ideally 6 hours or even overnight. A colder base churns more efficiently and results in a creamier, smoother gelato.
- Churn to Perfection: Pour your well-chilled gelato base into your ice cream or gelato maker. Follow your appliance’s instructions carefully, churning until the gelato reaches a soft-serve consistency. This typically takes 20-30 minutes, depending on your machine. The goal is a dense yet soft texture.
- For Stracciatella Only: If making Stracciatella Gelato, prepare your melted chocolate (combined with a tiny bit of coconut oil for fluidity) and chopped chocolate. During the last few minutes of churning, slowly drizzle the melted chocolate into the machine. It will instantly harden into delicate shards. Then, stir in the finely chopped chocolate pieces for extra texture and a beautiful presentation.
- Serve Immediately or Store: For the absolute best texture and flavor, enjoy your freshly churned Italian gelato right away. Its soft, dense consistency is truly incomparable at this stage. If storing, transfer it to an airtight container and place it in the freezer.
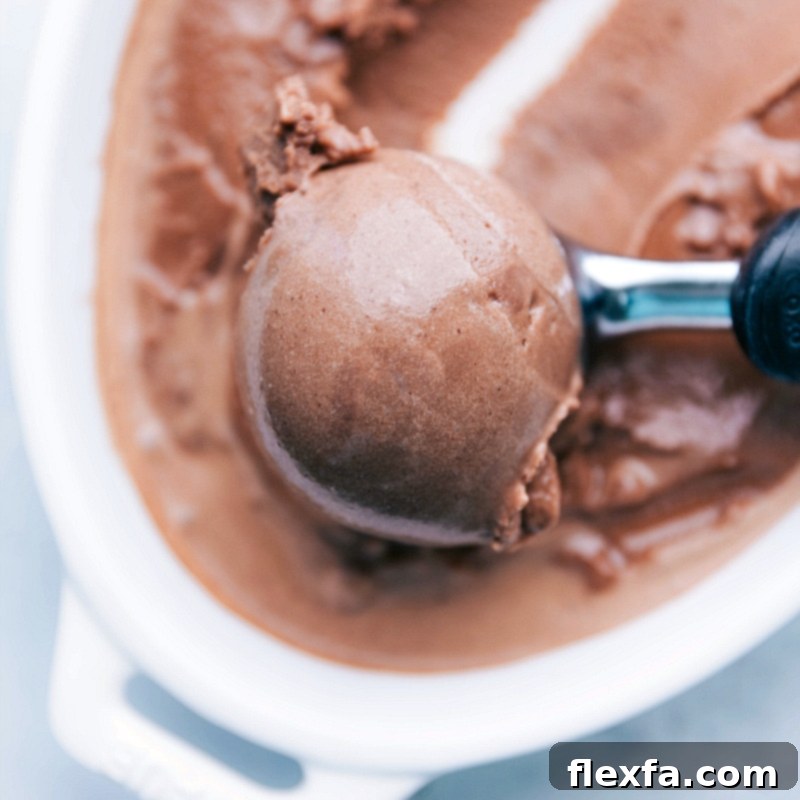
Gelato Making Tips & Frequently Asked Questions
Even with a tried-and-true gelato recipe, a few insider tips and answers to common questions can elevate your homemade gelato experience from good to extraordinary. Dive into these insights to ensure your success.
Gelato, by nature, has a lower fat content and less incorporated air than traditional ice cream, making it more prone to becoming icy and hard in the freezer, especially after prolonged storage. Fat helps to keep frozen desserts soft and scoopable. When gelato freezes for extended periods, the small ice crystals that form during churning can grow larger, leading to that undesirable icy texture. This is precisely why authentic gelato is best enjoyed fresh, directly from the machine. Once frozen solid, its delicate texture and vibrant flavor can diminish. To mitigate this, consider only churning the amount you plan to eat the same day. If you must store it, ensure it’s in a shallow, airtight container with plastic wrap pressed directly onto the surface to minimize air exposure, and allow it to temper at room temperature for a few minutes before serving.
The core differences lie in fat content, churning speed, and serving temperature. Italian gelato typically has less fat (more milk, less cream), is churned at a slower speed to incorporate less air (resulting in a denser product), and is served at a slightly warmer temperature. These factors combine to give gelato its characteristic dense, elastic, and intensely flavorful profile, allowing its ingredients to shine without being masked by excessive fat or extreme cold. It’s a dessert designed for flavor impact and a unique mouthfeel.
Yes, it’s possible, though it requires more effort and the texture may not be as perfectly smooth as with a machine. After preparing and thoroughly chilling your gelato base, pour it into a shallow, freezer-safe metal or glass pan. Freeze for about 30 minutes. Every 30-45 minutes, remove the pan from the freezer and vigorously whisk the mixture with a fork or electric mixer to break up any ice crystals. Repeat this process approximately 6 times, or until the mixture resembles a thick frozen yogurt or slushy. Finally, freeze it until firm enough to scoop (typically about 4 hours total). This manual method helps to mimic the churning process by preventing large ice crystals from forming, aiming for a relatively smooth consistency.
For Chocolate Gelato, I recommend high-quality semi-sweet chocolate. Its balanced sweetness allows the deep cocoa notes to come through without being cloyingly sweet. For Stracciatella Gelato, you have more flexibility. Bittersweet, dark, or semi-sweet chocolate works beautifully for the ribbons and chunks. In Italy, dark chocolate is a popular choice for stracciatella for a more pronounced chocolate flavor contrast with the vanilla base. Avoid overly waxy or low-quality chocolate, as it can result in a less pleasant texture and duller flavor in your homemade gelato. The quality of your chocolate directly impacts the final taste.
Thoroughly chilling your gelato base, ideally for 6 hours or even overnight, is crucial for two main reasons. First, a very cold base churns more efficiently, reducing the time it needs in the machine and minimizing the incorporation of excess air. This contributes to the denser texture of gelato. Second, and most importantly, chilling allows the ingredients, especially the cornstarch and milk proteins, to fully hydrate and develop. This creates a more stable emulsion, leading to a smoother, denser, and less icy final product. Patience in this step truly pays off in the unparalleled quality of your homemade Italian gelato.

Storage Tips for Homemade Gelato
While homemade gelato is undoubtedly at its peak texture and flavor when enjoyed fresh out of the machine, you can store leftovers for a short period. Transfer the gelato into a shallow, airtight container. To minimize ice crystal formation and preserve creaminess, press a layer of plastic wrap directly onto the surface of the gelato before sealing the container. This prevents air from reaching the surface and causing freezer burn or crystallization.
Freeze for up to 2–3 days for best quality. Beyond this, the texture tends to degrade, becoming icier and harder, and the flavors may dull. When ready to serve stored gelato, allow it to sit at room temperature for 5–10 minutes to soften slightly before scooping. This “tempering” step helps restore some of its original scoopable consistency and enhances its flavor, bringing it closer to the fresh experience.
More Delicious Frozen Desserts to Try:
Desserts
Grasshopper Pie
Desserts
Spumoni Ice Cream Recipe
Desserts
Brownie Oreo Ice Cream Bars
Desserts
Cookie Dough Ice Cream Bars

5 from 5 votes
Authentic Homemade Gelato Recipe
By Chelsea Lords
Learn how to whip up creamy Sicilian-style Chocolate and Stracciatella Gelato—rich, smooth, and downright irresistible!
Pin Recipe
Print Recipe
Equipment
- Ice cream maker or gelato maker
- Candy thermometer (recommended for accuracy)
- Large pot
- Large mixing bowls
- Whisk and rubber spatula
- Plastic wrap
- Airtight container for storage
Ingredients
For Rich Chocolate Gelato:
- 4 cups whole milk (do not recommend lower-fat or dairy-less alternatives for best texture)
- 1/2 cup heavy cream
- 3 ounces chopped semi-sweet chocolate (milk chocolate is not recommended)
- 2 tablespoons Dutch process cocoa powder (e.g., Hershey’s special dark)
- 3 tablespoons cornstarch
- 1/16 teaspoon salt (less than 1/8 teaspoon, to balance/intensify flavors)
- 1 cup granulated sugar
- 1 teaspoon vanilla extract
For Classic Stracciatella Gelato:
- 4 cups whole milk
- 3/4 cup + 2 tablespoons heavy cream
- 3 tablespoons cornstarch
- 1/16 teaspoon salt (less than 1/8 teaspoon, to balance/intensify flavors)
- 1 cup granulated sugar
- 1-1/2 teaspoons vanilla bean paste (or 1/2 of 1 (3-inch) vanilla bean, or 2 teaspoons vanilla extract; reduce if sensitive to vanilla)
- 3-1/2 ounces chocolate (bittersweet, dark, semi-sweet, or milk—whatever you prefer; in Italy, dark was used), divided
- 1 teaspoon coconut oil
Instructions
Chocolate Gelato:
- In a large pot, gently bring the whole milk and heavy cream to a low simmer (mixture temperature should be between 140°F and 175°F). Do not allow it to boil vigorously.
- Add the chopped semi-sweet chocolate to the simmering cream mixture. Stir constantly with a rubber spatula, making sure to scrape the bottom of the pot, until the chocolate is fully melted and incorporated into a smooth, homogeneous liquid.
- In a separate large bowl, combine the Dutch process cocoa powder, cornstarch, salt, and granulated sugar. Whisk these dry ingredients until they are thoroughly mixed and lump-free.
- Using a ladle, gradually add about 1 cup of the hot milk/cream/chocolate mixture to the dry ingredients, whisking constantly to temper the mixture. This prevents the cornstarch from clumping. Once smooth, pour the entire tempered mixture back into the pot with the remaining hot liquid.
- Continue to warm the mixture over medium-low heat, stirring constantly, until it thickens. Use a candy thermometer to ensure the mixture reaches 170°F (77°C). This temperature is crucial for the cornstarch to properly thicken the base and eliminate any starchy taste.
- Once the gelato base has thickened and reached the correct temperature, remove it from the heat. Transfer the mixture to a clean bowl and let it cool completely to room temperature. Stir in the vanilla extract. Cover the surface of the chocolate gelato base directly with plastic wrap (to prevent a “skin” from forming and minimize ingredient separation) and refrigerate for at least 2-3 hours, or ideally 6 hours to overnight, until thoroughly chilled.
- Once completely chilled, pour the chocolate gelato base into your ice cream or gelato maker. Churn according to your appliance’s instructions until it reaches a soft-serve consistency. This typically takes 20-30 minutes, resulting in a dense, creamy texture.
- Serve your rich chocolate gelato immediately for the best texture and flavor. If you have leftovers, spoon them into an airtight container and freeze.
Stracciatella Gelato:
- In a large pot, gently bring the whole milk and heavy cream to a low simmer (mixture temperature should be between 140°F and 175°F). Do not allow it to boil vigorously.
- In a separate large bowl, combine the cornstarch, salt, and granulated sugar. Whisk these dry ingredients until they are thoroughly mixed and lump-free.
- Using a ladle, gradually add about 1 cup of the hot milk/cream mixture to the dry ingredients, whisking constantly to temper the mixture. Once smooth, pour the entire tempered mixture back into the pot with the remaining hot liquid.
- Continue to warm the mixture over medium-low heat, stirring constantly, until it thickens. Use a candy thermometer to ensure the mixture reaches 170°F (77°C). This temperature is crucial for the cornstarch to properly thicken and activate.
- Once the gelato base has thickened and reached the correct temperature, remove it from the heat. Transfer the mixture to a clean bowl and let it cool completely to room temperature. Stir in the vanilla bean paste, vanilla bean seeds (if using), or vanilla extract. Cover the surface of the stracciatella gelato base directly with plastic wrap (to prevent a “skin” from forming) and refrigerate for at least 2-3 hours, or ideally 6 hours to overnight, until thoroughly chilled.
- Once completely chilled, pour the stracciatella gelato base into your ice cream or gelato maker. Churn according to your appliance’s instructions until it reaches a soft-serve consistency.
- While the gelato is churning and almost finished (typically in the last 5 minutes), prepare your chocolate drizzle: In a small, microwave-safe bowl, combine 2 ounces of the finely chopped chocolate and 1 teaspoon of coconut oil. Microwave in 15-second bursts, stirring well after each burst, until smooth and fully melted. Transfer this melted chocolate to a small plastic bag, seal it, and snip a tiny corner off the tip with scissors. Slowly drizzle the melted chocolate into the churning gelato. It will instantly harden into delicate, crispy shards – the characteristic “stracciatella.”
- Finely chop the remaining 1.5 ounces of chocolate into small chunks. Stir these into the gelato maker during the last minute or so of churning for additional texture.
- Serve your delightful stracciatella gelato immediately for the best texture and flavor. If you have leftovers, spoon them into an airtight container and freeze.
Recipe Notes
Storage: Store any leftover homemade gelato in a shallow, airtight container in the freezer for up to 2-3 days. For the best texture, press plastic wrap directly onto the surface of the gelato before sealing the container. Always remember that homemade gelato is best enjoyed immediately after churning, as its consistency and flavor may change the longer it’s in the freezer.
Serving Tip: If serving from the freezer, let the gelato sit at room temperature for 5-10 minutes to soften slightly before scooping, allowing it to return to its ideal creamy texture. This tempering step is crucial for enjoying the full flavor and mouthfeel.
Nutrition Information (Approximation)
Calories: 369kcal | Carbohydrates: 55g | Protein: 6g | Fat: 15g | Saturated Fat: 9g | Cholesterol: 30mg | Sodium: 77mg | Potassium: 299mg | Fiber: 1g | Sugar: 49g | Vitamin A: 409IU | Calcium: 198mg | Iron: 1mg
Nutrition information is automatically calculated and should only be used as an approximation.
Enjoyed this authentic Italian gelato recipe? Share your thoughts and leave a comment below!