
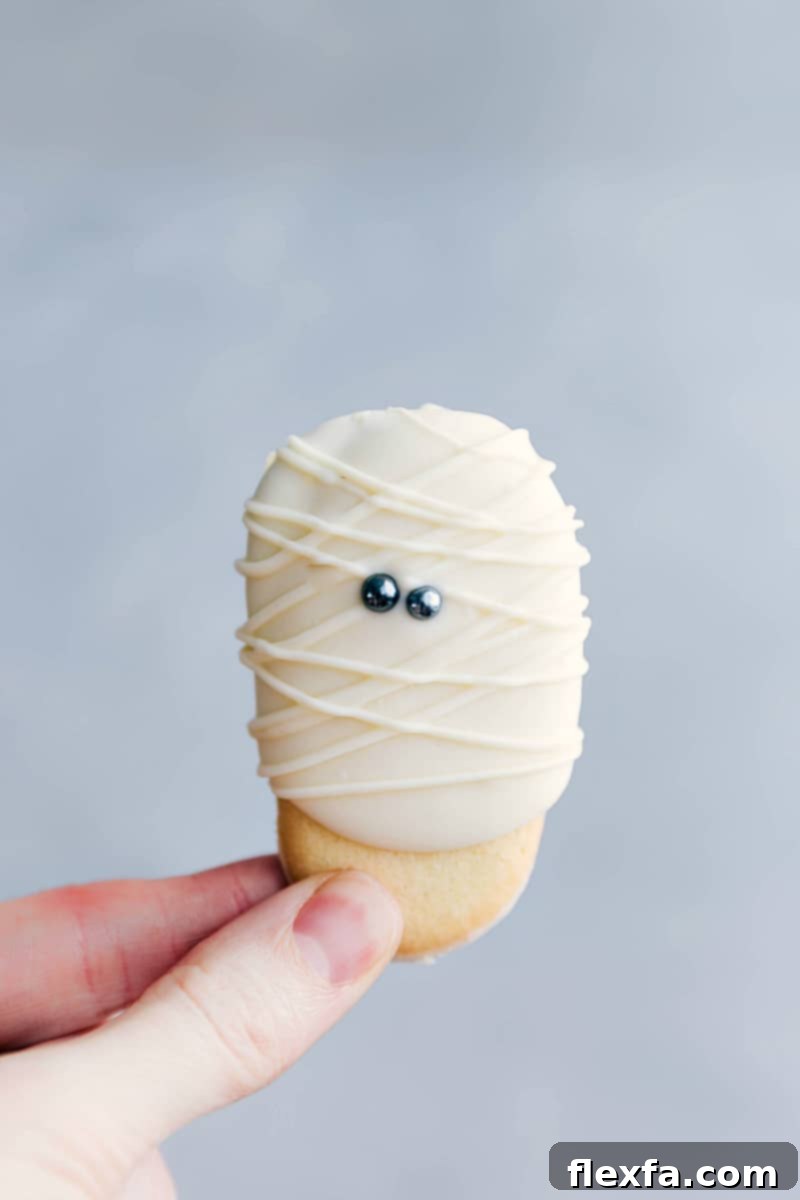
Mummy Cookies are the ultimate Halloween treat, using just four simple ingredients! Transform classic Milano cookies into adorable mummies by dipping them in luscious melted white chocolate, adding black pearl sprinkles for their spooky eyes, and finishing with whimsical chocolate “bandages.” These delightful confections are not only incredibly easy to make but also ridiculously delicious, making them a perfect last-minute addition to any Halloween party or a fun activity for the whole family.
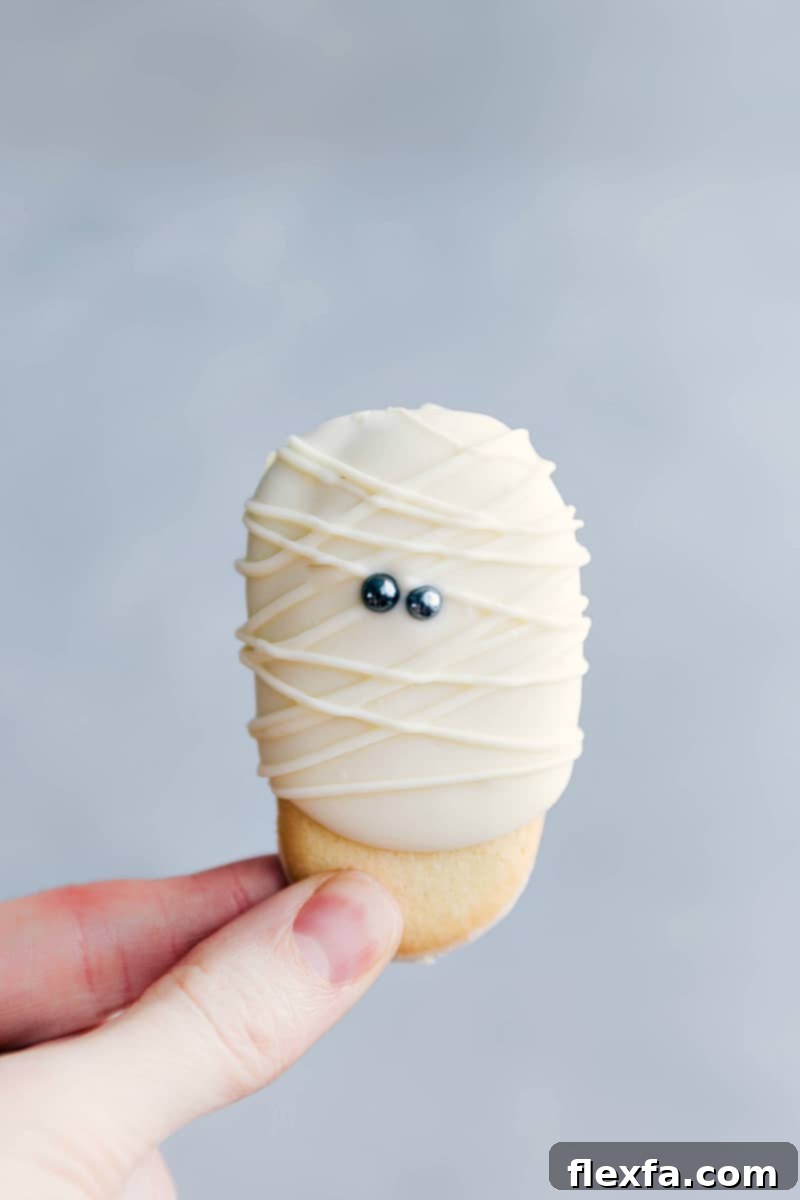
Spooktacular Mummy Cookies: Your Go-To Halloween Treat!
There’s something irresistibly comforting about Pepperidge Farm Milano cookies. Their delicate, crisp texture and rich chocolate filling are a match made in heaven. Now, imagine taking that perfection and elevating it to a festive, spooky level perfect for Halloween! My personal obsession with white chocolate-dipped Milano cookies sparked the idea for these incredibly cute and surprisingly simple Mummy Cookies. After experimenting with Mummy Bark, it became clear that the beloved Milano could be transformed into a charming, bandage-wrapped character with just a few extra touches.
These aren’t just any Halloween treat; they are a tradition in my home. Every year, without fail, my Mummy Cookies are the first to vanish from the dessert table. They strike the perfect balance between fun, festivity, and fantastic flavor, proving that you don’t need complex recipes to create holiday magic. Whether you’re hosting a ghoulish gathering or simply looking for a quick and impressive snack, these mummy cookies are guaranteed to be a monstrous hit.
Why Mummy Cookies Are the Ultimate Halloween Treat
Halloween is a time for costumes, trick-or-treating, and, of course, delicious themed treats! Our Mummy Cookies tick all the boxes for a perfect holiday confection. Here’s why they’ve become a staple:
- Effortlessly Easy: With just four ingredients and minimal steps, even novice bakers can create impressive results. No baking required, just melting and decorating!
- Kid-Friendly Fun: The decorating process is simple enough for children to participate, making it a wonderful family activity. Watch their creativity shine as they bring their mummy characters to life.
- Party Perfect: These cookies are ideal for Halloween parties, school events, or even as a unique gift. They’re robust enough to transport and always elicit “oohs” and “ahhs” from guests.
- Irresistibly Delicious: The combination of crispy Milano cookies with a generous coating of creamy white chocolate is simply divine. The sprinkles add a delightful textural contrast and a touch of playful crunch.
- Quick to Prepare: From start to finish, you can have a batch of these spooky delights ready in about 30 minutes, including chilling time. Perfect for last-minute cravings or unexpected guests!
The Magic is in the Minimal Ingredients: Only Four!
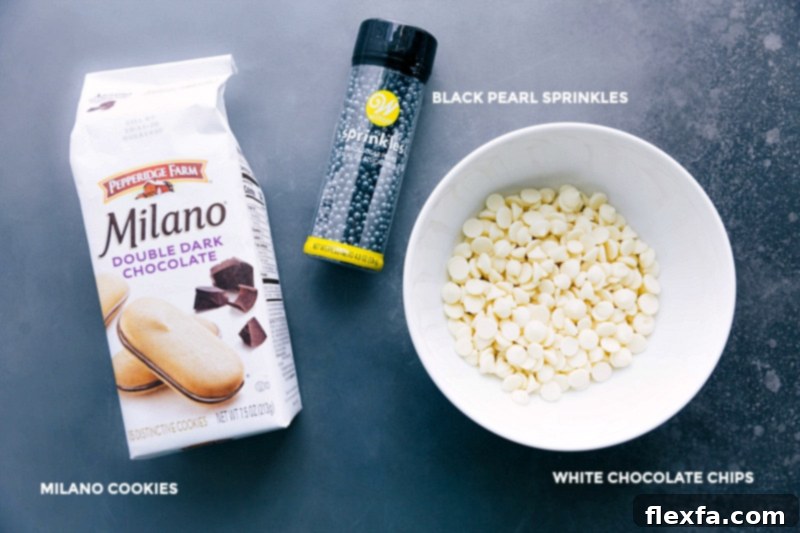
One of the best features of these Mummy Cookies is their simplicity. You only need four core ingredients to create these festive masterpieces. Focusing on quality for each component will truly elevate your final product.
- Milano Cookies: The Perfect Base
The classic Pepperidge Farm Milano cookie is the foundation of this recipe. Their elegant oval shape and chocolate filling make them ideal for transformation. While the original dark chocolate Milano is fantastic, feel free to explore other flavors! I’m particularly fond of the double dark chocolate Milanos, which offer an even richer contrast to the sweet white chocolate coating. For those feeling extra ambitious, you can even make your own Milano-style cookies from scratch, though the store-bought version saves valuable time and delivers consistent results. - High-Quality White Chocolate Chips: Creamy Perfection
The type of white chocolate you use can significantly impact both the taste and the ease of melting. Opt for high-quality white chocolate chips or a white chocolate baking bar for the best results. Brands like Ghirardelli® or Guittard® (note: not sponsored, just personal favorites!) melt smoothly and provide a rich, creamy flavor that complements the Milano cookies beautifully. Avoid using white chocolate candy melts if you’re looking for a truly gourmet taste, as they often contain less cocoa butter and more sugar. However, candy melts are a great option for vibrant colors or if you need a very easy-to-work-with coating that sets quickly. - Vegetable Oil: For a Silky Smooth Finish
Just a small amount of vegetable oil is your secret weapon for achieving a perfectly smooth and dippable white chocolate. It helps to thin the melted chocolate, ensuring it adheres beautifully and evenly to your Milano cookies without becoming clumpy or too thick. You can easily substitute vegetable oil with other neutral oils like canola oil or even coconut oil (unrefined for a subtle coconut flavor, refined for a neutral taste). Vegetable shortening is another excellent alternative that provides similar thinning properties. - Black Pearl Sprinkles: The Spooky Eyes
These small, round black pearl sprinkles are essential for giving your mummies their characteristic spooky eyes. While they can sometimes be a bit elusive in standard grocery aisles, you’ll readily find them at craft and hobby stores (like Michaels or Hobby Lobby), specialty baking and decorating shops, or conveniently online. I typically order mine online to ensure I always have a supply on hand. If black pearl sprinkles are absolutely unavailable, you can get creative with mini chocolate chips, edible black food marker dots, or small dots of black icing applied with a toothpick.
Crafting Your Mummy Masterpieces: A Simple Step-by-Step Guide
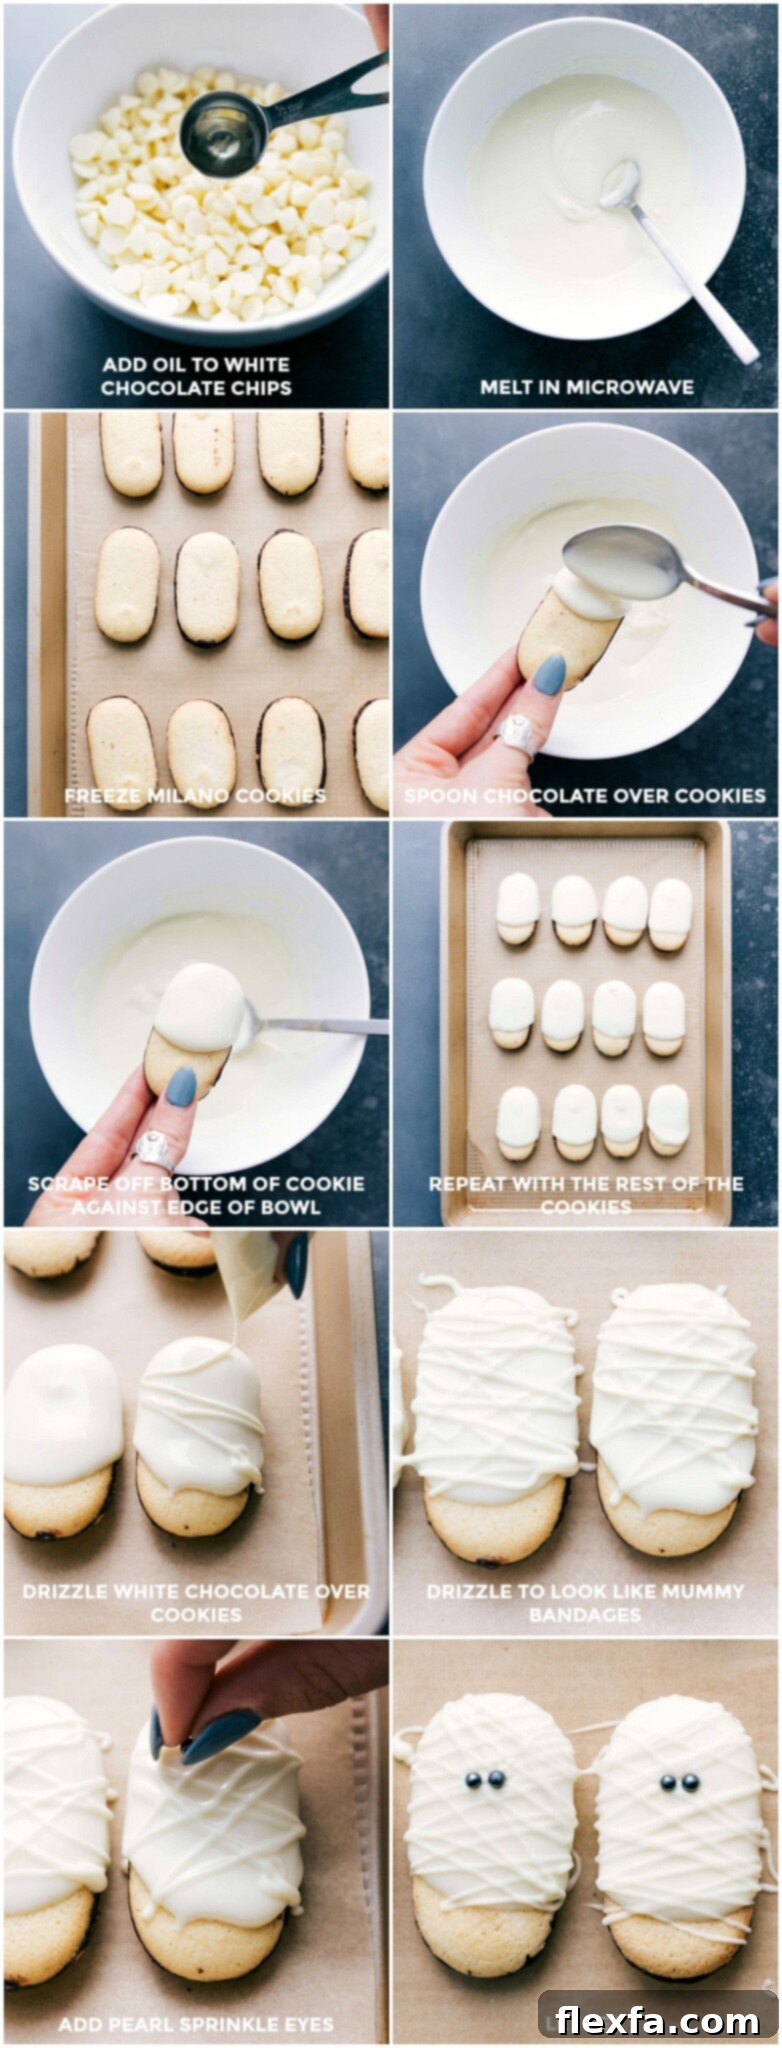
Transforming ordinary Milano cookies into these adorable mummies is a straightforward process that’s both fun and rewarding. Follow these detailed steps, and refer to the photo collage below for a visual breakdown of each stage.
- Prepare Your Workspace and Chill the Cookies.
Begin by lining a large sheet pan (approximately 15″ x 10″) with parchment paper. This non-stick surface will make it easy to remove your finished cookies once the chocolate has set. While you prepare your melting chocolate, place the Milano cookies in the freezer for about 10-15 minutes. Chilling the cookies helps the warm white chocolate set more quickly and reduces the chances of the chocolate melting the cookie’s own chocolate filling, ensuring a cleaner coating. - Perfectly Melt the White Chocolate.
In a sturdy, microwave-safe glass bowl (avoid plastic, as it can retain heat unevenly and scorch chocolate), combine your white chocolate chips and vegetable oil. Microwave the mixture in 30-second intervals, stirring vigorously for 20-25 seconds after each interval. White chocolate can seize or burn easily, so patience and frequent stirring are key. Remember, chocolate continues to melt from residual heat, so it might not look fully melted until after a good stir. Repeat until the chocolate is smooth and completely melted. (See “White Chocolate Melting Tips” below for more detailed advice.) - The Art of Coating Your Milano Mummies.
Working quickly, as white chocolate hardens fast, retrieve your chilled Milano cookies. Hold each cookie over the bowl of melted white chocolate and use a spoon to generously coat the top two-thirds of the cookie. Gently tap off any excess chocolate against the side of the bowl to ensure a smooth, even layer. Place the chocolate-coated cookies back onto your prepared parchment-lined baking sheet. Repeat with all cookies. - Drizzle the Bandages for Authentic Mummy Appeal.
Once all your cookies are coated, transfer about one-quarter of the remaining melted white chocolate into a small resealable plastic bag. Snip a tiny corner off the bag to create a makeshift piping bag. Drizzle the chocolate back and forth over the coated cookies in a zig-zag pattern, creating the “bandages” effect. You can vary the thickness and direction of the drizzles for a more authentic, tattered mummy look. - Bring Your Mummies to Life with Eyes.
Immediately after drizzling the bandages and before the white chocolate has a chance to fully harden, press two black pearl sprinkles onto each cookie to create the mummy’s eyes. Position them towards the top, peeking out from under the “bandages.” Work swiftly here, as the chocolate will set quickly, especially on the chilled cookies. - Chill, Harden, and Enjoy Your Spooktacular Creation!
Allow your decorated Mummy Cookies to harden completely. You can let them set at room temperature, which typically takes about 30-60 minutes, or for faster results and an even firmer set, refrigerate them for about 15-20 minutes. Once firm, they’re ready to be devoured! I personally love eating them straight out of the fridge—the slight crispness of the chocolate is utterly delightful.
Mastering White Chocolate: Essential Melting Tips for Success
Working with white chocolate can sometimes be a bit tricky, as it’s more prone to seizing or burning than dark or milk chocolate. But with a few expert tips, you’ll achieve a smooth, silky consistency every time for your Mummy Cookies.
- The Importance of Quality Chocolate.
As mentioned, invest in high-quality white chocolate chips or a good baking bar. Brands like Ghirardelli® or Guittard® are excellent choices because they contain a higher percentage of cocoa butter, which contributes to a smoother melt and a richer, more luxurious taste. Cheaper white chocolate often contains more sugar and less cocoa butter, making it more difficult to melt evenly and prone to a grainy texture. - Gentle Melting for a Silky Smooth Finish.
Always use sturdy, microwave-safe glass or ceramic bowls for melting chocolate. Plastic bowls can absorb microwave energy unevenly, leading to hot spots that can scorch your chocolate. Microwave your white chocolate chips in short bursts—no more than 30 seconds at a time. After each interval, remove the bowl and stir the chocolate vigorously for at least 20-25 seconds, even if it doesn’t look fully melted. The residual heat will continue to melt the chocolate, and stirring ensures even distribution of heat and prevents scorching. Repeat this process until the chocolate is smooth and free of lumps. - Work Smart, Work Fast.
White chocolate hardens quickly, especially when it comes into contact with chilled cookies. This means you need to work efficiently once your chocolate is melted and your cookies are ready. Have all your components—cookies, melted chocolate, and sprinkles—laid out and within easy reach. If you find the chocolate starting to thicken or harden while you’re still coating cookies, simply pop it back into the microwave for another 5-10 seconds and stir well to re-melt to a workable consistency. - Adjusting Consistency for Perfect Coating.
If your melted white chocolate appears too thick to coat the cookies smoothly, don’t fret! Simply add a tiny bit more vegetable oil (start with 1/4 teaspoon) and stir it in thoroughly. This will help thin the chocolate to your desired coating consistency without altering its flavor. Conversely, if your chocolate is too thin, you can try adding a few more chocolate chips and melting them in, or allow the chocolate to cool slightly and thicken naturally.
Creative Variations and Customization Ideas
While the classic Mummy Cookies are fantastic on their own, there are plenty of ways to get creative and customize them to your taste or party theme. These simple variations can add extra flair and flavor to your Halloween treats:
- Explore Different Milano Flavors: Don’t limit yourself to the classic dark chocolate Milanos. Experiment with seasonal flavors like Pumpkin Spice, Peppermint (for a holiday twist!), or even Mint Chocolate Milanos for an exciting flavor combination with the white chocolate coating.
- Add a Pop of Color: While white is traditional for mummies, you can add food coloring to your melted white chocolate to create vibrant, ghoulish coatings. Think green mummies, purple mummies, or even orange mummies for a truly colorful Halloween spread. Use oil-based food coloring for best results, as water-based colors can cause chocolate to seize.
- Get Creative with Sprinkles: If black pearl sprinkles are hard to find, or if you simply want more variety, consider other edible eyes. Mini chocolate chips can be used as eyes, or you can find edible candy eyes in various colors and sizes at most baking supply stores. You could even add a dash of edible glitter to your “bandages” for a shimmering, ghostly effect.
- Infuse Extra Flavors: A few drops of food-grade extract can dramatically change the flavor profile of your white chocolate. Try a touch of peppermint extract for minty mummies, almond extract for a nutty note, or even a hint of orange extract to complement the orange Milanos if you choose that flavor.
Storing Your Mummy Cookies for Lasting Freshness
Proper storage is key to keeping your Mummy Cookies delicious and picture-perfect for as long as possible. Here’s how to ensure they stay fresh:
- Room Temperature Storage: For immediate enjoyment or if you plan to consume them within a few days, store your leftover Mummy Cookies in an airtight container at room temperature. They will remain fresh and tasty for up to 3 days. Ensure they are placed in a single layer or separated by parchment paper to prevent the decorations from smudging or sticking together.
- Refrigerated Storage: If you want to extend their shelf life, store the cookies in an airtight container in the refrigerator for up to a week. The chill will keep the chocolate firm and prevent melting, especially in warmer climates. Again, arrange them in a single layer or use parchment paper dividers. Bring them to room temperature for about 10-15 minutes before serving, or enjoy them cold for a crisp texture.
- Make-Ahead Tips: These cookies are fantastic for making ahead of time, which is a huge plus when planning for Halloween parties. You can prepare them a day or two in advance and store them as directed. This frees up your time on party day to focus on other preparations.
Frequently Asked Questions About Mummy Cookies
Got questions about whipping up these spooky treats? Here are some common queries and their answers:
- Can I use other types of cookies instead of Milanos?
Absolutely! While Milanos are ideal due to their shape and sturdiness, you can experiment with other flat, oblong cookies like Pirouette wafers or even simple shortbread cookies. The key is to choose a cookie that can hold up to the dipping and decorating process. - What if my white chocolate seizes and becomes clumpy?
White chocolate often seizes if it gets too hot, if even a tiny drop of water gets into it, or if it’s stirred too infrequently during melting. If your chocolate seizes, unfortunately, it’s often difficult to fully recover its smooth texture. You can try stirring in a tablespoon of vegetable oil or melted shortening, but for best results, it’s usually better to start with a fresh batch. Prevention is key: melt slowly, stir often, and keep water away! - Are these Mummy Cookies suitable for school parties or events?
Yes, they are! Their festive appearance and delicious taste make them a huge hit with kids and adults alike. Just ensure there are no specific allergen restrictions (like nuts, if using certain Milano flavors) in place for the event. - Can kids help make these Mummy Cookies?
Absolutely! This is a fantastic kid-friendly activity. Children can help by placing the cookies on the parchment paper, spooning the chocolate (with supervision for younger ones), drizzling the “bandages,” and, of course, adding the all-important sprinkle eyes. It’s a great way to get them involved in holiday preparations.
Conclusion: A Hauntingly Good Treat Awaits!
These 4-ingredient Mummy Cookies are proof that the most impressive Halloween treats can also be the easiest to make. Combining the beloved flavor of Milano cookies with creamy white chocolate and playful sprinkles, they offer a delightful and memorable experience for everyone. So gather your simple ingredients, embrace the spirit of Halloween, and get ready to create a batch of these spooktacular cookies that will disappear faster than a ghost in the night! Happy decorating and happy Halloween!
More Spooky Halloween Treats to Try:
Appetizers
Halloween Appetizers
Desserts
Halloween Popcorn
Desserts
Monster Munch
Quick And Easy
Mummy Bark

Print Recipe
5 out of 5 stars based on 7 ratings
Mummy Cookies
Video
Equipment
-
Sheet pan (15″ x 10″)
-
Parchment paper
Ingredients
- 1 (7.5-ounce) package Milano cookies
- 1 cup white chocolate chips see note 1
- 1/2 tablespoon vegetable oil
- 32 black pearl sprinkles
Instructions
-
Line a sheet pan with parchment paper. Freeze cookies while melting the chocolate.
-
Microwave white chocolate and oil in 25-second intervals, stirring between each until melted.
-
Transfer 1/4 of the melted chocolate to a resealable plastic bag, seal, and snip the tip.
-
Spoon remaining chocolate over the top 2/3 of the cookies. Tap off excess and place back on the sheet.
-
Drizzle chocolate from the bag to create “bandages.”
-
Add two sprinkle eyes to each cookie. Chill and enjoy!
Recipe Notes
Storage: Store leftover Mummy Cookies in an airtight container at room temperature for up to 3 days or in the fridge for up to a week. Keep them in a single layer to avoid smudging the decorations.
Nutrition
Calories: 140kcal |
Carbohydrates: 17g |
Protein: 2g |
Fat: 8g |
Saturated Fat: 4g |
Cholesterol: 3mg |
Sodium: 69mg |
Potassium: 68mg |
Fiber: 1g |
Sugar: 14g |
Vitamin A: 4IU |
Vitamin C: 1mg |
Calcium: 32mg |
Iron: 1mg
Nutrition information is automatically calculated, so should only be used as an approximation.