
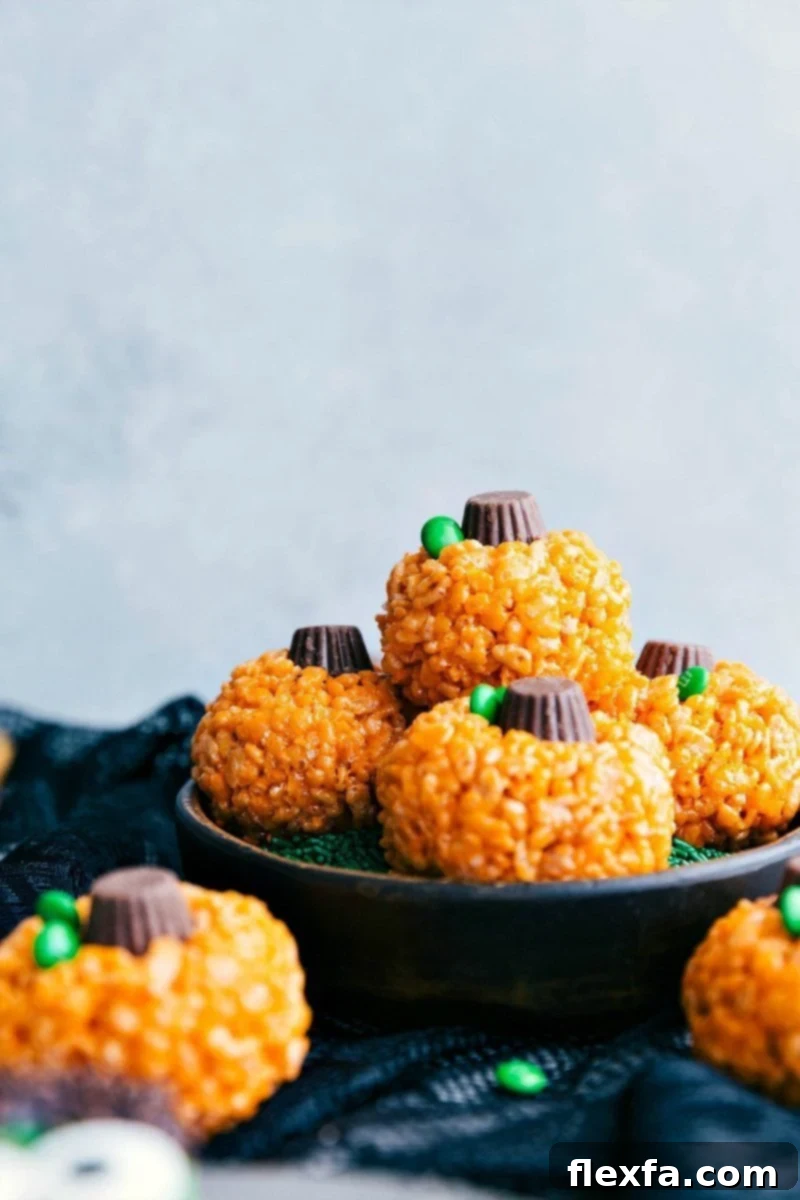
Welcome to the ultimate guide for creating 5 super easy and delightfully spooky Halloween treats! Whether you’re hosting a ghoulish gathering, planning a cozy family night, or simply craving some festive sweets, these recipes are designed for maximum fun with minimal effort. We’ll be whipping up adorable mummy cookies, eerie graveyard pudding cups, vibrant Frankenstein and pumpkin krispies, and charming double-sided Halloween sandwich cookies. Get ready to infuse your Halloween celebration with homemade magic!
MUMMY MILANO COOKIES: A SPOOKY SWEET TREAT
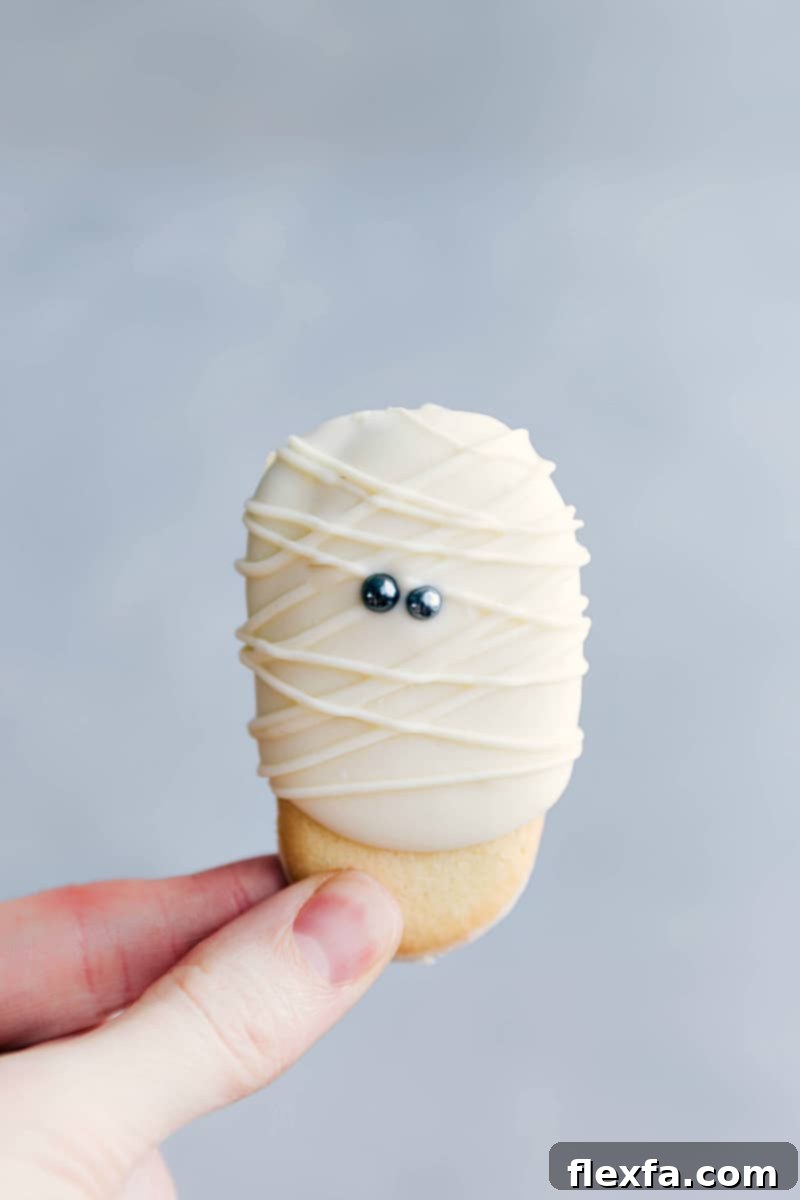
These Mummy Milano Cookies are an absolute Halloween favorite, combining the elegant simplicity of store-bought Milano cookies with a whimsical, ghostly transformation. They are incredibly easy to make, making them perfect for busy parents, first-time bakers, or anyone looking for a quick yet impressive Halloween dessert. The crisp chocolate cookie base perfectly contrasts with the sweet white chocolate “bandages” and the playful candy eyes, creating a treat that’s as delicious as it is adorable.
- To keep things incredibly simple and save time, these mummy cookies start with readily available Milano cookies. However, if you enjoy baking from scratch and want to elevate the experience, feel free to use your own homemade Milano cookie recipe as the base.
- For the eyes, while black pearl sprinkles offer a classic mummy look, mini chocolate chips are an excellent alternative and work just as well, providing a slightly different texture and flavor.
- For an extra touch, consider using different colored candy eyes (like green or blue) to give your mummies a unique personality!

Halloween Treats: Mummy Milano Cookies
Chelsea Lords
Simple to make mummy cookies made out of Milanos! These ghostly treats are perfect for any Halloween gathering, combining convenience with classic spooky charm.
15
15
1 package Milano cookies
Equipment
-
Sheet pan (15″ x 10″)
-
Parchment paper
-
Resealable plastic bag or piping bag with a #2 tip
Ingredients
Instructions
-
Line a sheet pan with parchment paper. This will provide a non-stick surface for your dipped cookies and make cleanup much easier. Set the prepared pan aside.
-
White chocolate tends to harden quickly, so it’s best to work in smaller batches. In a microwave-safe bowl, combine 1/2 cup white chocolate chips with 1/4 tablespoon of vegetable oil. The oil helps to thin the chocolate slightly, making it smoother for dipping and coating.
-
Microwave the mixture for 30 seconds. Remove and stir well. Continue microwaving in shorter intervals of 15-25 seconds, stirring thoroughly after each interval, until the chocolate is completely melted and smooth. If the chocolate still seems too thick, add a tiny bit more vegetable oil (about 1/4 teaspoon at a time) and stir until desired consistency is reached.
-
Gently hold a Milano cookie in one hand. Using a spoon in your other hand, generously spoon the melted white chocolate over the top two-thirds of the cookie. Ensure an even coating.
-
Lightly tap the edge of the cookie against the side of the bowl. This helps remove excess chocolate and creates a smooth, even coating. Avoid dipping the entire cookie directly into the chocolate, as the dark chocolate from the Milano cookie might mix with and discolor the white chocolate.
-
Carefully place the dipped cookies onto the prepared parchment-lined sheet pan. Allow them to dry and harden completely. This can be done at room temperature or in the refrigerator for quicker setting (about 10-15 minutes).
-
Repeat the melting and dipping process with the remaining white chocolate and Milano cookies, working in batches as needed to keep the chocolate in a workable state.
-
Once all cookies are dipped and dried, gather any leftover melted white chocolate. If it has started to thicken, microwave it for another 10-15 seconds until it’s very melted and fluid. Transfer this melted chocolate into a small resealable plastic bag or a piping bag fitted with a #2 tip.
-
Snip a very tiny corner off the plastic bag (or use your piping tip). Pipe thin, horizontal lines of melted white chocolate across the top two-thirds of each cookie. Overlap these lines slightly to create the appearance of mummy bandages, leaving a small gap for the “eyes.”
-
While the piped chocolate is still wet, carefully secure two black pearl sprinkles (or mini chocolate chips) onto each cookie to create the mummy’s eyes. Allow the cookies to set completely before handling or serving.
Nutrition
Serving: 1 serving
|
Calories: 140 kcal
|
Carbohydrates: 17g
|
Protein: 2g
|
Fat: 8g
|
Cholesterol: 3mg
|
Sodium: 69mg
|
Fiber: 1g
|
Sugar: 14g
Nutrition information is automatically calculated, so should only be used as an approximation.
GHOULISHLY GOOD GRAVEYARD PUDDING CUPS
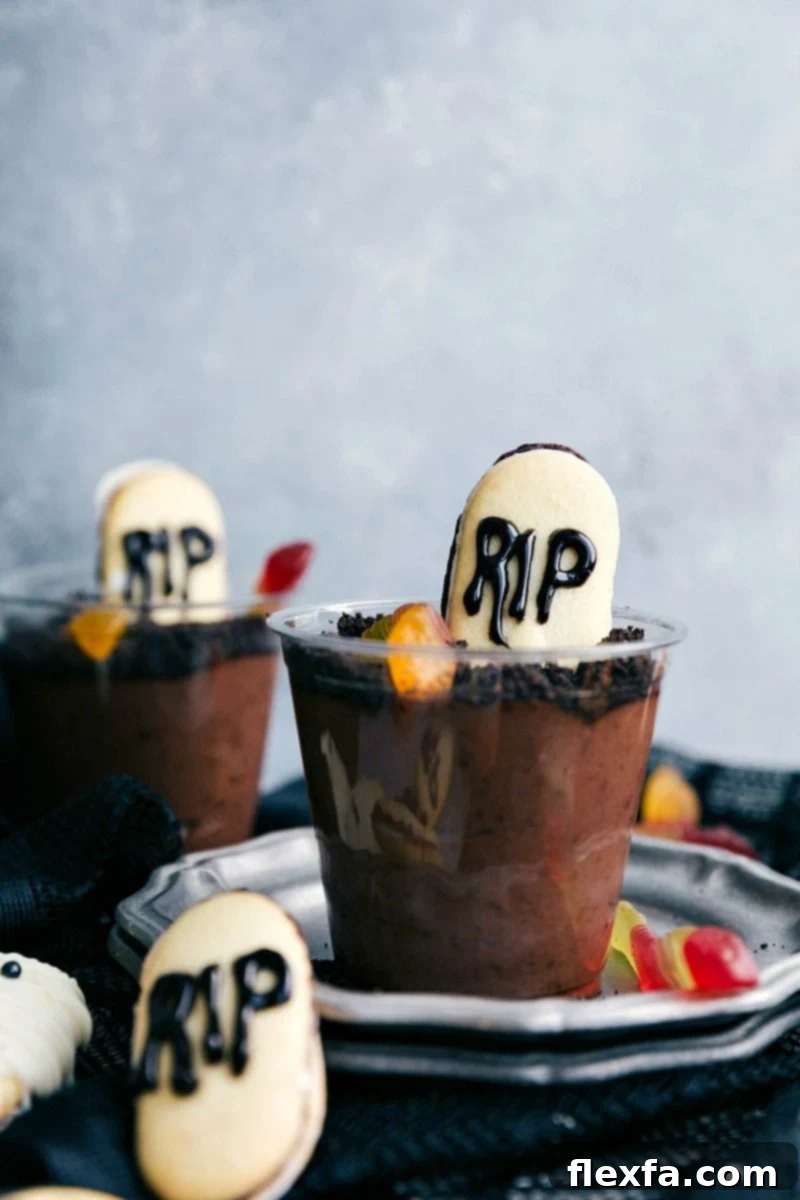
These Graveyard Pudding Cups are a classic Halloween treat that never fails to delight both children and adults. They are incredibly simple to assemble, requiring no baking, and offer a fantastic canvas for creative spooky decorations. With layers of rich chocolate pudding and “dirt” made from crushed cookies, topped with tombstone-shaped cookies and gummy worms, these cups bring a fun, eerie vibe to any Halloween celebration. They are also highly customizable, allowing you to easily adjust ingredients and decorations to suit your taste and availability.
- If you’re making just a few of these delightful Halloween treats, consider checking out local dollar stores for affordable plastic cups or trifle containers. They often have themed options that add to the spooky aesthetic without breaking the bank.
- While store-bought chocolate instant pudding mix makes this recipe incredibly quick, you can easily elevate the flavor by using your favorite homemade chocolate pudding recipe. This allows for a richer, more customizable taste.
- For the “dirt” layer, any chocolate sandwich cookie will work perfectly. There’s no need to meticulously remove the creme filling; simply pulse the entire cookies in a food processor or crush them in a resealable bag until fine crumbs are formed.
- Get creative with your graveyard decorations! Besides Milano tombstones and gummy worms, you could add candy pumpkins, candy corn, or even miniature plastic spiders for extra fright factor.

Graveyard Pudding Cups
Chelsea Lords
Easy-to-make pudding cups featuring crushed chocolate sandwich cookies for “dirt” and decorated cookies as spooky tombstones. A classic, fun, and delicious Halloween treat!
10
10
8 pudding cups; depending on the size of cups
Ingredients
Instructions
-
Prepare the instant chocolate pudding according to the package directions, typically by whisking with cold milk until thickened. Once prepared, use a spatula to gently fold in the completely thawed whipped topping. Continue folding until the mixture is smooth and evenly combined, creating a lighter, creamier pudding.
-
Fill your chosen plastic cups or serving dishes with the pudding mixture. For the “dirt” topping, crush the Oreos (or any chocolate sandwich cookies) into fine crumbs. A blender or food processor works best for this, or you can place them in a resealable bag and crush with a rolling pin. There’s no need to remove the creme filling; just crush the whole cookies. To prevent soggy cookie crumbs, add this “dirt” layer right before serving.
-
For the tombstones, take your Milano cookies. Using black edible food gel or an edible food marker, carefully write “RIP” (Rest In Peace) on each cookie. You can also draw other spooky symbols like crosses or skulls.
-
Just before you plan to serve, gently insert a decorated Milano cookie into the center of each pudding cup, standing it upright to resemble a tombstone. If desired, drape one or two gummy worm candies over the edge of the cup or have them peeking out from the “dirt” for a truly creepy effect. Serve immediately for the best texture and flavor.
Recipe Notes
Storage: These graveyard pudding cups are best enjoyed fresh, as the crushed Oreo “dirt” can become soft and soggy if stored for too long with the pudding. If you need to prepare them in advance, store the pudding mixture and crushed cookies separately and assemble just before serving. Leftovers, if any, should be covered and refrigerated, but consume within a day for optimal texture.
Nutrition
Serving: 1 serving
|
Calories: 401 kcal
|
Carbohydrates: 60.7g
|
Protein: 3.4g
|
Fat: 16.1g
|
Cholesterol: 0.8mg
|
Sodium: 466.2mg
|
Fiber: 0.4g
|
Sugar: 11g
Nutrition information is automatically calculated, so should only be used as an approximation.
CREATIVE FRANKENSTEIN & PUMPKIN RICE KRISPIES TREATS
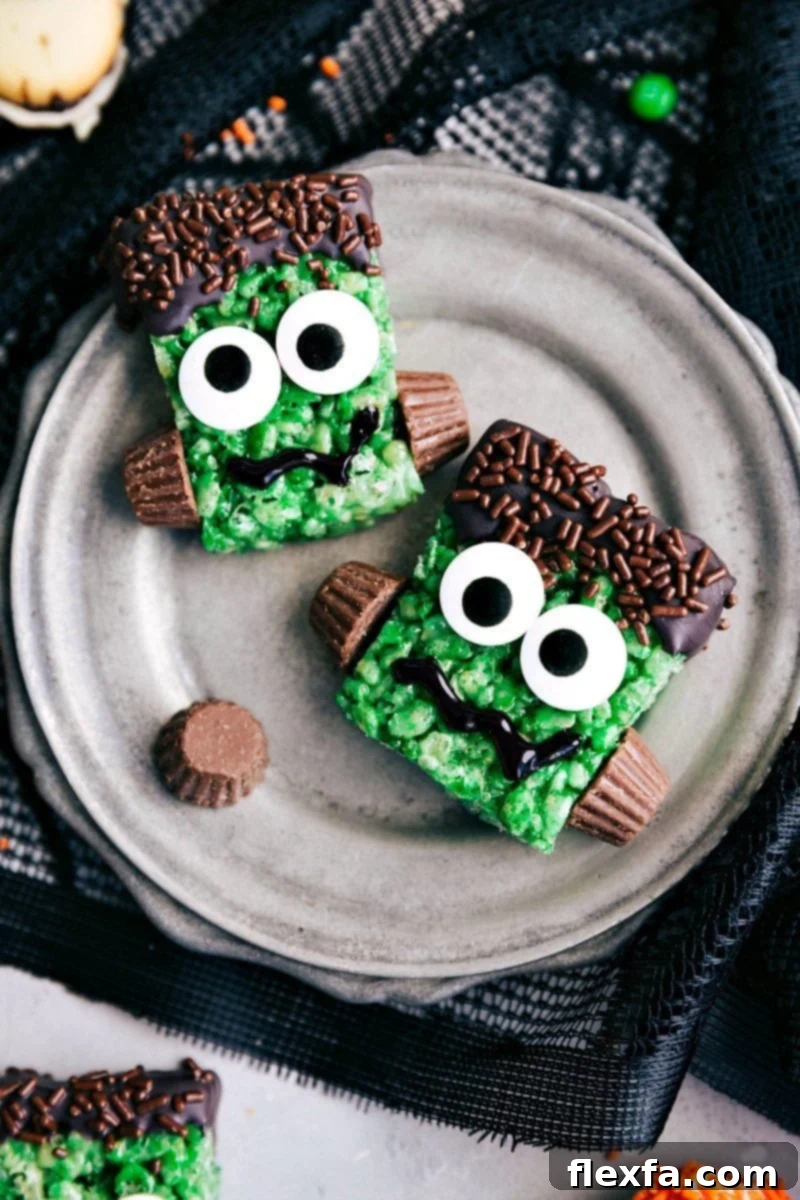
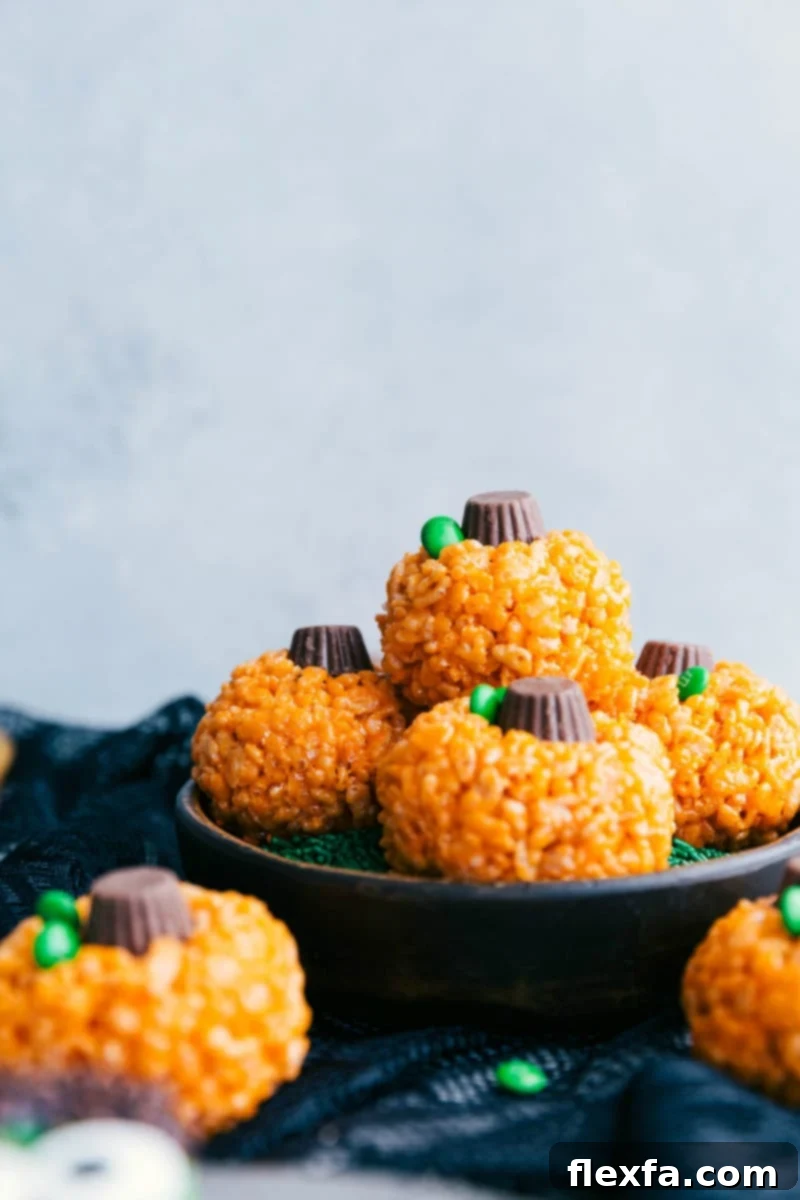
Get ready for a double dose of Halloween fun with these incredible Frankenstein and Pumpkin Rice Krispies treats! This versatile recipe allows you to create two distinct, equally adorable, and delicious spooky snacks from a single batch of marshmallow and cereal. Rice Krispies treats are always a hit, and these festive versions take them to a new level with their vibrant colors and creative decorations. They are perfect for kids’ parties, school events, or just a fun afternoon activity to celebrate the season.
This recipe below is cleverly designed to make BOTH the Frankenstein and Pumpkin Krispies from one preparation. This efficiency makes it ideal if you want a variety of treats without doubling your effort.
- If you just want to make one or the other: Follow the initial directions for making the marshmallow-cereal mixture, but instead of separating it into two parts, simply dye the entire batch either green for Frankenstein Krispies or orange for Pumpkin Krispies.
- Keep in mind that if you opt to make only one type of Krispie treat, you’ll need to double the specific decoration ingredients for that chosen character. For example, if you’re making only Frankenstein Krispies, ensure you have enough black candy melts, Reese’s Cups, and candy eyeballs for the full batch.
- For the Frankenstein Krispies, using a 9 x 9 inch pan (instead of the 8×8 listed below) will result in thicker, more substantial treats, which can make them even more satisfying and easier to decorate with their distinct features.
- When shaping the Krispies treats, remember that a light touch is key. Over-compressing the mixture can lead to dense, hard treats instead of the desired chewy, light texture.

Frankenstein AND Pumpkin Rice Krispies
Chelsea Lords
This fantastic recipe yields both Frankenstein and Pumpkin Rice Krispies treats from a single batch, perfect for varied Halloween fun! If you prefer to make just one type, simply dye the entire marshmallow mixture either green for Frankenstein or orange for pumpkins. Remember to double the specific decoration ingredients for your chosen character, and consider using a 9×9 pan for thicker Frankenstein treats.
20
20
12 Frankenstein Krispies and 8–10 pumpkin Krispies
Equipment
-
8 x 8-inch baking pan
-
Parchment paper or aluminum foil
-
Large pot
Ingredients
For the Frankenstein Krispies
For the Pumpkin Krispies
Instructions
-
Line an 8×8-inch baking pan with parchment paper or aluminum foil, leaving an overhang on the sides to easily lift the treats later. Lightly spray the paper or foil with cooking spray to prevent sticking. Set the pan aside.
-
In a large pot, melt the butter over medium heat, stirring occasionally to prevent burning. As soon as the butter is fully melted, add all the miniature marshmallows. Continue stirring constantly until the marshmallows are just melted and form a smooth, gooey mixture. Be careful not to overcook them, or the treats will be tough.
-
Remove the pot from the heat. Stir in the salt and vanilla extract until well combined. Immediately separate the marshmallow mixture evenly into two separate bowls. Add green food coloring to one bowl and orange food coloring to the other. Stir each bowl until the color is vibrant and uniform.
-
To each bowl, add 3 cups of Rice Krispies cereal. Fold gently with a spatula until the cereal is thoroughly coated with the colored marshmallow mixture. Avoid overmixing, as this can crush the cereal and result in denser treats.
For the Frankenstein Krispies
-
Carefully press the green Rice Krispies mixture evenly into the prepared 8×8-inch pan. Lightly spritz your hands with cooking spray before pressing down gently to compact the treats. Remember, pressing too hard will make your Krispies dense and hard, so aim for a light, even pressure.
-
Set the green Krispies aside to harden slightly at room temperature. Meanwhile, prepare your chocolate “hair.” In a microwave-safe bowl, combine the black candy melts (or milk chocolate chips) and vegetable oil. Microwave in short bursts of 15 seconds, stirring well for 10 seconds after each burst, until the chocolate is completely melted and smooth. The vegetable oil helps achieve a nice, smooth consistency.
-
Once the green Krispies are slightly firm, carefully lift them out of the pan using the parchment paper overhang. Cut the slab into 12 even bars. Dip the very top edge of each bar into the melted black chocolate to create Frankenstein’s “hair.” If desired, immediately add chocolate jimmies sprinkles onto the wet chocolate for extra texture. Using a small spoon or toothpick, apply a tiny dab of melted chocolate to the back of each large candy eyeball and press them onto the Krispie bar just below the “hair” to create the eyes. Repeat this process for the miniature Reese’s Cups, attaching one to each side of the Krispie treat bar to serve as Frankenstein’s “neck bolts.”
-
Allow the chocolate and decorations to set completely. Once firm, use the black food decorating gel to pipe a zigzag line below the eyes on each Frankenstein Krispie to create a spooky mouth.
For the Pumpkin Krispies
-
With the orange Rice Krispies mixture, lightly spritz your hands with cooking spray to prevent sticking. Grab a handful of the mixture and gently roll and shape it into a round ball, resembling a pumpkin. Remember to avoid compressing too much to ensure a soft, chewy treat.
-
Take a miniature Reese’s Cup and gently press it into the top center of each pumpkin-shaped Krispie treat. Reshape the Krispie treat as needed around the Reese’s Cup to secure it in place and maintain the pumpkin form; this will serve as the pumpkin’s stem.
-
Finally, press 1 to 3 miniature green M&M’s near the Reese’s Cup stem on each pumpkin. These tiny green candies will perfectly mimic small leaves, completing your adorable pumpkin Krispies treats.
Recipe Notes
Storage: To maintain their freshness and chewy texture, store Rice Krispie treats in an airtight container at room temperature for up to 2 days. For extended freshness, especially if made in a humid environment or if you prefer them firmer, keep them in the refrigerator for up to 5 days. Ensure they are well-sealed to prevent them from drying out.
Nutrition
Serving: 1 serving
|
Calories: 278 kcal
|
Carbohydrates: 7g
|
Protein: 0.7g
|
Fat: 27g
|
Saturated Fat: 17g
|
Polyunsaturated Fat: 1g
|
Monounsaturated Fat: 7g
|
Trans Fat: 1g
|
Cholesterol: 71mg
|
Sodium: 4880mg
|
Potassium: 15mg
|
Sugar: 3g
|
Vitamin A: 870 IU
|
Calcium: 13 mg
|
Iron: 1 mg
Nutrition information is automatically calculated, so should only be used as an approximation.
DELIGHTFUL DOUBLE-SIDED HALLOWEEN SANDWICH COOKIES
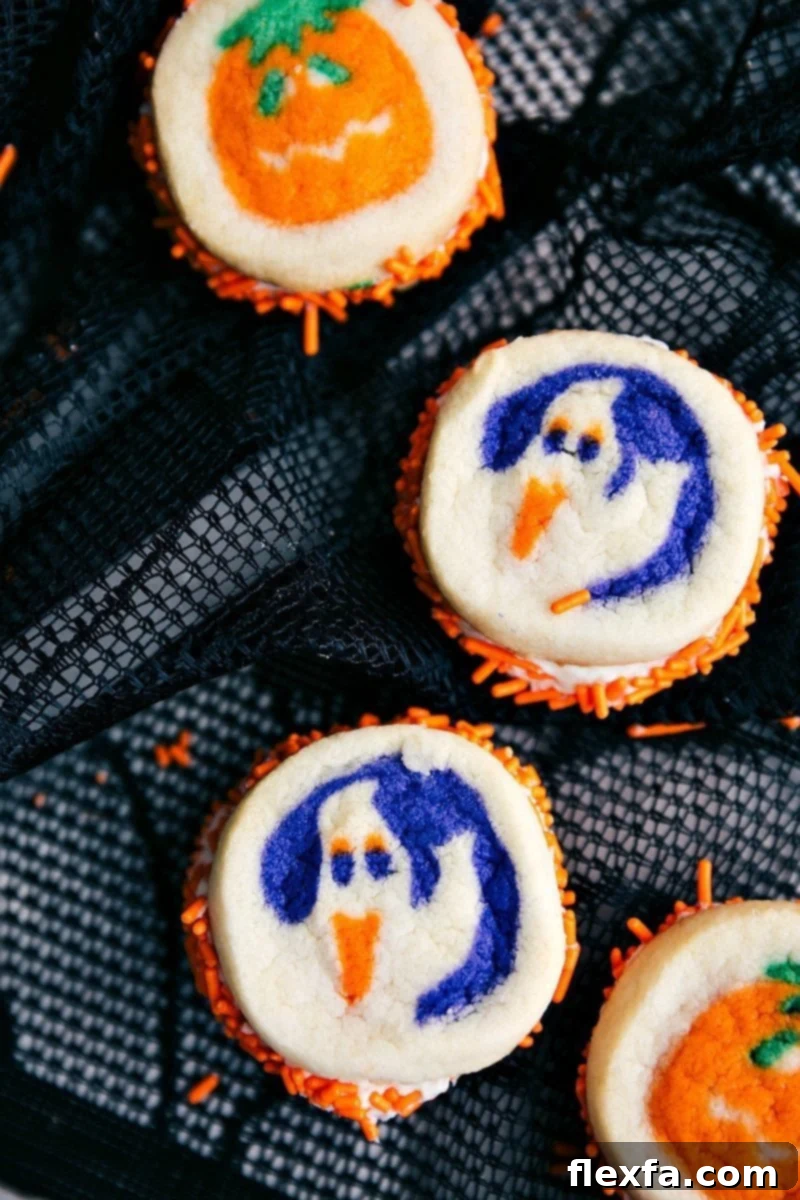
Add a playful and delicious twist to your Halloween dessert table with these double-sided Halloween sandwich cookies! These treats are incredibly fun and visually appealing, featuring two different iconic Halloween shapes – typically ghosts and pumpkins – joined together with a creamy frosting center. They are a fantastic option for parties, school lunches, or just a festive snack, and their customizable nature allows for both quick, semi-homemade versions and fully from-scratch creations.
- These cookies are particularly fun and easy to make if you can find the pre-made, “ready to bake” ghost and pumpkin sugar cookies. Brands like Pillsbury often offer these seasonal items in the refrigerated dough section of most major grocery stores, including Walmart, Smith’s (Kroger stores), Target, and other local supermarkets. Stocking up on these makes assembly a breeze!
- If you prefer to make your cookies from scratch or can’t find the pre-made versions, don’t worry! You can create your own festive cookies. The Sugarhero website provides an excellent tutorial on how to make your own slice-and-bake Halloween-themed cookies, allowing for custom shapes and flavors.
- For the creamy center, store-bought vanilla frosting is a convenient choice. However, for a richer, homemade taste, consider making your own frosting. Our detailed tutorial post on how to make a classic cream cheese frosting is a perfect guide to create a decadent filling that will truly elevate these sandwich cookies.
- Beyond orange sprinkles, you can experiment with black, purple, or even green sprinkles to match different Halloween themes. Edible glitter or finely crushed candy corn could also add a unique touch to the frosting edges.
Double-Sided Halloween Sandwich Cookies
Chelsea Lords
Create playful and delicious double-sided Halloween sandwich cookies, featuring a ghost on one side and a pumpkin on the other, all held together with a delightful creamy frosting!
15
10
25
20 servings
Equipment
-
Sheet pan (15″ x 10″)
Ingredients
Homemade Frosting (optional)
Instructions
-
Preheat your oven and bake both packages of pumpkin and ghost sugar cookies according to the package directions. Once baked, remove them from the oven and transfer them to a wire rack to cool completely. Ensure they are fully cooled before frosting to prevent the frosting from melting.
-
Meanwhile, prepare the frosting. If you’re using store-bought frosting, simply open the tub and stir it to loosen. If making homemade frosting (using the recipe provided below): In a large mixing bowl, beat the softened cream cheese and butter together with an electric mixer until the mixture is light and fluffy. Gradually add the powdered sugar, vanilla extract, and salt. Continue beating until the frosting is perfectly smooth and creamy, scraping down the sides of the bowl as needed.
-
Once the cookies are completely cool, frost the bottom (flat) side of half of the cookies with a generous layer of frosting. Take another cookie and gently place it on top, creating a sandwich. You can pair a pumpkin cookie with a ghost cookie to create the fun “double-sided” effect, or combine two of the same shape.
-
Pour your chosen orange sprinkles (or other festive sprinkles) into a shallow dish or plate. Carefully hold each sandwich cookie by its sides and rotate the frosted center edge through the sprinkles. This will coat the frosting beautifully, adding a decorative border and a festive crunch. Arrange the finished cookies on a serving platter.
Recipe Notes
Storage: To store leftover double-sided Halloween sandwich cookies, keep them in an airtight container. If you used store-bought frosting, they can be stored at room temperature for up to 3-4 days. If you used homemade cream cheese frosting, or for a longer shelf life, refrigerate them for up to a week. For best results, consider separating the ghost and pumpkin cookies if you’re making a large batch and want to keep them visually distinct until serving.
Nutrition
Serving: 1 serving
|
Calories: 310 kcal
|
Carbohydrates: 50g
|
Protein: 0.65g
|
Fat: 13g
|
Saturated Fat: 6g
|
Polyunsaturated Fat: 0.15g
|
Monounsaturated Fat: 0.15g
|
Trans Fat: 0.15g
|
Cholesterol: 47mg
|
Sodium: 119mg
|
Potassium: 31mg
|
Fiber: 0.1g
|
Sugar: 42g
|
Vitamin A: 280 IU
|
Calcium: 9.5 mg
|
Iron: 0.2 mg
Nutrition information is automatically calculated, so should only be used as an approximation.
With these five fantastic and easy Halloween treat recipes, you’re all set to create a memorable and delicious spooky season. From quick no-bake options to charmingly decorated cookies and Krispies, there’s something here for everyone to enjoy. Gather your ingredients, invite your loved ones, and let the Halloween spirit guide your culinary adventures. Happy haunting and happy baking!