
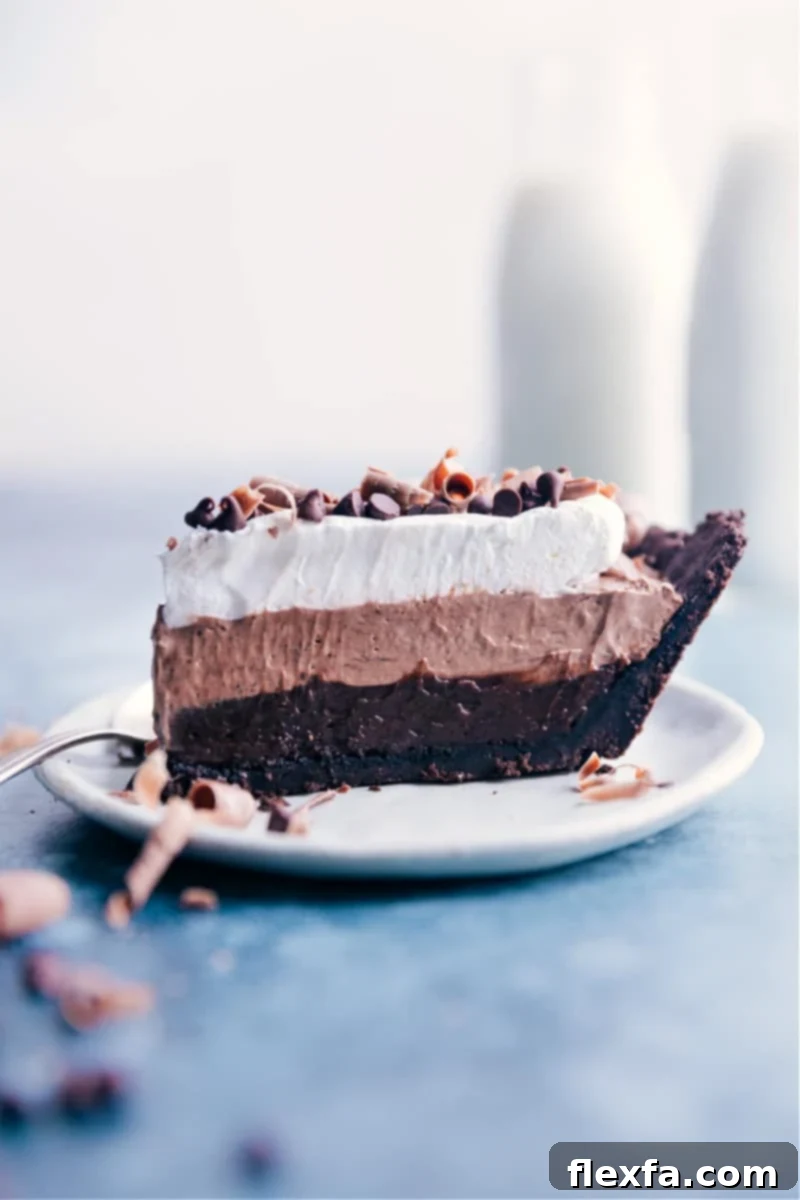
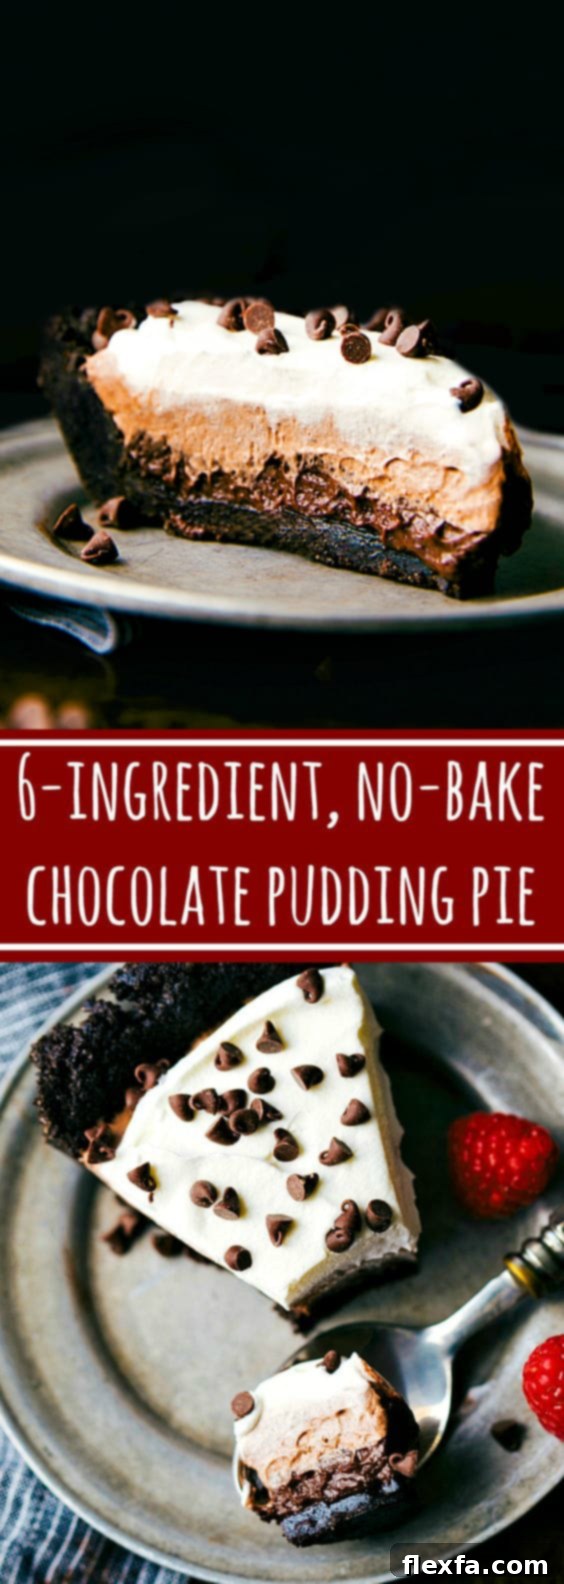
Prepare to be amazed by this **No-Bake Chocolate Pudding Pie**, a dessert that effortlessly combines stunning presentation with incredible ease of preparation. Crafted from just six staple ingredients, this pie promises to impress guests and satisfy any chocolate craving without requiring hours in the kitchen. It features a delectable Oreo® cookie crust and three distinct, creamy layers, all ingeniously derived from the same core ingredients.
If you find yourself with extra pudding mixes, don’t let them go to waste! They can be creatively transformed into other delightful treats. Consider whipping up Turtle Pudding Cups for a bite-sized indulgence, enhancing Cake Mix Cupcakes with a rich pudding element, or adding a chewy texture to Chocolate Chip Pudding Cookies. For a classic, comforting dessert, this Eclair Cake recipe is also a fantastic option.
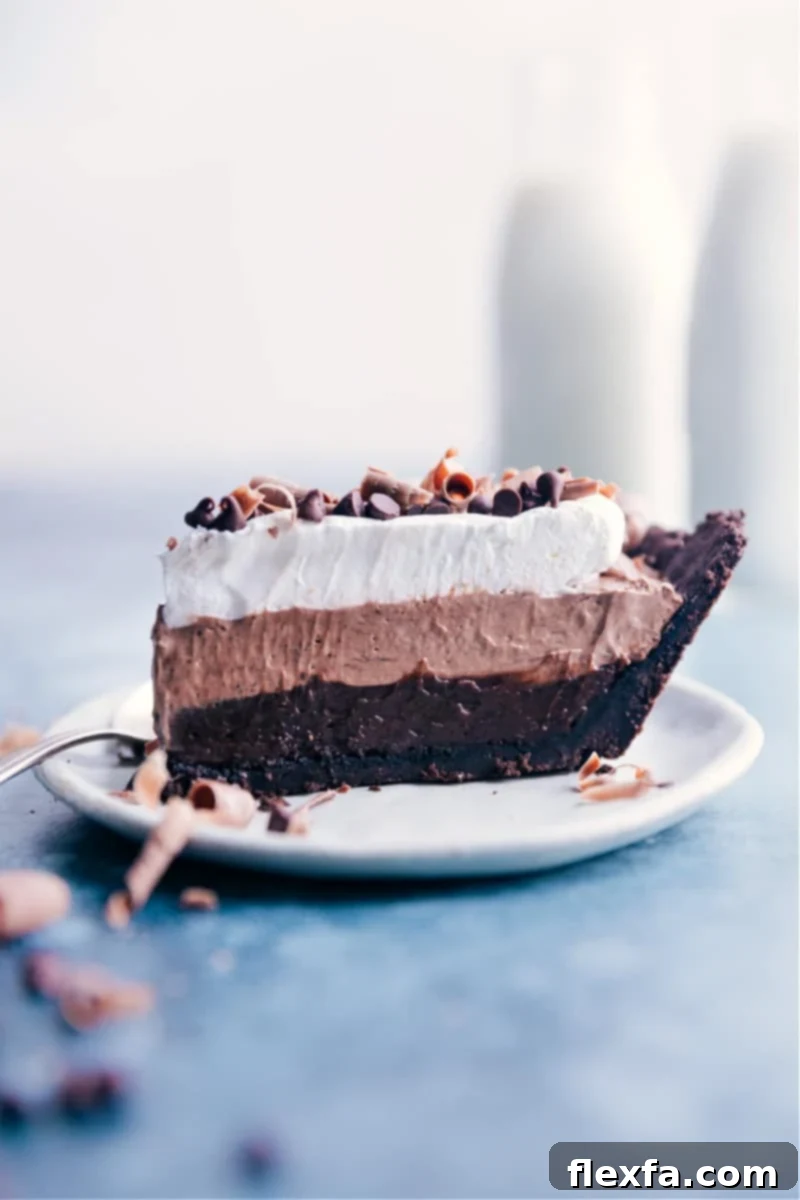
The Ultimate No-Bake Chocolate Pudding Pie: A Dessert Masterpiece!
This Chocolate Pudding Pie isn’t just a recipe; it’s a secret weapon in my dessert arsenal! Whether it’s a festive holiday gathering, a casual potluck, or a fun family night, this pie consistently earns rave reviews. What truly stuns everyone is discovering that the luxurious, deep chocolate flavor comes primarily from a humble store-bought instant pudding mix! Its minimal effort-to-impressiveness ratio makes it an absolute winner, proving that you don’t need to be a pastry chef to create something truly spectacular.
Every bite of this pie delivers a velvety, rich chocolate experience, perfectly complemented by the crisp, sweet Oreo crust. It’s a dessert that speaks of indulgence and sophistication, yet it’s deceptively simple to assemble. Say goodbye to complicated baking steps and hello to a fuss-free dessert that tastes like it came from a gourmet bakery.
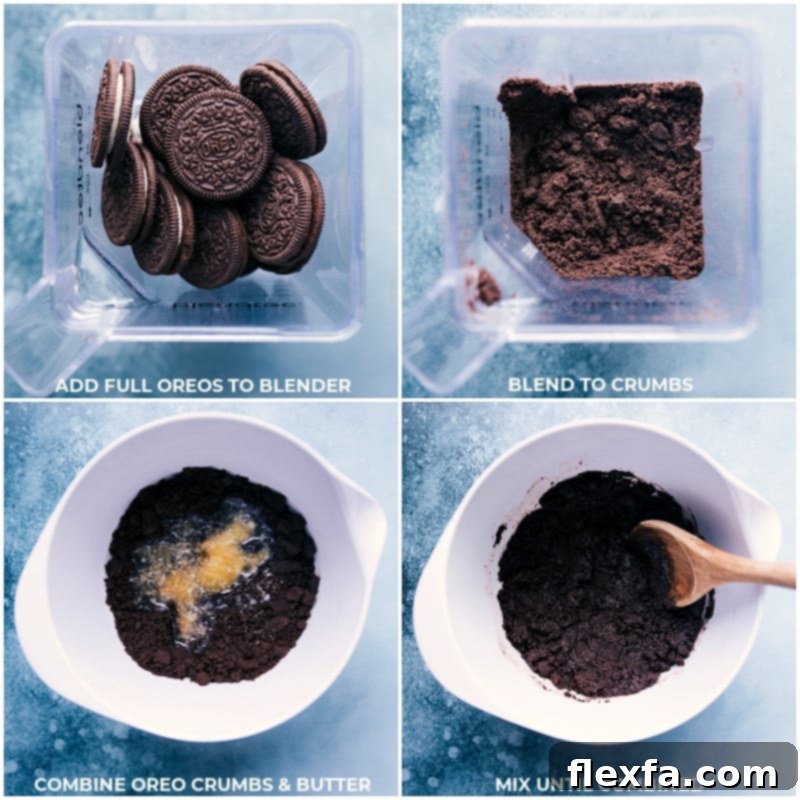
How to Assemble Your Decadent Chocolate Pudding Pie
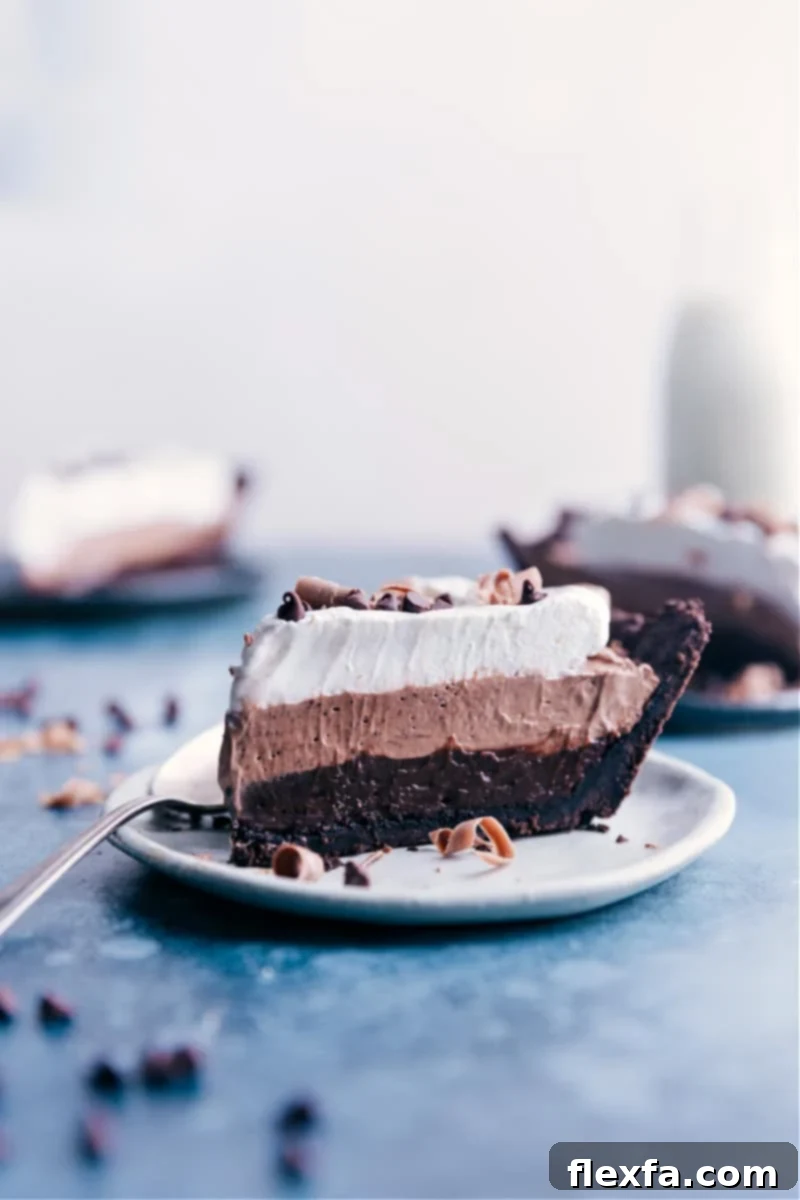
The visual appeal of this pie, with its three distinct and beautiful layers, might suggest a complex, time-consuming process. However, the beauty of this recipe lies in its simplicity! All three luscious layers are created using a clever variation of just **three fundamental ingredients**: instant pudding mix, milk, and whipped topping.
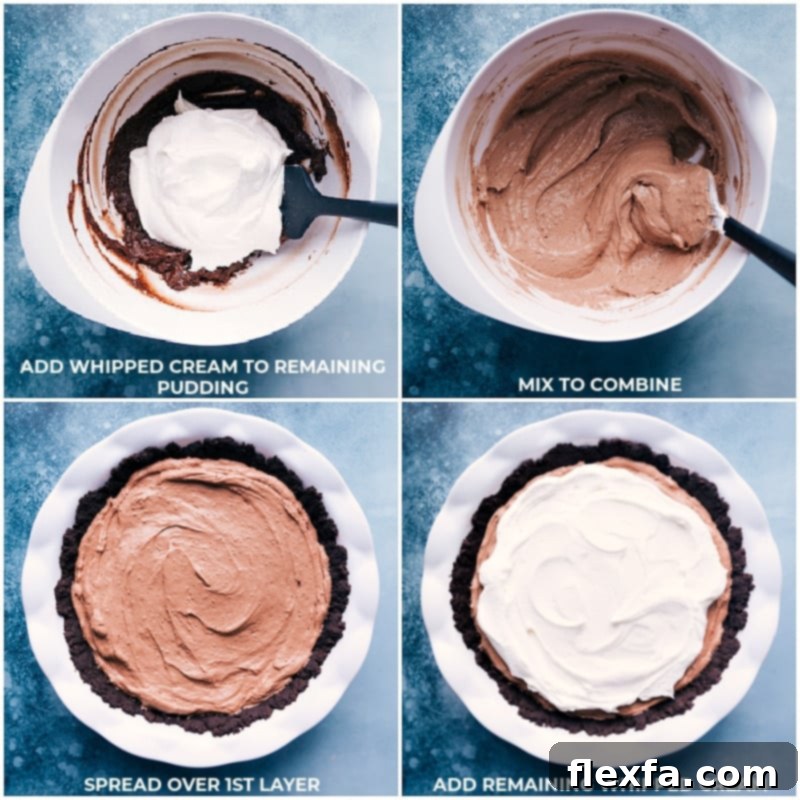
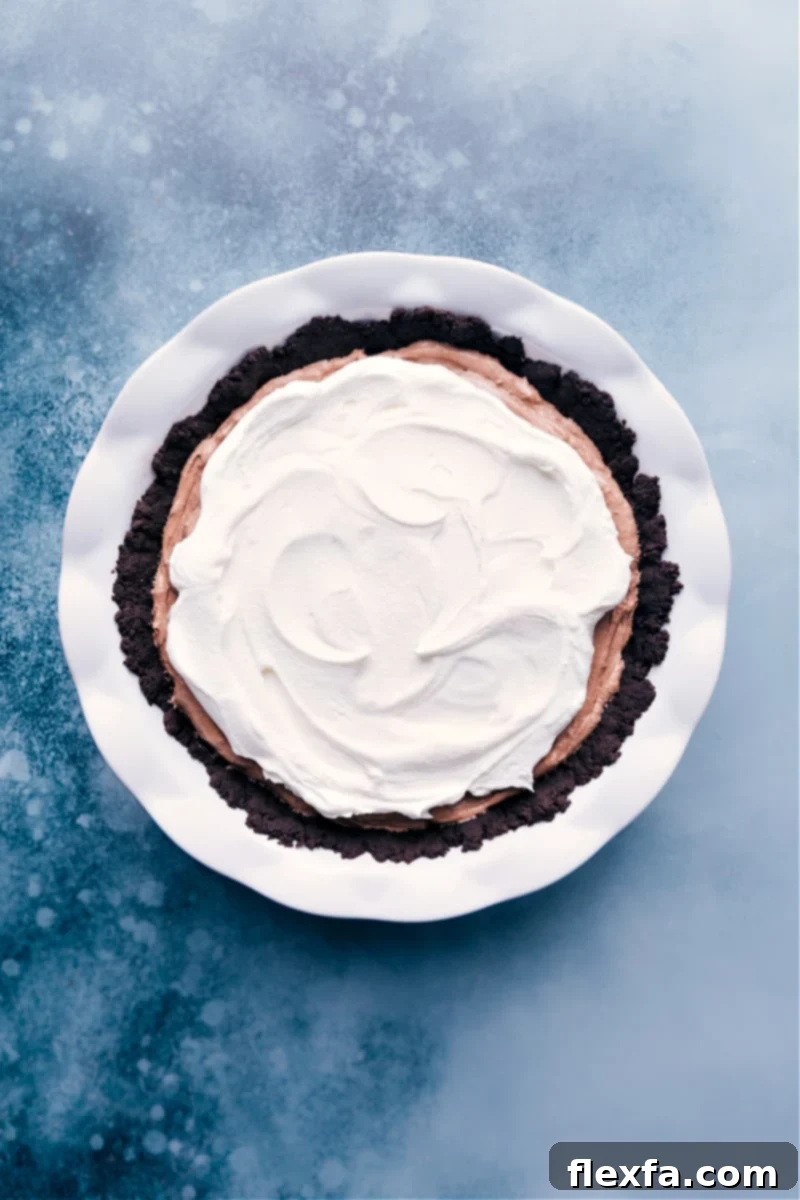
We begin with a robust foundation: a simple, dark, and sweet Oreo cookie crust. Once our crust is ready, the magic truly unfolds. We combine instant chocolate pudding mix with milk, then strategically incorporate whipped topping to create varied textures and flavors for each layer. The base layer is a rich, classic chocolate pudding. The middle layer introduces a lighter, mousse-like consistency by folding in some of the whipped topping. Finally, a generous crown of pure, airy whipped topping completes this magnificent dessert. It’s an easy Chocolate Pudding Pie, layered to perfection and utterly irresistible!
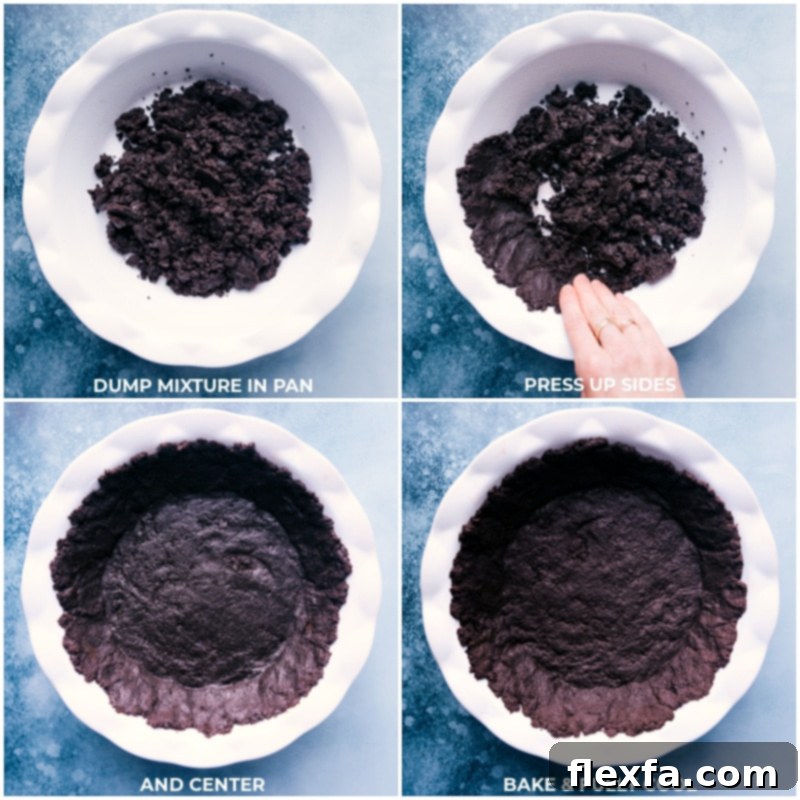
This recipe is built upon two core components: the indulgent instant chocolate pudding **filling** and the classic Oreo **crust**. Let’s delve into the details of each to ensure your pie is nothing short of perfect.
The Perfect Oreo Crust: Store-Bought or Homemade
To truly embrace the “No-Bake” philosophy for this Chocolate Pudding Pie, the simplest route is to opt for a pre-made Oreo cookie crust from your local grocery store. These convenient crusts are ready to fill right out of the package, eliminating any baking time and making assembly incredibly fast. They are ideal for busy days or when you simply prefer a shortcut without compromising on flavor.
However, for those who appreciate the unparalleled taste and texture of a homemade crust, crafting your own Oreo base is a rewarding endeavor. While our main recipe title emphasizes “No-Bake,” a homemade Oreo crust *can* be made truly no-bake by simply chilling it, or for a superior, firmer texture that prevents sogginess, a brief bake is recommended. Here are some essential tips for a flawless homemade Oreo crust:
- **Achieve Fine Crumbs**: The key to a cohesive and easily sliceable crust is finely crushed Oreos. Large cookie chunks, while tasty, can make the pie challenging to cut cleanly. A food processor or blender is your best friend here, yielding uniform crumbs in seconds. Alternatively, place Oreos in a sturdy plastic bag, remove excess air, and use a rolling pin or meat mallet to crush them thoroughly.
- **Keep the Creme Filling**: There’s no need to remove the white creme filling from the Oreos. It’s integral to the crust’s structure, contributing to its binding properties and adding extra sweetness, ensuring a perfectly balanced flavor.
- **Cool the Melted Butter**: After melting your butter, allow it to cool slightly to room temperature before mixing it with the cookie crumbs. Incorporating hot butter can result in a greasy crust that struggles to set properly.
- **Skip Added Sugar**: Unlike many traditional graham cracker crusts that call for extra sugar, an Oreo crust doesn’t need it. The sweetness from the Oreo creme filling is more than sufficient, creating a wonderfully sweet base without being cloyingly so.
- **Press Down Firmly**: Once the buttered crumbs are in the pie pan, press them down very firmly and evenly across the bottom and up the sides. I find the flat bottom of a metal measuring cup or a glass a great tool for this, ensuring a compact crust that holds together beautifully when sliced.
- **Consider Baking for Firmness (Optional but Recommended)**: For a truly robust crust that resists becoming soggy from the pudding and slices with impressive clean edges, a quick bake is highly recommended. Bake for about 10 minutes at 350°F (175°C), then allow it to cool completely before adding the filling. This step transforms the crust, making it sturdy enough to hold all those delicious layers. If you want to keep it strictly “no-bake” even with a homemade crust, simply press firmly and chill it for at least 30 minutes before filling, understanding it will be softer.
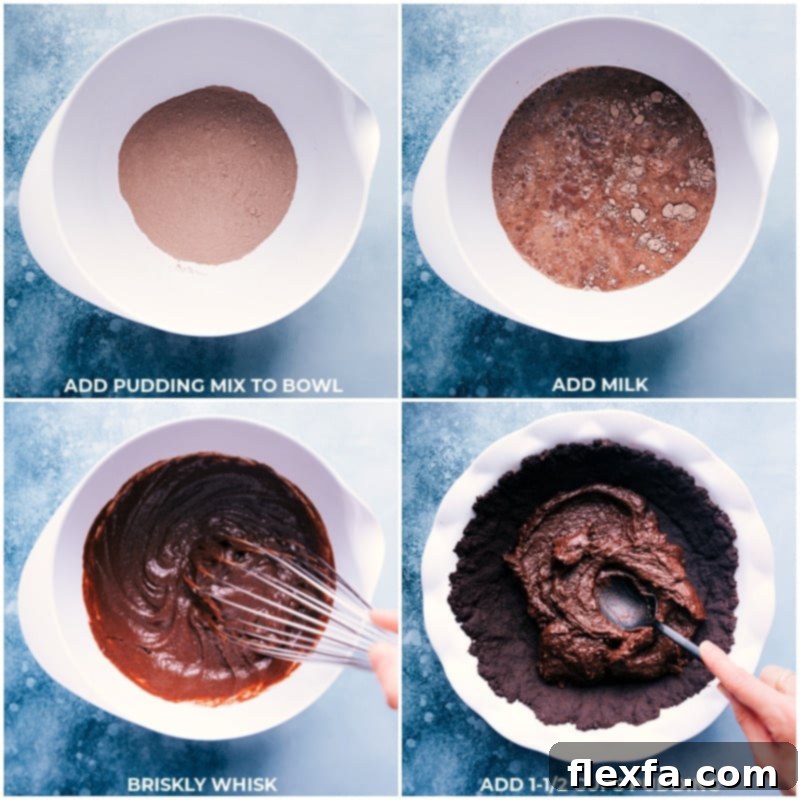
Jello Chocolate Pudding Pie Filling: The Three Magical Ingredients
As we’ve highlighted, the incredible filling for this pie relies on just three simple ingredients, creating a symphony of textures and flavors. Precision in selecting these components is key to achieving that perfect, creamy consistency and rich taste:
- **The Right Chocolate Pudding Mix**: This is crucial. You must use **instant chocolate pudding mix** (e.g., Jell-O brand, specifically Chocolate Fudge or regular Chocolate). Avoid the “cook-and-serve” variety, as it will not set correctly for this no-bake pie. Furthermore, steer clear of sugar-free or reduced-calorie versions; their different chemical compositions can affect the setting process and alter the indulgent flavor. Look for the standard small 3.9-ounce (110g) box. Remember, you’ll be following *this recipe’s* directions for preparation, not the package instructions, to ensure optimal thickness for a pie.
- **Full-Fat Whipped Topping (Cool Whip®)**: For the best results in terms of setting, richness, and classic flavor, opt for **regular, full-fat Cool Whip®**. Reduced-fat, low-fat, or sugar-free alternatives often contain more water and less fat, which can prevent the pie from setting firmly and may result in a less luxurious taste. Ensure your frozen whipped topping is completely thawed in the refrigerator before use; otherwise, it won’t incorporate smoothly into the pudding mixture, leading to lumps and an uneven texture.
- **Whole Milk for Richness**: The choice of milk significantly impacts the pie’s richness and structural integrity. **Whole milk** is highly recommended for its higher fat content, which contributes to a thicker, creamier, and sturdier pie. While 2% or 1% milk can be used, be aware that your pie might be slightly less thick and robust. I strongly advise against using skim milk or plant-based milk alternatives (like almond or soy milk) as they lack the necessary fat and protein to achieve the desired thick, stable consistency.
Quick Tip: Whipped Topping Alternatives
**Don’t want to use Cool Whip?** No problem! You can easily substitute it with another store-bought non-dairy whipped topping like TruWhip, or elevate your pie with a decadent homemade whipped cream. For instructions on making your own light and airy topping, refer to this excellent recipe. Just ensure it’s stabilized for pie fillings.
Expert Recipe Notes and Variations for Your Chocolate Pudding Pie
To ensure your Chocolate Pudding Pie is an absolute triumph and to explore exciting variations, keep these expert tips in mind:
- **Embrace Dark Chocolate**: For aficionados of a richer, more intense chocolate experience, consider using a **dark chocolate instant pudding mix** instead of the regular chocolate or chocolate fudge varieties. This simple swap deepens the flavor profile, offering a sophisticated twist to this beloved dessert.
- **Perfect Slicing Technique**: Achieving beautifully clean slices is key to presentation. Always use a **sharp chef’s knife** and make decisive, swift cuts. For the cleanest possible slices, run your knife under very warm water, dry it completely with a kitchen towel, make one cut, and then repeat this warming and drying process for each subsequent slice. This prevents the warm pudding from sticking to the blade.
- **Choose Your Pie Pan Wisely**: Any standard 9-inch pie pan will work perfectly for this recipe. However, if you’re aiming for that stunning, taller, and thicker pie profile often seen in professional photos, consider using a deeper dish. The pie pan I use here (link provided for reference) is an excellent choice for achieving that impressive height.
- **Elevate with Garnishes**: While delicious on its own, a simple garnish can transform your Chocolate Pudding Pie into a true showstopper. Sprinkle miniature chocolate chips generously over the top for added texture and visual appeal. For an elegant touch, try making edible chocolate curls (see our quick tip below for an incredibly easy method!). Other ideas include a dusting of cocoa powder, a drizzle of chocolate syrup, or even a few fresh raspberries for a pop of color and tartness.
Quick Tip: Effortless Chocolate Curls
Creating impressive chocolate curls is far simpler than you might imagine, adding a touch of gourmet flair to your pie. Here’s how:
- **Select Your Chocolate**: Start with a good quality chocolate bar. I personally love using a Lindt® Dark Chocolate Bar with Sea Salt (this is not sponsored, just a favorite!), as its quality and snap yield beautiful curls.
- **Peel Your Curls**: Unwrap the chocolate bar. Hold it firmly and use a standard vegetable peeler to gently shave down the side of the bar, directly over your chilled pie. The warmth of your hands will slightly soften the chocolate, allowing the peeler to create delicate, elegant curls that will gracefully fall onto the whipped topping.
Chocolate Pudding Pie FAQs: Your Questions Answered
Here are some frequently asked questions to help you master your Chocolate Pudding Pie:
How do you ensure instant pudding thickens perfectly for pie?
Achieving a perfectly set, thick pudding is vital for a structurally sound and delicious pie. Follow these key tips:
- **Choose the Correct Pudding Mix**: Always select **instant pudding**, specifically labeled as such. “Cook-and-serve” pudding varieties require heat to thicken and will not set properly for this no-bake application.
- **Adhere to Recipe Instructions**: Crucially, follow the liquid amounts and mixing times provided in *this recipe*, not the directions on the pudding mix box. Our recipe is calibrated to achieve a firmer, pie-specific consistency.
- **Use Whole Milk**: Opt for **whole milk**. Its higher fat content is essential for a rich texture and proper setting. Skim milk or most plant-based milk alternatives lack the necessary fat and can result in a thinner, less stable pudding.
How can I prevent my Chocolate Pudding Pie from becoming watery?
A watery pie can be disappointing. Here’s how to avoid it and keep your pie beautifully firm:
- **Stick to Full-Fat Products**: Use full-fat ingredients for your filling, specifically whole milk and regular whipped topping (like Cool Whip). Lower-fat, light, or sugar-free versions tend to “weep” or release moisture more readily, leading to a watery consistency.
- **Proper Crust Preparation and Cooling**: If making a homemade crust, ensure you **bake it** as recommended (for about 10 minutes) and then allow it to **cool completely** before adding the filling. A well-baked and cooled crust creates a barrier that helps prevent moisture absorption from the pudding. If using a truly no-bake homemade crust, ensure it’s chilled thoroughly to firm up.
- **Chill Adequately**: Allow the pie to chill in the refrigerator for the recommended 2-4 hours (or even longer) to fully set. Rushing this step can result in a softer, potentially watery pie.
Storage Guidelines
Can You Freeze Chocolate Pudding Pie? Storage Tips
For optimal taste and texture, **we do not recommend freezing this Chocolate Pudding Pie**. The generous amounts of dairy in the filling (whipped topping and milk) are prone to significant texture changes upon freezing and thawing. When thawed, dairy-rich fillings tend to become watery, and the pie crust will unfortunately absorb this excess moisture, resulting in a soggy and less enjoyable dessert.
This Chocolate Pudding Pie is at its absolute best when consumed within **2-3 days** of preparation. To maintain its freshness and creamy consistency, store any leftovers securely in an airtight container in the refrigerator. This will help prevent it from drying out or absorbing unwanted odors from other foods.
Explore More Irresistible Chocolate-Filled Desserts
If this Chocolate Pudding Pie has ignited your love for all things chocolate, you’ll adore these other decadent recipes:
- Indulge in our favorite Chocolate Cheesecake, crowned with an extra layer of rich chocolate topping for ultimate decadence.
- Cool down with a delightful Ice Cream Pie, featuring a complementary Oreo cookie crust, perfect for warm weather or any time of year.
- Discover the secret to perfectly chewy cookies with our Chewy Chocolate Chip Cookies, made extra special by a “secret” ingredient.
- For an incredibly simple yet satisfying treat, try our Ice Cream Sandwich Cake, requiring just four ingredients.
- Elevate your cupcake game with delicious Chocolate Chip Cupcakes, complete with a unique cookie crumb frosting.
Pin
Print Recipe
Chocolate Pudding Pie
Video Tutorial
Equipment
-
Pie pan 9-inch
Ingredients
- Cooking spray
- 24 Oreos
- 4 tablespoons unsalted butter melted, then cooled to room temperature
- 1/16 teaspoon salt optional, enhances flavor
- 2 (3.9-ounce) packages chocolate instant pudding and pie filling see note 1 below for important details
- 2 cups whole milk see note 2 for milk options
- 1 (8-ounce) container frozen whipped topping fully thawed, see note 3 for type
- mini chocolate chips optional, for garnish
Instructions
-
You have two options for the crust: purchase a pre-made Oreo cookie crust for a true no-bake experience, or make your own. To make your own homemade crust, preheat oven to 350°F (175°C). Lightly spray a 9-inch pie pan with cooking spray and set aside.
-
In a powerful blender or food processor, finely blend the entire Oreos (including the creme filling) into uniform crumbs. Measure to ensure you have approximately 1-3/4 cups of crumbs, then transfer them to a mixing bowl. Add the melted butter (which should be at room temperature) and the optional pinch of salt. Stir thoroughly until a thick, moist dough forms. Press this mixture firmly and evenly into the bottom of the prepared pie pan and up the sides. For a firmer, less soggy crust, bake for 10 minutes; then remove and cool completely. For a truly no-bake homemade crust, skip baking and chill in the refrigerator for at least 30 minutes before filling.
-
In a large mixing bowl, add both packages of instant pudding mix. Pour in the specified amount of whole milk and briskly whisk the mixture for exactly 2 minutes. The pudding should become very thick. Carefully scoop out 1-1/2 cups of this thickened pudding mixture and spread it evenly as the first layer into the bottom of your cooled (or chilled) Oreo cookie crust.
-
To the remaining pudding mixture in the bowl, gently fold in half of the thawed whipped topping. Mix until just combined and smooth. Carefully spread this lighter, mousse-like mixture evenly over the first pudding layer in the pie crust. This creates the delightful second layer.
-
Using a clean spatula, spread the remaining whipped topping evenly and smoothly over the top of the second layer. This forms the final, airy, and luscious top layer of your pie. Place the pie in the refrigerator and chill for a minimum of 2–4 hours, or until thoroughly set. For best results, chill overnight.
-
When you’re ready to serve, for clean, perfect slices, warm a very sharp knife under hot water, dry it completely, and make quick, clean cuts. It is crucial to repeat the process of warming and drying the knife between each individual cut. If desired, sprinkle the top of the pie with mini chocolate chips or homemade chocolate curls for a beautiful garnish. Serve chilled and enjoy!
Recipe Notes
Note 2 (Milk Type): While you can use 2% or 1% milk for a slightly less dense pie, we highly recommend whole milk for the richest flavor and best pie thickness. We do not recommend skim milk or plant-based milk alternatives, as they often result in a watery or poorly set pie.
Note 3 (Whipped Topping): For ideal texture and setting, use regular, full-fat Cool Whip. Reduced-fat, low-fat, sugar-free, or fat-free versions will not perform the same and may lead to a softer or watery pie. Ensure your frozen whipped topping is completely thawed in the refrigerator before incorporating it into the mix.
Storage: This pie is best enjoyed and fully consumed within 2–3 days of being made. Store it in an airtight container in the refrigerator to maintain freshness. We do not recommend freezing this pie due to the high dairy content, which tends to change texture and become watery upon thawing, making the crust soggy.
Nutrition Information
Nutrition information is automatically calculated and is an estimate. It should only be used as an approximation.