
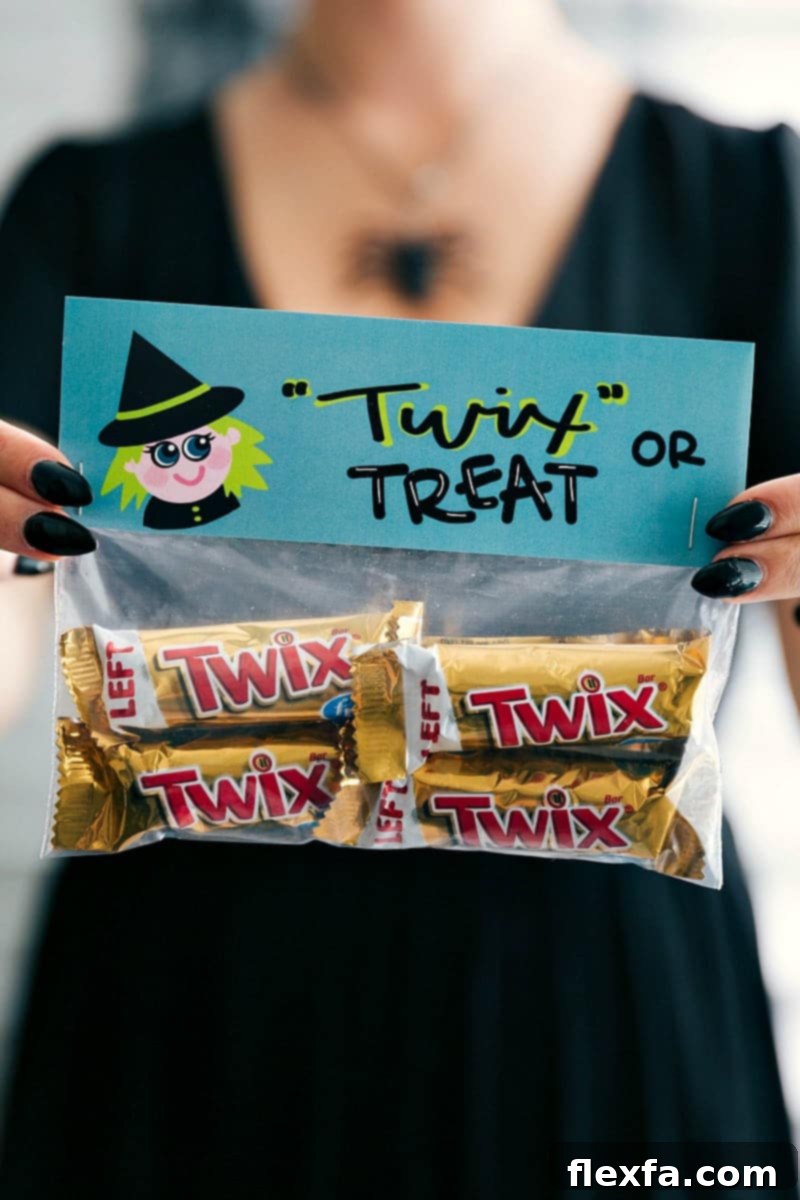
DIY Halloween Treat Bags: 6 Fun & Festive Ideas with Free Printables
Halloween is a time for spooky fun, creative costumes, and, of course, delicious treats! While store-bought candy is always a hit, there’s something extra special about receiving a personalized treat bag that shows a touch of handmade charm. This guide offers six incredibly fun and easy DIY Halloween treat bag ideas, complete with FREE printable toppers that will make your offerings stand out this spooky season. Each concept is designed to be simple to assemble, making them perfect for busy parents, craft enthusiasts, and anyone looking to add a unique touch to their Halloween celebrations.
Whether you’re preparing for trick-or-treaters, planning a festive party, or putting together thoughtful gifts for friends and family, these treat bags are sure to delight. From classic candies dressed in clever themes to a homemade “Goblin Goodies” recipe, you’ll find inspiration to create memorable handouts that everyone will love. Get ready to transform ordinary snack bags into extraordinary Halloween delights!
Why Choose DIY Halloween Treat Bags?
Creating your own Halloween treat bags goes beyond simply distributing candy; it’s an opportunity to infuse personality and care into your holiday preparations. Here’s why these DIY projects are a fantastic choice:
- Personalized Touch: Unlike generic store-bought options, these bags allow you to express your creativity and show recipients that you put extra thought into their Halloween treat.
- Budget-Friendly: Utilizing free printables and bulk candy can often be more cost-effective than purchasing pre-packaged themed treats, especially if you’re preparing for a large number of trick-or-treaters or a big party.
- Fun for All Ages: The assembly process is simple enough for kids to help with, turning it into a fun family activity. From filling bags to stapling toppers, everyone can contribute to the Halloween spirit.
- Memorable & Unique: Handing out a treat bag with a clever pun or a cute, custom design leaves a lasting impression. Your treats will be remembered long after the candy is gone!
- Versatility: These treat bags are perfect for a variety of occasions – trick-or-treating, school parties, community events, or even as small gifts for neighbors and teachers.
Halloween Treat Bag Essentials & Pro Tips
Before diving into the individual treat bag designs, let’s go over some crucial notes and helpful tips to ensure your crafting experience is smooth and your final products look professionally made.
- Print What You Need: Each unique treat bag design comes with its own printable page. This means you only print the specific toppers you want, saving paper and ink.
- Optimal Printing Quality: For the most vibrant colors and durable toppers, we highly recommend printing on glossy cardstock. This material gives your toppers a polished, professional look and feel. If you don’t have a high-quality home printer or prefer expert results, consider emailing the PDF files to local print shops like Staples or Office Max for professional printing services.
- Precision Cutting & Folding: To achieve crisp edges and neat folds, invest in a paper cutter and a scoring board. A paper cutter ensures straight, clean cuts every time, while a scoring board helps you create perfectly aligned folds without creasing the cardstock. These tools save time and elevate the overall appearance of your treat bags.
- Choosing the Right Bags: While any snack-size bag will work, we personally prefer Zip-loc snack-size bags for their consistent quality and appearance. Their reliable seal also helps keep your treats fresh.
- Important: Save Before Printing: Always save the printable PDF files directly to your computer before attempting to print. Printing directly from a website or browser can sometimes lead to formatting issues or incomplete pages. If you encounter any printing problems, try using a different web browser or contact us for assistance.
- Need Them Ready-Made? If you’re short on time or prefer to have your toppers pre-printed, cut, and shipped directly to you, you can shop here for a convenient solution.
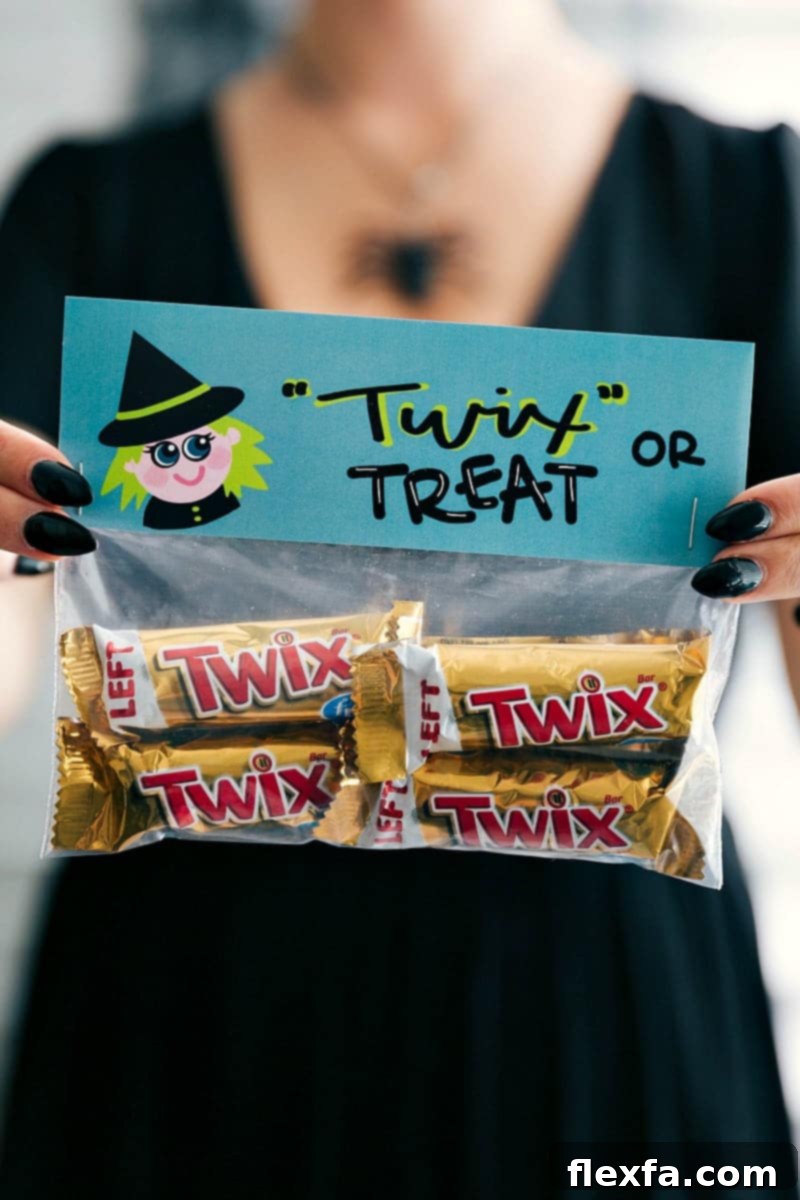
1. “Twix Or Treat” Treat Bags
This classic treat bag puts a clever twist on the traditional Halloween greeting. Perfect for chocolate lovers, these “Twix Or Treat” bags are quick to assemble and always a crowd-pleaser.
Supplies:
- Snack Sized Ziplock Bag
- Free Printable Topper: Click Here
- Stapler
- Fun Size Twix Bars
Instructions:
Begin by filling each snack-sized Ziplock bag with one or two fun-size Twix bars, ensuring the bag is adequately full but still seals neatly. Once filled, seal the bag securely. Next, carefully cut out your “Twix Or Treat” printable toppers. Using your scoring board, gently score the center line of each topper for a clean, sharp fold. Fold the topper over the sealed candy bag, aligning the edges. Finally, staple each side of the topper to the bag. These delightful bags are now ready to be gifted or distributed to excited trick-or-treaters!
Creative Twist:
For an extra touch, consider adding a small “witch’s broom” made from a pretzel stick and some shredded chocolate to the bag before sealing, playing on the “witch” theme often associated with Halloween.
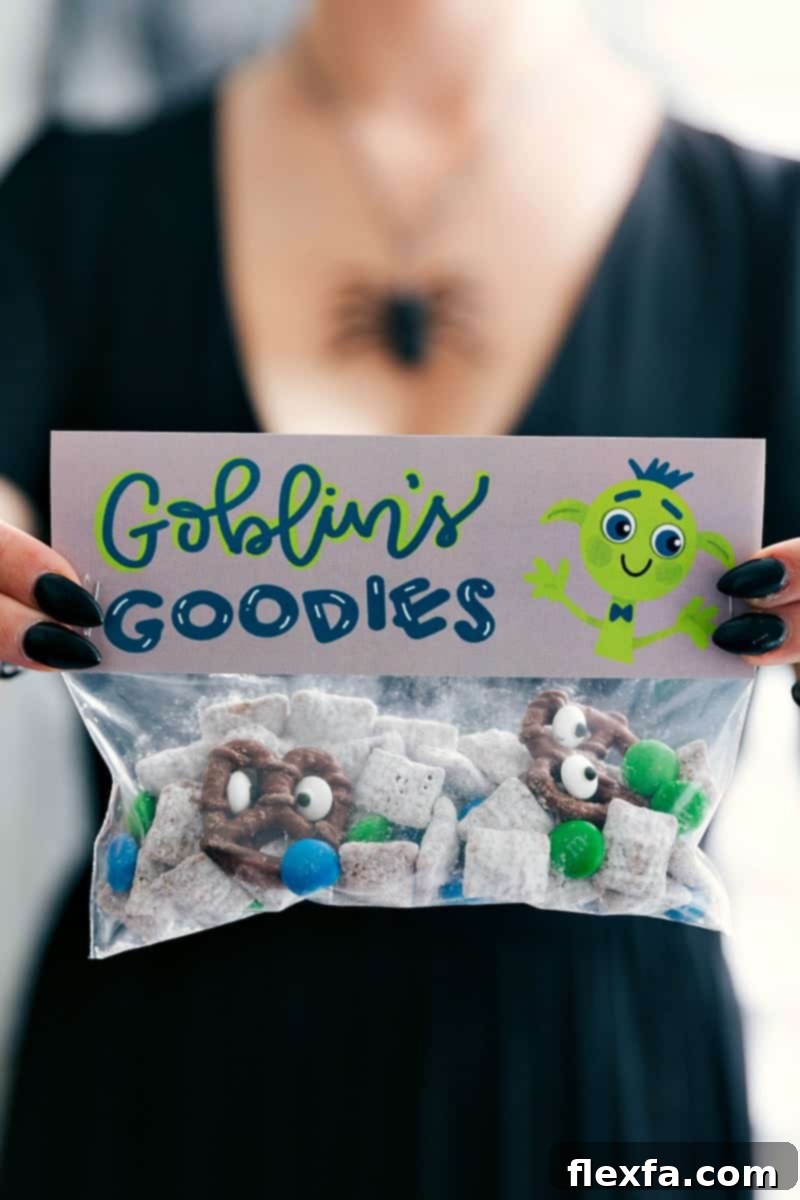
2. “Goblin Goodies” Treat Bags (Featuring Homemade Muddy Buddies)
For those who love to offer a homemade treat, these “Goblin Goodies” bags are a perfect choice. They feature a delicious batch of Halloween-themed Muddy Buddies (or Puppy Chow), enhanced with colorful M&Ms and optional chocolate-covered monster pretzels, all topped with a festive printable.
Supplies:
- Snack Sized Ziplock Bag
- Free Printable Topper: Click Here
- Stapler
- Goblin’s Goodies (Recipe detailed below; inspired by this Muddy Buddies recipe with M&Ms and Chocolate-Covered Monster Pretzels!)
Instructions:
First, prepare a batch of the delightful “Goblin Goodies” following the recipe provided below. Once cooled and ready, fill the snack-sized bags with an appropriate portion of this irresistible treat mix. Seal the bags firmly to maintain freshness. Next, retrieve your “Goblin Goodies” printable toppers, cut them out precisely, and score them down the middle. Fold each topper over a filled bag, ensuring it sits neatly. Secure the topper by stapling it on both sides. These homemade bags are now ready to spread some goblin-approved joy!
Creative Twist:
Customize your “Goblin Goodies” by using Halloween-themed M&Ms (orange, purple, green) or adding other spooky elements like gummy worms or candy corn to the mix for extra color and texture.
Make Halloween extra fun with these 6 easy treat bags! Just fill snack-size plastic bags with candy, add the free printable toppers, and you’re set for a spook-tacular time!
Goblin’s Goodies (Halloween Muddy Buddies) Recipe
By Chelsea Lords
Prep Time: 15 minutes
Total Time: 15 minutes
Servings: 12 goody snack bags
Equipment
- Resealable plastic bag (1 gallon-sized and 12 snack-sized)
- Large Mixing Bowl
- Microwave-Safe Bowl
Ingredients
- 9 cups Rice Chex cereal
- 1/2 cup creamy peanut butter
- 1 cup milk chocolate chips or semisweet chocolate chips (Guittard or Ghirardelli recommended)
- 4 tablespoons unsalted butter
- 1 teaspoon vanilla extract
- 1/2 teaspoon salt
- 1-1/2 cups powdered sugar
- 1-1/2 cups M&M’s (green and blue suggested for a goblin theme)
- 1/2 cup chocolate-covered pretzels
- Candy eyeballs (optional, for pretzel monsters)
- Melted Chocolate (optional, for pretzel monsters)
Instructions
- Add the Rice Chex cereal to a large mixing bowl; set aside.
- In a large microwave-safe bowl, combine the creamy peanut butter, chocolate chips, and unsalted butter. Microwave the mixture in 15-second bursts, stirring thoroughly between each burst, until completely melted and smooth. Stir in the vanilla extract and salt until well combined. Pour this chocolate-peanut butter mixture over the prepared cereal in the large bowl. Stir carefully but thoroughly until the cereal is evenly coated.
- Transfer the coated cereal mixture into a gallon-sized resealable plastic bag. Pour the powdered sugar over the cereal. Seal the bag securely, making sure to remove as much air as possible, and shake vigorously until the cereal is entirely and evenly coated with the powdered sugar.
- Pour the Muddy Buddies back into a large bowl and stir in the M&M’s. Distribute the “Goblin Goodies” evenly among 12 snack-sized resealable plastic bags.
- Optional Pretzel Monsters: If desired, create fun pretzel monsters. Melt a small amount of chocolate and use it as “glue” to attach candy eyeballs to the chocolate-covered pretzels. Allow them to dry completely (this can be sped up in the refrigerator). Once dry, add a few pretzel monsters to each individual snack bag for an extra spooky touch.
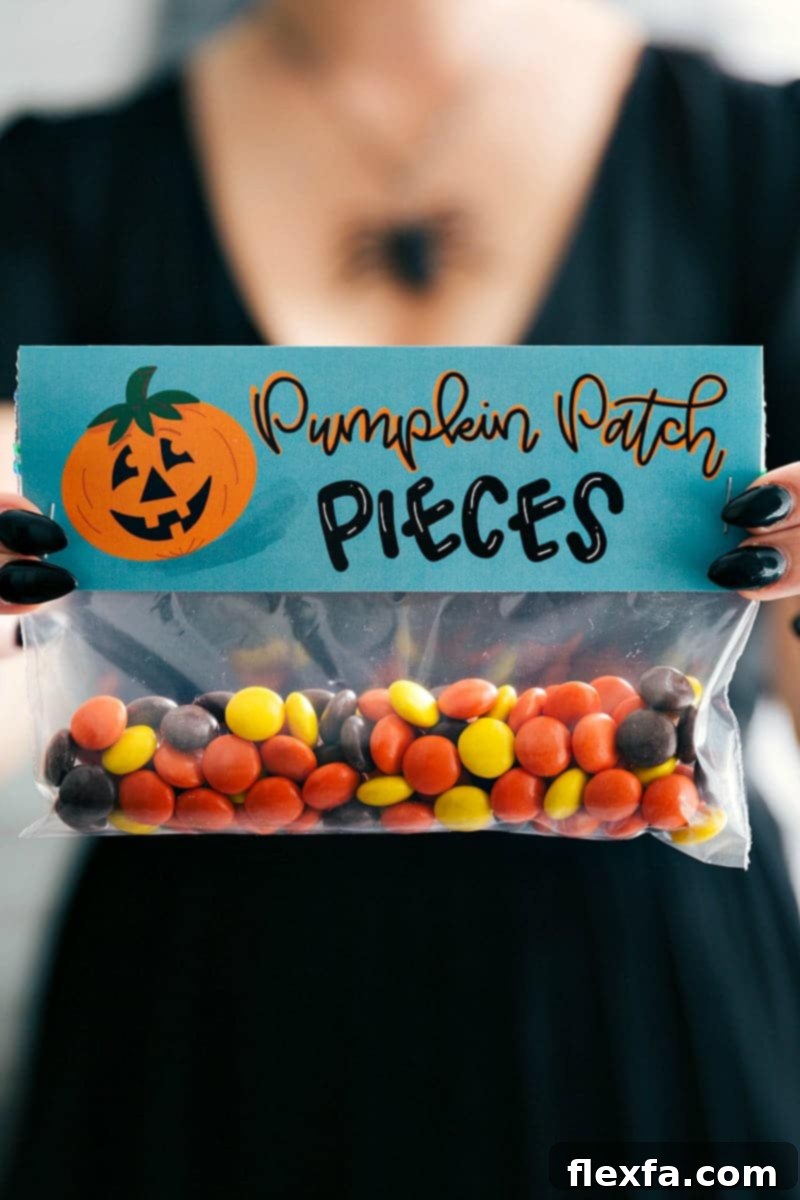
3. “Pumpkin Patch Pieces” Treat Bags
Embrace the iconic colors of autumn and Halloween with these “Pumpkin Patch Pieces” treat bags, featuring everyone’s favorite peanut butter candy, Reese’s Pieces. The vibrant orange, yellow, and brown candies perfectly complement the pumpkin theme.
Supplies:
- Snack Sized Ziplock Bag
- Free Printable Topper: Click Here
- Stapler
- Reese’s Pieces
Instructions:
Fill each snack-sized Ziplock bag with a generous portion of Reese’s Pieces, ensuring the bags are securely sealed. Next, carefully cut out your “Pumpkin Patch Pieces” printable toppers, score the center line, and fold neatly. Position the folded topper over the top of each candy-filled bag, aligning it perfectly. Secure the topper in place by stapling both sides to the bag. These cheerful and thematic bags are now ready for gifting! *Important Freshness Note: Even though the bag is sealed, for maximum freshness and flavor, we recommend packaging these particular treats no more than 1-2 days before they are intended to be gifted.
Creative Twist:
Instead of just Reese’s Pieces, mix in some candy corn or mini chocolate chips to add more variety to your “pumpkin patch.” You could also tie a small green ribbon around the stapled topper to mimic a pumpkin stem.
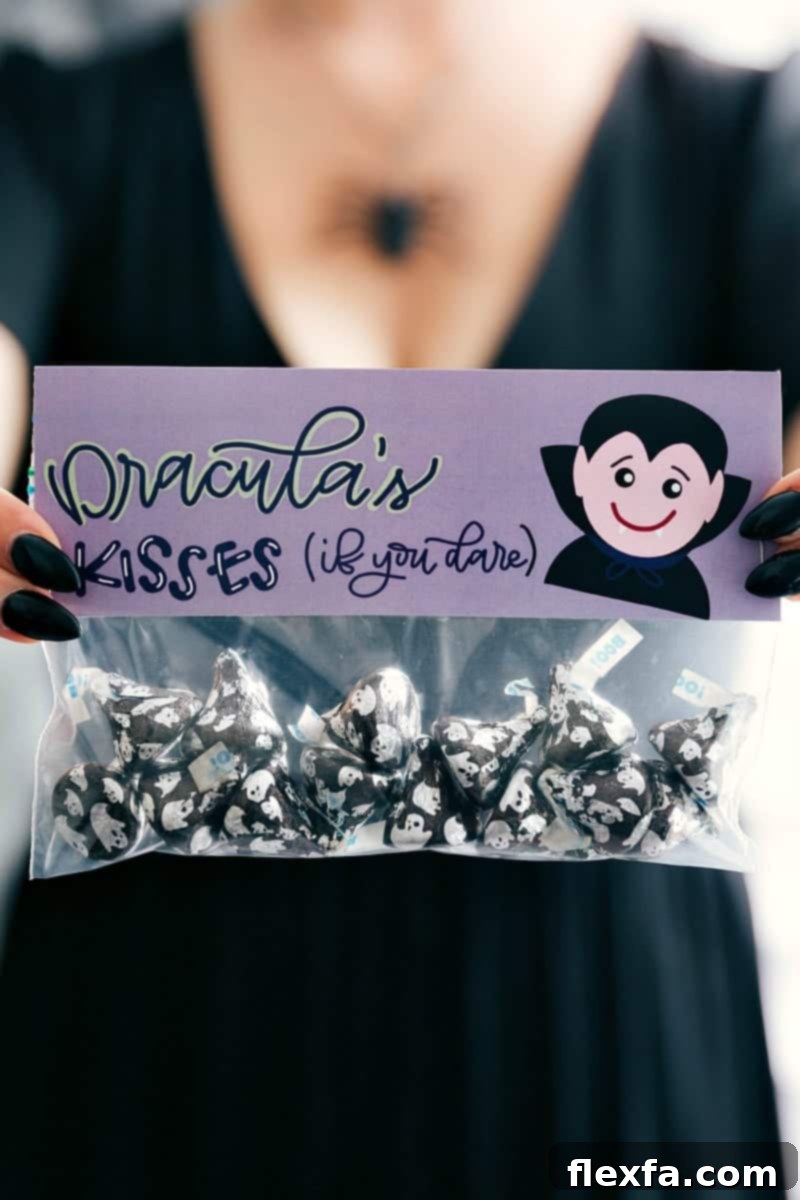
4. “Dracula Kisses” Treat Bags
Add a touch of vampire charm with these “Dracula Kisses” treat bags, filled with the classic and beloved Hershey’s Kisses. This simple yet effective design is perfect for spreading sweet (and slightly spooky) affection.
Supplies:
- Snack Sized Ziplock Bag
- Free Printable Topper: Click Here
- Stapler
- Hershey’s Kisses (for an extra festive touch, use Halloween foil-wrapped kisses if available!)
Instructions:
Begin by filling each snack-sized Ziplock bag with a handful of Hershey’s Kisses. If you can find them, the Halloween-themed foil-wrapped Kisses add a wonderful festive flair to these bags! Seal the bags tightly once filled. Next, take your “Dracula Kisses” printable toppers, cut them out, score them down the middle, and fold them. Affix the folded topper over the sealed candy bag, ensuring it is centered. Secure it firmly with staples on each side. Your charming “Dracula Kisses” are now ready to be shared with all your little monsters!
Creative Twist:
Include a small plastic vampire fang toy inside the bag with the Hershey’s Kisses for an extra surprise, or use red and black ribbons to tie around the bag before attaching the topper.
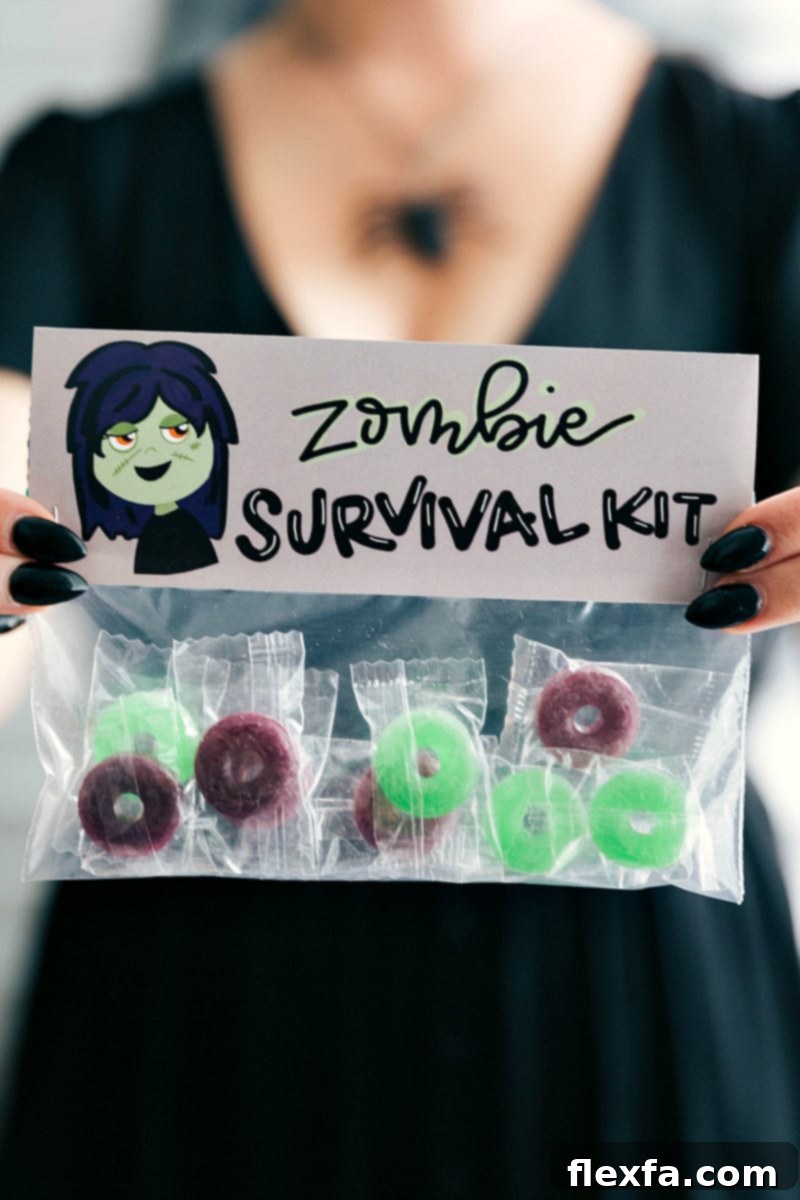
5. “Zombie Survival Kit” Treat Bags
Prepare for the apocalypse (or just a fun Halloween night) with these amusing “Zombie Survival Kit” treat bags. Filled with Lifesavers, they’re a lighthearted and unique offering that’s sure to get a chuckle.
Supplies:
- Snack Sized Ziplock Bag
- Free Printable Topper: Click Here
- Stapler
- Lifesavers candy rolls
Instructions:
Fill each snack-sized Ziplock bag with one or two rolls of Lifesavers candy. Seal the bags securely. Next, cut out your “Zombie Survival Kit” printable toppers, score them along the center, and fold them. Place the folded topper over the top of each candy-filled bag, ensuring a neat fit. Secure the topper by stapling both sides to the bag. Your emergency “Zombie Survival Kits” are now ready to be deployed to those in need of a sweet rescue!
Creative Twist:
For an enhanced “survival kit,” you could also include a small band-aid, a mini flashlight keychain, or even a glow stick alongside the Lifesavers. Choose green or red Lifesavers to further match the zombie theme.
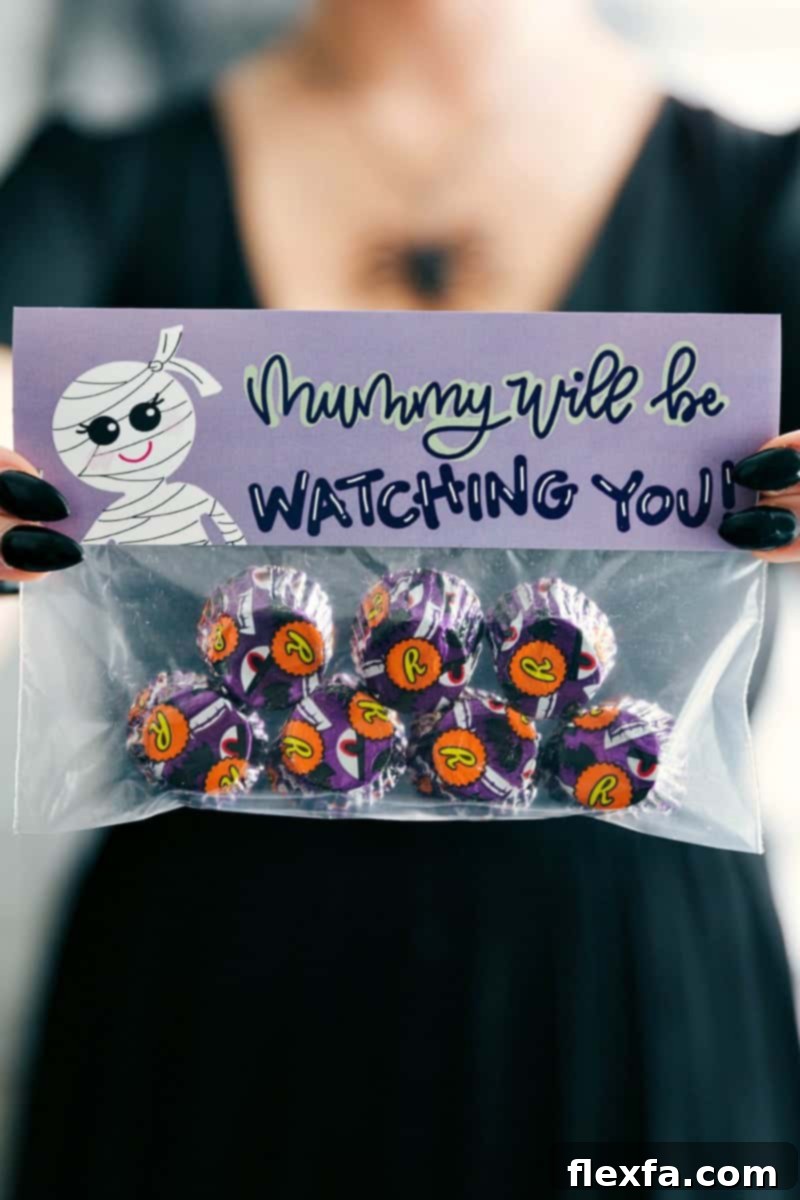
6. “Mummy Will Be Watching You” Treat Bags
These “Mummy Will Be Watching You” treat bags are playfully eerie and perfectly themed for Halloween. Filled with watchful candy eyeballs or eyeball-wrapped Reese’s cups, they’re sure to catch attention.
Supplies:
- Snack Sized Ziplock Bag
- Free Printable Topper: Click Here
- Stapler
- Eyeball candies (such as gummy eyeballs or individually wrapped Reese’s cups with eyeball designs)
Instructions:
Carefully fill each snack-sized Ziplock bag with your chosen eyeball candies. Individually wrapped Reese’s cups with eyeball designs are particularly thematic and delicious! Ensure the bags are securely sealed. Next, cut out your “Mummy Will Be Watching You” printable toppers, score them down the middle, and fold them. Place the folded topper over the top of each candy-filled bag, making sure it’s centered and aligned. Secure the topper firmly by stapling both sides to the bag. These uniquely spooky bags are now ready to be distributed, complete with their watchful gaze!
Creative Twist:
You can create your own “mummy” look by wrapping standard fun-size chocolate bars in white paper strips and adding small candy eyes before placing them in the bags. This adds an extra layer of DIY charm!
More Halloween Treat Bag Inspiration
Beyond the six fantastic ideas detailed above, the possibilities for DIY Halloween treat bags are endless! Here are a few more quick ideas to spark your creativity, whether you’re looking for non-candy options or more homemade delights:
- Ghostly Grahams: Create simple “ghosts” by dipping graham cracker squares halfway into melted white chocolate and adding two mini chocolate chips for eyes before they set.
- Spider Web Snacks: Arrange pretzel sticks to form a “spider web” and drizzle with melted white chocolate, or use chocolate sandwich cookies with a gummy spider on top.
- Monster Mash Mix: A customizable snack mix featuring popcorn, various Halloween-themed candies, small cookies, and spooky sprinkles. Great for varying textures and flavors.
- Witch’s Brew Bubbles: For a non-candy alternative, fill bags with small bottles of bubbles and attach a topper that whimsically reads “Witch’s Brew” or “Potion for Fun.”
- Candy Corn Creations: Package small bags of candy corn with a topper that says, “Have a CORNy Halloween!”
- Skeleton Bones: Fill bags with white yogurt-covered pretzel sticks or white chocolate-covered mini pretzels to resemble spooky bones.
Don’t be afraid to experiment with different candies, themes, and embellishments. The key is to have fun and let your Halloween spirit shine through in every treat you create! These ideas offer a great starting point for personalized and memorable Halloween handouts.
Gifting and Storage Tips for Your Treat Bags
To ensure your handcrafted Halloween treat bags are at their absolute best when received, keep these practical tips in mind for preparation, storage, and distribution:
- Optimal Assembly Timing: While most commercially packaged candies will maintain freshness for several weeks, for homemade treats like the “Goblin Goodies” Muddy Buddies, or other items that can quickly become stale (such as chips, certain cookies, or freshly baked goods), it’s best to assemble them no more than 1-3 days before they are intended to be gifted or consumed. This ensures maximum freshness, flavor, and enjoyment for the recipients.
- Proper Storage Conditions: Once assembled, store your completed treat bags in a cool, dry place, away from direct sunlight or any sources of heat or humidity. An airtight container or a large resealable bag can provide an extra layer of protection against moisture, odors, and potential pests, ensuring your treats remain pristine until Halloween night.
- Thoughtful Distribution Ideas:
- Classic Trick-or-Treating: Have a well-lit and easily accessible station ready to hand out your beautifully themed bags to eager trick-or-treaters.
- School or Classroom Parties: These personalized bags make a fantastic and unique alternative to standard cupcakes or store-bought snacks. Always remember to check with school or teacher guidelines regarding homemade treats and allergy policies.
- Thoughtful Neighbor Gifts: Deliver them as a friendly and festive gesture to neighbors, friends, or family members, spreading holiday cheer beyond just trick-or-treating.
- Halloween Party Favors: Arrange them neatly at each place setting, in a decorative basket by the door, or as part of a candy buffet at your Halloween party, allowing guests to take one as they leave.
- Allergy Awareness & Alternatives: It’s increasingly common for children to have food allergies. If you are aware of guests with specific dietary restrictions, consider preparing a few separate bags with allergy-friendly candies or non-food treats. Participating in the Teal Pumpkin Project is a wonderful way to offer safe alternatives for all children during trick-or-treating.
We truly hope you thoroughly enjoy the process of creating and distributing these easy, fun, and festive Halloween treat bags. Let your creativity soar this spooky season! Happy crafting and happy gifting! We’d absolutely love to see your unique spooky creations – feel free to share photos of your personalized treat bags on social media!
Like this? Leave a comment below!