
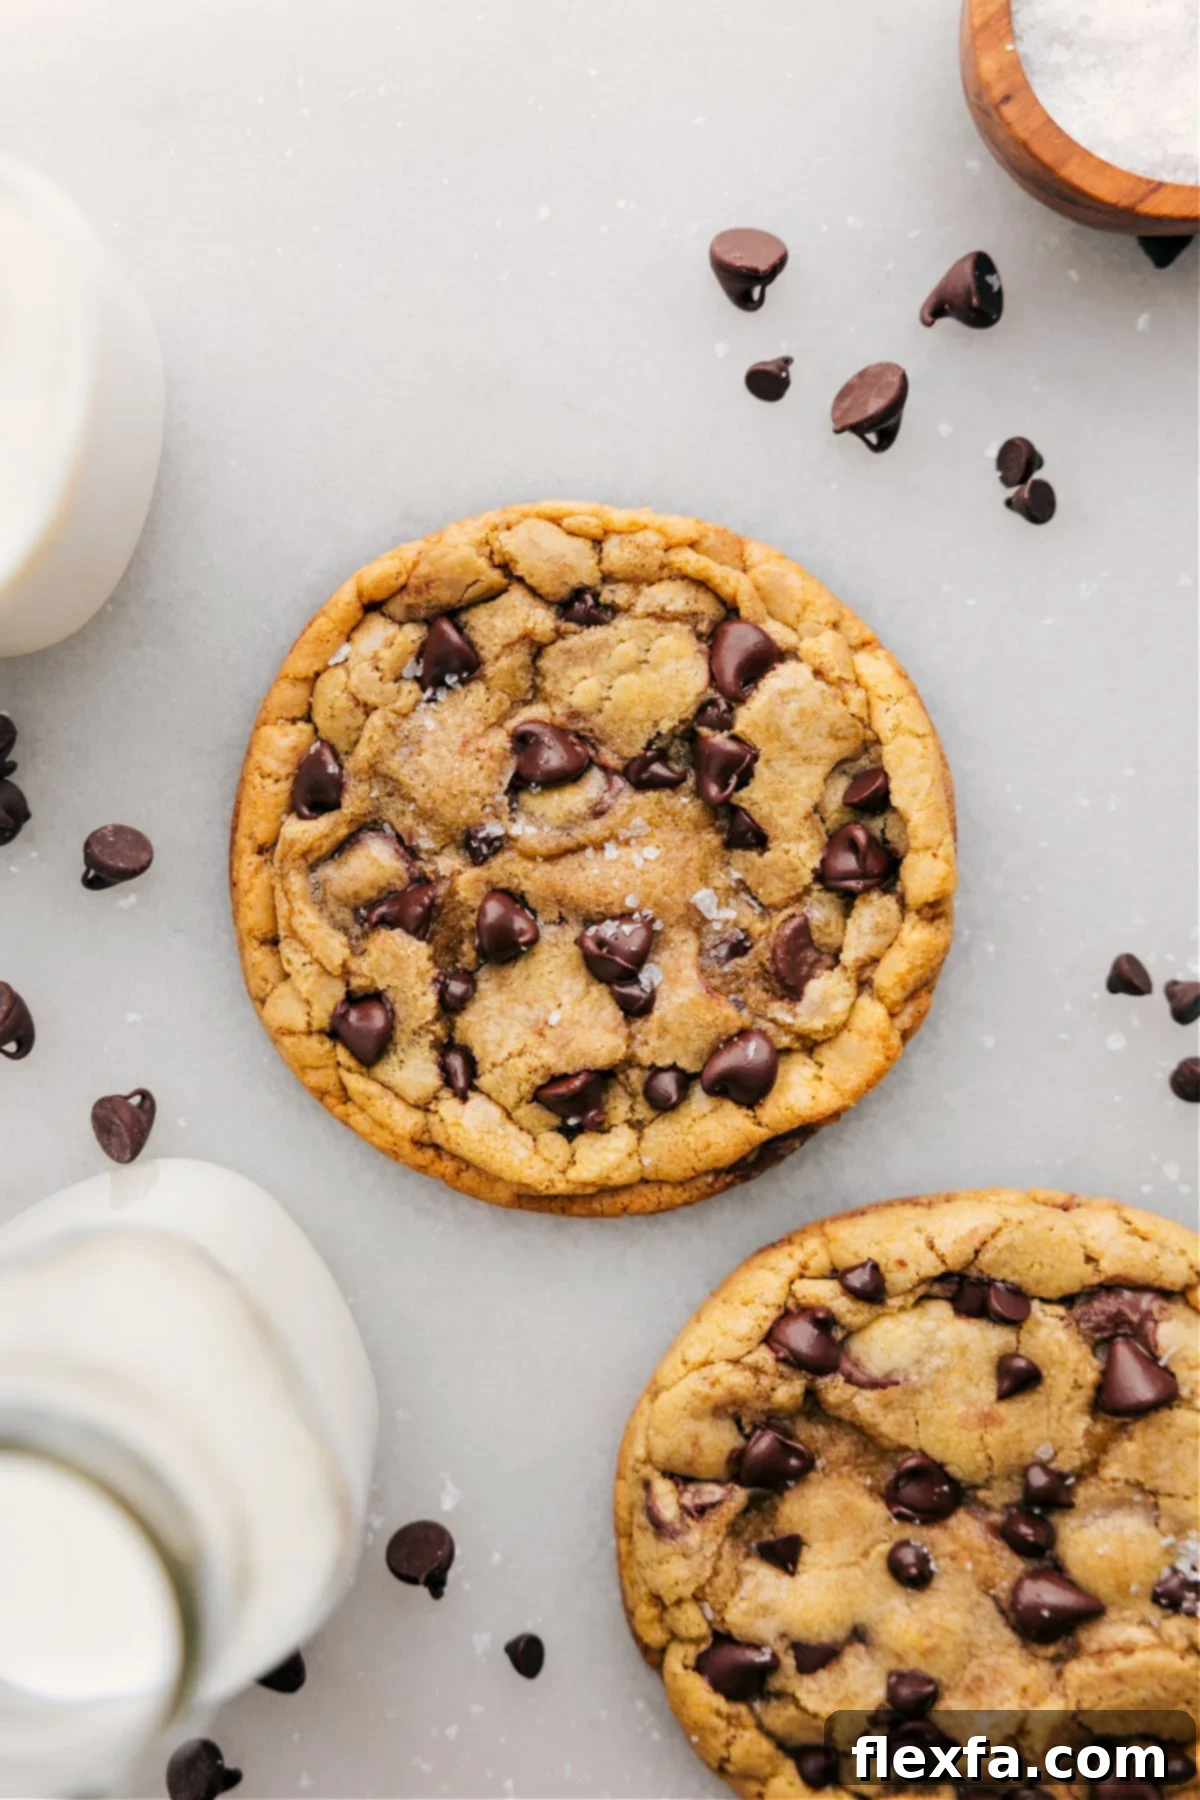
Indulge your sweet cravings with the ultimate **Single Serve Chocolate Chip Cookie**! This isn’t just a cookie; it’s a moment of pure bliss, meticulously crafted for those times when a full batch is simply too much, yet anything less than perfection won’t do. Boasting impeccably crisp, golden edges, a sumptuously soft and gooey center, and an abundance of melty chocolate chips in every single bite, this recipe promises an unparalleled homemade treat. Forget long chilling times or complex processes; this is the quickest, most satisfying way to enjoy a warm, delicious chocolate chip cookie, tailor-made for one or two.
What Defines a Single Serve Chocolate Chip Cookie?
A single serve chocolate chip cookie recipe is a culinary innovation designed for instant gratification. Instead of yielding dozens of cookies, these recipes are specifically formulated to produce a small handful—typically one to three cookies—perfect for an individual craving or a cozy shared moment without the commitment of extensive baking. It’s the ideal solution for preventing excess leftovers, controlling portion sizes, or simply satisfying that sudden urge for something sweet and homemade without overindulging.
What sets this particular single serve recipe apart is its efficiency. Many traditional cookie recipes call for a lengthy dough chilling period, which can be a deterrent when a craving strikes. This optimized recipe bypasses that wait, allowing you to go from craving to warm cookie in a remarkably short time. It’s about delivering maximum flavor and texture with minimum fuss, ensuring that delectable experience is always within reach. And if your heart desires an even deeper chocolate experience, be sure to explore our Single Serve Double Chocolate Cookie recipe for an intense cocoa hit.
Mastering the Single Serve Chocolate Chip Cookie
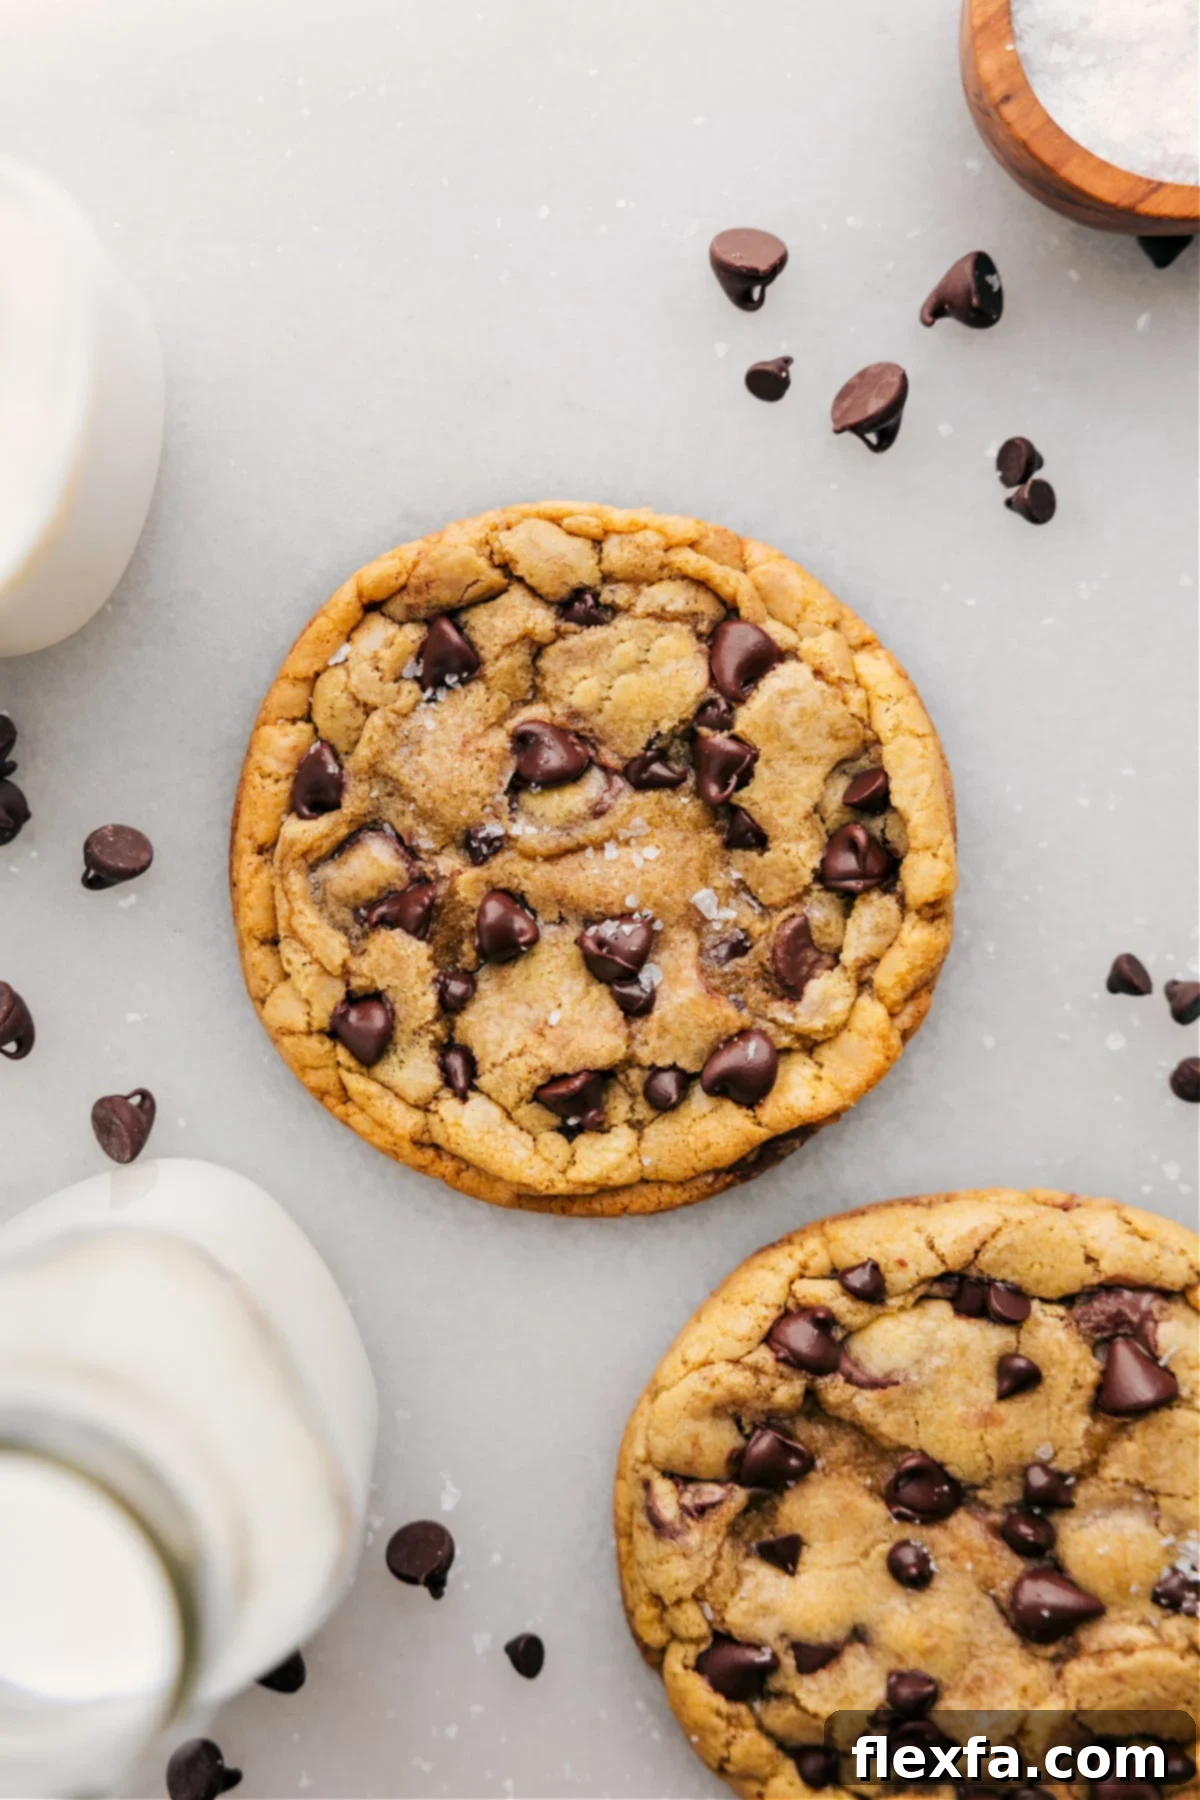
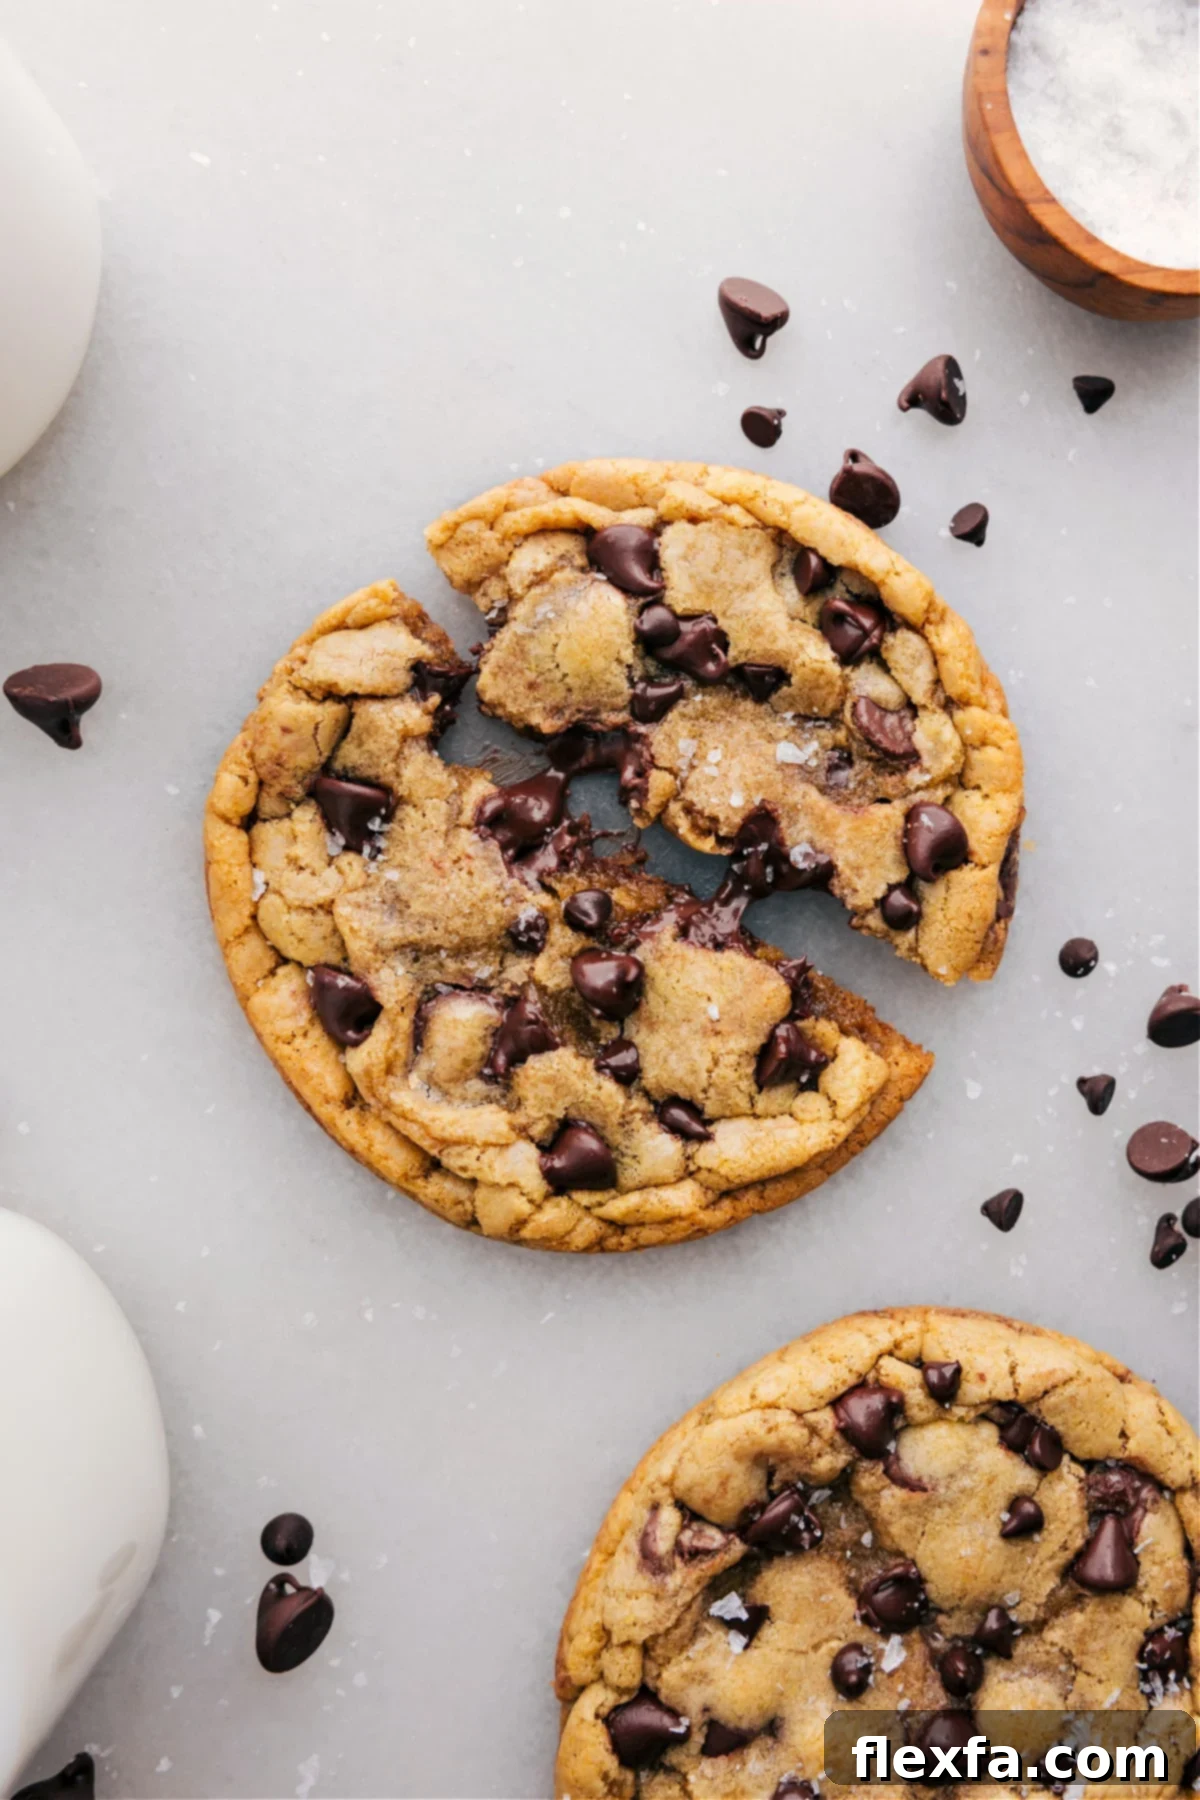
There are moments when only a giant, warm, and utterly delicious chocolate chip cookie will suffice, but the thought of baking an entire batch, or even a small-batch, feels overwhelming. That’s precisely when our single-serving chocolate chip cookie recipe shines. These cookies are not just good; they are truly exceptional, offering a symphony of textures and flavors that will redefine your perception of a quick treat. You’ll be rewarded with an intensely **delicious, perfectly sweet, rich, and wonderfully chewy cookie** with a gloriously soft interior that melts in your mouth and satisfyingly crisp edges.
Having dedicated over a decade to sharing and refining recipes, this specific single-serve chocolate chip cookie formulation has become a perennial favorite and a constant go-to for its consistent excellence. Through countless iterations, we’ve honed it to perfection, discovering key techniques that elevate it from good to truly great. Precision in measuring is paramount for achieving these stellar results, as even slight variations can impact the delicate balance of texture and spread. Trust the process, follow the guidelines, and prepare for the best single-serve cookie experience of your life.
Key Insights from Perfecting This Recipe:
- No Lengthy Chilling Required: While dough chilling can enhance flavor and texture in larger batches, the beauty of a single-serving cookie lies in its immediacy. When a craving hits, you want that cookie *now*. This recipe is engineered to deliver that instant gratification without compromising on quality or requiring an hour-long wait.
- Embrace Melted Butter: Initially, this recipe called for softened butter. However, extensive testing revealed that melted butter, when properly cooled, offers a superior texture and makes the dough significantly easier to mix, especially in small quantities. It contributes to a wonderfully chewy interior and those desirable crisp edges, transforming the cookie’s character for the better. The trick is to ensure the melted butter is cooled to room temperature before combining with sugars to prevent a greasy dough.
- Accurate Flour Measurement is Non-Negotiable: The success of this cookie hinges on precise flour measurement. Too much flour will result in a dry, cake-like cookie that lacks chewiness, while too little will cause excessive spreading, leading to thin, brittle results. We highly recommend using a food scale for the most accurate measurement to achieve the ideal soft, chewy, and perfectly textured cookie.
Featured Comment
“If I could give this recipe 10 out of 5 stars, I absolutely would! I’ve experimented with countless chocolate chip cookie recipes over the years, and none have come close to this one. THIS is, without a doubt, the BEST recipe I’ve ever used. Every single person I’ve shared these cookies with has fallen head over heels for them. I’ve made this recipe dozens of times – I even have it memorized! I simply adore it! THANK YOU!”
– Alexa
Essential Ingredients for Your Perfect Single Serving Cookie
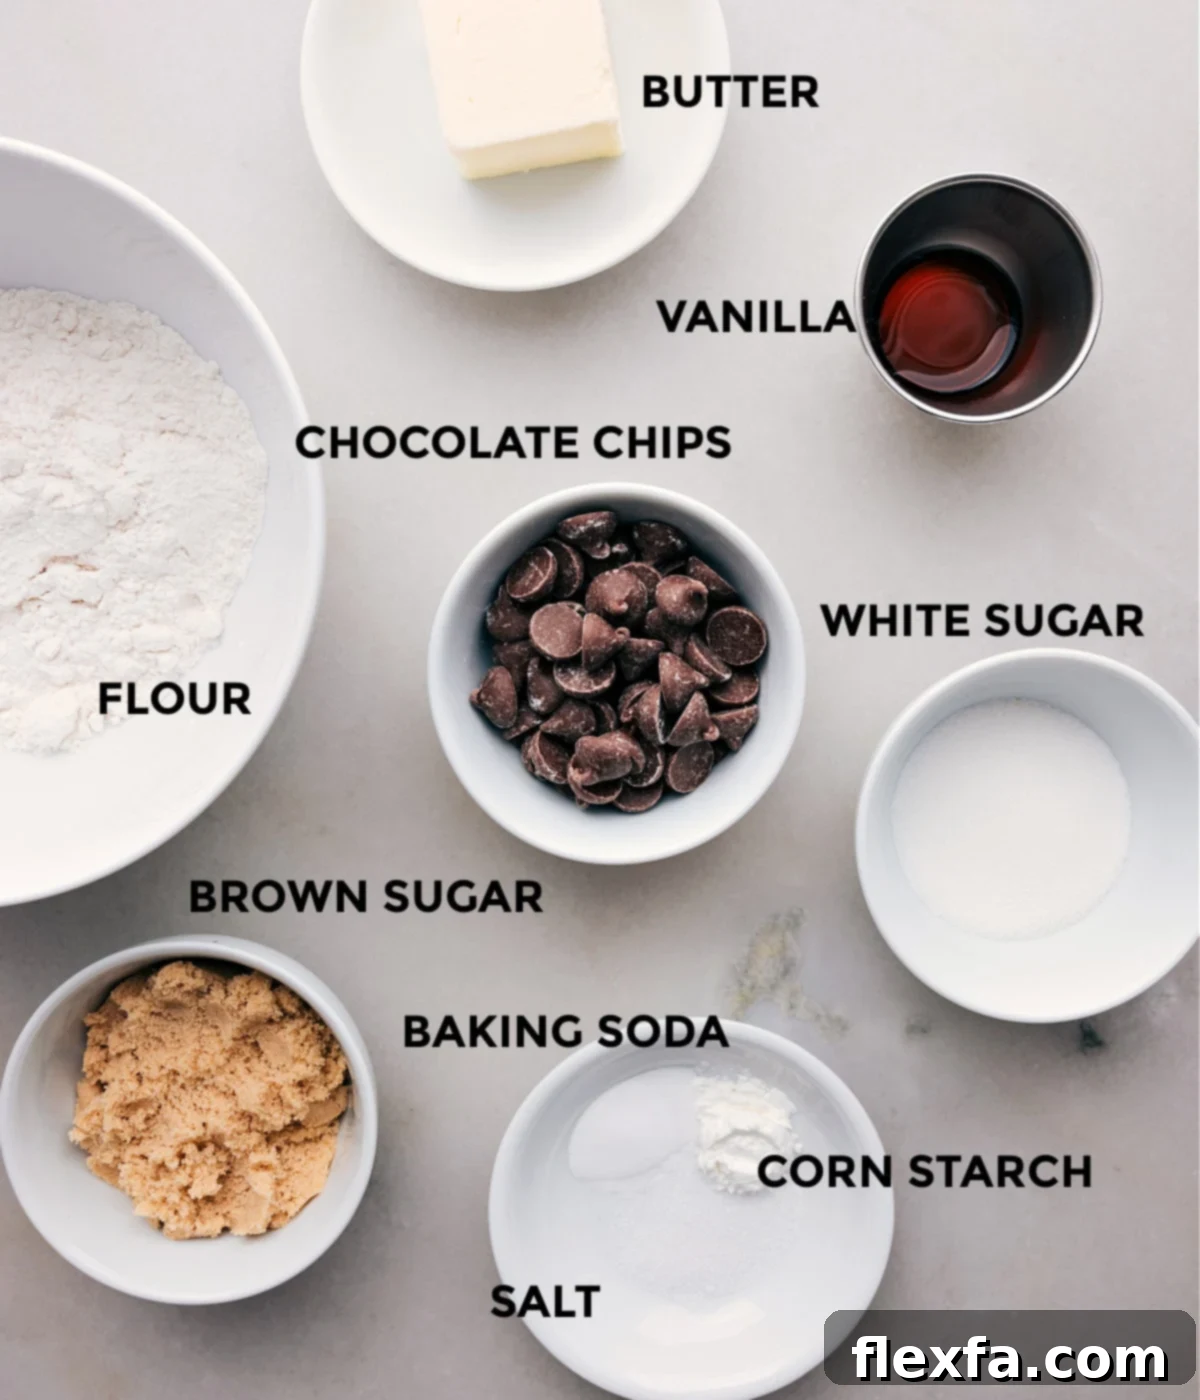
Crafting the perfect single-serve chocolate chip cookie relies on a few key ingredients, each playing a vital role in achieving that desirable taste and texture. Here’s a closer look at what you’ll need and some tips for optimizing each one:
- Salted or Unsalted Butter: Butter is the foundation of flavor and richness. If you opt for unsalted butter, remember to add a generous 1/8 teaspoon of salt to the dough to balance the sweetness and enhance the chocolate flavor. For an extra gourmet touch and a subtle flavor contrast, consider sprinkling a few flaky sea salt flakes on top of your baked cookies.
- Light Brown Sugar and Granulated White Sugar: This combination is crucial for texture. Brown sugar, with its molasses content, contributes to the cookie’s chewiness and moistness, while granulated sugar promotes crisp edges and spread. Ensure your brown sugar is fresh, soft, and free of hard clumps. Pack it firmly into your measuring spoons and level it off accurately. Remember, 1/2 tablespoon is precisely 1 and 1/2 teaspoons.
- Vanilla Extract: While optional, a good quality vanilla extract significantly deepens and enriches the cookie’s flavor profile. It adds a warm, aromatic note that complements the chocolate and butter beautifully, transforming a good cookie into an extraordinary one.
- Egg Yolk: This is a secret weapon for single-serve cookies! Using only the egg yolk (instead of a whole egg) concentrates the fat and richness, resulting in a wonderfully tender and chewy cookie. It also acts as a powerful binder, helping to create a cohesive dough. Be meticulous in separating the yolk from the whites; even a tiny amount of white can affect the texture. Don’t forget to pinch off the stringy part (chalaza) for a smoother mixture.
- Baking Soda: This leavening agent is responsible for the cookie’s lift and contributes to its chewy texture and golden-brown appearance. Always ensure your baking soda is fresh and active (you can test it with a drop of vinegar). If it’s clumpy, sift it through a fine-mesh strainer to ensure even distribution in the dough.
- Cornstarch: An optional but highly recommended addition, cornstarch helps to create an incredibly soft and tender cookie. It prevents the cookies from becoming tough and contributes to that desirable melt-in-your-mouth quality, making them feel extra luxurious.
- All-Purpose Flour: As mentioned, accurate flour measurement is critical. The best method is to spoon the flour lightly into your measuring cup and then level it off with the back of a knife. For truly professional results, use a food scale to weigh your flour (approximately 62 grams for 1/2 cup) to avoid accidental over-measurement, which can lead to a dense, cake-like cookie.
- Chocolate Chips: The star of the show! Feel free to choose your favorite type of chocolate chips. Milk chocolate offers a classic, creamy sweetness, while semi-sweet provides a deeper, more traditional flavor. For an exciting twist, try mixing different varieties, such as a combination of milk, semi-sweet, or even dark chocolate chips, to create layers of chocolatey goodness in every bite.
Crafting Your Perfect Single Serve Chocolate Chip Cookie: A Step-by-Step Guide
Creating this irresistible single-serve chocolate chip cookie is a straightforward and rewarding process. Follow these simple steps to bring your sweet craving to life:
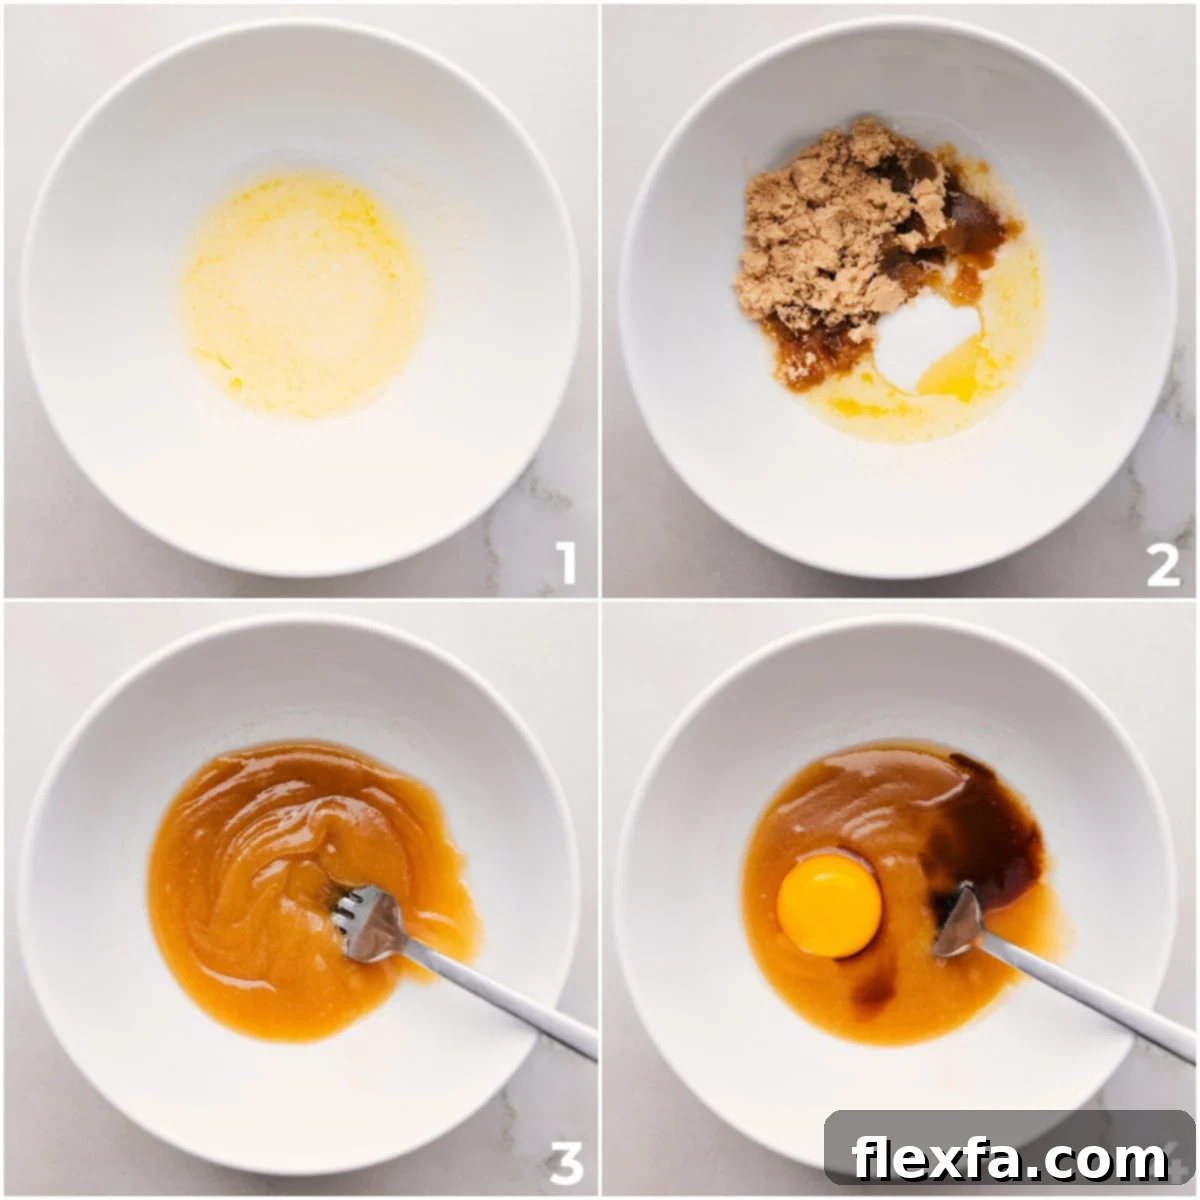
- Prepare Your Oven and Butter: Begin by preheating your oven to 350°F (175°C). In a microwave-safe ceramic or porcelain bowl, melt the butter until it’s just liquid, being careful not to let it get hot. Crucially, allow the melted butter and the bowl to cool completely to room temperature. This prevents the sugars from crystallizing and ensures a perfectly textured dough.
- Combine Sugars and Butter: Once the butter is cool, add both the light brown sugar and granulated sugar to the bowl. Vigorously whisk the mixture with a fork for a full minute until it is well combined and slightly lightened in color. This vigorous mixing helps create air pockets and properly incorporates the sugars.
- Integrate Egg Yolk & Vanilla: Stir in the isolated egg yolk and vanilla extract (if using). Continue whisking briskly with the fork for another minute until the mixture is fully emulsified and appears remarkably creamy and smooth. This step is essential for the cookie’s rich texture.
- Add Dry Ingredients (Excluding Flour): Introduce the baking soda and cornstarch (if using) to the wet mixture. Mix thoroughly with your fork, ensuring there are no clumps and everything is evenly distributed. If you’re using unsalted butter, this is the stage to add your 1/8 teaspoon of salt.
- Fold in Flour and Chocolate Chips: Gradually add the all-purpose flour and your chosen chocolate chips to the bowl. Begin stirring with a fork until the dough starts to become thick and difficult to mix. At this point, switch to a silicone spatula and gently fold the ingredients until the dough is uniformly combined, with no visible streaks of dry flour. Be careful not to overmix.
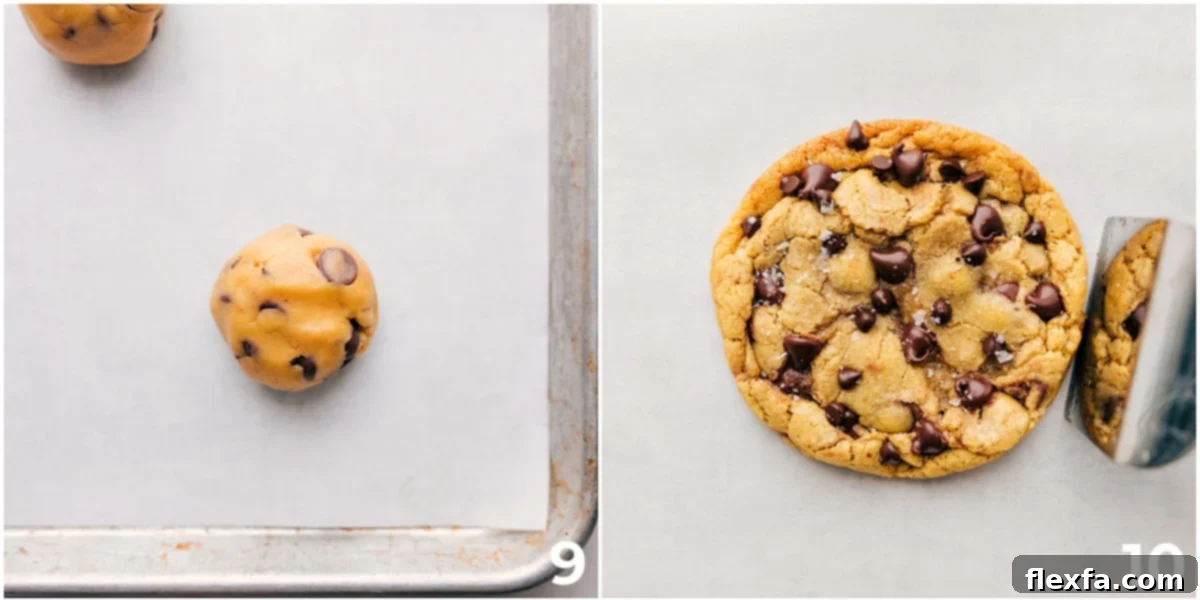
- Shape and Prepare for Baking: Using a 1/4 cup measuring cup, scoop the dough and level off the top. Gently roll the dough into a large, cohesive ball. Repeat this process until you have three perfectly formed dough balls. Any remaining dough is your baker’s treat – enjoy it responsibly, or consider saving it for Edible Cookie Dough! Place these dough balls onto a baking sheet lined with parchment paper or a silicone mat. For an even better bake, place the baking sheet in the freezer for 5-10 minutes while your oven finishes preheating. This brief chill helps the cookies maintain their shape and develop crispier edges.
- Bake to Perfection: Transfer the chilled dough balls to your preheated oven. Bake for approximately 10-12 minutes, or until the edges are beautifully golden brown and set, but the centers still look delightfully soft and slightly underbaked. Remember, cookies continue to cook slightly as they cool, so pulling them out a little early is key to that coveted gooey center.
- Cool and Finalize: Immediately upon removing the baking tray from the oven, use a metal spatula to gently press any uneven edges inward, creating a perfectly round cookie. This is also the ideal moment to press a few extra chocolate chips onto the tops of the cookies for that irresistible “bakery-style” appeal. Optionally, sprinkle with flaky sea salt. Allow the cookies to cool on the baking sheet for at least 5 minutes before carefully transferring them to a wire rack or, even better, enjoying them warm directly from the pan.
Expert Tips for the Best Single Serve Chocolate Chip Cookie
Achieving cookie perfection, even in a single-serve batch, often comes down to a few critical details. These expert tips will ensure your cookies are consistently delicious:
- Measure with Precision: For the most consistent and best results, especially with small batch baking, precision in measuring is paramount. A digital food scale is your best friend for exact measurements of dry ingredients like flour. If using measuring cups and spoons, always level off the tops precisely to prevent adding too much or too little.
- Proper Butter Measurement: Butter is a key component, and its quantity significantly impacts texture. To ensure you have exactly the right amount, cut butter from the middle of the stick whenever possible. This avoids inaccuracies that can arise if the wrapper isn’t attached evenly at the ends.
- Slightly Underbake is Key: For that perfectly soft and chewy center, resist the urge to overbake. Remove the cookies from the oven when their edges are lightly golden and set, but the center still appears slightly soft or even a little gooey. They will continue to set as they cool on the hot baking sheet, resulting in that ideal chewy texture.
- Shape After Baking: The moment cookies come out of the oven, their structure is still pliable. Use this opportunity! Take a metal spatula and gently press any irregular edges inwards to create perfectly round, bakery-style cookies. This is also the perfect time to stud the tops with a few extra chocolate chips for a visually appealing and extra chocolatey finish.
- Cool the Melted Butter Completely: This step cannot be overstated. If your melted butter is warm when mixed with the sugars, it can lead to a greasy dough and cookies that spread too much. Always ensure the butter is completely cooled to room temperature before proceeding with the recipe.
- Mix Wet Ingredients Thoroughly: When combining the melted butter, sugars, egg yolk, and vanilla, ensure you whisk vigorously until the mixture is truly creamy and emulsified. This creates a stable base for your dough and contributes to a uniform texture in the final cookie.
- Flatten If Needed: Should your cookies appear too puffy after baking, a simple trick can save the day. Gently tap the baking sheet on your counter immediately after removing it from the oven. This slight jolt helps the cookies settle and flatten just enough to achieve that classic cookie shape.
Frequently Asked Questions About Single Serve Chocolate Chip Cookies
While you can technically double or triple this recipe, it’s generally much easier and often yields better results to simply use a recipe designed for a larger batch if you need many cookies. This specific recipe is optimized for its small scale. For larger quantities, we highly recommend trying our favorite Chewy Chocolate Chip Cookies, the popular Bakery Style Chocolate Cookies, or even our renowned Gideon’s Bakehouse Cookie Recipe Copycat for a truly impressive spread.
Reducing the sugar content in this recipe is not recommended. Sugar plays a critical role in not only the sweetness but also the overall texture, structure, and browning of a single-serve chocolate chip cookie. Altering the sugar can lead to significant changes in chewiness, crispness, and spread. If you are concerned about the sweetness level, consider using darker chocolate chips (like 60% or 70% cacao) and an extra pinch of flaky sea salt to help balance the flavors without compromising the cookie’s integrity.
The key to a perfect cookie is knowing when to pull it from the oven. Look for edges that are visibly set and lightly golden brown. The center of the cookie should still appear soft, slightly puffy, and possibly even a little underbaked. Remember, the residual heat of the baking sheet will continue to cook the cookie for a few minutes after it’s removed from the oven, allowing it to firm up to the ideal chewy texture. Slightly under-baked cookies are always the most delicious!
This recipe is specifically formulated for baking in a conventional oven to achieve its signature crisp edges and gooey center. It will not yield the same delicious results if attempted in a microwave, as microwave cooking methods differ significantly. If you’re looking for a quick, microwave-friendly dessert, we recommend trying a dedicated microwave recipe, such as our delightful Microwave Caramel Corn!
Essential Tools for Baking This Single Serve Cookie
Having the right tools can make your baking experience even more enjoyable and efficient. For these perfect single-serve chocolate chip cookies, here are a few helpful items you’ll want on hand:
- Microwave-Safe Ceramic/Porcelain Bowls: Ideal for melting butter quickly and allowing it to cool down to room temperature without retaining too much heat. Their non-reactive surface is perfect for mixing.
- Fork: A simple fork is surprisingly effective for briskly whisking the melted butter with sugars, and then for thoroughly incorporating the egg yolk and vanilla until the mixture achieves that desirable creamy, emulsified texture.
- Silicone Spatula: Essential for mixing the dough once it becomes too thick for a fork. A silicone spatula allows you to fold the ingredients gently without overworking the gluten, ensuring a tender cookie. It’s also excellent for scraping every last bit of delicious dough from the bowl.
- Baking Tray and Liner: A sturdy baking tray (a 15″ x 10″ sheet pan works well) is necessary for baking. Lining it with parchment paper or a silicone baking mat is crucial. These liners prevent sticking, promote even baking, contribute to a better texture on the bottom of your cookies, and make cleanup an absolute breeze.
- Metal Spatula: This tool becomes invaluable immediately after baking. Use a thin, rigid metal spatula to gently press the warm, soft edges of your cookies inwards to create a perfectly round shape. It’s also great for carefully transferring the warm cookies after they’ve set slightly.
Storage Tips
Keeping Your Single Serve Chocolate Chip Cookies Fresh
These cookies are undoubtedly at their peak deliciousness when enjoyed warm, straight from the oven, perhaps even topped with a scoop of your favorite vanilla ice cream!
For any rare “leftovers” (though with a single-serve recipe, that’s less likely!), store the baked cookies in an airtight container or bag at room temperature for up to 2-3 days to maintain their freshness and chewiness. If you have unbaked dough and want to save it for later, wrap it tightly in plastic wrap and place it in an airtight freezer bag. You can bake the dough directly from the freezer, simply adding an extra minute or two to the baking time.
More Quick & Easy Cookie Recipes to Love:
Cookies
Effortless No Bake Cookies Recipe
Desserts
Irresistible Chocolate Chip Cookie Bars Recipe
Desserts
Delicious Fruit Pizza Recipe with Sugar Cookie Crust
Desserts
Quick & Easy Avalanche Cookies (No Baking Required!)
Print Recipe
Single Serve Chocolate Chip Cookie
Chelsea Lords
10 minutes
10 minutes
20 minutes
3
cookies
Video
Equipment
-
Sheet pan (15″ x 10″)
-
Parchment paper or silicone baking mat
Ingredients
- 3 tablespoons unsalted butter or salted butter, see note 1
- 3 tablespoons light brown sugar, firmly packed
- 1-1/2 tablespoons granulated sugar
- 1/2 teaspoon vanilla extract (optional)
- 1 large egg yolk, see note 2
- 1/4 teaspoon baking soda
- 1/2 teaspoon cornstarch (optional)
- 1/2 cup all-purpose flour, see note 3
- 6 tablespoons chocolate chips (milk chocolate recommended!)
- Flaky sea salt for topping (optional)
Instructions
- Use exact measurements and level off the tops of measuring cups/spoons for best results.
- Preheat oven to 350°F (175°C). Add butter to a ceramic/porcelain bowl and microwave until just melted but not hot. Let butter and bowl fully cool to room temperature.
- To the cooled butter, add both brown and granulated sugars. Stir briskly with a fork until well combined. Add the egg yolk and vanilla. Continue to whisk with a fork until the mixture is emulsified and appears very creamy.
- Add baking soda, salt (if using unsalted butter), and cornstarch. Mix thoroughly with a fork. Add flour and chocolate chips. Continue stirring with a fork until it becomes difficult, then switch to a silicone spatula and fold until the dough is uniform without dry streaks.
- With the dough, fill up a 1/4 cup measuring cup and level off the top. Roll into a large ball. Repeat until you have 3 dough balls. (Anything left over is your treat!) Place the balls on a parchment or silicone-lined baking sheet. Freeze for 5–10 minutes while the oven heats.
- Bake for 10–12 minutes or until the edges are lightly browned and the tops are set but soft looking. Immediately after you pull the tray from the oven, use a metal spatula to press the edges of the cookies inward if needed.
- Optionally, press additional chocolate chips into the tops and sprinkle with sea salt. Allow cookies to cool on the baking sheet for 5 minutes before enjoying.
Recipe Notes
Note 2: When separating the yolk from whites, take your time to make sure no amount of white makes it in the dough. Also, get rid of the stringy part (chalaza); I gently pull it off with my fingers.
Note 3: Accurate flour measurement is crucial. Use a food scale to weigh out exactly 62 grams for best results. Too much flour leads to cakey cookies, while too little causes excessive spreading.
Storage: Store cookies in an airtight bag at room temperature. If you have unbaked dough, keep it in an airtight bag in the freezer and bake directly from freezer.
Nutrition Facts (per serving)
Serving: 1 cookie | Calories: 398kcal | Carbohydrates: 49.7g | Protein: 5.2g | Fat: 21.2g | Cholesterol: 92mg | Sodium: 112.3mg | Fiber: 2.6g | Sugar: 31.2g
Nutrition information is automatically calculated and should only be used as an approximation.
Love this recipe? Share your thoughts below!