
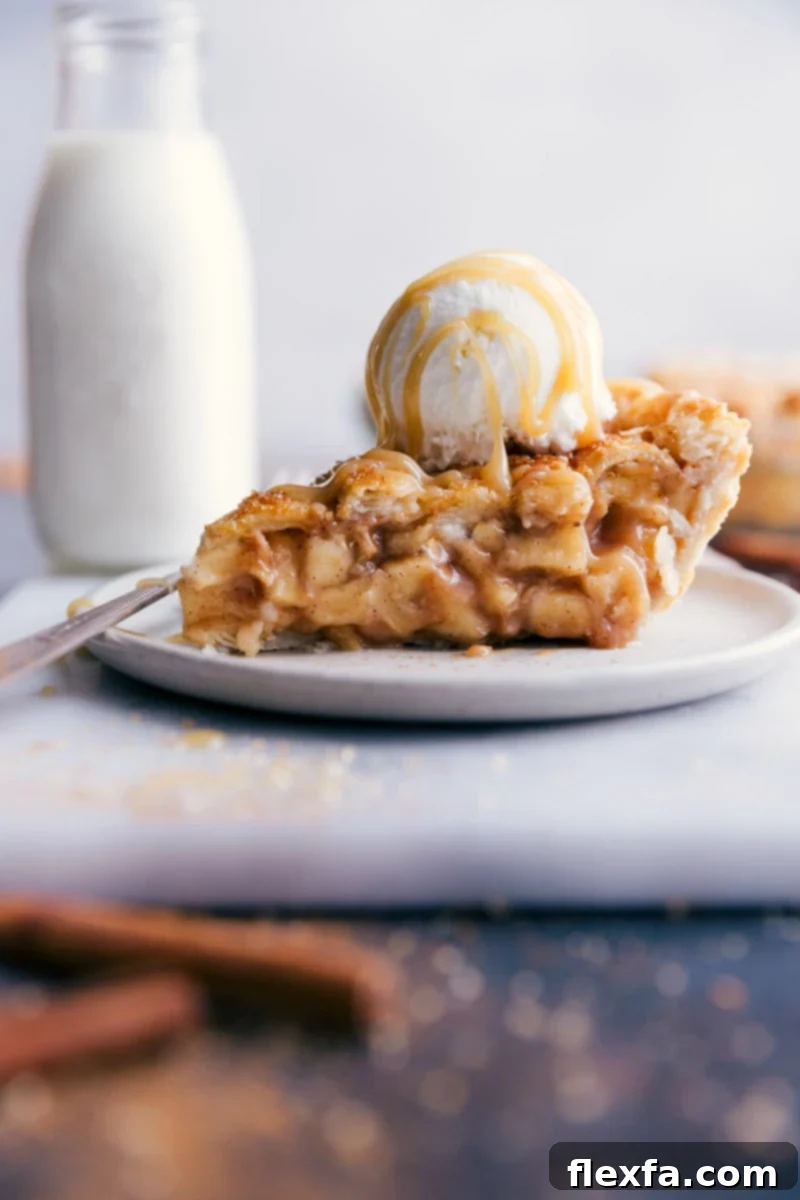
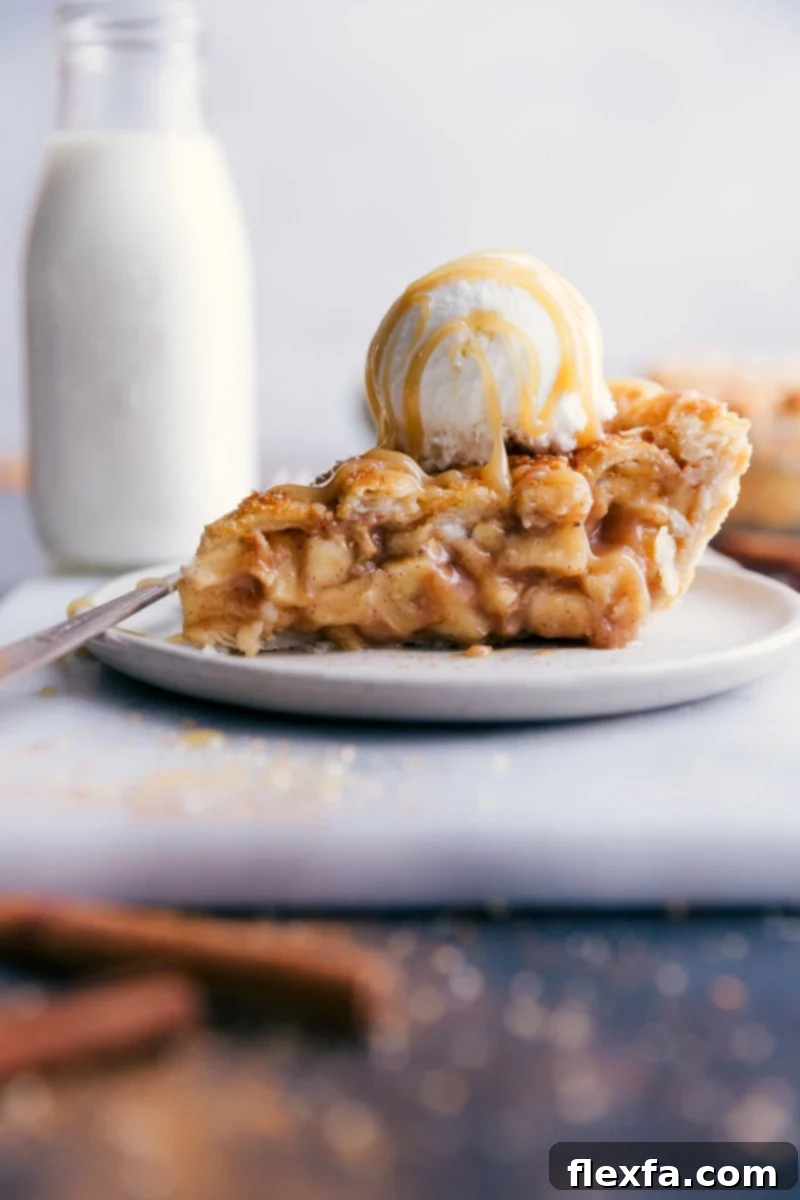
Apple Pie stands as a timeless symbol of comfort and homemade goodness. Imagine a dessert with a perfect golden, irresistibly crisp crust, giving way to a rich, thick, and wonderfully saucy filling. Each bite is a symphony of flavors, featuring tender apple chunks infused with warm, aromatic cinnamon and other autumnal spices. This isn’t just a dessert; it’s an experience, a slice of pure culinary bliss that evokes warmth and nostalgia. Best enjoyed with a generous scoop of creamy vanilla ice cream, allowing the cold sweetness to melt into the warm, spiced apples, creating an unforgettable sensation. Whether it’s a holiday gathering, a family dinner, or a simple craving for something sweet, this cozy classic promises to be the highlight of your meal.
The Quest for the Best Homemade Apple Pie
My culinary journey often intertwines with the preferences of my loved ones, especially my husband. From the moment we met, his profound love for apple and cherry desserts became delightfully clear. This revelation spurred me into a passionate pursuit of mastering all things apple, leading to the creation of delightful treats like these tasty Caramel Apple Cheesecake Bars, a rustic Apple Crumble, and adorable Mini Apple Turnovers. Yet, despite these successes, classic apple pie remained an intimidating challenge. It felt like an Everest in the dessert world, a dish everyone seemed to have a cherished, heirloom recipe for, and I wasn’t sure I could craft one that would truly impress him as much as my other apple creations.
For a long time, the idea of baking the perfect apple pie filled me with a mixture of excitement and trepidation. I was determined to conquer this iconic dessert, to create a pie that would not only satisfy but truly amaze. This determination led me down a path of extensive research, countless hours of testing different apple varieties, spice blends, crust techniques, and filling consistencies. It was a journey of trial and error, of learning from every mistake, and refining every detail. Finally, after much perseverance and dedication, I gathered the courage to bring my own unique apple pie recipe to life. The moment of truth arrived with the first slice, and let me tell you, the result was beyond my wildest expectations. It was, without a doubt, the best apple pie I had ever tasted – a sentiment enthusiastically echoed by my apple-loving husband. He declared it the best apple pie he had ever had in his life, a testament to the effort and passion poured into its creation. This recipe isn’t just a collection of ingredients and instructions; it’s the culmination of a personal quest to achieve apple pie perfection, now ready to be shared with you.
Mastering the Art of Apple Pie: Essential Ingredients
The foundation of an extraordinary apple pie lies in the careful selection and preparation of its ingredients. Each component plays a vital role in achieving that perfect balance of flavor, texture, and aroma. Here’s a detailed look at what you’ll need and why:
- Pie Crusts: The crust is the backbone of any great pie. Using two chilled pie crusts is crucial for achieving a flaky, tender texture that crisps beautifully. Chilling the dough before rolling and assembling prevents it from becoming too soft or sticky, ensuring your pie maintains its structure and doesn’t shrink during baking. You can opt for high-quality store-bought crusts or try your hand at a homemade version for an even more personalized touch.
- Apples: The heart of your pie! For the most complex and delightful flavor profile, a blend of sweet and tart apples is highly recommended. Sweet apples like Honeycrisp, Fuji, or Golden Delicious provide a lovely tenderness and natural sugars, while tart varieties like Granny Smith or Braeburn offer a crucial acidic counterpoint that brightens the entire filling and prevents it from being overly sweet. This combination also contributes to a varied texture in the final bake.
- Unsalted Butter: This adds an incredible richness and depth to the apple filling, infusing it with a subtle, creamy flavor. Using unsalted butter allows you to control the overall saltiness of the pie, ensuring it’s perfectly seasoned.
- Lemon: Both the zest and juice of a fresh lemon are indispensable. Lemon juice provides a vibrant tang that balances the sweetness of the apples and spices, preventing the filling from becoming cloying. More importantly, it helps keep the apples from oxidizing and turning brown, preserving their fresh appearance. The zest adds an aromatic citrus note, enhancing the overall fragrance and complexity of the pie.
- Brown Sugar & White Sugar: This combination of sugars creates a wonderfully nuanced sweetness and helps to develop a rich, syrupy filling. Lightly packed brown sugar, with its molasses content, adds a deeper, caramelized flavor and moistness, while white granulated sugar provides straightforward sweetness and aids in the thickening process. Ensure brown sugar is lightly packed to get the correct measurement.
- Spices (Cinnamon, Allspice, Cloves, Nutmeg): This blend of warming spices is what truly transforms ordinary apples into an extraordinary filling. Ground cinnamon is the star, delivering its classic warmth. Allspice, ground cloves, and nutmeg contribute layers of subtle complexity, adding hints of peppery, sweet, and earthy notes. Feel free to adjust the quantities of these spices to match your personal preference for a bolder or milder flavor profile.
- Flour: All-purpose flour is essential as a thickening agent for the apple filling. It helps absorb excess moisture released by the apples during cooking, ensuring your pie filling is perfectly saucy and not watery. Make sure to mix it evenly with the sugar before adding it to the apples to prevent any lumps.
- Vanilla Extract: A touch of pure vanilla extract elevates the overall flavor of the filling, adding a comforting, aromatic sweetness that beautifully complements the apples and spices.
- Greek Yogurt or Sour Cream: This unexpected ingredient is a game-changer! A small amount of plain Greek yogurt or sour cream adds a subtle tanginess, making the filling incredibly creamy and tender without making it too heavy. It also helps to mellow the sweetness and adds another layer of depth. Opt for plain varieties to ensure a neutral flavor that enhances rather than overpowers.
- Egg Wash: A simple mixture of beaten egg and a tablespoon of milk, brushed over the top crust, serves a dual purpose. It helps to seal the edges of the pie, preventing the filling from bubbling out, and gives the crust that signature golden-brown, shiny finish that is so visually appealing.
Step-by-Step Guide to Baking Your Best Apple Pie
Creating the perfect apple pie is a rewarding culinary endeavor that brings joy to any home. Follow these detailed steps to ensure your pie turns out beautifully, with a flaky crust and a luscious, perfectly spiced apple filling:
- Prepare and Chill Crusts: Begin by ensuring your pie crusts are well-chilled. If you’re using store-bought crusts, keep them refrigerated until you’re ready to roll them out. If making homemade crusts, wrap them tightly in plastic wrap and chill for at least 30 minutes (or up to 2 days) before use. Cold dough is key to a tender, flaky crust.
- Zest and Juice the Lemon: Using a fine zester, zest one lemon to get approximately 1 teaspoon of zest. Then, with a citrus juicer, extract about 2 tablespoons of fresh lemon juice. Set both aside; they will be used to enhance the apple filling.
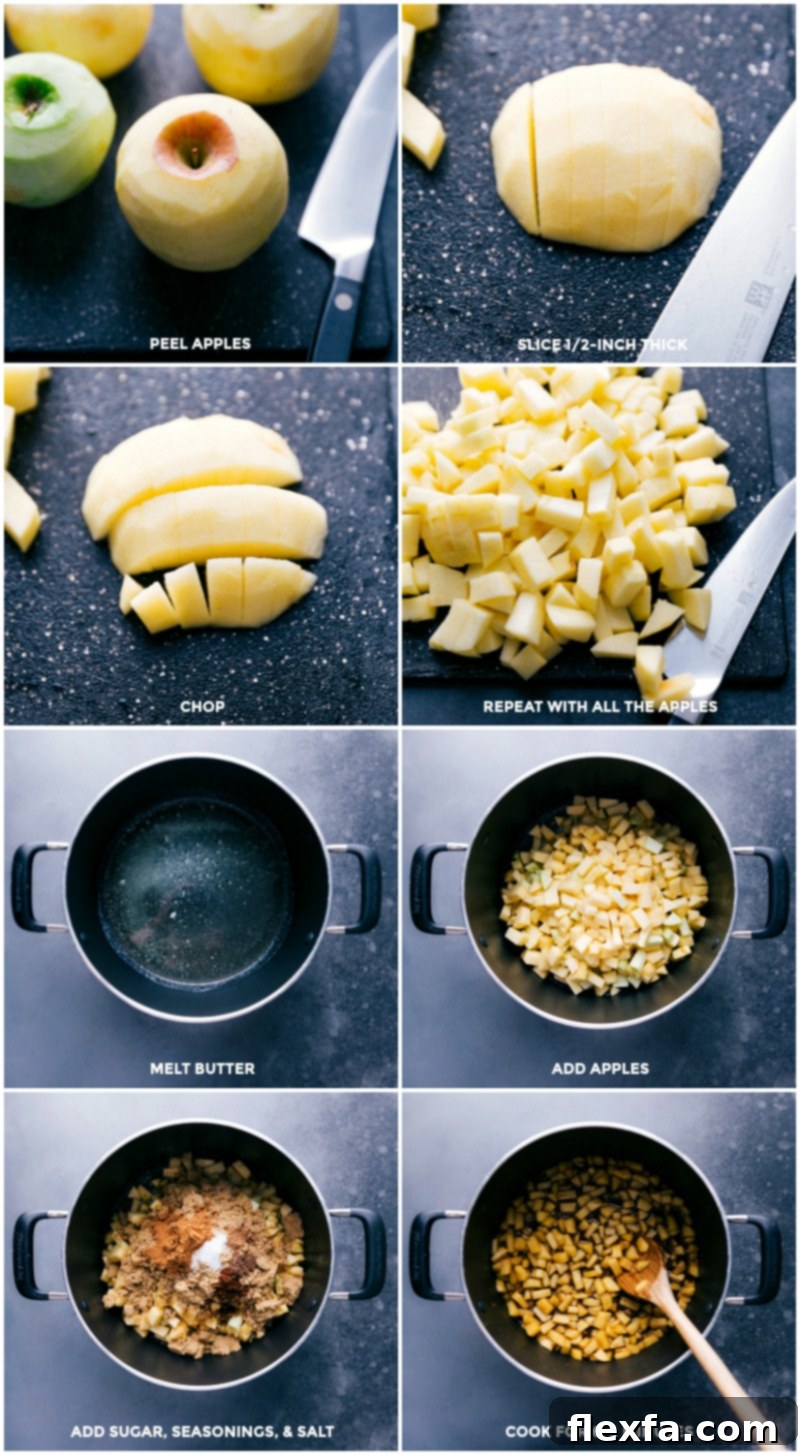
- Prepare the Apples: Take your chosen apples (a mix of sweet and tart is ideal), peel them thoroughly, remove the core, and dice them into uniform 1/2-inch cubes. Aim for about 7 cups of diced apples. Uniform sizing ensures even cooking.
- Cook the Apple Filling Base: In a large, heavy-bottomed pot or Dutch oven, melt the unsalted butter over medium heat. Add the diced apples, lemon juice, and lemon zest. Stir in the dark brown sugar, ground cinnamon, allspice, ground cloves, ground nutmeg, and salt. Cook this mixture, stirring occasionally, for 6-8 minutes. During this time, the apples will begin to soften slightly, and their natural juices, combined with the butter and sugars, will start to thicken into a fragrant sauce.
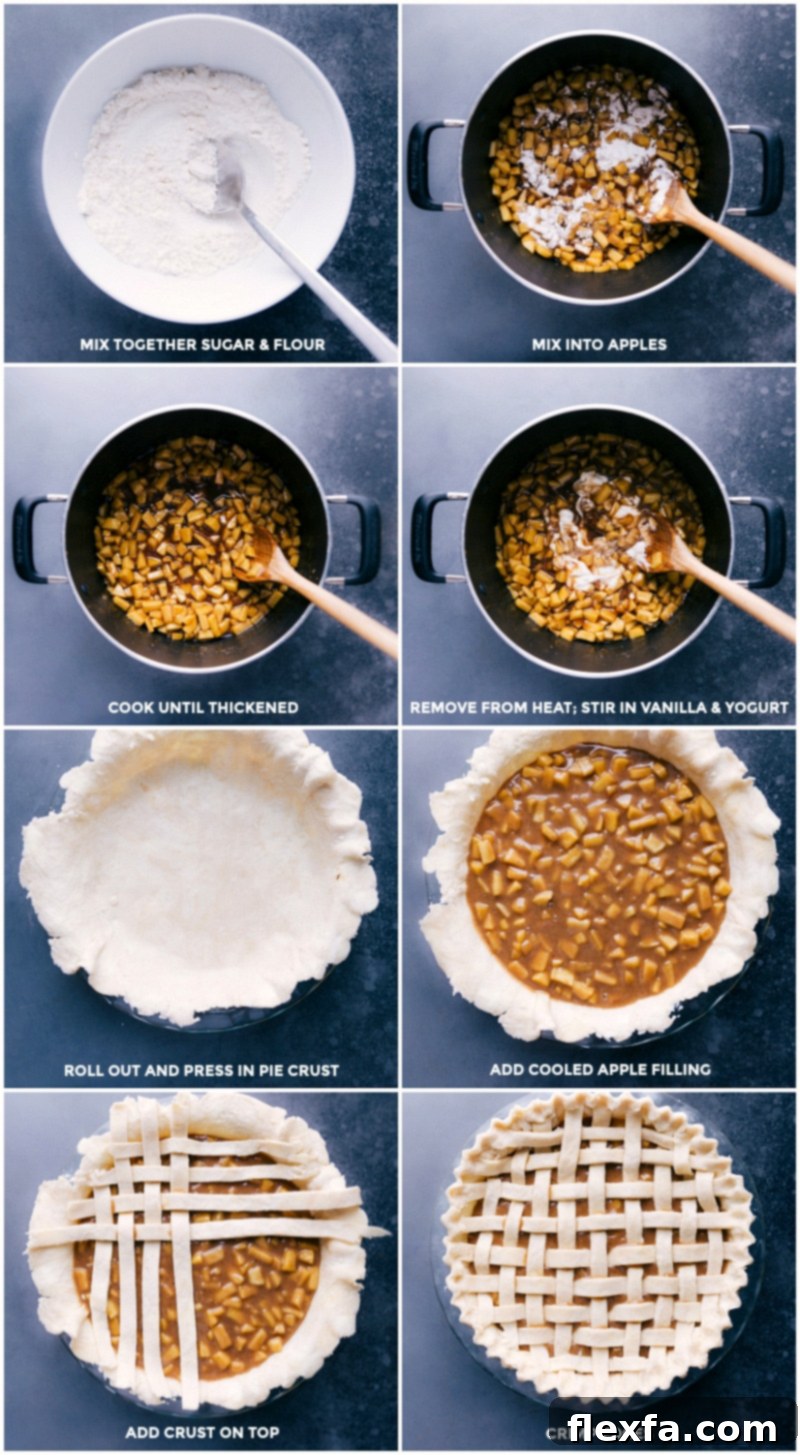
- Thicken the Filling: In a separate small bowl, whisk together the granulated sugar and all-purpose flour until thoroughly combined. This mixture acts as your thickening agent. Sprinkle this sugar-flour blend evenly over the apple filling in the pot. Continue to cook for another 4-5 minutes, stirring frequently to ensure the flour is fully incorporated and the filling thickens to a rich, glossy consistency. Remove the pot from the heat and let it rest for about 5 minutes. Then, stir in the vanilla extract and Greek yogurt (or sour cream). This step adds creaminess and depth.
- Chill the Filling: Transfer the apple filling to a shallow dish or bowl and refrigerate it. Allow it to chill completely for at least 45 minutes. A chilled filling prevents the bottom crust from becoming soggy during baking and helps the pie hold its shape.
- Prepare Egg Wash: In a small bowl, whisk together one large egg and 1 tablespoon of milk with a fork until the mixture is smooth and uniform. This will be used to create a golden, shiny crust.
- Assemble the Pie: Preheat your oven to 400°F (200°C). Lightly flour a clean surface and roll out one of your chilled pie crusts to fit the bottom of a 9.5-inch pie pan. Carefully transfer the crust to the pan, pressing it gently into the bottom and up the sides. Lightly brush the inside bottom of this crust with a small amount of the prepared egg wash; this creates a barrier that further helps prevent a soggy bottom. Spread the cooled apple filling evenly over the bottom crust.
- Add Top Crust and Seal: For the top, you can either lay the second rolled-out crust directly over the filling (remembering to cut several vents for steam to escape) or create a beautiful lattice top (refer to note 3 in the recipe notes for instructions). Once the top crust is in place, press firmly all around the edges to seal the two crusts together. Trim any excess crust flush with the rim of the pan, or tuck it underneath. If desired, crimp the edges decoratively using your fingers or a fork (refer to note 4).
- Chill Assembled Pie: Place the assembled pie in the refrigerator to chill for another 30 minutes to 1 hour. This final chilling step helps the crust maintain its flakiness and prevents excessive shrinking during baking.
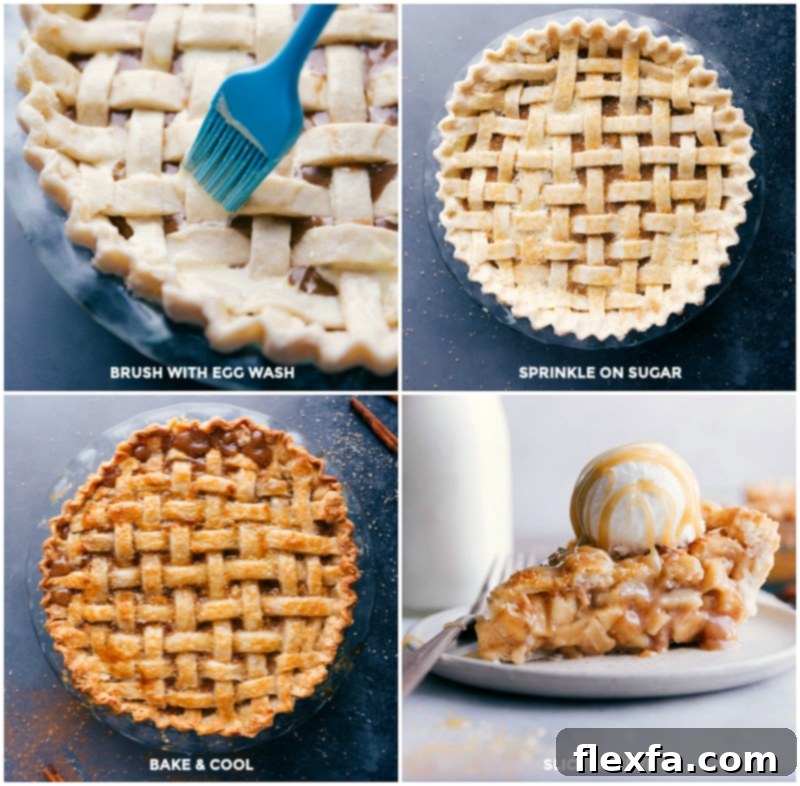
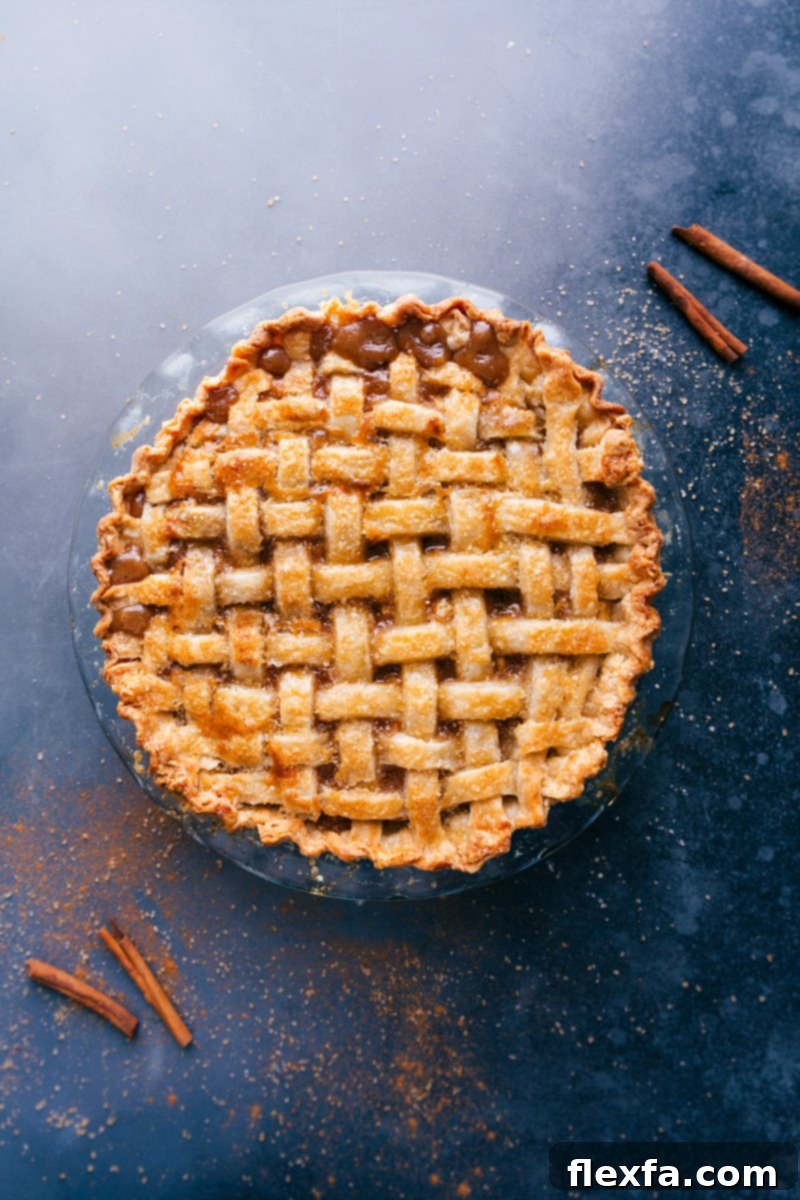
- Bake to Golden Perfection: Remove the chilled pie from the fridge. Brush the entire top crust (avoiding the crimped edges, if you wish to prevent them from over-browning too quickly) with the remaining egg wash. For an extra crunch and visual appeal, sprinkle your desired sugar topping evenly over the pie (refer to note 2). Place the pie on a baking sheet lined with parchment paper (to catch any potential drips) and bake in the preheated oven for 55-65 minutes. The pie is ready when the crust is a deep, rich golden brown and the filling is visibly bubbling through the vents. If the edges start to brown too quickly, loosely cover them with a pie shield or aluminum foil (refer to note 5).
- Cool Before Serving: This is perhaps the most crucial step for a perfect slice. Once baked, remove the pie from the oven and allow it to cool completely at room temperature. This typically takes 3-5 hours. Resisting the urge to cut into a hot pie is difficult, but necessary! Cooling allows the filling to set properly, transforming from a runny liquid into that thick, juicy, and perfectly saucy consistency we all love. Cutting it too early will result in a messy, wet slice. Once cooled, serve with a generous scoop of fresh vanilla bean ice cream or a dollop of homemade whipped cream for the ultimate dessert experience.
Achieving Perfection: Advanced Apple Pie Tips & Tricks
Baking a truly exceptional apple pie involves a few key techniques that can elevate your results from good to unforgettable. These expert tips will help ensure a flaky crust, a perfectly set filling, and an all-around delicious dessert:
- Chill Everything: The golden rule for pie crusts! Keeping your pie crusts, the apple filling, and even the assembled pie cold before baking is paramount. This ensures that the butter or fat in the crust remains solid, creating pockets of steam during baking that result in an incredibly flaky and tender texture. It also prevents the dough from becoming too soft and difficult to handle, helping your pie hold its shape beautifully.
- Enhance with a Sugar Topping: For an extra layer of sweetness, crunch, and visual appeal, don’t forget the sugar topping! Before baking, generously sprinkle the top crust with coarse sugars like Demerara Baking Sugar, Turbinado Sugar, or white sparkling sugar. These sugars create a delightful crispy layer that adds texture and makes your pie look professionally baked.
- The Critical Cooling Time: Patience is a virtue, especially when it comes to pie. Allowing your apple pie to cool completely to room temperature before slicing is not just a suggestion – it’s a requirement for success. This extended cooling period, typically 3-5 hours, gives the filling ample time to set and thicken into that desirable juicy, saucy consistency. Cutting a warm pie will inevitably lead to a runny, messy slice. Embrace the wait for perfect slices!
- Maintain Cold Temperatures During Preparation: Beyond just chilling the dough, strive to keep all your ingredients as cold as possible during the preparation process. This includes using cold butter, cold water (if making homemade crust), and minimizing handling of the dough with warm hands. If the dough starts to become too pliable, pop it back into the refrigerator for 10-15 minutes.
- Prevent a Soggy Bottom with an Egg Wash Base: A common complaint with homemade pies is a soggy bottom crust. To combat this, lightly brush the inside of your bottom pie crust with a thin layer of egg wash before adding the filling. This creates a protective seal, acting as a barrier against the moisture from the apple filling and helping the bottom crust stay delightfully crisp.
- Proper Venting is Essential: If you’re using a solid top crust instead of a lattice, remember to cut several vents (slits) into the top before baking. These vents allow steam to escape during the baking process, preventing the crust from bubbling up, cracking, or becoming soggy. Proper venting also ensures the filling cooks evenly and thickens correctly.
- Protect the Edges: Pie crust edges can brown much faster than the rest of the pie. If you notice your crust edges are getting too dark midway through baking, loosely cover them with a pie shield or create one from aluminum foil. This simple trick ensures the entire crust bakes to an even, beautiful golden color without burning.
- Use a Baking Sheet: Always place your pie on a baking sheet lined with parchment paper before putting it in the oven. This catches any potential drips or spills from the filling, keeping your oven clean and preventing burning on the oven floor.
Storage and Reheating
Leftovers
Ensuring your delicious apple pie remains fresh and enjoyable for as long as possible is key. Here’s how to properly store and reheat your pie:
- Room Temperature: A freshly baked apple pie can be stored covered at room temperature for up to 2 days. Make sure it’s covered tightly with plastic wrap or foil to prevent it from drying out.
- Refrigerator: For extended freshness, transfer your apple pie to an airtight container or wrap it securely in plastic wrap and then foil. It will keep well in the refrigerator for up to 5 days. Chilling also helps the filling maintain its firm, juicy texture.
- Freezing: Apple pie freezes beautifully! To freeze, wrap the entire cooled pie tightly in several layers of plastic wrap, followed by a layer of aluminum foil. This double wrapping helps prevent freezer burn. It can be frozen for up to 3 months. When ready to enjoy, thaw the pie overnight in the refrigerator before reheating.
- Reheat: For the best texture and flavor, reheat individual slices or the whole pie in the oven. Preheat your oven to 350°F (175°C) and warm the pie for 15-20 minutes for a slice, or 30-40 minutes for a whole pie, until the crust is crisp again and the filling is warm and bubbling. This method helps restore that freshly baked quality.
More Delightful Dessert Recipes to Explore
If you’ve fallen in love with the comforting flavors of apple desserts, there’s a whole world of sweet treats waiting to be discovered. Expand your baking repertoire with these other fantastic recipes that are sure to please:
- Apple Coffee Cake
- Fruit Salsa
- Peach Cobbler
- Apple Fritter Bread
- Applesauce Cake

Pin
Apple Pie
Chelsea Lords
1 hour
30 minutes
1 hour
5 hours
7 hours
30 minutes
10 slices
Equipment
-
Pie pan 9.5-inch
-
Large pot
Ingredients
- 1 lemon
- 2 pie crusts
- 8 apples peeled, cored, and diced, see note 1
- 4 tablespoons unsalted butter
- 1 cup dark brown sugar lightly packed
- 1-1/2 teaspoons ground cinnamon
- 1/4 teaspoon allspice
- 1/4 teaspoon ground cloves
- 1/4 teaspoon ground nutmeg
- 3/4 teaspoon salt
- 1/3 cup granulated sugar
- 1/4 cup flour
- 2 teaspoons vanilla extract
- 1/3 cup honey vanilla Greek yogurt or sour cream
- 1 large egg beaten
- 1 tablespoon milk
- Sugar topping as desired, see note 2
Instructions
-
Zest lemons with a zester to get 1 teaspoon zest. Juice the lemon using a citrus juicer to get 2 tablespoons lemon juice. Set aside.
-
You can buy pie crusts, or make them homemade. Be sure to chill pie crusts (tightly wrapped in plastic wrap) for at least 30 minutes before rolling them out. It’s best to keep everything as cold as possible! Chill pie dough, apple pie filling, and pie before baking.
-
Peel and core apples. Dice into 1/2-inch cubes, measure 7 cups, and set aside.
-
In a large pot over medium heat, melt butter. Add diced apples, lemon juice, and zest. Stir in brown sugar, cinnamon, allspice, cloves, nutmeg, and salt. Cook, stirring occasionally, for 6–8 minutes until juices thicken and apples begin to soften.
-
In a small bowl, mix granulated sugar and flour. Sprinkle over the apple filling on the stovetop and stir. Cook for 4–5 minutes, stirring often until the filling thickens. Remove from heat and let sit for 5 minutes. Stir in vanilla and Greek yogurt. Refrigerate the apple filling until chilled, about 45 minutes.
-
In a small bowl, whisk together the egg and milk with a fork until smooth. Set aside.
-
Place a pie crust in the bottom of a 9.5-inch pie pan. Lightly brush with egg wash. Spread cooled apple filling evenly over the crust. Cover the top with pie crust (see note 3). Press all around edges to seal the two crusts together. Trim or tuck excess crust so it is flush with rim of the pan. If desired, crimp edges (see note 4). Place assembled pie in fridge and chill for 30 minutes to an hour. Preheat oven to 400°F.
-
Take out the pie and brush all but the crimped edges with egg wash. Sprinkle optional sparkling sugar (see note 2) evenly over the pie. Set the pie on a sheet pan lined with parchment paper and bake for 55–65 minutes, or until the crust is a deep golden brown. If crust is browning too quickly, use a pie shield (see note 5).
-
Cool completely, at room temperature, before cutting into pie and serving. If the pie is cut straight out of the oven it’ll be runny and wet; it needs time for the filling to become juicy and thick. I typically wait 3–5 hours before cutting into the pie. If desired, serve with fresh whipped cream or vanilla bean ice cream.
Recipe Notes
Note 2: You can sprinkle your pie crust with some sugar to add a sweet crunch. I like to use Demerara Baking Sugar, Turbinado sugar, or white sparkling sugar for topping.
Note 3: Elise from SimplyRecipes.com has step-by-step instructions for creating a lattice crust. If you don’t want to do a lattice crust, simply add the entire crust on top of the apple filling and cut some vents in the top of the crust with a sharp knife.
Note 4: If you’re unsure how to crimp the edges of your pie, here’s a picture tutorial.
Note 5: You may want a pie shield to keep edges from getting too dark. You can make your own pie shield by following this tutorial.
Nutrition Note: Nutritional information is calculated using two refrigerated crusts from the grocery store.
Storage: Store apple pie covered for up to 2 days, keep in an airtight container in the fridge for up to 5 days, or wrap pie tightly and freeze for up to 3 months. Thaw in the fridge before serving. Warm in the oven at 350°F for the best texture reheated.
Nutrition
Serving:
1serving
|
Calories:
434kcal
|
Carbohydrates:
76g
|
Protein:
4g
|
Fat:
14g
|
Saturated Fat:
6g
|
Cholesterol:
13mg
|
Sodium:
326mg
|
Potassium:
259mg
|
Fiber:
5g
|
Sugar:
48g
|
Vitamin A:
236IU
|
Vitamin C:
8mg
|
Calcium:
49mg
|
Iron:
2mg
Nutrition information is automatically calculated, so should only be used as an approximation.
Like this? Leave a comment below!