
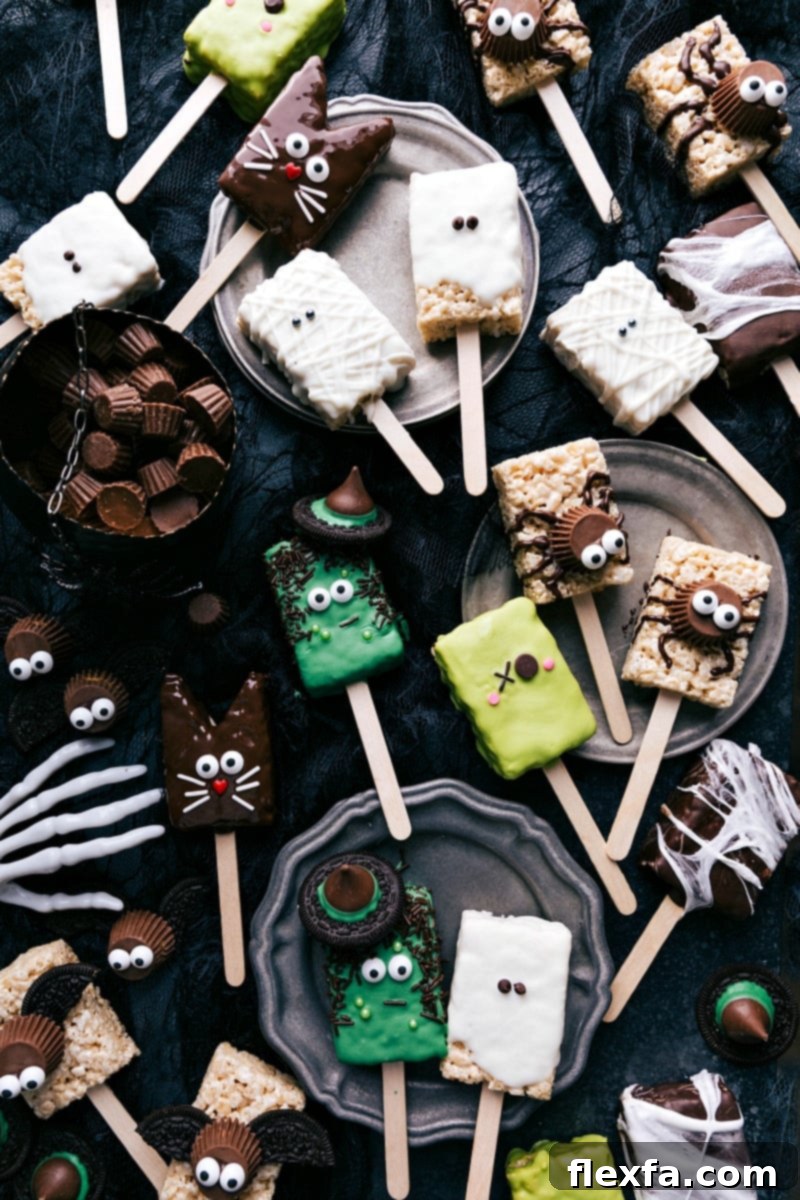
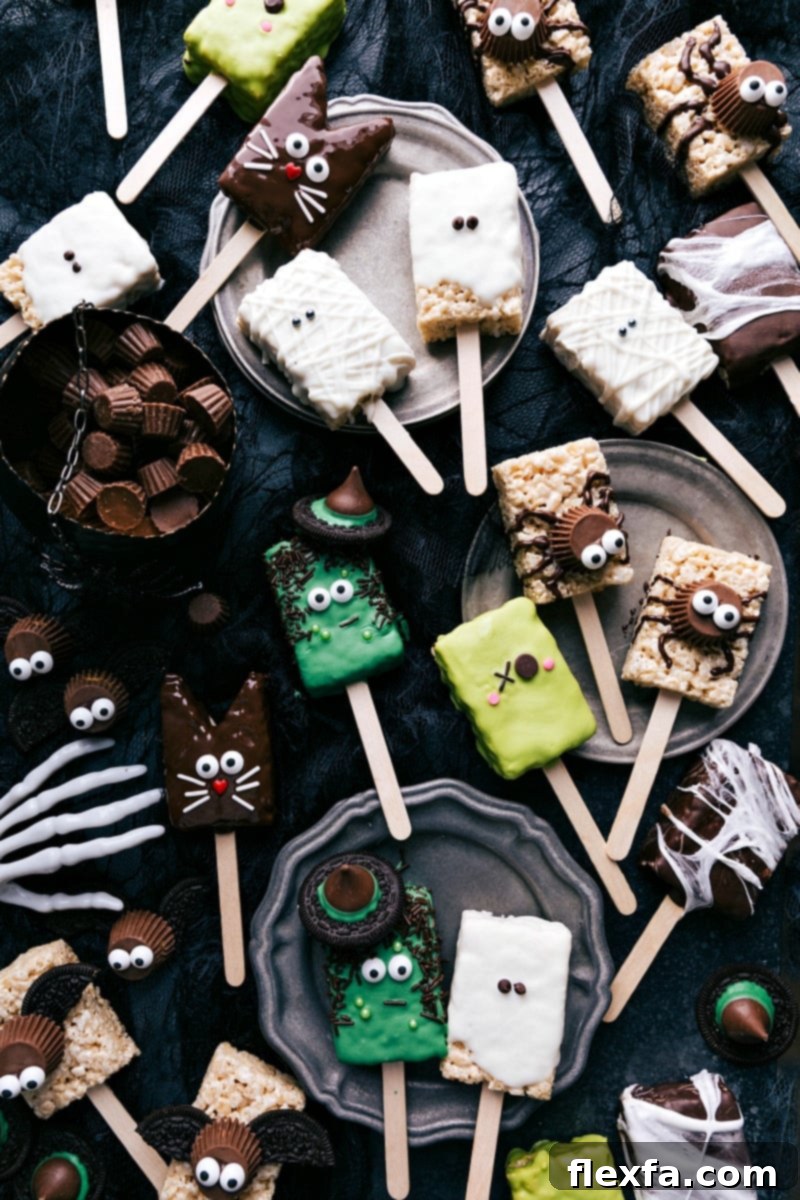
Get ready to bewitch your taste buds with these eight utterly adorable and incredibly simple Halloween Rice Krispie Treats! Featuring festive designs like mummies, friendly ghosts, mischievous black cats, creepy spiders, flying bats, ghoulish zombies, wicked witches, and intricate spider webs, these delightful desserts are a must-have for any Halloween celebration.

From the Kitchen of Chelsea Lords
These Treats Disappear Faster Than Candy!
Halloween is hands-down my favorite holiday, and crafting these adorable Halloween Rice Krispies Treats has been my most enjoyable project to date. They embody everything I love about the season: they’re wonderfully festive, incredibly simple to make, and consistently a massive hit with both children and adults. There’s something truly magical about transforming a classic treat into spooky characters!
A few years back, my Pumpkin & Frankenstein Rice Krispie Treats were such a smashing success that I knew I had to expand the collection. This year, I’ve gone all out, introducing eight brand-new designs: the mysterious mummy, the friendly ghost, the charming black cat, the eight-legged spider, the soaring bat, the quirky zombie, the spellbinding witch, and the delicate spider web. Each design brings its own unique charm and a touch of Halloween spirit.
These treats are absolutely perfect for any Halloween party, school event, or just a fun afternoon activity with the family. The joy of decorating them is matched only by the delight of eating them. My kids couldn’t get enough, and to be perfectly honest, neither could I! Prepare for them to vanish in a flash!
Quick Decorating Tip
Each Halloween Rice Krispies Treat design can be easily scaled to fit your party size. Remember that the amount of chocolate or candy melts needed will vary depending on the size of your treats and how generously you coat them. It’s always a good idea to have a little extra chocolate or candy melts on hand, just in case you need to cover more treats or fix any decorative mishaps!
Making the Perfect Rice Krispie Treats from Scratch
Before we dive into the fun world of Halloween decorating, let’s master the art of making the perfect, soft, and chewy Rice Krispie Treat base. While many recipes exist, my go-to recipe ensures a consistently delicious foundation for all our spooky creations. We’ll skip the typical white chocolate and sprinkle toppings for this base, saving all the creative flair for our Halloween designs below.
For an extra layer of flavor and fun, consider these delightful variations as your base: indulge in Peanut Butter Rice Krispie Treats, try the classic combination of Scotcheroos, opt for the rich decadence of Chocolate Rice Krispie Treats, or add a burst of color with Fruity Pebble Rice Krispie Treats. Each offers a unique twist that can complement your Halloween themes!
Essential Tips for Flawless Halloween Rice Krispies Treats
Crafting these festive Halloween Rice Krispie Treats starts with a perfectly soft and chewy base. Here are a few essential tricks to ensure your bars are consistently delightful every single time:
- Maintain Low Heat: When melting your butter and marshmallows, always keep the heat on medium-low. Melting them slowly and gently prevents the sugar in the marshmallows from caramelizing too quickly, which can result in hard, brittle treats. Patience is key for that signature gooey texture.
- Prioritize Fresh Marshmallows: The freshness of your marshmallows makes a huge difference. Newer bags contain softer marshmallows that melt more smoothly and uniformly. This leads to a more consistent, tender batch of treats, as stale marshmallows can create lumps and a tougher chew.
- Avoid Over-Packing: Once you’ve mixed your cereal and marshmallows, gently press the mixture into your prepared pan. Resist the urge to smash it down firmly, as this compresses the cereal and squeezes out air, resulting in dense, hard bars instead of light, airy ones. A light, even pressure is all you need for the ideal texture.
- Prepare Your Pan Properly: Always line your baking pan with parchment paper or foil, leaving an overhang on the sides. This simple step makes it incredibly easy to lift the entire slab of treats out once cooled, preventing sticking and making cutting a breeze. Lightly greasing the parchment or foil with cooking spray is an extra layer of protection.
- Work Quickly and Efficiently: Marshmallow mixtures can become stiff as they cool, making them harder to work with. Have all your ingredients measured and your pan prepared before you start melting. Once the cereal is added, stir quickly but thoroughly to coat everything before the mixture sets.
Eight Frightfully Fun Halloween Rice Krispies Treats:
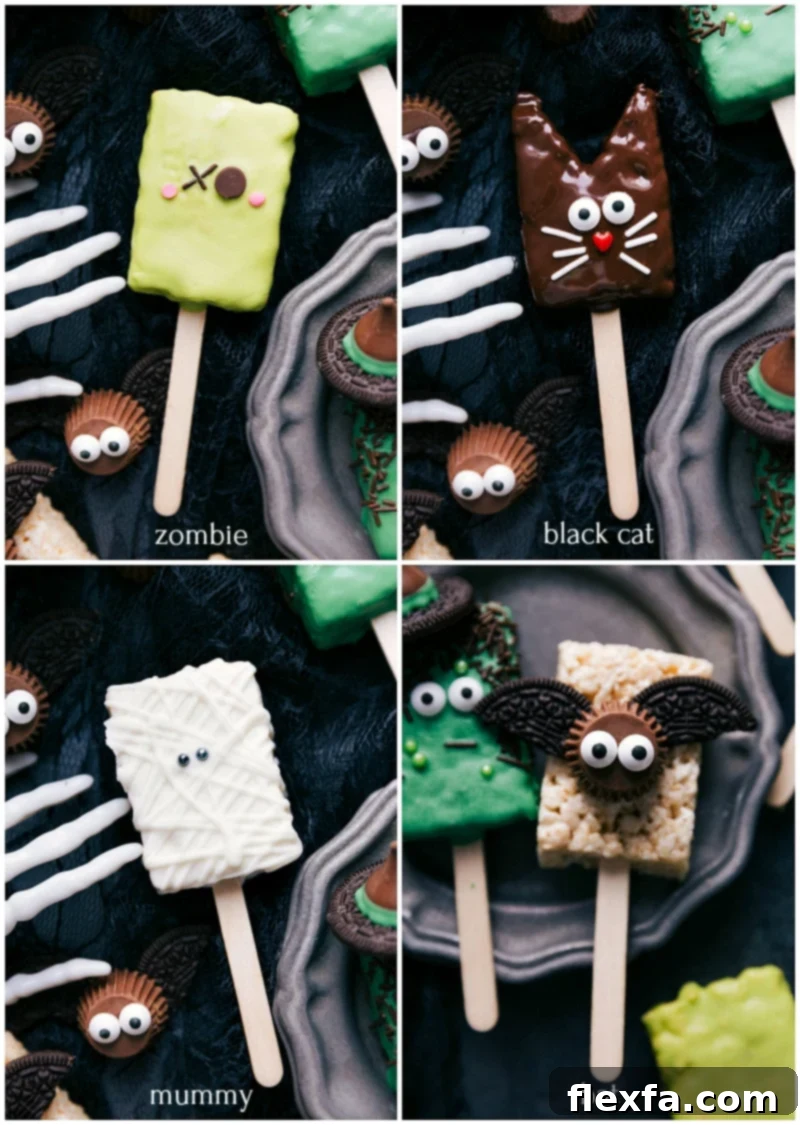
1. Zombie Rice Krispie Treats
Bring these classic movie monsters to life with a vibrant green hue and wonderfully ghoulish details!
Ingredients:
- 5 prepared Rice Krispie Treats
- 1 cup green candy melts + ½ tbsp coconut oil (for melting consistency)
- 5 chocolate chips
- Chocolate jimmies (for the second eye and hair)
- Pink confetti sprinkles (for rosy cheeks)
How To:
Melt the green candy melts with coconut oil until smooth and fluid. Dip each Rice Krispie Treat into the melted green mixture, ensuring a full and even coating. Gently tap off any excess and place them on parchment paper to set. Before the candy sets completely, carefully place one chocolate chip on each treat for a single, haunting eye. Next, arrange a few chocolate jimmies to create the other “missing” eye and a smattering of jimmies on top for a wild, zombie hairstyle. Finish by adding two pink confetti sprinkles for a touch of zombie blush. Let them fully harden.
2. Black Cat Halloween Rice Krispie Treats
These adorable black cats are more cute than spooky, perfect for adding a touch of feline charm to your Halloween spread.
Ingredients:
- 5 prepared Rice Krispie Treats
- 1 cup chocolate chips + ½ tbsp coconut oil (for melting)
- 10 candy eyes
- White jimmies (for whiskers)
- 5 heart sprinkles (for cute noses)
How To:
Melt the chocolate chips with coconut oil until smooth. Dip each Rice Krispie Treat into the melted chocolate, coating it entirely. Allow any excess chocolate to drip off, then place the coated treats on parchment paper. While the chocolate is still wet, carefully press two candy eyes onto each treat. Place one heart sprinkle upside down beneath the eyes to create a charming little black cat nose. Finally, arrange several white jimmies around the nose to form playful whiskers. Let the treats set completely, allowing the chocolate to harden and secure all the decorative elements.
3. Mummy Rice Krispie Treats
Wrap up some fun with these classic mummy treats, perfect for a hauntingly good time.
Ingredients:
- 5 prepared Rice Krispie Treats
- 1 ¼ cups white chocolate chips + ½ tbsp coconut oil (for melting)
- 10 black sugar pearl sprinkles (for eyes)
How To:
Melt the white chocolate chips with coconut oil until smooth. Dip each Rice Krispie Treat into the melted white chocolate, ensuring a thorough coating. Place the coated treats on parchment paper to begin setting. Transfer the remaining melted white chocolate into a piping bag with a very small round tip (or a ziplock bag with a tiny corner snipped off). Pipe thin lines of white chocolate horizontally across each treat, overlapping them slightly and leaving a small gap for the “eyes” to create the appearance of mummy bandages. Before the white chocolate completely hardens, carefully place two black sugar pearl sprinkles in the gap for the mummy’s piercing eyes. Allow the treats to set fully.
4. Bat Halloween Rice Krispie Treats
These flying nocturnal creatures are a sweet and spooky addition to your Halloween lineup.
Ingredients:
- 5 prepared Rice Krispie Treats
- 5 mini Reese’s Cups (for bat bodies)
- ¼ cup chocolate chips (for “glue” and detailing)
- 10 candy eyes
- 1 package Oreos (for wings)
How To:
Melt the ¼ cup of chocolate chips until smooth, then transfer it to a small piping bag or a ziplock bag with a tiny corner snipped. Carefully twist apart the Oreos to separate the cookies, discarding the cream filling or saving it for another use. These will be your bat wings. Using a dab of melted chocolate, attach two Oreo halves (cookies only) to the sides of each Rice Krispie Treat, creating the outstretched wings. Next, attach a mini Reese’s Cup to the top center of each treat with another dab of melted chocolate, forming the bat’s body. Finally, secure two candy eyes onto the Reese’s Cup with tiny dots of melted chocolate. Allow all components to set firmly before serving.
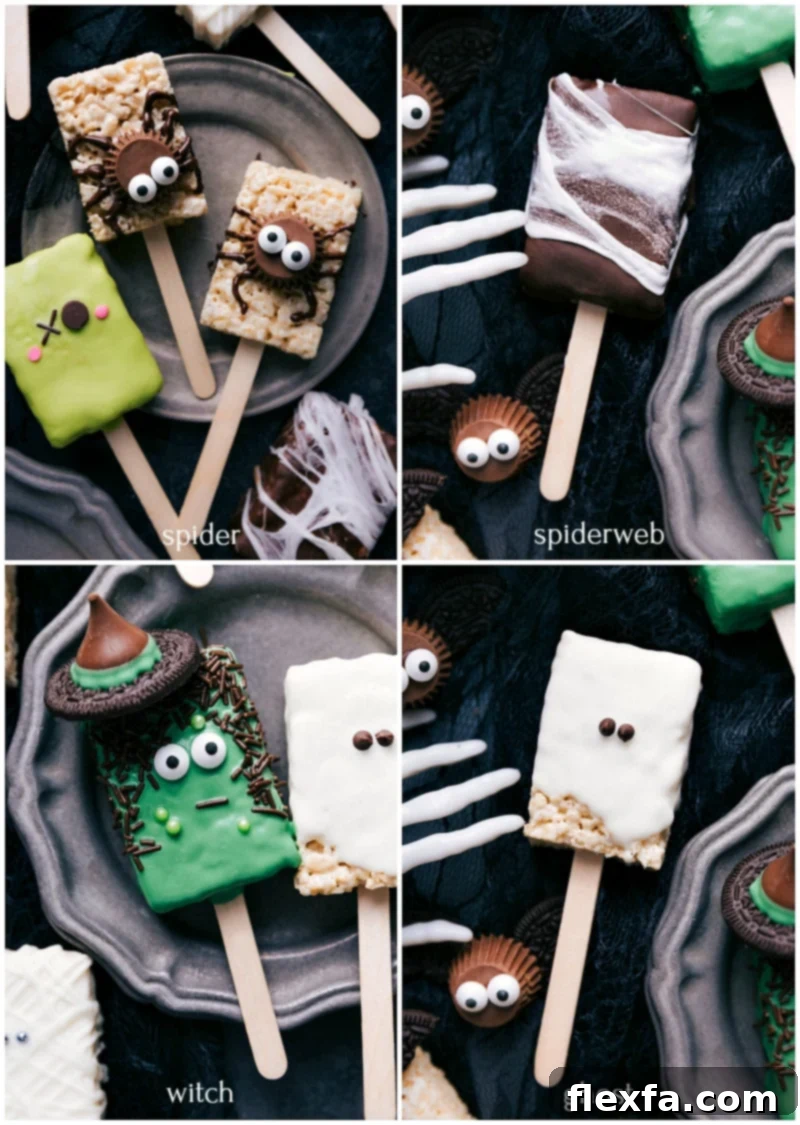
5. Spider Halloween Rice Krispie Treats
Eight-legged creepy crawlies that are surprisingly delicious!
Ingredients:
- 5 prepared Rice Krispie Treats
- 5 mini Reese’s Cups (for spider bodies)
- ⅓ cup chocolate chips (for “glue” and legs)
- 10 candy eyes
How To:
Melt the chocolate chips until perfectly smooth and transfer the melted chocolate to a piping bag. Take each mini Reese’s Cup and, using a tiny dot of melted chocolate, attach two candy eyes to the top, forming the spider’s face. Once the eyes are secure, press the decorated Reese’s Cup onto the top center of each Halloween Rice Krispie Treat, using a bit more melted chocolate to hold it in place. Now, with the piping bag, carefully pipe four chocolate legs on each side of the Reese’s Cup, extending them slightly onto the Rice Krispie Treat, making sure they look like a spider’s jointed legs. Allow the chocolate to set completely, ensuring the spider’s features are firmly attached.
6. Spider Web Rice Krispie Treats
A delicate and slightly spooky design, perfect for those who appreciate intricate Halloween details.
Ingredients:
- 5 prepared Rice Krispie Treats
- 1 cup chocolate chips + ½ tbsp coconut oil (for melting)
- 20 mini marshmallows
How To:
Melt the chocolate chips with coconut oil until smooth. Dip each Halloween Rice Krispie Treat into the melted chocolate, coating it entirely, then gently tap off any excess. Place the coated treats on parchment paper and allow the chocolate to harden completely. While the chocolate is setting, place the mini marshmallows in a microwave-safe bowl. Microwave them for 10-15 seconds until they puff up slightly (be careful not to burn them). Immediately stir the puffed marshmallows with a spoon, then quickly pull and stretch thin strands of the sticky marshmallow mixture over each chocolate-coated treat, creating realistic spider web patterns. Tuck any loose ends of the marshmallow web onto the sides of the treats to secure them. Serve once the webs are in place.
7. Witch Halloween Rice Krispie Treats
Cast a delicious spell with these whimsical witch-themed treats, complete with pointy hats and warts!
Ingredients:
- 5 prepared Rice Krispie Treats
- 1 cup chocolate chips + ½ tbsp coconut oil (for melting and decoration)
- 10 candy eyes
- Chocolate jimmies (for hair and mouth)
- 15 green pearl sprinkles (for warts)
- 5 Oreos (split, for hat brim)
- 5 chocolate kisses (for hat top)
How To:
Melt the chocolate chips with coconut oil until smooth. Dip each Rice Krispie Treat into the melted chocolate, ensuring a full and even coating. Allow any excess chocolate to drip off, then place the coated treats on parchment paper to begin setting. While the chocolate is still wet, carefully place two candy eyes on each treat. Use a chocolate jimmie to create a crooked, slightly sinister “mouth” below the eyes. Arrange more chocolate jimmies on the top of the treat for wild, witchy hair. Dot a few green pearl sprinkles around the face to create charming warts. For the witch hats, separate the Oreos and attach one chocolate kiss to the center of each Oreo half (the cookie part) using a dab of melted chocolate, forming a miniature witch’s hat. Once these hats are assembled, carefully attach them to the top of each decorated Rice Krispie Treat with more melted chocolate. Let all components set completely, ensuring the hats are securely fastened.
8. Ghost Rice Krispie Treats
Simple, classic, and always a crowd-pleaser – these adorable ghosts are friendly and delicious.
Ingredients:
- 5 prepared Rice Krispie Treats
- 1 cup white chocolate chips + ½ tbsp coconut oil (for melting)
- 10 mini chocolate chips (for eyes)
How To:
Melt the white chocolate chips with coconut oil until smooth and fluid. Dip each Halloween Rice Krispie Treat into the melted white chocolate, ensuring a smooth, even coating. Gently tap off any excess chocolate and place the coated treats on parchment paper. While the white chocolate is still wet, carefully place two mini chocolate chips on each treat to create the ghost’s eyes. The mini chocolate chips will slightly melt into the warm white chocolate, securing them in place. Allow the treats to set completely until the white chocolate has hardened, revealing your cute and spooky ghost treats.
More Fun Halloween Treats
Halloween
Halloween Cupcakes
Quick And Easy
Halloween Oreo Pops #1
Appetizers
Halloween Appetizers
Quick And Easy
Halloween Donuts
Halloween Rice Krispie Treats
Chelsea Lords
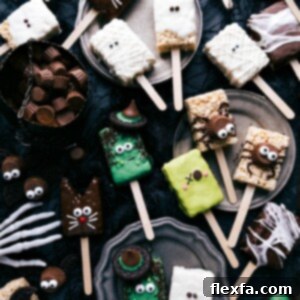
These cute and easy Halloween Rice Krispies Treats include a mummy, ghost, black cat, spider, bat, zombie, witch, and a spiderweb design—fun, festive, and perfect for Halloween!
30 minutes
1 hour
1 hour 30 minutes
16 bars
Equipment
- 9 x 9-inch baking pan
- Parchment paper
- Large pot
Ingredients for the Base Rice Krispie Treats
- Cooking spray (for pan and hands)
- 5 tablespoons unsalted butter
- 1 (16-ounce) bag miniature marshmallows, divided (use 8 cups for melting, reserve 2½ cups for mixing in)
- 6 cups Rice Krispies cereal
- ¼ teaspoon salt (adjust to taste)
- 1 teaspoon vanilla extract
Instructions for Base Recipe:
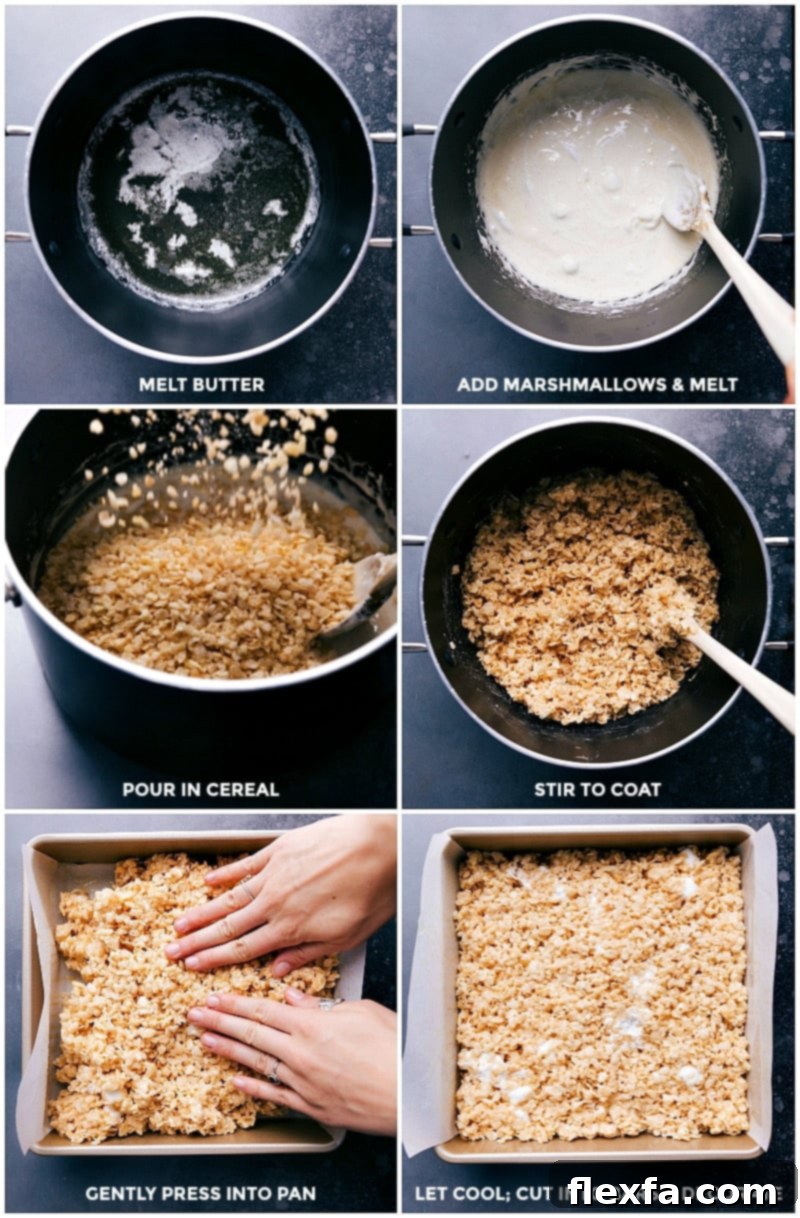
- Prepare the Pan: Line a 9×9-inch baking pan with parchment paper or foil, leaving an overhang on all sides. This overhang will help you easily remove the treats later. Lightly spray the parchment/foil with cooking spray to prevent sticking. Set the prepared pan aside.
- Melt Butter and Marshmallows: In a large, heavy-bottomed pot, melt the unsalted butter over medium-low heat. Stir occasionally to ensure even melting. As soon as the butter is fully melted, immediately reduce the heat to low. Add 8 cups of the miniature marshmallows to the pot. Stir constantly using a spatula until the marshmallows are just melted and form a smooth, gooey mixture. Be careful not to let the marshmallows brown or cook too long, as this can make the treats hard.
- Combine with Cereal: Remove the pot from the heat. Quickly stir in the salt and vanilla extract. Immediately add the 6 cups of Rice Krispies cereal to the marshmallow mixture. Stir vigorously until the cereal is completely coated with the melted marshmallows. Once well coated, pour in the remaining 2½ cups of miniature marshmallows. Stir gently to incorporate these whole marshmallows into the mixture. These will remain mostly whole, adding extra chewiness to your treats.
- Press into Pan: Pour the entire mixture into your prepared 9×9-inch baking pan. Lightly spray your hands with cooking spray or butter to prevent sticking. Gently and evenly press the mixture into the pan. Do not press too hard or compact the mixture excessively, as this will result in dense, hard treats. The key is a light, even pressure for a tender, chewy bar.
- Cool and Cut: Set the pan aside to cool completely at room temperature, which typically takes about 30 minutes to 1 hour. Once cooled and firm, use the parchment paper overhang to lift the entire slab of Rice Krispie Treats out of the pan. Place it on a cutting board. For clean cuts, use a sharp knife; running the knife under hot water and drying it with a towel before each cut can make the process much easier. Slice into 16 bars. Enjoy these delicious treats the same day for optimal freshness and texture!
Recipe Notes
The decorative ideas for customizing these treats with a spooky Halloween theme are outlined in detail throughout the blog post above. Refer back to the “Eight Frightfully Fun Halloween Rice Krispies Treats” section for inspiration and step-by-step guidance on creating each unique design!
Nutrition Information
- Serving:
- 1 bar
- Calories:
- 162 kcal
- Carbohydrates:
- 32 g
- Protein:
- 1 g
- Fat:
- 4 g
- Saturated Fat:
- 2 g
- Polyunsaturated Fat:
- 0.2 g
- Monounsaturated Fat:
- 1 g
- Trans Fat:
- 0.1 g
- Cholesterol:
- 9 mg
- Sodium:
- 115 mg
- Potassium:
- 16 mg
- Fiber:
- 0.1 g
- Sugar:
- 17 g
- Vitamin A:
- 808 IU
- Vitamin C:
- 7 mg
- Calcium:
- 2 mg
- Iron:
- 3 mg
Nutrition information is automatically calculated and should be used as an approximation only.
Love these spooky treats? Leave a comment below and share your favorites!