
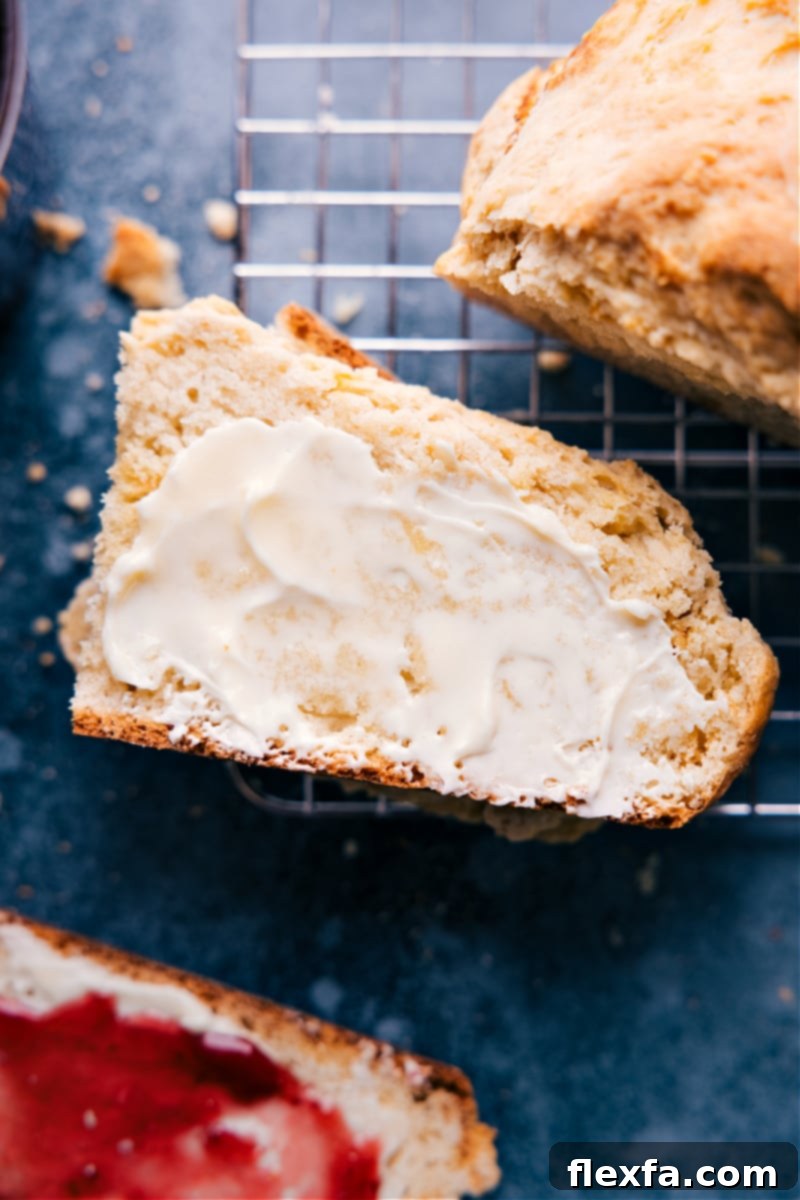
Imagine the delightful aroma of freshly baked bread filling your kitchen, a golden-brown loaf ready to be sliced and savored. Now, imagine achieving this exquisite experience in under 90 minutes, with absolutely no need for yeast or lengthy rising times! This simple yet revolutionary No-Yeast Bread recipe is your ticket to homemade bread bliss, designed for speed, ease, and irresistible flavor. Whether you’re a seasoned baker or just starting, this recipe promises a warm, satisfying slice of bread with minimal effort and maximum reward.
While this recipe focuses on the incredible convenience of no-yeast baking, we understand that sometimes you might crave the classic texture of a yeasted loaf. If that’s the case, we invite you to explore our traditional White Bread recipe, the wholesome goodness of our Honey Whole Wheat Bread, or our famously fluffy Dinner Rolls. And no matter which bread you choose, don’t forget to complement it with a generous spread of our heavenly Honey Butter for an unforgettable treat!
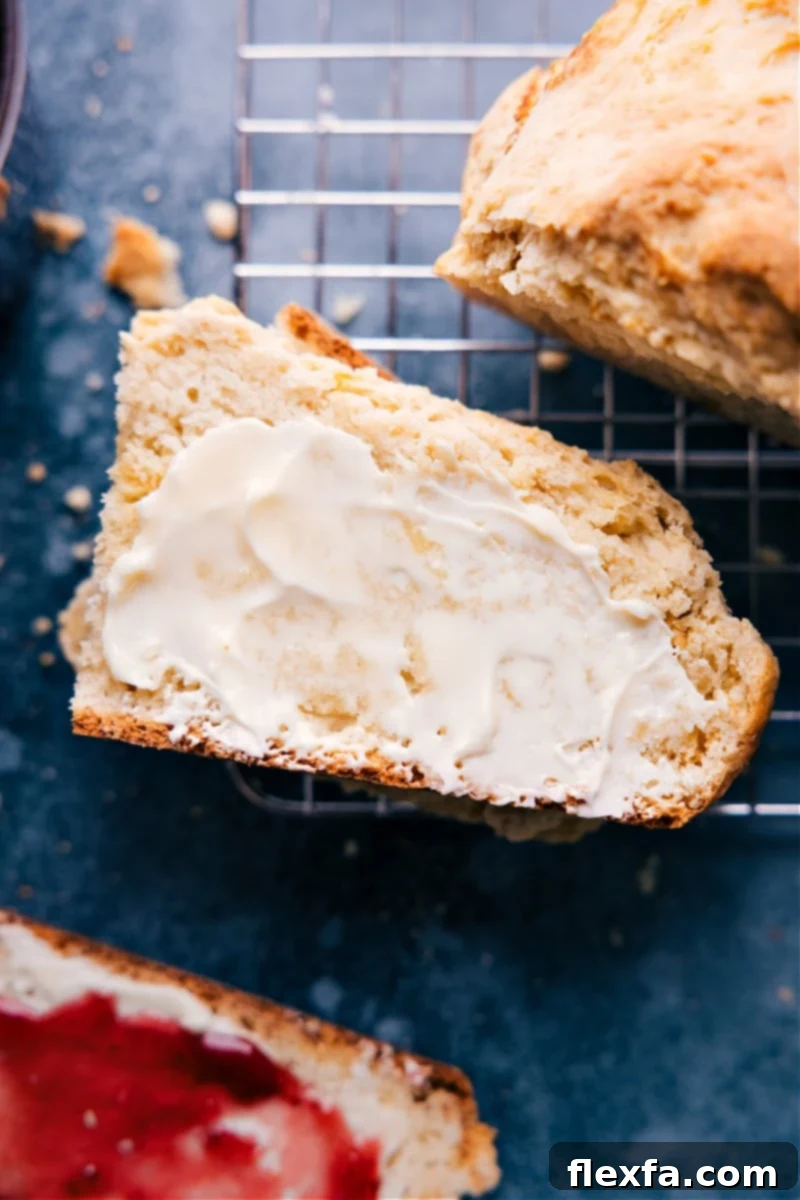
The Magic of No-Yeast Baking: Understanding Quick Breads
Many home bakers find the idea of baking bread intimidating, often due to the time-consuming process of working with yeast. But what if we told you there’s a whole category of bread that skips this step entirely? Welcome to the world of no-yeast bread, often referred to as quick bread or, more specifically, soda bread. This particular recipe falls perfectly into that category, offering all the satisfying texture and flavor of traditional bread without the waiting game.
The secret to its incredible rise lies in a fascinating chemical reaction. Instead of relying on yeast, this bread uses readily available leavening agents: baking powder and baking soda. When these interact with an acidic ingredient, such as buttermilk, they produce carbon dioxide gas. These gases are trapped within the dough, creating air pockets that cause the bread to expand and rise beautifully in the oven. It’s a quick, efficient, and utterly delicious way to achieve a fluffy loaf!
Beyond its innovative leavening method, this easy bread recipe with no yeast stands out for its straightforward preparation. Forget about complex kneading techniques, multiple rises, or the need for specialized equipment like stand mixers. This dough comes together quickly in a single large bowl, using just a wooden spoon or spatula. It’s truly a beginner-friendly recipe that delivers impressive results every time.
Texture and Taste: A Delightful Experience
Prepare your palate for a truly unique and satisfying experience. This no-yeast bread boasts a rich, buttery flavor that’s mild and comforting, often compared to the subtle sweetness and tenderness of a classic biscuit. While it’s wonderfully enjoyable on its own, its true potential shines when paired with simple accompaniments like butter, jam, or marmalade. It’s not designed to be a strong standalone flavor but rather a versatile canvas for your favorite spreads.
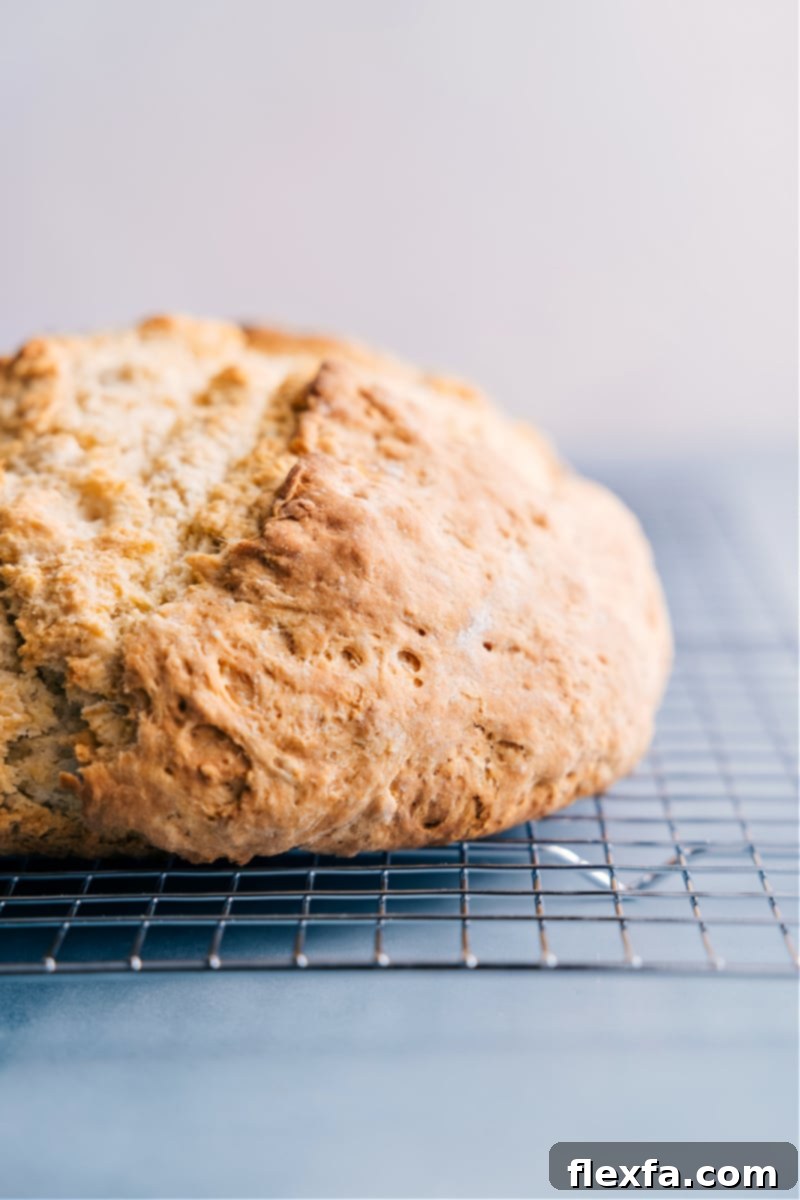
The texture is equally remarkable. You’ll be greeted by a lovely crisp crust that gives way to a dense, tender, and moist interior. Unlike the open, airy crumb of some yeasted breads, this loaf features a much tighter, softer crumb, making it distinct from your typical sandwich bread. We find this bread is at its absolute best when enjoyed the same day it’s baked, much like fresh biscuits. As the days pass, it gradually develops a chewier, softer texture, still delicious but undeniably different from its fresh-from-the-oven peak. It’s a bread that truly celebrates immediate gratification!
The Genius Behind This Easy Preparation: The Butter Clump Method
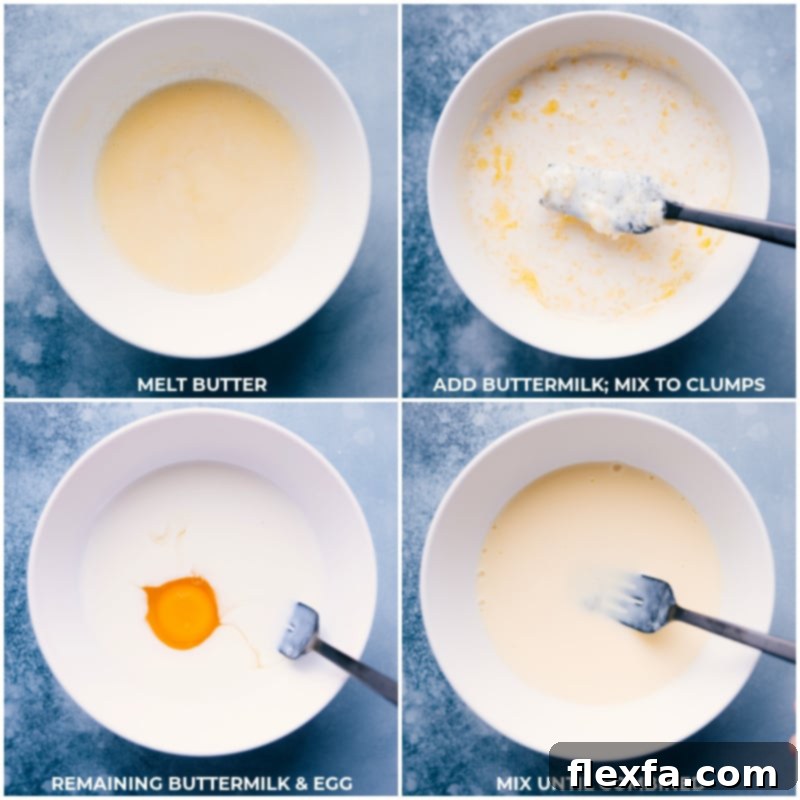
The true “secret” to the effortless preparation and delightful texture of this no-yeast bread lies in a clever technique borrowed from our beloved Drop Biscuits recipe. Traditional biscuit-making often involves laboriously cutting cold, cubed butter into flour using a food processor or pastry blender to create tiny pockets of fat. This method is crucial for a flaky, tender result.
However, we’ve discovered a brilliant shortcut that delivers similar, if not superior, results with far less effort. Instead of cutting in cold butter, we actually melt the butter. While melting butter typically leads to a less flaky texture in baked goods, we ingeniously counteract this by introducing ice-cold buttermilk. The thermal shock of the cold buttermilk hitting the warm melted butter causes the butter to rapidly solidify into numerous small, irregular clumps, as you can see in the process photo above. These newly formed butter clumps act just like the traditional cut-in butter, creating tiny pockets within the dough. As the bread bakes, these butter pockets melt, releasing steam and contributing to an incredibly tender, moist, and flavorful crumb without any strenuous work. This clever trick, inspired by the culinary experts at Cooks Illustrated, transforms the baking process, making it wonderfully accessible.
We’ve successfully adapted this ingenious method for our No-Yeast Bread. The combination of hot melted butter with cold buttermilk yields those perfect butter clumps that are instrumental not only in creating the ideal texture but also in contributing to the bread’s rise and overall moistness. It’s a game-changer that makes baking delicious bread more approachable than ever before.
If you’re specifically seeking no-yeast bread rolls, we highly recommend revisiting that drop biscuit recipe, as its tender, pillowy texture offers a fantastic roll-like alternative.
Why Butter Clumps Matter: A Quick Baking Science Insight
Fat, like butter, plays a pivotal role in the texture of quick breads and biscuits. When distributed throughout the dough in small clumps, it creates tiny pockets. As these butter clumps melt in the hot oven, they leave behind voids. Simultaneously, the carbon dioxide (CO2) gas produced by the baking powder and soda has a space to expand into these voids, helping the bread achieve a light, airy rise. Without these critical butter pockets, the CO2 would escape more easily, resulting in a dense, hard, and flat loaf. The clumps essentially act as tiny, temporary scaffolding, ensuring a beautifully risen and tender crumb.
Mastering Your No-Yeast Bread: Essential Tips for Success
You’ll be genuinely surprised at how swiftly this bread comes together. To ensure your no-yeast bread turns out perfectly golden, tender, and delicious every time, pay close attention to these vital tips. Following these guidelines will elevate your baking from good to extraordinary.
1. Precision in Baking Time is Key
Baking times can vary significantly based on your oven’s calibration, altitude, and even the type of pan you use. Therefore, actively monitoring your bread while it bakes is crucial. Look for a beautiful golden-brown crust as your primary visual cue. To confirm doneness, gently tap the bottom of the loaf; it should produce a hollow sound. If you notice the crust browning too quickly before the center appears fully baked, loosely tent the loaf with aluminum foil to prevent scorching and allow the interior to cook through properly.
2. The Importance of Scoring the Loaf
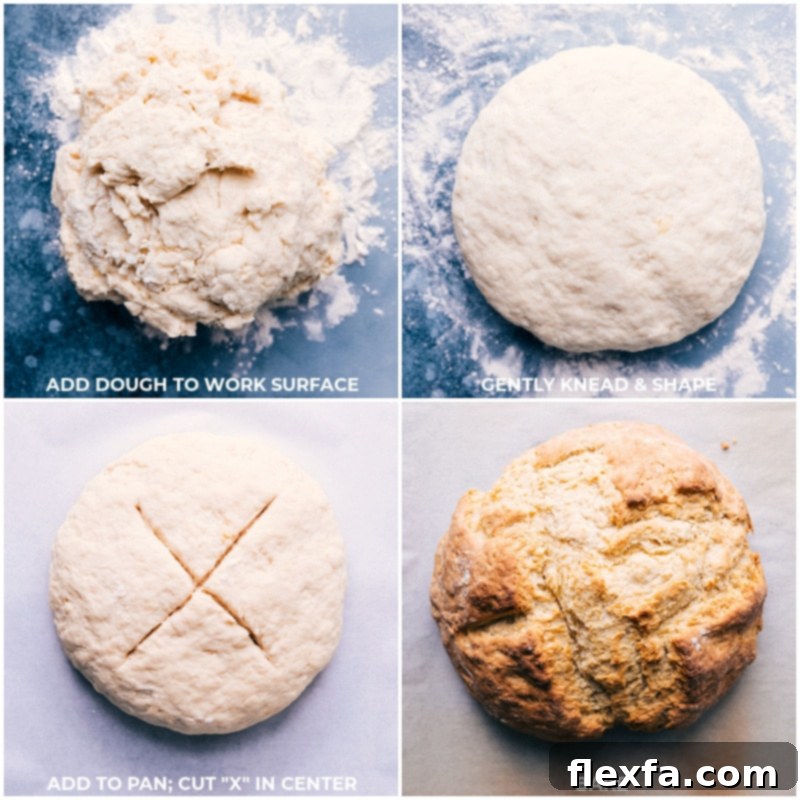
Before your bread goes into the oven, take a sharp serrated knife and cut a shallow “X” across the top of the loaf, about 1/4-inch deep. This simple scoring technique serves a vital purpose: it helps the heat penetrate the center of the loaf more effectively, promoting an even bake and preventing the crust from cracking unevenly as the bread expands.
3. The Crucial Cooling Time
Resist the temptation to slice into your freshly baked bread immediately! After removing it from the oven, let the loaf rest on the baking pan for 5-10 minutes. Then, transfer it to a wire cooling rack for at least 30 minutes. This resting period is just as critical as the baking time itself. During this time, the residual heat and trapped steam continue to cook the center of the bread, allowing it to set properly. Cutting too soon will likely result in a doughy, gummy center. Patience truly is a virtue in baking.
4. Harnessing the Power of Cold Buttermilk
For the best results, use buttermilk straight from the refrigerator. The colder your buttermilk, the better! This low temperature is essential for achieving the perfect butter clumps when combined with the melted butter. The rapid temperature change causes the butter to solidify quickly and form those desirable pockets of fat, which are crucial for the bread’s texture and rise.
5. Precision in Flour Measurement
Adding flour can be one of the trickiest parts of baking, as factors like humidity, altitude, and ambient temperature can influence the exact amount needed. Always start with slightly less flour than the recipe suggests. Gradually add more, a tablespoon at a time, until the dough just begins to pull away from the sides of the bowl and is no longer excessively sticky. The dough should still feel moist and soft, not dry or stiff.
- The perils of too much flour: Over-flouring is a common mistake that leads to a dense, tough, and less flavorful loaf of no-yeast bread. The bread will be dry and heavy.
- The consequences of too little flour: Conversely, insufficient flour will result in a dough that spreads excessively in the oven, leading to a flat and unappealing loaf.
- Mastering the “Spoon and Level” method: For accurate flour measurement, always use the “spoon and level” technique. Instead of scooping your measuring cup directly into the flour container (which compacts the flour and results in too much), spoon the flour into your measuring cup until it’s overflowing. Then, use the back of a knife or a straight edge to level off the excess. This method ensures you get the precise amount of flour needed for a perfectly balanced dough. You can see a visual guide on how to spoon and level flour here.
Delightful Serving Suggestions for Your No-Yeast Bread
While delicious in its own right, no-yeast bread offers a relatively plain and versatile flavor profile, making it an excellent canvas for a myriad of toppings and pairings. Its mild taste means it truly shines when enhanced by complementary flavors. Here are some of our favorite ways to enjoy this homemade delight:
- Classic Butter & Jam: There’s nothing quite like a slice of warm, fresh bread. Spread a thick layer of room-temperature butter immediately after slicing. For an extra touch of gourmet, consider adding a pinch of sea salt to unsalted butter to enhance its creamy notes, or infuse it with freshly chopped herbs like rosemary or thyme. Alternatively, indulge in the sweet simplicity of your favorite citrus marmalade or vibrant berry jam. If the bread has cooled, a quick toast will bring back its warmth and crispness, making it perfect for preserves.
- Hearty Sandwiches: Its dense yet tender crumb makes this bread an excellent foundation for both savory and sweet sandwiches. Pile on your favorite deli meats and cheeses for a satisfying lunch, or get creative with an open-faced sandwich. Toast a slice until golden, top with melted cheese and perhaps some thinly sliced tomatoes or avocado for a quick, comforting meal.
- Innovative Meals: Reimagine comfort food by using a toasted slice of no-yeast bread as a base for biscuits and gravy. The sturdy texture holds up beautifully to rich, creamy gravy, creating a surprisingly delicious twist on a Southern classic. This hearty meal became an instant favorite!
- Sweet Indulgences: Transform leftover slices into incredible French Toast. Its slightly denser texture absorbs the custard mixture wonderfully, resulting in a rich and tender French toast. Serve generously drizzled with our homemade buttermilk syrup, classic pancake syrup, or a burst of fruity flavor with blueberry syrup.
- Savory Pairings: This bread is absolutely perfect for dunking into a warm bowl of soup. Its hearty crumb soaks up savory broths beautifully, adding substance to your meal. Explore our extensive list of 30 favorite soup recipes to find your ideal pairing. It’s also a fantastic accompaniment to stews or chili, providing a comforting, absorbent vehicle for rich sauces.
Don’t Waste That Buttermilk! More Delicious Uses
Buttermilk is a star ingredient in this no-yeast bread, and chances are you might have some leftover. Don’t let it go to waste! Buttermilk adds incredible tenderness and flavor to a variety of dishes. Put your leftover buttermilk to good use with these fantastic recipes: whip up a batch of our favorite Homemade Pancakes for a weekend brunch, prepare this irresistibly tasty Corn Casserole with creamed corn, or indulge in decadent Chocolate Chip Pancakes for a sweet start to your day.
Storing Your Homemade No-Yeast Bread for Optimal Freshness
Homemade no-yeast bread, like many freshly baked goods, is at its peak flavor and texture right out of the oven. Since it lacks the preservatives found in store-bought varieties, proper storage is essential to maintain its quality for as long as possible. Understanding how to store it will help you enjoy every last crumb.
- Optimal Freshness: The absolute best way to enjoy this bread is on the same day it’s baked, ideally within a few hours of cooling. Its crust is crispest and its interior is most tender immediately after baking.
- Room Temperature Storage: For continued enjoyment, store your bread in a cool, dry place for 3 to 5 days. To prevent mold and allow for air circulation, use a breathable container such as a paper bag, a bread box, or a loosely covered container. Avoid airtight plastic bags unless you’re freezing it, as they can trap moisture and encourage mold growth. Counterintuitively, the refrigerator actually speeds up the staling process of most breads due to a phenomenon called starch retrogradation, so it’s best to avoid storing this bread in the fridge.
- Freezing for Later: If you anticipate not finishing the loaf within 2-3 days, or simply want to extend its shelf life, freezing is an excellent option. Slice the bread before freezing, then wrap individual slices or portions tightly in plastic wrap and place them in a freezer-safe bag or container. This method helps maintain freshness for up to 3 months. When ready to enjoy, you can thaw slices at room temperature or toast them directly from the freezer for a quick and warm treat.
Quick Tip for Enjoying Crumbly Slices
No-yeast bread can sometimes be notoriously crumbly, especially if sliced thinly or not completely cooled. To enhance its stability and make it easier to handle, particularly for sandwiches or when serving with soft toppings, consider toasting the bread first. Toasting adds a pleasant crispness and firmness, making each slice less prone to crumbling.
Explore More Quick Bread Recipes for Every Craving
Once you’ve mastered this delightful no-yeast bread, you’ll surely want to explore more quick bread recipes that offer similar ease and delicious results. These loaves come together quickly and are perfect for breakfast, snacks, or dessert. Dive into these other fantastic quick bread creations:
- Pumpkin Bread: A moist and flavorful loaf, crowned with a irresistible crusty sugary top. Perfect for autumn, but delicious all year round.
- Healthy Banana Bread: Made with Greek yogurt for an extra boost of protein and moisture, this is a guilt-free indulgence that doesn’t skimp on flavor.
- Lemon Blueberry Bread: Bursting with the bright zest of fresh lemon and juicy blueberries, this bread is a refreshing treat.
- Applesauce Bread: A comforting, spiced bread featuring tender fresh apple chunks throughout, offering warmth and natural sweetness.
- Chocolate Banana Bread: The ultimate combination of classic banana bread enriched with delightful chocolate chips, a favorite for all ages.
Rated 5 out of 5 stars by 1 voter.
No-Yeast Bread
No-Yeast Bread is a quick, easy, and satisfying recipe, allowing you to bake a warm loaf in minutes—with no rising time required! Enjoy fresh homemade bread in under 90 minutes from start to finish.
Equipment
- Large sheet pan (15″ x 21″) or 5-quart cast-iron pot
- Parchment paper or silicone baking mat
- Cooling rack
Ingredients
- 8 tablespoons unsalted butter (1/2 cup), melted
- 1-3/4 cups cold buttermilk, divided (see note 1)
- 1 large egg
- 4-1/2 cups all-purpose flour, plus more for dusting (see note 2)
- 3 tablespoons granulated sugar
- 2-1/2 teaspoons baking powder
- 1 teaspoon baking soda
- 1-1/2 teaspoons salt
Instructions
- Preheat your oven to 425°F (220°C). Prepare a large sheet pan by lining it with parchment paper or a silicone liner. Alternatively, if using, line a 5-quart cast-iron pot with parchment paper. Set this aside. In a medium microwave-safe bowl, melt the butter.
- Remove the melted butter from the microwave and carefully pour in 1 cup (237g) of cold buttermilk. Stir gently with a fork and let it sit for about 5 minutes to allow the butter to clump up. In a separate medium bowl, whisk together the remaining 3/4 cup (176g) buttermilk and the large egg until smooth. Set aside.
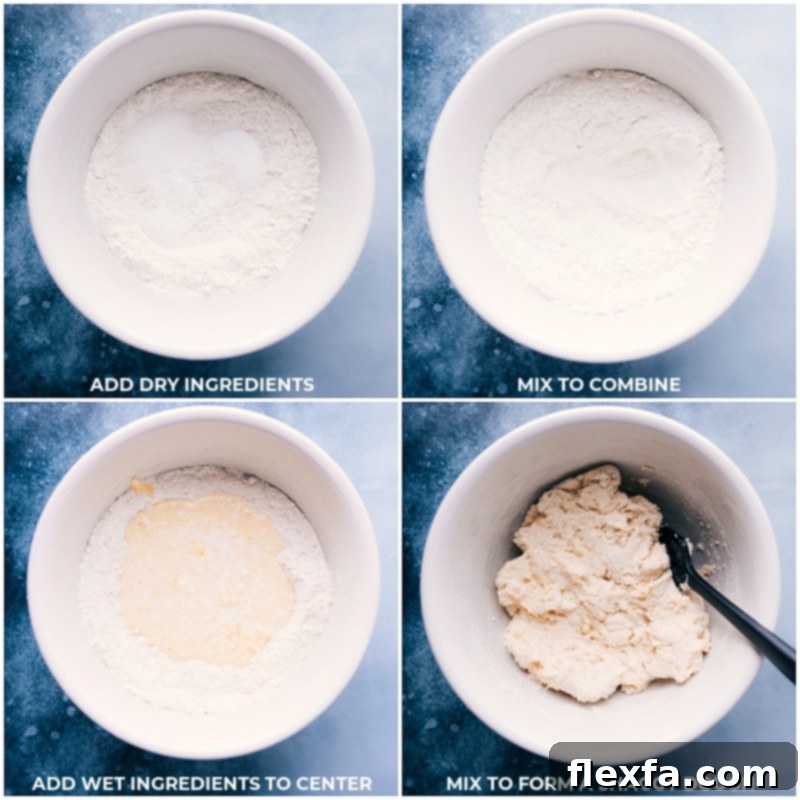
- In a very large mixing bowl, combine the flour, granulated sugar, baking powder, baking soda, and salt. Whisk these dry ingredients together thoroughly until well combined. Create a well in the center of the dry ingredients. Pour the buttermilk and egg mixture into this well. Stir the butter and buttermilk mixture again vigorously, ensuring small clumps form (the more clumps, the better!). Use a spatula to scrape every bit of this clumpy mixture into the bowl with the other ingredients.
- Using a strong spatula or a wooden spoon, gently mix the ingredients just until everything is combined and no dry flour streaks remain. Be careful not to overmix or overwork the dough, as this can lead to a tough bread. Lightly sprinkle 2 tablespoons of extra flour onto a clean work surface. Scrape all the dough out onto the floured surface and sprinkle an additional 2 tablespoons of flour over the top of the dough. Gently knead the bread about 6-8 times, just enough to bring everything together into a wide, smooth ball.
- Carefully transfer the dough ball to your prepared sheet pan or cast-iron pot. Gently pat it down to form a round loaf about 1-1/2 inches in height. Using a sharp serrated knife, cut a shallow “X” across the surface of the loaf, about 1/4-inch deep. Place the bread in the preheated oven and bake at 425°F (220°C) for 25 minutes. After 25 minutes, without opening the oven door, reduce the heat to 400°F (200°C) and continue baking for another 20-30 minutes, or until the base of the loaf sounds hollow when lightly tapped in the middle (this typically takes 25 minutes in my oven); refer to note 3 for testing doneness.
- Once baked, remove the pan from the oven and let the bread stand on the pan for about 10 minutes. Then, carefully transfer it to a wire cooling rack. Allow the bread to cool for at least 30 minutes before attempting to slice into it (the trapped steam is still crucial for the bread to finish cooking and set internally!)—see note 4 for more details on cooling.
Recipe Notes
Note 1: While other milks might seem interchangeable, for this recipe, real buttermilk is absolutely essential. Its natural acidity is crucial for reacting with the baking soda and baking powder to create the necessary leavening and rise in the bread. Do not substitute with regular milk or a homemade buttermilk substitute if you want the best results.
Note 2: Accurate flour measurement is key for the ideal bread texture. We highly recommend using a food scale for the most precise weight. If measuring by volume, always use the “spoon and level” method: spoon flour into your measuring cup until it overflows, then level it off with the back of a knife. Pressing a measuring cup directly into a flour container compacts the flour, resulting in a significant excess amount, which will make your bread dense and dry. Watch this video for a demonstration on how to spoon and level flour.
Note 3: To accurately test for doneness, put on oven mitts and carefully remove the bread from the hot pan. Support the loaf with one hand and gently tap the bottom with your fingers. A fully baked loaf will produce a distinctly hollow sound. Tapping the bread while it’s still in the pan or on a countertop will not provide an accurate indication of doneness.
Note 4: The cooling period after baking is just as important as the bake time itself. Allowing the bread to rest for 5-10 minutes on the pan and then at least 30 minutes on a wire rack ensures that the residual heat and steam continue to finish cooking the interior of the loaf. This process prevents a doughy or gummy center. As tempting as it is, resist cutting into the bread too soon!
Storage: Store your no-yeast bread in a cool, dry place for 3-5 days. To prevent mold and allow proper ventilation, use a container that is not completely airtight, such as a bread box or a loosely covered dish. Avoid storing this bread in the refrigerator, as the cold temperatures can accelerate its staling. For longer storage, especially for bread older than 2-3 days, it’s best to freeze it in sliced portions. Properly wrapped, it will stay fresh for up to 3 months. Thaw slices at room temperature or toast directly from the freezer for a quick snack.
Nutrition
Serving: 1 serving | Calories: 297kcal | Carbohydrates: 45g | Protein: 7.1g | Fat: 9.8g | Cholesterol: 39.8mg | Sodium: 151.9mg | Fiber: 1.4g | Sugar: 5g
Nutrition information is automatically calculated and should only be used as an approximation.