
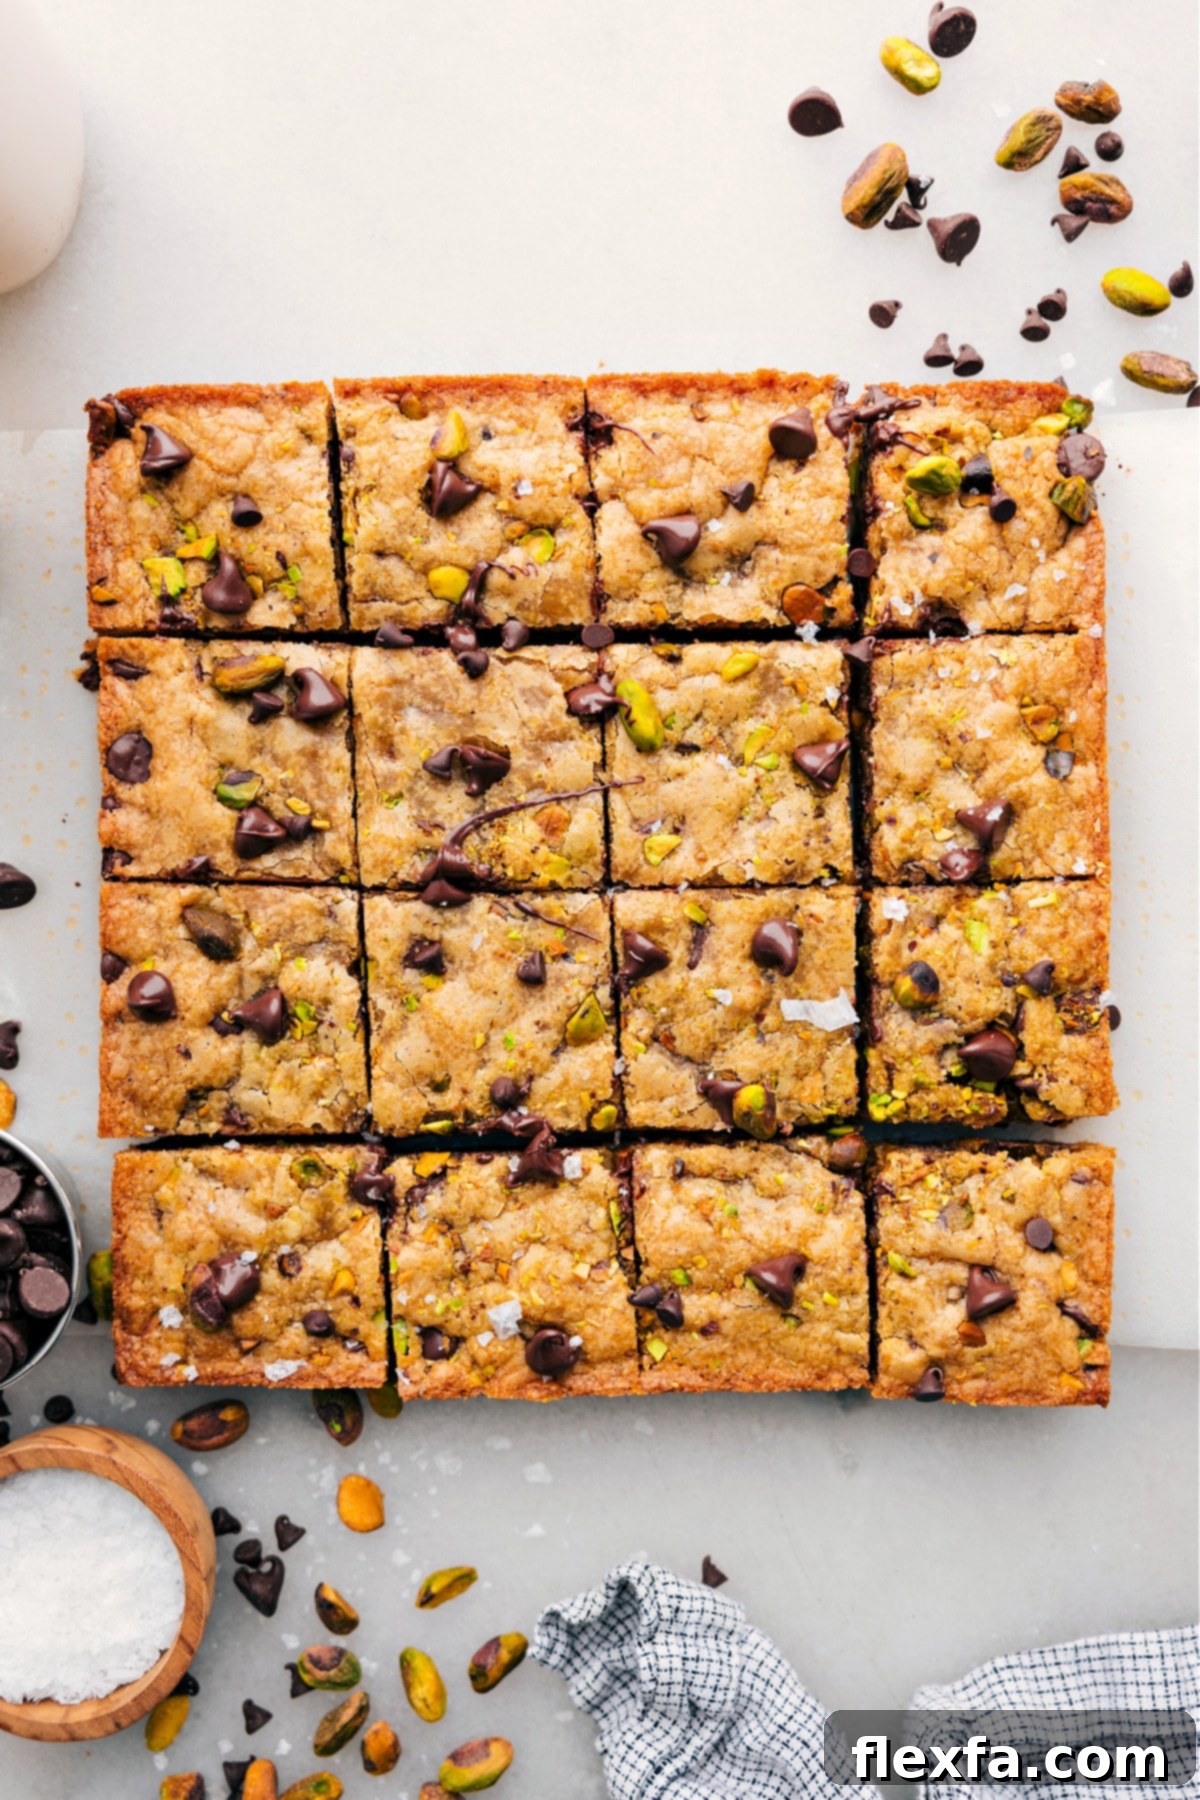
The Ultimate Chewy Brown Butter Blondie Recipe
Prepare to fall in love with these incredibly delicious Blondies! This recipe delivers thick, perfectly chewy, and supremely flavorful bars that are remarkably easy to make. What makes them truly special is their incredible versatility, allowing you to customize them with your favorite mix-ins, from classic chocolate chips and nuts to fun candies and beyond. Forget everything you thought you knew about blondies; this recipe sets a new standard for a truly unforgettable dessert.
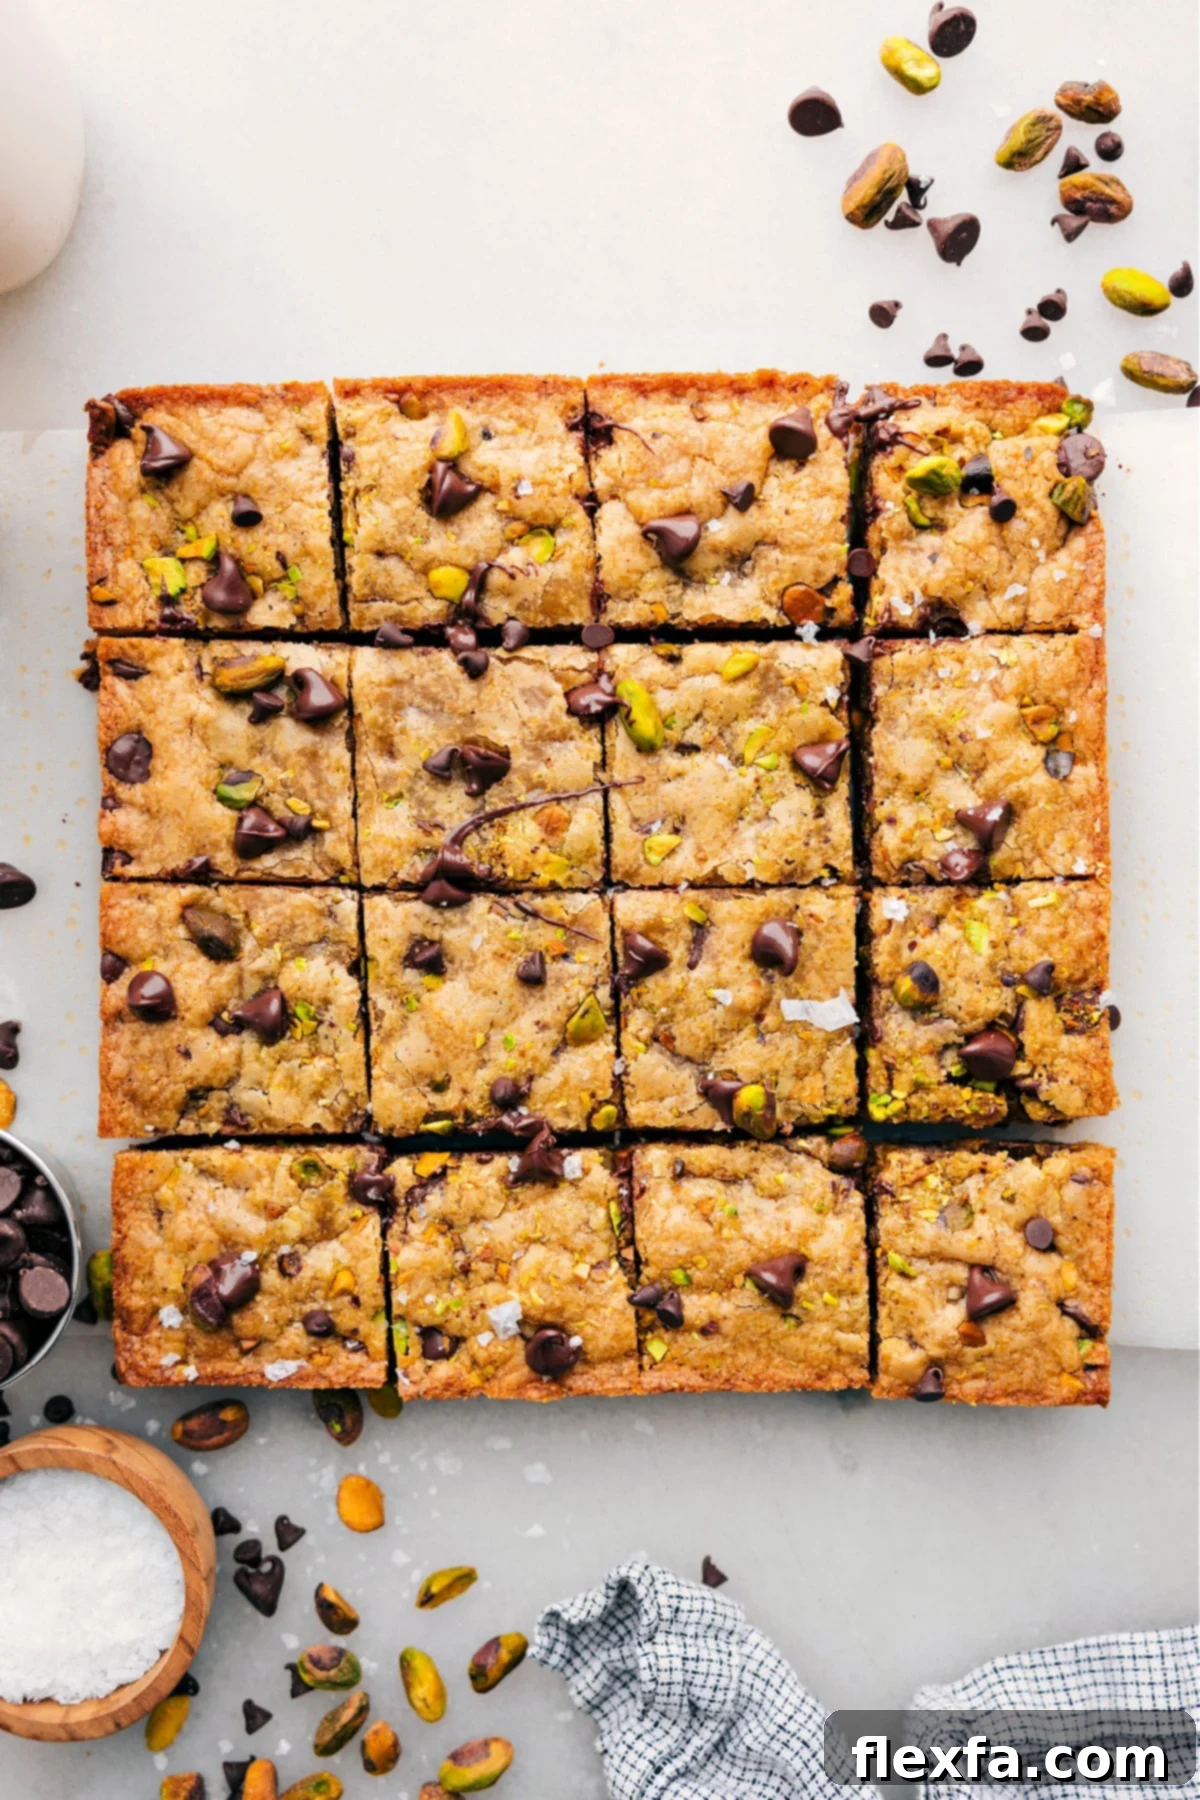
A Note from the Author
The Blondies That Stole My Brownie-Loving Heart
As a devoted chocolate enthusiast, my heart has always belonged to brownies. The rich, fudgy texture and intense chocolate flavor were always my go-to. However, I must confess that this particular Blondie recipe has dared to challenge that long-standing affection, potentially even claiming the top spot! While they still feature delightful chocolate elements, the unique, buttery, and caramel-like depth of these blondies offers a truly distinct and equally compelling experience.
This phenomenal recipe is a cherished inspiration from the renowned Inspired Taste, and after countless batches and extensive taste tests, I can confidently say it’s the absolute best I’ve ever encountered. It consistently produces blondies that are simply unparalleled in flavor and texture. Here’s why these blondies will undoubtedly become your new favorite:
- Endless Customization: They are incredibly forgiving and fun to experiment with. Easily swap out the chocolate chips and nuts for an entirely new flavor adventure every time you bake!
- Effortless Preparation: This recipe comes together in a flash with just a handful of straightforward, pantry-staple ingredients, making it perfect for both novice and experienced bakers alike.
- Unforgettable Texture: The result is pure perfection—dense, wonderfully chewy, with a slight crispness around the edges, and a melt-in-your-mouth interior that is honestly addicting. Each bite is a testament to their superior quality.
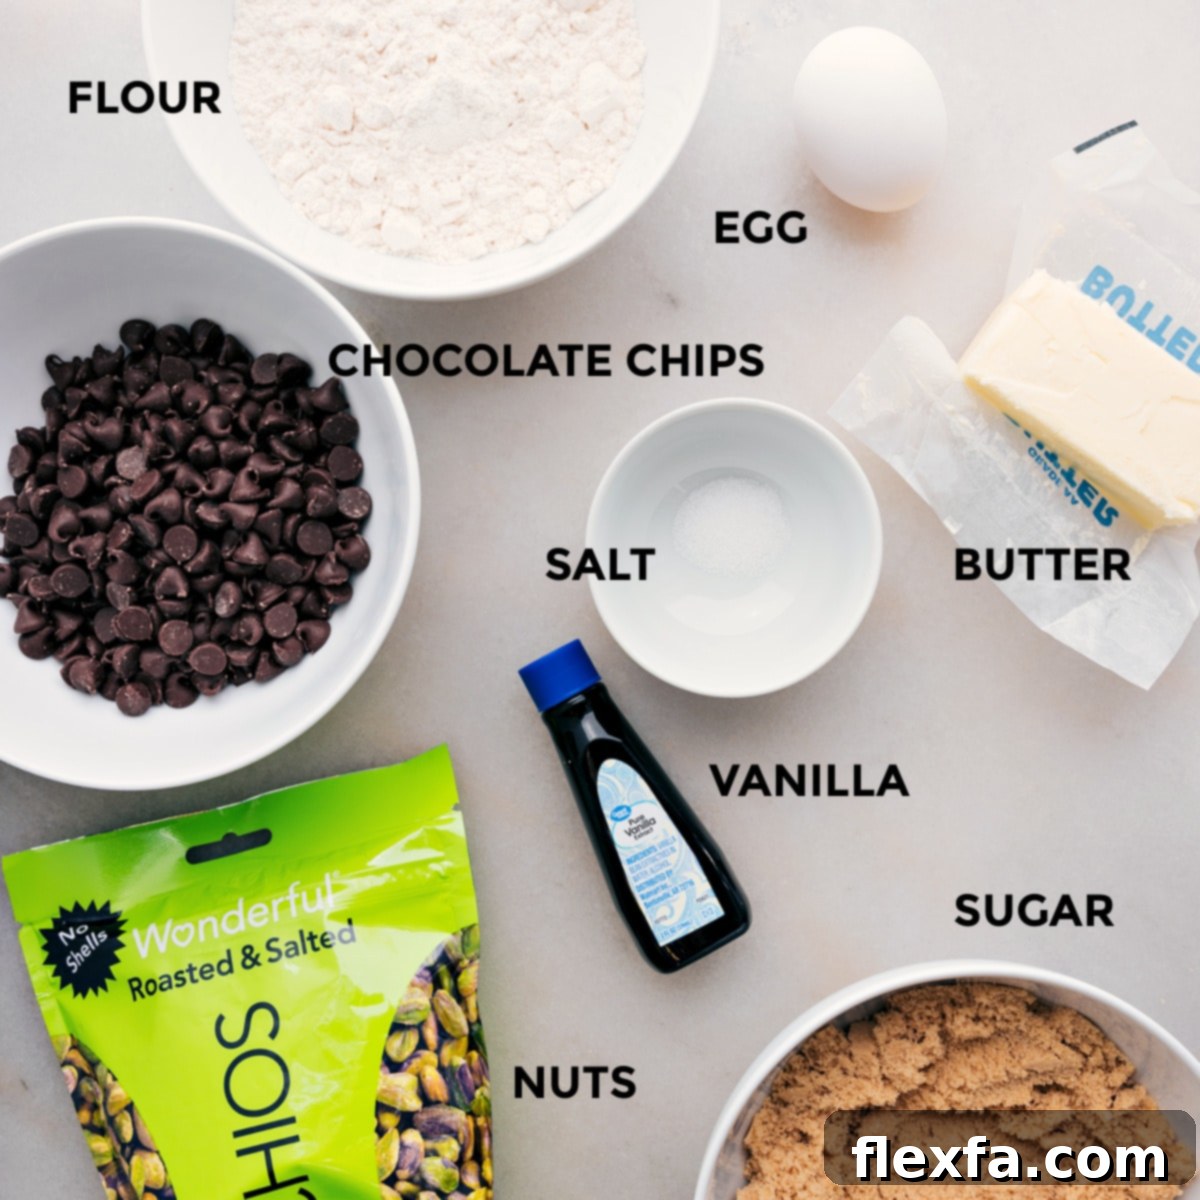
Ingredients You’ll Need for Perfect Blondies
Crafting the perfect blondie starts with selecting the right ingredients. Each component plays a vital role in achieving that coveted chewy texture and rich, caramel-like flavor. Here’s a closer look at what you’ll need and why each element is important:
- Unsalted Butter: This is the secret weapon! Browning the butter infuses these blondies with an incredibly rich, nutty, and complex flavor that truly elevates them beyond a basic bar. If you’ve experienced the magic of Brown Butter Oatmeal Cookies, you already know the profound impact this simple step makes. Unsalted butter allows you to control the overall saltiness of the final product.
- Light Brown Sugar: The star of the blondie show! Light brown sugar is crucial for that signature caramel-like flavor and contributes significantly to the moist and chewy texture. Its molasses content adds depth and richness. It’s important to avoid dark brown sugar here, as its higher moisture content and stronger molasses flavor can alter the texture and taste profile too much, making the blondies overly dense or wet.
- Vanilla Bean Paste or Vanilla Extract: Vanilla is essential for enhancing the overall sweetness and bringing out the nuanced flavors in the blondies. Vanilla bean paste offers a more intense vanilla flavor and those beautiful little specks, but a high-quality pure vanilla extract works wonderfully as a substitute. For a unique twist, consider experimenting with almond extract for a marzipan-like note or maple extract for a cozy, autumnal touch.
- Large Egg: The binder and moistener! A single large egg is vital for holding the blondie batter together, providing structure, and contributing to the moist, tender crumb. It also helps achieve that desirable chewy consistency.
- Salt: Don’t ever skip the salt in baked goods! A quarter teaspoon of salt might seem small, but it’s a powerful flavor enhancer. It meticulously boosts and balances the sweetness of the brown sugar, preventing the blondies from tasting one-dimensionally sweet and instead delivering a harmonious flavor profile.
- All-Purpose Flour: The foundation of the structure. All-purpose flour provides the necessary framework for the blondies. The key here is to mix it just until combined; overmixing will develop too much gluten, resulting in tough rather than soft and tender blondies.
- Chocolate Chips: Your favorite mix-in! While blondies are distinct from brownies, a touch of chocolate is always welcome. Feel free to use your preferred variety: semi-sweet chips for classic balance, milk chocolate for extra sweetness, dark chocolate for a richer contrast, or even white chocolate chips for a creamy, sweet addition. This is where the customization truly begins!
- Nuts (Optional, but recommended): Adding nuts introduces a delightful crunch and an extra layer of flavor. While any nut you like will work, using roasted and salted nuts (like pistachios, pecans, walnuts, or almonds) will add a phenomenal depth of flavor and a perfect counterpoint to the blondies’ sweetness. Lightly toasting them yourself before adding can also enhance their natural flavor.
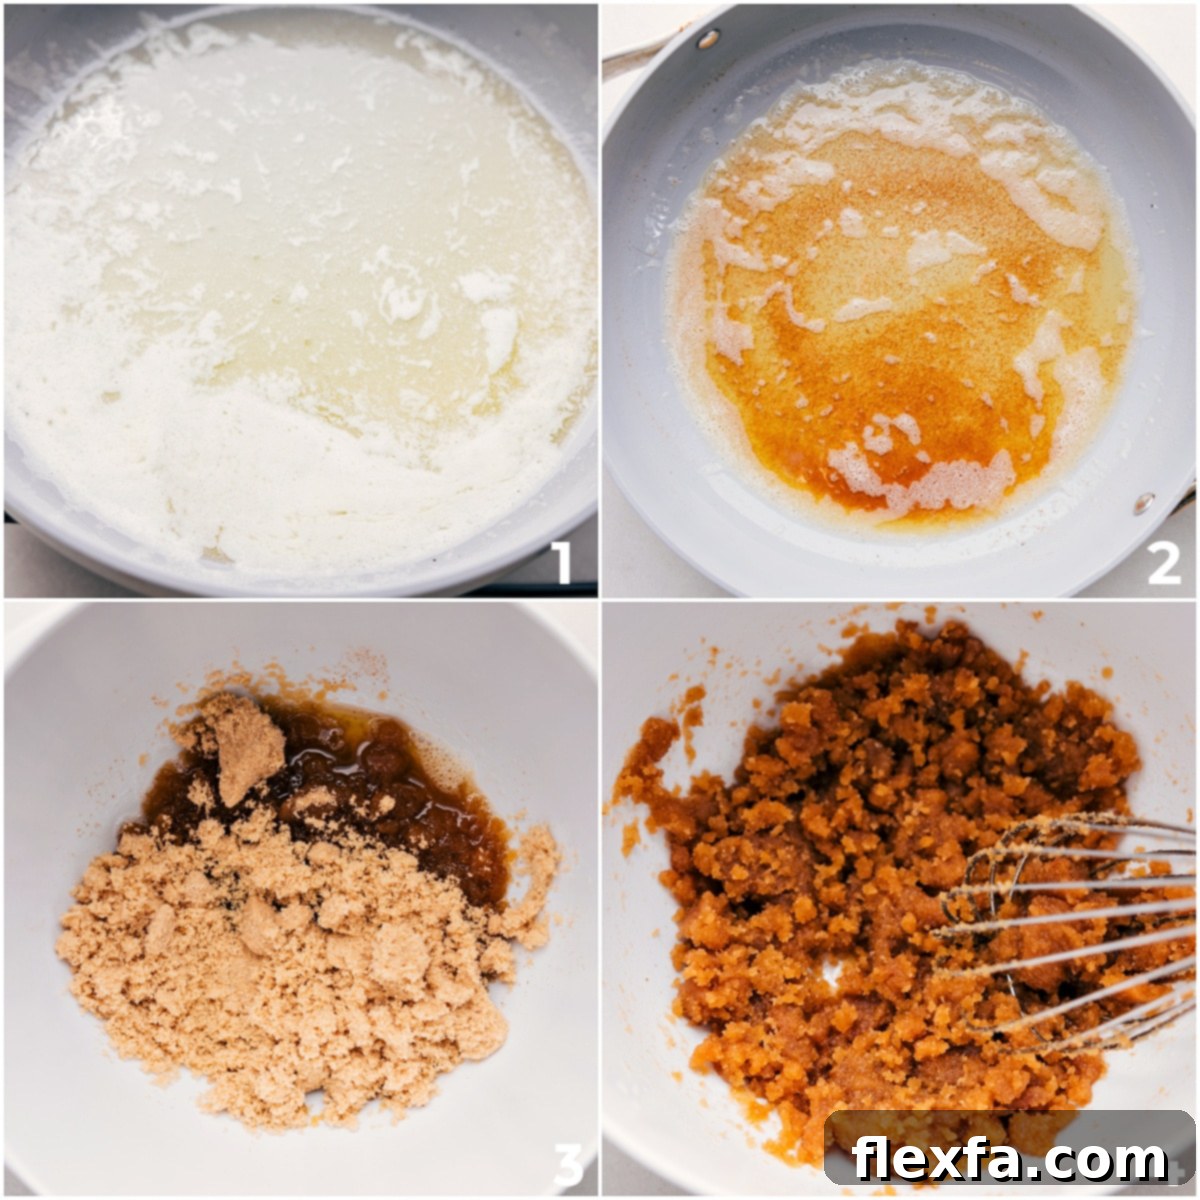
Step-by-Step Guide: How To Make This Blondie Recipe
Creating these irresistible blondies is a straightforward process, but a few key steps ensure perfection every time. Follow these instructions carefully to achieve the ideal chewy texture and rich flavor.
- Prepare Your Pan and Preheat the Oven: Begin by preheating your oven to 350°F (175°C). Next, lightly spray an 8×8-inch baking pan with cooking spray. Line the pan with parchment paper, leaving a generous overhang on two sides. This parchment paper sling will make it incredibly easy to lift the baked blondies out of the pan later.
- Brown the Butter to Perfection: In a light-colored, wide saucepan (the light color helps you monitor the browning), melt the unsalted butter over medium-high heat. Once the butter has fully melted and begins to foam, reduce the heat to medium and stir constantly with a silicone spatula. The butter will bubble, then foam, and eventually, small golden-brown specks will appear at the bottom of the pan, releasing a wonderfully nutty aroma. As soon as you see these brown bits and smell the nutty fragrance, immediately remove the pan from the heat to prevent burning. Carefully pour the browned butter into a separate heat-safe bowl, making sure to scrape all the flavorful browned bits from the bottom of the pan – these are packed with flavor! Allow the browned butter to cool for about 5 minutes.
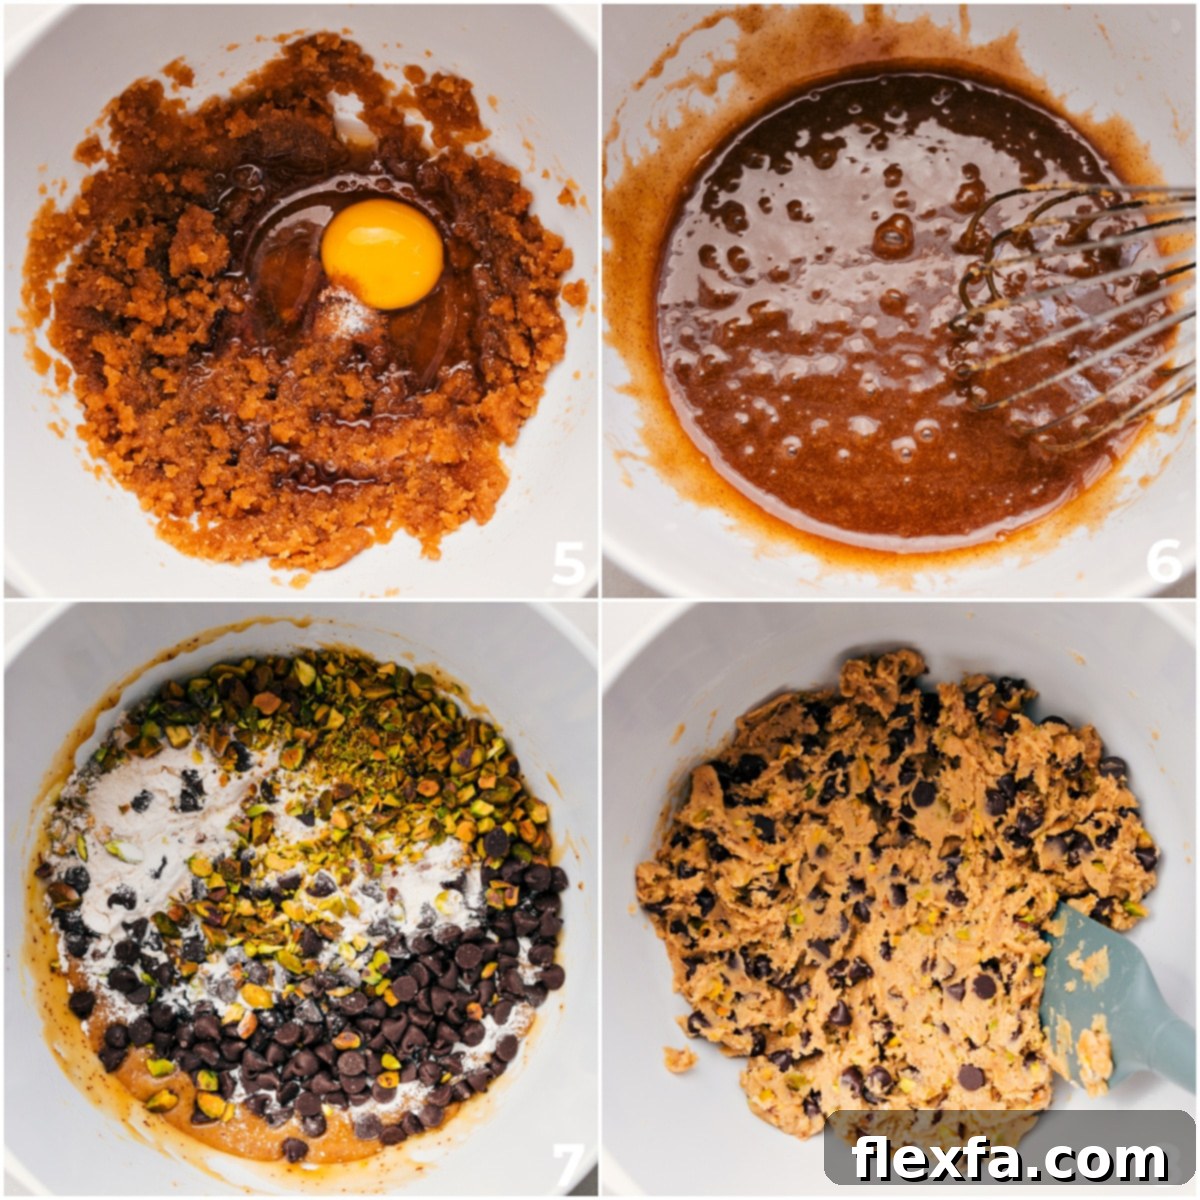
- Combine Wet Ingredients: Add the packed light brown sugar to the slightly cooled browned butter. Whisk vigorously for about 1-2 minutes until the mixture is thoroughly combined, has a slightly gritty texture resembling wet sand, and is smooth. Next, incorporate the large egg, vanilla bean paste (or extract), and salt. Continue whisking briskly for another 1-2 minutes until the mixture becomes very creamy, lighter in color, and appears emulsified, forming a thick, glossy base for your blondies.
- Gently Fold in Dry Ingredients and Mix-Ins: Add the all-purpose flour to the wet ingredients. Switch from a whisk to a sturdy spatula. Fold the dough gently until no dry streaks of flour remain. Be careful not to overmix, as this can lead to tough blondies. Finally, fold in your chosen chocolate chips and chopped nuts. The batter will be quite thick and dense at this stage.
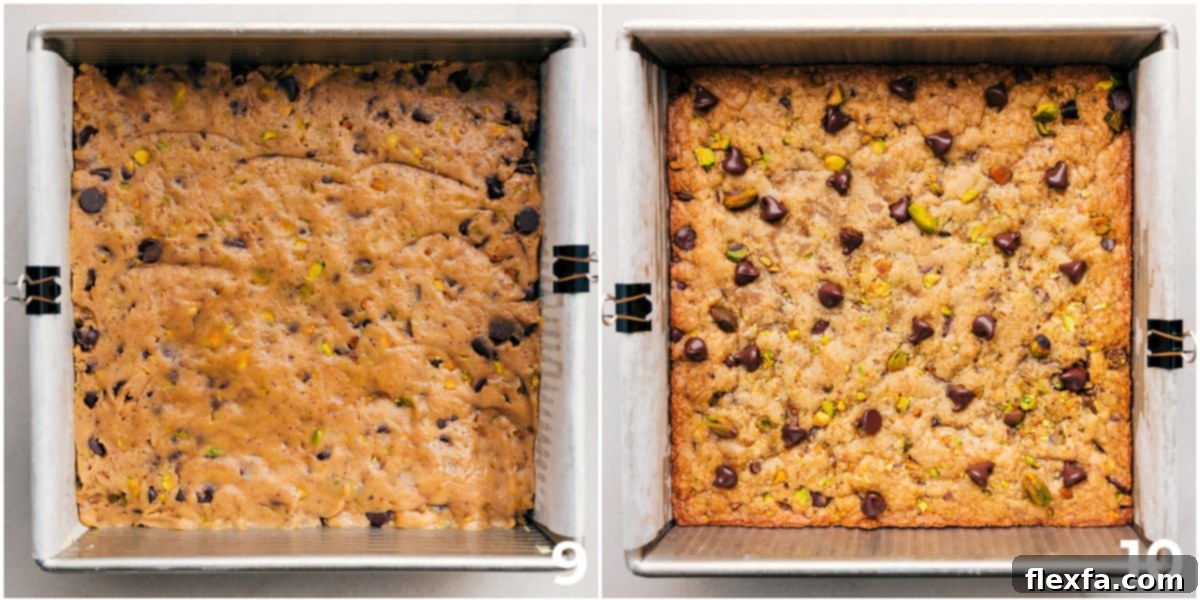
- Bake and Cool to Perfection: Evenly spread the thick blondie batter into your prepared 8×8-inch pan. Use your spatula to smooth the top, ensuring an even layer for consistent baking. Bake for 25-27 minutes, or until the edges are lightly golden brown and the center appears set when gently touched. A wooden skewer inserted into the center should come out with moist crumbs, not wet batter. Remove the pan from the oven and let the blondies cool in the pan for 10-15 minutes. This crucial cooling period helps them set and prevents crumbling. Then, use the parchment paper overhang to carefully lift the entire slab of blondies onto a cooling rack. Remove the parchment paper and allow them to cool completely before slicing into desired bar sizes and serving.
Expert Tips for Making the Best Blondie Recipe
Achieving bakery-quality blondies at home is easy with a few insider tips. These simple techniques will ensure your blondies are perfectly chewy, moist, and bursting with flavor every single time.
- Master the Brown Butter Technique: This step is non-negotiable for incredible flavor. Always use a light-colored pan so you can easily observe the butter solids browning at the bottom. The transformation from melted butter to rich, nutty brown butter happens quickly, so watch it closely and stir frequently. Don’t forget to scrape every single bit of those glorious brown flecks into your bowl – they are concentrated pockets of flavor! If you’re nervous, try a smaller test batch first.
- Gentle Folding is Key: Once you add the flour, switch from a whisk to a spatula. Fold the ingredients just until the flour streaks disappear. Overmixing develops gluten, which can make your blondies tough and cakey rather than soft and chewy. A light hand ensures a tender crumb.
- Cool Completely Before Cutting: Patience is a virtue, especially when it comes to blondies! Allowing them to fully cool in the pan before attempting to slice them is crucial. Warm blondies are very delicate and prone to crumbling and falling apart. Cooling them solidifies the fats and sugars, resulting in clean, firm, and perfectly chewy bars.
- Always Line Your Pan: Using parchment paper to line your baking pan is a game-changer. Not only does it make lifting the entire batch of blondies out of the pan incredibly easy, preventing sticking and damage, but it also helps the bottom of the blondies achieve that beautiful golden hue and even bake, eliminating soggy bottoms.
- Choose the Right Baking Pan: A light-colored metal baking pan is ideal for blondies. Darker pans tend to absorb more heat, which can lead to over-browning or even burning the edges and bottom of your blondies before the center is fully cooked. A light-colored pan ensures more even heat distribution and a perfectly uniform bake.
- Don’t Overbake: Blondies are meant to be moist and chewy, not dry and crumbly. They should still look slightly soft in the center when you pull them from the oven, as they will continue to cook slightly from residual heat as they cool. The edges should be lightly golden, and the center just set.
Customization and Flavor Variations
One of the most exciting aspects of this blondie recipe is its adaptability. While the basic brown butter blondie is fantastic on its own, it serves as a perfect canvas for countless flavor combinations. Get creative and make these blondies uniquely yours!
- Chocolate Variety: Beyond standard chocolate chips, try chopped chocolate bars (milk, dark, or even flavored chocolates), mini chocolate chips for a more even distribution, or a mix of white and dark chocolate for a striking contrast.
- Nutty Additions: Walnuts, pecans, almonds, macadamia nuts, or even toasted shredded coconut can add wonderful texture and flavor. Always consider toasting your nuts lightly beforehand to enhance their natural oils and aroma.
- Candy Craze: Transform these into a fun party treat by folding in chopped candy bars (Snickers, Twix, Kit Kat), M&M’s, peanut butter cups, or even mini marshmallows for a gooey surprise.
- Fruity & Zesty: For a brighter flavor, add dried cranberries, chopped dried cherries, or a tablespoon of orange or lemon zest to the batter.
- Spice It Up: A pinch of cinnamon, nutmeg, or even a tiny dash of cayenne pepper (for a subtle kick) can add unexpected warmth and complexity to the brown sugar base.
- Caramel & Toffee: Swirl in some dulce de leche or add a handful of toffee bits for an extra layer of rich, buttery sweetness that complements the blondie’s natural flavor profile perfectly.
Blondie Recipe Storage
While these blondies are undeniably at their absolute best—softest, chewiest, and freshest—on the very day they are made, they do store well, allowing you to savor them for a few days.
- Room Temperature Storage: For any leftovers, place them in an airtight container. They will keep beautifully at room temperature for 2-4 days. While their texture might slightly firm up compared to day one, they will still be incredibly delicious and satisfying.
- Freezing for Longer Enjoyment: To extend their shelf life significantly, blondies are excellent candidates for freezing. Once completely cooled, wrap each individual blondie tightly in plastic wrap, then place them all into a large zip-top freezer bag or an airtight freezer-safe container. They can be frozen for up to 3 months. When you’re ready to enjoy, simply thaw them at room temperature or gently warm them in the microwave for a few seconds for that freshly baked feel.
More Delicious Cookies And Bars to Explore
If you loved these blondies, you’re sure to enjoy these other delightful bar and cookie recipes. Perfect for parties, snacks, or a sweet treat anytime!
Desserts
Chocolate Chip Cookie Bars Recipe
Snacks
Energy Bars Recipe (No-Bake, 5-Ingredients!)
Desserts
Magic Cookie Bars
Desserts
Homemade Twix Bar
Blondie Recipe
This blondie recipe is the ultimate quick dessert, creating soft, chewy bars loaded with delicious customizable mix-ins. A truly amazing and easy-to-make treat!
Equipment
- 8 x 8-inch baking pan (lined with parchment)
- Large saucepan (light-colored, for browning butter)
Ingredients
- 8 tablespoons unsalted butter, cubed
- 1 cup light brown sugar, packed
- 1 teaspoon vanilla bean paste or vanilla extract
- 1 large egg
- 1/4 teaspoon salt
- 1 cup all-purpose flour
- 1 cup chocolate chips (your favorite kind)
- 1/2 cup chopped roasted pistachios or any preferred nut
Instructions
- Preheat oven to 350°F (175°C). Lightly spray an 8 x 8-inch pan with cooking spray, then line it with parchment paper, leaving an overhang on two sides for easy removal.
- Melt butter in a light-colored, wide saucepan over medium-high heat. Once melted, reduce to medium and stir constantly with a silicone spatula. The butter will bubble and foam. When it smells nutty and you see light-brown specks under the foam, quickly remove from heat and pour butter into a bowl, scraping all the bits from the pan. Let it cool for 5 minutes.
- Add the brown sugar to the cooled butter and whisk vigorously until the mixture resembles wet sand. Add the egg, vanilla, salt, and whisk briskly until the mixture is very creamy and emulsified.
- Add the flour, chocolate chips, and nuts, then switch to a spatula to fold the dough until no dry streaks of flour remain. The batter will be thick.
- Spread the batter evenly into the prepared pan and smooth the top with a spatula. Bake for 25–27 minutes, or until the edges are lightly golden and the top is set.
- Remove from the oven and let the bars cool in the pan for 10–15 minutes. Use the parchment-paper overhang to transfer the bars to a cooling rack, then remove the parchment paper. Cut into bars and serve.
Recipe Notes
Browning Butter Tip: Using a large, light-colored saucepan makes browning butter significantly easier. This allows you to clearly see when the butter solids turn brown, ensuring you achieve that perfect nutty flavor without burning.
Storage: These bars are truly best enjoyed on the first day when they are freshest, softest, and chewiest. Store any leftovers in an airtight container at room temperature for 2-4 days. For longer preservation, wrap individual blondies and freeze them in a zip-top bag for up to 3 months. Thaw at room temperature before serving.
Nutrition Information (Approximate)
| Calories: 154 kcal
| Carbohydrates: 19.5 g
| Protein: 2 g
| Fat: 7.9 g
| Cholesterol: 26.9 mg
| Sodium: 45.2 mg
| Fiber: 0.6 g
| Sugar: 12.6 g
Nutrition information is automatically calculated and should be used as an approximation.
Loved this recipe? Leave a comment and share your experience below!
Frequently Asked Questions About Blondies
While often confused due to their bar cookie format, blondies and brownies are distinct. Blondies are typically lighter in color and flavor, characterized by a rich, buttery, caramel-like taste derived primarily from brown sugar and vanilla. They often feature a chewy, dense texture. Brownies, on the other hand, are dark and fudgy, with a deep chocolate flavor from cocoa powder or melted chocolate. They tend to be richer and more intensely sweet, offering a different sensory experience altogether.
It is highly recommended to stick with brown sugar for blondies. Brown sugar is critical for both the signature caramel flavor and the moist, chewy texture. White granulated sugar would result in a blondie that is drier, crispier, and lacks the depth of flavor that makes blondies so special. If you only have white sugar, you can try adding a tablespoon of molasses per cup of white sugar to create a makeshift brown sugar substitute, though the texture might still be slightly different.
Blondies are done when the edges appear lightly golden brown and the center is set but still looks slightly soft. A toothpick or skewer inserted into the center should come out with moist crumbs attached, but not wet batter. Overbaking will lead to dry, cakey blondies, so it’s better to slightly underbake than overbake for that perfect chewy texture.