
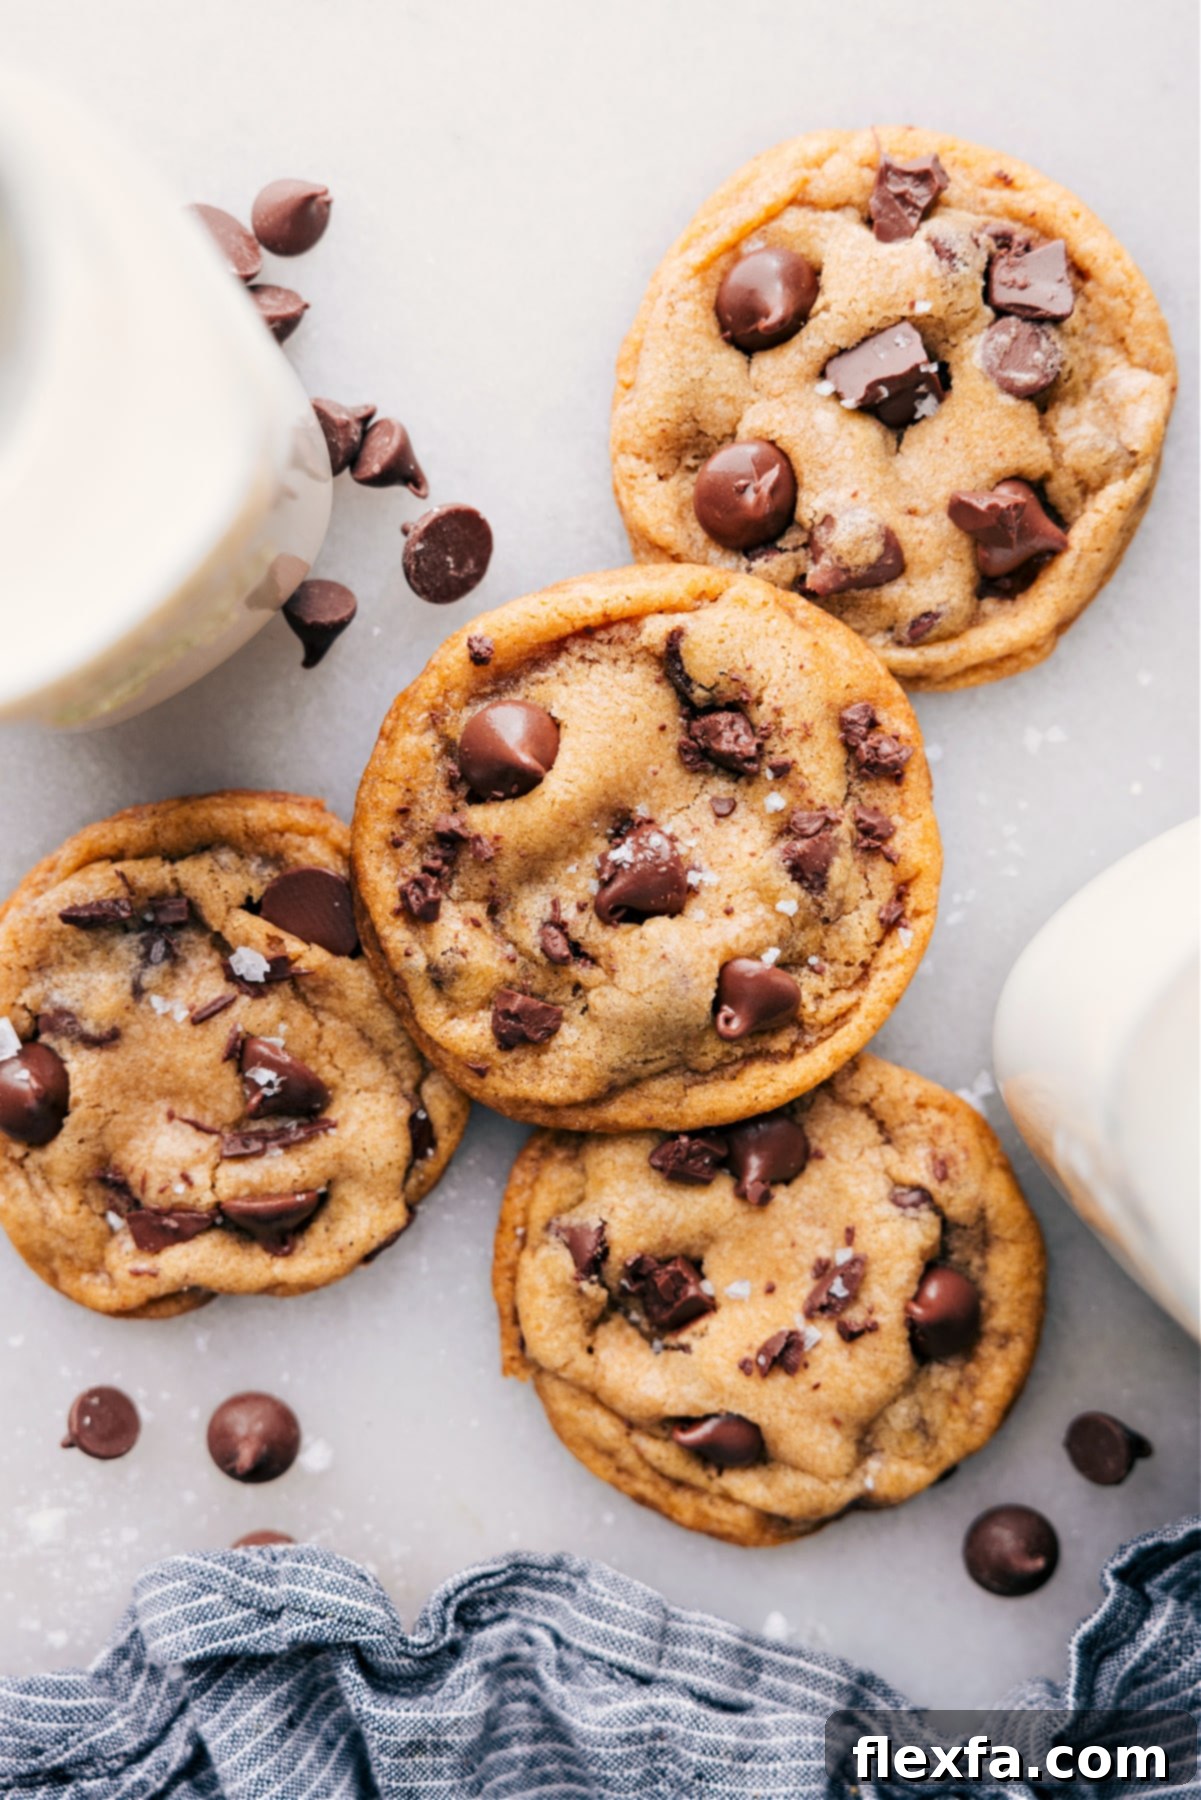
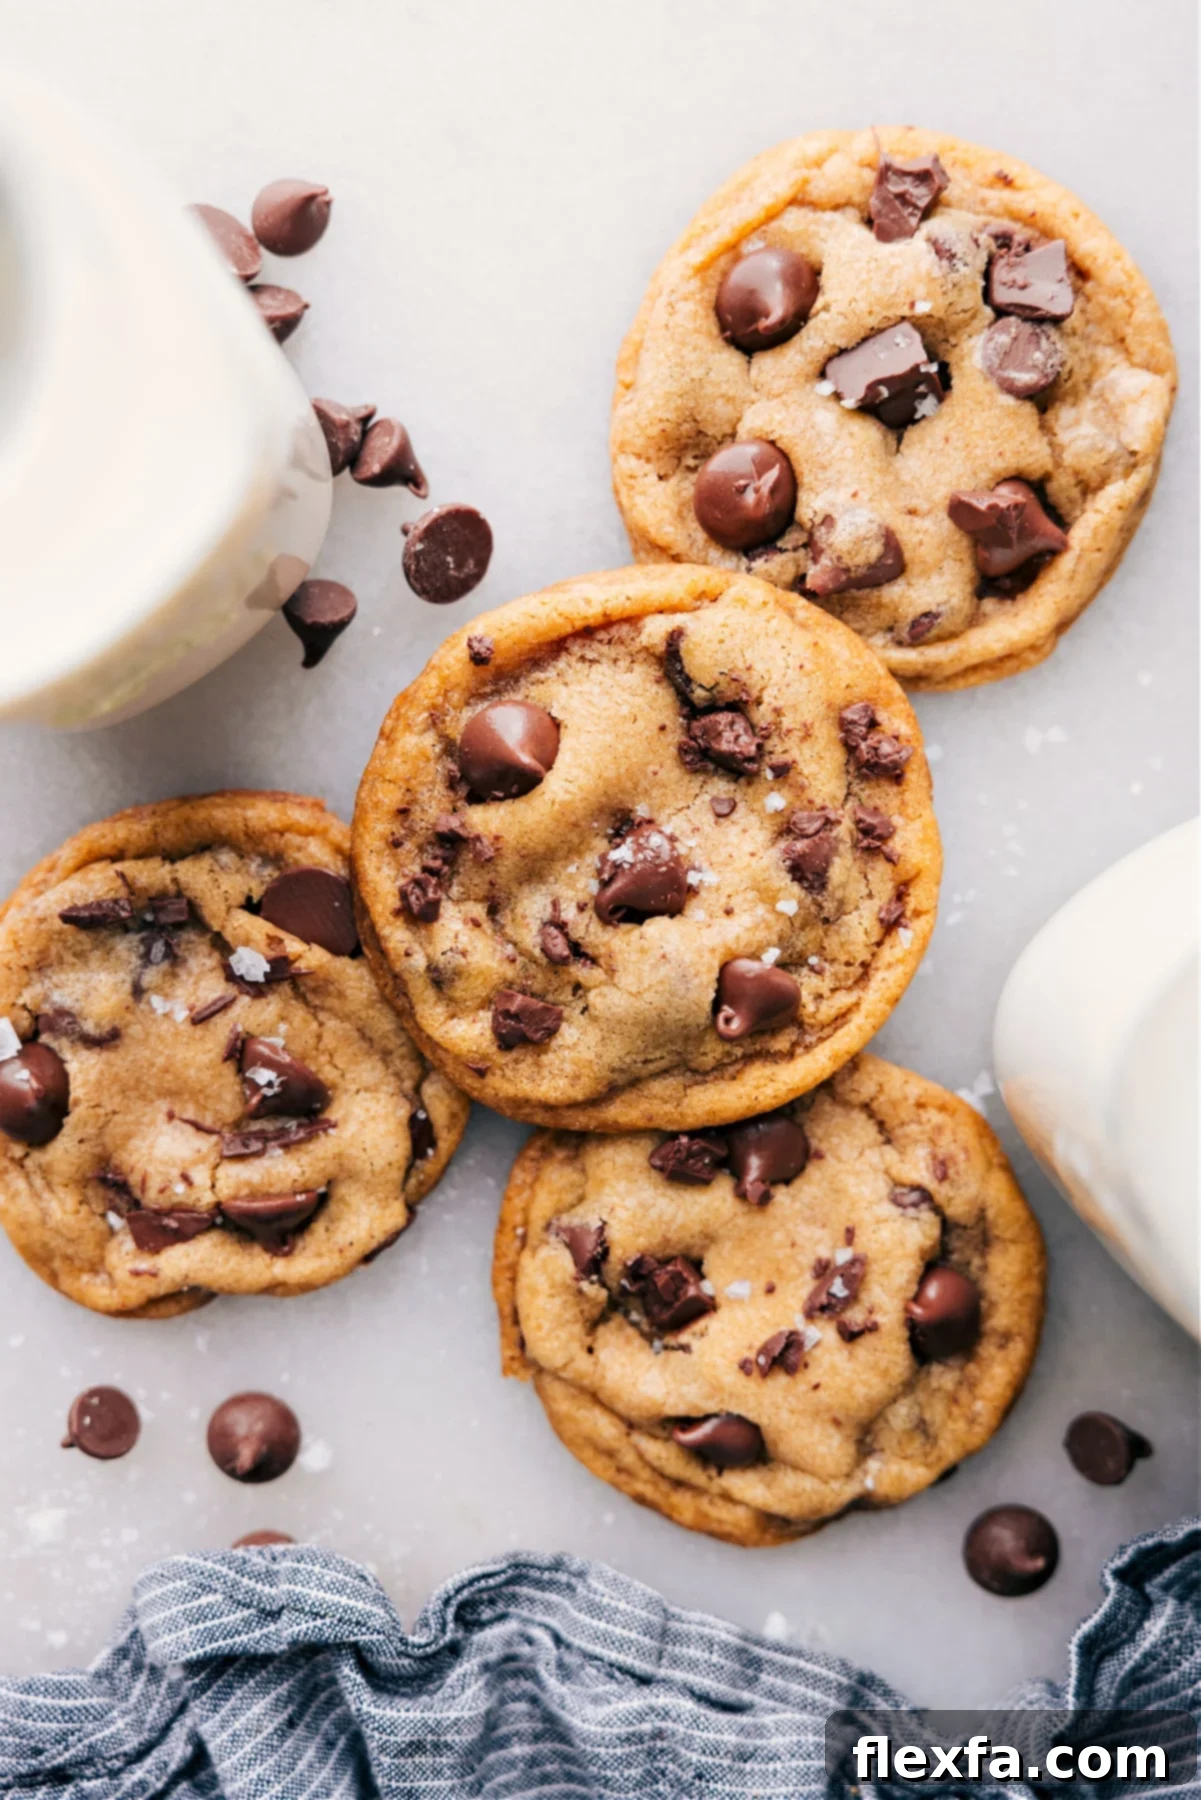
Coconut Oil Chocolate Chip Cookies are a revelation in baking, offering that coveted balance of crunchy, golden edges and a wonderfully soft, irresistibly chewy center that will keep you coming back for more.

author’s note
Coconut Oil Is The Swap You Didn’t Know You Needed!
For years, my inbox has been flooded with questions about tweaking my classic chewy chocolate chip cookie recipe, and one ingredient kept popping up: coconut oil. After countless requests, I finally dedicated myself to extensive testing, and I can confidently say that the results were so spectacular, these cookies absolutely deserve their own spotlight!
If you’re new to baking with coconut oil, prepare to be amazed. These aren’t just good; they’re truly exceptional, easily earning a spot among my all-time favorite cookie recipes. The coconut oil doesn’t merely impart a subtle tropical note; it fundamentally transforms the cookie’s structure, creating a texture that is simply out of this world.
Throughout this guide, I’ll share all my personal baking “secrets” and pro tips to ensure that your coconut oil chocolate chip cookies turn out perfectly golden, chewy, and delicious every single time you bake them!
Why Coconut Oil is a Game-Changer in Chocolate Chip Cookies
Many bakers are curious about swapping out traditional butter for coconut oil in their favorite cookie recipes. Here’s why coconut oil is more than just a substitute—it’s an enhancement for your chocolate chip cookies:
- Enhanced Texture: Coconut oil has a unique fat composition that contributes to a remarkably tender interior while promoting crispy edges. Unlike butter, which contains water, coconut oil is 100% fat, leading to a richer, less cakey texture.
- Subtle Flavor Profile: While virgin coconut oil might impart a very faint tropical hint, refined coconut oil is neutral in taste. In both cases, the rich chocolate and sweet sugars dominate, but the coconut oil adds a depth and richness that is truly unparalleled. It elevates the classic chocolate chip cookie without overpowering it.
- Moisture and Chewiness: The fat from the coconut oil helps keep the cookies incredibly moist and chewy, even days after baking. It creates a delightful mouthfeel that sets these cookies apart from those made with butter alone.
- Dairy-Free Option: For those looking to reduce or eliminate dairy, these cookies offer a fantastic, flavorful alternative to traditional butter-based recipes.
Essential Coconut Oil Chocolate Chip Cookies Ingredients
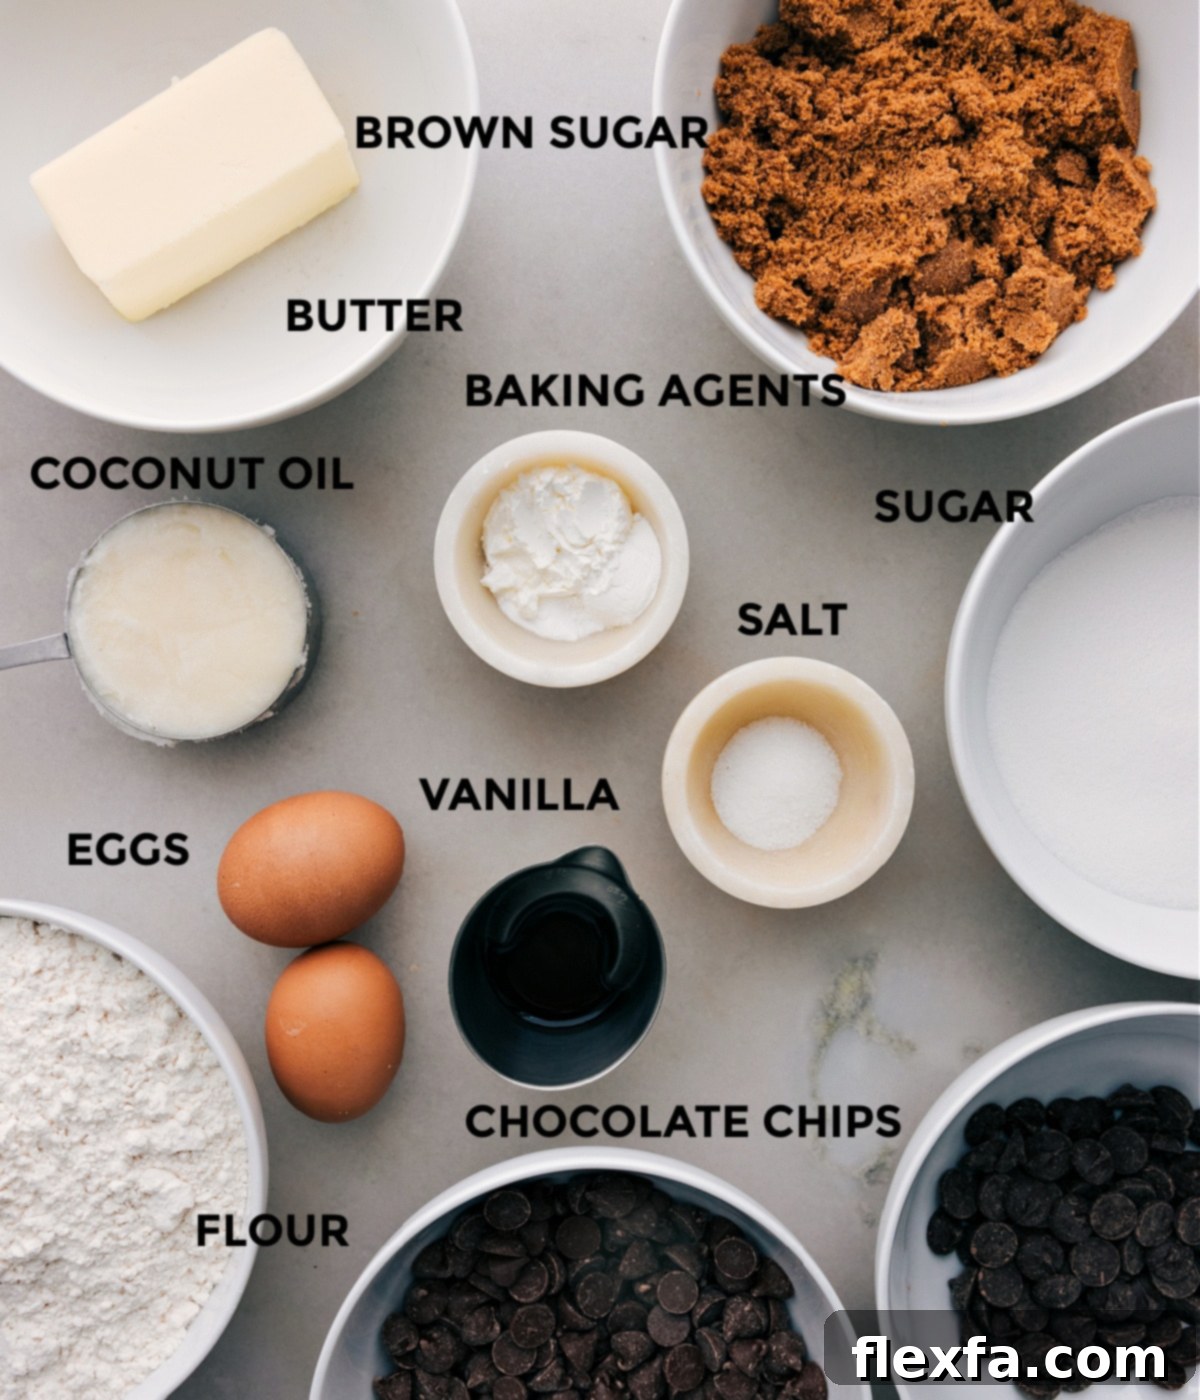
Crafting the perfect coconut oil chocolate chip cookie relies on a handful of high-quality ingredients. Let’s delve into what makes each one crucial for that irresistible texture and flavor:
| Ingredient | Why it’s important / Quick note |
|---|---|
| Coconut oil | The star ingredient! Measure it while solid for precise accuracy, then melt. It’s key for the unique texture. |
| Unsalted butter | We use a blend of butter and coconut oil for the best of both worlds. Unsalted butter allows you to control the overall saltiness of the cookies. |
| Brown sugar | Whether you choose light or dark brown sugar, it’s vital for moisture and that coveted chewy texture. Dark brown sugar, my personal preference, lends a deeper caramel note. |
| Granulated sugar | Provides structure, helps with browning, and contributes to the crispy edges. |
| Cornstarch | This might seem unusual, but a touch of cornstarch is a secret weapon for achieving an unbelievably soft and tender center. |
| Chocolate chips | This is where you can truly customize! Use your favorite variety – a mix of milk and dark chocolate chips creates a wonderful complexity in every bite. Semi-sweet or even white chocolate chips are also delicious options. |
| Eggs | Act as a binder, adding structure and richness. Ensure they are at room temperature for better emulsification with the fats. |
| Vanilla extract | A must-have flavor enhancer that complements the chocolate and adds warmth to the cookies. |
| Baking soda & Baking powder | These leavening agents work together to give the cookies their rise and characteristic texture. Ensure they are fresh for optimal results. |
| Salt | Balances the sweetness and enhances all the flavors, making the chocolate truly sing. A pinch of flaky sea salt on top after baking is highly recommended! |
| All-purpose flour | The structural backbone of the cookie. Proper measurement is crucial to avoid tough cookies. |
How To Make The Best Coconut Oil Chocolate Chip Cookies: Step-by-Step Guide
Creating these incredible cookies is a straightforward process, but a few key techniques will guarantee outstanding results. The full detailed instructions are in the comprehensive recipe card below, but here are some of my top tips to guide you through each stage:
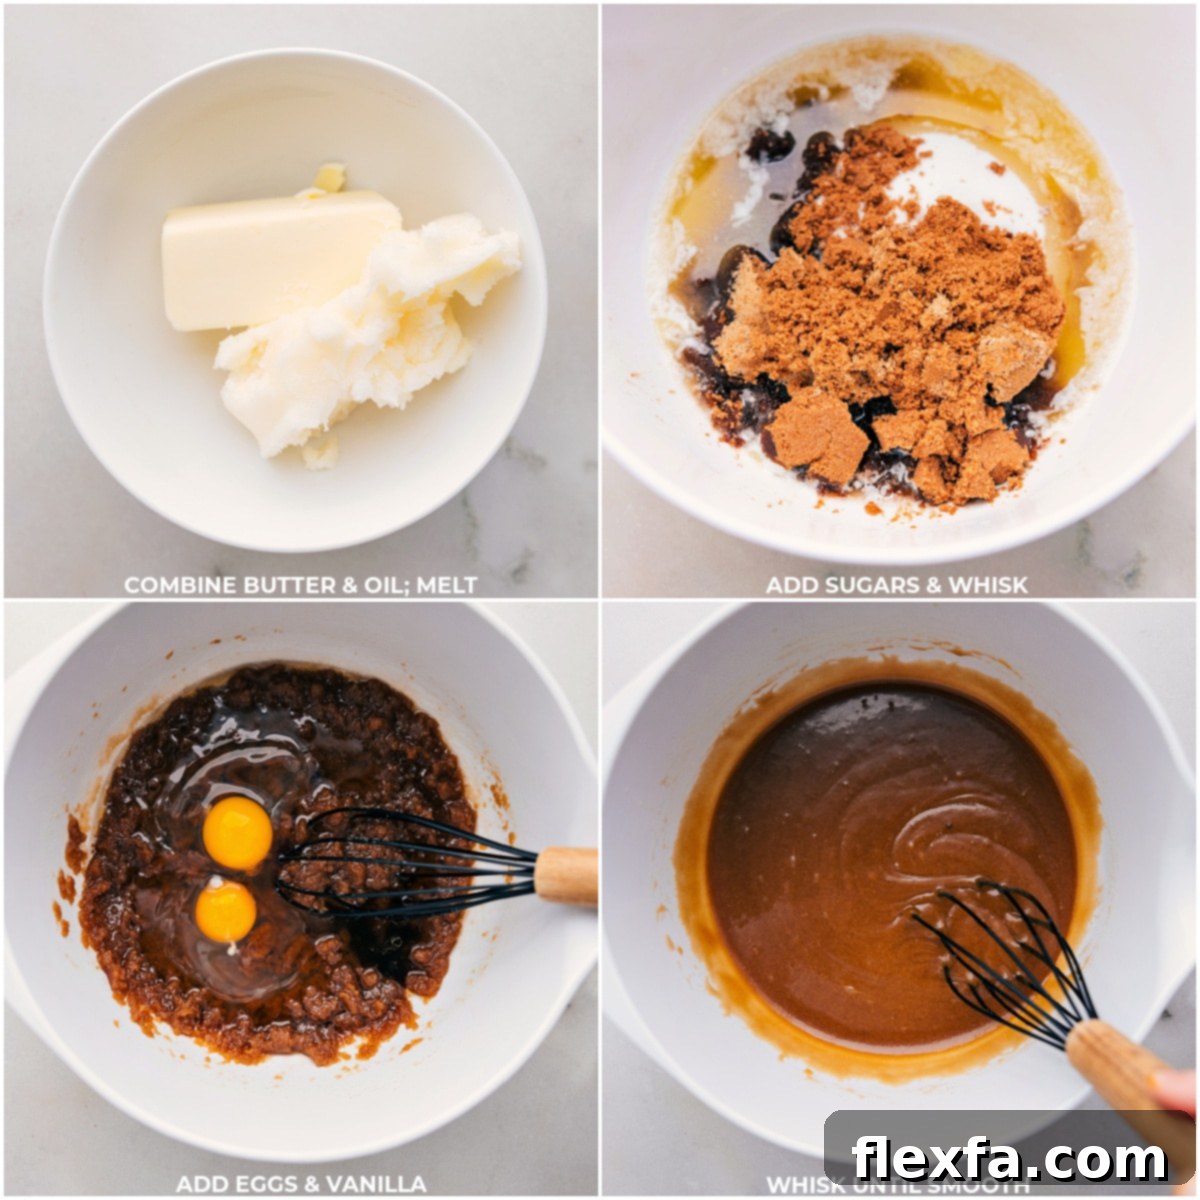
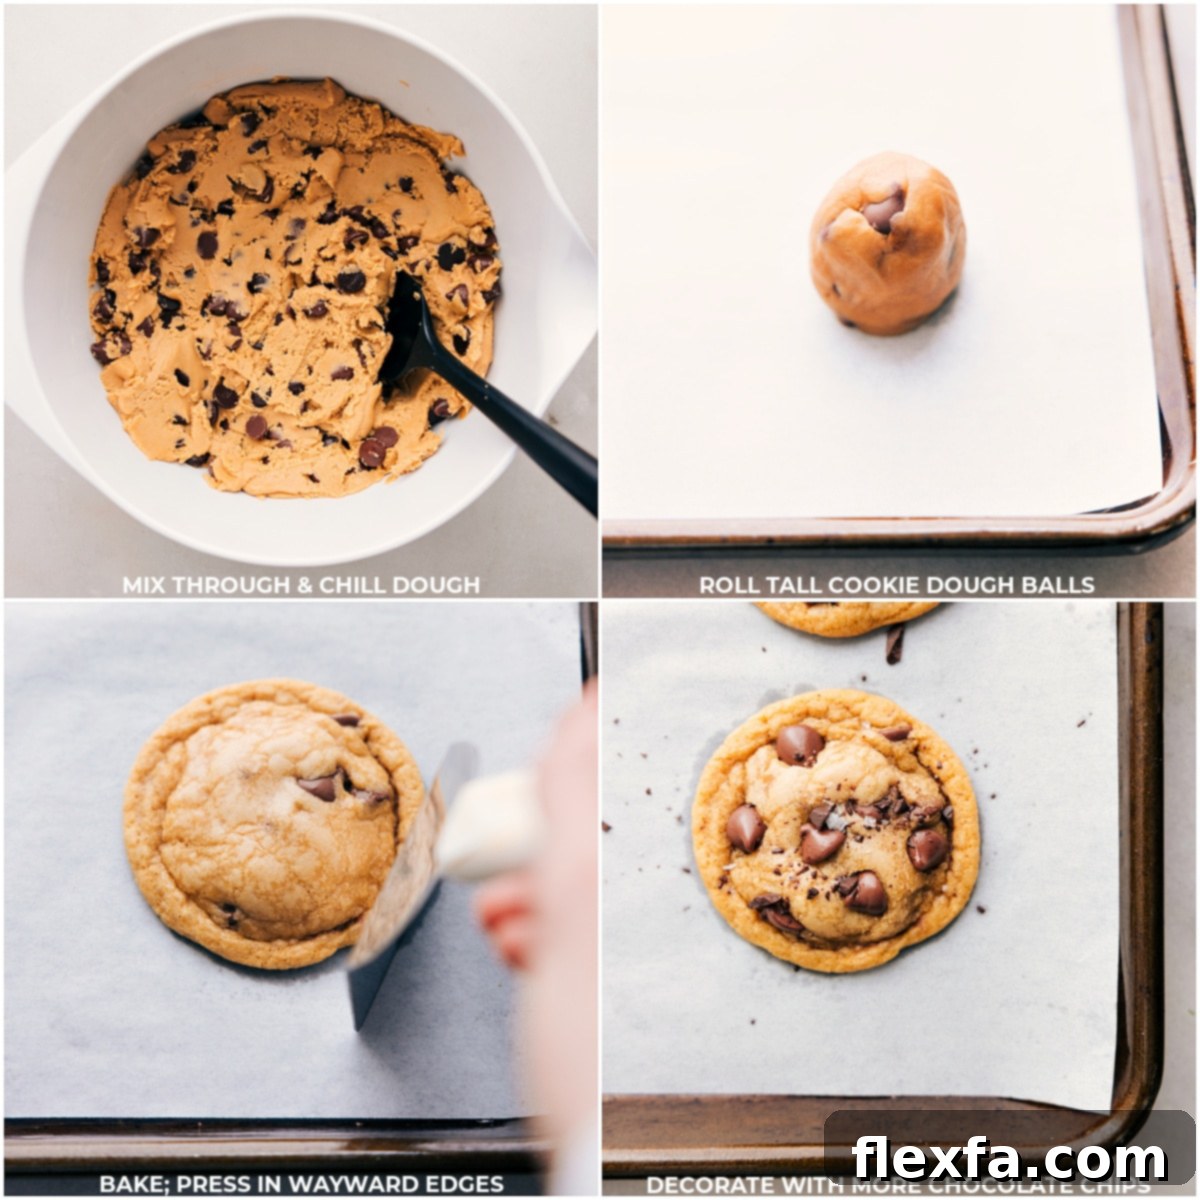
- Prepare Wet Ingredients Precisely: Begin by melting your measured coconut oil and butter together. It’s absolutely crucial to let this mixture cool completely to room temperature before combining with other ingredients. Adding warm fat to your sugars and eggs can lead to greasy cookies or even partially cook your eggs, affecting the final texture. This cooling step allows for proper emulsification, resulting in a perfectly smooth, uniform dough.
- Combine Wet Ingredients for Perfect Emulsion: Once the butter-oil mixture is cooled, transfer it to a large mixing bowl. Add both brown and granulated sugars, whisking thoroughly until well combined. Next, incorporate the vanilla extract and room-temperature eggs. Whisk vigorously for a good 2-3 minutes until the mixture appears light, fluffy, and completely emulsified, with no visible oil separation. This aeration is key for a tender cookie.
- Incorporate Dry Ingredients Carefully: Sift your baking soda, baking powder, and cornstarch directly over the wet mixture. Don’t forget the salt! Whisk these dry agents until they are fully integrated. Ensuring your baking agents are fresh and active is critical for proper lift and spread.
- Add Flour and Chocolate Chips Gently: Switch to a wooden spoon or a sturdy spatula. Gradually mix in the all-purpose flour until just combined, being careful to avoid overmixing. Overmixing develops too much gluten, which can lead to tough, dense cookies. Stop mixing as soon as no dry streaks of flour remain. Finally, fold in your chosen chocolate chips gently, ensuring they are evenly distributed throughout the dough.
- Chill the Dough – Don’t Skip This Step!: This is perhaps the most important “secret” for superior cookies. Cover your dough bowl with plastic wrap and refrigerate for at least 1 hour, or ideally, overnight. Chilling allows the fats to solidify, preventing excessive spreading during baking. More importantly, it gives the flour time to fully hydrate, concentrating the flavors and leading to a wonderfully chewy texture with crispy edges.
- Shape and Bake for Bakery-Style Results: If your dough was chilled overnight, let it sit at room temperature for about an hour to soften slightly for easier handling. Scoop generous portions (about 2 heaping tablespoons or 45 grams) and roll them into tall, round balls. This “tall” shape helps achieve thicker cookies with a gooey center. Place 6 dough balls per parchment-lined baking sheet, leaving ample space for spreading. Bake in a preheated oven until the edges are lightly golden and the centers are just set, but still appear slightly underbaked and not glossy.
- Finishing Touches for Perfection: Immediately after removing them from the oven, if any cookies have slightly irregular shapes, use the back of a metal spatula or a round cookie cutter larger than the cookie to gently push the edges inward, creating perfectly round cookies. For an extra touch of beauty and irresistible appeal, press a few extra chocolate chips onto the warm tops of the cookies. Allow them to cool on the baking sheet for 3-4 minutes to firm up before transferring them to a wire rack to cool completely.
Coconut Oil Substitutions: Understanding Your Options
While this recipe specifically celebrates the unique qualities of coconut oil, it’s good to know your options if you need a substitute or simply wish to experiment. Keep in mind that any substitution will alter the cookie’s final texture and flavor profile:
- Vegetable oil: A neutral-flavored oil that will result in a very tender cookie, but potentially less crisp on the edges compared to coconut oil.
- Canola oil: Similar to vegetable oil, canola oil is also neutral and will contribute to a soft texture.
- Additional butter: You can certainly use all butter instead of the butter and coconut oil blend. This will yield a more classic chocolate chip cookie texture, often with a richer, dairy-forward flavor. However, it might be slightly less chewy and lack the unique subtle crispness that coconut oil provides.
It’s generally safe to use equal parts when substituting most liquid oils or butter. However, remember that different fats have varying smoke points, flavor contributions, and water content (butter contains about 20% water, while oils are nearly 100% fat). These differences can significantly impact the spread, chewiness, and overall taste of your cookies. For the absolute best results and the texture described in this recipe, it’s highly recommended to stick to recipes specifically developed for coconut oil, just like these amazing coconut oil chocolate chip cookies!
Storage & Freezing Tips for Fresh Cookies
Leftover Cookies? Here’s How to Keep Them Perfect!
- Room Temperature Storage: These delightful cookies are best enjoyed on the day they are baked, when their edges are crispest and their centers are softest. However, they will stay wonderfully fresh and delicious for up to 3 days when stored in an airtight container at room temperature. Beyond this, they might start to lose their optimal softness and vibrant flavor.
- Freezing Coconut Oil Chocolate Chip Cookies: Want to enjoy freshly baked cookies any time? Freezing the dough is a fantastic option!
- To Freeze Dough Balls: Scoop and roll the dough into individual balls as directed in the recipe. Place them on a baking sheet lined with parchment paper and freeze for about 1 hour, or until solid. Once firm, transfer the frozen dough balls to a freezer-safe bag or airtight container. They can be stored for up to 3 months.
- Baking from Frozen: When ready to bake, simply place the frozen dough balls on a prepared baking sheet and bake directly from frozen. You may need to add an extra 2-4 minutes to the specified bake time, depending on your oven and the size of your cookies. Keep an eye on them until the edges are golden and the centers are set.
Frequently Asked Questions (FAQs)
- Will my cookies taste like coconut?
- If you use refined coconut oil, the cookies will have a very neutral flavor, and you likely won’t detect any coconut taste. If you opt for virgin (unrefined) coconut oil, there might be a very subtle coconut hint, which many people find delightful and complementary to the chocolate. Most people, however, are surprised at how little it tastes like coconut.
- Do I need to chill the dough?
- Yes, chilling the dough is highly recommended and, in my opinion, essential for the best results. It allows the fats to solidify, preventing the cookies from spreading too much, and gives the flour time to hydrate, which deepens the flavor and creates a chewier texture. Even an hour makes a difference, but overnight chilling yields superior cookies.
- Can I use only coconut oil instead of butter?
- While you can, this specific recipe uses a blend of coconut oil and butter to achieve its signature texture and flavor profile. Using all coconut oil might result in a slightly different texture, possibly a bit crispier and flatter, depending on the type of coconut oil used and how it interacts with the other ingredients.
- How do I properly measure solid coconut oil?
- To measure solid coconut oil accurately, spoon it into your measuring cup, pressing it down to eliminate any air pockets, until it reaches the desired mark. Then, level off the top with a straight edge. Once measured, you can melt it as instructed in the recipe.
- What’s the best type of chocolate chips to use?
- The best chocolate chips are your favorite ones! I love a mix of milk chocolate and dark chocolate for a balanced sweetness and rich flavor. Semi-sweet chocolate chips are also a classic choice. Don’t be afraid to experiment with different varieties or even chopped chocolate bars for pools of melted chocolate.
More Delicious Cookie Recipes You’ll Love:
If you’re a cookie enthusiast like me, you’re always on the hunt for new and exciting recipes to try. After mastering these incredible coconut oil chocolate chip cookies, why not explore some other delightful options from my kitchen? Here are a few more favorites that are sure to satisfy your sweet cravings:
Desserts
Classic Oatmeal Chocolate Chip Cookies
Desserts
Refreshing Mint Chocolate Chip Cookies
Desserts
Irresistible Almond Joy Cookies Recipe
Desserts
Decadent Caramel Snickerdoodles
Print Recipe
Coconut Oil Chocolate Chip Cookies
Chelsea Lords
15 minutes
9 minutes
1 hour
1 hour 24 minutes
35 cookies
Video Overview
Watch how to make these delicious Coconut Oil Chocolate Chip Cookies!
Click here to watch the recipe video!
Equipment
-
Large Sheet Pan (15″ x 10″)
-
Parchment paper or a silicone baking mat
-
Large mixing bowls
-
Whisk
-
Wooden spoon or spatula
-
Measuring cups and spoons
-
Wire cooling rack
Ingredients
Yields: 35 cookies
- 1/2 cup coconut oil melted (measure in solid form for accuracy)
- 1/2 cup unsalted butter melted
- 1 cup dark brown sugar (or light brown, packed)
- 1 cup granulated sugar
- 1/2 tablespoon vanilla extract
- 2 large eggs at room temperature
- 1 teaspoon baking soda
- 1 teaspoon baking powder
- 2 teaspoons cornstarch
- 1 teaspoon salt
- 3 cups all-purpose flour
- 1-1/4 cup milk chocolate chips (or your favorite: semi-sweet, additional dark, etc.)
- 1/2 cup dark chocolate chips (or your favorite: semi-sweet, additional milk, etc.)
Instructions
-
Pro Tip for Accuracy: For the most precise measurements, especially with ingredients like flour and sugars, I highly recommend using a kitchen scale set to grams. Many recipe cards, including some digital ones, allow you to toggle to “metric” measurements, which is perfect for scale use. This method eliminates inconsistencies that can arise from measuring cups and ensures consistently perfect cookies every time.
-
Combine the coconut oil and unsalted butter in a microwave-safe bowl. Heat gently until just melted and combined. It is absolutely essential to allow this mixture to cool completely to room temperature before proceeding. This cooling step prevents greasy cookies and ensures proper emulsification.
-
Once cooled, scrape every bit of the oil and butter mixture into a large mixing bowl. Add both the brown sugar (packed) and granulated sugar. Using a sturdy whisk, mix thoroughly until the sugars are well incorporated into the fats. Next, add the vanilla extract and the room-temperature eggs. Whisk vigorously for 2-3 minutes until the mixture is light in color, smooth, and fully emulsified, with no signs of oil separating from the other ingredients.
-
Directly sift in the baking soda, baking powder, and cornstarch into the wet ingredients. Add the salt. Whisk again until these dry agents are fully integrated into the mixture. Switch to a wooden spoon or a robust spatula. Gradually mix in the all-purpose flour until there are no visible dry streaks of flour. Be very careful not to overmix the dough, as this can lead to tough cookies. Finally, gently fold in the milk and dark chocolate chips until they are evenly distributed throughout the dough.
-
Cover the bowl tightly with plastic wrap and refrigerate the cookie dough for a minimum of 1 hour, or ideally, up to overnight. This chilling period is crucial as it allows the fats to firm up, preventing the cookies from spreading too much during baking, and gives the flavors time to meld and deepen, resulting in a more complex and chewy cookie.
-
If the dough has been chilled overnight, let it sit at room temperature for about 1 hour before you begin to shape it. This will make it easier to scoop and roll. Shape the dough into tall, round balls, using approximately 2 heaping tablespoons (or about 45 grams if you are using a kitchen scale) for each cookie. Arrange no more than 6 dough balls at a time on a baking sheet lined with parchment paper or a silicone baking mat, ensuring at least 3 inches of space between each one to allow for proper spreading.
-
Preheat your oven to 350°F (175°C).
-
Bake the cookies for 8–11 minutes. They are done when the edges are lightly golden brown and the centers appear just set but still slightly soft and not glossy. Remember that cookies continue to cook slightly even after being removed from the oven.
-
Remove the baking sheet from the oven. If desired, use a metal spatula or the back of a round cookie cutter to gently push any ragged edges inward, creating beautifully round cookies. For an extra touch of deliciousness and visual appeal, press a few additional chocolate chips onto the warm tops of the cookies. Let the cookies rest on the hot baking sheet for 3–4 minutes to set before carefully transferring them to a wire cooling rack to cool completely.
Recipe Notes
Note on Coconut Oil Measurement: To ensure you have the exact amount of coconut oil, scoop it out in its solid form and firmly pack it into a 1/2 cup measuring cup, leveling off the top. Only after measuring should you melt it.
Storage & Freezing: These cookies are truly at their peak when enjoyed the same day they are baked. However, they will retain their wonderful flavor and softness for up to 3 days when stored in an airtight container at room temperature. For longer storage, you can freeze the rolled dough balls. Simply place them on a tray and freeze for 1 hour until solid, then transfer to a freezer-safe bag for up to 3 months. When you’re ready for a fresh batch, bake them directly from frozen, adding a couple of extra minutes to the baking time.
Nutrition Information (Approximate)
Serving:
1cookie
|
Calories:
154kcal
|
Carbohydrates:
22g
|
Protein:
2g
|
Fat:
7g
|
Saturated Fat:
5g
|
Trans Fat:
1g
|
Cholesterol:
18mg
|
Sodium:
53mg
|
Potassium:
41mg
|
Fiber:
1g
|
Sugar:
13g
|
Vitamin A:
97IU
|
Vitamin C:
1mg
|
Calcium:
24mg
|
Iron:
1mg
Nutrition information is automatically calculated, so should only be used as an approximation and can vary based on specific ingredients and brands used.
Enjoyed this recipe? Leave a comment below!