
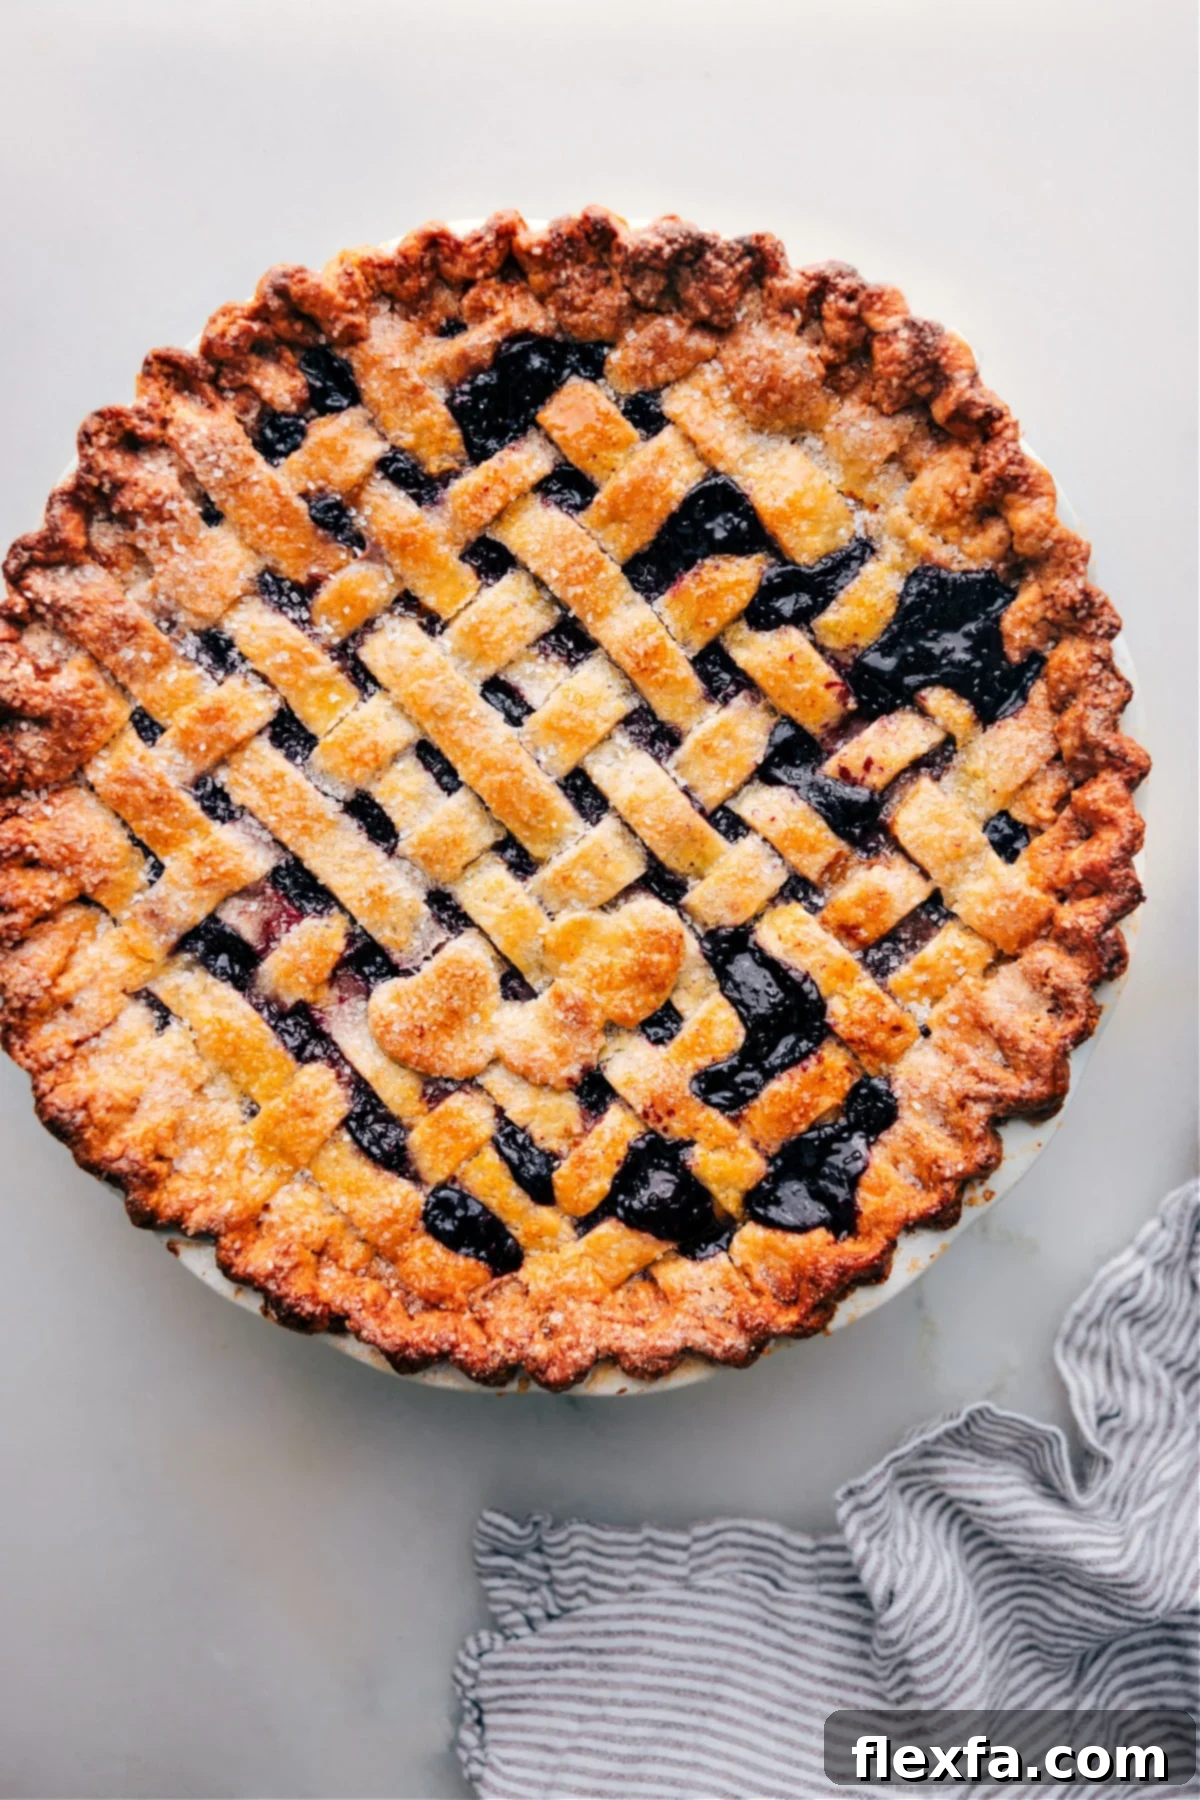
Welcome to your new go-to, forever Pie Crust Recipe! Baking a truly exceptional pie starts with a stellar crust, and this recipe delivers on every front. Designed for ease and consistency, it utilizes the simplicity of a food processor to bring together ingredients effortlessly, resulting in a crust that is consistently flaky, wonderfully tender, and richly buttery. Say goodbye to store-bought crusts and hello to homemade perfection!
Beyond the basic steps, I’m thrilled to share invaluable pro tips gleaned directly from a seasoned French pastry chef. These insights will elevate your pie-making skills and ensure your crusts are nothing short of culinary masterpieces.

Author’s Notes: My Secret to Perfect Pies
The Only Pie Crust You’ll Ever Need (Seriously!)
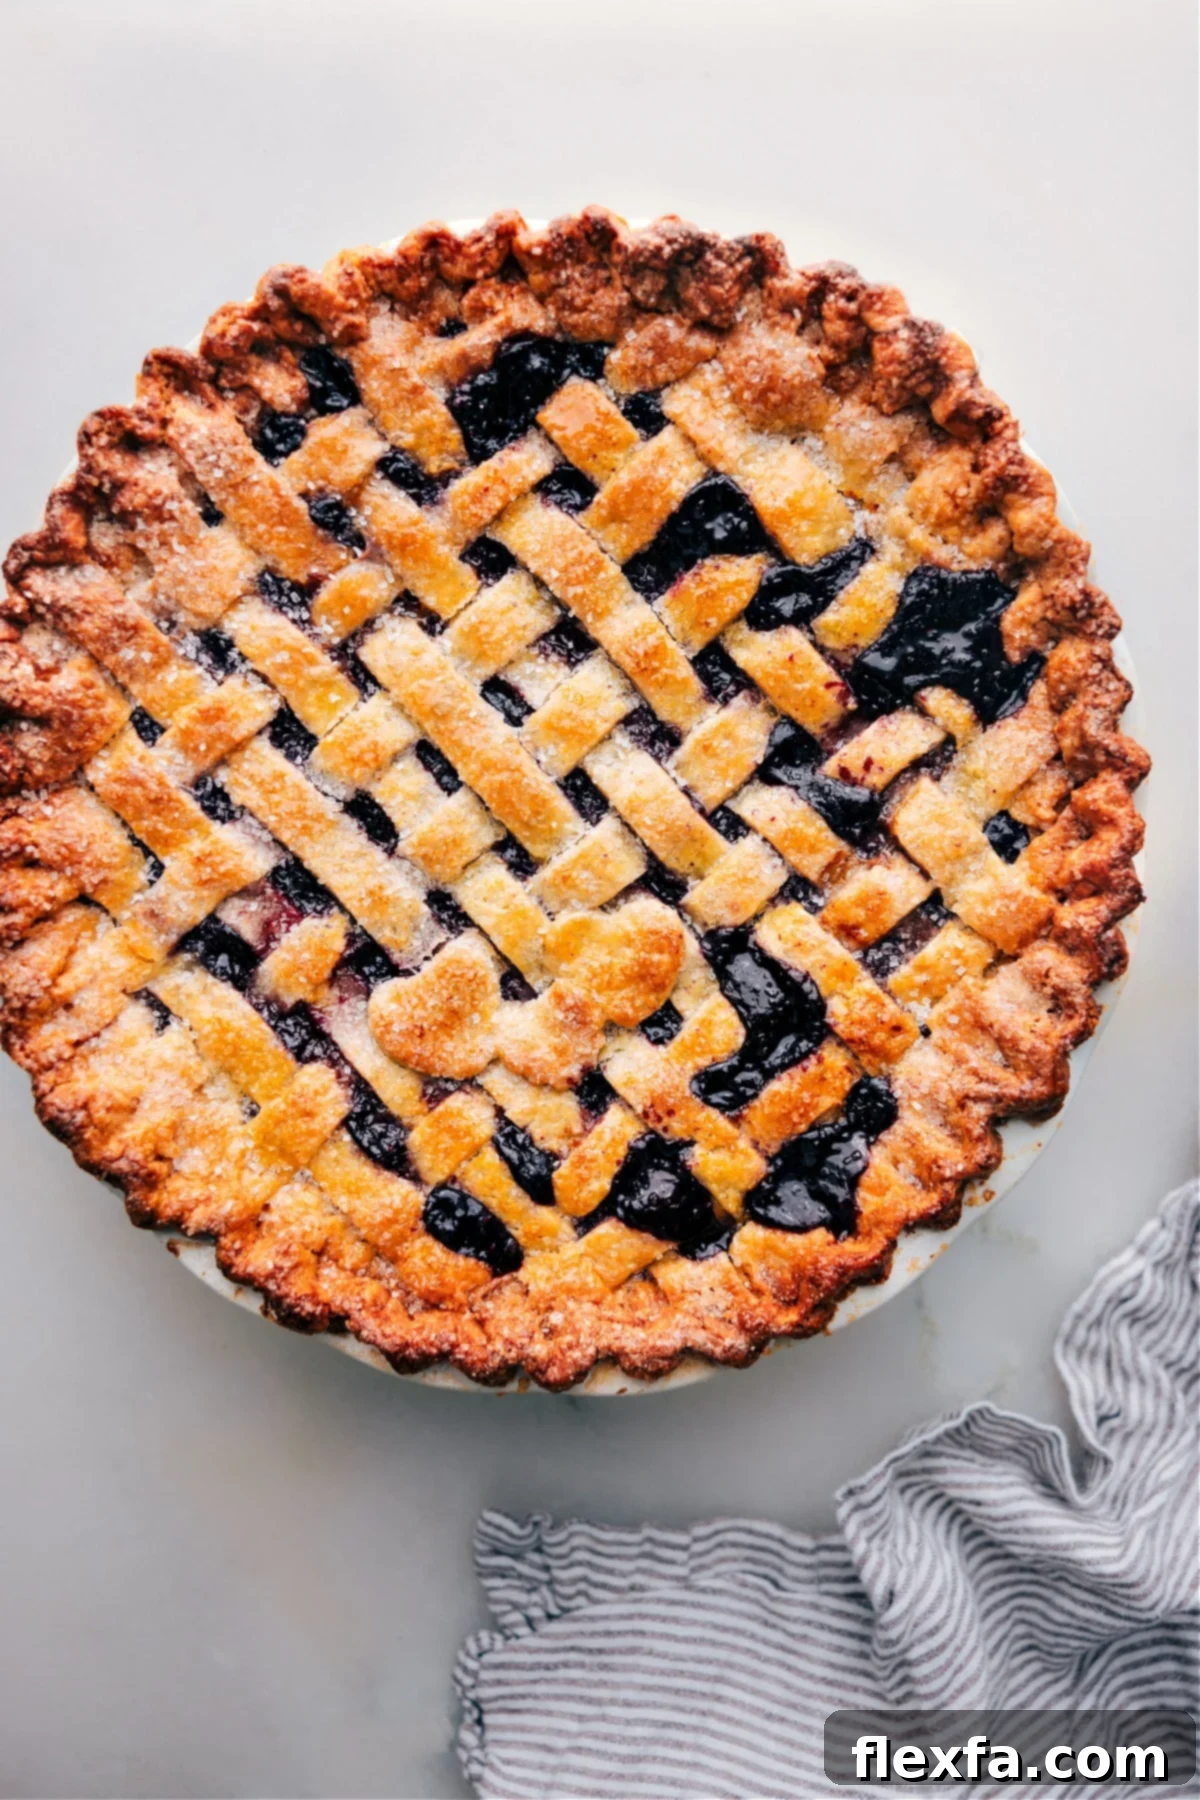
If you were to ask my husband to choose just one dessert for the rest of his life, it would undoubtedly be a classic Apple Pie. He’s notorious for devouring an entire pie in a mere two days! And every single time, without fail, this is the very crust I use. It’s not just good; it’s consistently exceptional.
This all-butter pie crust boasts a luxurious buttery flavor and an unbelievably flaky texture. What truly sets it apart is how incredibly easy it is to roll out. You won’t struggle with frustrating cracks or disheartening shrinkage. Instead, you’ll achieve a perfect, pliable pie dough that transforms into an utterly *amazing* tasting crust.
Crafted with just a few simple pantry staples, this recipe emphasizes the rich flavor that only all-butter can provide – no shortening necessary here. I’m also thrilled to share my most trusted tips, including detailed guidance on how to properly par-bake your crust and master the art of preventing a soggy bottom. Once you experience the superior quality and taste of this homemade pie crust, I promise, you’ll never consider a store-bought alternative again!
Why Homemade Pie Crust Trumps Store-Bought Every Time
While convenience might tempt you towards pre-made pie crusts, the difference in flavor, texture, and overall quality of a homemade crust is monumental. A store-bought crust often lacks the rich, nuanced butter flavor and the delicate, shatteringly flaky layers that define a truly great pie. Furthermore, making your own crust gives you complete control over the ingredients, allowing you to avoid unnecessary additives and preservatives.
This recipe emphasizes using high-quality butter and precise techniques to create a crust that complements any filling, whether sweet or savory. The effort you put into making this crust will be rewarded tenfold with every bite of your finished pie, making it a truly rewarding baking experience.
Essential Pie Crust Ingredients and Their Roles
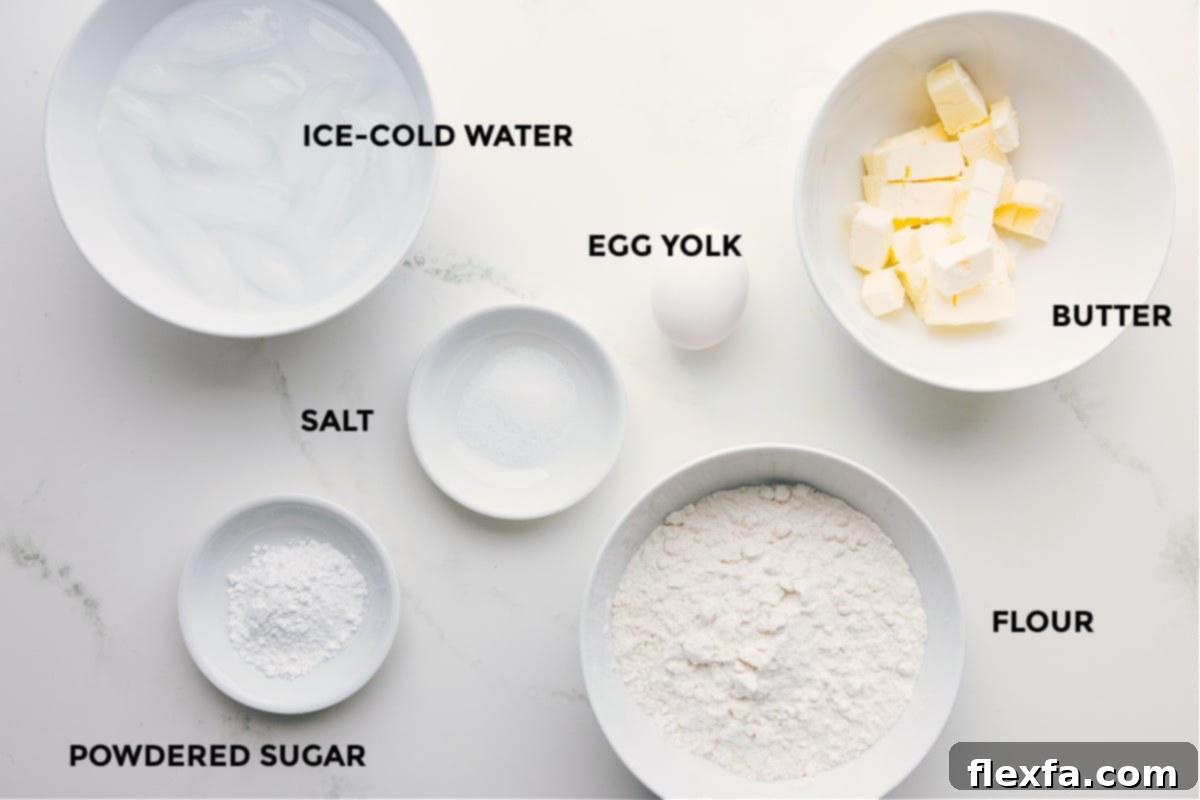
Crafting the perfect pie crust relies on understanding the function of each ingredient. Here’s a breakdown of what you’ll need and why:
- Unsalted Butter: This is the star of the show! Butter provides unparalleled rich flavor and is crucial for achieving that desirable flaky texture. Using unsalted butter allows you to control the salt content in your recipe. It’s imperative that the butter is kept as cold as possible; cold butter creates pockets of steam during baking, which separates the dough into layers, resulting in flakiness.
- Ice Water: Just like cold butter, ice water is non-negotiable. It helps hydrate the flour and bind the dough without developing too much gluten, which can lead to a tough crust. The cold temperature also ensures the butter remains firm and distinct within the dough.
- All-Purpose Flour: The structural base of your crust. All-purpose flour provides the right balance of protein to create a tender, yet workable dough. Avoid over-mixing, as this can activate too much gluten, making the crust tough.
- Powdered Sugar: While granulated sugar can be substituted, powdered sugar (confectioners’ sugar) dissolves more readily and contributes to a slightly more tender crust. It also adds a subtle sweetness that balances the richness of the butter and helps with browning.
- Large Egg Yolk: A secret weapon for richness and tenderness! The egg yolk adds fat and emulsifiers, contributing to a more tender and pliable dough that’s easier to roll out. It also helps bind the ingredients, making the dough less prone to cracking. Save the whites for other delicious recipes, like Meringue Cookies.
- Salt: A small but mighty ingredient! Salt doesn’t just add flavor; it balances the sweetness and enhances the overall taste of the crust, preventing it from tasting bland.
Crafting Your Pie Crust: Food Processor vs. Hand Method
There are several effective ways to make this exceptional pie crust, but for consistent success and minimal effort, I highly recommend using a 10 to 14-cup food processor. The key to a flaky crust is to handle the dough as little as possible, preventing the butter from melting and too much gluten from developing. The food processor achieves this beautifully, quickly bringing the dough together with just a few pulses.
Food Processor Method:
- Prep Your Ingredients: Cut your very cold unsalted butter into small cubes and place them back in the refrigerator while you measure the dry ingredients. Have a small bowl of ice water ready.
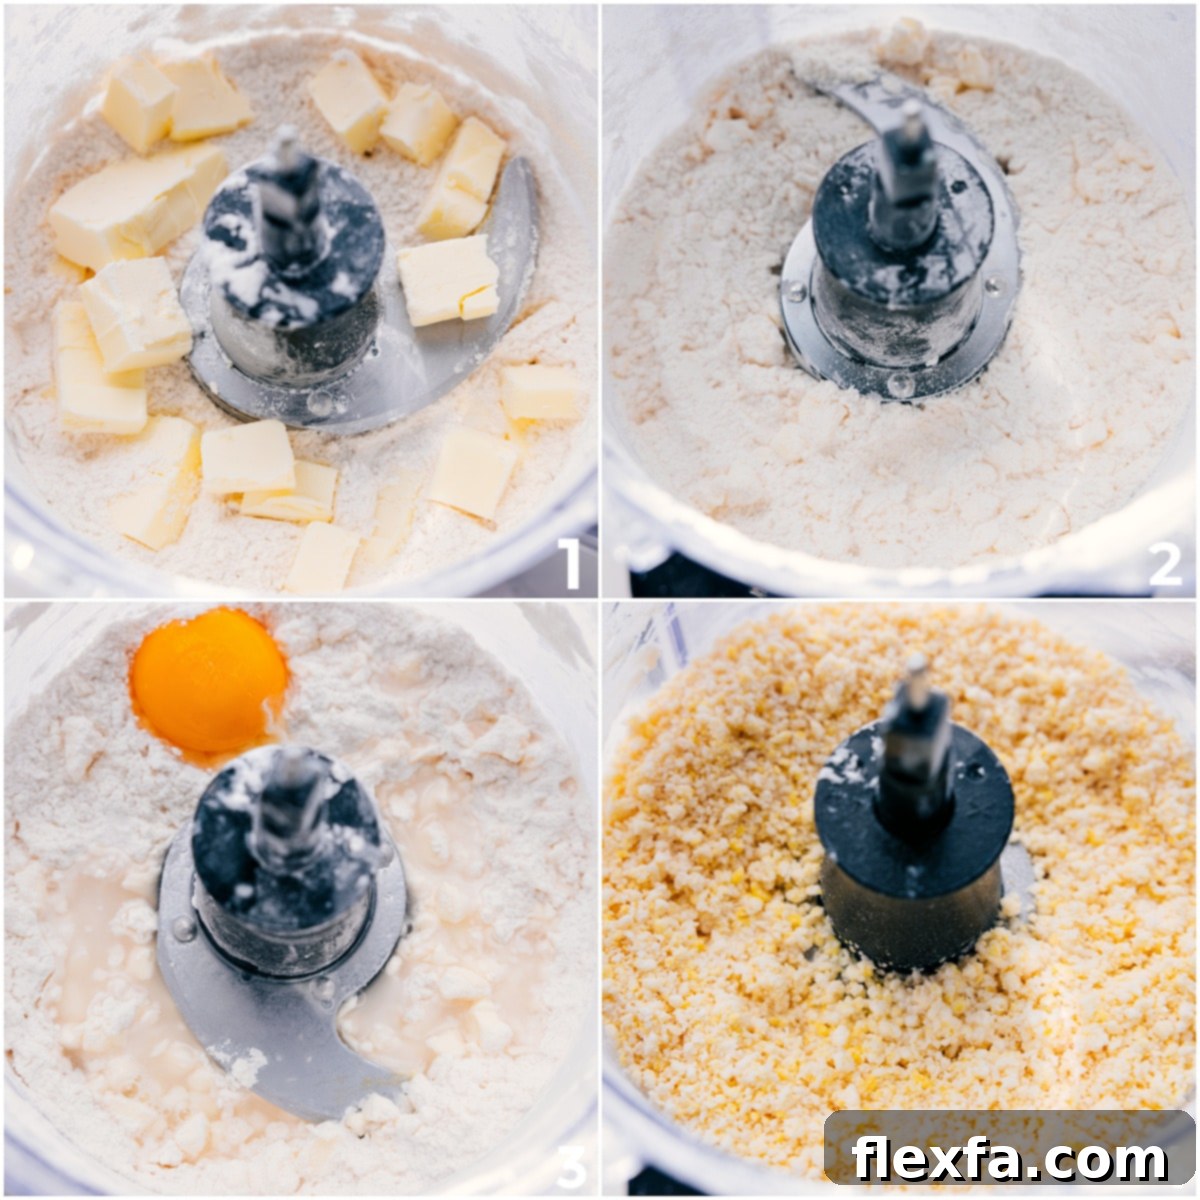
- Combine Dry Ingredients: In the bowl of your food processor, combine the all-purpose flour, salt, and powdered sugar. Pulse briefly (about 2 seconds) to ensure they are well mixed.
- Incorporate Butter: Add the cold butter cubes to the dry ingredients. Pulse 10-12 times in short bursts. You want the butter to be cut into pea-sized pieces, with some smaller and some slightly larger. This variation contributes to flakiness.
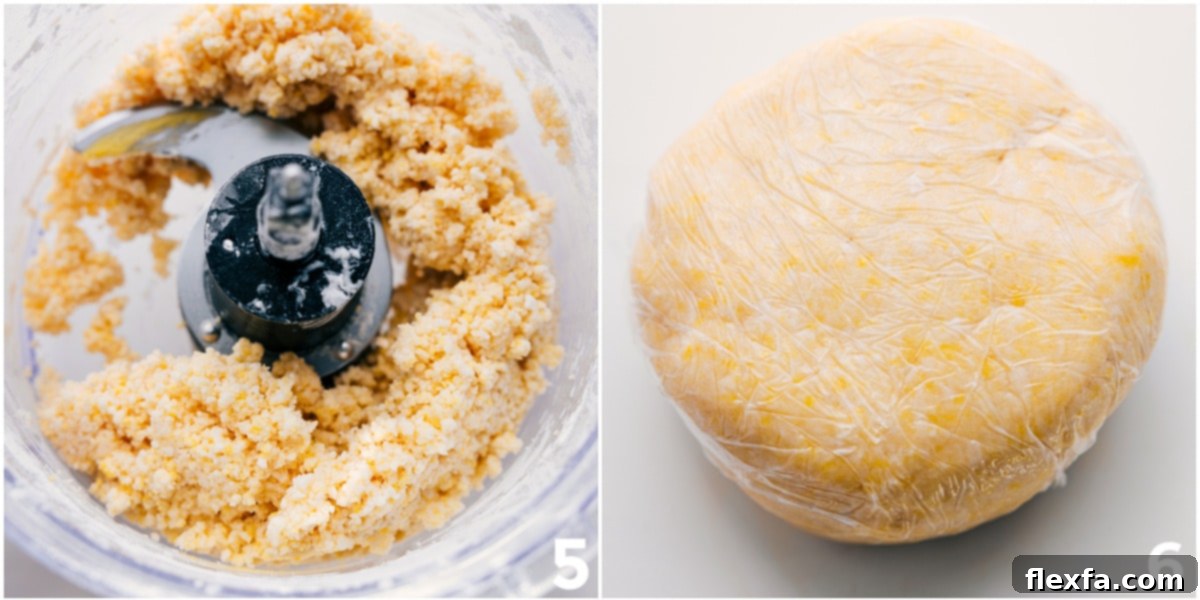
- Add Wet Ingredients: Add the single large egg yolk and 2 tablespoons of ice water. Pulse just until soft crumbles begin to form. The dough should look shaggy, not uniform.
- Adjust Hydration (if needed): If the mixture still appears too dry and isn’t starting to clump, add the remaining tablespoon of ice water and pulse a few more times. Stop as soon as the dough begins to collect into large clumps. It’s crucial not to over-mix at this stage.
- Form and Chill: Transfer the dough immediately to a clean, lightly floured surface. Gently press it into a flat disc – avoid kneading, as this will develop gluten and make your crust tough. Wrap the disc tightly in plastic wrap and refrigerate for at least 1-2 hours, or ideally longer. This chilling period is vital for the butter to firm up and the gluten to relax, making the dough much easier to roll out.
No Food Processor? No Problem! (Hand Method)
Even without a food processor, you can still achieve a fantastic pie crust. It just requires a bit more manual effort and attention to keeping ingredients cold.
- Combine Dry Ingredients: In a large mixing bowl, whisk together the flour, salt, and powdered sugar.
- Cut in Butter: Add the cold, cubed butter to the dry ingredients. Use a pastry cutter, two knives, or even your fingertips (working very quickly!) to cut the butter into the flour mixture. Work until the butter pieces resemble small peas and some coarser crumbs.
- Add Wet Ingredients: In a separate small bowl, whisk the egg yolk with 2 tablespoons of ice water. Pour this mixture into the flour and butter mixture.
- Mix Gently: Use a wooden spoon or your hands (again, quickly and gently) to mix until soft crumbles form. If the dough is too dry, add the remaining tablespoon of ice water, mixing just until it starts to come together in large clumps.
- Form and Chill: Transfer to a clean surface, gently press into a disc, wrap in plastic, and chill as described in the food processor method.
Mastering the Roll: Pastry Chef’s Secrets for Perfect Dough Transfer
Rolling out pie dough used to be my biggest baking hurdle. It wasn’t until a talented French exchange student stayed with us and shared her pastry chef father’s wisdom that my technique completely transformed. His number one rule, which became my mantra, is: handle the dough as little as possible. This preserves the cold butter and keeps the gluten relaxed, ensuring a tender, flaky crust.
The Revolutionary Plastic Wrap & Parchment Method:
This technique makes rolling and transferring pie dough almost foolproof, eliminating sticking and tearing:
- Prepare Your Surface: Lay out two large sheets of plastic wrap on your counter, overlapping them slightly in the center. Ensure you have enough surface area to roll your dough comfortably.
- Position the Chilled Dough: Take your thoroughly chilled dough disc from the refrigerator and place it directly in the center of the prepared plastic wrap.
- Cover with Parchment: Place one sheet of parchment paper directly over the dough. This creates a non-stick sandwich, preventing the dough from adhering to your rolling pin or work surface.
- Roll with Ease: Begin rolling the dough from the center outwards, rotating it frequently. Aim for a circle that is approximately 1/8 inch thick and at least 2-3 inches wider than your pie dish (to account for the sides and crimping). The plastic wrap and parchment make this process incredibly smooth.
- Remove Parchment: Once rolled to the desired size and thickness, carefully peel off the top layer of parchment paper.
- Effortless Transfer: Now, using the plastic wrap still underneath the dough, gently lift the entire dough circle and invert it directly into your pie pan. The plastic wrap acts as a support, preventing any tearing or stretching.
- Fit Gently: Carefully peel off the plastic wrap. Then, using your fingertips, gently press the dough into the contours of the pie pan. The key here is to fit it *without* pulling or stretching, which can cause the crust to shrink during baking.
- Final Shaping: Once fitted, you’re ready to trim the excess and finish shaping the edges. This pie crust recipe is now perfectly situated for your chosen filling!
Finishing Touches: How to Crimp Pie Edges for Beauty and Function
Crimping the edges of your pie crust isn’t just about aesthetics; it serves a practical purpose too! Beautifully crimped edges help to create a seal, preventing your delicious filling from bubbling out during baking. A thicker edge also tends to bake more evenly and achieves a lovely golden-brown finish. Thin edges, on the other hand, are prone to shrinking or burning.
Classic Finger Crimping Technique:
- Trim and Fold: Once your dough is fitted into the pie pan, use kitchen shears or a sharp knife to trim any excess dough, leaving about a 1/2 to 3/4-inch overhang around the rim of the pan. Then, carefully fold this overhang under itself, creating a thick, reinforced edge. Press this folded edge evenly and gently around the entire perimeter of the pan, making sure it’s securely attached without pulling or stretching.
- Pinch and Shape: To create the classic crimped pattern, use the thumb and index finger of one hand to gently push the dough from the inside, while simultaneously using the thumb and index finger of your other hand to pinch the dough from the outside, creating a ‘V’ shape. Repeat this motion all the way around the crust. Shorter fingernails can be helpful for a cleaner pinch!
The Easier Fork Method:
For a quicker, equally charming look, simply press the tines of a fork around the sealed edge of your crust. This creates a rustic, appealing pattern with minimal effort.
Elevate Your Pie: Crafting a Lattice Pie Crust
For an extra touch of elegance and visual appeal, consider topping your pie with a beautiful lattice crust. This woven design allows glimpses of the vibrant filling underneath while providing additional texture. If you’re feeling adventurous, Elise at Simply Recipes offers a fantastic step-by-step guide with detailed photos to walk you through the process. Of course, a traditional full top crust is equally delicious and always a crowd-pleaser!
Endless Possibilities: Recipes That Shine with This Pie Crust
This versatile, all-butter pie crust is perfect for a wide array of both sweet and savory creations. Here are some of our favorite recipes where this crust truly makes a difference:
Pork
EASY Ham Pot Pie
Desserts
Berry Pie Recipe
Dinner
Chicken Pot Pie Recipe
Desserts
Peach Pie Recipe
Saved
Pin
The Ultimate Flaky All-Butter Pie Crust Recipe
Video Tutorial
Equipment You’ll Need
-
Large food processor 10-14 cups capacity (see note 2 for alternative)
-
Plastic wrap Standard plastic film, not press-and-seal
-
Parchment paper
-
Pie pan And essential pie weights (or dried beans, sugar, lentils, etc.)
Ingredients for One Pie Crust
- 7 tablespoons unsalted butter cubed and thoroughly chilled
- 2 to 3 tablespoons ice water
- 1-1/3 cups all-purpose flour
- 1/2 teaspoon salt
- 1 tablespoon powdered sugar
- 1 large egg yolk straight from the fridge (see note 1)
Step-by-Step Instructions
-
Prepare Ingredients: Cut the very cold unsalted butter into small, even cubes and return them to the refrigerator. Fill a small bowl with ice water and set it aside; you want it as cold as possible.
-
Process Dry Ingredients & Butter: In the bowl of a 12-cup food processor, pulse the flour, salt, and powdered sugar for 2 seconds to combine. Add the cold butter cubes and pulse 10-12 times in short bursts until the butter is cut into pea-sized pieces, with some resembling small pebbles and others coarse meal.
-
Add Wet Ingredients & Form Dough: Add the egg yolk and 2 tablespoons of the ice water to the food processor. Pulse just until soft crumbles begin to form and the dough looks shaggy. If the mixture appears too dry and isn’t starting to come together, add the last tablespoon of ice water and pulse a few more times until the dough just begins to collect in large clumps. Be careful not to over-mix, as this can make the crust tough.
-
Chill the Dough: Transfer the dough immediately from the food processor to a clean, lightly floured surface. Gently gather and press the dough into a flat disc; avoid kneading. Wrap the disc tightly in plastic wrap and chill it in the refrigerator for at least 1–2 hours. This crucial step firms the butter and allows the gluten to relax, making the dough much easier to roll.
-
Roll and Transfer: On your counter, lay two overlapping sheets of plastic wrap. Place the chilled dough disc in the center and cover it with a sheet of parchment paper. Roll the dough into a uniform circle, about 1/8 inch thick and approximately 3 inches wider than your pie dish. Carefully remove the top parchment paper. Using the plastic wrap underneath, lift and invert the dough seamlessly into your pie pan. Gently press the dough into the pan’s contours without stretching or pulling.
-
For a Single Crust Pie: Trim any excess dough, leaving about a 1/2-inch overhang. Fold this overhang under itself to create a thick edge, then crimp it decoratively with your fingers or by pressing with a fork. For best results, freeze the formed crust for 30–60 minutes before baking (refer to baking notes for specific instructions).
-
For a Double Crust Pie: If making a double-crust pie, chill the base crust for at least 20 minutes after fitting it into the pan. Then, add your desired filling and top with the second rolled crust (or a lattice top). Seal and shape the edges as desired, either by crimping with fingers or pressing with a fork.
Important Recipe Notes & Pro Tips
Note 2: No Food Processor? No Problem! If you don’t own a food processor, you can still achieve a beautiful crust. Use a pastry cutter or two table knives to cut the cold butter into the dry ingredients until it resembles coarse meal with some pea-sized pieces. Then, gently mix in the egg yolk and ice water with a wooden spoon, just until the dough comes together. Remember to work quickly to keep everything cold.
Note 3: Baking Instructions & Blind Baking Guide
- If your pie bakes for 40+ minutes: In most cases, if your pie filling requires a long bake time (40 minutes or more), there’s no need for par-baking the crust. Simply add your cooled filling to the unbaked, chilled crust and bake as directed by your specific pie recipe. The crust will bake sufficiently alongside the filling.
- Par-bake (or Partial Bake – for shorter bakes or custards): This method is used when the pie filling has a short baking time, is very wet (like custards or quiches), or if you want to ensure a crispy bottom crust. To par-bake, first prick the bottom and sides of the chilled crust all over with a fork (this prevents bubbling). Line the crust with parchment paper and fill it with pie weights, dried beans, or even granulated sugar. Bake at 400°F (200°C) for 15 minutes. Carefully remove the weights and parchment paper, then return the crust to the oven and bake for an additional 5 minutes, or until the bottom looks dry and lightly golden. Cool completely before adding your filling. This prevents soggy bottoms!
- Fully Bake (for no-bake or chilled pies): For pies that won’t go back into the oven after filling (such as chocolate pudding pie, coconut cream pie, or an ice cream pie), you’ll need a fully baked crust. Follow the par-bake steps described above. After removing the weights and parchment, continue to bake the crust at 350°F (175°C) for an additional 60–75 minutes, or until it is deeply golden brown and thoroughly cooked. If the edges start to brown too quickly, you can use a crust shield or create one with foil to protect them. Let the crust cool completely to room temperature before adding any filling.
Nutrition Note: Please note that the nutrition information provided is for the entire pie crust. For individual nutrition figures, divide by the number of slices you typically cut your pie into.
Storage & Make-Ahead Tips: This pie crust can be prepared in advance! Once you’ve formed the dough disc and wrapped it in plastic wrap, it can be stored in the refrigerator for up to 3 days or frozen for up to 2 months. Thaw frozen dough in the refrigerator overnight before rolling. A fully baked crust (cooled completely) can be wrapped tightly in plastic wrap or foil and stored at room temperature for 1-2 days, or frozen in an airtight container for up to 2 months. Thaw at room temperature before filling.
Nutrition Information (Per Serving)
Nutrition information is automatically calculated and should only be used as an approximation. It can vary based on specific ingredients and brands used.
Mastering Blind Baking: Preventing the Dreaded Soggy Bottom
Blind baking, or pre-baking, your pie crust is a crucial technique for many pie recipes, especially those with wet fillings or no-bake fillings. It helps prevent the crust from becoming soggy and ensures it’s perfectly crisp and golden. Once your dough is artfully nestled in the pie pan, you have two primary options before adding your filling: to par-bake (partially bake) or fully bake the crust.
Understanding Your Baking Options:
- Par-bake (Partially Bake): This method involves baking the crust until it’s set but not fully browned. It’s ideal for pies with fillings that require further baking, such as custards, quiches, or fruit pies with a shorter oven time. Par-baking ensures the bottom crust is firm and won’t get mushy. Always check your recipe to see if par-baking is recommended.
- Fully Bake: When a pie filling will not be baked at all (e.g., chocolate pudding pie, coconut cream pie, or an ice cream pie), you need a fully baked and golden-brown crust. This ensures the crust is completely cooked and ready to hold your delicious, unbaked filling.
Key Tips for Flawless Blind Baking:
- Don’t Stretch the Dough: As emphasized before, always gently press the dough into the pan rather than stretching it. Stretching causes the gluten to tense up, leading to significant shrinkage during baking.
- Prick the Base with a Fork: Before blind baking, gently prick the bottom and sides of the raw crust with a fork multiple times. These small holes act as vents, allowing steam to escape and preventing the crust from puffing up or bubbling.
- Thorough Chilling is Essential: Always chill your crust in the pan for at least 30 minutes (or freeze for 15-20 minutes) before baking. This helps the butter firm up and the gluten relax, further reducing shrinkage and helping the crust hold its shape.
- Use Pie Weights (or Alternatives): Line the chilled crust with parchment paper or foil, then fill it generously with ceramic pie weights, dried beans, uncooked rice, or granulated sugar. These weights prevent the crust from bubbling up and shrinking dramatically during the initial bake.
- Bake with Weights, Then Remove: For par-baking, bake the crust with the weights for the initial stage. Then, carefully remove the weights and parchment, and continue baking for a few more minutes to dry out the bottom and achieve a light golden hue. For fully baked crusts, continue baking after removing weights until deep golden brown.
Frequently Asked Questions About Pie Crust
The egg yolk is a magical ingredient in this recipe! It adds extra richness and fat, which contributes to a wonderfully tender and compact crust. Additionally, the emulsifiers in the yolk help to bind the dough, making it more pliable and significantly easier to roll out without cracking, especially when compared to an all-water crust.
Cracking is a common issue and usually points to one of a few problems: the dough might be too dry (not enough liquid), too cold and stiff, or it hasn’t rested long enough for the flour to fully hydrate and the gluten to relax. Ensure you’ve added enough ice water (up to 3 tablespoons), allowed sufficient chilling time (1-2 hours), and let the dough sit at room temperature for just 5-10 minutes if it feels too hard right out of the fridge before rolling.
Chilling the pie crust before baking is absolutely crucial for several reasons. Firstly, it firms up the butter pieces, preventing them from melting too quickly in the oven and ensuring maximum flakiness. Secondly, it allows the gluten in the flour to relax, which is key to preventing the crust from shrinking dramatically during baking. A well-chilled crust holds its shape beautifully and results in a more tender, flaky final product.
Top Tips for Pie Crust Success Every Time
Beyond the recipe steps, these pro tips will ensure your pie crust is consistently perfect:
- Temperature is Key – Keep Everything Cold: Always use cold butter, ice water, and a cold egg yolk. Work quickly when handling the dough to prevent the butter from warming up. If your kitchen is warm, you can even chill your food processor bowl and blade before starting.
- Less is More – Minimize Handling: The less you handle the dough, the more tender and flaky your pie crust will be. Overworking the dough develops too much gluten, resulting in a tough crust.
- Don’t Over-mix: Whether using a food processor or making by hand, stop mixing as soon as the dough just barely comes together in large clumps. It should still look a little crumbly, not smooth and uniform.
- The Magic of an Egg Wash: For a beautifully golden, glossy finish, whisk together 1 egg with 1 tablespoon of milk or water and lightly brush it onto the edges (or entire top) of your pie crust before baking.
- Embrace the Rustic Charm: Don’t strive for absolute perfection in your pie crust’s appearance. Imperfect, rustic pies often have the most character and are just as delicious!
- Protect Those Edges: The edges of a pie crust tend to brown faster than the rest. To prevent them from over-browning or burning, use a pie shield. You can also easily make one at home using aluminum foil; follow this helpful tutorial.
Bake Your Way to Pie Perfection
With this ultimate pie crust recipe and a wealth of expert tips, you are now equipped to create stunning, delicious pies with confidence. Whether you’re a seasoned baker or just starting out, this all-butter, flaky, and tender crust will become your trusted foundation for every sweet and savory pie creation. Embrace the joy of homemade baking, and get ready to impress everyone with your perfect pies!