
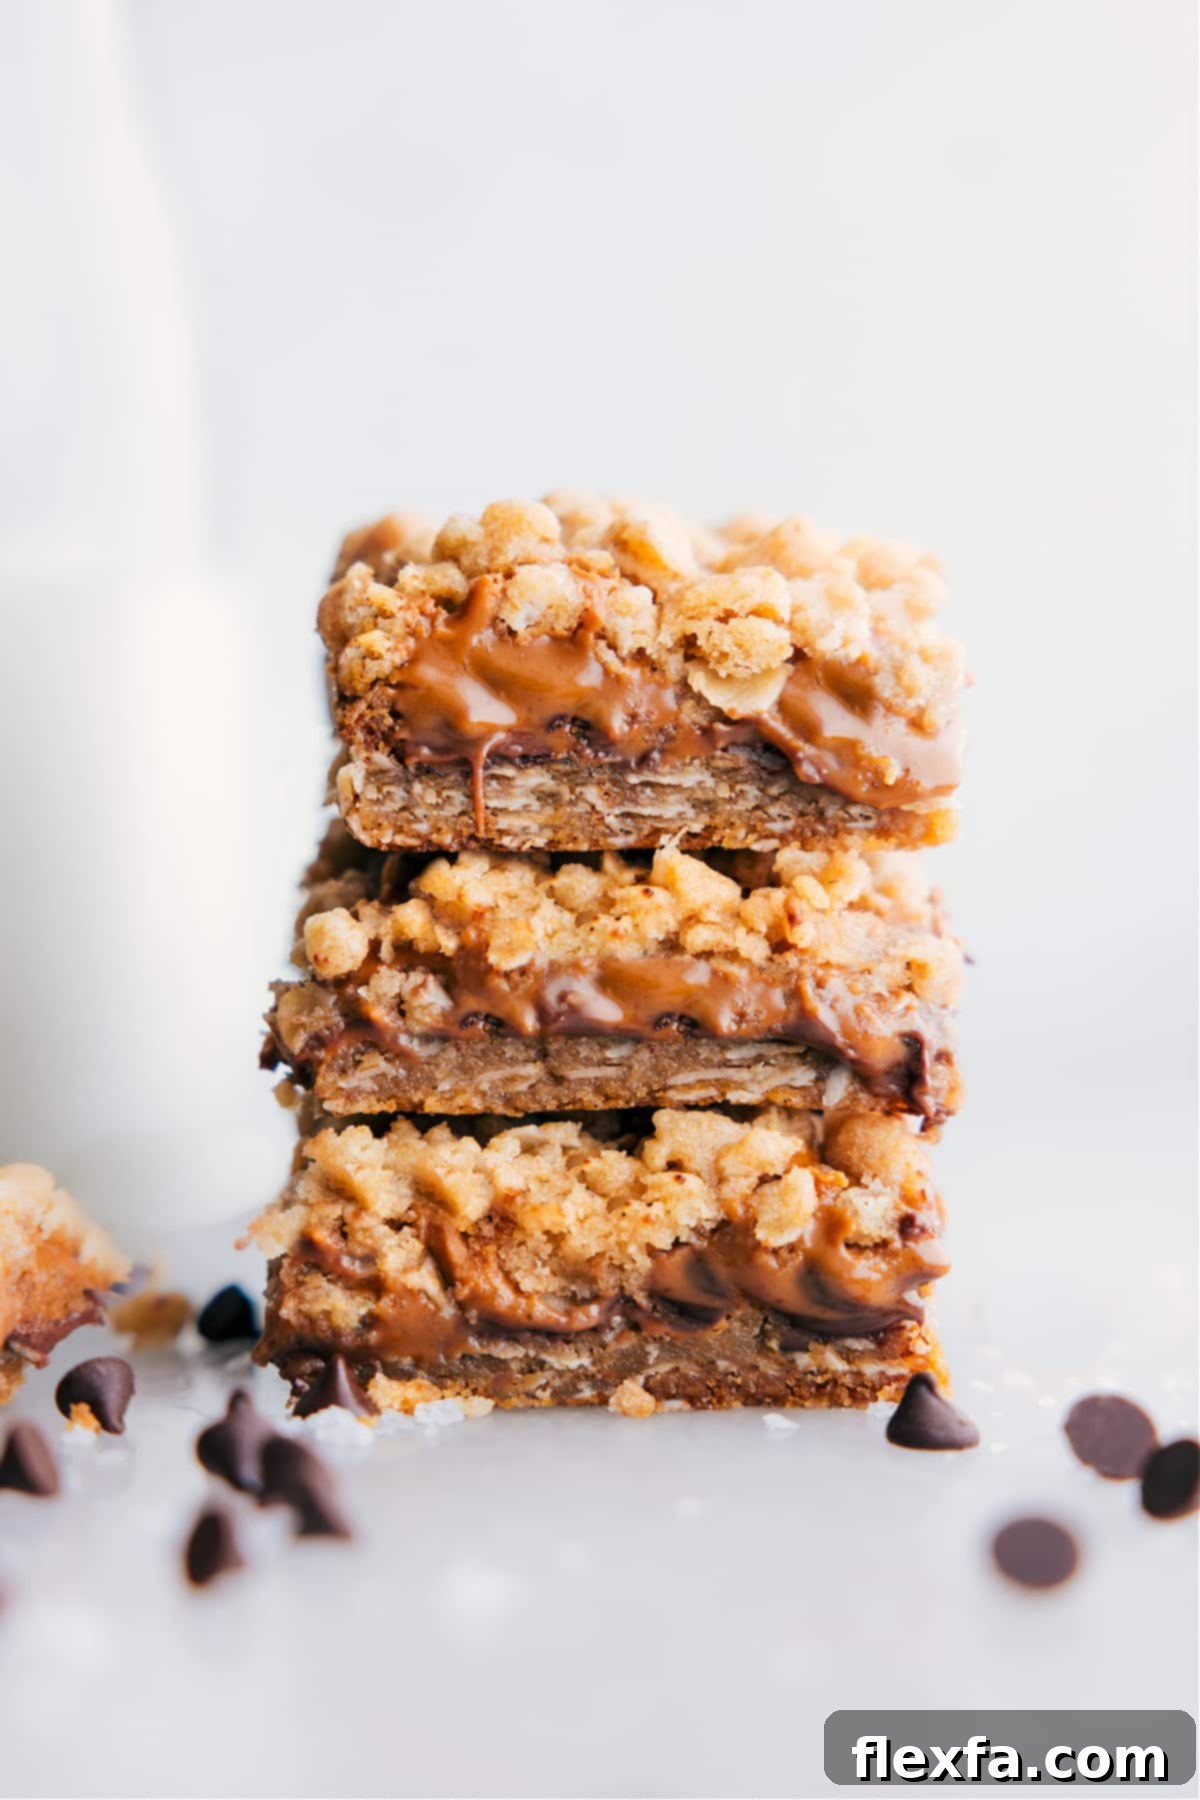
Indulge in the magic of our homemade Cookie Butter Bars! These delightful treats feature a perfectly chewy oatmeal crust, a warm and luscious cookie butter layer, and pockets of sweet, melted chocolate chips, creating a truly unforgettable dessert experience.

Author’s Note
From “Carmelitas” to “Cookie Butter Bliss”: A Recipe’s Sweet Evolution!
Every baker has that one go-to recipe, the one that never fails to impress and always brings a smile to everyone’s face. For me, that has long been my cherished Carmelitas recipe. They are, quite simply, downright delicious and a guaranteed hit wherever they make an appearance. Their rich caramel and chewy oat layers are a classic for a reason.
One memorable day, I enthusiastically embarked on making a fresh batch of Carmelitas. The oatmeal dough was perfectly mixed, the kitchen was filled with anticipation, and then, a sudden realization hit me like a ton of bricks: I was completely out of caramels! My heart sank for a moment, thinking my dessert plans were derailed. But then, a flicker of inspiration ignited.
Why not embrace the unexpected? I scanned my pantry, searching for an alternative, and my eyes landed on a jar of creamy, spiced cookie butter. An idea sparked – what if I substituted the caramel with this delightful spread? It felt like a bold move, but sometimes the best culinary discoveries are born from such improvisations. And let me tell you, this combination turned out to be unbelievably good – perhaps one of my best ideas yet (and I’m not being dramatic!).
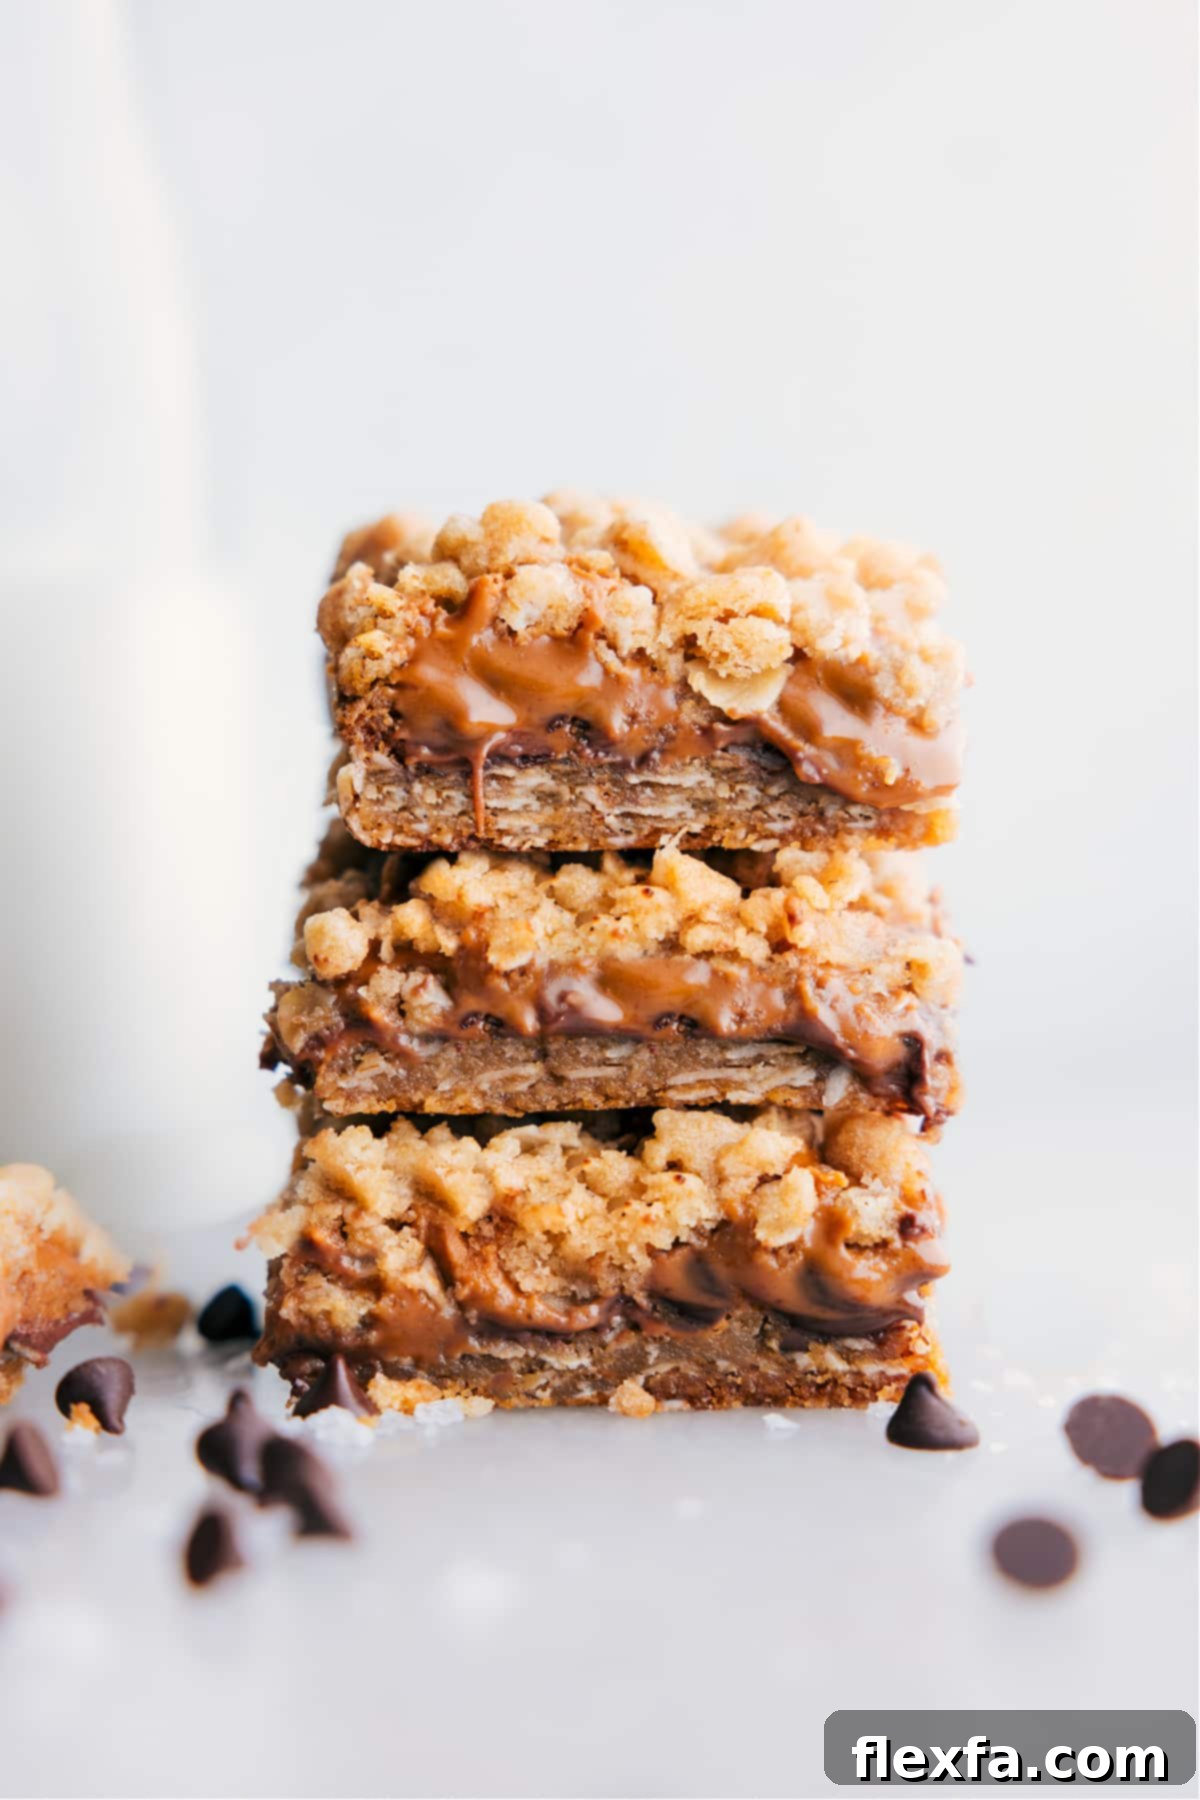
These sweet oatmeal Cookie Butter Bars are an absolute dream. Each bite delivers a harmonious blend of textures and flavors: a sturdy, chewy oatmeal crust, generously scattered with luscious, melty milk chocolate chips, and crowned with a thick, gooey layer of warm, spiced cookie butter. The final crumble topping adds that perfect finish, making them wonderfully unique, incredibly rich, and absolutely delicious. They quickly became known as the “Where Did They Go” Cookie Bars in my household because they vanish so quickly! Prepare for a new addiction.
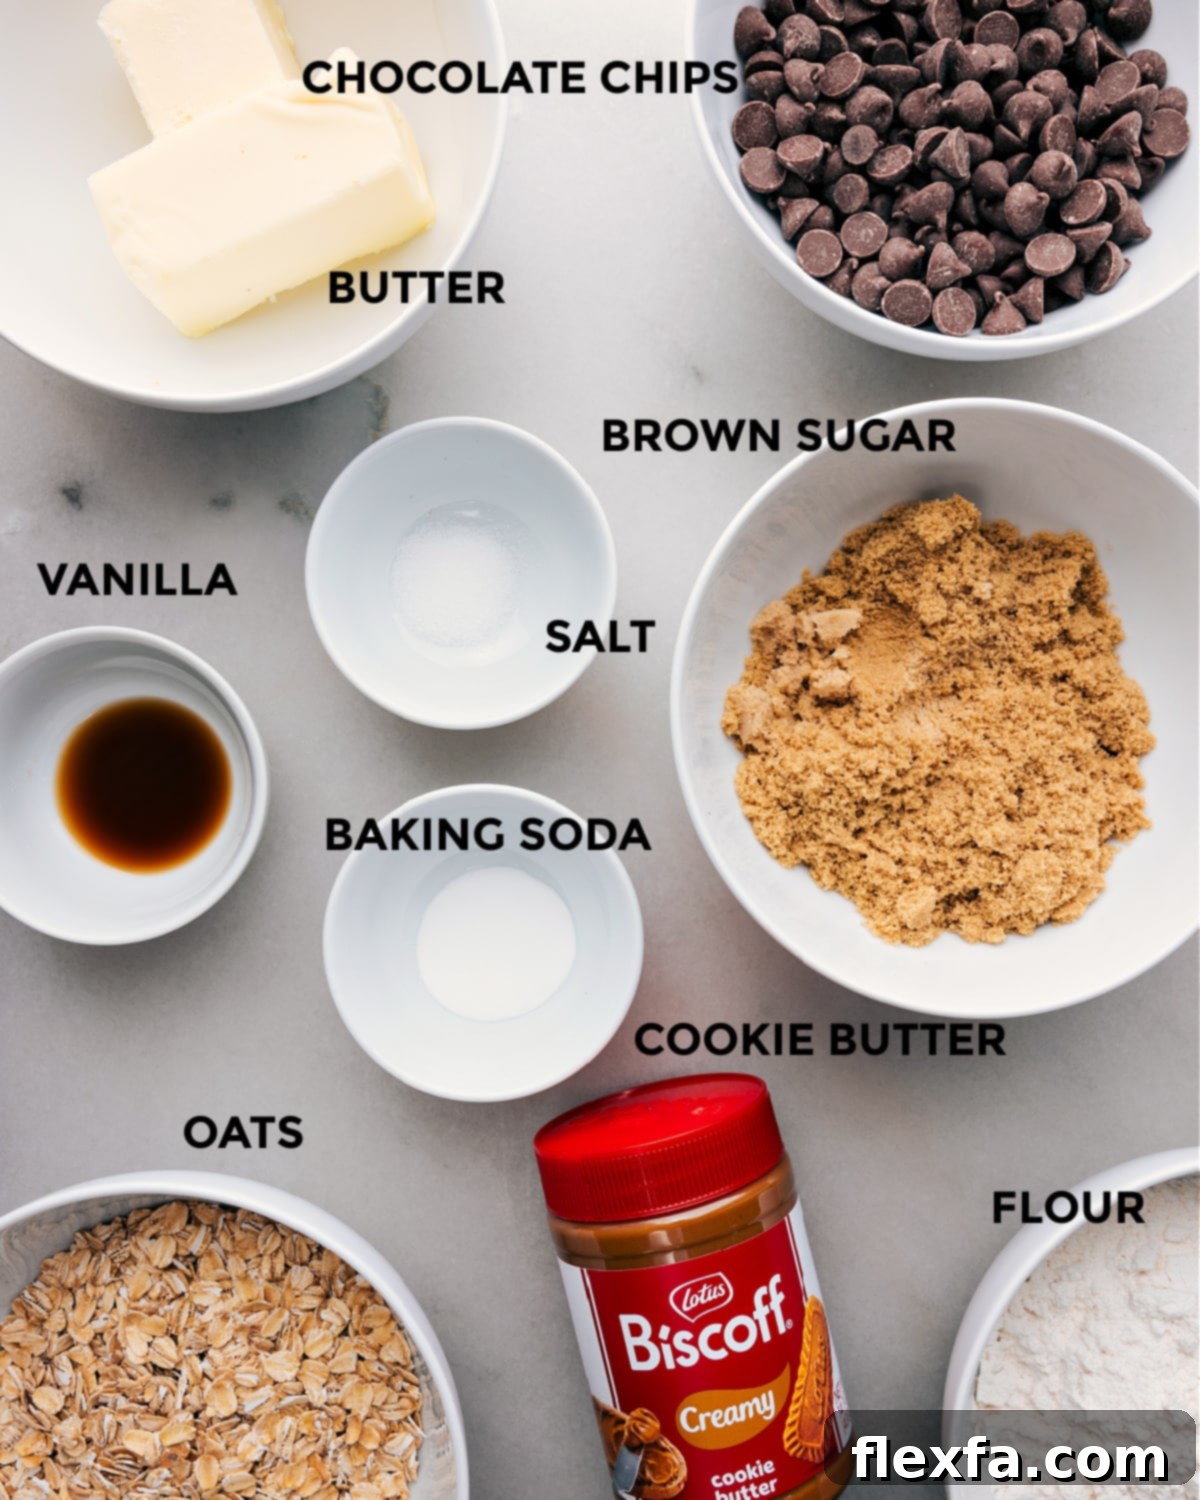
Essential Ingredients for Perfect Cookie Butter Bars
Crafting these delectable Cookie Butter Bars begins with understanding each ingredient’s role in creating that signature chewy texture and rich, comforting flavor. Here’s a comprehensive guide to what you’ll need and some crucial tips for success:
| Ingredient | Why It’s Essential & Pro Tips for Best Results |
|---|---|
| Unsalted Butter | Butter is the foundation of our rich, flavorful crust. Using unsalted butter allows you to precisely control the sodium content in your recipe. If salted butter is all you have on hand, simply omit the additional 1/4 teaspoon of salt mentioned in the recipe. For optimal texture and ease of mixing, ensure your butter is at perfect room temperature – soft enough to indent with a finger but not melted. |
| Light Brown Sugar | Brown sugar isn’t just for sweetness; its molasses content is vital for creating that deeply caramelized flavor and contributing to the incredibly chewy texture of these bars. Always pack it firmly into your measuring cup to ensure you’re getting the correct amount. This moisture is key to the dough’s consistency. |
| Old-Fashioned Rolled Oats | The star of our chewy crust! Old-fashioned oats provide the ideal texture and structure for these bars. It’s critical to use this type of oat. Avoid quick oats, as they break down too much during baking and can lead to a mushy, less appealing texture. Steel-cut oats are also unsuitable; they remain too firm and won’t integrate properly into the dough. |
| All-Purpose Flour | Flour provides the necessary structure for our oatmeal crust. Accurate measurement is crucial to prevent dense or dry bars. The best method is “spoon and level”: gently spoon the flour into your measuring cup until it overflows, then use the back of a knife or a straight edge to level off the excess. Do not scoop flour directly from the bag, as this compacts it and can add too much to your recipe. |
| Baking Soda | This common leavening agent works with the brown sugar to give the bars a slight lift and contributes to their tender, slightly crumbly texture. Always ensure your baking soda is fresh for effective leavening. |
| Salt | A small amount of salt is a flavor enhancer, crucial for balancing the sweetness of the cookie butter and chocolate. It elevates all the other ingredients, bringing depth to each bite. Remember to adjust or omit if using salted butter. |
| Vanilla Extract | Pure vanilla extract adds a warm, inviting aroma and a depth of flavor that complements both the oats and the spiced cookie butter. It’s a small addition that makes a big difference in the overall taste profile. |
| Cookie Butter (or Biscoff Spread) | This is the glorious centerpiece of our bars! Whether you choose Biscoff spread or a generic speculoos cookie butter (like Trader Joe’s offers), warming it slightly in the microwave (15-30 seconds) before use is essential. This makes it wonderfully pourable and ensures you can spread a smooth, even layer over the chocolate chips, guaranteeing gooey perfection in every square. |
| Chocolate Chips | Any type of chocolate chip works wonderfully here, allowing for customization to your preference. Milk chocolate chips offer the sweetest and meltiest experience, creating delightful pockets of rich, gooey chocolate throughout the bars. If you prefer a less sweet dessert or a more intense chocolate flavor, semi-sweet or dark chocolate chips are fantastic alternatives that will add a beautiful depth. |
Why These Cookie Butter Bars Will Be Your New Favorite Dessert
Prepare to fall head over heels for these incredible Cookie Butter Bars. They’re more than just a dessert; they’re an experience waiting to happen. Here’s why they consistently earn rave reviews and disappear in a flash:
- A Symphony of Flavors: Imagine the comforting chewiness of an oatmeal cookie, perfectly balanced with the warm, spiced notes of cookie butter, and rich, melting chocolate. It’s a flavor profile that’s both familiar and excitingly unique, a delightful dance on your taste buds.
- Irresistible Textural Contrast: Each bite offers a delightful interplay of textures. You’ll savor the sturdy, yet tender oatmeal crust and crumble, which perfectly cradles the unbelievably gooey and smooth cookie butter layer, studded with soft, melted chocolate. It’s a sensory delight!
- Deceptively Easy to Make: Despite their gourmet appearance and taste, these Cookie Butter Bars are surprisingly simple to assemble. With clear, step-by-step instructions, even novice bakers can achieve impressive results. No complicated techniques or fancy equipment needed!
- The Ultimate Crowd-Pleaser: Hosting a party? Need a dessert for a potluck? These bars are your answer. They’re universally loved and always the first to vanish from any dessert spread. Be prepared to share the recipe!
- Customizable to Your Liking: While milk chocolate chips are a fantastic choice for their sweetness, you have the flexibility to swap them for semi-sweet or dark chocolate to tailor the richness to your preference. Experiment and find your perfect balance!
- Comfort in Every Square: There’s something undeniably comforting about a warm, homemade bar. These Cookie Butter Bars evoke that cozy, nostalgic feeling, making them perfect for a quiet evening treat or sharing with loved ones.
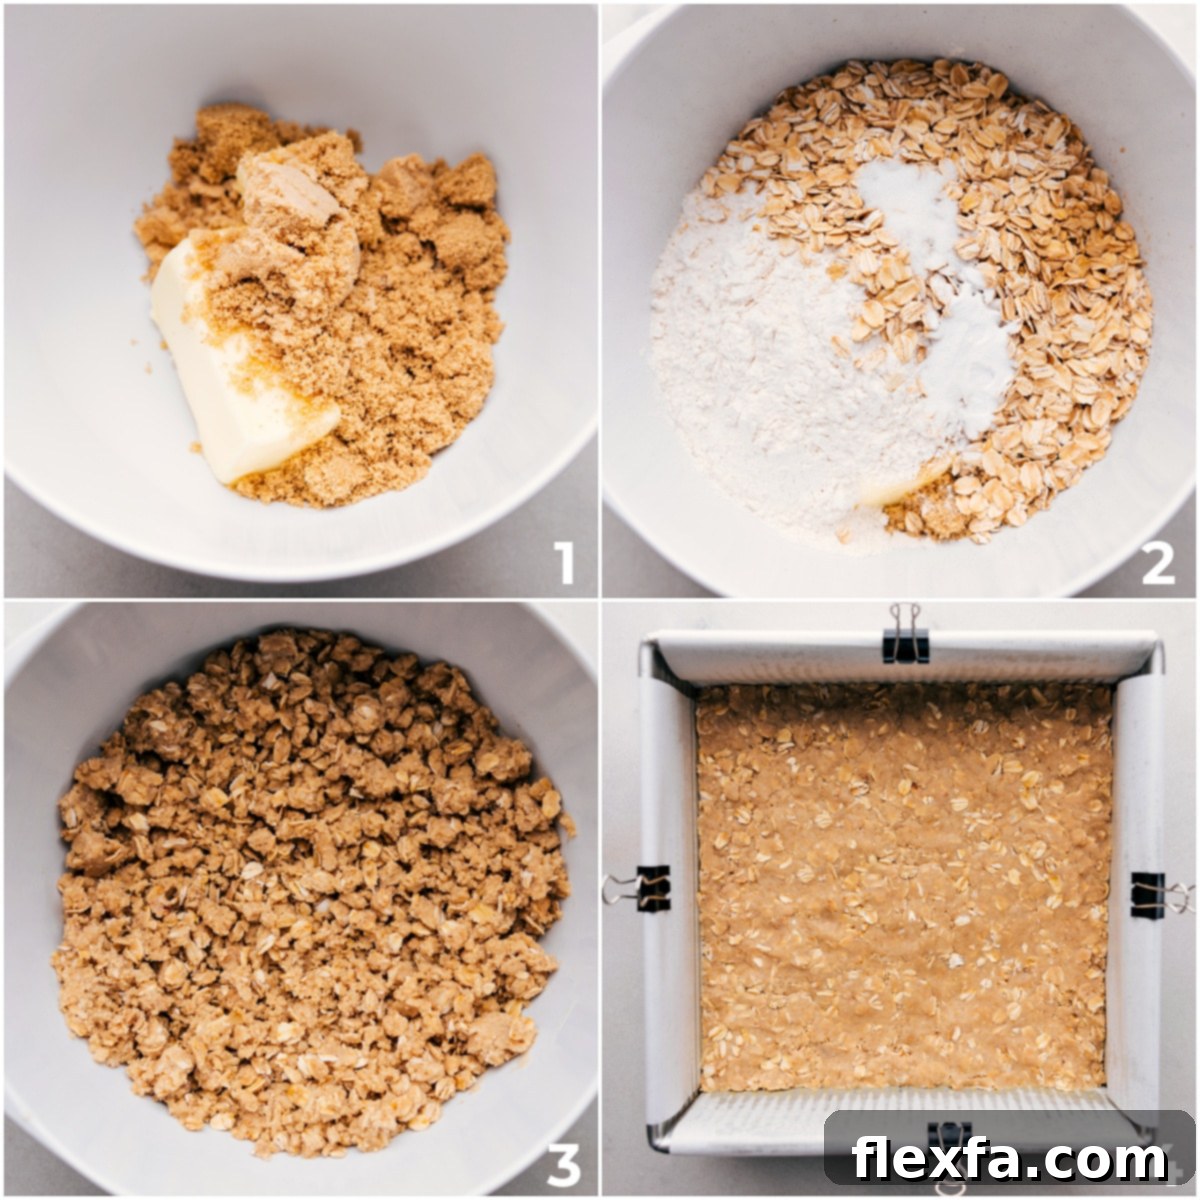
How to Bake the Ultimate Cookie Butter Bars: A Step-by-Step Guide
Creating these delightful Cookie Butter Bars is a straightforward process that promises truly spectacular results. Follow these simple steps for baking success, ensuring each layer is perfect:
- Prepare Your Oven and Pan: Begin by preheating your oven to 350°F (175°C). Take a 9×9-inch (23×23 cm) baking pan and lightly grease it before lining it with parchment paper. Make sure to leave a generous overhang on two opposite sides; this foresight will be your best friend for effortless lifting and cleanup once your bars are baked and cooled.
- Craft the Chewy Oatmeal Dough: In a large mixing bowl, combine the softened, room-temperature unsalted butter with the firmly packed light brown sugar, all-purpose flour, old-fashioned rolled oats, baking soda, pure vanilla extract, and salt. Use a hand mixer (or a stand mixer fitted with a paddle attachment) to beat these ingredients together until a thick, uniform dough forms. The dough will be quite dense and crumbly, which is exactly the desired consistency.
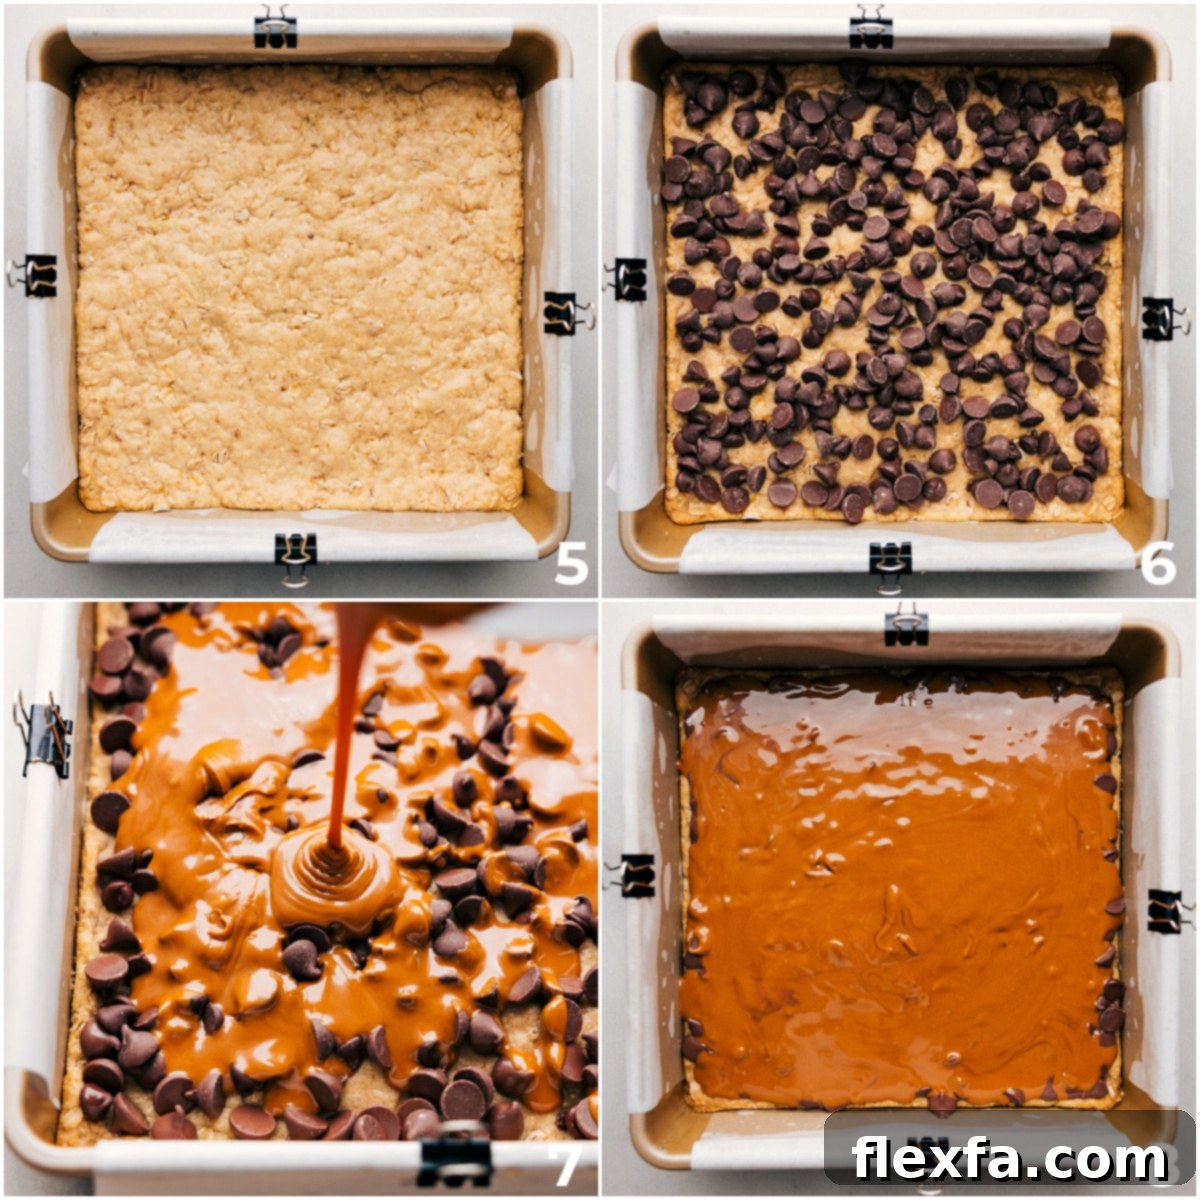
- Form and Bake the Golden Base: Divide the prepared oatmeal dough mixture roughly in half. Press one half firmly and evenly into the bottom of your parchment-lined baking pan. Ensure this base layer is compact and extends to all edges for a consistent, sturdy crust. Place the pan in the preheated oven and bake this base layer for exactly 8 minutes. While it bakes, move on to preparing your luscious filling.
- Prepare the Gooey Filling: While your base layer is in the oven, measure out 1 cup of cookie butter and transfer it to a microwave-safe bowl. Microwave it for 15-30 seconds, or just until it’s warm enough to become delightfully pourable and easy to spread. This slight warming is key for an even, gooey layer.
- Layer the Delicious Fillings: Once the base has completed its initial 8-minute bake, carefully remove the pan from the oven. Immediately and evenly sprinkle your chosen chocolate chips (whether milk, semi-sweet, or dark) over the warm crust. Without delay, pour the warmed, runny cookie butter over the chocolate chips. Use a spatula or the back of a spoon to gently smooth the cookie butter into an even, luscious layer across the entire surface of the bars.
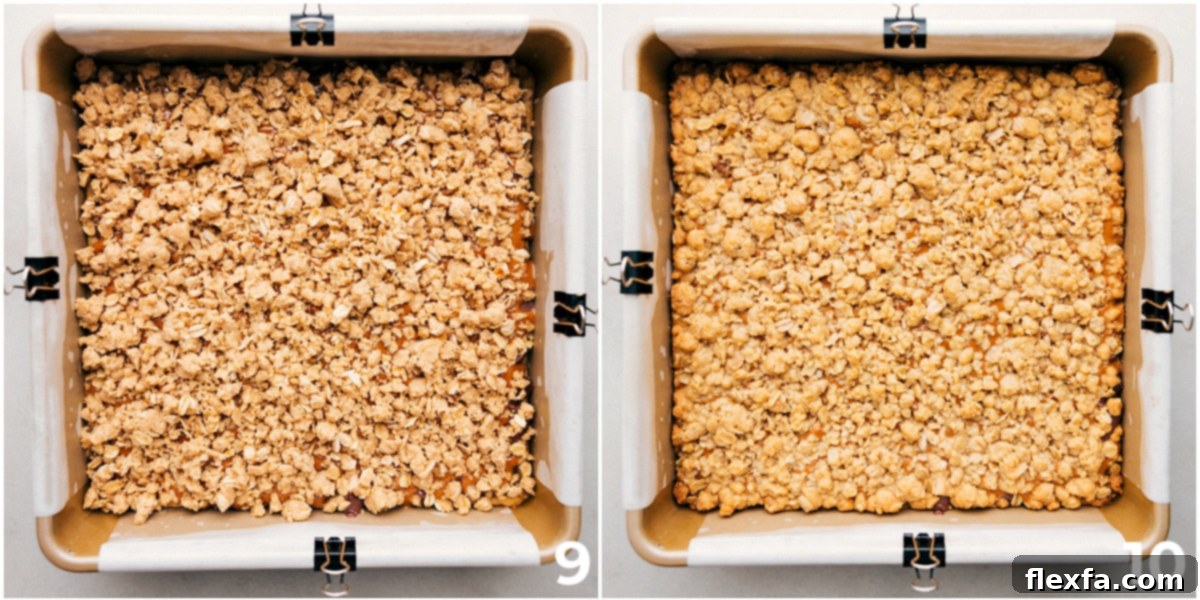
- Add the Crumble Topping and Final Bake: Now, take the remaining half of your oatmeal dough. Crumble it loosely and evenly over the cookie butter layer. It’s important not to press this layer down; we want to achieve a delightful, textured, and crumbly topping. Return the pan to the oven and bake for an additional 13-18 minutes, or until the edges are lightly golden brown and the cookie butter layer appears set and slightly bubbly. Keep an eye on them, as oven temperatures can vary.
- Cool Completely and Slice: Once baked to perfection, remove the pan from the oven. This next step is perhaps the most challenging but utterly crucial: patience! Allow the bars to cool completely at room temperature for at least 1 hour, or even longer. Full cooling is essential for the cookie butter and chocolate layers to properly set, which in turn ensures clean, perfect slices. Once fully cooled, use the parchment paper overhang to carefully lift the entire slab of bars out of the pan. Transfer to a cutting board and slice into 16 uniform squares.
Expert Tips for Irresistible Cookie Butter Bars Every Time
To ensure your Cookie Butter Bars turn out perfectly chewy, gooey, and absolutely delicious, keep these expert tips in mind:
- The Unsung Hero: Parchment Paper: Seriously, this step is non-negotiable! Lining your 9×9-inch pan with parchment paper, ensuring a generous overhang on two opposite sides, is the easiest way to remove the cooled bars from the pan without any sticking or mess. It also makes cleanup a breeze!
- Achieve an Even Crust: When pressing the first half of the oatmeal mixture into the baking pan for the base, dedicate a moment to ensure it forms an even and compact layer. A uniform thickness guarantees that the crust bakes evenly, preventing any soft spots or overly crisp edges.
- Perfectly Pourable Cookie Butter: Warming the cookie butter for 15-30 seconds in the microwave is a small step with a big impact. This makes it wonderfully fluid and easy to pour and spread. Aim for a smooth, even layer over the chocolate chips to ensure that signature gooey texture in every bite. Don’t fret if it doesn’t cover every single chocolate chip – the heat from the oven will help it melt and spread beautifully.
- Master the Crumble Topping: When it’s time to add the remaining oatmeal mixture for the topping, remember the golden rule: crumble it loosely. Resist the urge to press it down! This light, airy application creates that fantastic, rustic crumble texture that bakes into golden peaks and valleys, adding an extra layer of delicious chewiness and visual appeal.
- Patience During Cooling is Paramount: We know it’s tempting to dive right into these warm, fragrant bars straight from the oven, but cooling completely is crucial. Allowing the bars to cool fully at room temperature (at least 1 hour, preferably longer) ensures that the warm cookie butter and melted chocolate layers have ample time to set. This firming-up process is key for achieving clean, neat slices and preventing a gooey mess when you cut into them.
- Avoid Overbaking: Keep a close eye on the bars during their second bake. They are ready when the edges are lightly golden brown and the center appears set. Overbaking can lead to dry, crumbly bars, so pull them out of the oven when they’re just right. The centers will continue to set slightly as they cool.
- Quality Ingredients Make a Difference: While this recipe is straightforward, using good quality butter, fresh old-fashioned oats, and your favorite brand of cookie butter and chocolate chips will truly elevate the final taste and texture of your bars.
Storage and Freezing Instructions for Lasting Freshness
Ensure your delicious Cookie Butter Bars stay fresh and delightful for as long as possible with these storage and freezing tips:
- Room Temperature Storage: Once completely cooled, store your Cookie Butter Bars in an airtight container at room temperature. They will maintain their optimal freshness, soft texture, and incredible flavor for 3-4 days. For best results, keep them in a single layer or separate layers with parchment paper if stacking.
- Freezing Leftovers: These bars are excellent for freezing, making them a perfect make-ahead treat! To freeze, first allow the bars to cool entirely. Then, wrap each individual bar tightly in plastic wrap to prevent freezer burn. Once wrapped, place them in a large, freezer-safe zip-top bag or an airtight container. They can be safely stored in the freezer for up to 2-3 months.
- Thawing Frozen Bars: To enjoy a frozen bar, simply remove it from the freezer and unwrap it. Let it thaw at room temperature for about an hour or two. A helpful tip: if the chocolate appears slightly speckled after thawing, don’t worry! This is a natural phenomenon where milk solids in the chocolate rise to the surface due to temperature fluctuations, and it does not affect the taste or quality of your delicious bar.
- Optional Reheating: For an extra gooey and warm experience, you can gently microwave a thawed bar for 10-15 seconds before serving. This melts the chocolate and cookie butter just enough to bring back that freshly baked warmth.
Explore More Irresistible Bar Recipes:
Desserts
Classic 7 Layer Bars
Desserts
Bright Confetti Bars
Desserts
Indulgent Twix Cheesecake Bars
Desserts
Gooey Brownie Cookie Bars
Cookie Butter Bars
Average Rating: 4.75 out of 5 stars (based on 4 votes)
By Chelsea Lords
These irresistible Cookie Butter Bars begin with a simple, incredibly chewy oatmeal cookie dough. This golden base is then baked to perfection, generously layered with a shower of melty chocolate chips, and an abundant pour of rich, gooey cookie butter, all crowned with a delicious, textured crumble topping. A truly unique and satisfying dessert that’s perfect for sharing or savoring solo!
Prep Time: 15 minutes
Cook Time: 22 minutes
Total Time: 37 minutes
Servings: 16 bars
Equipment
- 1 (9 x 9-inch) baking pan
- Parchment paper
- Hand mixer (or stand mixer with paddle attachment)
Ingredients
- 12 tablespoons (3/4 cup) unsalted butter, at room temperature
- 3/4 cup light brown sugar, firmly packed
- 1 teaspoon vanilla extract
- 1 cup old-fashioned oats (do NOT use steel cut or quick oats!)
- 1 teaspoon baking soda
- 1/4 teaspoon salt
- 1-1/4 cups all-purpose flour
- 1 cup cookie butter (such as Biscoff spread or Trader Joe’s Speculoos Spread)
- 1 cup milk chocolate chips (or semi-sweet or dark chocolate chips, see Recipe Notes)
Instructions
- Preheat Oven & Prep Pan: Preheat your oven to 350°F (175°C). Lightly grease a 9×9-inch baking pan, then line it with parchment paper, allowing an overhang on two opposite sides for easy removal later.
- Prepare Oatmeal Dough: In a large mixing bowl, combine the room-temperature unsalted butter, firmly packed light brown sugar, all-purpose flour, old-fashioned oats, baking soda, vanilla extract, and salt. Using a hand mixer (or stand mixer), beat these ingredients together until a thick, crumbly dough forms.
- Bake the Base Layer: Divide the prepared dough mixture in half. Press one half firmly and evenly into the bottom of your parchment-lined baking pan, forming a solid base. Bake for 8 minutes.
- Warm Cookie Butter: While the base bakes, measure 1 cup of cookie butter into a microwave-safe bowl. Microwave for 15-30 seconds, or until it is warm and easily pourable.
- Add Fillings: Remove the pan from the oven after the initial 8-minute bake. Evenly sprinkle the chocolate chips over the warm baked crust. Carefully pour the warmed cookie butter over the chocolate chips, using a spatula or spoon to gently spread it into an even layer.
- Crumble Topping & Final Bake: Take the remaining half of the oatmeal dough and crumble it loosely and evenly over the cookie butter layer. Do not press it down; allow it to remain a loose crumble. Return the pan to the oven and bake for an additional 13-18 minutes, or until the edges are lightly golden brown and the top appears set.
- Cool & Slice: Once baked, remove the pan from the oven. Let the bars cool completely at room temperature for at least 1 hour. This crucial cooling time allows the layers to set properly, ensuring clean and easy cutting. Once fully cooled, use the parchment paper overhang to lift the entire slab out of the pan, then slice into 16 bars.
Recipe Notes
Note 1: Cookie Butter Availability: You can find delicious cookie butter at Trader Joe’s (often labeled as Speculoos Cookie Butter Spread) or look for Biscoff spread at most major grocery stores. It’s usually located near the peanut butter and other nut/seed spreads.
Note 2: Chocolate Preference: While milk chocolate chips offer a delightful sweetness and meltiness that many adore, feel free to use semi-sweet or dark chocolate chips if you prefer a less sweet or more intense chocolate flavor. Any choice will be delicious!
Storage: Store these baked and cooled Cookie Butter Bars in an airtight container at room temperature. They are best enjoyed within 2-4 days for optimal freshness and texture.
Nutrition Information (per serving)
Serving: 1 bar | Calories: 259 kcal | Carbohydrates: 28g | Protein: 3g | Fat: 15g | Saturated Fat: 7g | Trans Fat: 1g | Cholesterol: 24mg | Sodium: 110mg | Potassium: 45mg | Fiber: 1g | Sugar: 16g | Vitamin A: 277IU | Calcium: 16mg | Iron: 1mg
Nutrition information is automatically calculated and should be used as an approximation.
We hope you adore these irresistible Cookie Butter Bars as much as we do! Don’t forget to share your baking journey and leave a comment below with your thoughts. Happy baking!